How to move files to a new partition when you don't have a secondary drive on Windows 10
If you need to move your files to a new partition, but you don't have extra storage, then use this workaround on Windows 10.
When you're dealing with unrepairable logical problems or using the wrong file system on a drive, you typically create a backup of your data, delete the old and create a new partition, and then restore the files from backup.
Although that's the recommended process, there will be times when you have a large number of files and no enough space or an extra drive to back them up. If this is the case, you can still start clean with a new partition, but you'll need to use some extra steps with the Disk Management tool to manipulate the drive to shrink, create, and delete partitions to protect your files.
In this Windows 10 guide, we'll walk you through the steps to move files to a partition or file system, when you're dealing with a lot of data, and you don't have a spare drive to backup your files.
How to move files to a new partition without a secondary drive
If you don't have enough space or an extra drive to backup your files, you can use this process to move your data to a new partition.
Shrinking and creating a new partition
To shrink the old and create a new temporary partition on Windows 10, use these steps:
- Open Start.
- Search for Disk Management and click the top result to open the experience.
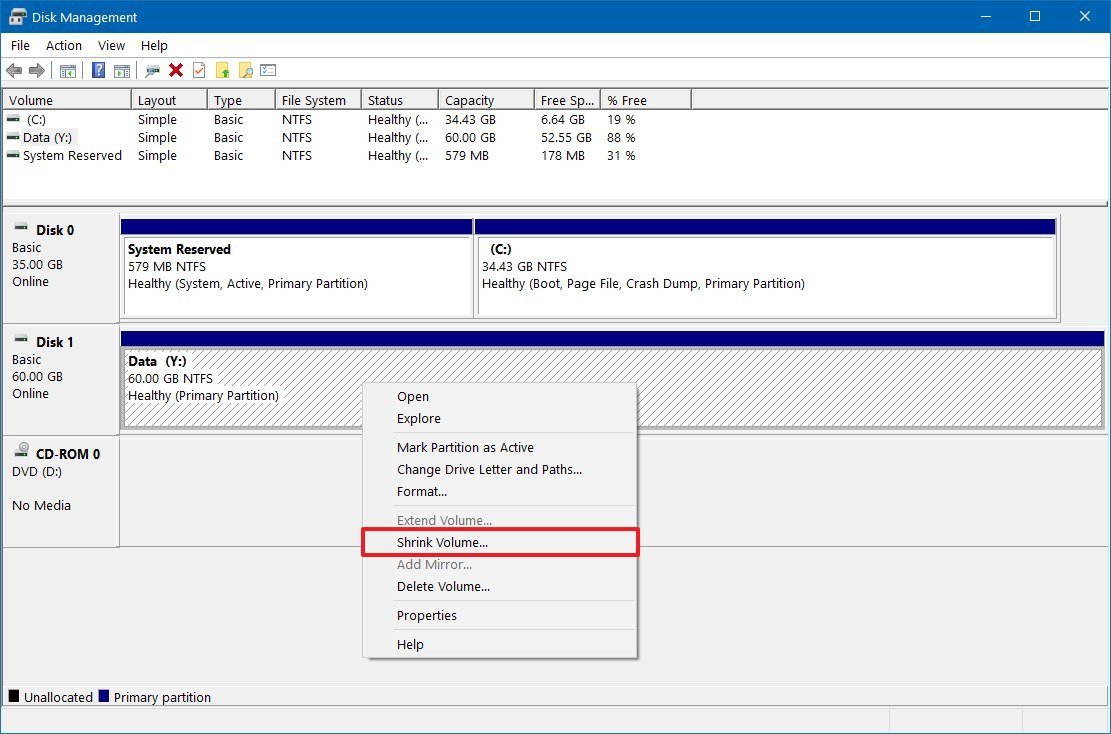
- Right-click the drive with the partition you want to recreate, select the Shrink Volume option.
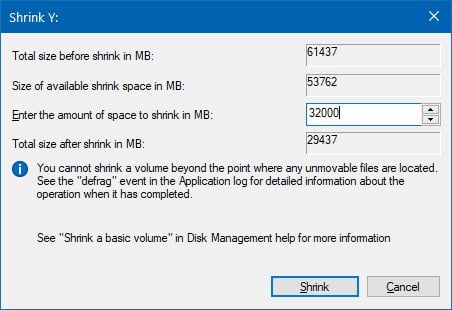
- Specify the amount (in megabytes) of space to shrink.Quick tip: The amount of space to shrink should be equal or larger of the amount of data you need to move.
- Click the Shrink button.
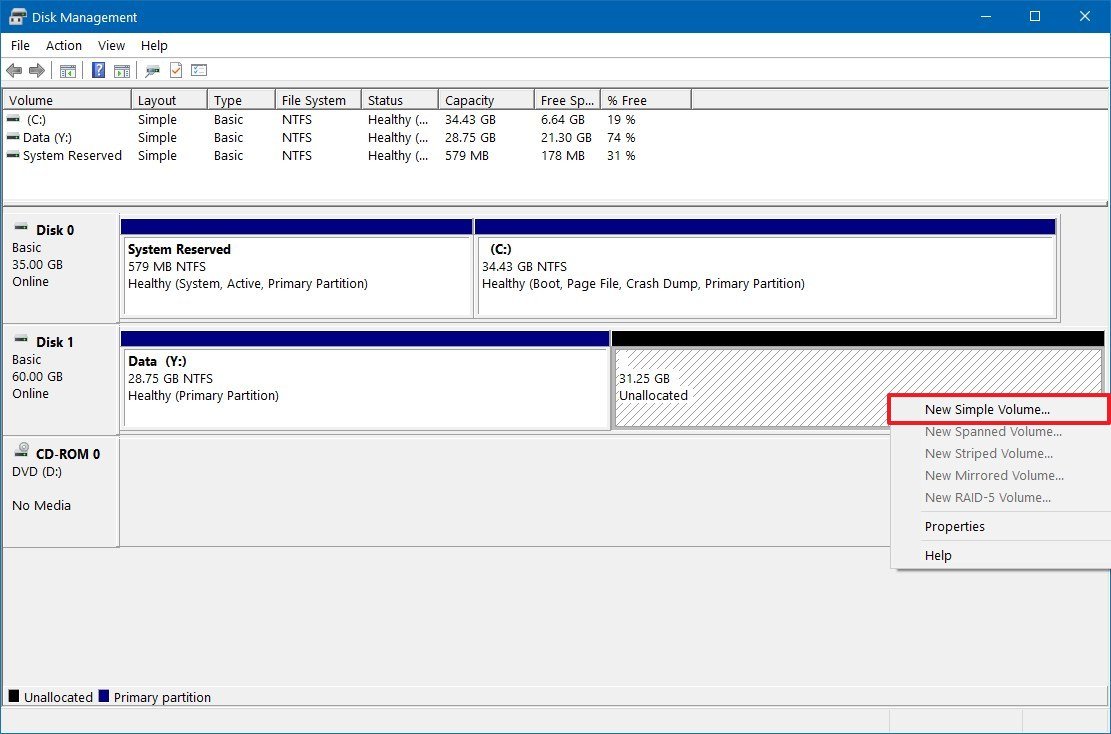
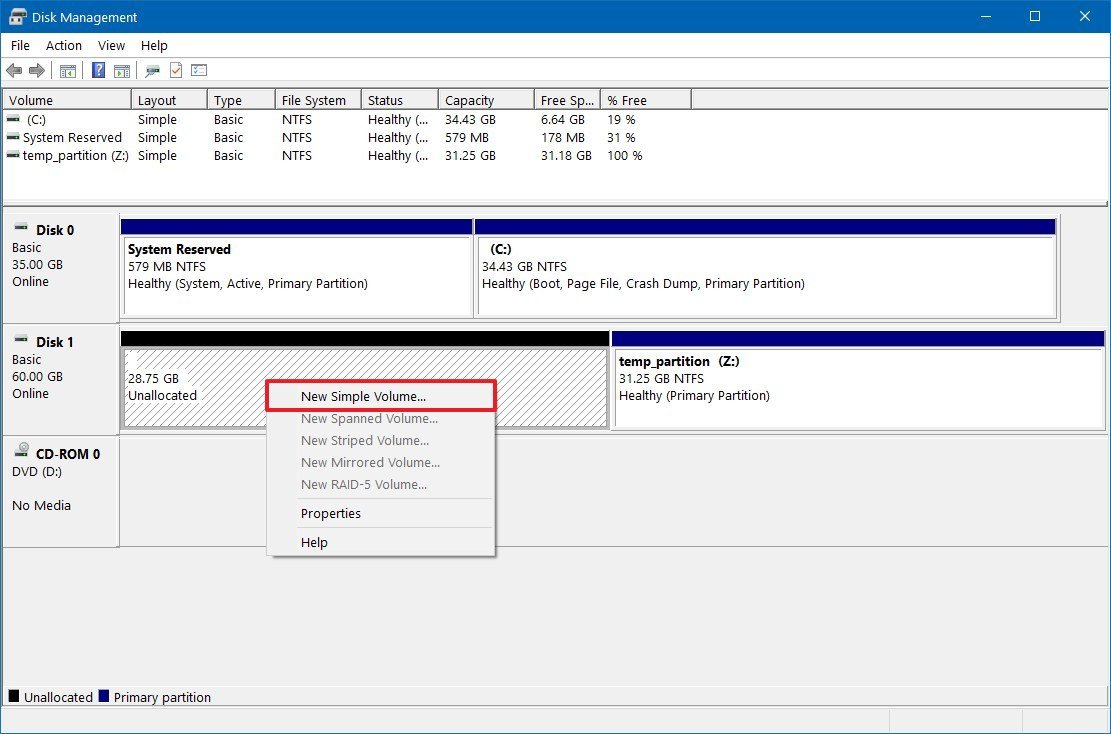
- Right-click the "Unallocated space," and select the New Simple Volume option.
- Click the Next button.
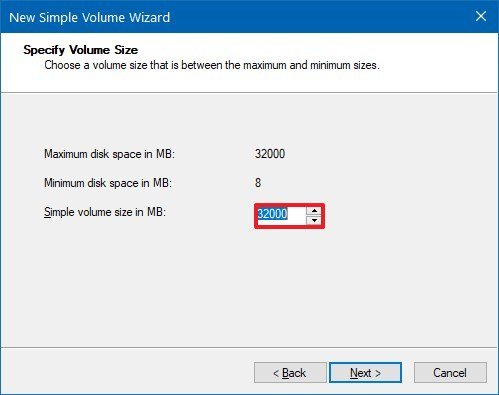
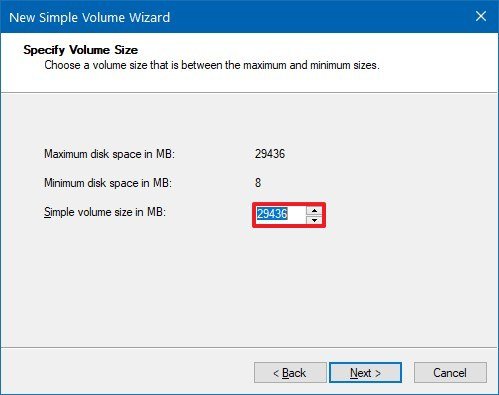
- Use the default settings for the volume size.
- Click the Next button.
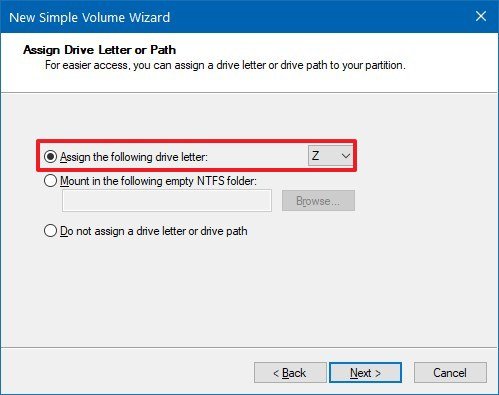
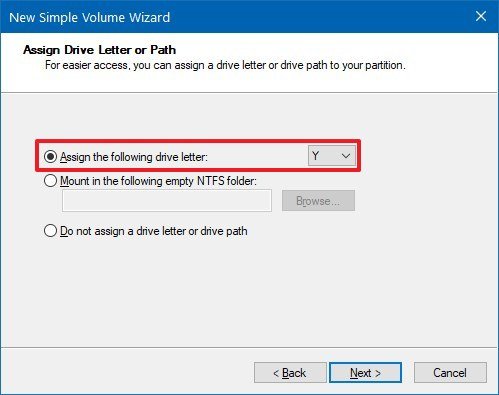
- Use the "Assign the following drive letter" drop-down menu to select a letter for the new drive.
- Click the Next button.
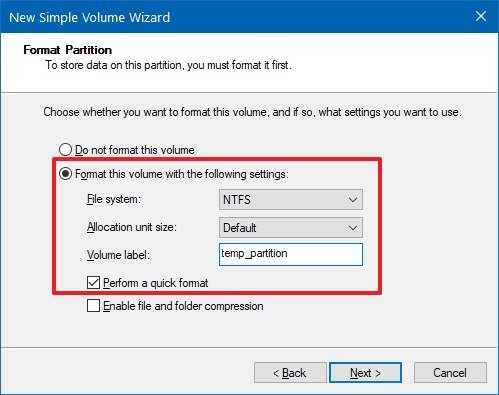
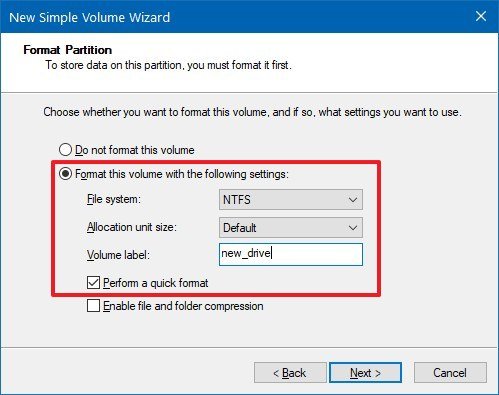
- Use the "File system" drop-down menu, and select the NTFS option.
- Use the "Allocation unit size" drop-down menu, and select the Default option.
- In the "Value label" field, type a descriptive name for the drive. For example, temp_partition.
- Check the Perform a quick format option.
- Unless necessary, clear the Enable file and folder compression option.
- Click the Next button.
- Click the Finish button.
Once you complete the steps, the drive will have a second partition that you can use as temporary storage to backup your files.
Moving files to a new partition
To transfer the files from the old to new temporary partition, use these steps:
All the latest news, reviews, and guides for Windows and Xbox diehards.
- Open File Explorer.
- Click on This PC from the left pane.
- Under the "Devices and drives" section, double-click the drive with the data you have to move.
- Select the files that you want to move.Quick tip: If you have a large amount of data, it's best only to transfer some of the data at a time.
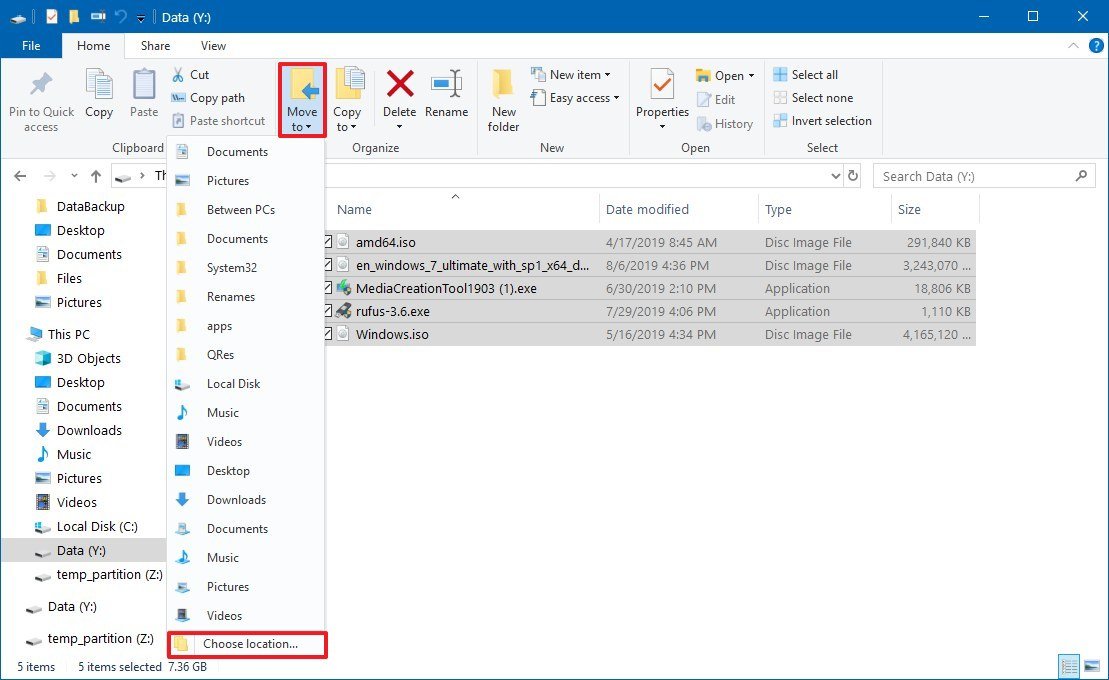
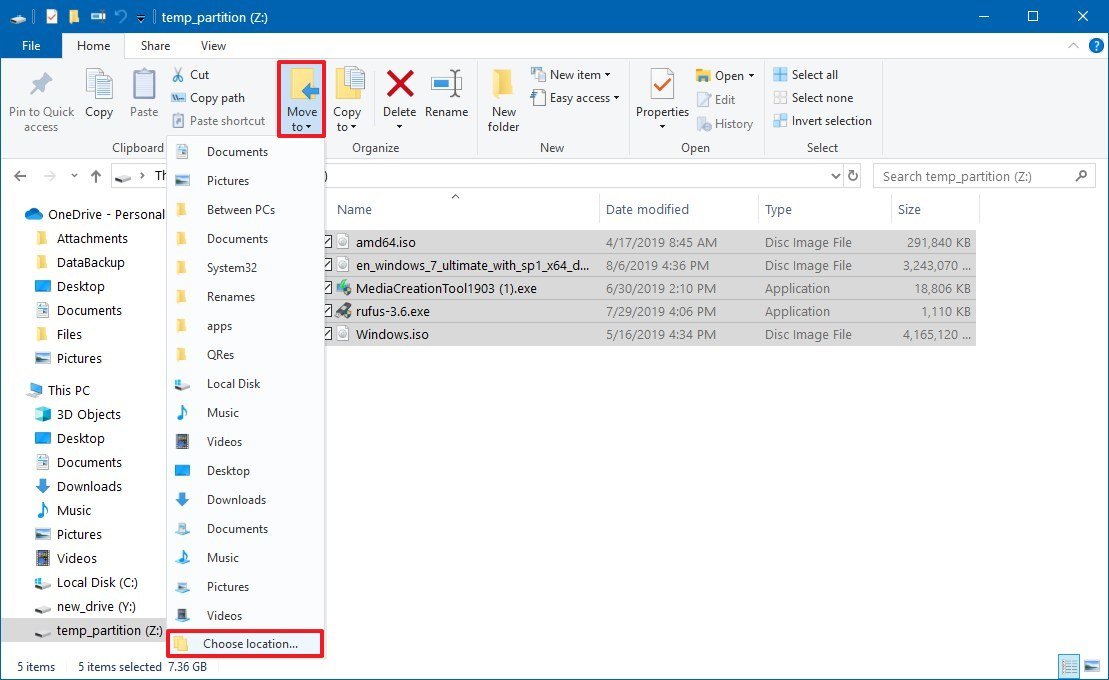
- Click the Move to button from the "Home" tab.
- Click the Choose location option.
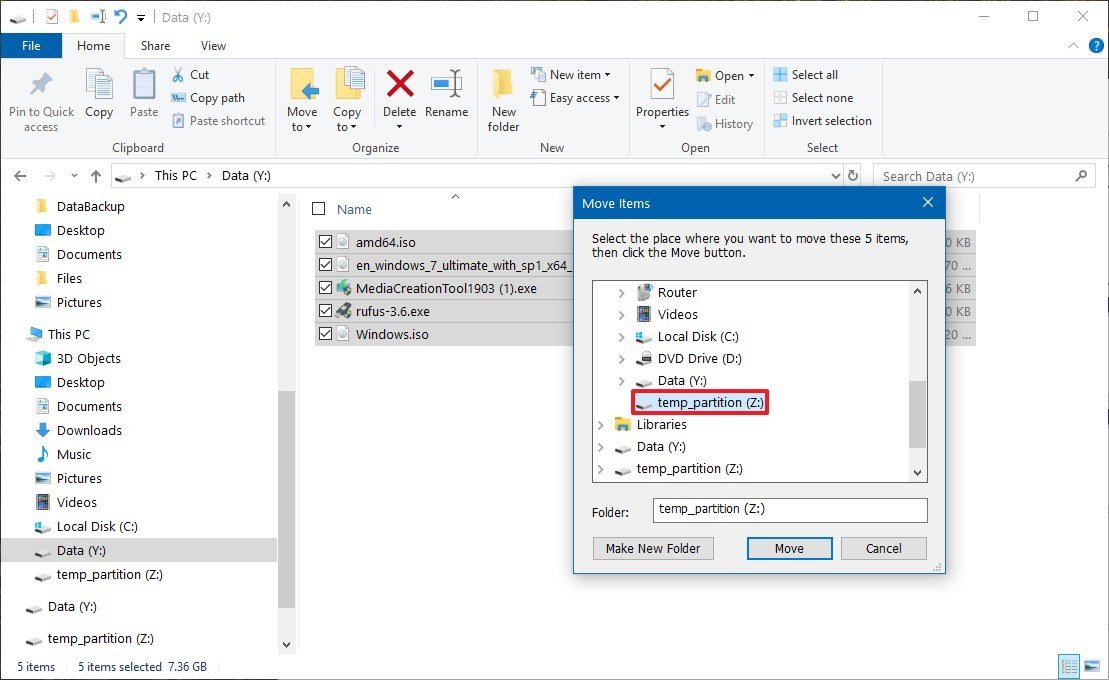
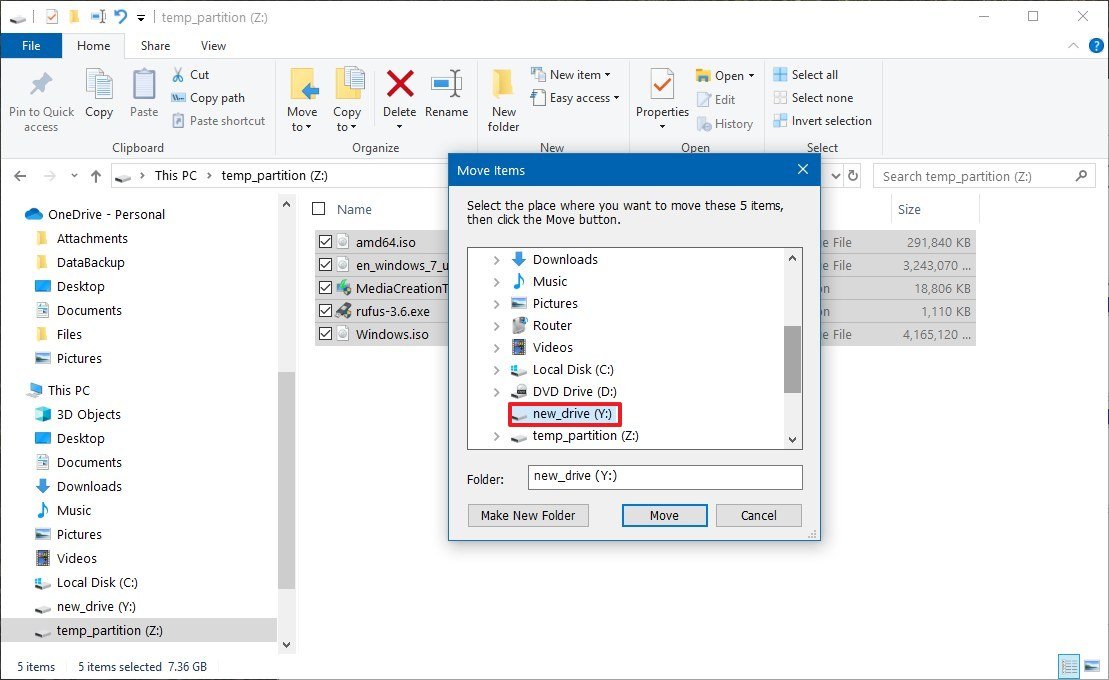
- Select the new location.
- Click the Move button.
After you complete the steps, you will have relocated the files to the new partition.
Deleting and creating a new partition
To delete the old and create a new partition at the beginning of the drive, use these steps:
- Open Start.
- Search for Disk Management and click the top result to open the experience.
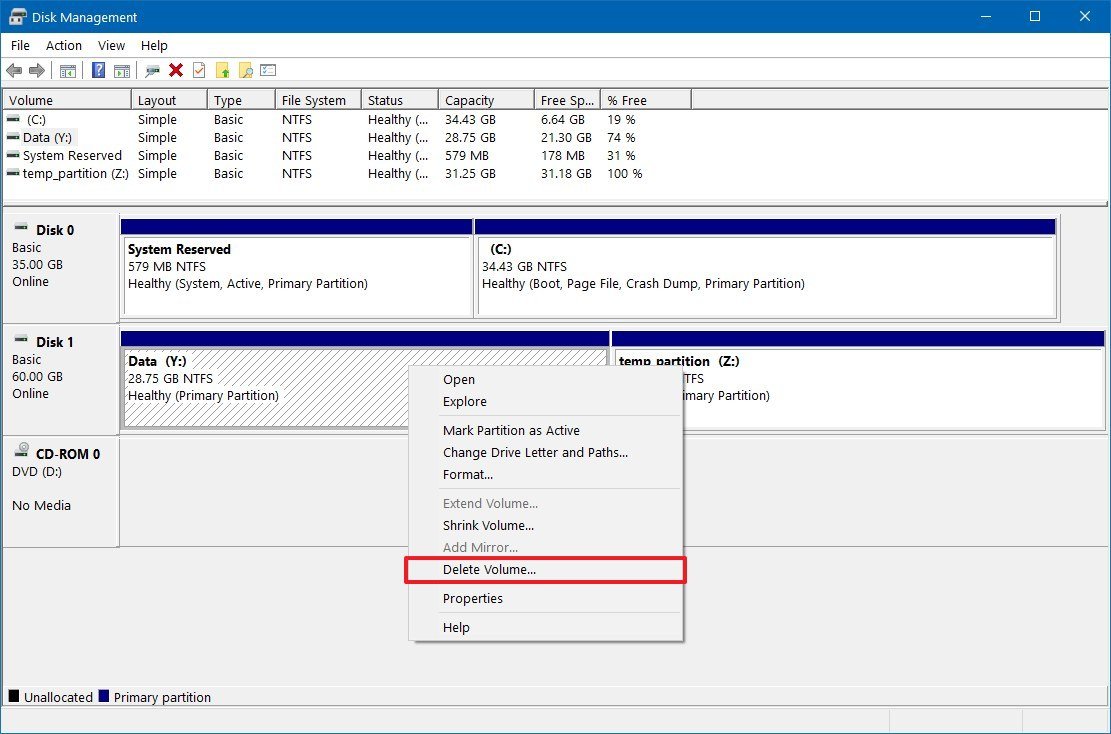
- Right-click the drive with the old partition, and select the Delete Volume option.
- Click the Yes button to confirm that the action will erase all the contents of the drive.
- Right-click the "Unallocated space," and select the New Simple Volume option.
- Click the Next button.
- Use the default settings for the volume size.
- Click the Next button.
- Use the "Assign the following drive letter" drop-down menu to select a letter for the new drive.
- Click the Next button.
- Use the "File system" drop-down menu, and select the NTFS option.
- Use the "Allocation unit size" drop-down menu, and select the Default option.
- In the "Value label" field, type a descriptive name for the drive. For example, new_drive.
- Check the Perform a quick format option.
- Unless necessary, clear the Enable file and folder compression option.
- Click the Next button.
- Click the Finish button.
After you complete the steps, you can start moving the files back to the new drive.
Moving file back to a new partition
To move files to the new location, use these steps:
- Open File Explorer.
- Click on This PC from the left pane.
- Under the "Devices and drives" section, double-click the temporary storage.
- Select the files to move.Quick tip: You can use the Ctrl + A keyboard shortcut to select all the files. Or press and hold the Ctrl key and click with the mouse the items that you want to select.
- Click the Move to button from the "Home" tab.
- Click the Choose location option.
- Select the new drive.
- Click the Move button.
Once you complete the steps, the files will be transferred to their permanent location, and the only thing left to do is to delete the temporary partition and extend the new partition with your data.
Deleting and extending partition
To delete the old and extend the new partition with Disk Management, use these steps:
- Open Start.
- Search for Disk Management and click the top result to open the experience.
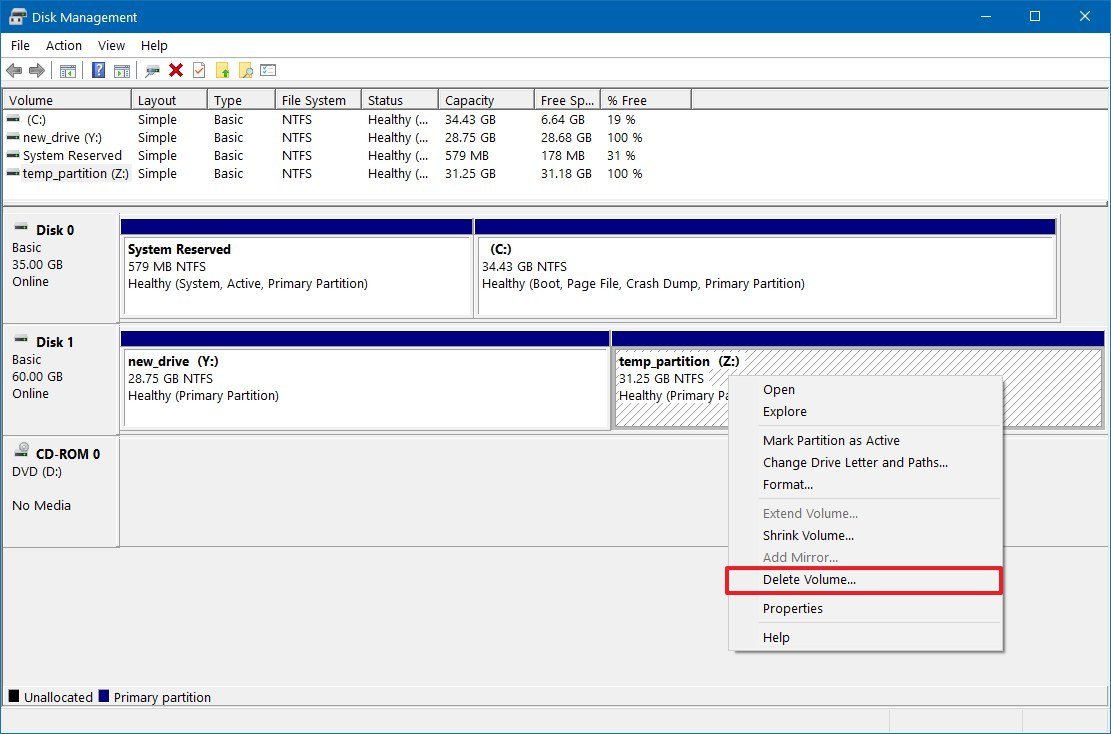
- Right-click the empty temporary partition, and select the Delete Volume option.
- Click the Yes button to confirm.
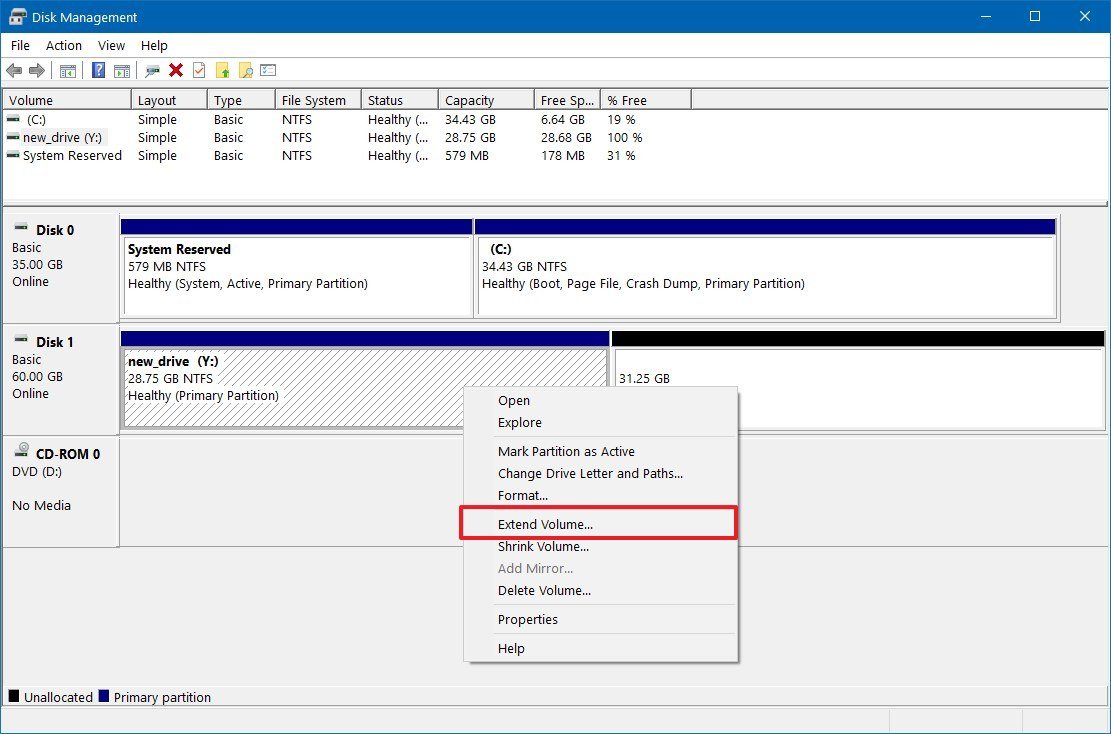
- Right-click the only available partition, and choose the Extend Volume option.
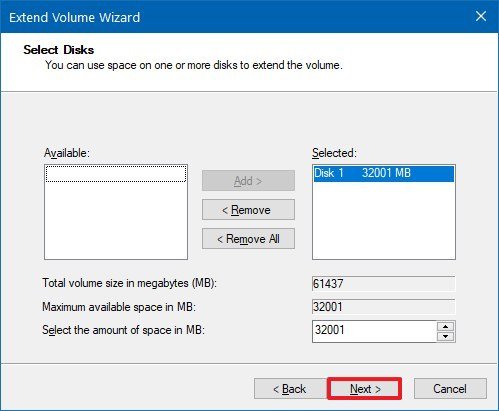
- Click the Next button.
- Click the Next button again to extend the partition using the remaining available space.
- Click the Finish button.
After you complete the steps, you'll end up with a fresh partition to store your files without the need for additional hardware.
While the ideal scenario would be to create a new partition to move files to the new storage, delete the old partition, and then extend the new storage, you can't extend a partition backward on Windows 10. You can extend the storage backward using a dynamic disk, but it's not a good idea, because you'll end up with a single volume made up of multiple partitions.
As a result, the proper process involves transferring the files to the new temporary partition, deleting the old partition, creating a new partition at the beginning of the drive, moving the files back, and deleting the temporary partition to extend the storage using the remaining available space properly.
If you don't have enough space, you could shrink the partition as much as possible, and then move some of the files to the new partition. Once you free up some space, you can further re-shrink the old partition, create an additional partition using the unallocated space to move the remaining files. After you're done moving the files, you can delete the old partition, create a new partition at the beginning of the drive and start transferring the files back beginning with the partition closest to the permanent partition. Then delete the temporary partitions, and extend the drive to use the remaining space.
We're focusing this guide on secondary drives containing non-system files, but you can also use the same concept when you need to perform a clean install of Windows 10, and you don't have an external drive to backup your files.

Mauro Huculak has been a Windows How-To Expert contributor for WindowsCentral.com for nearly a decade and has over 22 years of combined experience in IT and technical writing. He holds various professional certifications from Microsoft, Cisco, VMware, and CompTIA and has been recognized as a Microsoft MVP for many years.
