How to mount drive on Windows 10
Do you need to mount or unmount a drive on your device? If so, in this guide, you'll learn about multiple ways to complete this task on Windows 10.
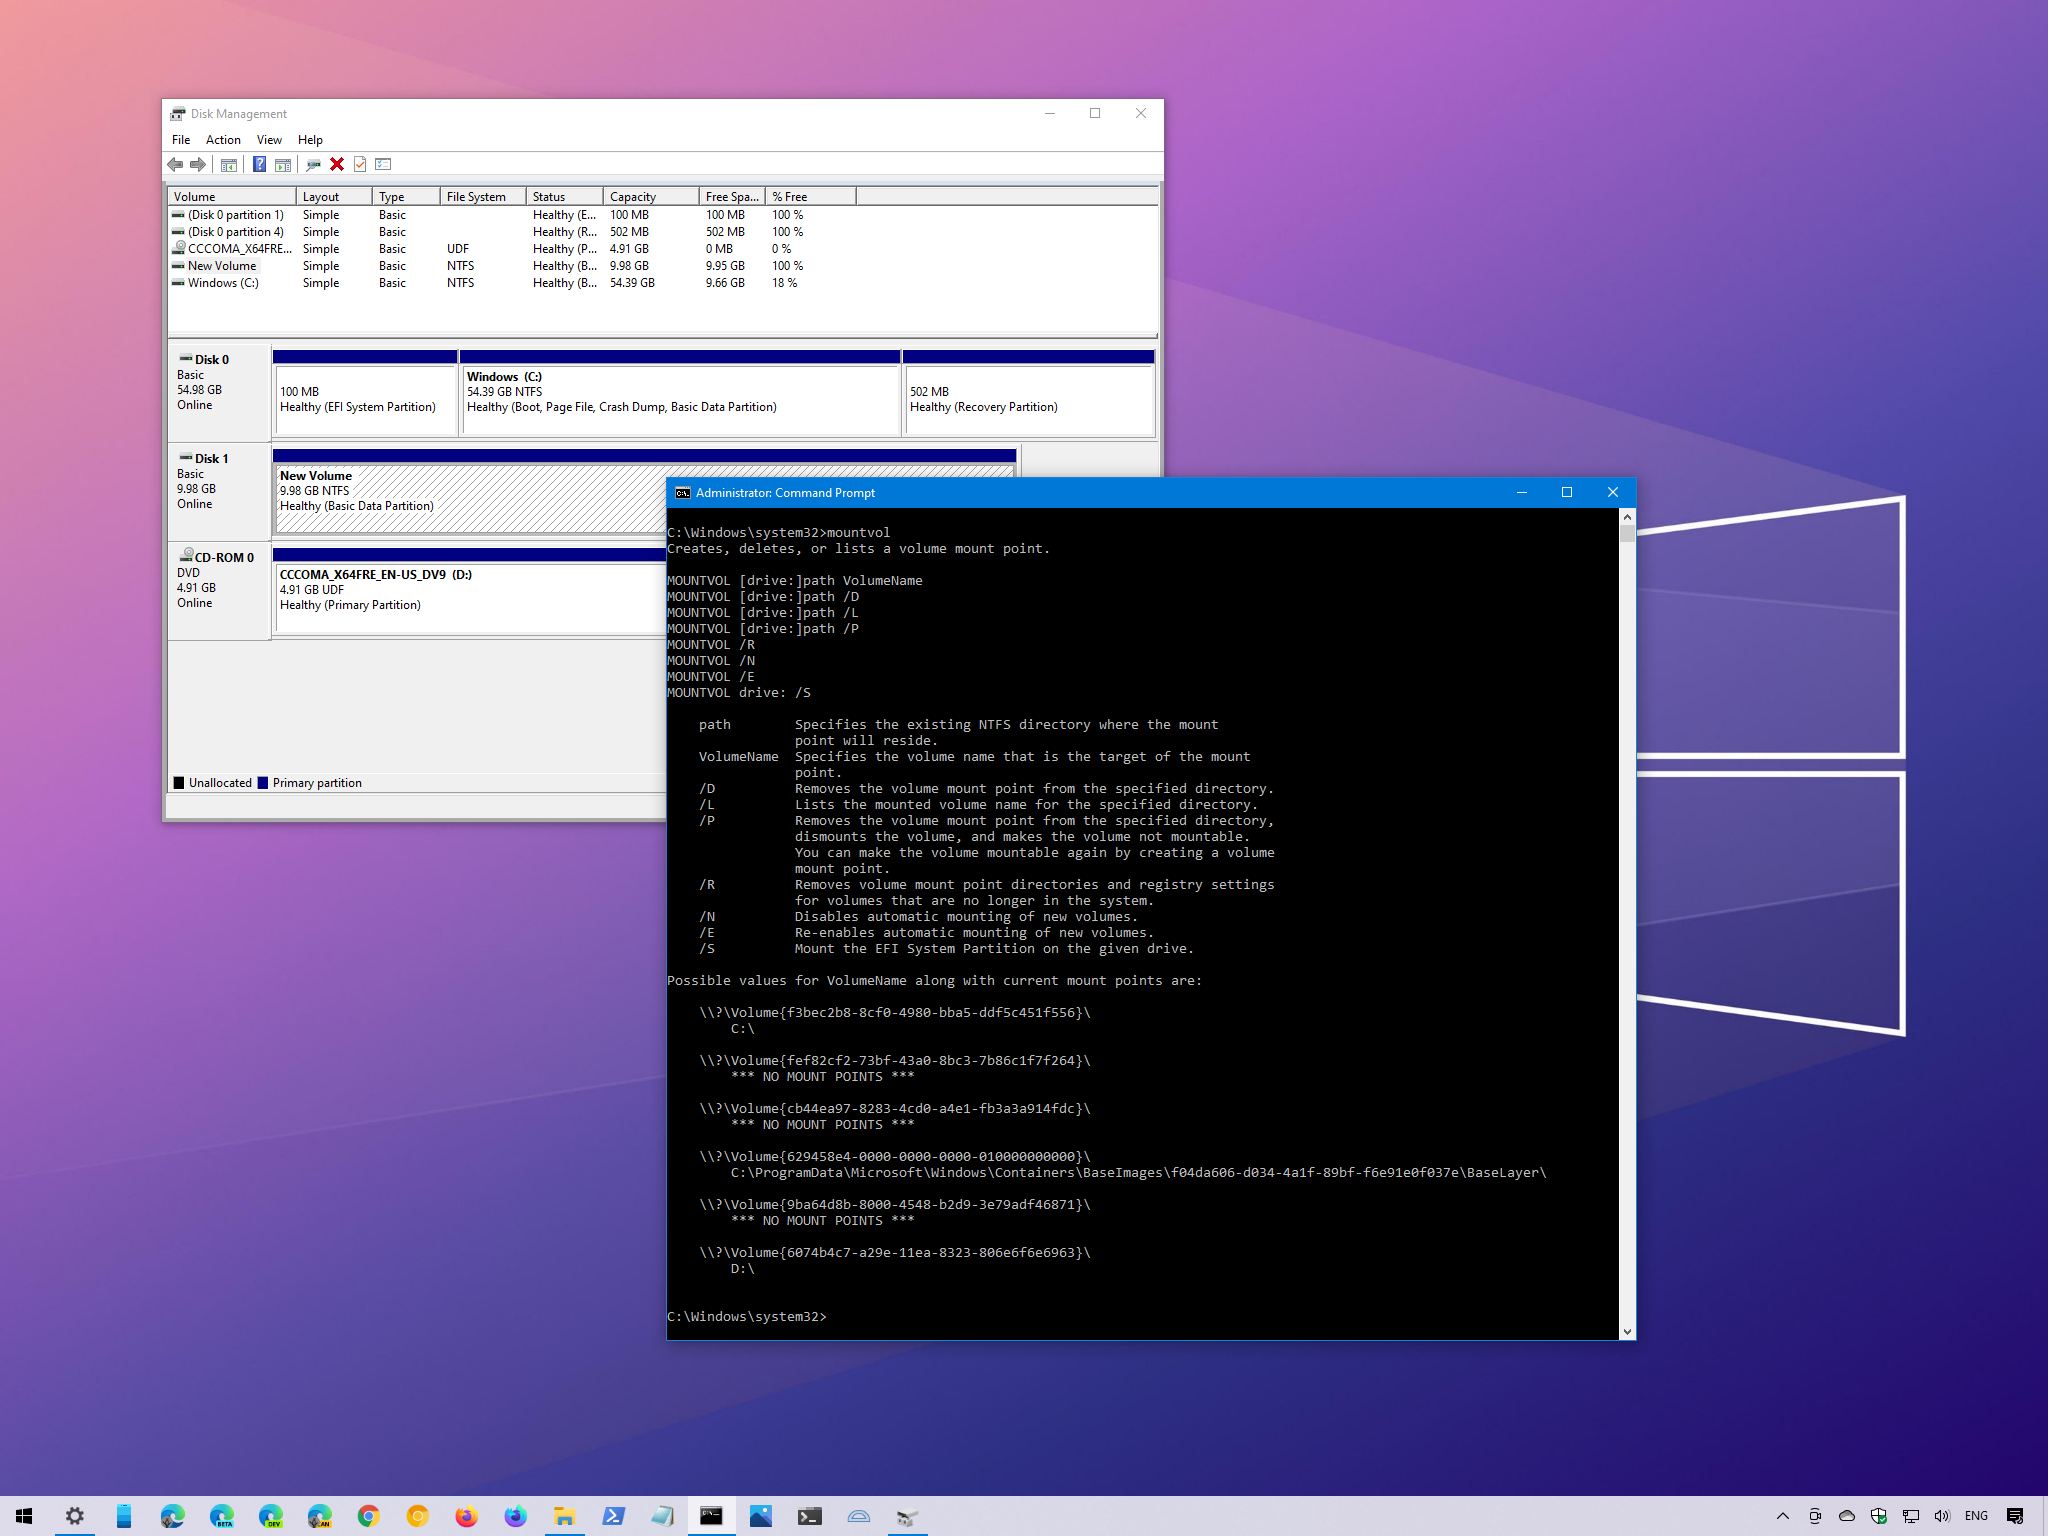
Although Windows 10 can automatically mount a drive, the ability to mount and unmount a drive manually can come in handy in many scenarios. For example, when the system does not automatically assign a drive letter upon connecting a new storage device. You formatted a drive using commands, and you did not specify a mount point. Or you need to unmount a device's storage to make it permanently inaccessible to users.
Whatever the reason it might be, Windows 10 allows you to quickly mount or unmount a drive using a graphical interface with Disk Management or with command-line using the mountvol and DiskPart tools in Command Prompt.
In this Windows 10 guide, we will walk through the steps to mount and unmount a drive (or volume) using the Disk Management graphical console and mountvol and DiskPart command-line tools available with Command Prompt.
How to mount drive on Windows 10
On Windows 10, when you mount a drive manually, you will create a mount point with a drive letter that will make the storage available to users and allow the system to automatically mount the drive with the same drive letter.
You can complete this process in at least three ways with the Disk Management console and the mountvol and DiskPart command-line tools.
Mount drive with Disk Management
To use Disk Management to mount a drive on Windows 10, use these steps:
- Open Start.
- Search for Create and format hard disks partitions and click the top result to open Disk Management.
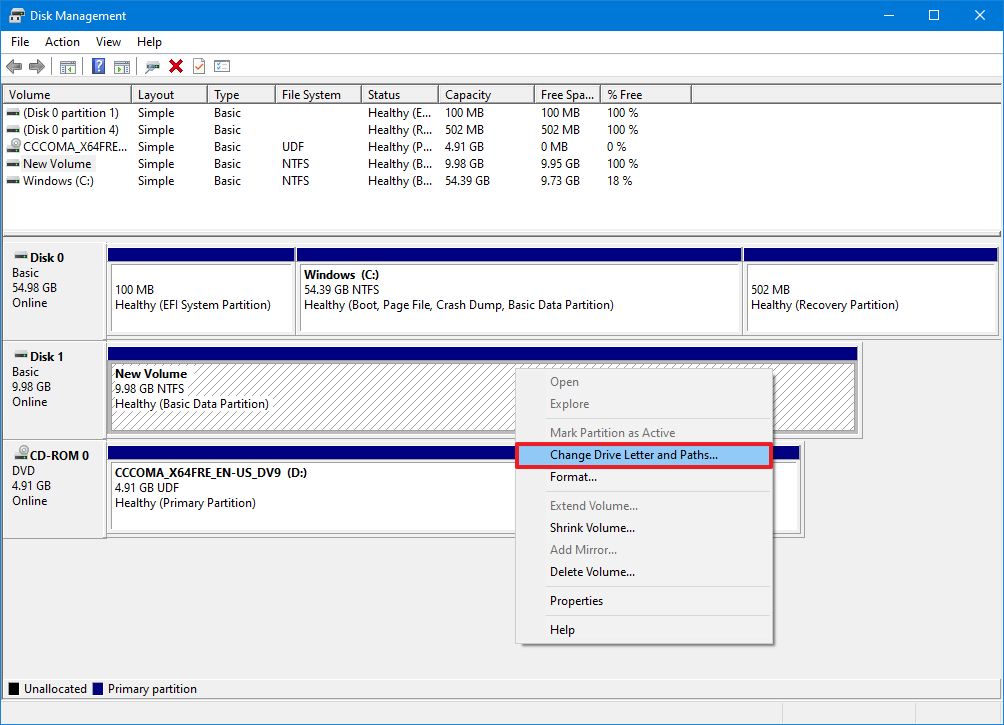
- Right-click the drive and select the Change Drive Letter and Path option.
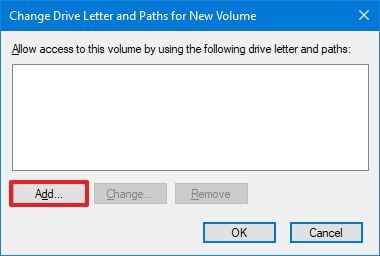
- Click the Add button.
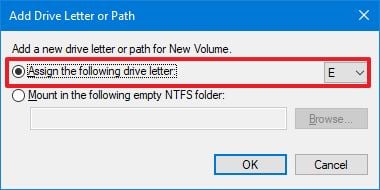
- Select the Assign the following drive letter option.
- Use the drop-down menu and select one of the available letters.Quick tip: When assigning a letter manually, it's best to start with the last available letter to have a point of reference to determine if the volume was mounted manually or automatically.
Once you complete the steps, the drive will mount and appear in the system to store data.
All the latest news, reviews, and guides for Windows and Xbox diehards.
Mount drive with mountvol
To use mountvol to mount a drive, use these steps:
- Open Start.
- Search for Command Prompt, right-click the top result, and select the Run as administrator option.
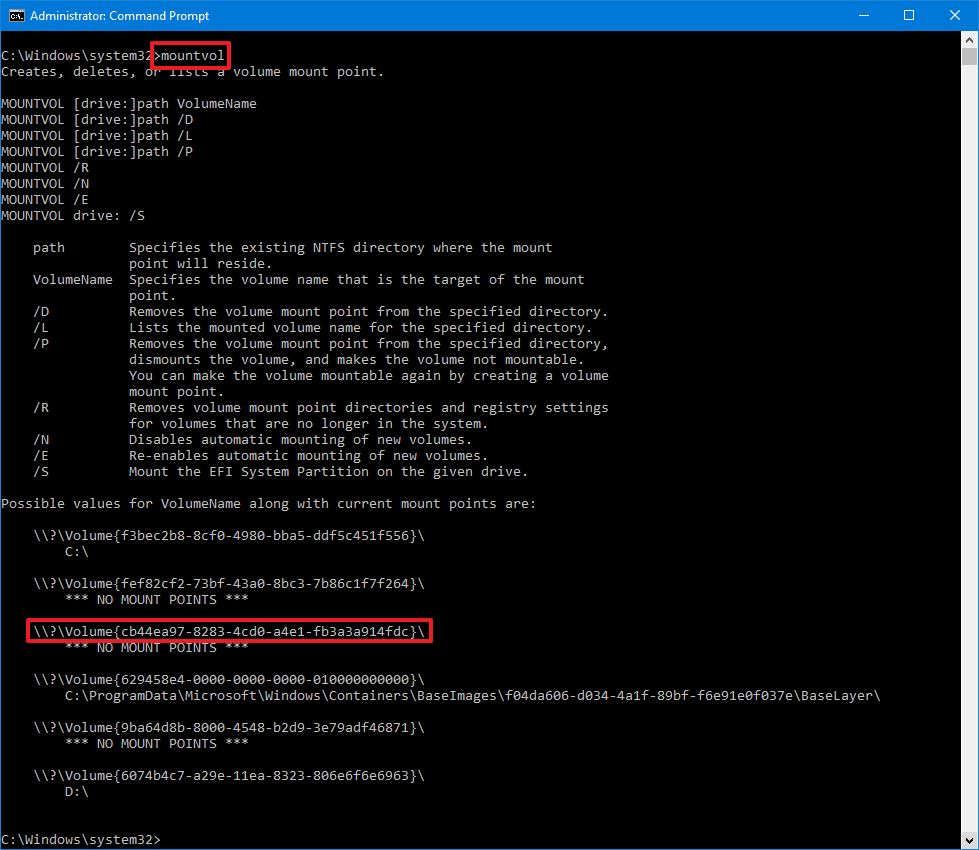
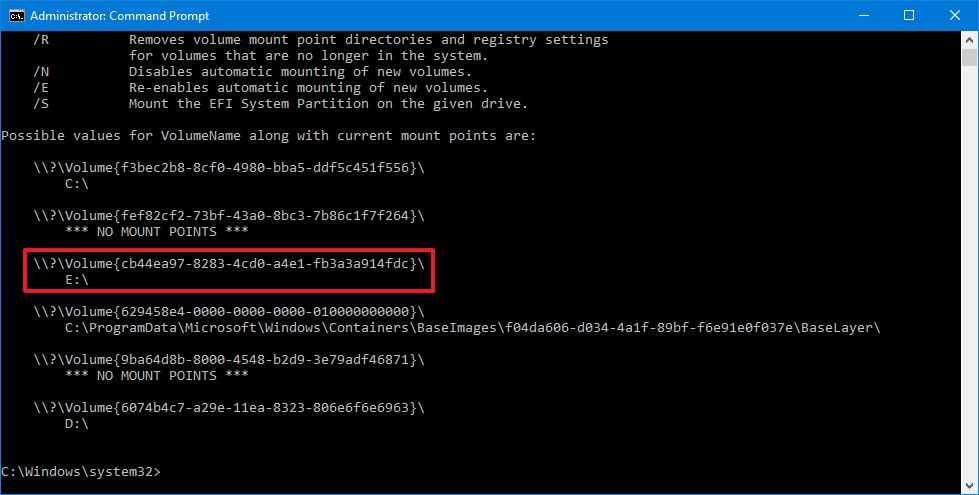
- Type the following command to list all the available mount points and press Enter:
mountvol
- Select the mount point path to copy the information to the clipboard.Quick note: Usually, the volume may or may not be listed with the "Not mountable until a volume mount point is created" label. If you cannot identify the volume, then use the Disk Management console instead.
- Type the following command to mount the volume and press Enter:
mountvol DRIVE-LETTER:\ VOLUME-NAMEIn the command, make sure to replace DRIVE-LETTER and VOLUME-NAME with the appropriate information.For example, this command mounts the\\?\Volume{cb44ea97-8283-4cd0-a4e1-fb3a3a914fdc}\with theedrive letter:mountvol e:\ \\?\Volume{cb44ea97-8283-4cd0-a4e1-fb3a3a914fdc}\
After you complete the steps, the volume will be accessible through File Explorer and across the experience.
Mount drive with DiskPart
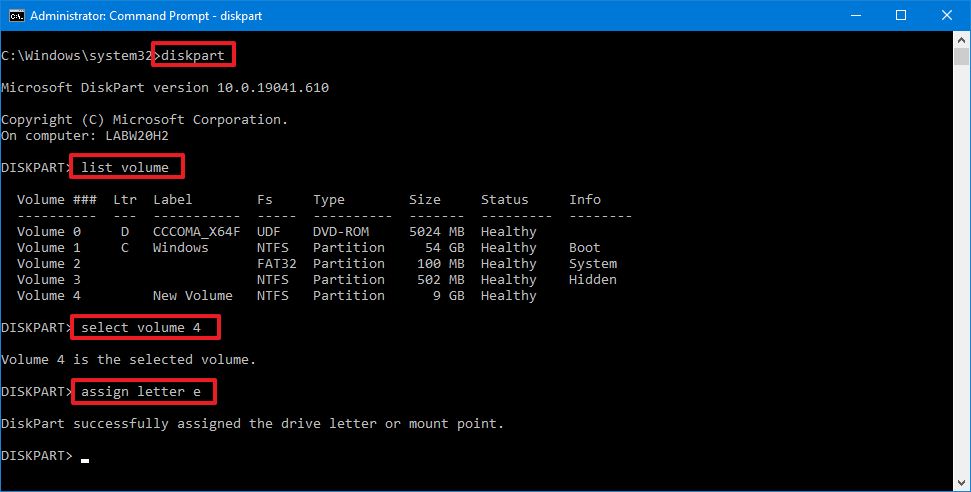
Alternatively, you can also accomplish the task using DiskPart with these steps:
- Open Start.
- Search for Command Prompt, right-click the top result, and select the** Run as administrator** option.
- Type the following command to start the tool and press Enter:
diskpart - Type the following command to list all the available volumes and press Enter:
list volume - Confirm the volume you want to mount.
- Type the following command to select the drive and press Enter:
select volume VOLUME-NUMBERIn the command, replace VOLUME-NUMBER with the number of the drive (volume) you want to mount.For example, this command selects volume number four:select volume 4
- Type the following command to mount the drive on Windows 10 and press Enter:
assign letter DRIVE-LETTERIn the command, replace DRIVE-LETTER with the letter you want to mount and access the storage.For example, this command mounts the drive and assigns theedrive letter:assign letter e
How to unmount drive on Windows 10
When you unmount a drive manually, you will remove the mount point making the storage inaccessible. Also, the system will no longer try to mount it automatically. If you want to make the drive mountable again, you will need to revert the changes (see above steps).
If you want to unmount a drive, you can also use the same Disk Management, mountvol, and DiskPart tools.
Unmount drive with Disk Management
To unmount a drive with Disk Management, use these steps:
- Open Start.
- Search for Create and format hard disks partitions and click the top result to open Disk Management.
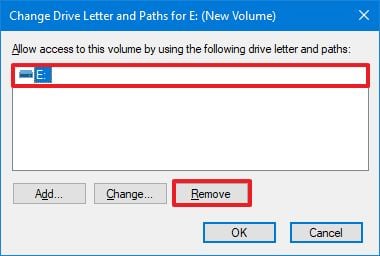
- Right-click the drive and select the Change Drive Letter and Path option.
- Click the Remove button.
- Click the Yes button.
Once you complete the steps, the drive will no longer be accessible on Windows 10.
Unmount drive with mountvol
To dismount a drive (or volume) with mountvol, use these steps:
- Open Start.
- Search for Command Prompt, right-click the top result, and select the Run as administrator option.
- Type the following command to list all the available mount points and press Enter:
mountvol
- Type the following command to dismount a drive and press Enter:
mountvol DRIVE-LETTER:\ /pIn the command, make sure to change DRIVE-LETTER with the correct drive letter of the mount point you are trying to dismount.For example, this command unmounts thee:\mount point:mountvol e:\ /pQuick note: The/poption will unmount the drive and remove the drive letter. The tool also offers the/doption, but it is only meant to remove mount points individually.
After you complete the steps, the mount points will be removed, making the storage inaccessible to users.
Unmount drive with DiskPart
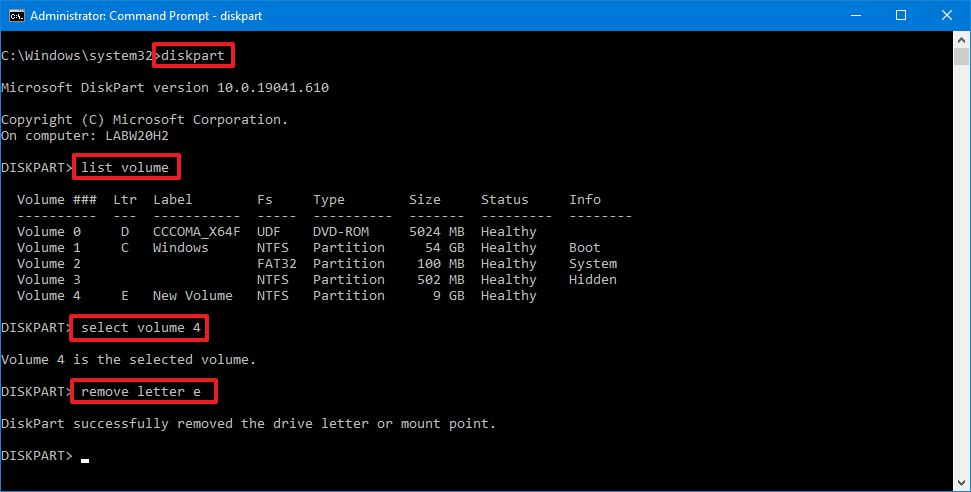
You can also dismount a drive with DiskPart using these steps:
- Open Start.
- Search for Command Prompt, right-click the top result, and select the** Run as administrator** option.
- Type the following command to start the tool and press Enter:
diskpart - Type the following command to list all the available volumes and press Enter:
list volume - Confirm the volume you want to unmount.
- Type the following command to select the drive and press Enter:
select volume VOLUME-NUMBERIn the command, replace VOLUME-NUMBER with the number of the drive (volume) you want to mount.For example, this command selects volume number four:select volume 4
- Type the following command to unmount the drive on Windows 10 and press Enter:
remove letter DRIVE-LETTERIn the command, replace DRIVE-LETTER with the letter of the storage you want to unmount.For example, this command dismounts theedrive:remove letter e
Also, do not confuse mounting a drive with mounting a drive as a folder, which is something different. You can use these instructions to mount a drive as a folder.

Mauro Huculak has been a Windows How-To Expert contributor for WindowsCentral.com for nearly a decade and has over 22 years of combined experience in IT and technical writing. He holds various professional certifications from Microsoft, Cisco, VMware, and CompTIA and has been recognized as a Microsoft MVP for many years.
