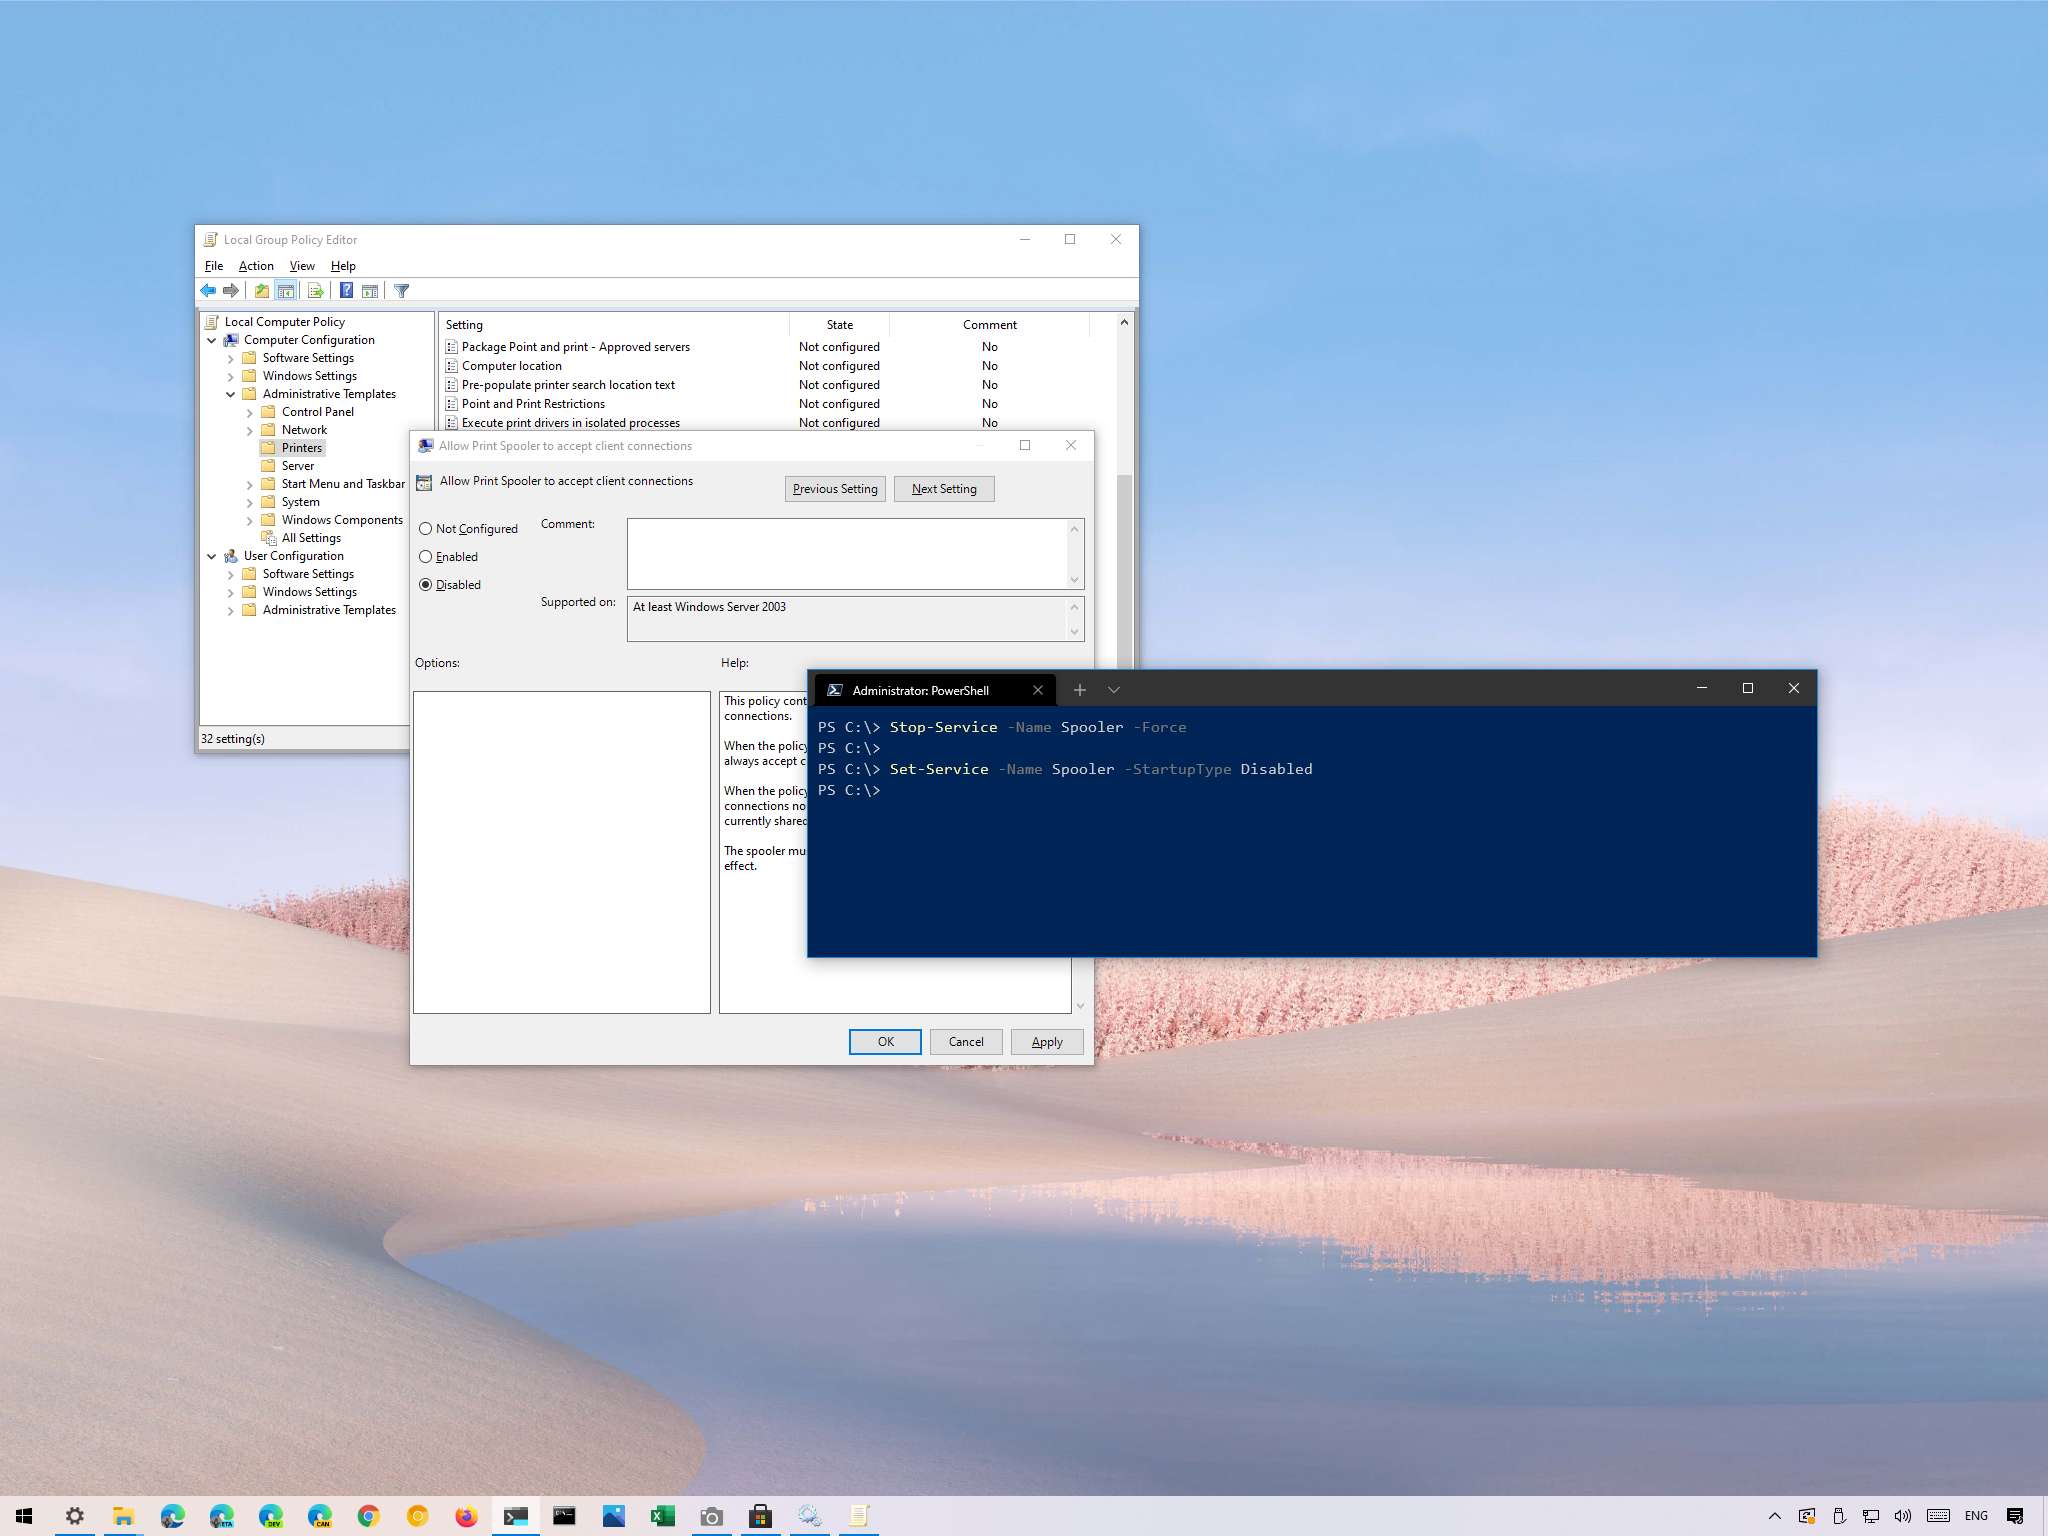
How to mitigate Print Spooler PrintNightmare vulnerability on Windows 10
An unpatched vulnerability could open the doors for attackers from accessing your device — here's how you can protect yourself until a permanent fix is released.

Microsoft has acknowledged a new vulnerability known as "PrintNightmare" that affects all versions of Windows. The vulnerability affects the Print Spooler service and allows hackers to execute lines of code to install apps, manipulate your data, or even create a new account with full privileges.
According to reports, the vulnerability was accidentally published by Sangfor researchers, and it was soon deleted. However, the code was quickly forked on GitHub, allowing others to get access to it before it was removed.
The company is actively investigating the problem and is recommending temporarily disabling Windows Print Spooler service or blocking incoming connections to the print server whenever possible until a permanent fix is released.
In this Windows 10 guide, we will walk you through the steps to mitigate the newly discover PrintNightmare vulnerability.
- How to disable Print Spooler service on Windows 10
- How to disable Print Spooler service via Group Policy on Windows 10
How to disable Print Spooler service on Windows 10
To disable Print Spooler service to mitigate the PrintNightmare vulnerability on Windows 10, use these steps:
- Open Start.
- Search for PowerShell, right-click the top result and select the Run as administrator problem.
- Type the following command to stop the Print Spooler service and press Enter:
Stop-Service -Name Spooler -Force
- Type the following command to prevent the service from starting back up again during restart and press Enter:
Set-Service -Name Spooler -StartupType Disabled
Once you complete the steps, the device should be protected against the PrintNightmare attack, but you will no longer be able to print locally or remotely.
Re-enable Print Spooler
If you need to print temporarily or a permanent fix has been released, you can enable the feature again. Here's how:
All the latest news, reviews, and guides for Windows and Xbox diehards.
- Open Start.
- Search for PowerShell, right-click the top result and select the Run as administrator problem.
- Type the following command to prevent the service from starting back up again during restart and press Enter:
Set-Service -Name Spooler -StartupType Automatic
- Type the following command to stop the Print Spooler service and press Enter:
Start-Service -Name Spooler
After you complete the steps, the printer should start working normally.
How to disable Print Spooler service via Group Policy on Windows 10
If you have Windows 10 Pro (or Enterprise), the easiest way to mitigate the printing vulnerability is to use Local Group Policy Editor.
To disable the Print Spooler with Group Policy, use these steps:
- Open Start.
- Search for gpedit.msc and click OK to open the Local Group Policy Editor.
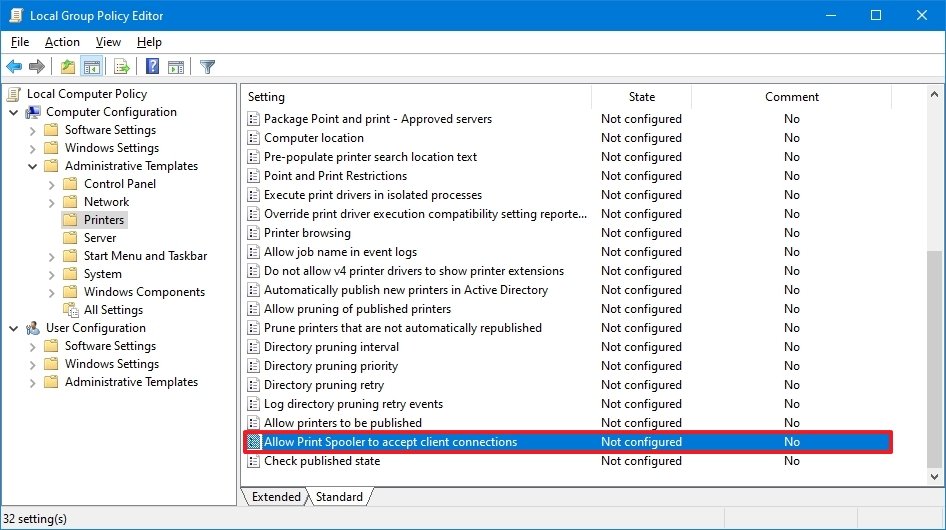
- Browse the following path:
Computer Configuration > Administrative Templates > Printers - On the right side, double-click the Allow Print Spooler to accept client connections: policy.
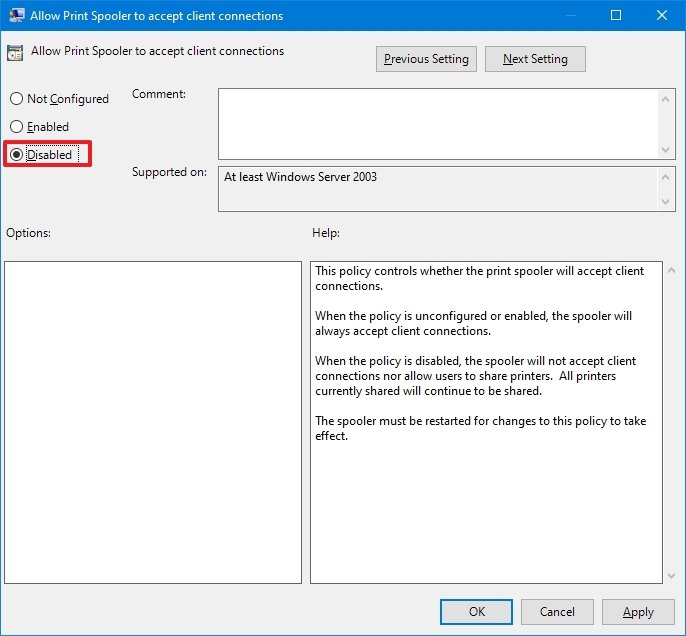
- Select the Disabled option.
- Click the Apply button
- Click the OK button.
Once you complete the steps, disabling the external network connections will prevent the vulnerability from being exploited. If you have Windows 10 configured as a printer server, users will no longer be able to print, but the printer directly connected to the device will continue to work.
Re-enable Print Spooler
To enable the Print Spooler with Group Policy, use these steps:
- Open Start.
- Search for gpedit.msc and click OK to open the Local Group Policy Editor.
- Browse the following path:
Computer Configuration > Administrative Templates > Printers - On the right side, double-click the Allow Print Spooler to accept client connections: policy.
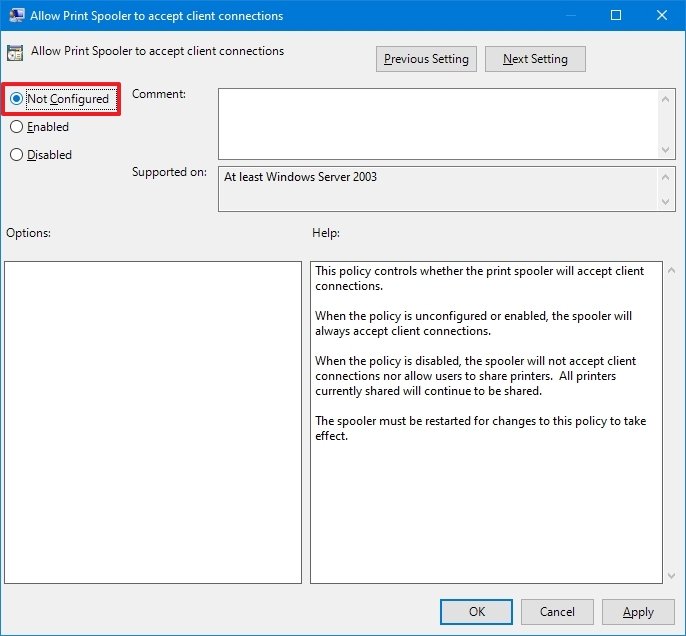
- Select the Not Configured option.
- Click the Apply button
- Click the OK button.
After you complete the steps, the print server should start working normally.
While we are focusing this guide on Windows 10, these steps should also work for the previous version of the OS.
More Windows resources
For more helpful articles, coverage, and answers to common questions about Windows 10 and Windows 11, visit the following resources:
- Windows 10 on Windows Central — All you need to know
- Windows 10 help, tips, and tricks
- Windows 11 on Windows Central — All you need to know

Mauro Huculak has been a Windows How-To Expert contributor for WindowsCentral.com for nearly a decade and has over 22 years of combined experience in IT and technical writing. He holds various professional certifications from Microsoft, Cisco, VMware, and CompTIA and has been recognized as a Microsoft MVP for many years.


