How to manage email and account settings on Windows 10
If you use more than one service to access your emails and apps, use this guide to add the accounts to Windows 10 to allow apps easier and faster access.
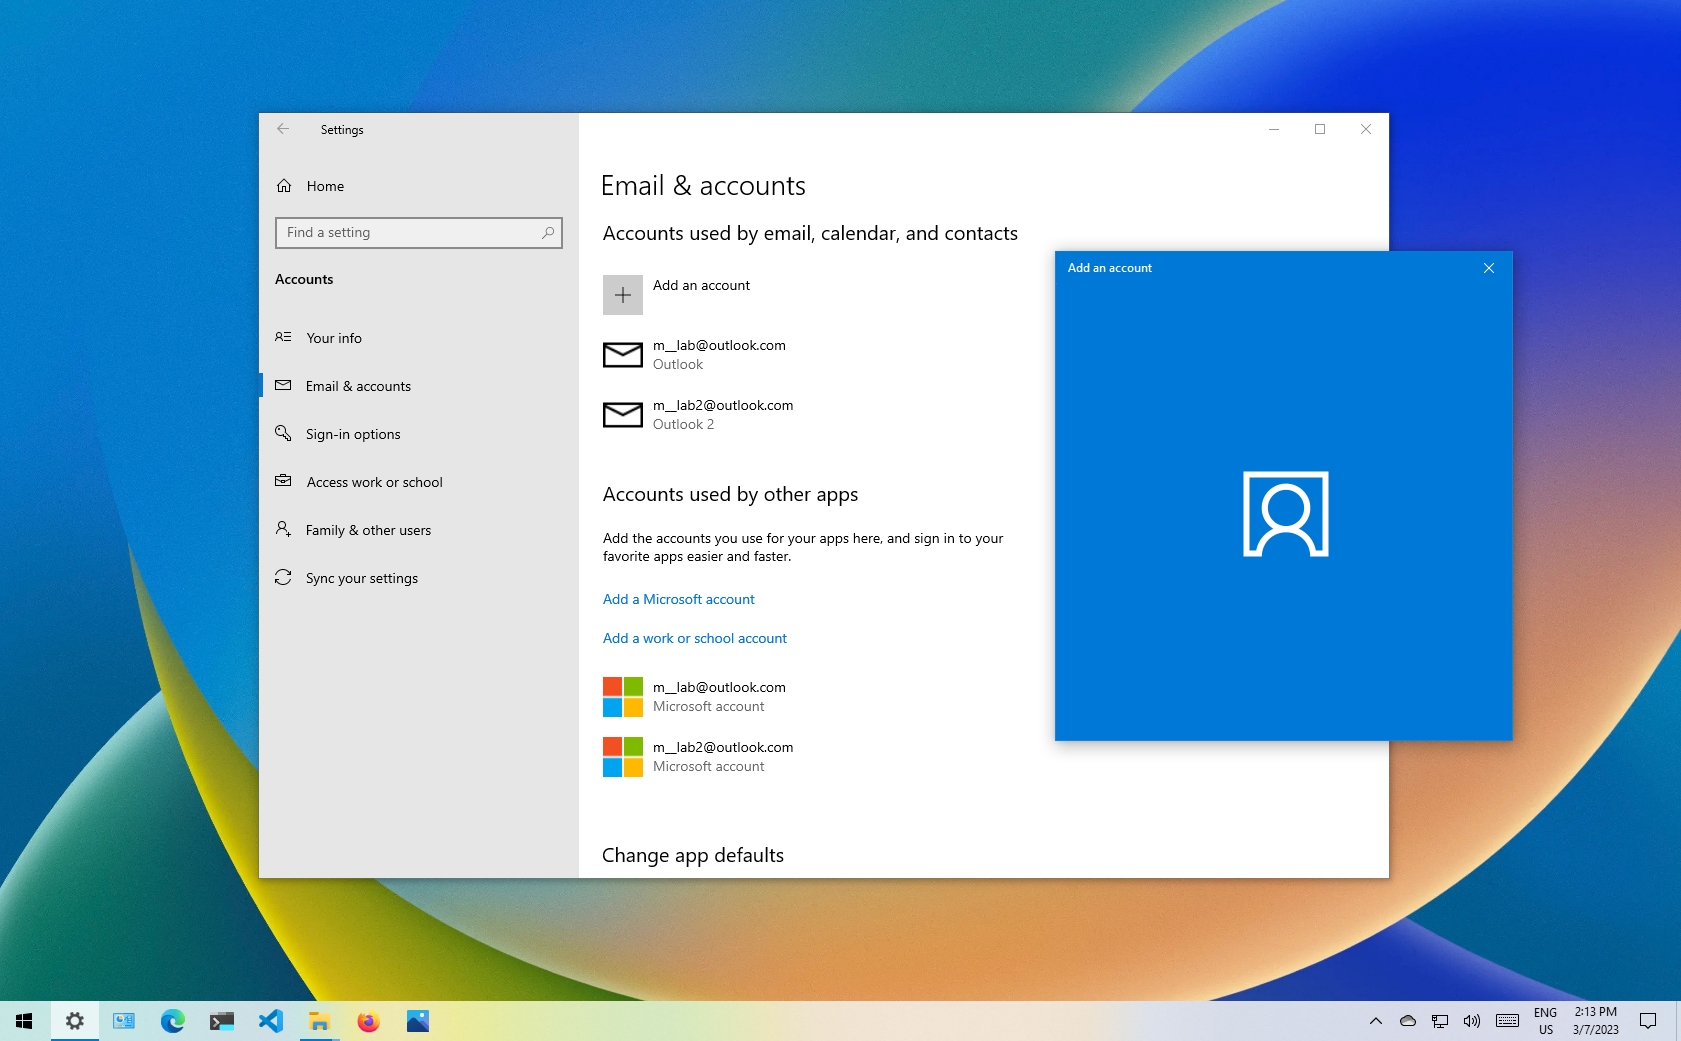
Although signing in with a Microsoft account makes it easier to access additional benefits, such as the ability to sync settings, preferences, and files across devices without additional configuration on Windows 10, you still have to configure access manually for apps and services using a different account.
However, if you use multiple services with different accounts, the Settings app lets you add them ahead of time allowing apps easier and faster access to your services.
This how-to guide will walk you through the steps to add and remove accounts from your computer.
Important: These instructions are meant to include additional accounts to your Windows 10 profile. If you're looking to add a new user account, you need to use these instructions.
How to add emails and accounts from Settings
To preload accounts for the Mail, Calendar, and other apps on Windows 10, you have two choices.
Add new account for emails
To add an account for emails and apps on Windows 10, use these steps:
Get the Windows Central Newsletter
All the latest news, reviews, and guides for Windows and Xbox diehards.
- Open Settings.
- Click on Accounts.
- Click on Email & accounts.
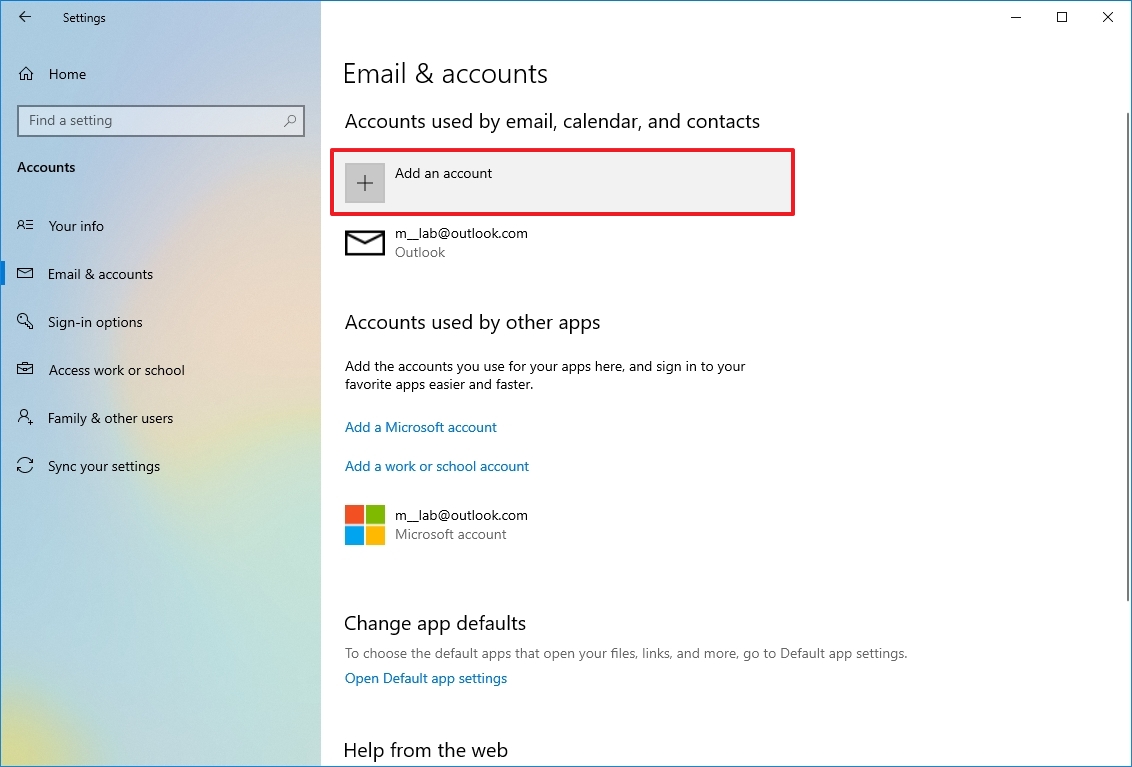
- Click the "Add an account" button to include a new email account to allow the Mail and Calendar apps to access your emails and calendar.
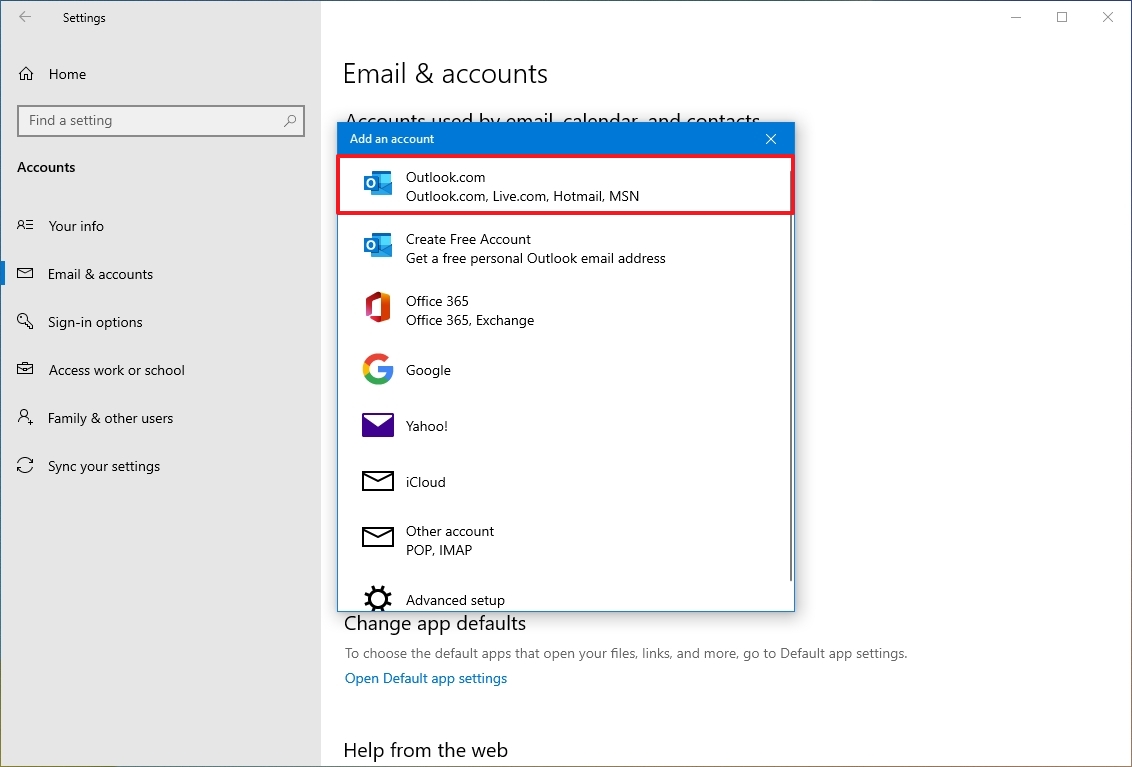
- Select the service provider — for example, Outlook.com.
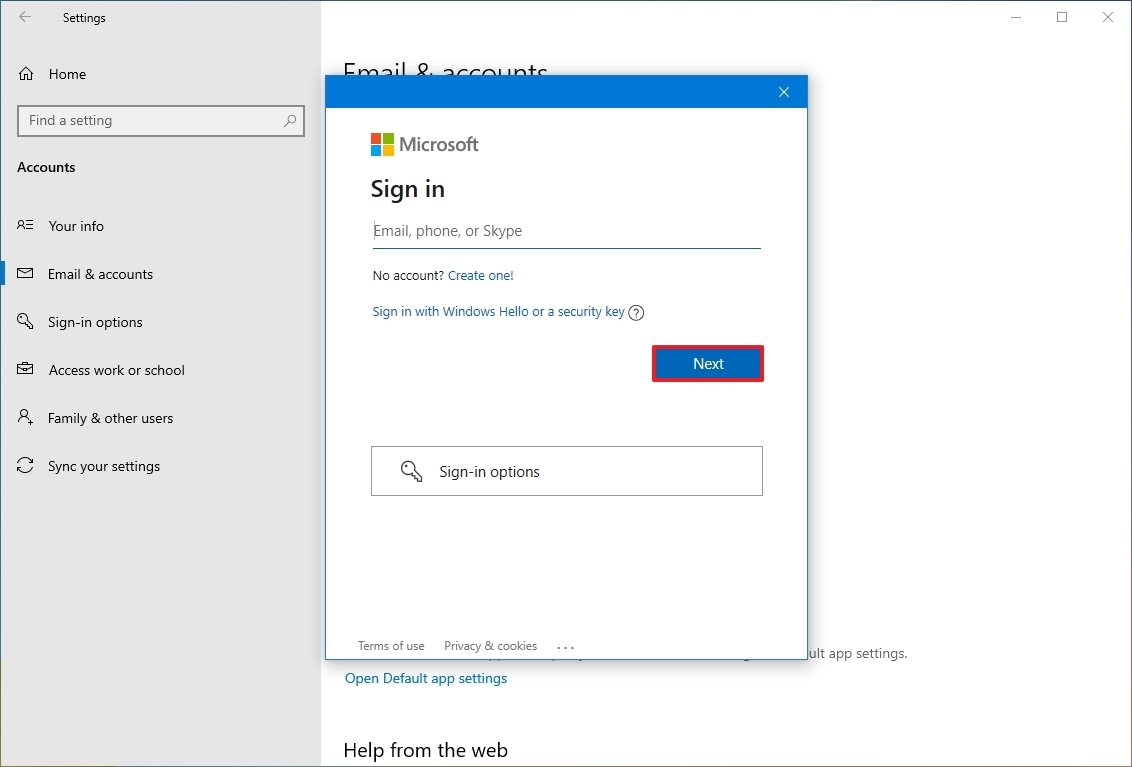
- Confirm the email account information.
- Click the Next button.
- Confirm the account password.
- Click the Sign-in button.
- Click the OK button.
- Click the Done button.
Once you complete the steps, the new account will be added to your device to access your email, calendar, and contacts. If you add a Microsoft account, the information will also be available to sign in to other apps. (This option is like adding an account directly into the Mail app.)
Add extra Microsoft accounts for apps
If you use apps with a different Microsoft account (such as for OneDrive, Xbox, and others), you can preload those credentials for easier access with these steps:
- Open Settings.
- Click on Accounts.
- Click on Email & accounts.
- Under the "Accounts used by other apps" section, click the "Add a Microsoft account" option.
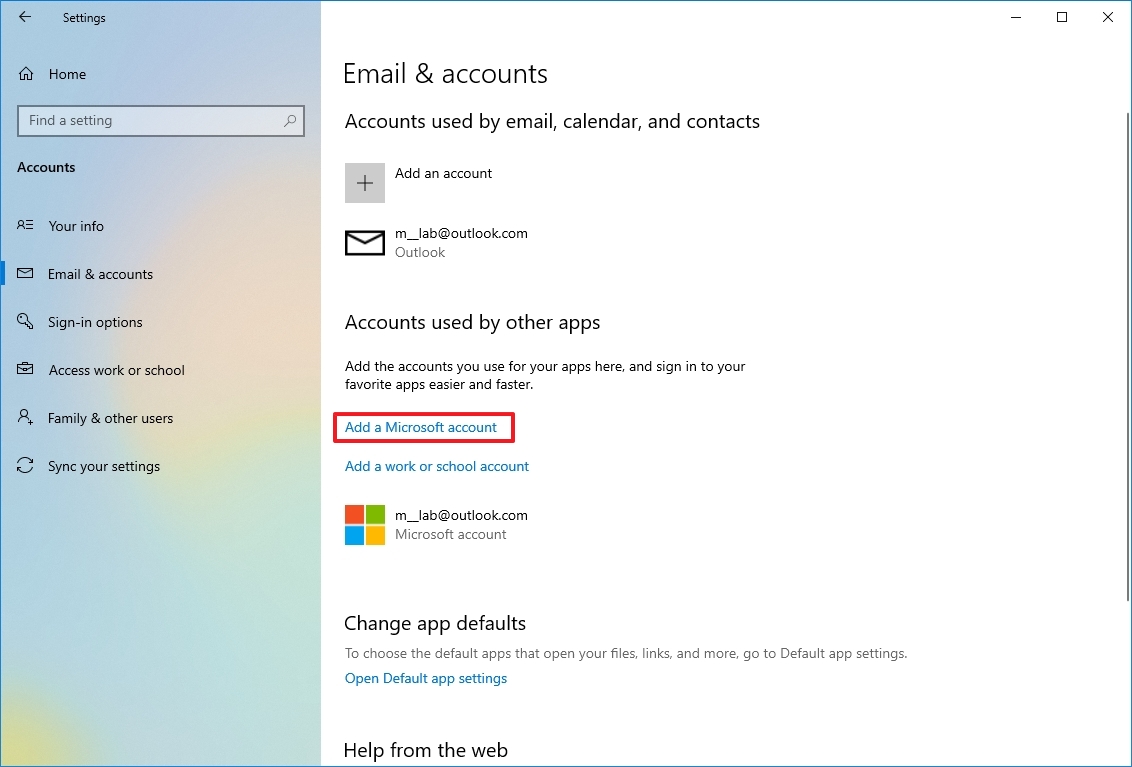
- Confirm your Microsoft account information.
- Click the Next button.
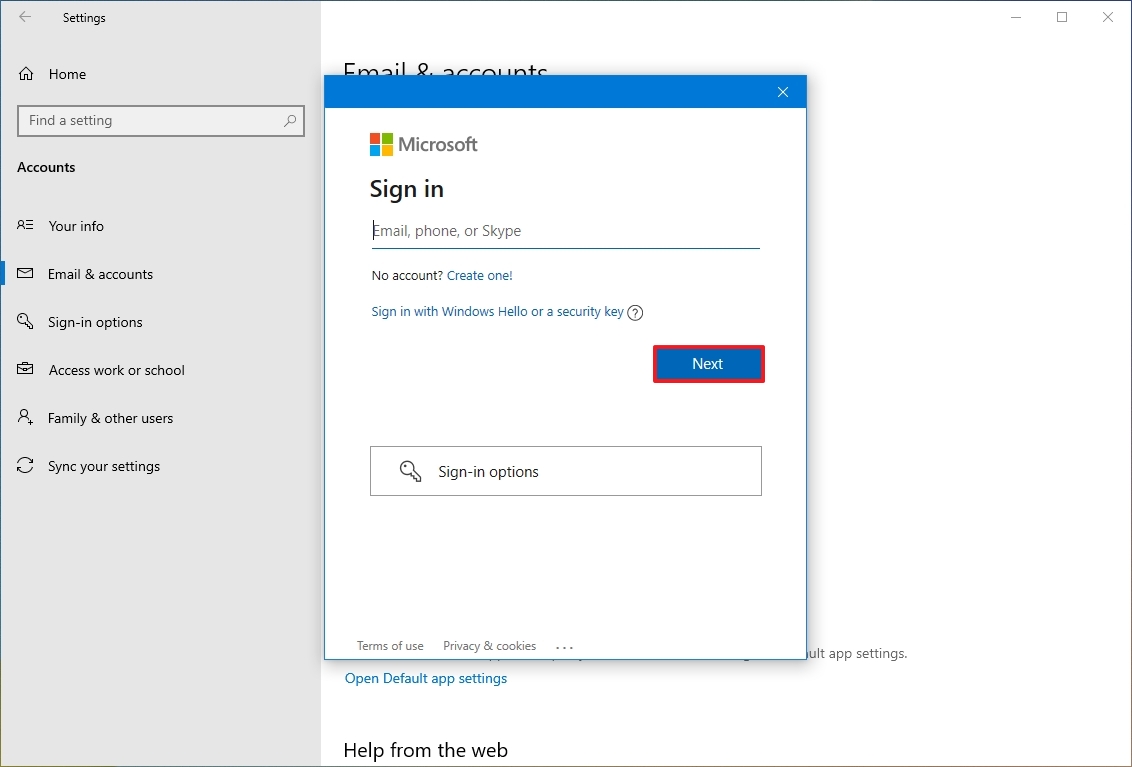
- Confirm the account password.
- Click the Sign-in button.
- Click the OK button.
- Click the Done button.
After completing the steps, the account information will be available for apps to sign in automatically. (You may need to repeat the steps to add more accounts.)
Manage accounts for apps
Windows 10 will use the information to sign you into services automatically when adding accounts for other apps. However, you can change the settings to ask for permission before using your credentials.
To manage a different Microsoft account for apps on Windows 10, use these steps:
- Open Settings.
- Click on Accounts.
- Click on Email & accounts.
- Select the account that you want to change.
- Use the drop-down menu, and select the "Apps need to ask me to use this account" option.
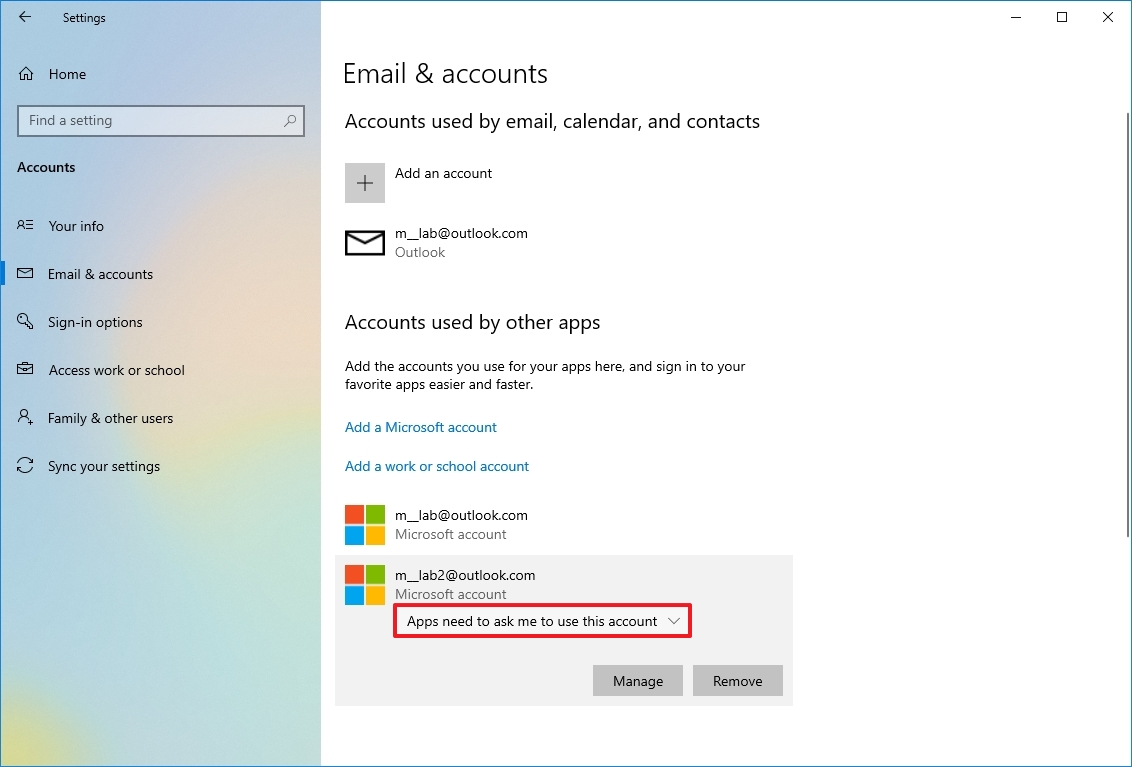
After you complete the steps, apps will prompt you to allow access before signing in to the service.
How to remove emails and accounts from Settings
If you no longer need the account, you can remove it from Settings using these steps:
- Open Settings.
- Click on Accounts.
- Click on Email & accounts.
- Select the account to remove.
- Click the Manage button.
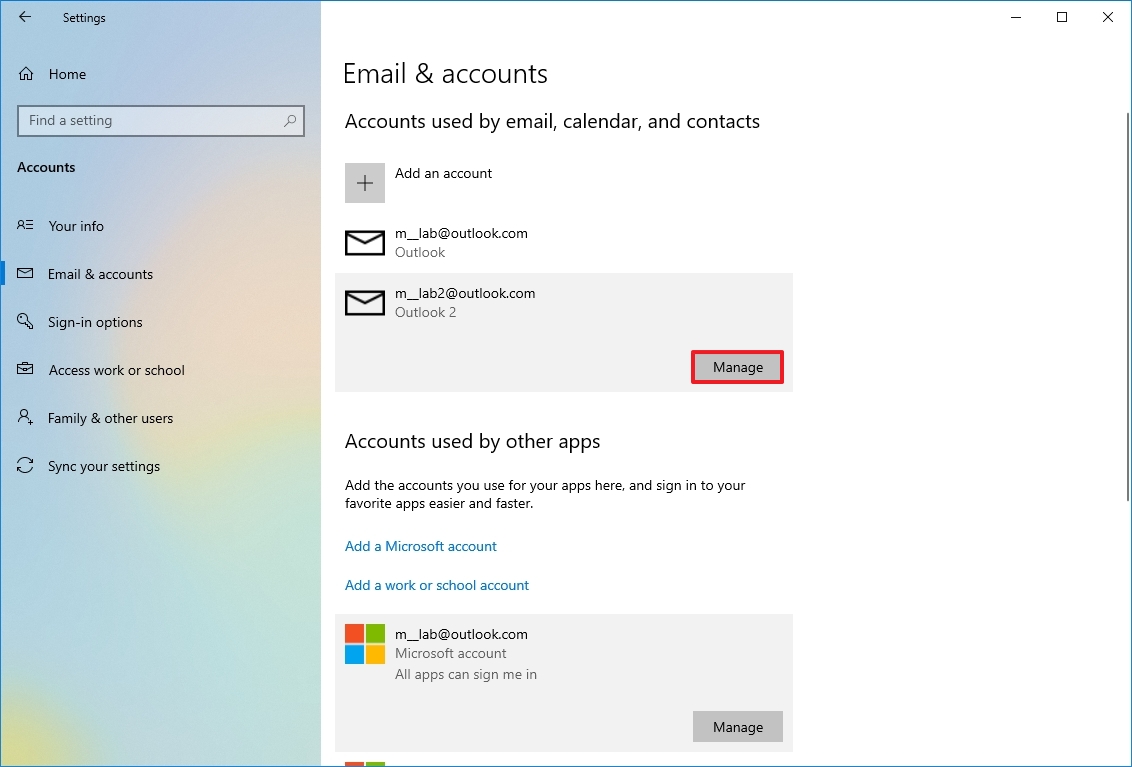
- Click the "Delete account from this device" option.
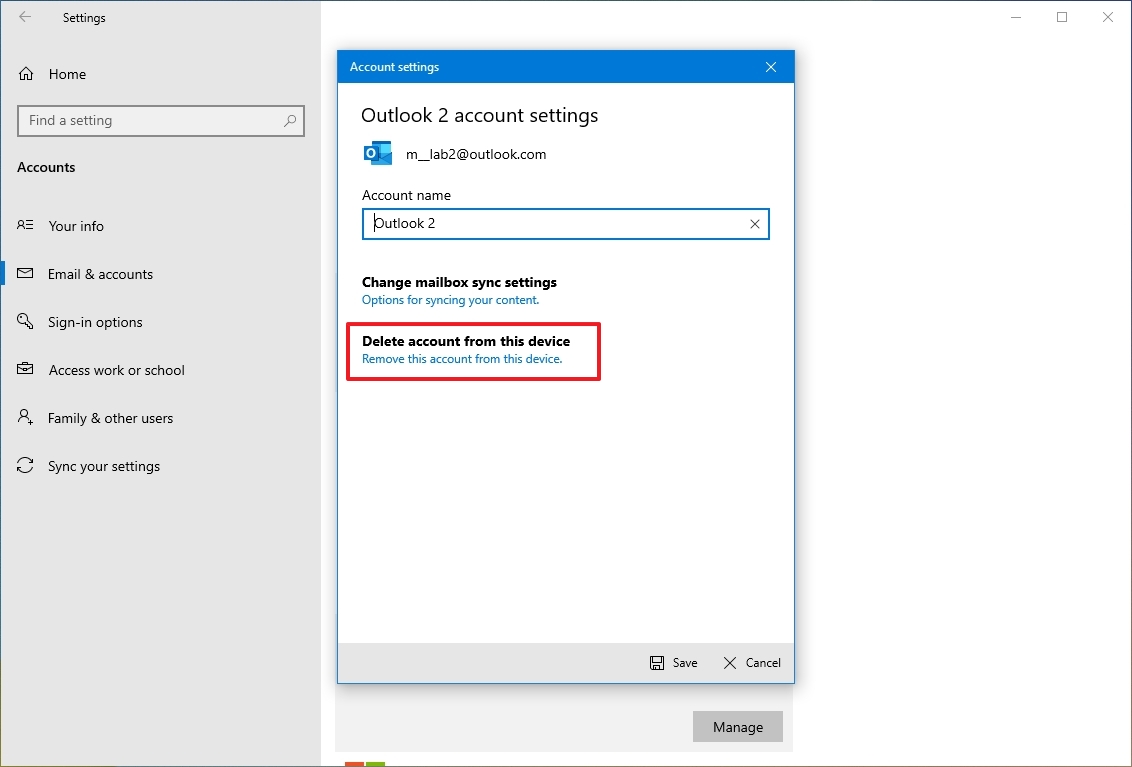
- Click the Delete button.
- Click the Done button.
Once you complete the steps, the account information will only be removed from the Mail and Calendar apps. If you want to remove a Microsoft account information completely, you also need to delete the data from the "Accounts used by other apps" section with the steps below.
Removing accounts for apps
If you need to remove an account for apps, use these steps:
- Open Settings.
- Click on Accounts.
- Click on Email & accounts.
- Under the "Accounts used by other apps" section, select the account you plan to remove.
- Click the Remove button.
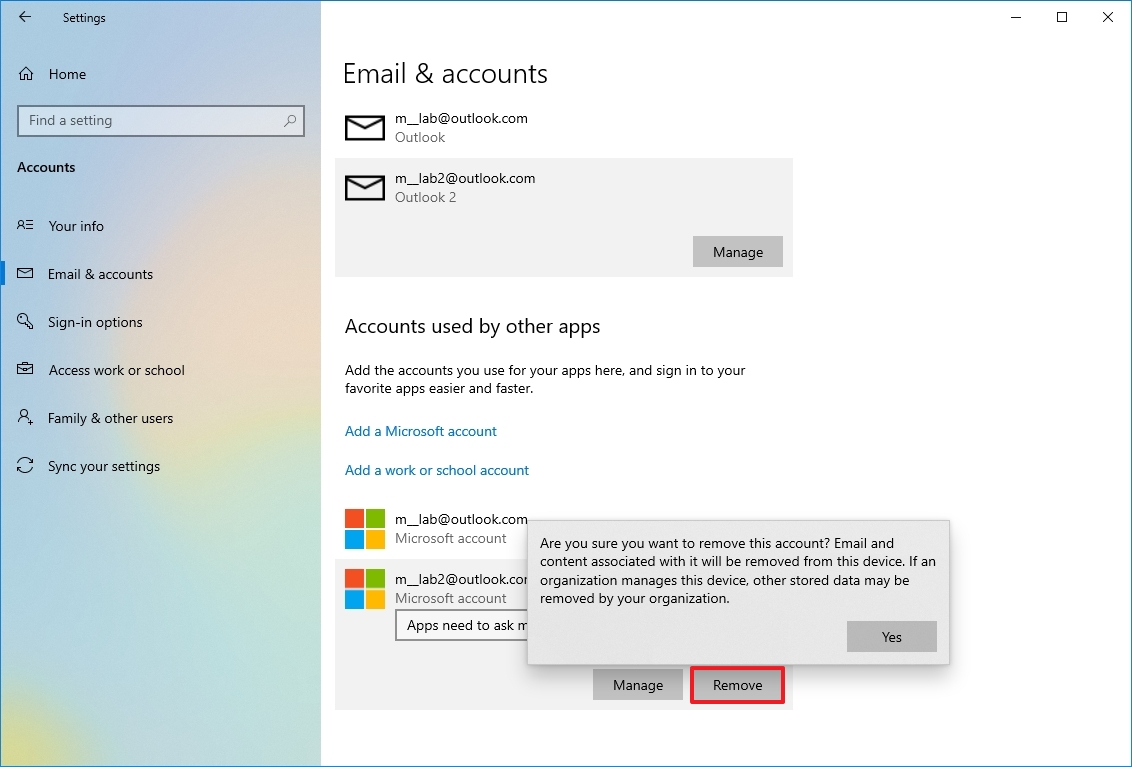
- Click the Yes button.
After you complete the steps, the account information will no longer be available on Windows 10.
More resources
For more helpful articles, coverage, and answers to common questions about Windows 10 and Windows 11, visit the following resources:
Mauro Huculak has been a Windows How-To Expert contributor for WindowsCentral.com for nearly a decade and has over 15 years of experience writing comprehensive guides. He also has an IT background and has achieved different professional certifications from Microsoft, Cisco, VMware, and CompTIA. He has been recognized as a Microsoft MVP for many years.


