How to manage Windows 10's Automatic Maintenance feature
Here's what you need to know about Windows 10's Automatic Maintenance feature, the steps to manage its settings, and how to disable it (if necessary).
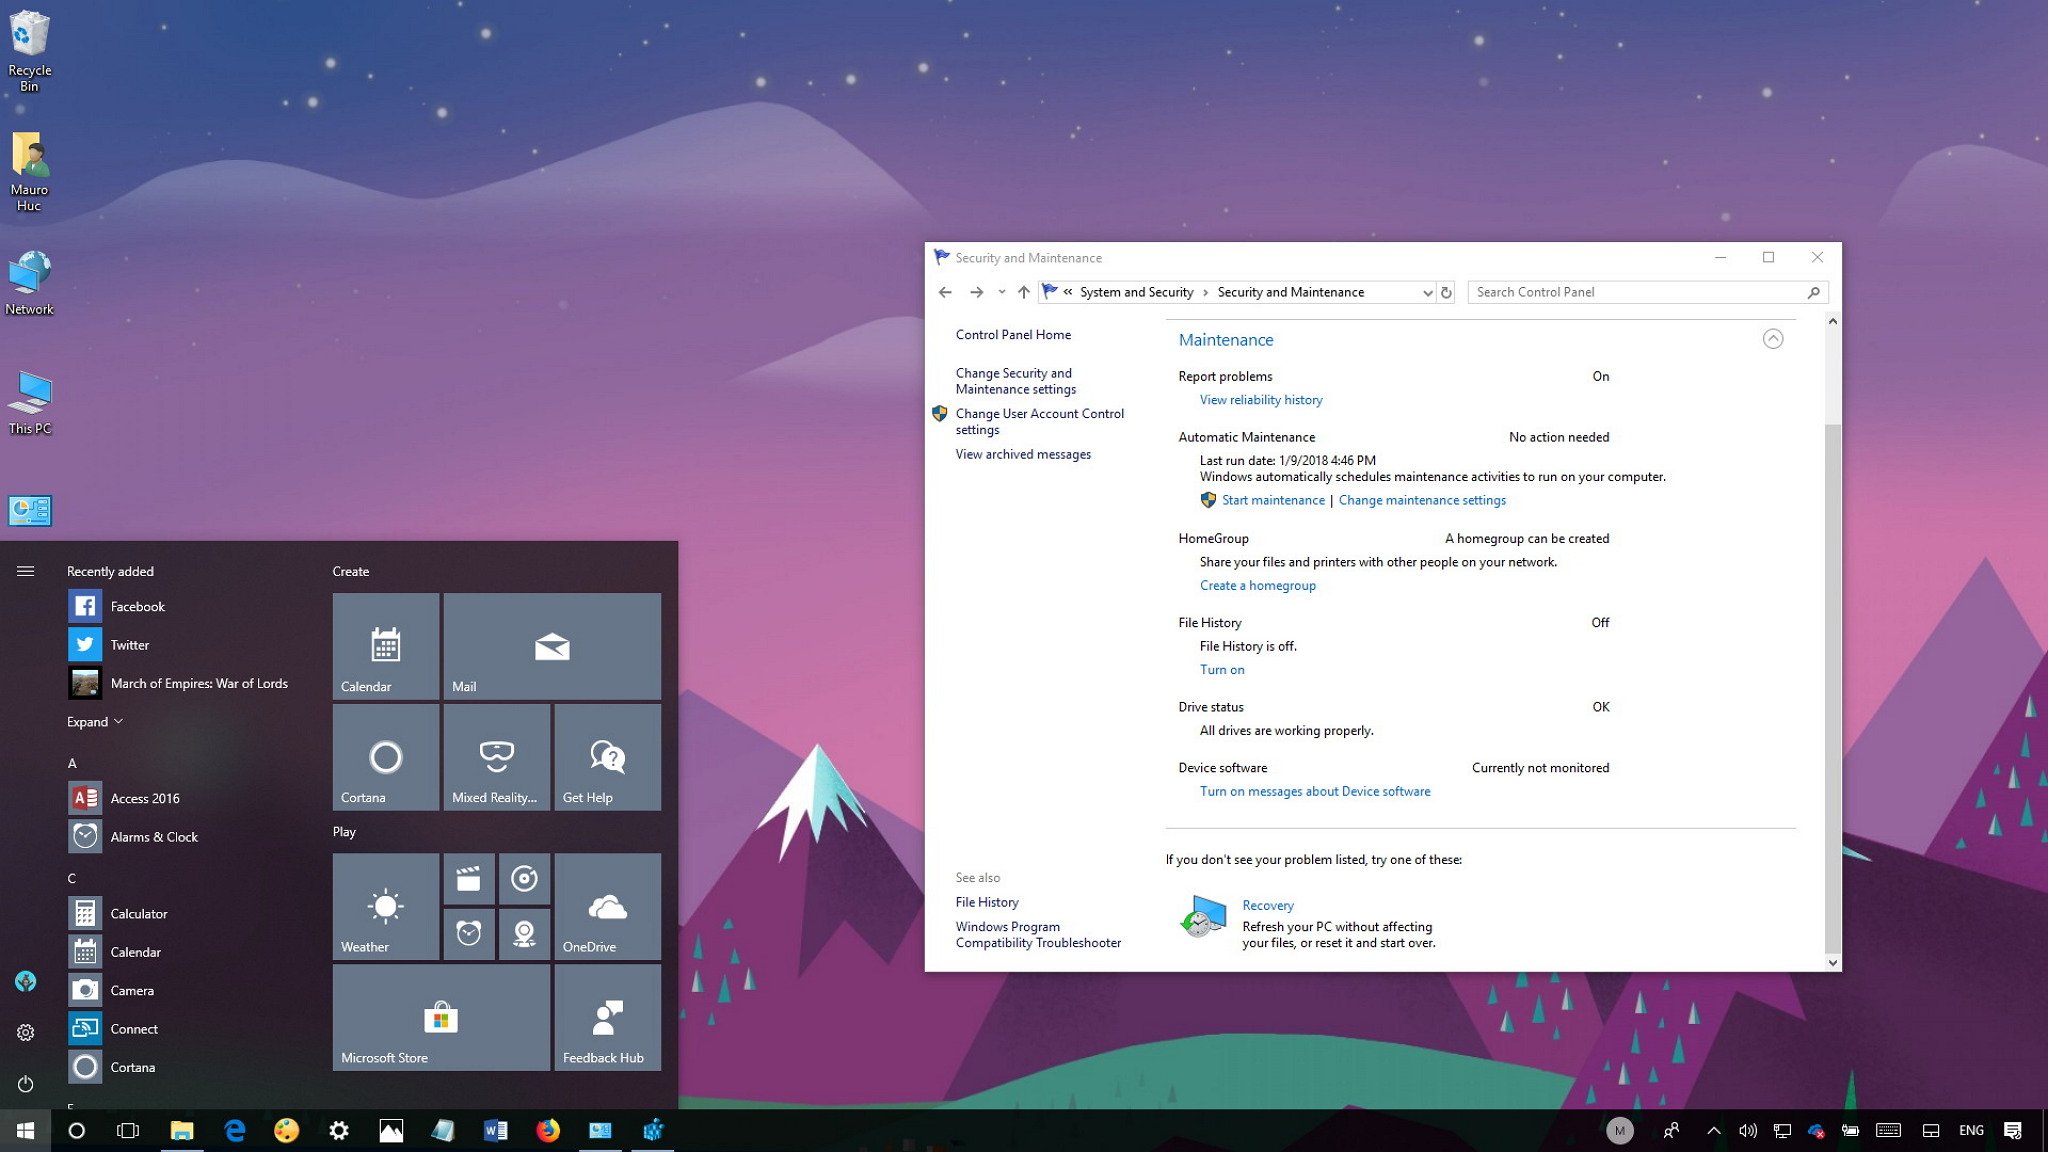
On Windows 10, Automatic Maintenance is a feature that helps to keep your computer healthy and optimized by combining and running all maintenance tasks without impacting performance or energy efficiency.
Usually, the automated system optimization happens once a day when you're not actively using your device. However, it's possible to change the time and other settings to prevent missing a maintenance schedule because your computer was powered off, you were actively using it, or it's not behaving as expected.
In this Windows 10 guide, we explain in more detail how Automatic Maintenance works. We outline the steps to manage its settings to optimize your device at any time of your choosing, and we'll also show you how to disable the feature if necessary.
- About Automatic Maintenance on Windows 10
- How to control Automatic Maintenance on Windows 10
- How to disable Automatic Maintenance on Windows 10
About Automatic Maintenance on Windows 10
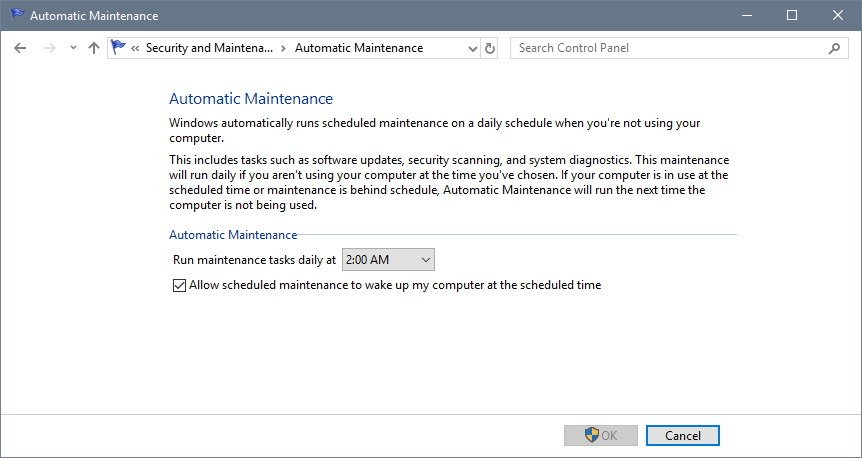
Automatic Maintenance is just a set of related tasks scheduled to run daily at 2:00 AM by default. These tasks run at the same time in the background, but only if your computer is powered on and sitting idle. If your device is asleep and plugged into a power source, Windows 10 is also able to wake it up to run the maintenance and put it back to sleep when it's done.
During a maintenance session, the feature will run specific tasks, such as disk optimization and defragmentation, system and apps updates, security and malware scans, diagnostics, and other tasks with the sole purpose of keeping your device healthy and running at peak performance. However, the number of tasks will be different on every computer, as software developers can also build their apps to plug tasks into this feature.
The optimization process can only run for one hour a day, and if tasks aren't finished within that window, they'll stop and resume during the next schedule. The only exception is when there are tasks marked as critical, in which case, they will continue to run until they're complete even if you're actively using the device.
It's worth noting that updates on Windows 10 are more intrusive, and they'll download and install even outside the regular maintenance schedule. So you can't use this feature to disable Windows Update.
Get the Windows Central Newsletter
All the latest news, reviews, and guides for Windows and Xbox diehards.
In the case your computer isn't powered on, or you're actively working on it, the schedule to run maintenance tasks will be postponed until a later time when tasks won't impact performance or energy efficiency.
How to control Automatic Maintenance on Windows 10
Although the maintenance feature works automatically on Windows 10, you can manage various aspects of Automatic Maintenance. Here's how:
- Open Control Panel.
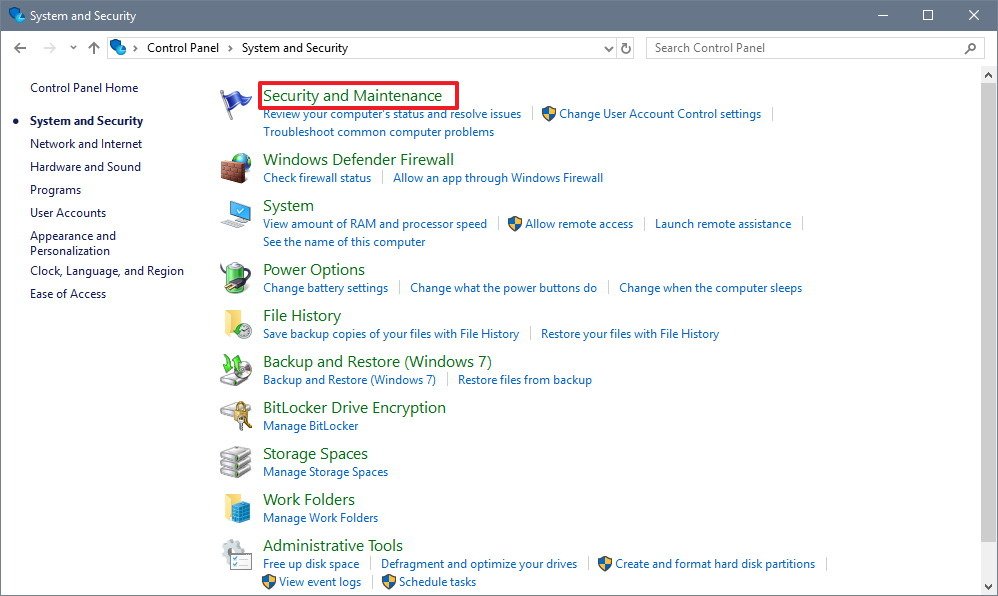
- Click on System and Security.
- Click on Security and Maintenance.
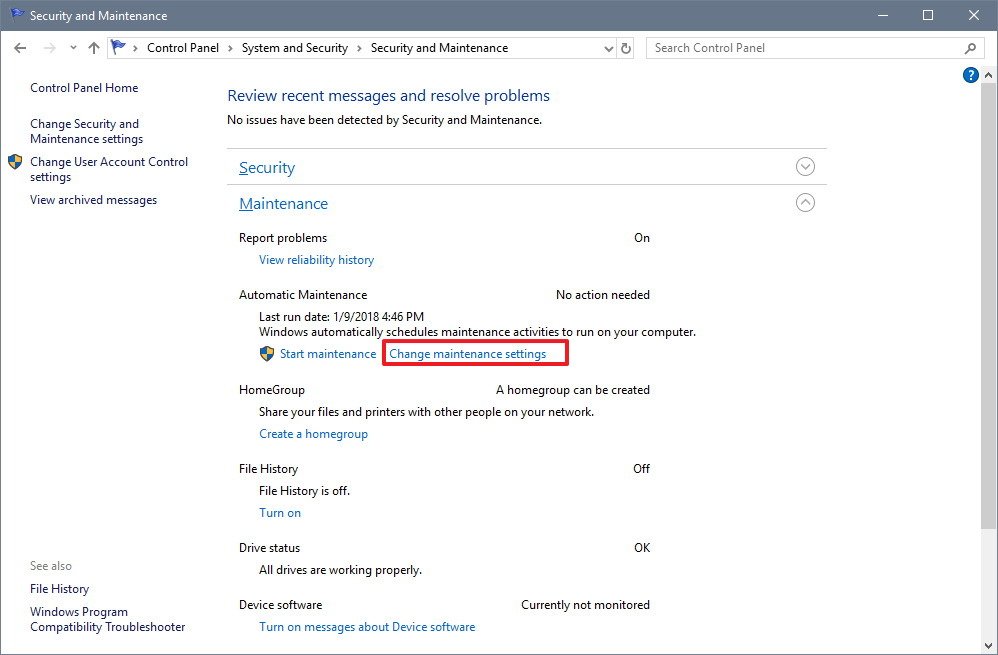
- Expand the Maintenance section to reveal the Automatic Maintenance options.
- Click the Change maintenance settings link.
- Use the Run maintenance tasks daily at drop-down menu to select the time you want your system to perform the automated maintenance tasks.
- Quick Tip: If you don't want your device to wake up at night automatically, make sure to clear the Allow scheduled maintenance to wake up my computer at the scheduled time option.
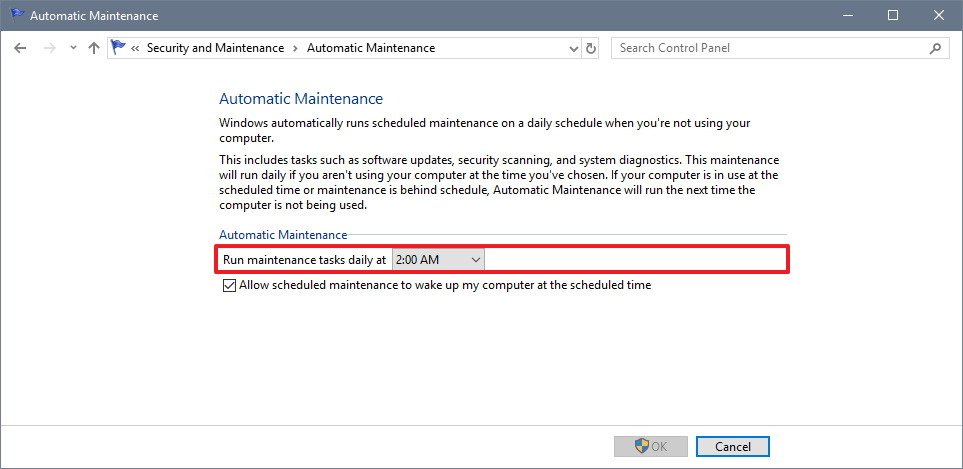
- Click the OK button.
Once you complete these steps, your computer will perform maintenance daily at the time you specified for a maximum period of one hour. However, if you're actively using your device, Windows 10 will skip the schedule and try again at a later time.
If you want to run maintenance immediately, you can click the Start maintenance option within the "Maintenance" section in Control Panel, but using this option will continue to run tasks even if you're actively using your device.
How to disable Automatic Maintenance on Windows 10
Typically, Automatic Maintenance is a useful feature, and you should keep it enable to maintain your computer running smoothly, but if you're experiencing problems, such as an unexpected impact on performance, sudden crashes, and other issues, you may want to disable this feature.
Warning: This is a friendly reminder that editing the Registry is risky, and it can cause irreversible damage to your installation if you don't do it correctly. We recommend making a full backup of your PC before proceeding.
Although Control Panel doesn't include an option to disable Automatic Maintenance on Windows 10, you can still accomplish this task modifying the Registry. Just use these steps:
- Use the Windows key + R keyboard shortcut to open the Run command.
- Type regedit, and click OK to open the Registry.
- Browse the following path:
HKEY_LOCAL_MACHINE\SOFTWARE\Microsoft\Windows NT\CurrentVersion\Schedule\Maintenance- Quick Tip: On Windows 10 Creators Update and later, you can copy and paste the path into the new Registry's address bar to quickly jump to the key destination.
- Right-click the newly created key, select New, and click on DWORD (32-bit) Value.
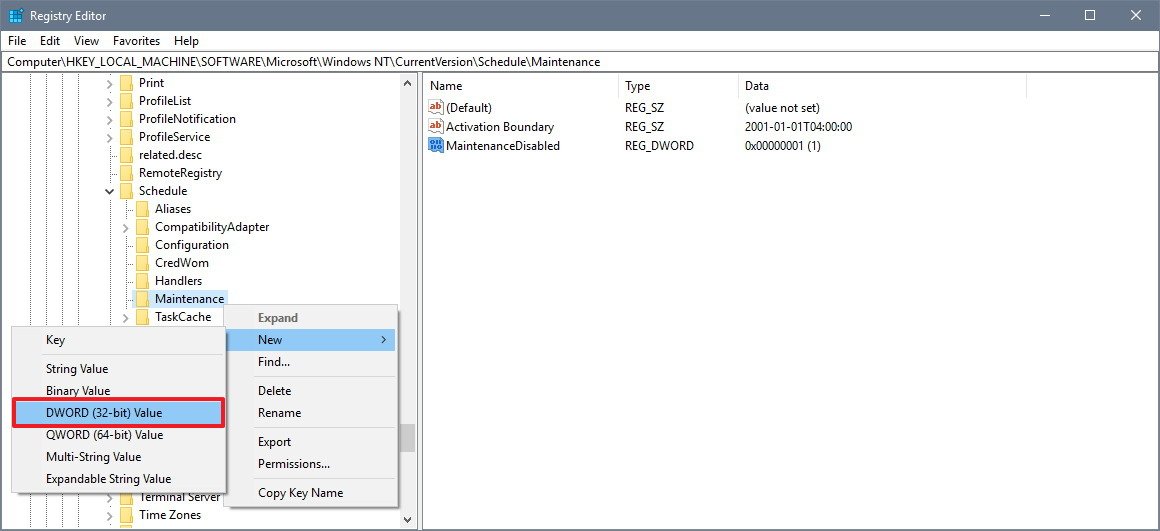
- Name the key MaintenanceDisabled and press Enter.
- Double-click the newly created DWORD and set the value from 0 to 1.
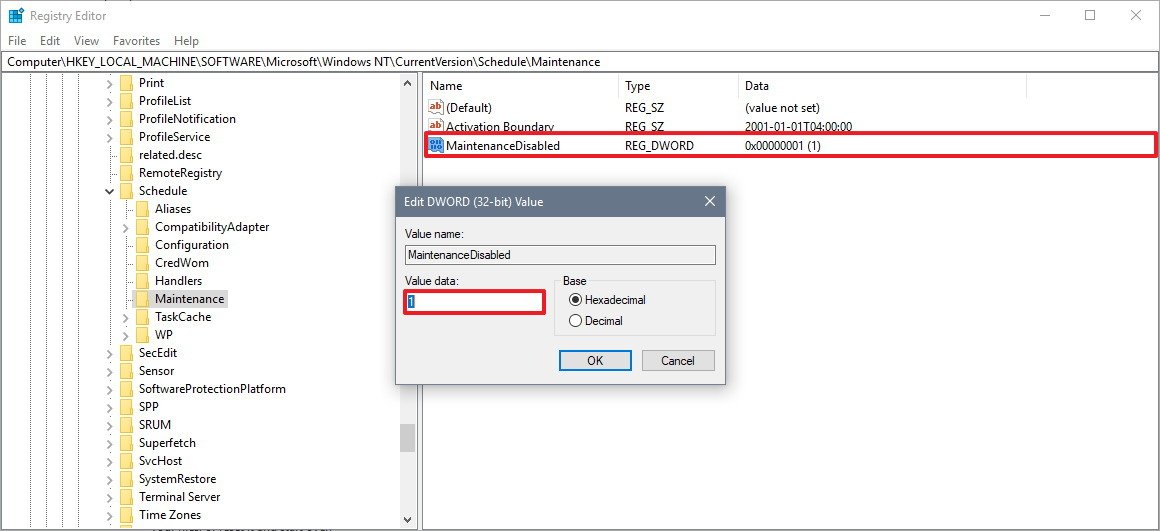
- Click OK.
- Restart your computer.
After you complete these steps, you will still be able to see the "Maintenance" section and its options in Control Panel, but the schedule will not run, and clicking the "Start maintenance" option won't do anything
At any time, you can revert the changes to enable the feature again using the same instructions, but on step No. 5, make sure to right-click the MaintenanceDisabled DWORD and select Delete to remove it.
While this guide is focused on Windows 10, this feature isn't unique to the latest version of the OS, so you can also refer to these instructions to manage Automatic Maintenance on Windows 8.1.
More Windows 10 resources
For more helpful articles, coverage, and answers to common questions about Windows 10, visit the following resources:
- Windows 10 on Windows Central – All you need to know
- Windows 10 help, tips, and tricks
- Windows 10 forums on Windows Central
Mauro Huculak has been a Windows How-To Expert contributor for WindowsCentral.com for nearly a decade and has over 15 years of experience writing comprehensive guides. He also has an IT background and has achieved different professional certifications from Microsoft, Cisco, VMware, and CompTIA. He has been recognized as a Microsoft MVP for many years.

