How to make the Sign-in experience tougher to hack on Windows 10
Prevent someone from guessing your password by using this guide to temporarily lock out your computer after a specific number of invalid attempts.
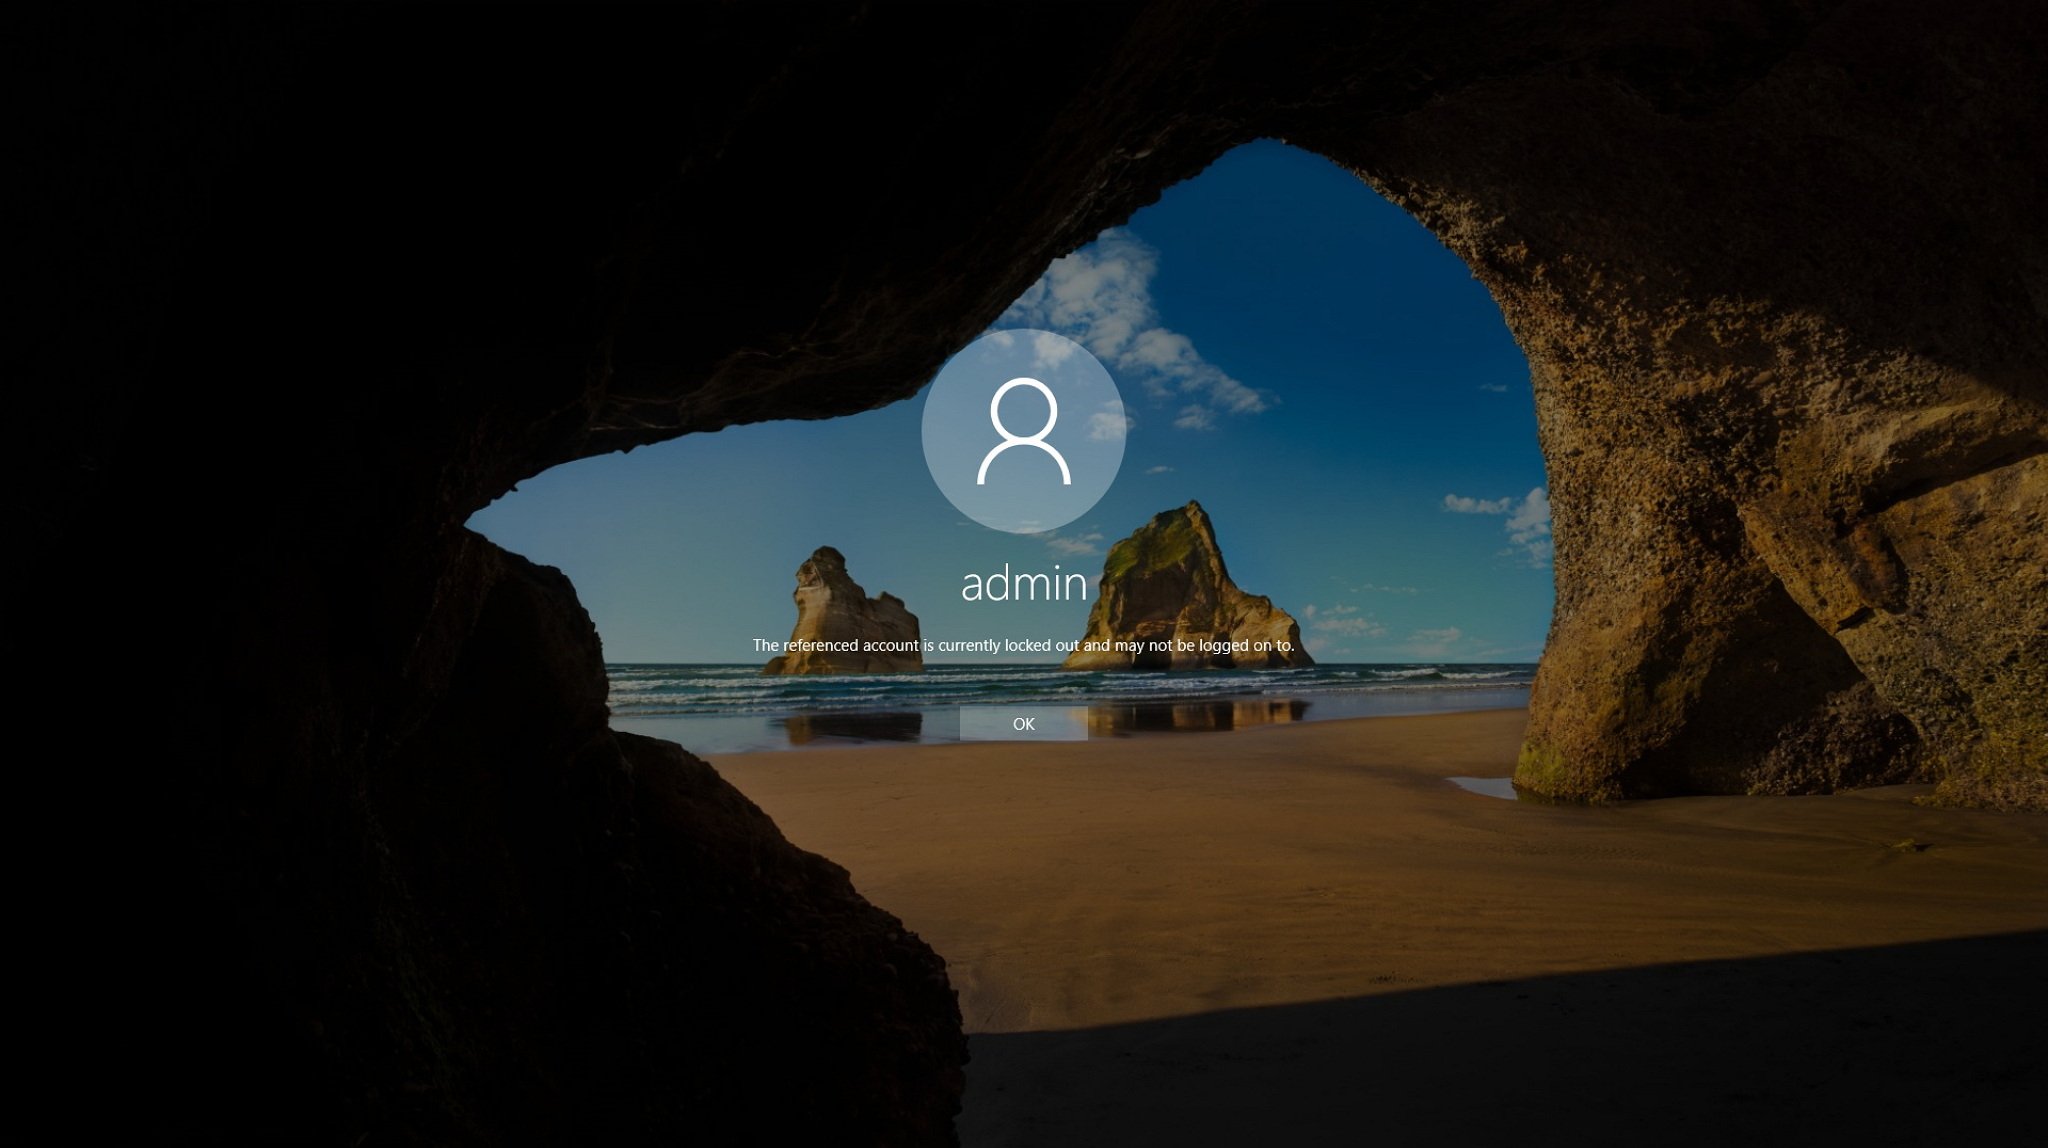
Microsoft has designed Windows 10 to keep your information protected from the most advanced security threats with features like BitLocker, Windows Hello, and an entirely new Windows Defender for malware protection. However, even with so many security technologies in place, there are still chances of someone guessing your password. In part is because, by default, the operating system allows unlimited passwords attempts through the Sign-in screen.
Perhaps one of the main reasons for this is to prevent you from quickly getting locked out of your system when you suddenly forget your password. But unfortunately, it also leaves the doors open to anyone with physical access to your device to have unlimited tries to guess your password -- and probably guess the right one.
Thankfully, Windows 10 (and previous versions), includes a set of advanced security options to temporarily lock out your account after a defined number of failed sign-in attempts. While there are a bunch of different ways that someone can try to bypass your password, you will at least slow down and make it harder for anyone to hack into your local Windows 10 account.
In this Windows 10 guide, we'll walk you through the steps to use the Local Group Policy Editor and Command Prompt to automatically lockout your computer after an specific number of invalid sign-in attempts.
- How to temporarily lock your PC after specific failed password attempts using Group Policy
- How to temporarily lock your PC after specific failed password attempts using Command Prompt
How to temporarily lock your PC after specific failed password attempts using Group Policy
If your computer is running Windows 10 Pro, Enterprise, or Education, the quickest way to make the Sign-in experience tougher to bypass is by using the Local Group Policy Editor to configure your account security settings.
- Use the Windows key + R keyboard shortcut to open the Run command.
- Type gpedit.msc and click OK to open the Local Group Policy Editor.
- Browse the following path:
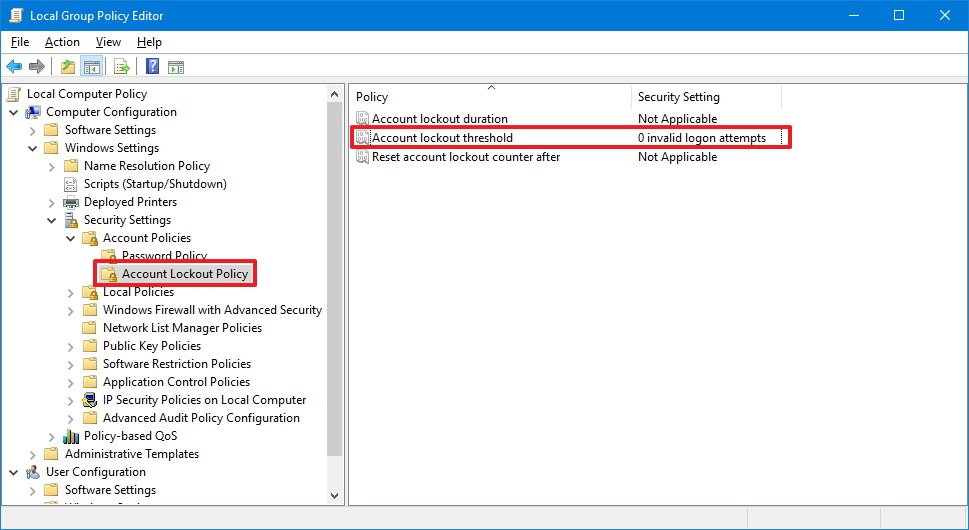
Local Computer Policy > Computer Configuration > Windows Settings > Security Settings > Account Policy
- On the right side, you'll find three policies, double-click Account lockout threshold.
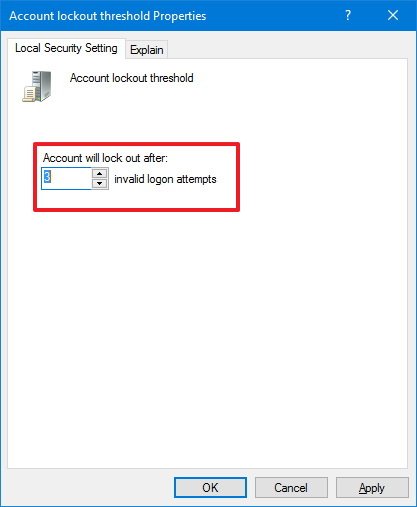
- In the Local Security Setting tab, you'll notice that the default configuration is set to "0" invalid sign-in attempts indicating this option is currently disabled. To enable the feature, simply enter the number of failed password attempts before locking out your account.While you can pick any number from 1 to 999, it's recommended to set the minimum of invalid sign-in attempts to either 3 or 5 to ensure you won't get locked out of your computer.
- Click Apply.
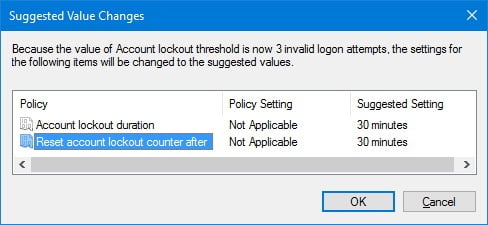
- Click OK to confirm the suggested values for the account lockout duration and reset the sign-in counter, as you can't change those settings on this page.
- Click OK again to complete the task.
After completing the steps, you noticed that in step 7, Windows 10 also configured automatically two additional policies to 30 minutes, including:
- Account lockout duration: Determines the time your computer will remain locked out and prevent any additional sign-in attempts before the account becomes active again.
- Reset account lockout counter after: Determines the time you must wait after the last invalid password attend before the counter gets reset, and you can once again try to sign-in.
In case you want to make the lockout period shorter or longer, you can double-click either policy and change the time to virtually anything you want (not greater than 99,999 minutes). In addition, because these two policies are related, the time you set in one of the policies will automatically configure the other.
All the latest news, reviews, and guides for Windows and Xbox diehards.
At any time you can revert the changes by following the same steps, but this time on step 5 make sure to set the invalid logon attempts in the "Account lockout threshold" back to 0. You don't necessarily need to change the other two policies as they will no longer be applicable.
How to temporarily lock your PC after specific failed password attempts using Command Prompt
If your computer is running Windows 10 Home, you won't have access to the Local Group Policy Editor, but you can use the following commands in Command Prompt to change your account restrictions and achieve the same result.
- Use the Windows key + X keyboard shortcut to open the Power User menu, and select Command Prompt (admin).
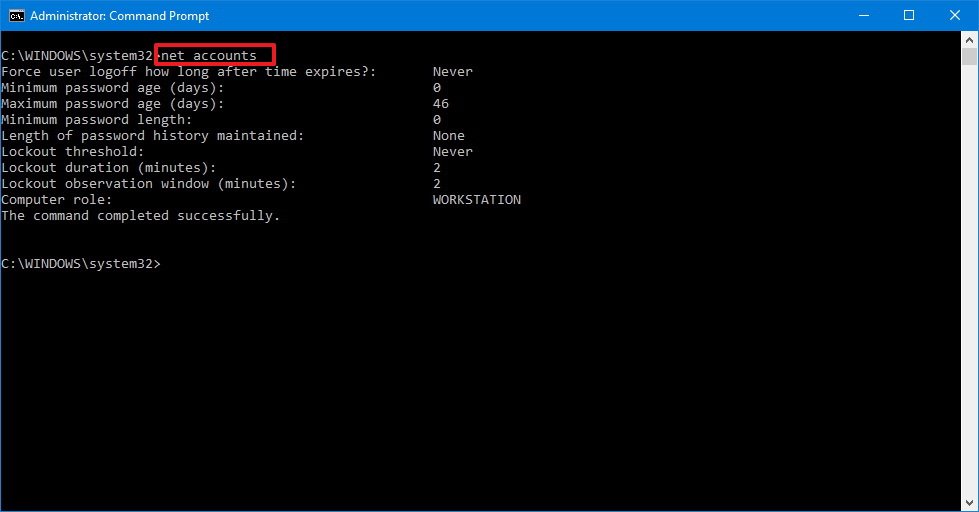
- Type the following command to review the current account policy settings on your computer and press Enter:
net accountsIf you're doing this for the first time, the "Lockout threshold" setting should say "Never" indicating that you can enter invalid passwords unlimited times.
- Type the following command to set the number of invalid sign-in attempts before your computer gets locked out and press Enter:
net accounts /lockoutthreshold:3In this command, we're using the /lockouttheshold:3 switch to set the number of failed password attempts to 3 times, but you can change the value to 5 or any number you want. Remember not to set the number too high to reduce the chance of someone guessing your password, but not too low to ensure that you don't get locked out of your system very easily.
- Type the following command to set the lockout duration and press Enter:
net accounts /lockoutduration:30In this command, we're using the /lockoutduration:30 switch to tell the operating system in minutes the time your computer will be locked out after reaching the number of failed sign-in attempts. However, you can change 30 to virtually any time you want.
- Type the following command to set lockout observation window and press Enter:
net accounts /lockoutwindow:30In this command, we're using the /lockoutwindow:30 switch to tell the operating system in minutes the time before the counter of failed password attempts is reset. The command shows 30 minutes, but you can change the number to virtually any time you want, just make sure it's less or equal to the time you have configured for the lockout duration on step 4.
- Type the following command to review all the new settings and press Enter:
net accounts
If you used the same configuration references as pointed out in this guide, then your computer will automatically lock out for 30 minutes after anyone fails to sign-in three times, which will help you keep your account more secure.
In the case you need to revert the changes, you can follow the steps mentioned above, but on step 3 use this command: net accounts /lockoutthreshold:0 to disable the feature. You don't necessary need to reset the "lockoutduration" or "lockoutwindow" as they are not applicable after disabling the "Account lockout threshold".
Wrapping things up
The best part is that at the Sign-in screen everything will look the same as always, there aren't warnings or any messages hinting the security policies in place. The only way to find out is to reach the number of failed sign-in attempts, which is just an extra layer of security.
The only caveat is that these security settings will only work for local accounts, not Microsoft accounts. Though if you're using a Microsoft Account, you can set up two-step verification to keep it secure.
The steps we're showing you are meant to prevent (or at least slow down) other people from trying to get unauthorized access to your local computer. This guide is not meant to be used on a device connected to a domain using Active Directory, as these settings are typically controlled by your network administrator.
More Windows 10 resources
For more help articles, coverage, and answers on Windows 10, you can visit the following resources:
- Windows 10 on Windows Central – All you need to know
- Windows 10 help, tips, and tricks
- Windows 10 forums on Windows Central

Mauro Huculak has been a Windows How-To Expert contributor for WindowsCentral.com for nearly a decade and has over 22 years of combined experience in IT and technical writing. He holds various professional certifications from Microsoft, Cisco, VMware, and CompTIA and has been recognized as a Microsoft MVP for many years.
