How to make a full backup of your Windows 10 PC
You should always create a backup to safeguard your files and setup, and here's how on Windows 10.
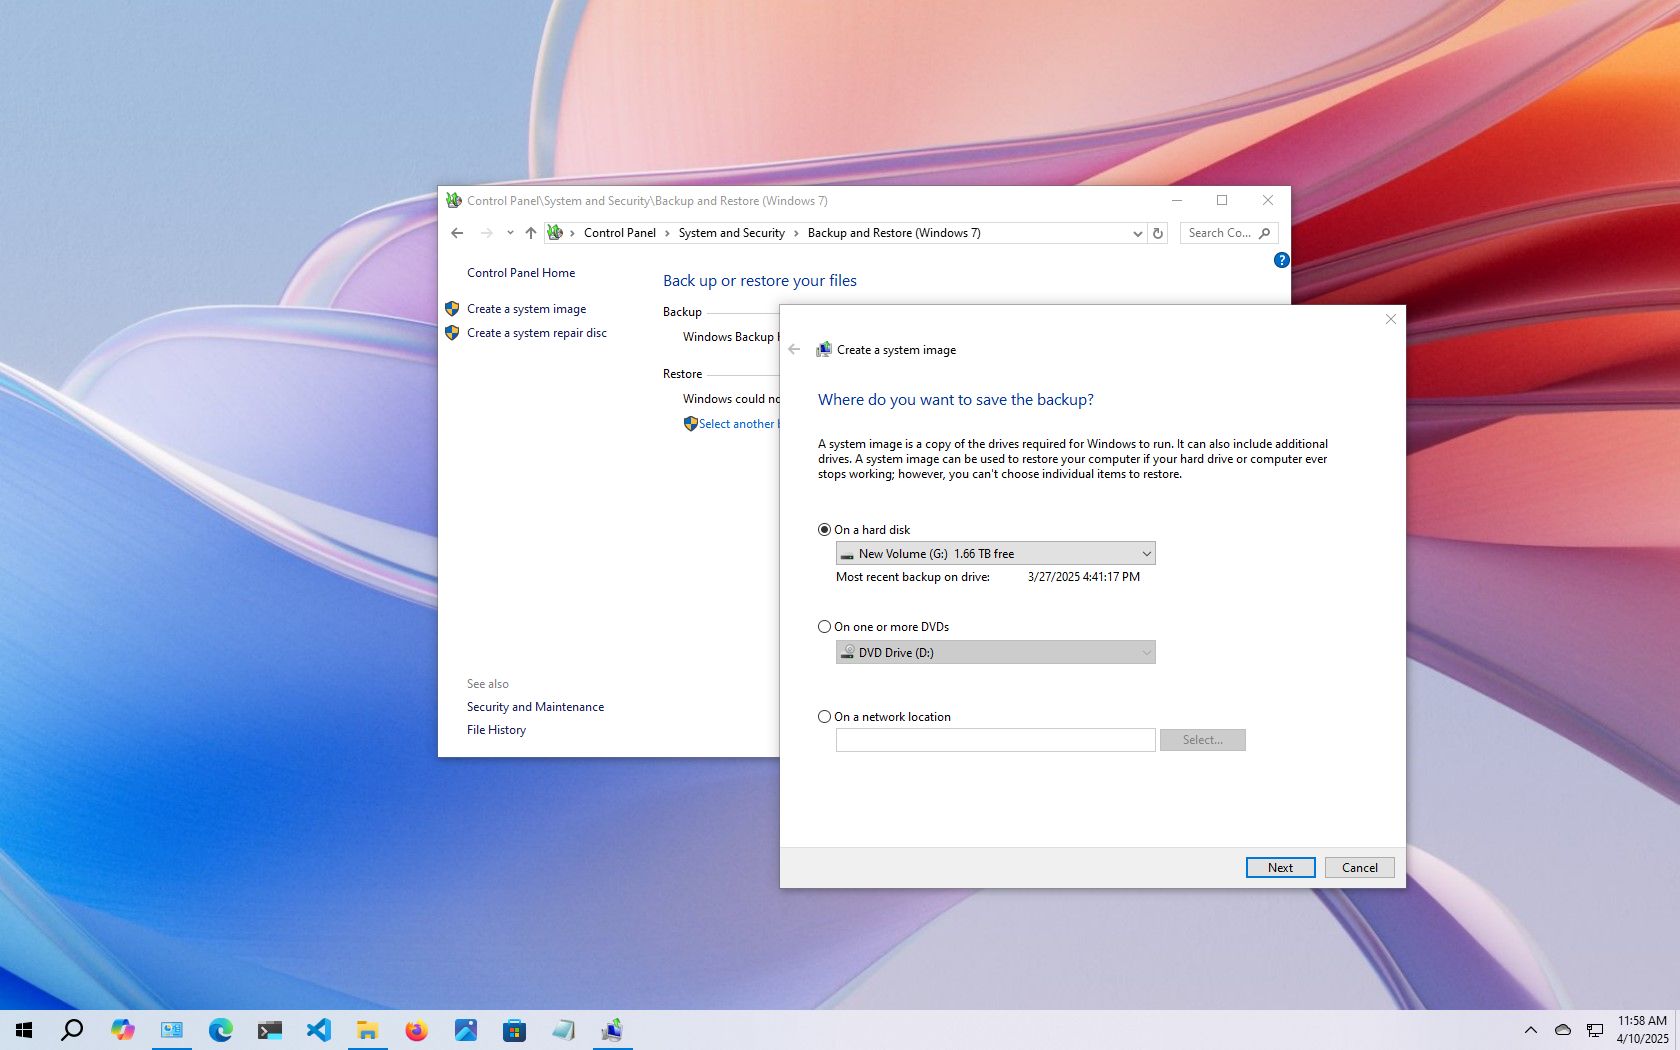
When planning a recovery strategy for your Windows 10 device, creating a full system backup should be your top priority. It is the most reliable method to safeguard your system against potential threats, including hardware failures, software glitches, upgrade issues, and malware attacks that could corrupt your files or compromise the operating system.
Failing to back up your system regularly puts your most valuable data (documents, irreplaceable photos, and custom configurations) at serious risk. Many users only realize the importance of a backup after it's too late.
Fortunately, Windows 10 offers several options to help you protect your data. You can use third-party software to create a complete system image, manually copy files to an external drive, or sync your data to a cloud storage service like OneDrive. However, if you prefer to avoid third-party solutions or manual steps, Windows 10 still includes a built-in System Image Backup tool, part of the legacy features, which lets you create a full backup with minimal effort.
A system image is essentially a full snapshot of your entire system. It includes everything (Windows installation files, settings, applications, and all your personal files). This method is especially effective when recovering from severe issues such as hard drive failure or when rolling back to a previous version of Windows 10 after a problematic update.
Using a full backup ensures peace of mind and quick recovery, making it an essential step for data protection and system reliability.
In this how-to guide, I'll outline the steps for creating a full backup with all your custom settings, apps, files, and installation using the system image tool.
Recent updates
These instructions has been updated to ensure accuracy and reflect changes to the process in the operating system.
How to create a backup with system image tool on Windows 10
The system image tool allows you to create a full backup to an external drive or network-shared folder. However, it is best to use removable storage, which you can disconnect and store in a different physical location.
Get the Windows Central Newsletter
All the latest news, reviews, and guides for Windows and Xbox diehards.
Quick note: The System Image Backup tool for Windows 10 is no longer a maintained feature, but you can still use it for the foreseeable future. The instructions outlined in this guide are meant to create a temporary full backup while the feature is still available. You can also read this guide with alternative ways to back up your computer.
To create a full backup of Windows 10 with the system image tool, use these steps:
- Open Settings.
- Click on Update & Security.
- Click on File backup.
- Click the "Go to Backup and Restore (Windows 7)" option under the "Looking for an older backup?" section.
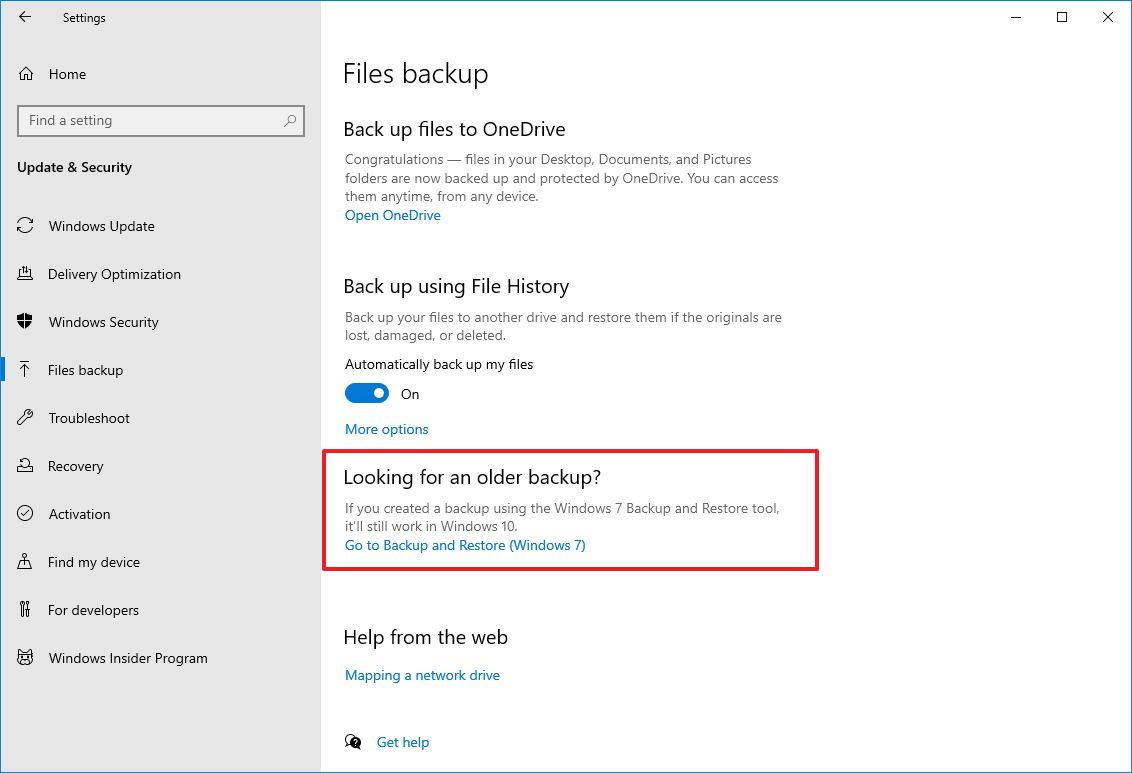
- Click the "Create a system image" option from the left pane.

- Select the "On a hard disk" option.
- Use the "On a hard disk" drop-down menu and select the location to export the Windows 10 full backup.
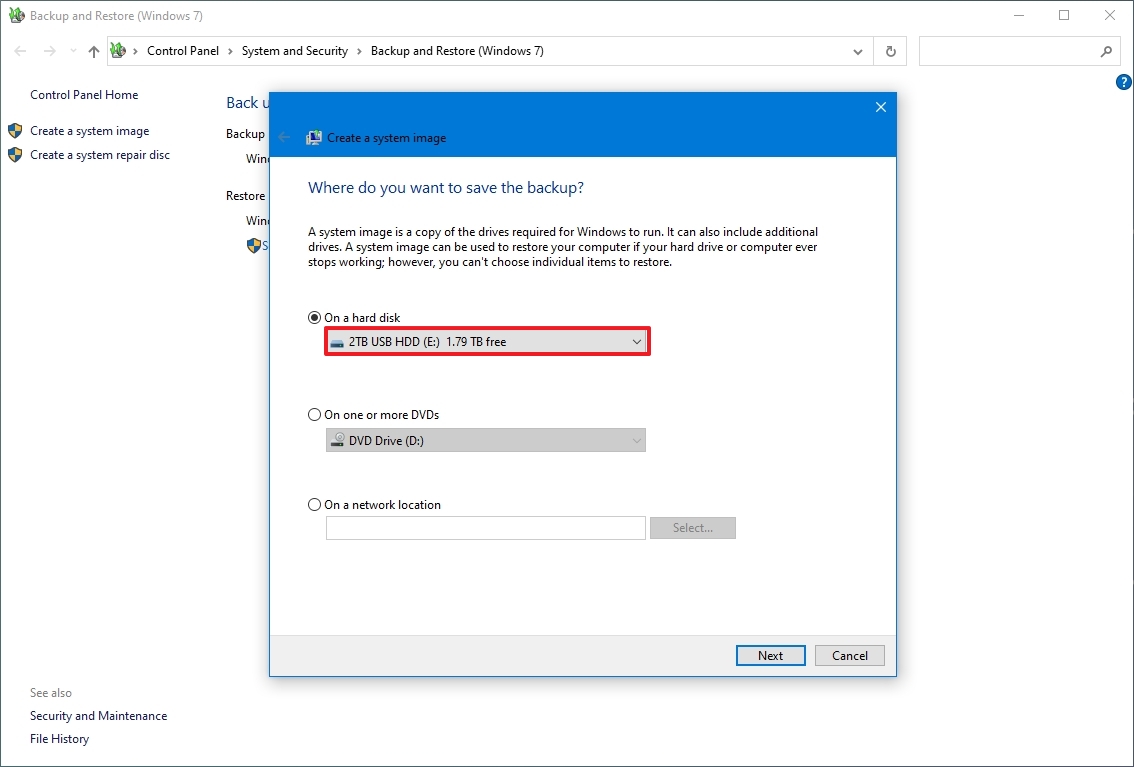
- Click the Next button.
- (Optional) Select any additional hard drives to include them in the backup.
- Click the Next button.
- Click the Start backup button.
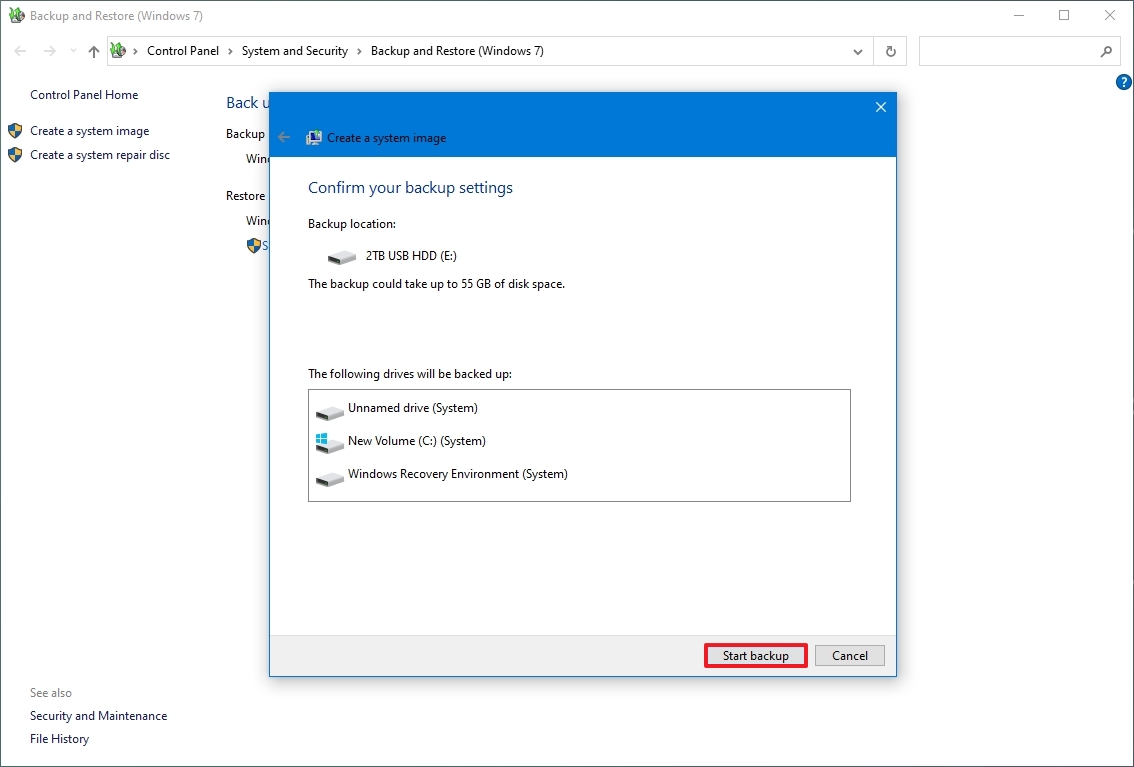
- Click the No button.
- Quick note: You'll also receive a prompt to create a system repair disc, but because most devices no longer include an optical drive, you can skip it. If you must restore the machine, you can use a USB installation media to access the recovery environment.
- Click the Close button.
Once you complete the steps, the tool will create an image of the entire system, including everything on the primary hard drive and other drives you may have selected.
While the backup is in progress, you can continue working on the device since it uses the "Shadow Copy" feature to backup files even if files are open and apps are running.
After the process, you can disconnect and store the external drive safely. If you have valuable data, you may consider keeping the backup in a different physical location.
How to restore a backup with system image tool on Windows 10
If you need to replace the hard drive or hardware failure occurs, you can use one of the backups to recover the device and files.
To restore a backup on Windows 10, use these steps:
- Connect the drive with the full backup to the device.
- Connect the Windows 10 USB bootable drive to the computer.
- Start the computer.
- On the USB bootable drive startup prompt, press any key to continue.
- Quick tip: If the device does not start in the Windows Setup wizard, you will need to access the Basic Input/Output System (BIOS) or Unified Extensible Firmware Interface (UEFI) to change the boot order settings. You can use this guide to access the BIOS/UEFI, but the steps are usually different per manufacturer and device model. It is recommended that you check your manufacturer's support website for more specific details.
- On the "Windows Setup" page, click the Next button.
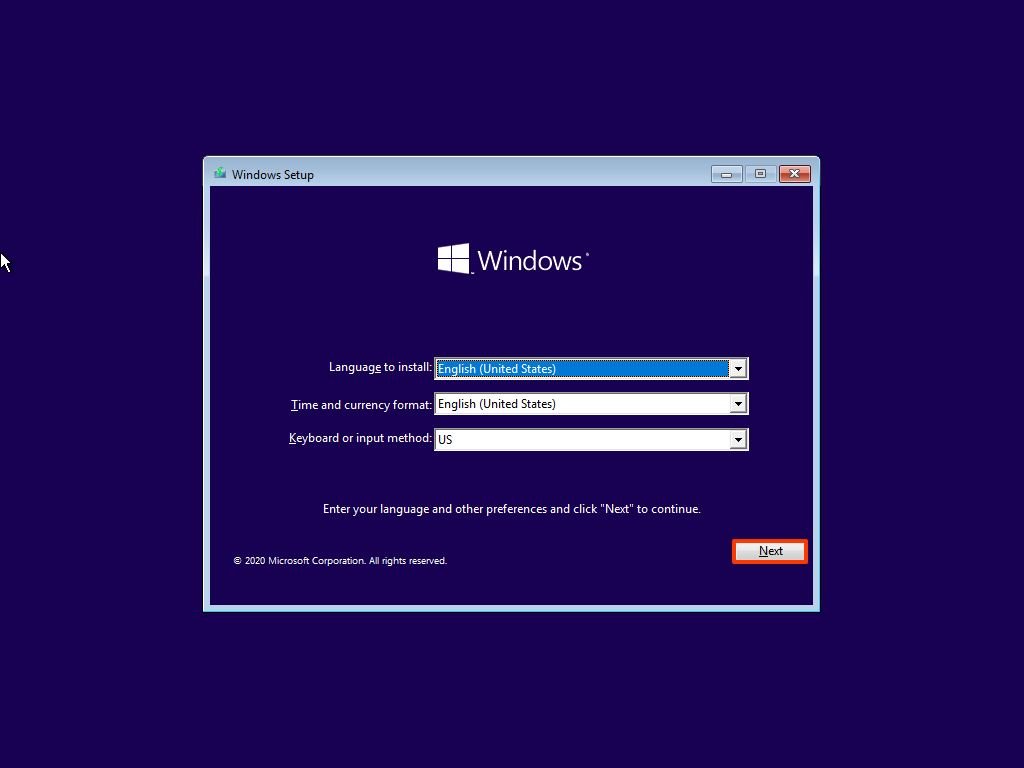
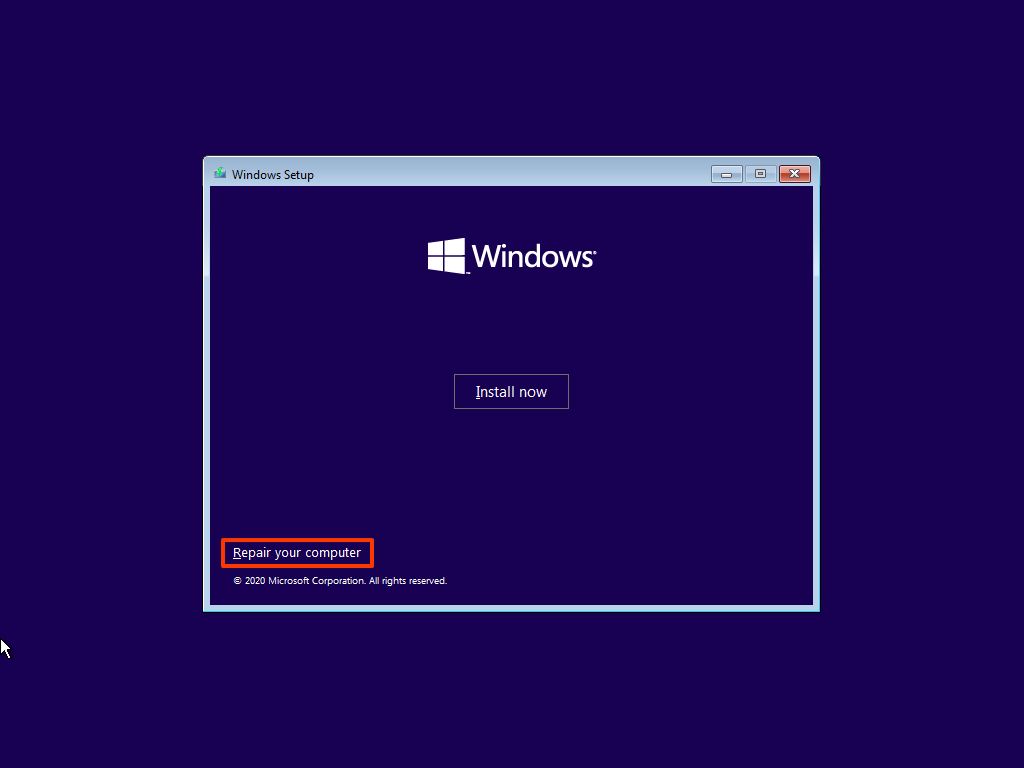
- Click the "Repair your computer" option from the bottom-left corner of the screen.
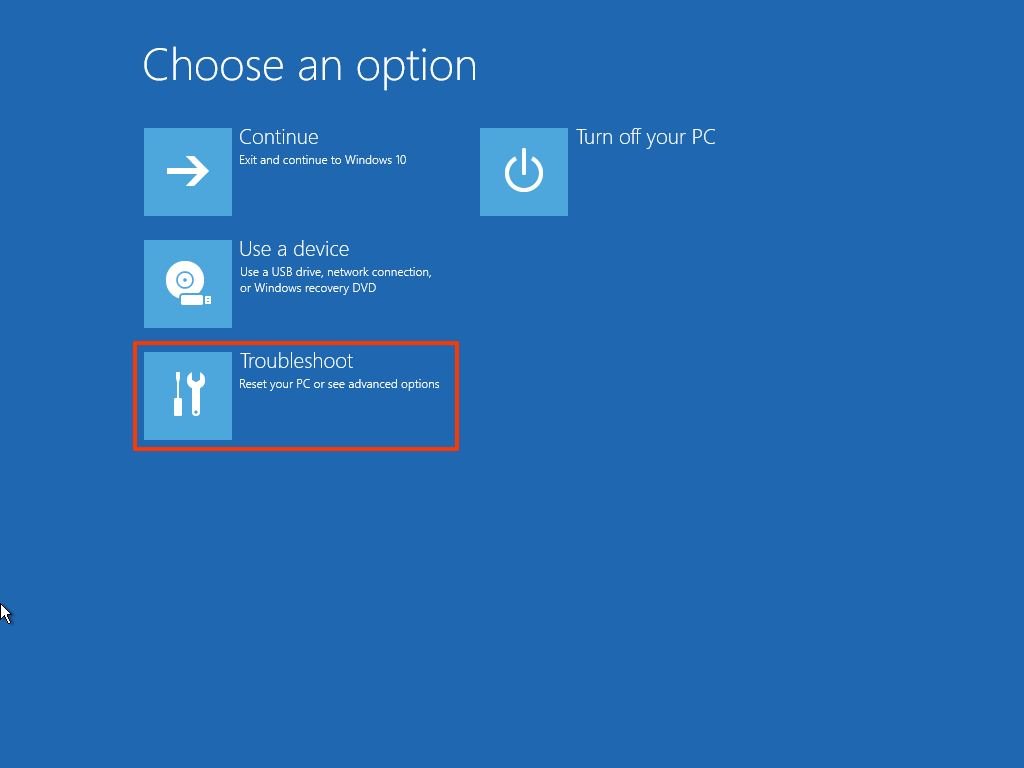
- Click the Troubleshoot option.
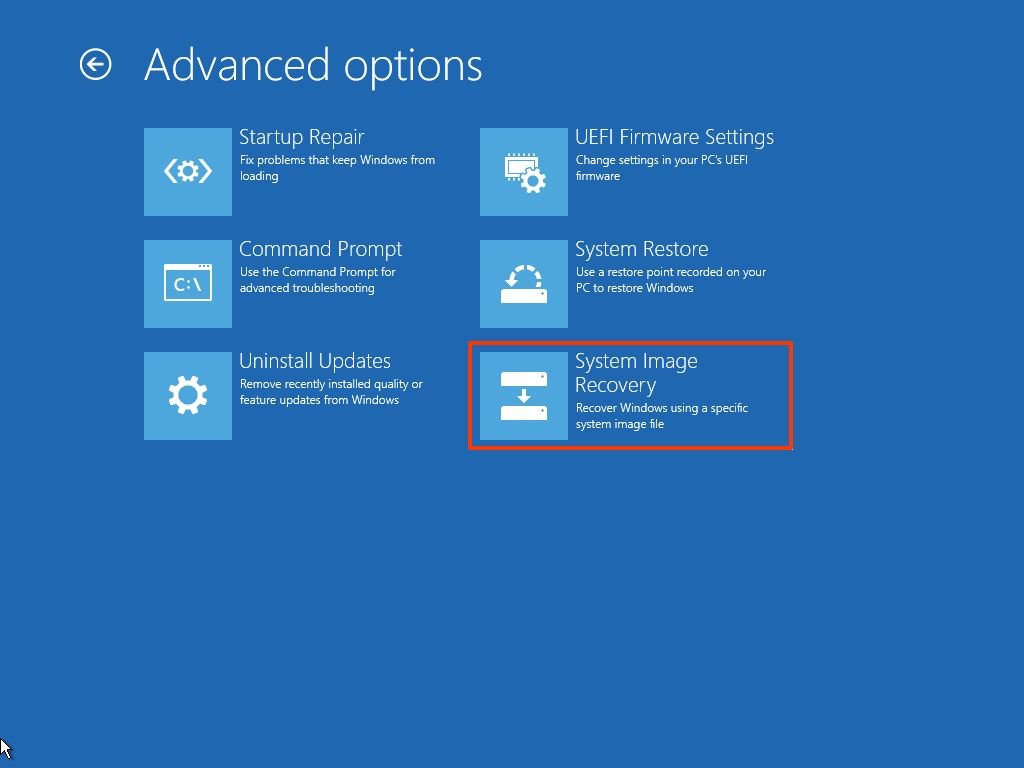
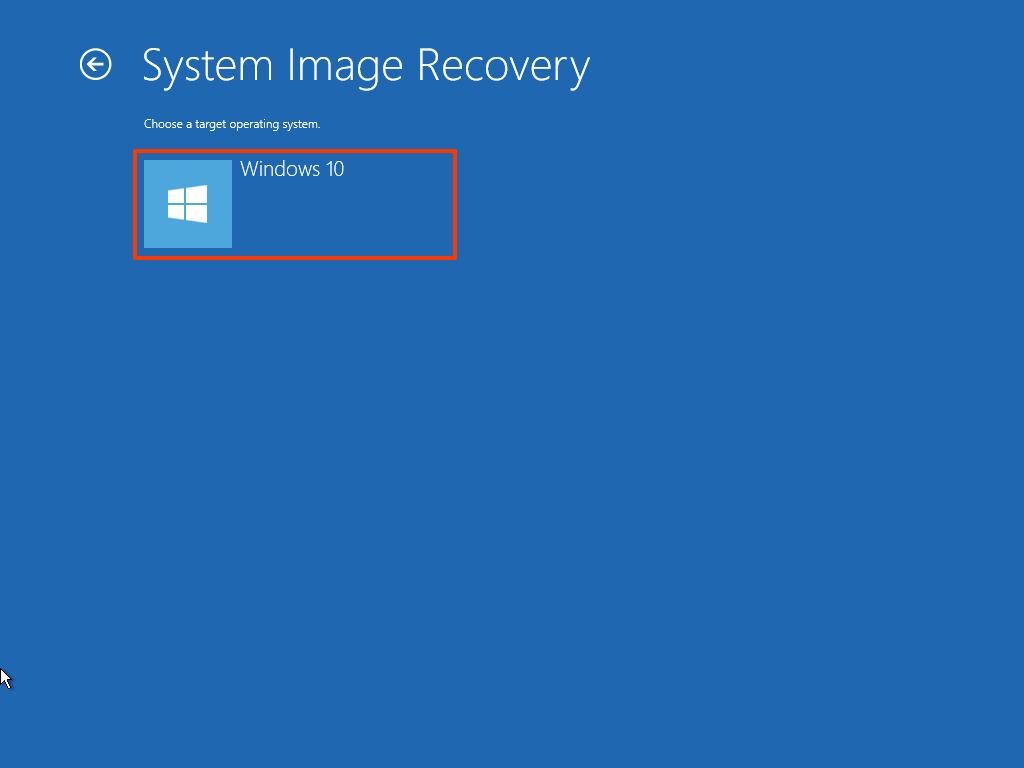
- Click the "System Image Recovery" option.
- Select the Windows 10 option as the target operating system.
- Select the "Use the latest available system image" option on the "Re-image your computer" page.
- Quick tip: You can use the "Select a system image" option if you have multiple backups and you are trying to restore an older version of the system and files.
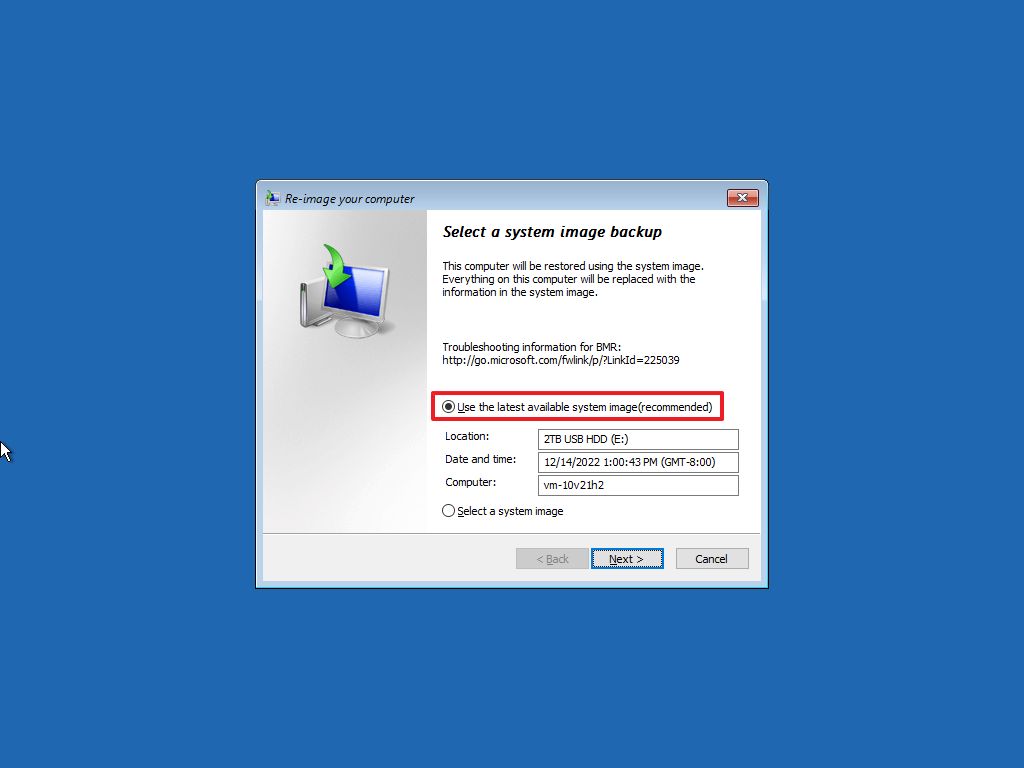
- Click the Next button.
- (Optional) Carefully select the "Format and repartition disks" option before restoring the backup (if you are restoring the backup on a new drive).
- Quick tip: If you choose this option, use the Exclude disks option to prevent formatting secondary drives that may contain data.
- (Optional) Check the "Only restore system drivers" option (if the backup contains a copy of multiple drives and you only want to restore the operating system).
- Click the Next button.
- Click the Finish button.
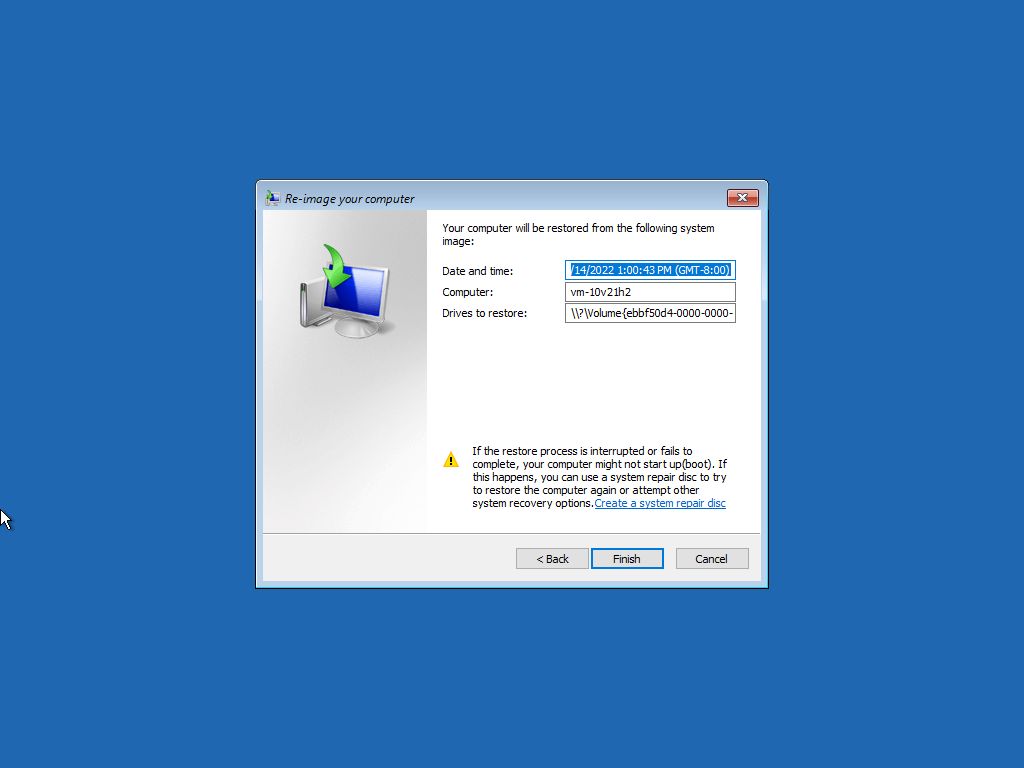
- Click the Yes button.
After you complete the steps, the recovery process will start on the computer. The time to finish the restoration will depend on the amount of data and the hardware configuration.
Best practices restoring a backup
When restoring a system image on Windows 10, never interrupt the process. Doing so can corrupt the backup, rendering the system unbootable and potentially causing data loss. To ensure a smooth recovery, always connect a laptop to a power source or a desktop computer to an uninterruptible power supply (UPS). Power interruptions during restoration can lead to irreversible errors.
Once the restoration completes, it’s essential to check for missing updates. Go to Settings > Update & Security > Windows Update, and click the "Check for Updates" button to install any pending patches, including critical security updates that may have been released after the backup was created.
Although Windows 10 offers various backup methods, the System Image Backup tool still has its place (especially in specific scenarios). For instance, it’s an ideal solution when:
- You don’t have another recovery method available.
- You’re preparing for a major Windows 10 upgrade.
- You’re planning to replace the system hard drive.
- You need to transfer your current installation and files quickly without reinstalling everything.
It's also a good idea to periodically create a backup of your computer in case the unexpected happens, as it offers a reliable fallback in case of unexpected issues such as hardware failure, ransomware, malware attacks, or system corruption.
However, it’s important to understand the limitations of the System Image Backup tool. It is designed to restore the entire system (operating system, apps, settings, and files) exactly as they were at the time of the backup. It does not support restoring individual files or settings.
To keep your files continuously protected and up to date, complement system images with other solutions like OneDrive or File History. Also, be proactive since only the data captured in the most recent full backup can be recovered. Any changes or files added after that point will be lost during restoration.
If you combine full system backups with ongoing file backups, you can build a reliable recovery plan that keeps your data and system safe against virtually any threat.
Lastly, it's important to note that the end of support for Windows 10 will occur on October 14, 2025, and after this date, Microsoft will no longer release security or maintenance updates and will not provide any kind of support.
You can use these instructions to prepare your device and upgrade from Windows 10 to 11.
More resources
For more helpful articles, coverage, and answers to common questions about Windows 10, visit the following resources:
Mauro Huculak has been a Windows How-To Expert contributor for WindowsCentral.com for nearly a decade and has over 15 years of experience writing comprehensive guides. He also has an IT background and has achieved different professional certifications from Microsoft, Cisco, VMware, and CompTIA. He has been recognized as a Microsoft MVP for many years.
You must confirm your public display name before commenting
Please logout and then login again, you will then be prompted to enter your display name.

