How to limit Windows Update bandwidth on the Windows 10 Fall Creators Update
Windows 10 Fall Creators Update lets you limit bandwidth usage for system and app updates, and in this guide, we'll tell you the steps to adjust the settings.
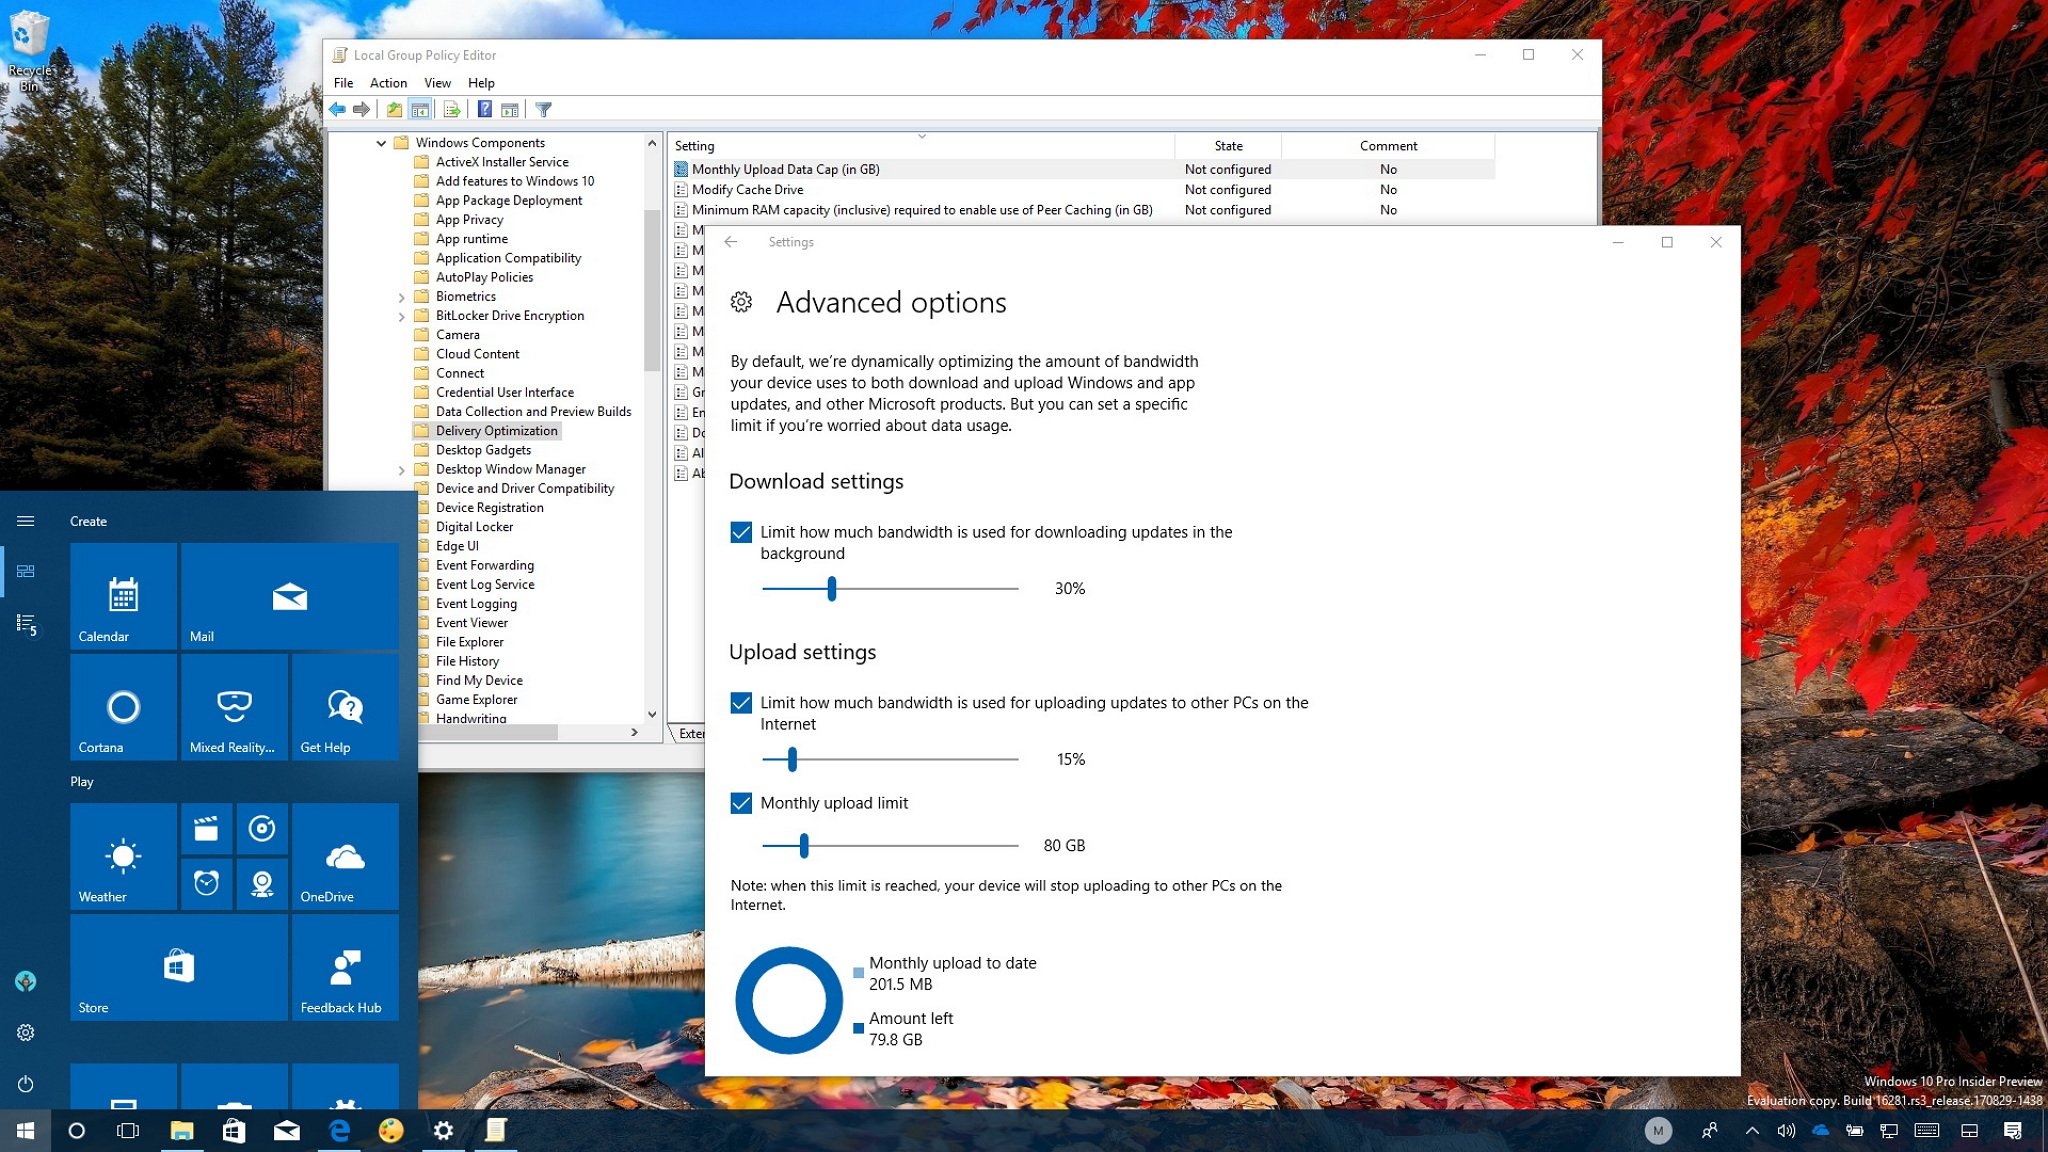
Windows 10 has a mechanism to dynamically measure and optimize the bandwidth your device uses to download and upload system updates, as well as for apps acquired from the Store, and numerous other products to make sure these activities don't interrupt your experience.
However, the delivery optimization mechanism can only analyze the network activity of your device, and it's not aware of the bandwidth usage on other computers on the local network. As a result, if you have a limited connection to the internet, other devices may experience noticeable speeds reduction during update activities.
Starting with the Windows 10 Fall Creators Update (version 1709), Microsoft is addressing this issue by introducing new options that allow you to limit the bandwidth your device uses to download and upload updates.
In this Windows 10 guide, we'll walk you through the steps to manually throttle background download and uploads speeds while getting new system and app updates on your device – even if you're running the previous version of the OS.
- How to limit bandwidth for Windows Update using Settings
- How to limit bandwidth for Windows Update using Group Policy
How to limit bandwidth for Windows Update using Settings
If you want to minimize your internet connection impact during updates, you can use the new Delivery Optimization options to limit the bandwidth usage on your device.
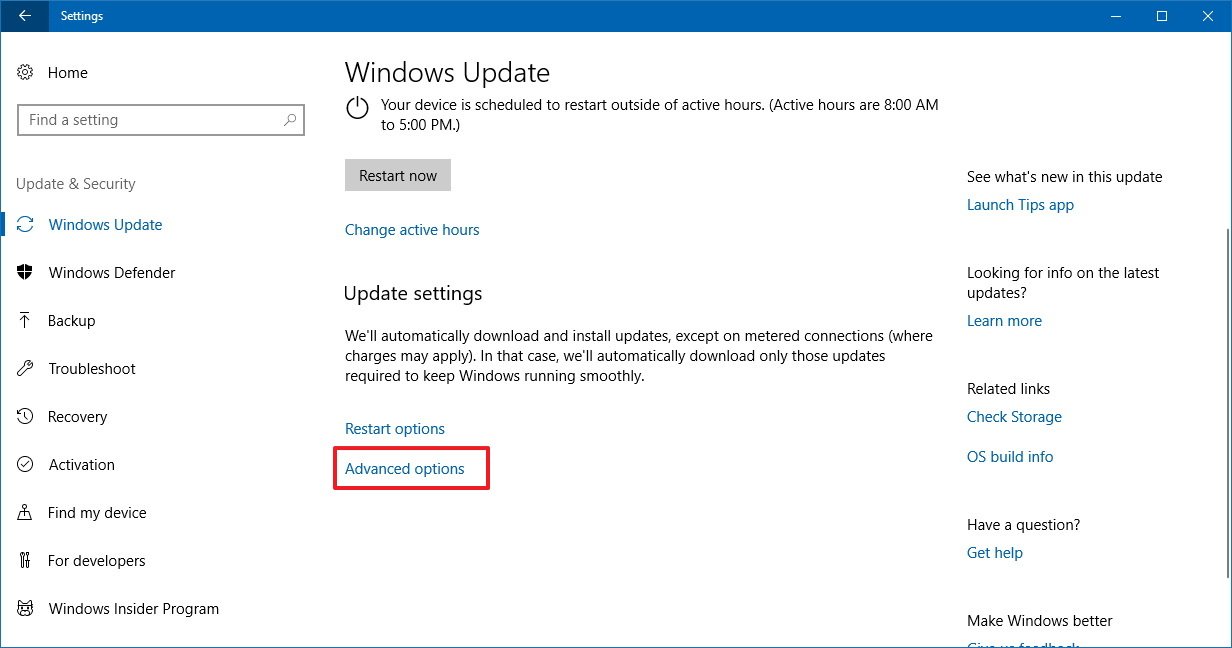
- Open Settings.
- Click on Update & Security.
- Click the Advanced options link.
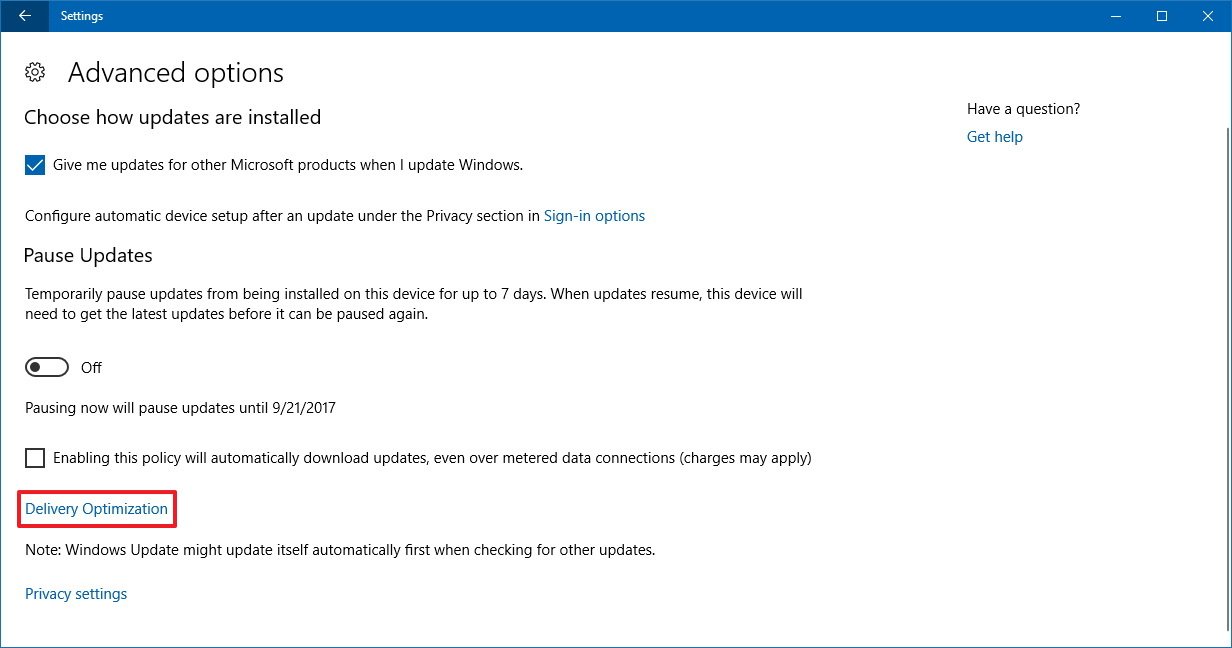
- On "Advanced options," click the Advanced options link.
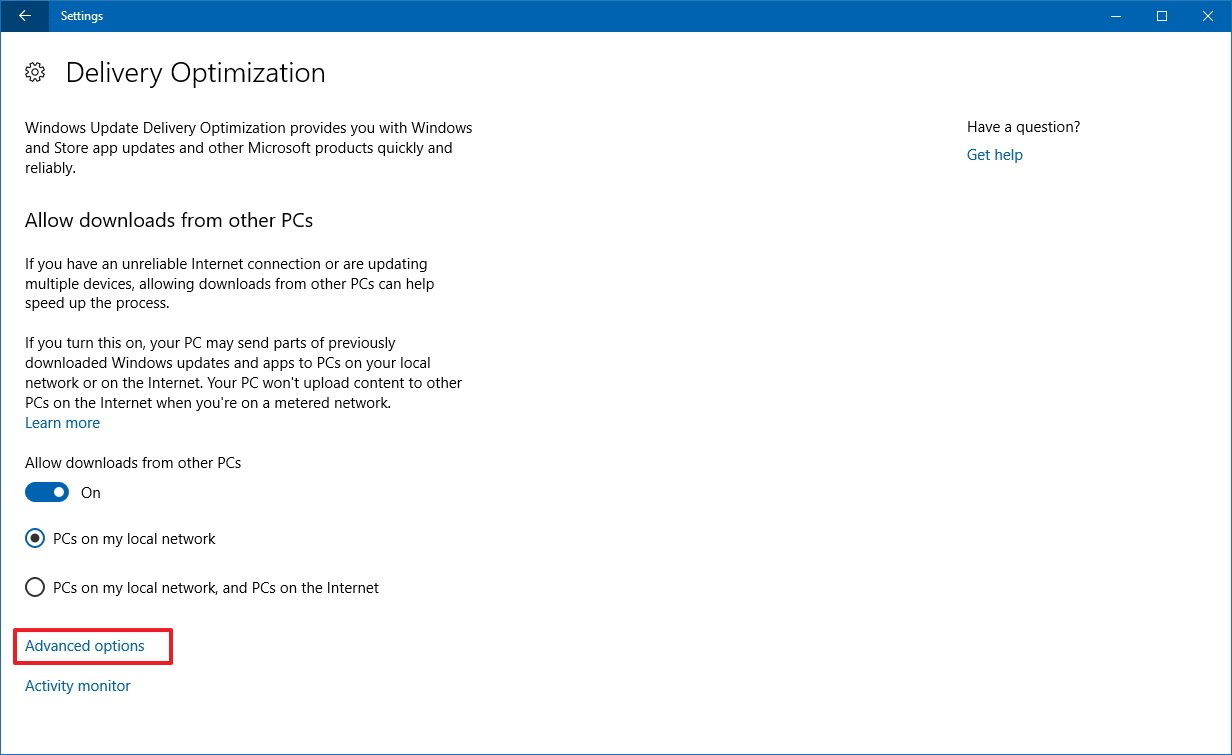
- On "Delivery Optimization," click the Advanced options link.
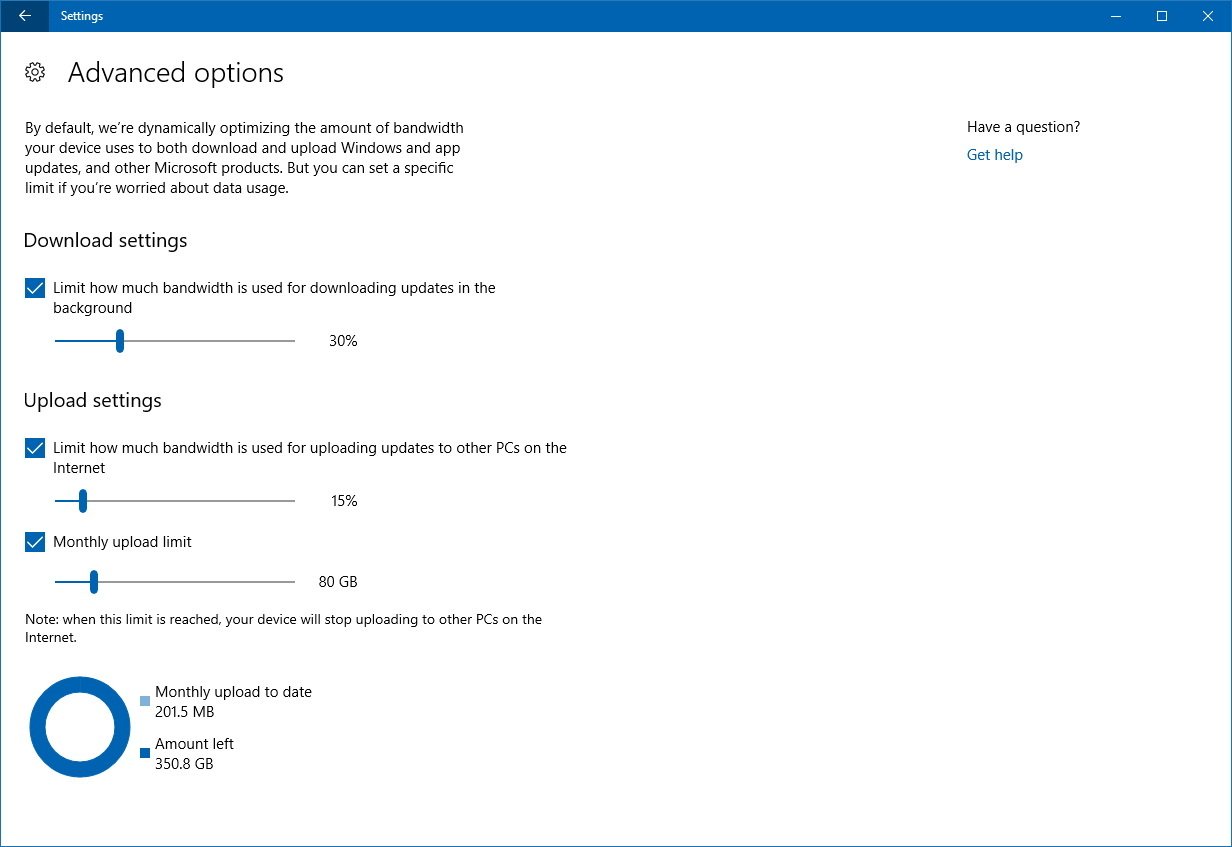
- Under "Download settings," check the Limit how much bandwidth is used for downloading updates in the background option.
- Use the slider to specify (in percentage) the amount of bandwidth you want your device to use.
- Under "Upload settings," check the Limit how much bandwidth is used for uploading updates to other PCs on the Internet option.
- Use the slider to set (in percentage) the amount of bandwidth you want to dedicate for uploads.
- If you want to limit the amount of data your device uploads per month, you can also check the Monthly upload limit option.
- Use the slider to set the upload limit in gigabytes.
It should be noted that the upload settings will only work if you have the "Deliver Optimization" settings configured to Allow downloads from other PCs using the PCs on my local network, and PCs on the Internet option. However, if you're looking to minimize the data speed usage, you should be using the PCs on my local network option instead.
If there are multiple devices connected to the same internet connection, it's also recommended to configure each device to limit the bandwidth usage with the above instructions.
All the latest news, reviews, and guides for Windows and Xbox diehards.
Viewing activity monitor stats for Windows Update
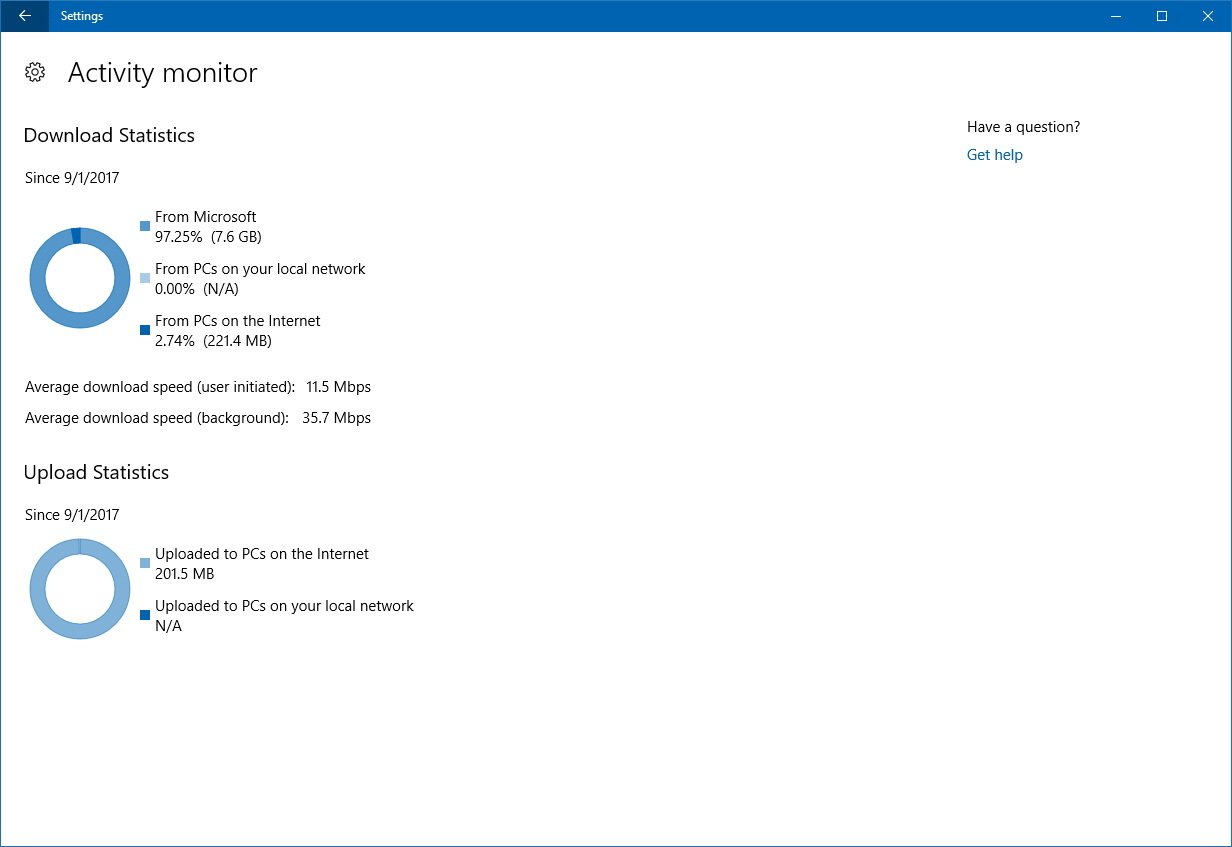
The Delivery Optimization feature also includes a page to view the overall bandwidth usage for feature and quality updates, as well as for app downloads and updates from the Windows Store.
- Open Settings.
- Click on Update & Security.
- Click the Advanced options link.
- On "Delivery Optimization," click the Advanced options link.
- Click the Activity monitor link.
On the Activity monitor page, you'll see two sections. The Downloads Statistics shows you the overall amount of data that your device has downloaded from Microsoft, local network, and other PCs on the internet in the last month along with the average download speed based on the current settings.
And then there is the Uploads Statistics section, which includes the overall data information that has been uploaded from your device to other computers on the local network and the internet within a given month.
How to limit bandwidth for Windows Update using Group Policy
If you're not running version 1709 on your machine, but you're using Windows 10 Pro (version 1703), it's also possible to change the Delivery Optimization settings to limit the download and uploads bandwidth using the Group Policy Editor.
- Use the Windows key + R keyboard shortcut to open the Run command.
- Type gpedit.msc and click OK to open the Local Group Policy Editor.
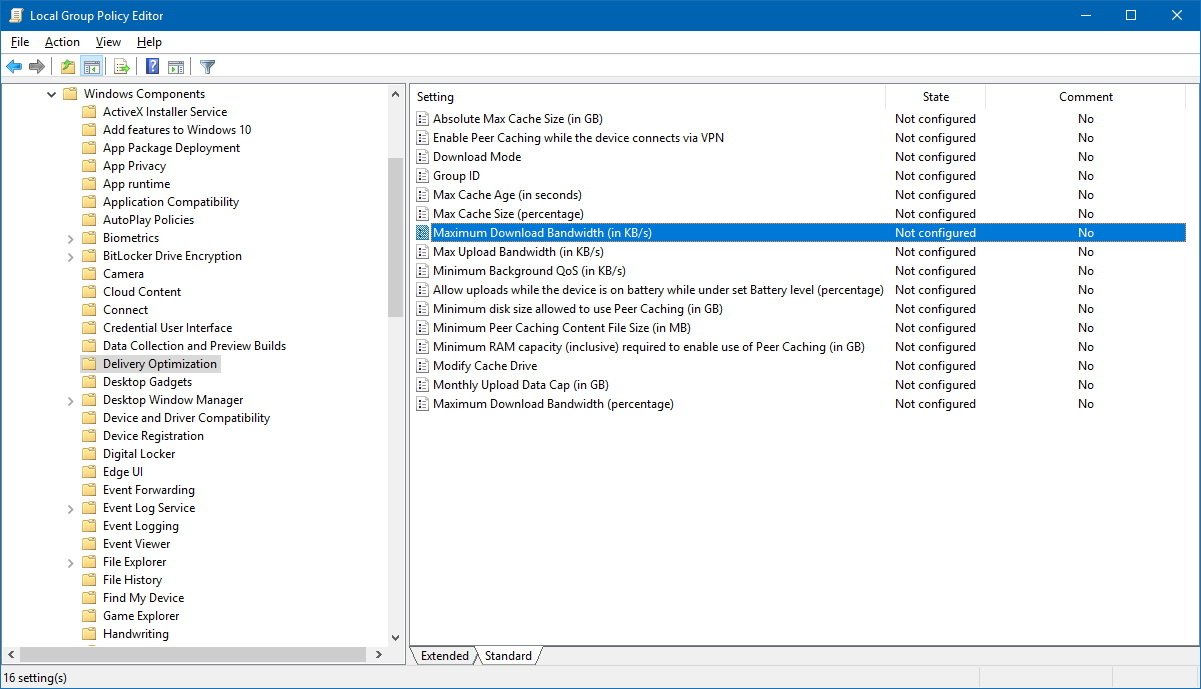
- Browse the following path:
Computer Configuration > Administrative Templates > Windows Components > Delivery Optimization
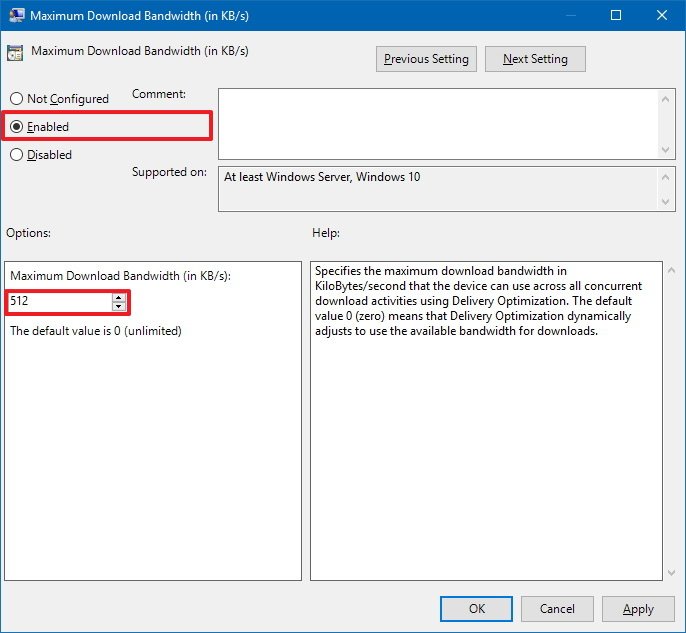
- Double-click the Maximum Download Bandwidth (percentage) policy (the equivalent to the "Download settings" option in the Settings app).
- Select the Enabled option.
- Under "Options," enter the download bandwidth in percentage.
- Click Apply.
- Click OK.
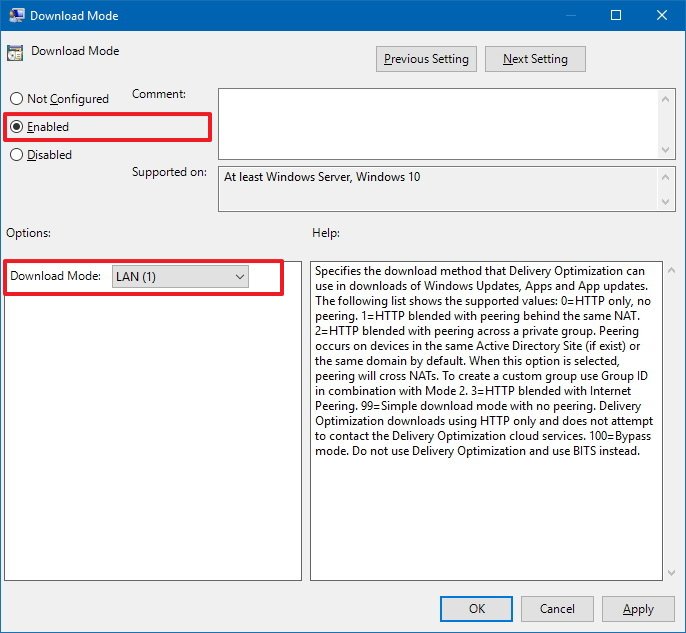
- Double-click the Download Mode policy.
- Select the Enabled option.
- Under "Options," use the "Download Mode" drop-down menu, and select the LAN (1) option (the equivalent to "PCs on the local network" option in the Settings app).
- Important: You only need to configure this option and follow the remaining steps if you want to allow your device to upload updates to other PCs on the internet.
- Click Apply.
- Click OK.
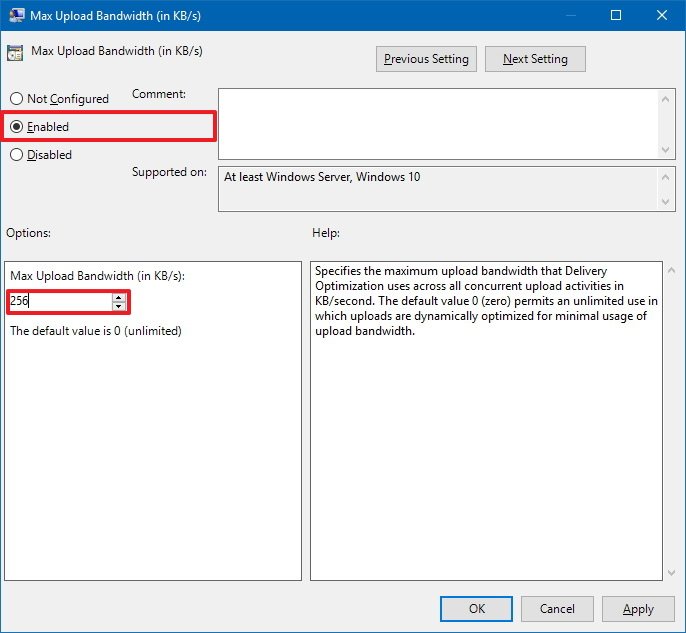
- Double-click the Max Upload Bandwidth (in KB/s) policy.
- Select the Enabled option.
- Under "Options," specify the bandwidth speed you want to dedicate for uploads – unlike the download settings, you must specify this option in kilobits per second.
- Click Apply.
- Click OK.
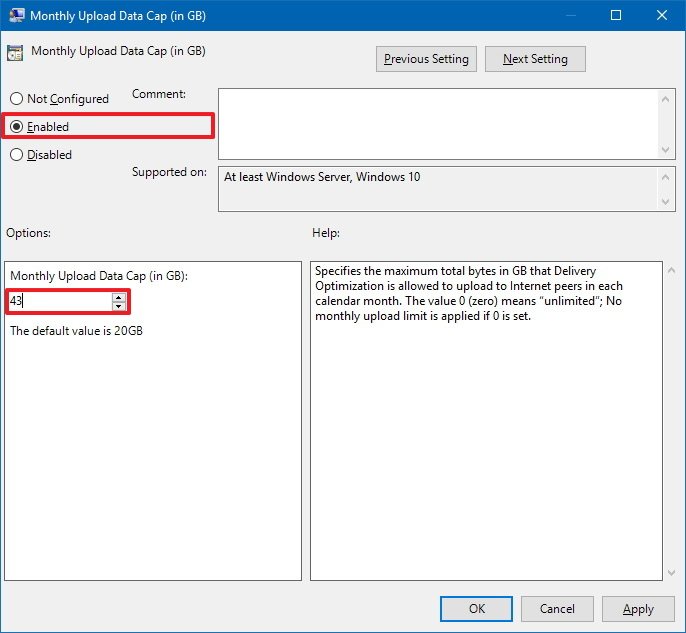
- If you want to specify a month quota, double-click the Monthly Upload Data Cap (in GB) policy.
- Select the Enabled option.
- Under "Options," specify the upload data cap in gigabytes.
- Click Apply.
- Click OK.
Once you've completed the steps, your device will reduce bandwidth usage during updates, thus minimizing the impact on other computers in the local network.
You can always revert the changes following the same instructions, but on step No. 5, step No. 10, step No. 15, and step No. 20, select the Not configured option.
It's worth noting that using the Group Policy option will cause the Settings app to display a Some settings are managed by your organization message, which will go away sometime after disabling the policies.
More Windows 10 resources
For more helpful articles, coverage, and answers to common questions about Windows 10, visit the following resources:
- Windows 10 on Windows Central – All you need to know
- Windows 10 help, tips, and tricks
- Windows 10 forums on Windows Central

Mauro Huculak has been a Windows How-To Expert contributor for WindowsCentral.com for nearly a decade and has over 22 years of combined experience in IT and technical writing. He holds various professional certifications from Microsoft, Cisco, VMware, and CompTIA and has been recognized as a Microsoft MVP for many years.
