How to keep Windows Defender disabled when using a third-party antivirus on Windows 10
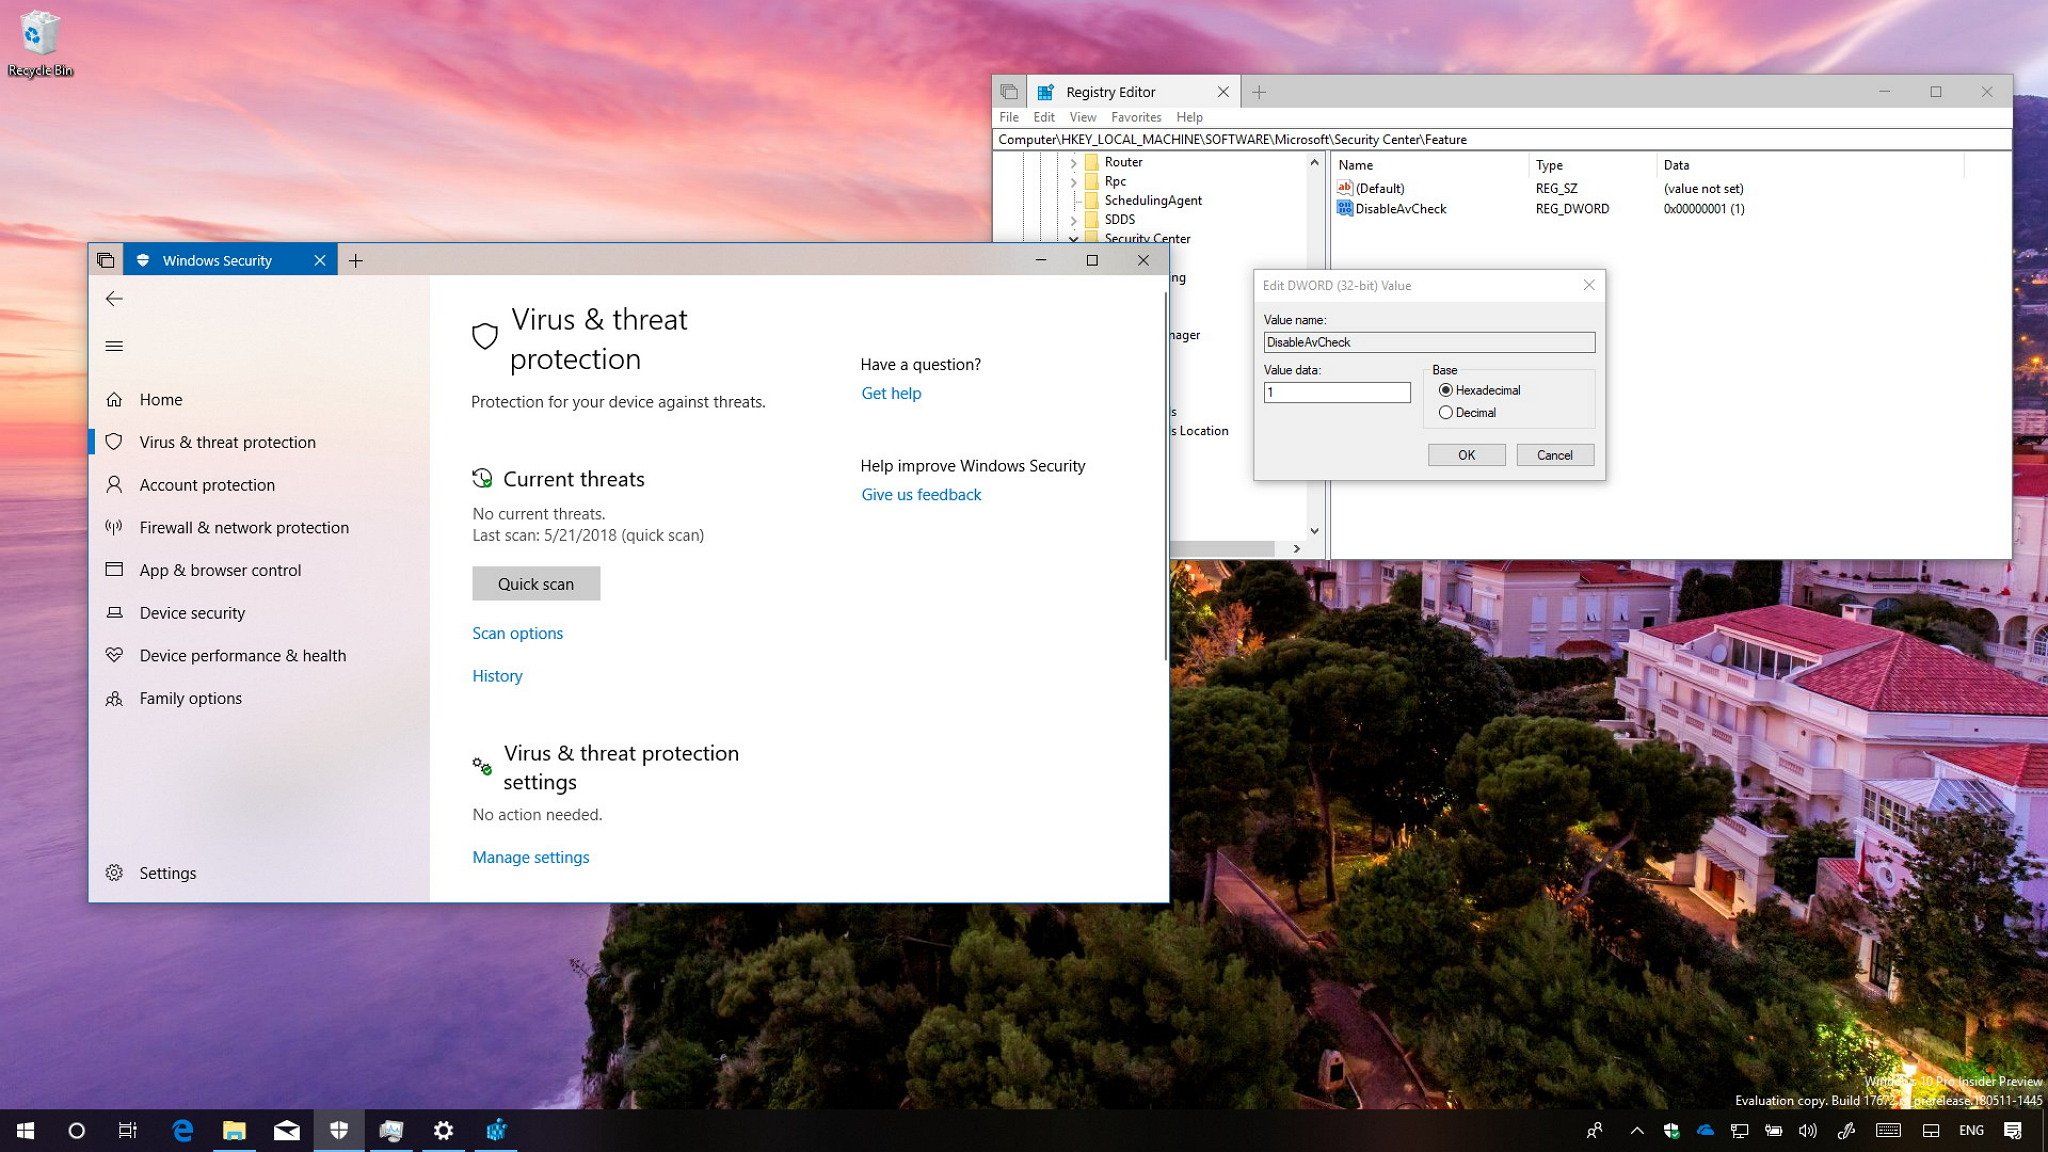
If you're running the latest Windows 10 Insider Preview build, this is how you can keep Windows Defender Antivirus disabled after installing another antivirus product.

Up until the Windows 10 April 2018 Update, when you installed a third-party antivirus, Windows Defender Antivirus disabled itself automatically to prevent conflicts and performance issues. However, starting with the Windows 10 Redstone 5 update, Windows Security Center (WSC) service will require products to run as a protected process to register. Otherwise, the built-in antivirus will continue to run alongside other third-party security products, and it'll not appear in the Windows Security interface.
Although it's expected that security companies will update their antivirus products by the time the Redstone 5 update releases later this fall, if you're a participant of the Windows Insider Program running build 17672 or later, you can use the Registry to disable this requirement.
In this Windows 10 guide, we'll walk you through the steps to ensure that Windows Defender Antivirus stays disabled as you install a different antivirus product that doesn't run as a protected process.
How to keep Windows Defender Antivirus disabled on Windows 10
If you're using a third-party antivirus on Windows 10 build 17672 or later, you can make sure that Windows Defender Antivirus stays disabled by making changes to the Registry.
Warning: This is a friendly reminder that editing the Registry is risky, and it can cause irreversible damage to your installation if you don't do it correctly. It's recommended to make a full backup of your PC before proceeding.
- Use the Windows key + R keyboard shortcut to open the Run command.
- Type regedit, and click OK to open the Registry.
- Browse the following path:
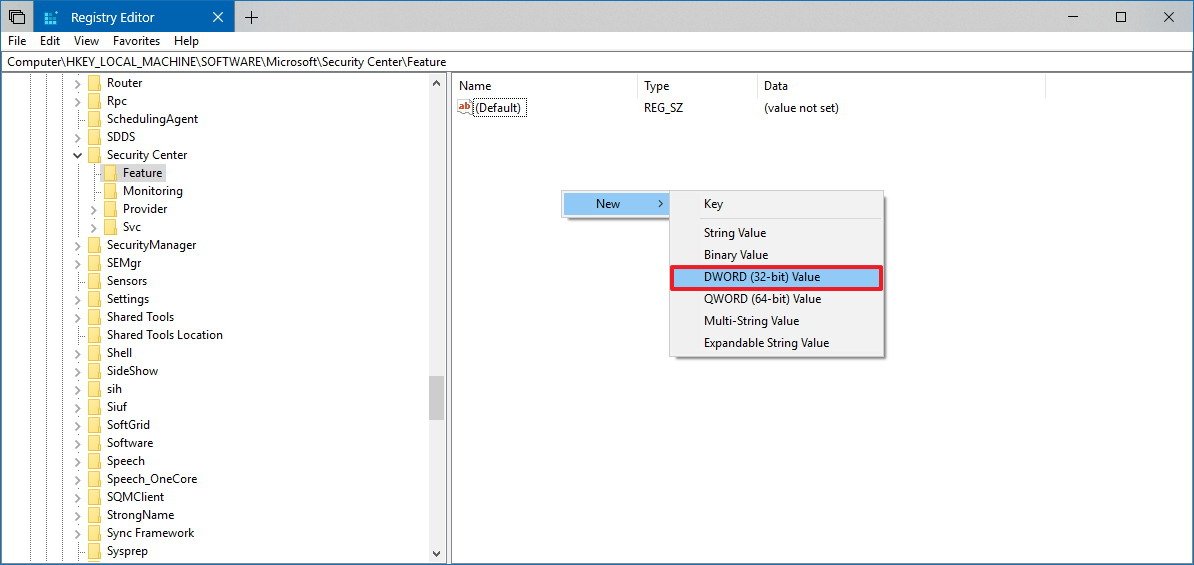
HKEY_LOCAL_MACHINE\SOFTWARE\Microsoft\Security Center\FeatureQuick Tip: On the Windows 10 Creators Update and later, you can now copy and paste the path in the new Registry's address bar to quickly jump to the key destination. - Right-click the Feature (folder) key, select New, and click on DWORD (32-bit) Value.

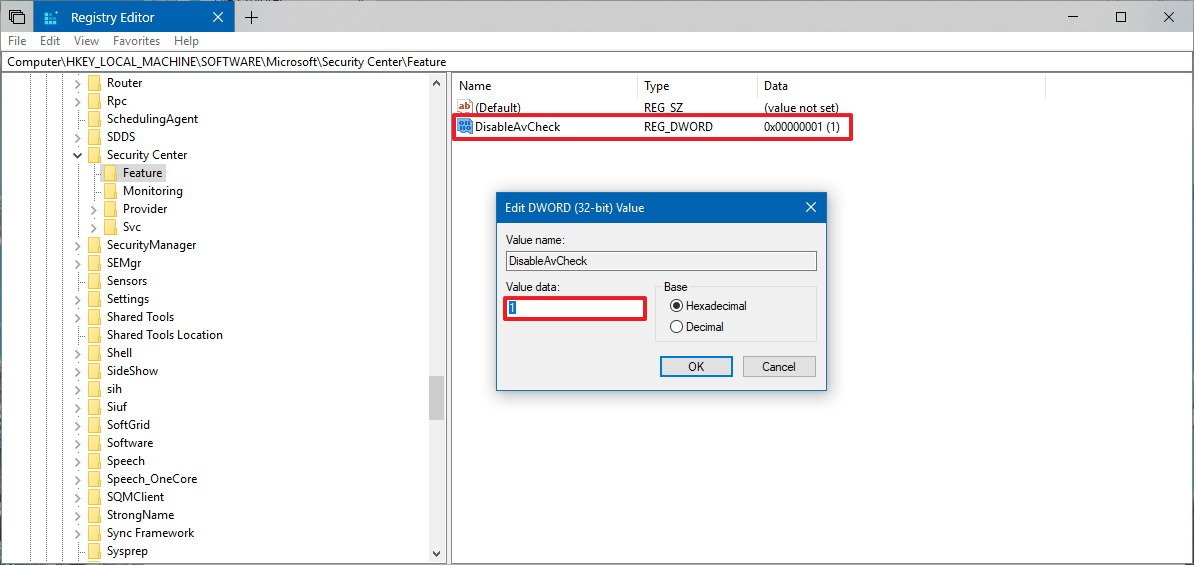
- Name the key DisableAvCheck and press Enter.
- Double-click the newly created DWORD and set the value from 0 to 1.

- Click OK.
- Restart your computer.
After completing the steps, Windows Security Center will no longer require the antivirus to run in a protected process to register keeping Windows Defender Antivirus disabled when a third-party antivirus is installed.
At any time, you can revert the changes using the same instructions, but on step 6, make sure to change the value from 1 to 0, or delete the DisableAvCheck key.
All the latest news, reviews, and guides for Windows and Xbox diehards.
If you're looking to disable Windows Defender Antivirus permanently on Windows 10, you should be following these instructions.
More Windows 10 resources
For more helpful articles, coverage, and answers to common questions about Windows 10, visit the following resources:
- Windows 10 on Windows Central – All you need to know
- Windows 10 help, tips, and tricks
- Windows 10 forums on Windows Central

Mauro Huculak has been a Windows How-To Expert contributor for WindowsCentral.com for nearly a decade and has over 22 years of combined experience in IT and technical writing. He holds various professional certifications from Microsoft, Cisco, VMware, and CompTIA and has been recognized as a Microsoft MVP for many years.
