How to install Ubuntu 21.10 on WSL for Windows 10 and 11
The Microsoft Store doesn't have the latest version of Ubuntu for WSL, but that doesn't mean you can't install it yourself.
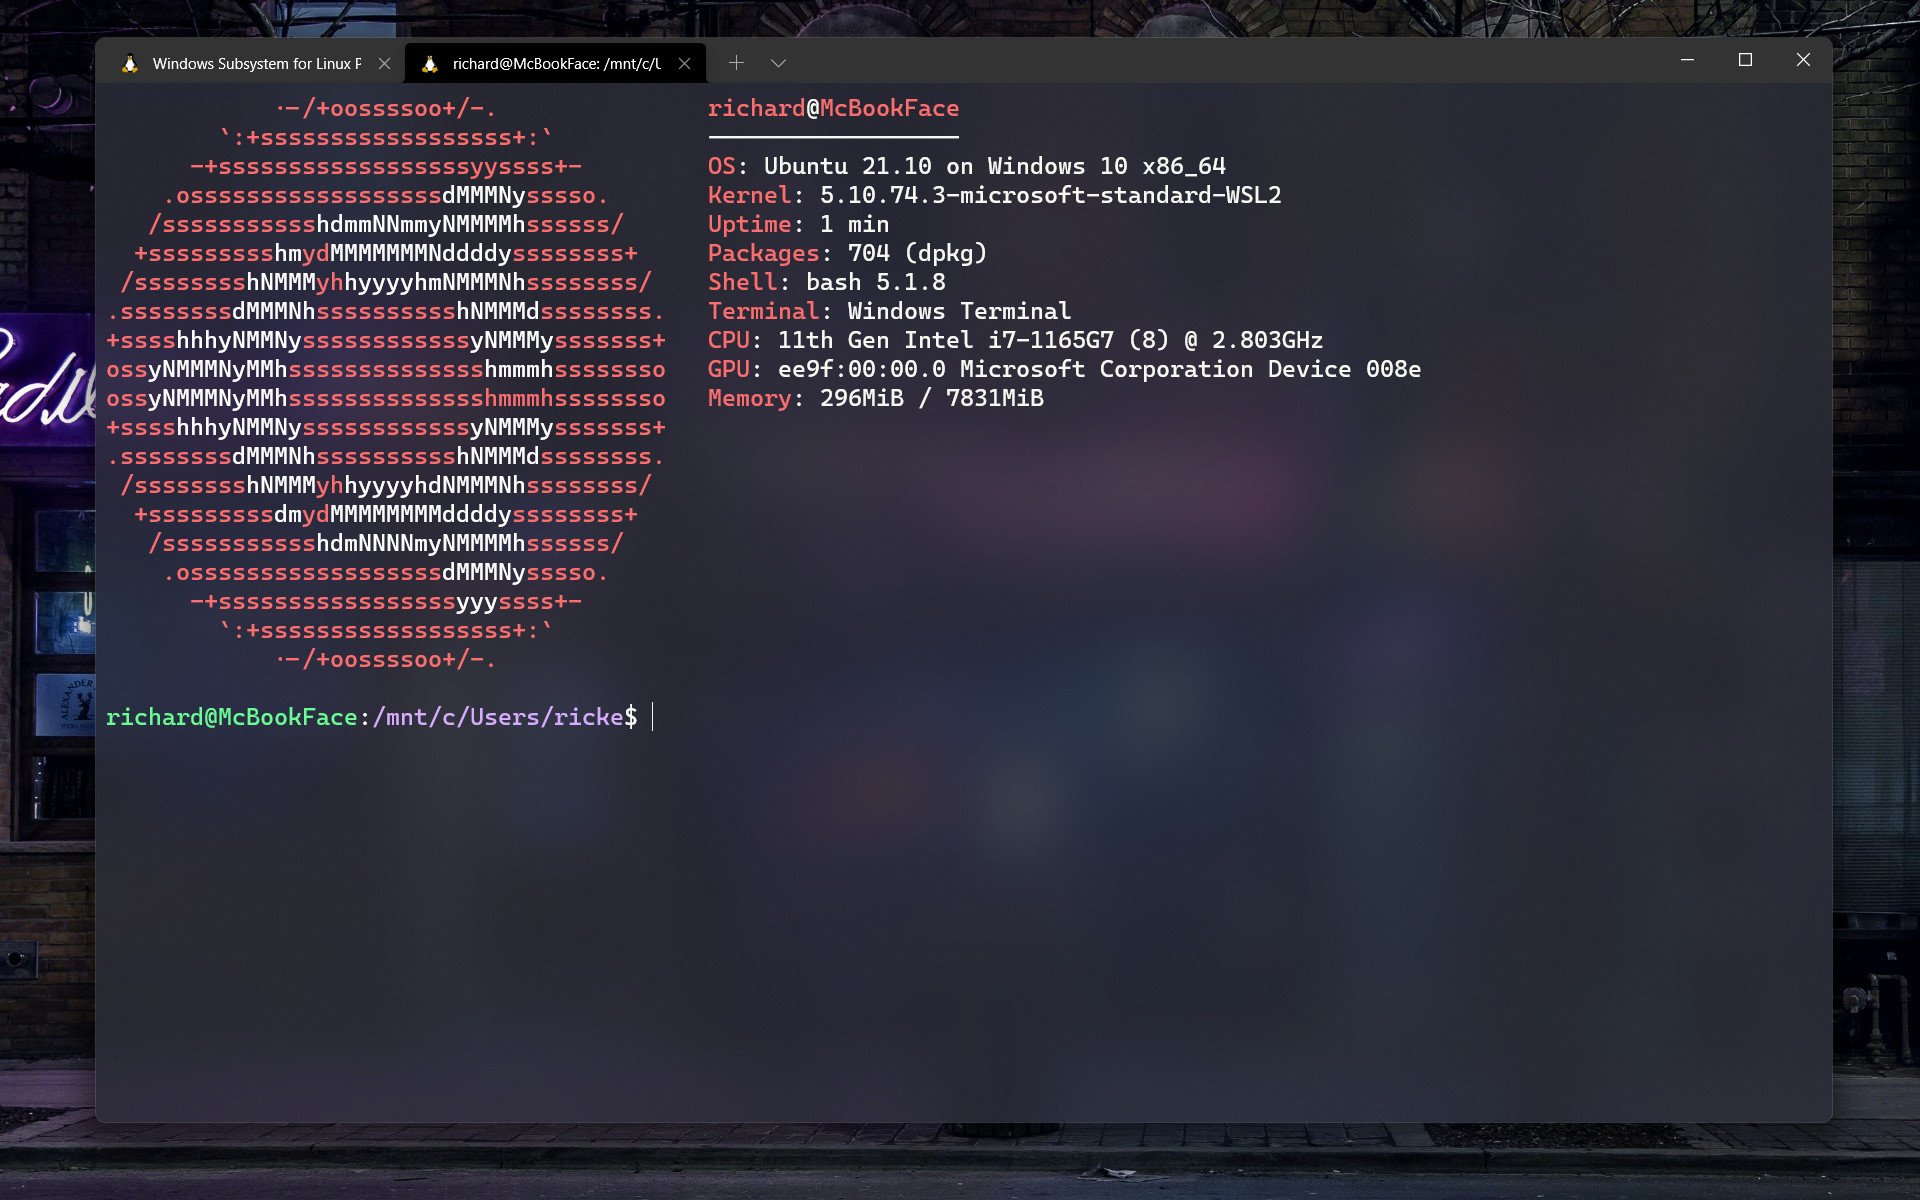
Installing WSL 2 on Windows 10 and 11 is easier than ever, and adding a distro to it requires little more than downloading an app from the Microsoft Store. But it doesn't have to end there. The Microsoft Store has a good, but limited selection of Linux distros, and in the case of Ubuntu, you're basically looking at the LTS versions and not the latest rolling releases.
For many, this is absolutely fine, but there will always be good reasons to want access to the latest version, particularly in development. If you need Ubuntu 21.10, there's no need to go off and fire up a virtual machine; you can quite easily install it on Windows 10 or 11.
You just have to know where to look.
How to download Ubuntu 21.10 for WSL
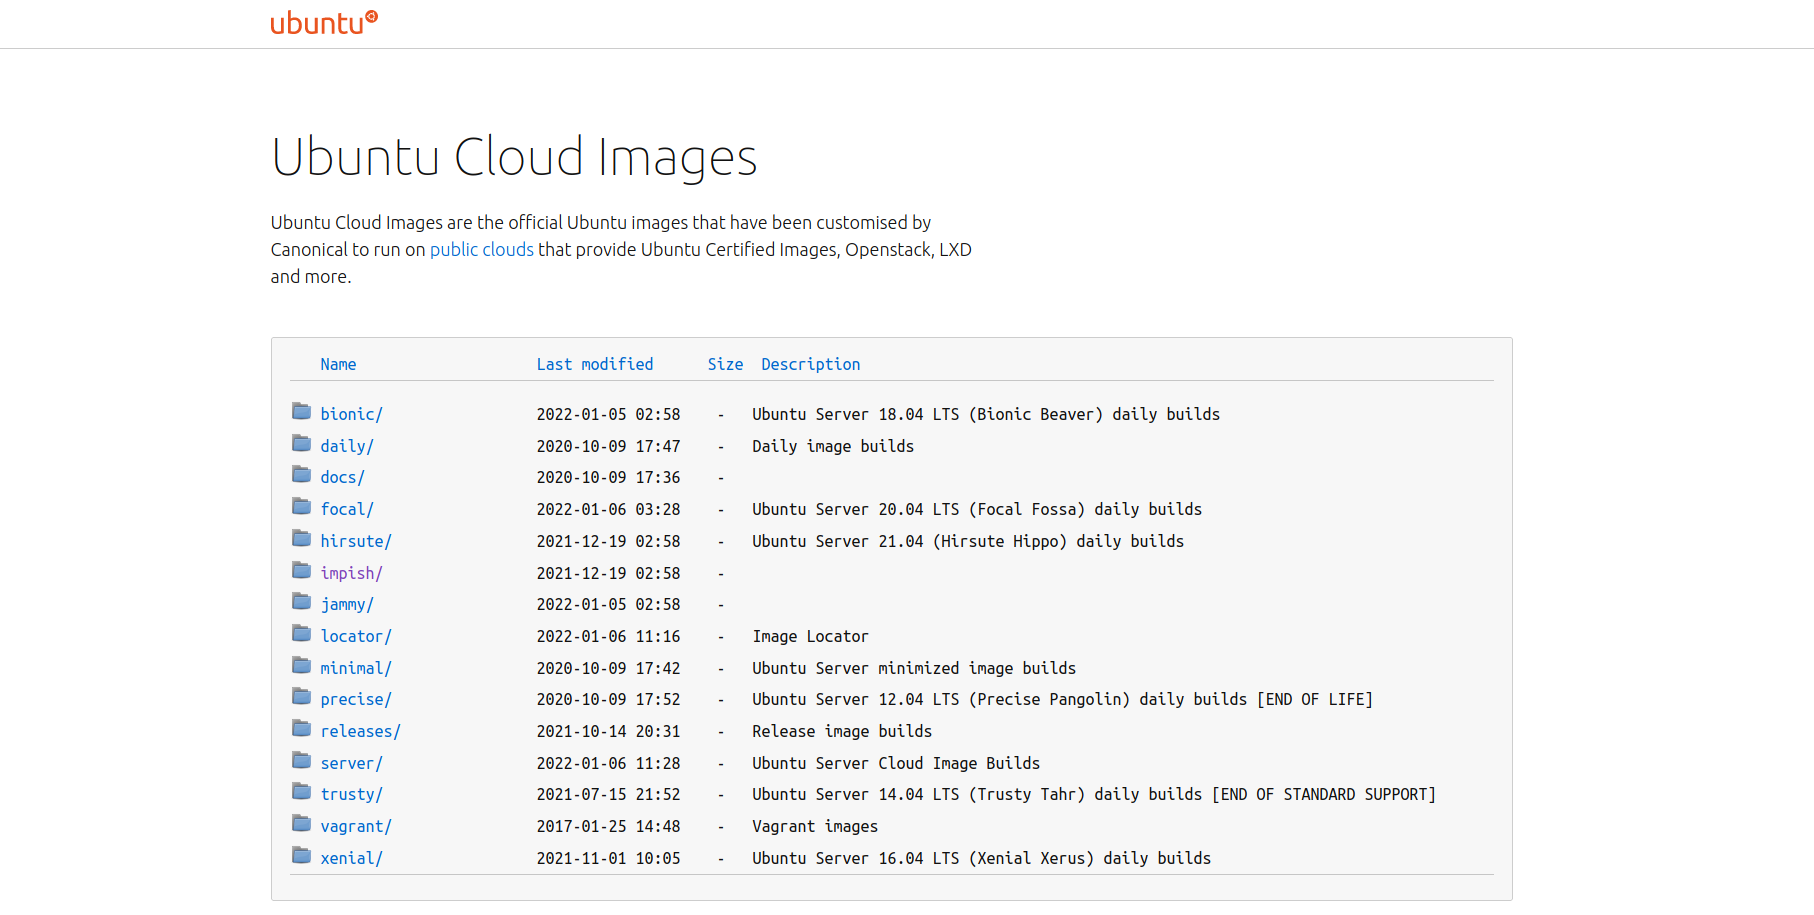
Downloading Ubuntu 21.10 for WSL isn't difficult, but it's also not particularly obvious where you even get it. It is possible to upgrade inside WSL to the latest release, but in the case of 21.10, you'd need to already be on 21.04.
But here we're going to download an image file and install a completely fresh build of Ubuntu 21.10.
To get the files you need, head over to the Ubuntu website and follow these steps.
- Click on the option labeled impish.
- Next, click on current.

- Locate the files labeled wsl.rootfs.tar.gz.
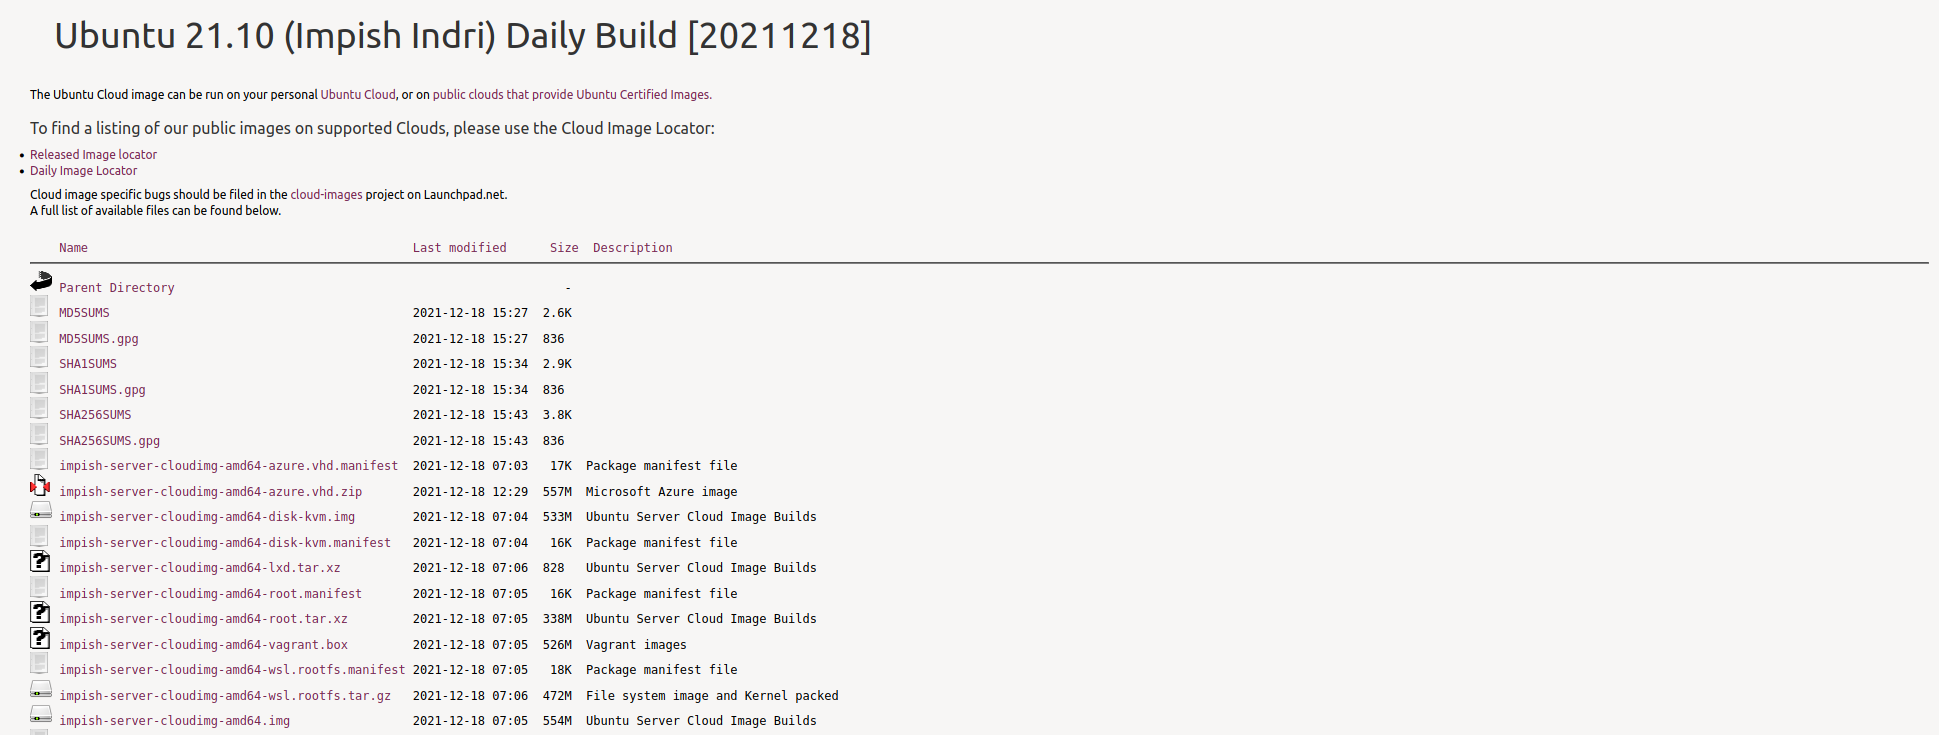
There will be multiple files, but the ones labeled with manifest you can ignore. You also need to choose the right version for your PC. If you're using an Intel- or AMD-powered machine, choose the amd64 version. If you're using an ARM-based machine, choose the arm64 version.
Get the Windows Central Newsletter
All the latest news, reviews, and guides for Windows and Xbox diehards.
Download the relevant file, then it's onto the installation process.
How to install Ubuntu 21.10 on WSL for Windows 10 and 11
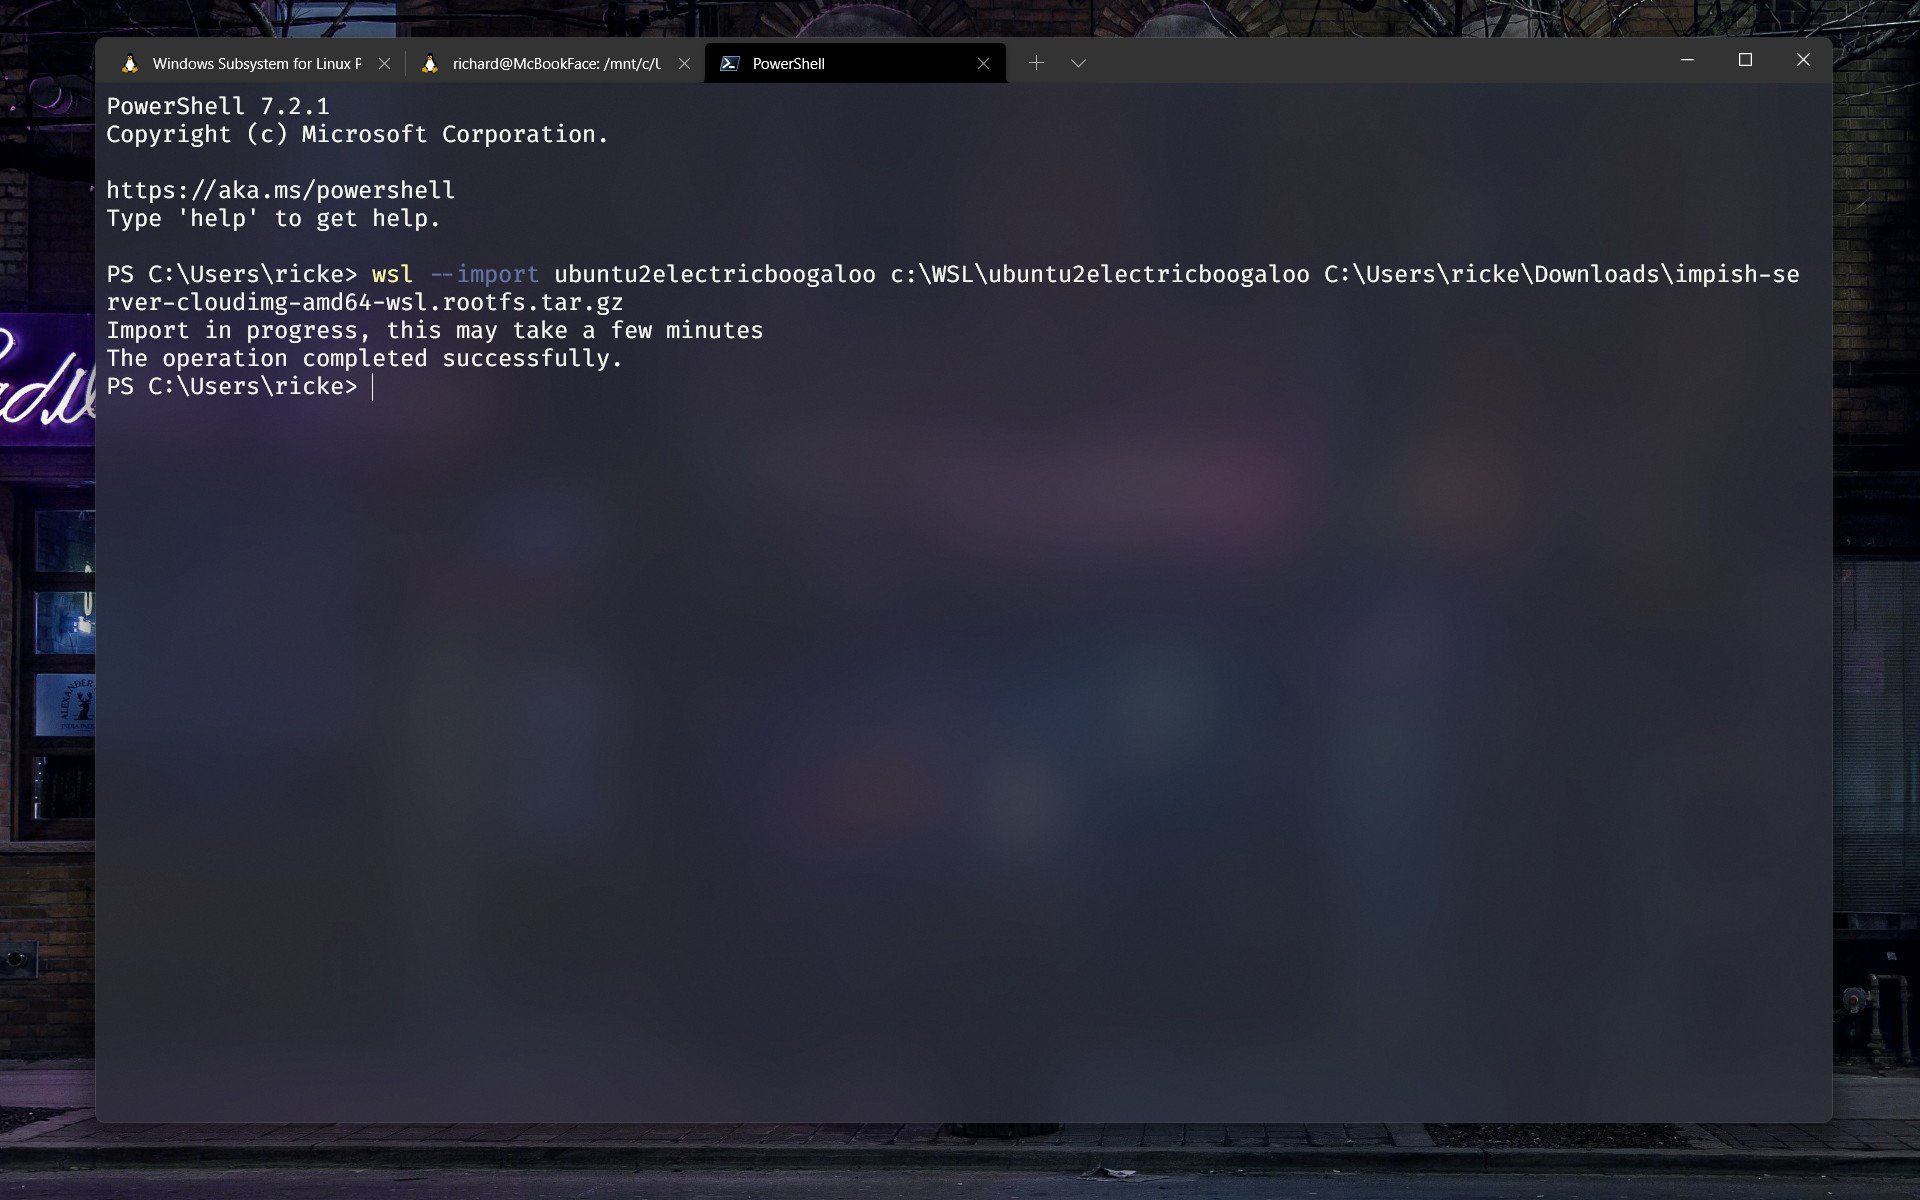
From here on out you're going to be in your PowerShell terminal. Take a note of where you've downloaded the tar file from the steps above to as you'll need the file location as part of the install process.
The process of installation begins with importing the downloaded image from Ubuntu into your WSL setup. We have a full guide on exporting and importing Linux distros in WSL that can help, but we'll still cover everything you need here.
Inside PowerShell, you will need to enter the following command to import and install Ubuntu 21.10:
wsl --import <name> <location to="" unpack=""> <location of="" download=""></location></location></name>So, on my system, it looks like this:
wsl --import Ubuntu-2110 c:/WSL/Ubuntu-2110 c:/Downloads/impish-server-cloudimg-amd64-wsl.rootfs.tar.gzIt doesn't really matter where you unpack and install the image, but it doesn't hurt to create a dedicated directory, especially if you plan on installing multiple distros in this fashion.
Additionally, you can specify a version of WSL at the end with the
--versionflag. It will install to whichever version of WSL your system recognizes as default, but you can alter that at installation to save the need to convert it later on. Simply add a 1 or a 2 after the flag to specify which version you require.
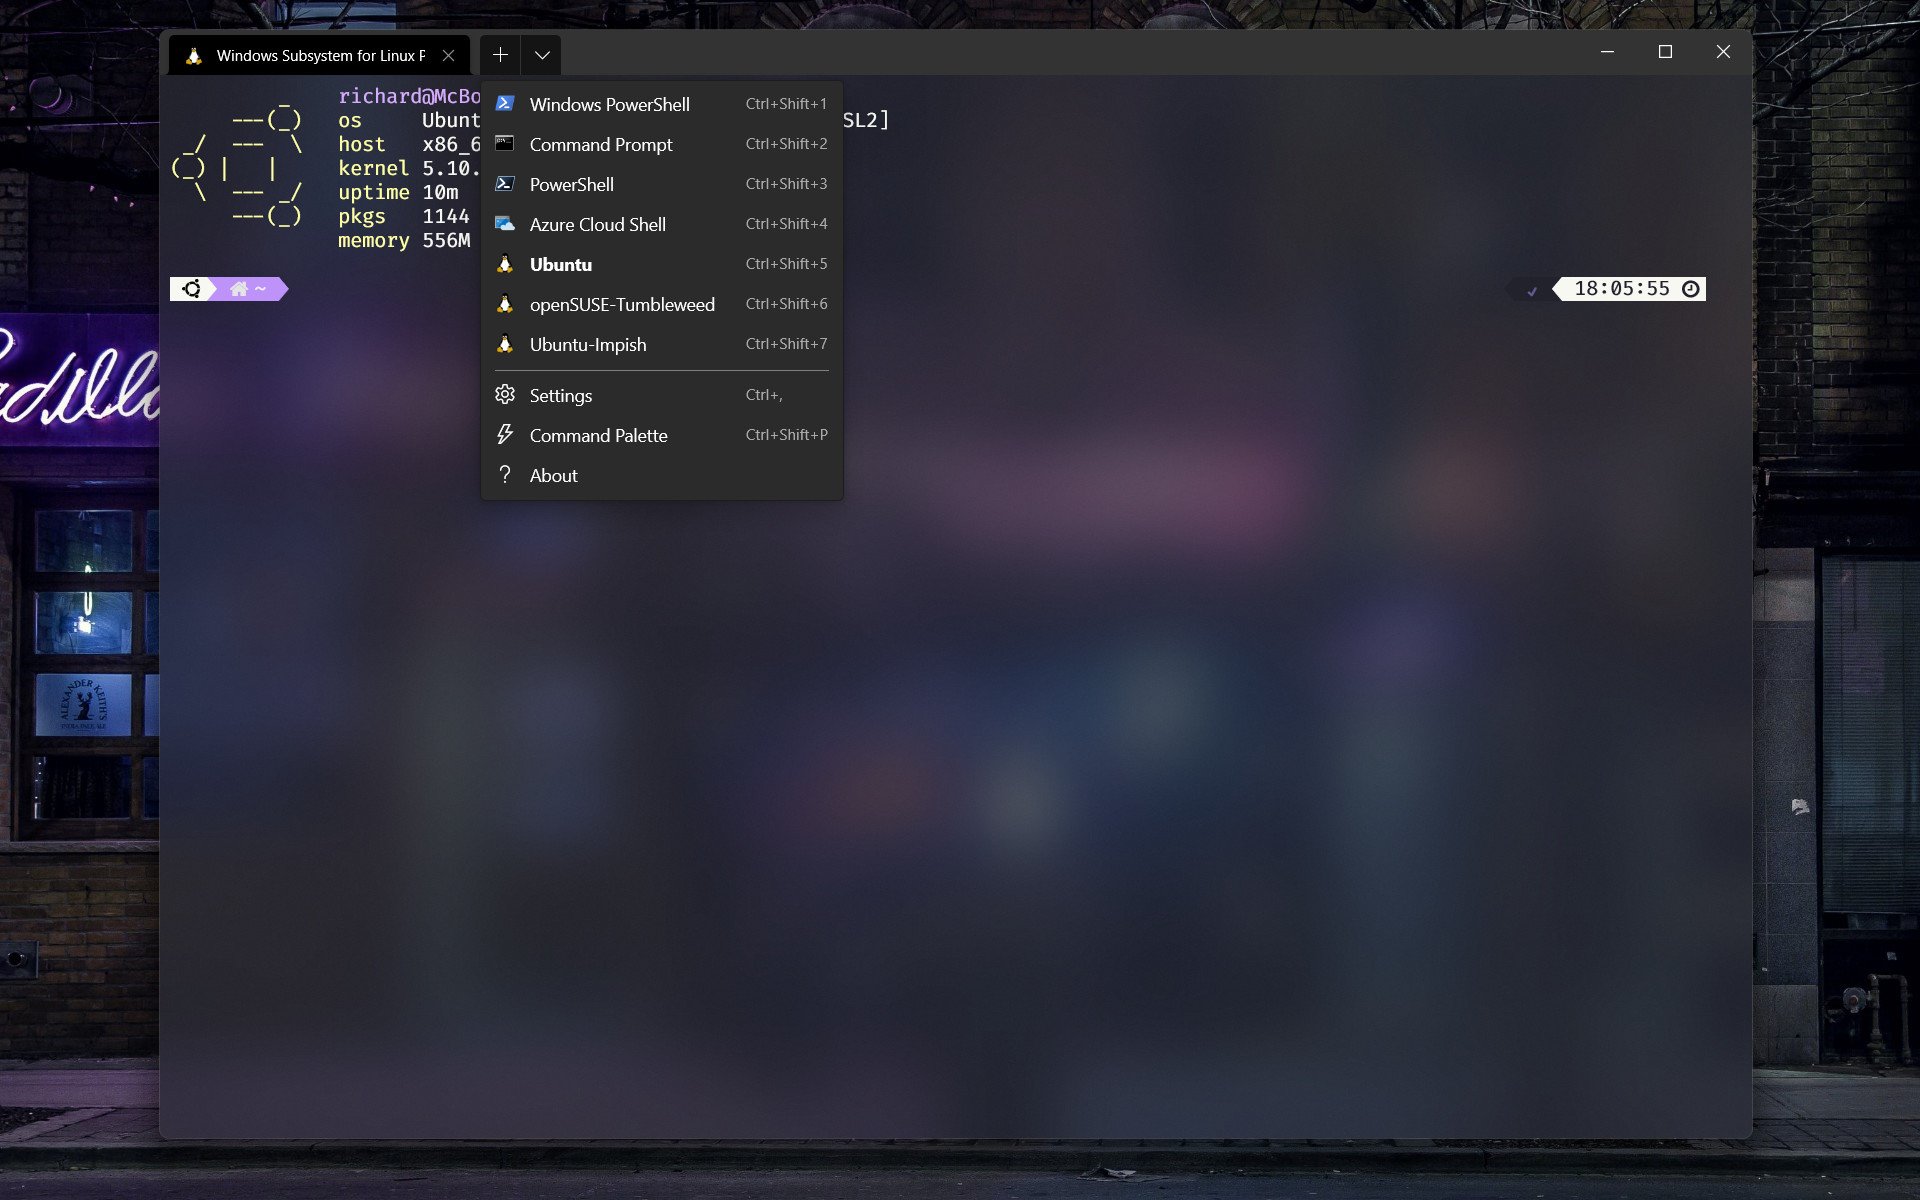
It'll take a minute, but once it's finished you can move on to setting up. As this hasn't been installed from the Microsoft Store, there is no app shortcut created in the Start Menu. You'll need to launch it manually with:
wsl -d <distroname></distroname>If you use Windows Terminal, however, and you really should, WSL will automatically add it to the dropdown menu with all the other shells you can open.
Basic setup of Ubuntu 21.10
As you've basically sideloaded Ubuntu 21.10, it doesn't run through the initial setup process you get when you install Ubuntu from the Microsoft Store. As such you won't have a user set up, there will only be root. So you'll want to create one and add it to the sudo group:
adduser <yourusername>usermod -aG sudo <yourusername></yourusername></yourusername>And switch to that user with:
su <yourusername></yourusername>To launch into Ubuntu 21.10 as your new user, from PowerShell enter:
wsl -d <distroname> -u <yourusername></yourusername></distroname>While not a long process to switch to or enter your new installation as your user instead of root, automating the process is always better. Configuring the default user for a distro installed in this way is a little different to those that have an executable downloaded from the Store.
There are a few different ways you can handle this, but the easiest, and largely safest, is to edit the wsl.conf file on the distro to tell WSL to log you in as your user account instead of root. Open up Ubuntu 21.10 and navigate to the file as below. The file likely doesn't exist at first installation, so let's get it set up, and for this you'll want to stay logged in as root and not your user account.
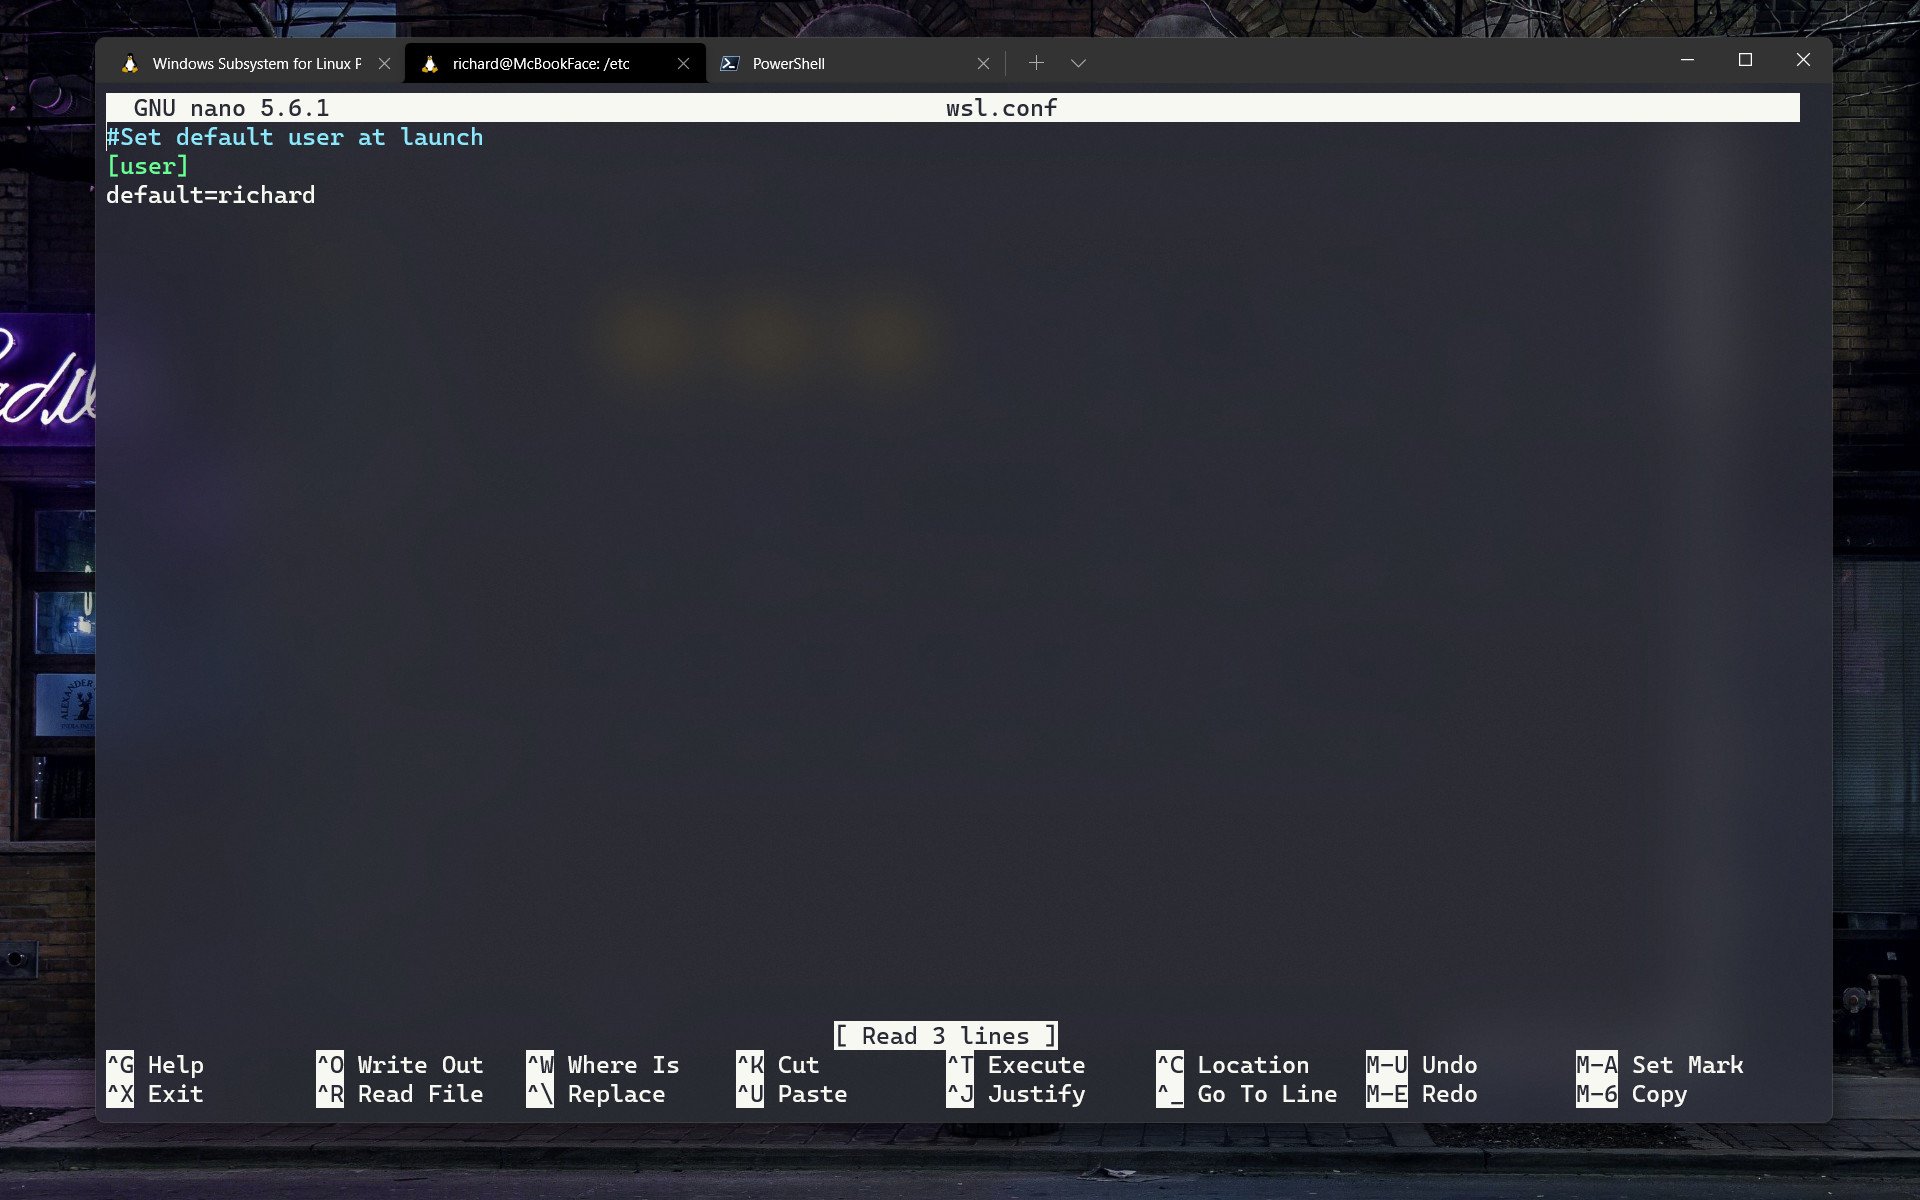
- In the terminal enter
cd /etc/ - Enter
lsto list the contents. If you don't have wsl.conf we can create one. - Enter
touch wsl.conf. - Open the wsl.conf file with nano by entering
nano wsl.conf.
Now you'll need to enter the information needed to tell Ubuntu 21.10 to launch as user and not root. Enter the following block into the document.
# Set the user when launching a distribution with WSL.[user]default=YourUserNameThe first line isn't required, but it's a good idea to keep comments throughout your wsl.conf file to remind you in plain English what each part does.
Exit nano by pressing Ctrl + X followed by Y and Enter to save the file. Close down WSL entirely, leave it a few seconds, and then when you next boot back into Ubuntu 21.10, you should be user and not root.
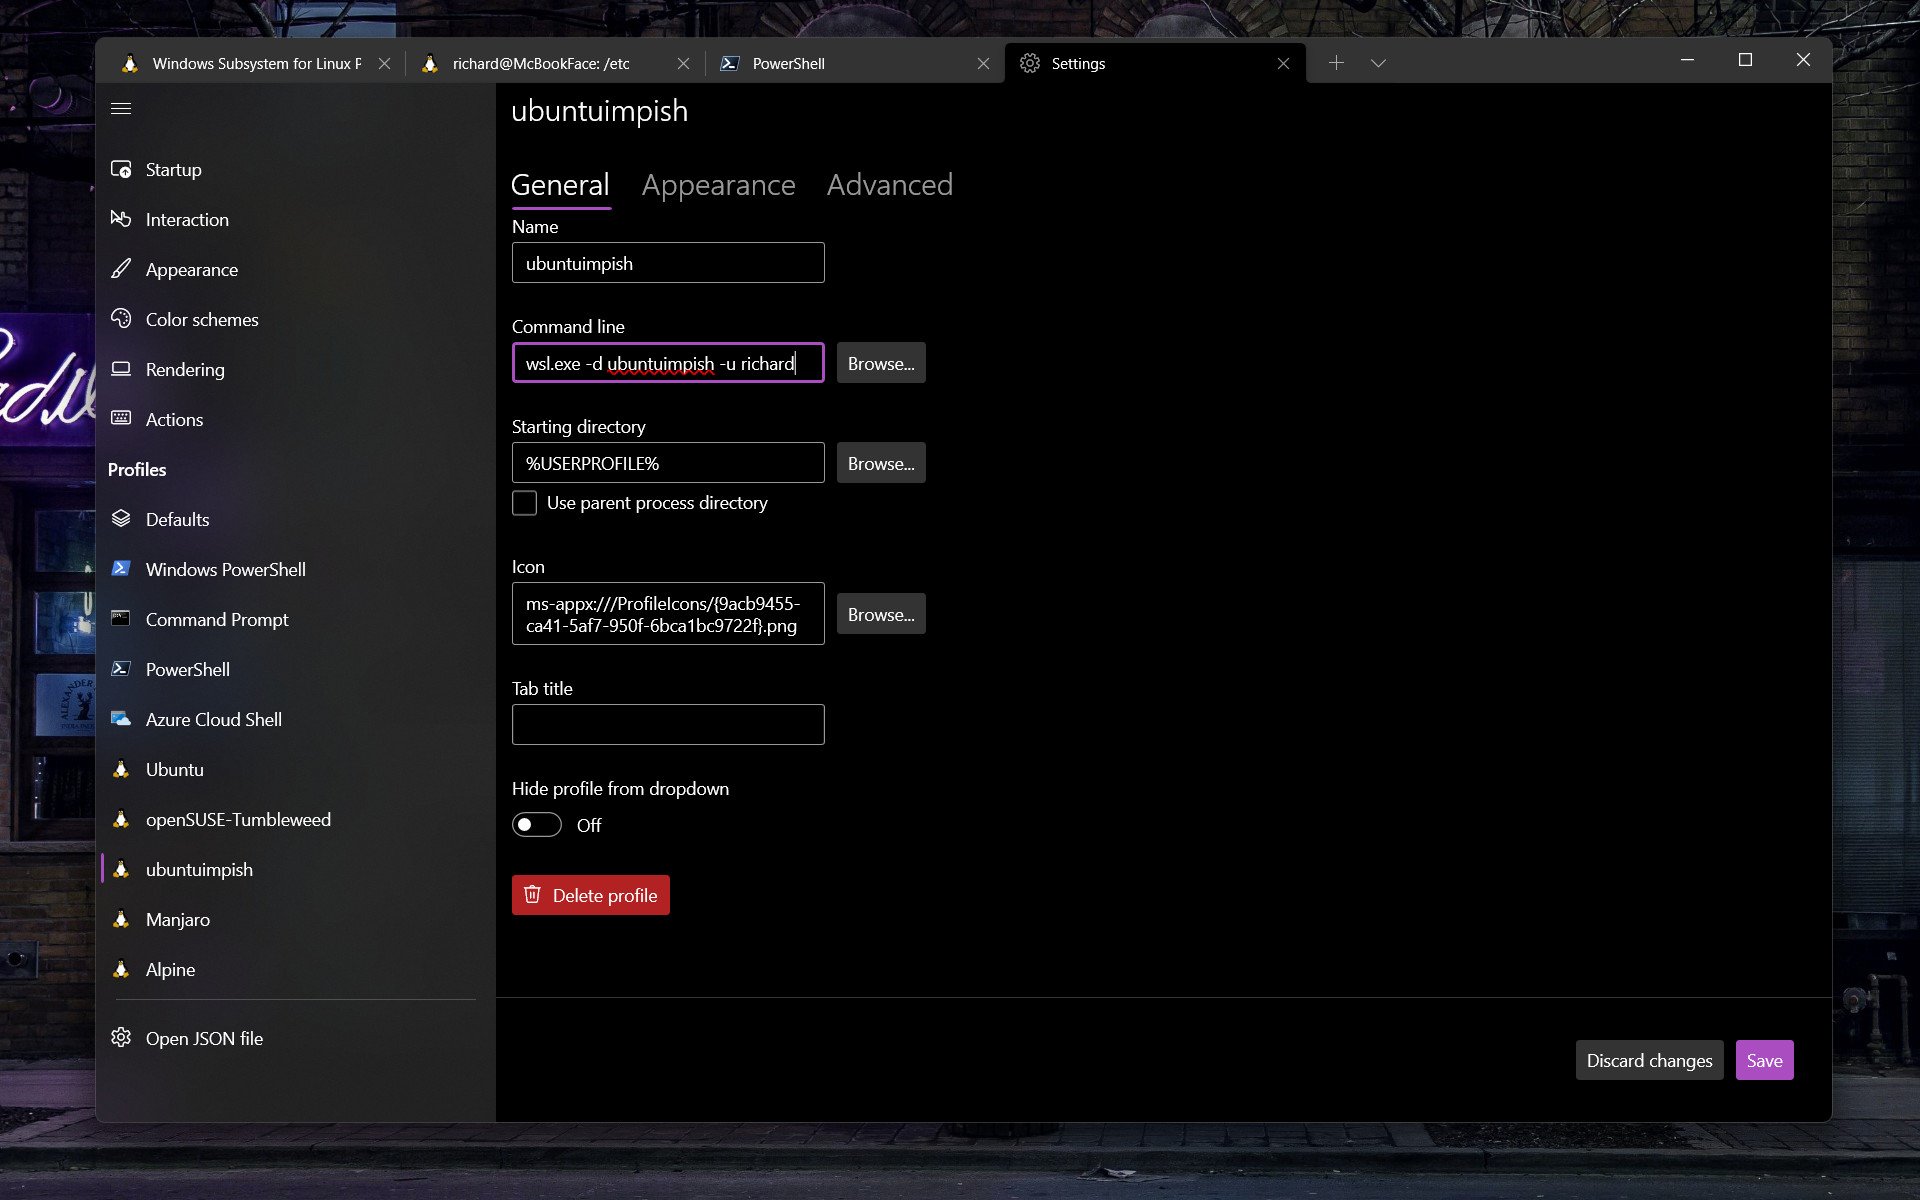
Alternatively, if you're using Windows Terminal, open the Settings, find your Ubuntu 21.10 install in the sidebar, and in the command line box ensure this command is stored:
wsl.exe -d <distroname> -u <yourusername></yourusername></distroname>This will have the same effect once closed down and restarted.
That's all there is to it. It's a little more of a process than installing from the Microsoft Store, but it's not too difficult, and it's a process you can repeat for future rolling releases or just to have multiple versions of the same distro installed for different purposes.

Richard Devine is a Managing Editor at Windows Central with over a decade of experience. A former Project Manager and long-term tech addict, he joined Mobile Nations in 2011 and has been found on Android Central and iMore as well as Windows Central. Currently, you'll find him steering the site's coverage of all manner of PC hardware and reviews. Find him on Mastodon at mstdn.social/@richdevine
