How to fully hard-mute people in Microsoft Teams
You can now prevent attendees from speaking during a Microsoft Teams' meeting, and in this guide, we'll show you the steps to complete this task on Windows 10.
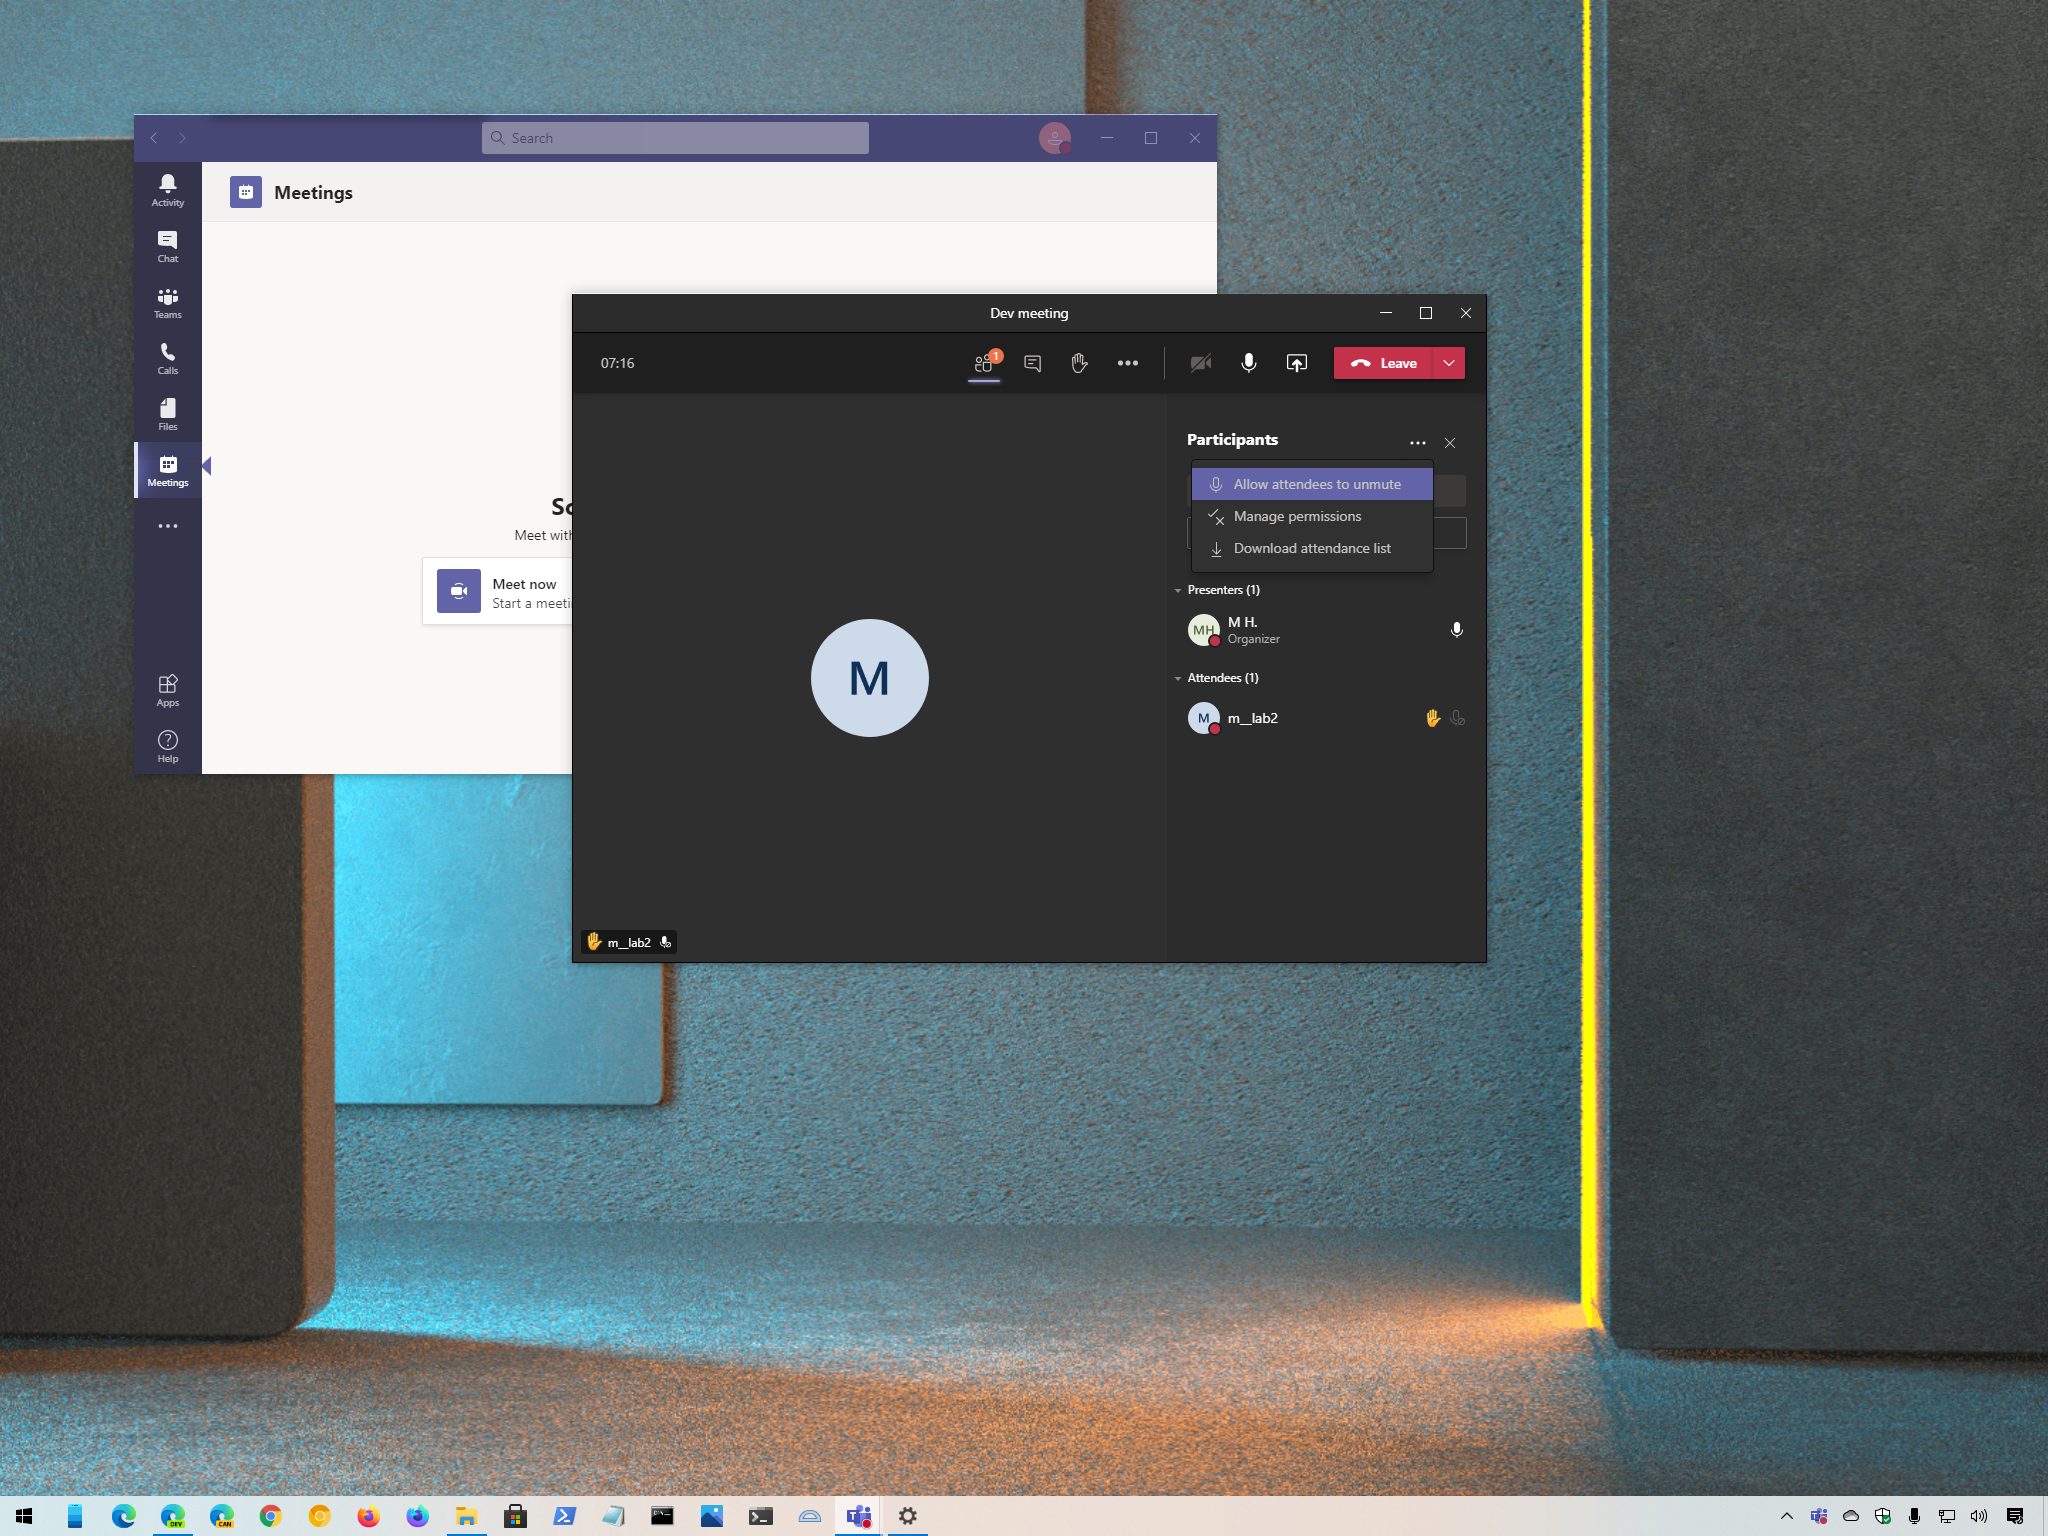
If you use Microsoft Teams to host webinars and virtual classrooms for employee training in your organization, you can now use the new "hard mute" option to allows presenters to prevent attendees from unmuting their microphones during a meeting.
The feature is available for organizations using the free or paid version of Microsoft Teams, and it's been designed to minimize background noises and other distractions that can break the flow of the presentation when hosting large meetings.
When using hard mute, you can block all attendees' microphone privileges during or before the meeting begins. You can disable or allow the unmute option for everyone while in the call, and you can enable individual participants to unmute as long as they raise their hands first.
In this Windows 10 guide, we'll walk you through the steps to disable attendees' ability from using their microphones during a Microsoft Teams' meeting.
- How to disable unmute for attendees during a meeting on Microsoft Teams
- How to disable unmute for attendees before meeting on Microsoft Teams
How to disable unmute for attendees during a meeting on Microsoft Teams
The ability to block people from using their microphones while in a meeting is available for the free and paid version of Teams.
To hard mute users during a Microsoft Teams meeting, use these steps:
- Open Microsoft Teams.
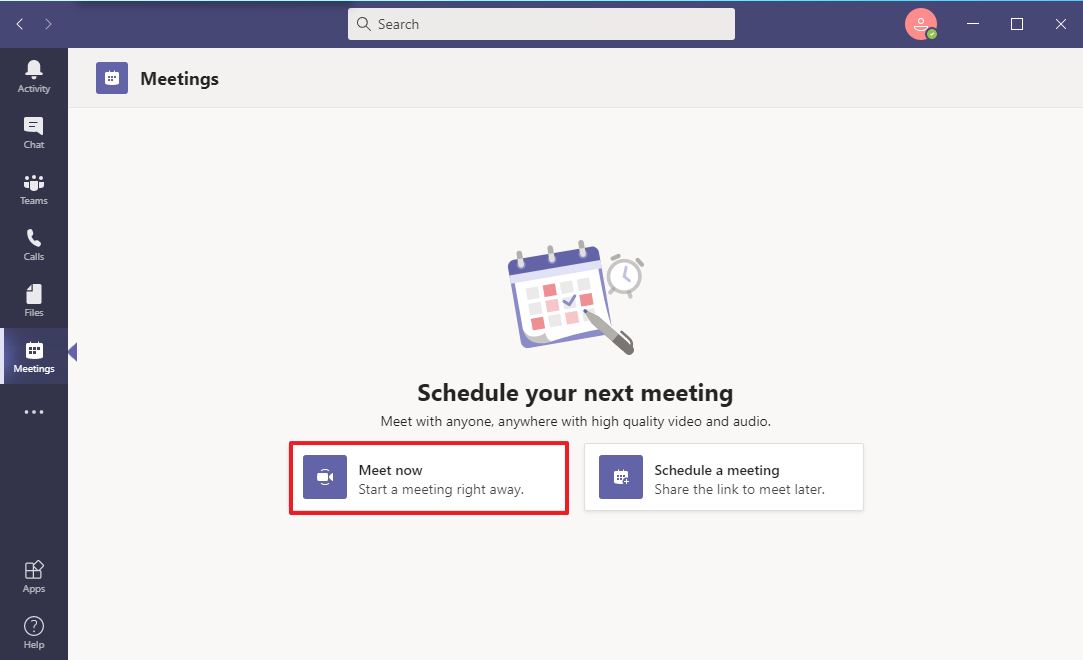
- Click on Meetings from the left navigation pane.Quick tip: If you don't see the option, click the More added apps (ellipsis) button from the left pane and click the Meetings option.
- Click the Meet now button.
- Click on Meet.
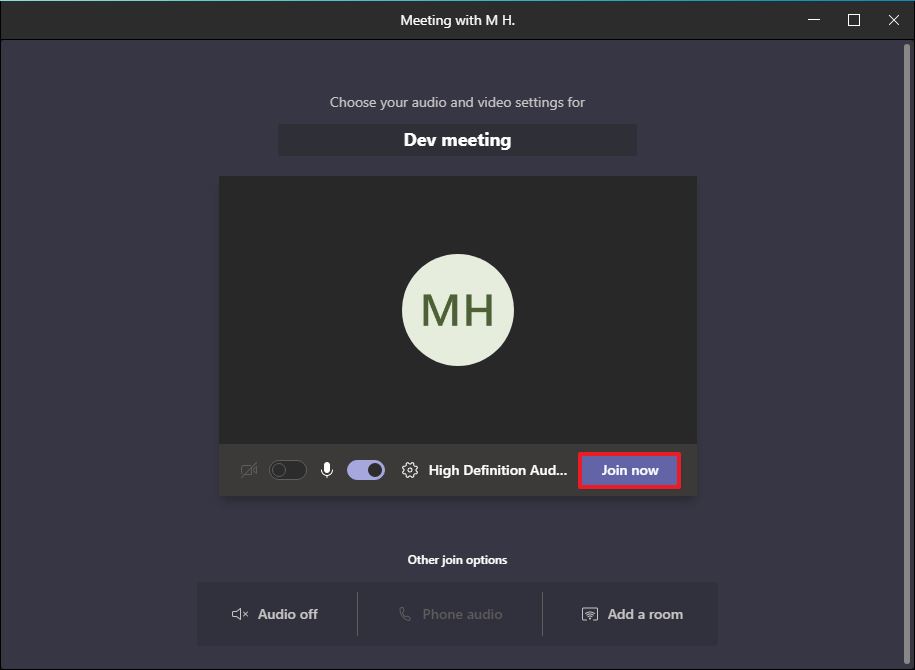
- Set the preferences for the meeting.
- Click the Join now option.
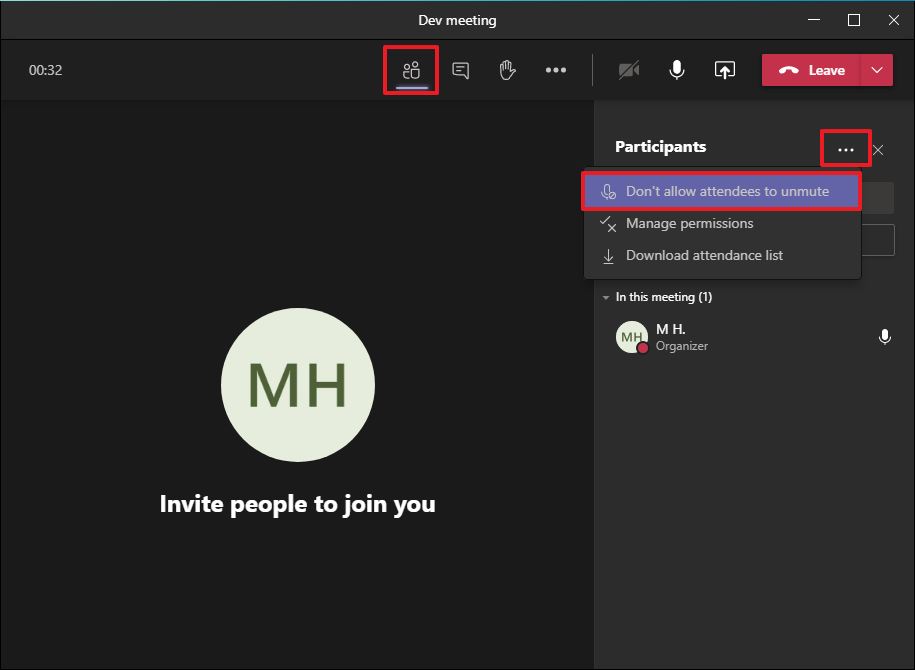
- Click the Participants button from the toolbar (if applicable).
- Click the More actions (ellipsis) button from the top-right corner.
- Select the Don't allow attendees to unmute option.
- Click the Don't allow button.
Once you complete the steps, people in the call won't be to speak, nor they'll be able to unmute the microphone from their end.
All the latest news, reviews, and guides for Windows and Xbox diehards.
Allow attendees to unmute during a meeting
To allow people to use their microphone during a meeting, use these steps:
- Click the Participants button from the toolbar.
- Click the More actions (ellipsis) button from the top-right corner.
- Select the Allow attendees to unmute option.
- Click the Allow button.
After you complete the steps, participants will be able to mute or unmute without restrictions.
Allow individual attendee to unmute during a meeting
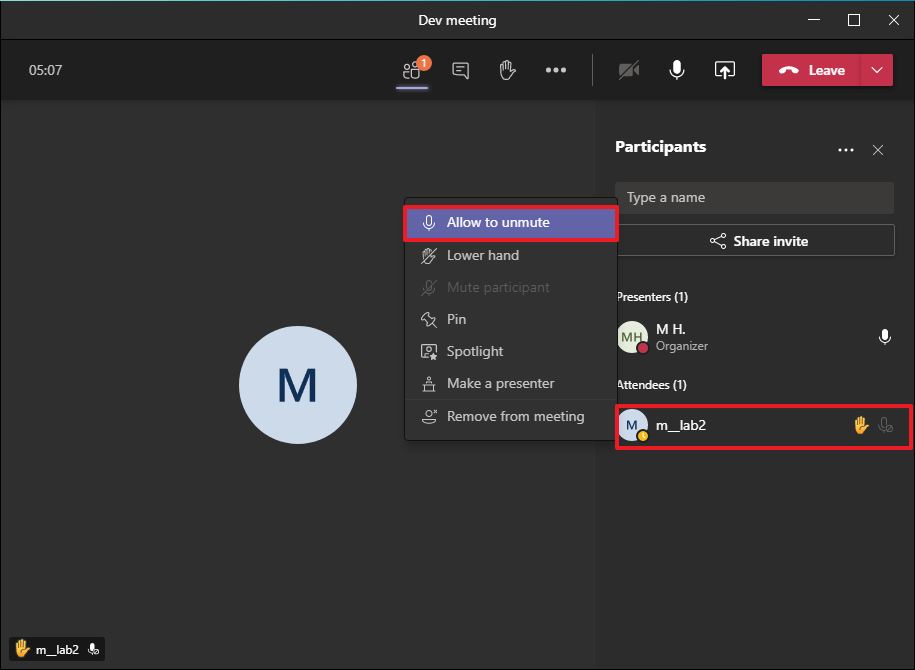
It's also possible to allow only one person to unmute during a Teams call, but before the option becomes available, attendees must click the button to raise their hands to request to speak and then use these steps:
- Click the Participants button from the toolbar.
- Right-click the attendee and select the Allow to unmute option.
- Right-click the attendee and select the Don't allow to unmute option (as necessary).
- Repeat steps No. 2 and 3 to enable other attendees to unmute their microphones (as necessary).
Once you complete the steps, only the participants you manually allow will be able to speak during the Microsoft Teams meeting.
If the person isn't able to speak due to a microphone issue, use these steps to troubleshoot and fix the device problem on Microsoft Teams.
How to disable unmute for attendees before meeting on Microsoft Teams
If you have a paid subscription to use Microsoft Teams, you can also set the option to block users from unmuting their microphones before the meeting by editing the schedule settings.
To configure a meeting schedule to prevent attendees from using their microphones on Microsoft Teams, use these steps:
- Open Microsoft Teams.
- Click on Meetings from the left navigation pane.Quick tip: If you don't see the option, click the More added apps (ellipsis) button from the left pane and click the Meetings option.
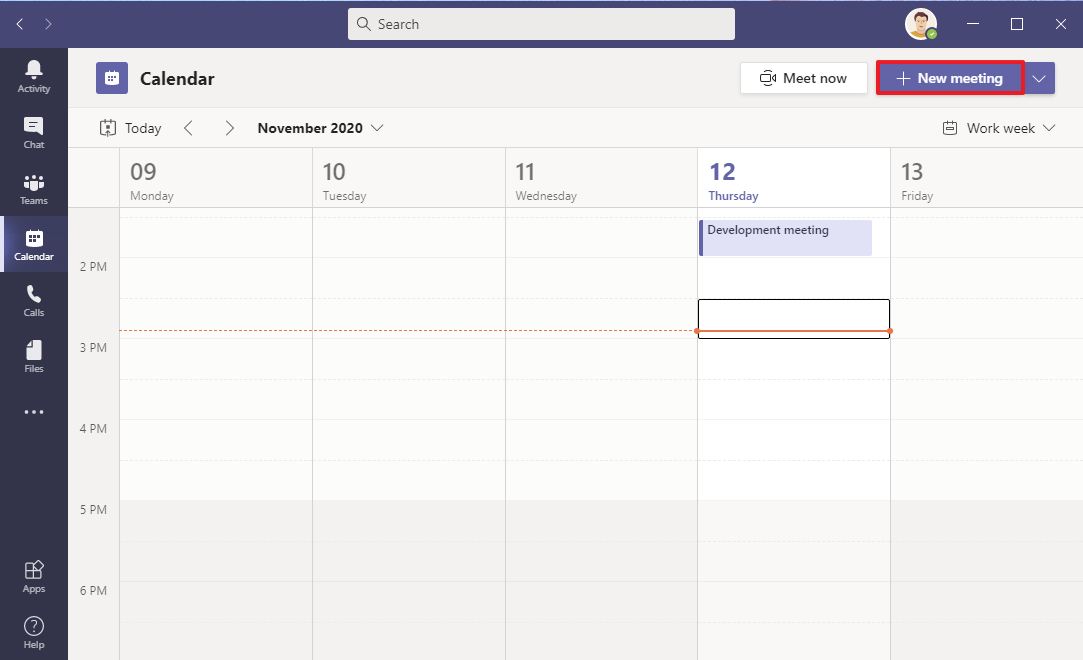
- Click the New meeting button from the top-right corner.Quick note: Skip to step No. 6 if you have a meeting already scheduled.
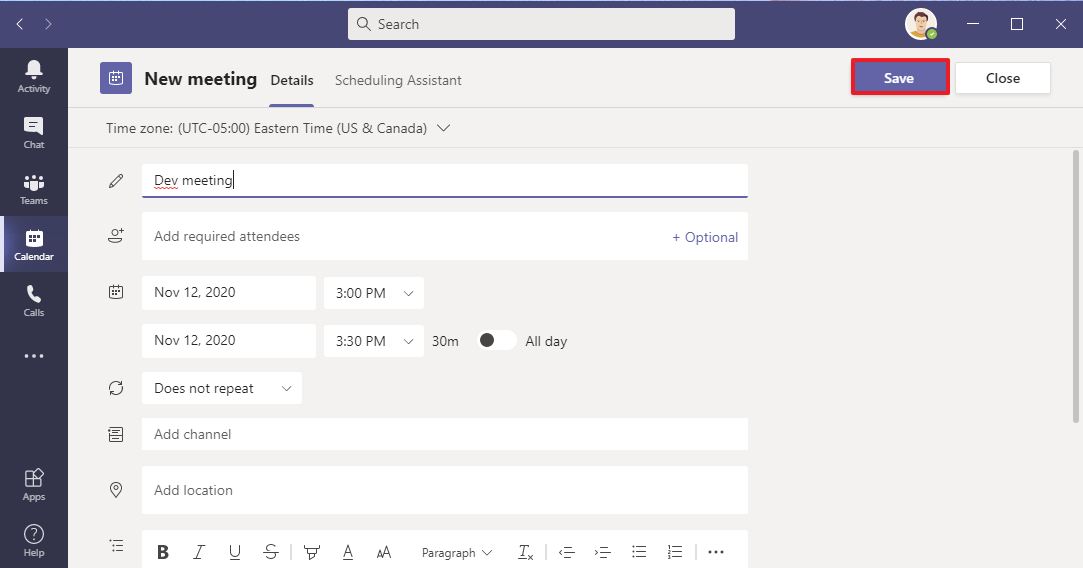
- Set the preferences for the meeting.
- Click the Save button.
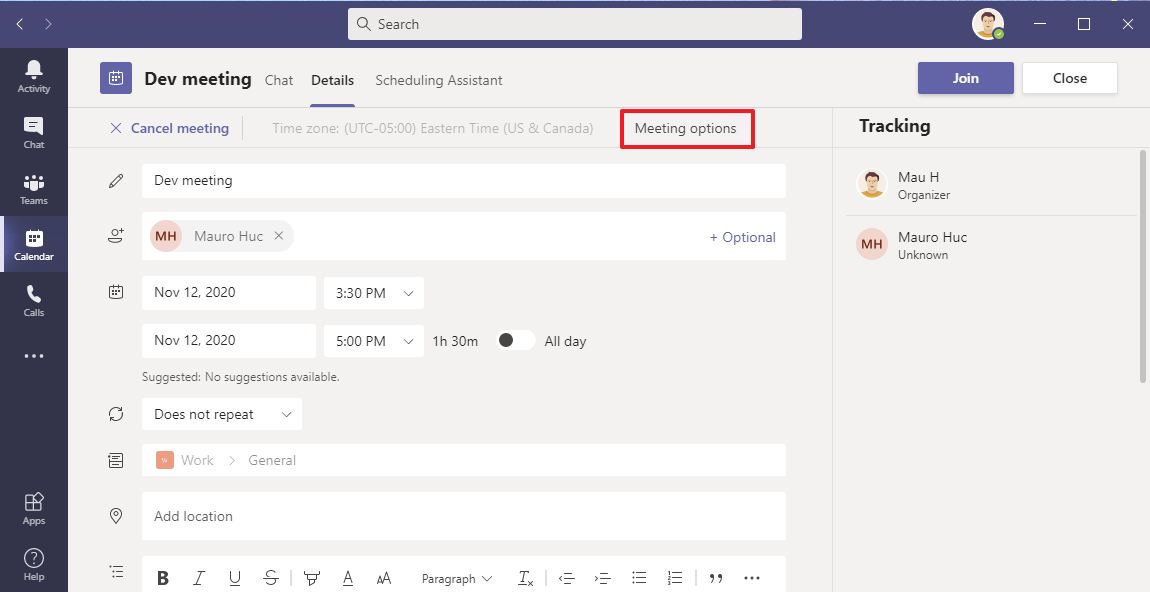
- Select the meeting schedule and click the Edit button.
- Click the Meetings options button from the toolbar (next to the time zone option).Quick note: If you don't have enough permissions, you won't be able to change these settings. If this is the case, you'll need to contact your Teams administrator for assistance.
- Turn off the Allow attendees to unmute toggle switch.
- Click the Save button.
After you complete the steps, participants will not be allowed to use their microphones as they join the meeting, and the option will be grayed out.
If you change your mind, you can always use the same instructions outlined above to disable the option, but on step No. 8, make sure to turn off the toggle switch. In the case that you're already in the meeting, then refer to the unmute during meeting instructions to allow people to use their microphone.

Mauro Huculak has been a Windows How-To Expert contributor for WindowsCentral.com for nearly a decade and has over 22 years of combined experience in IT and technical writing. He holds various professional certifications from Microsoft, Cisco, VMware, and CompTIA and has been recognized as a Microsoft MVP for many years.
