How to get started with the Media Player app on Windows 11 (preview)
The Media Player app brings basic media audio and video playback to Windows 11, and here's how to use it.
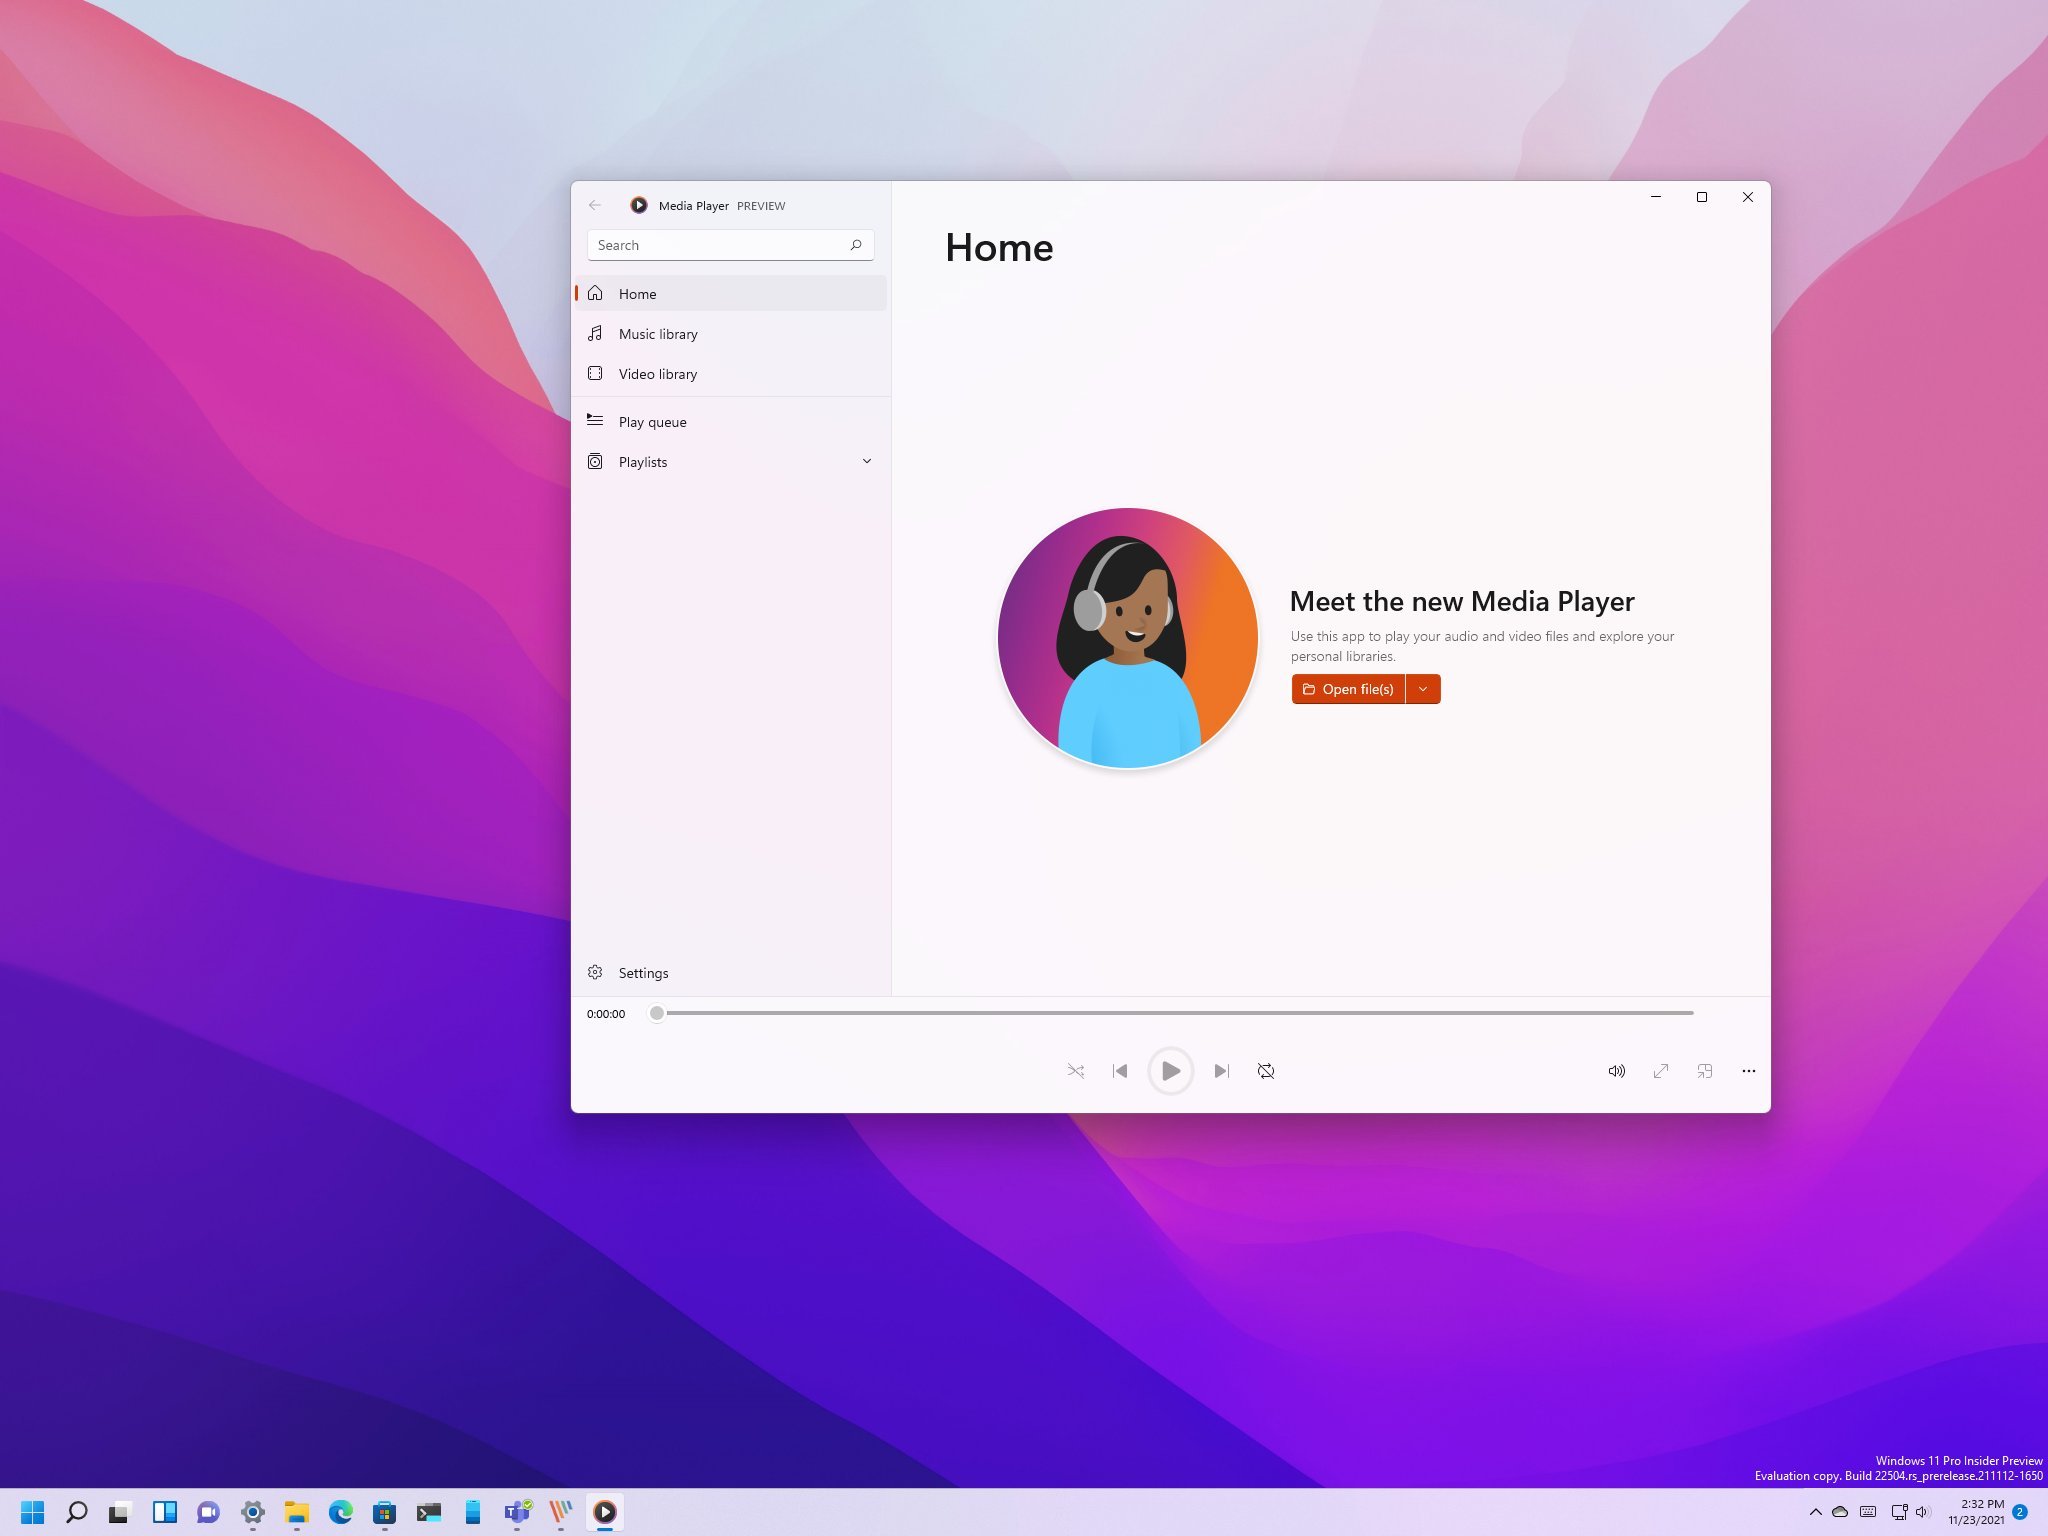
Windows 11 is getting a media player application known simply as "Media Player." The new app features a new interface that matches the new design style with rounded corners and semi-transparent materials.
The Media Player app replaces the Groove Music and the classic Windows Media Player app — even though it'll continue to be available on Windows 11. Although the app includes playback support for both audio and video files, it's a very basic app. Since it does not integrate with any online music or movie streaming services, it only plays media files locally stored on your computer or network share.
The app is straightforward, and by default, it automatically scans and adds all of your folders that include videos and music stored locally. Also, you can create playlists and play standard file formats like .mp3, .mp4, .avi, and .wma, but at the time of this writing, it's unclear all the formats that the final version will support. Furthermore, it can detect and show artist information and album art for all your media content.
Perhaps one of the best features that Microsoft is making available with this new player is the ability to open media stream URLs over the network and internet.
In this Windows 11 guide, we will walk you through everything you need to know to get started with the new Media Player app available in the Dev Channel.
- How to download Media Player app on Windows 11
- How to add locations to Media Player app
- How to use play queue on Media Player app
- How to create playlist on Media Player app
- How to use mini mode on Media Player app
- How to edit track information on Media Player app
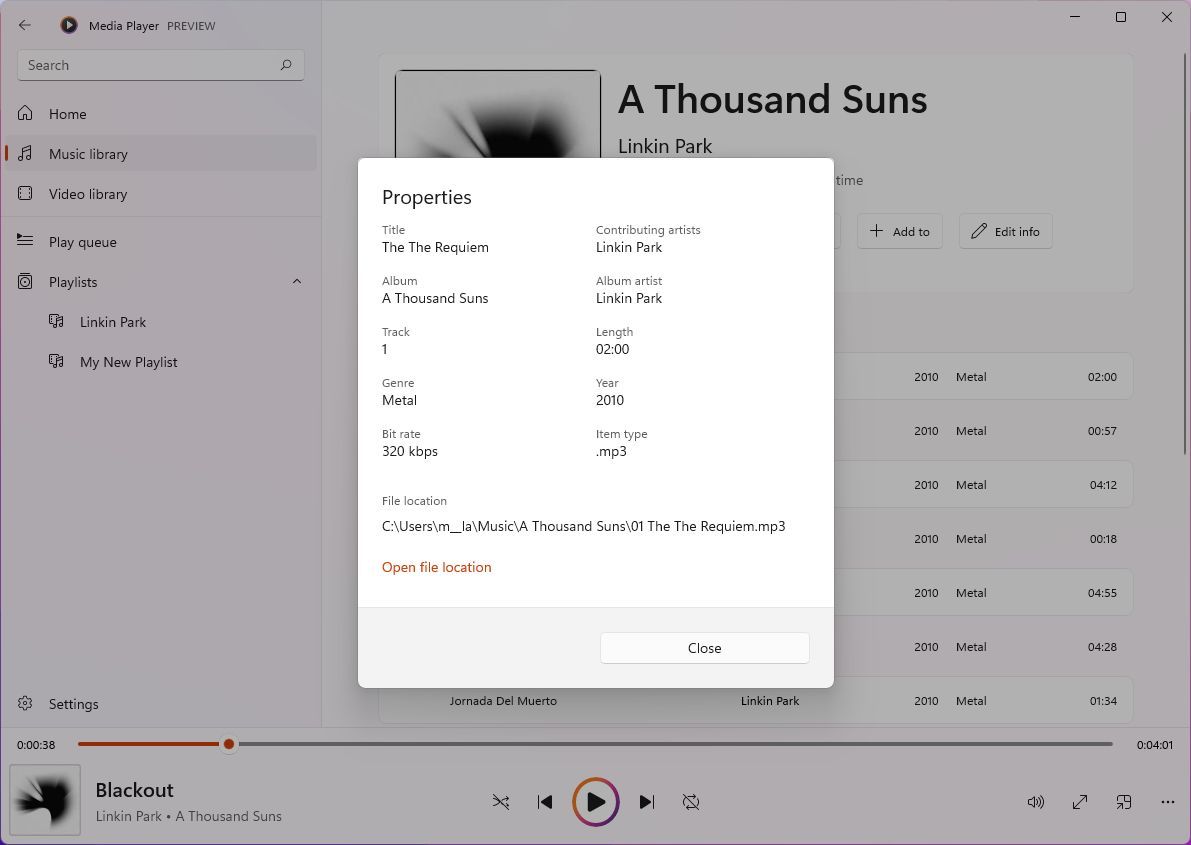
- How to view media file details on Media Player app
- How to use equalizer on Media Player app
- How to control media speed on Media Player app
- How to enable close caption on Media Player app
- How to open URL stream on Media Player app
- How to switch between light and dark theme on Media Player app
How to download Media Player app on Windows 11
The Media Player app is currently available as a preview for devices enrolled in the Dev Channel of the Windows Insider Program. If you want to try the app, the machine must be running Windows 11 build 22504 or higher.
To download and install the Media Player app for Windows 11, use these steps:
All the latest news, reviews, and guides for Windows and Xbox diehards.
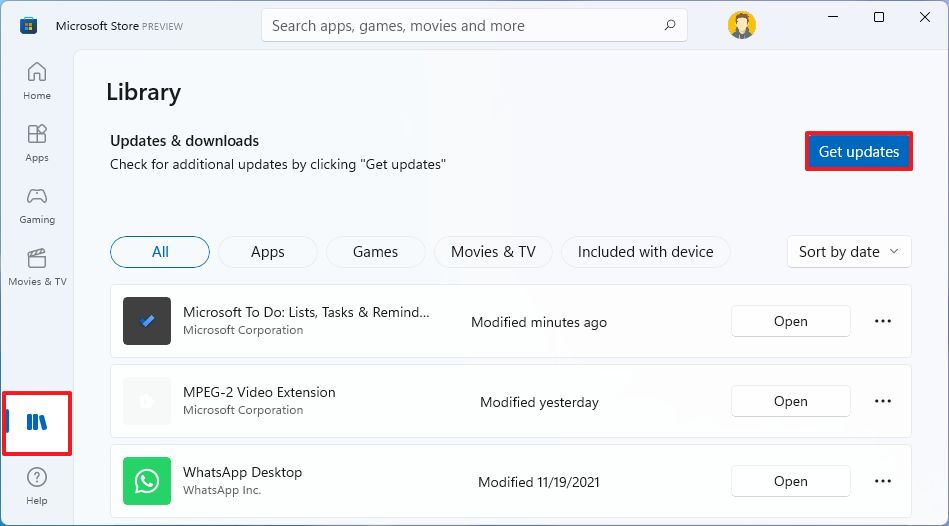
- Open Microsoft Store.
- Click on Library on the bottom-right side.
- Click the Get updates button.
Once you complete the steps, the Media Player app should download and install automatically, replacing the Groove Music app.
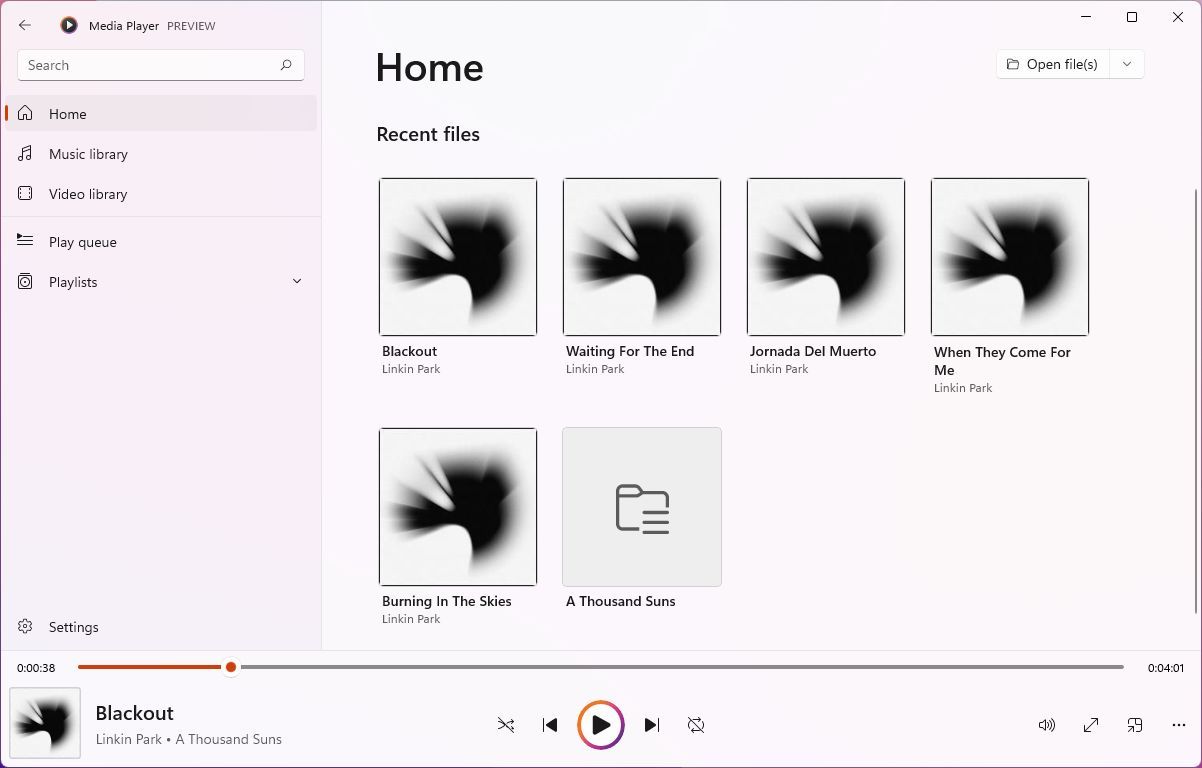
After installing the app, you can start playing your local tracks and videos. On the Home page, you will find all your recently played files and the options to open new files or stream.
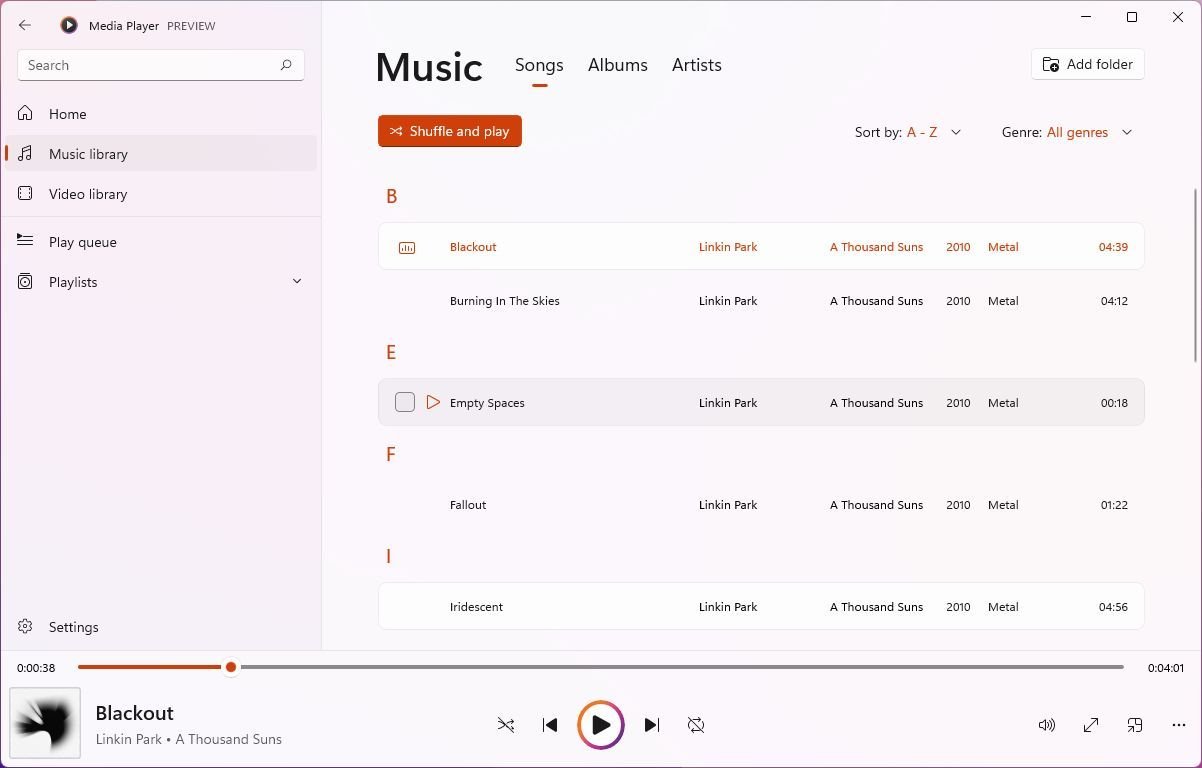
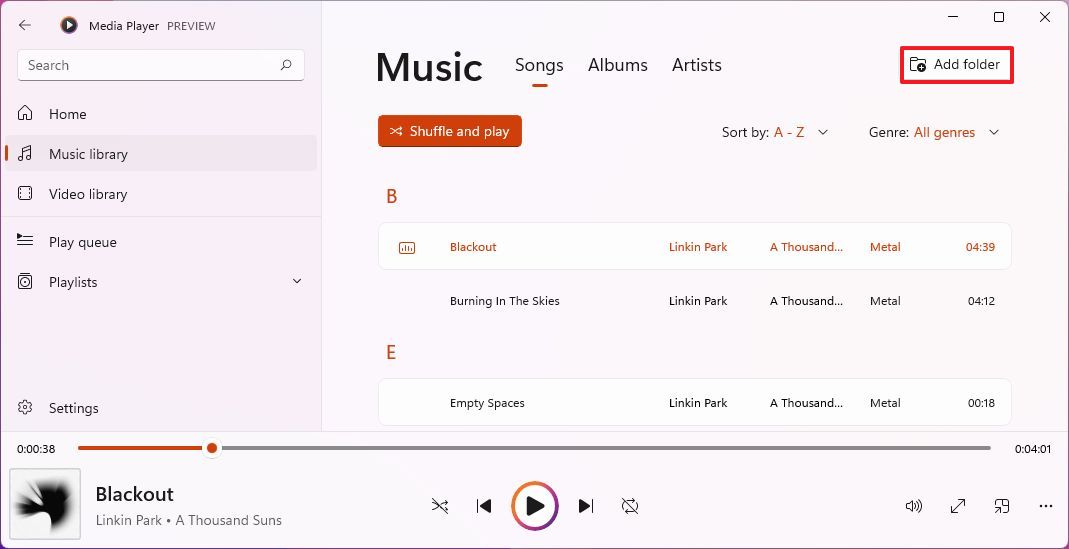
The Music library includes all your songs locally stored on your computer or network shared folder. This page is divided into three tabs, including Songs, Albums, and Artists. You can shuffle the tracks and sort the list in different ways, including alphabetical, genre, and more. Also, when playing a song, clicking the full-screen button will show the artist's art.
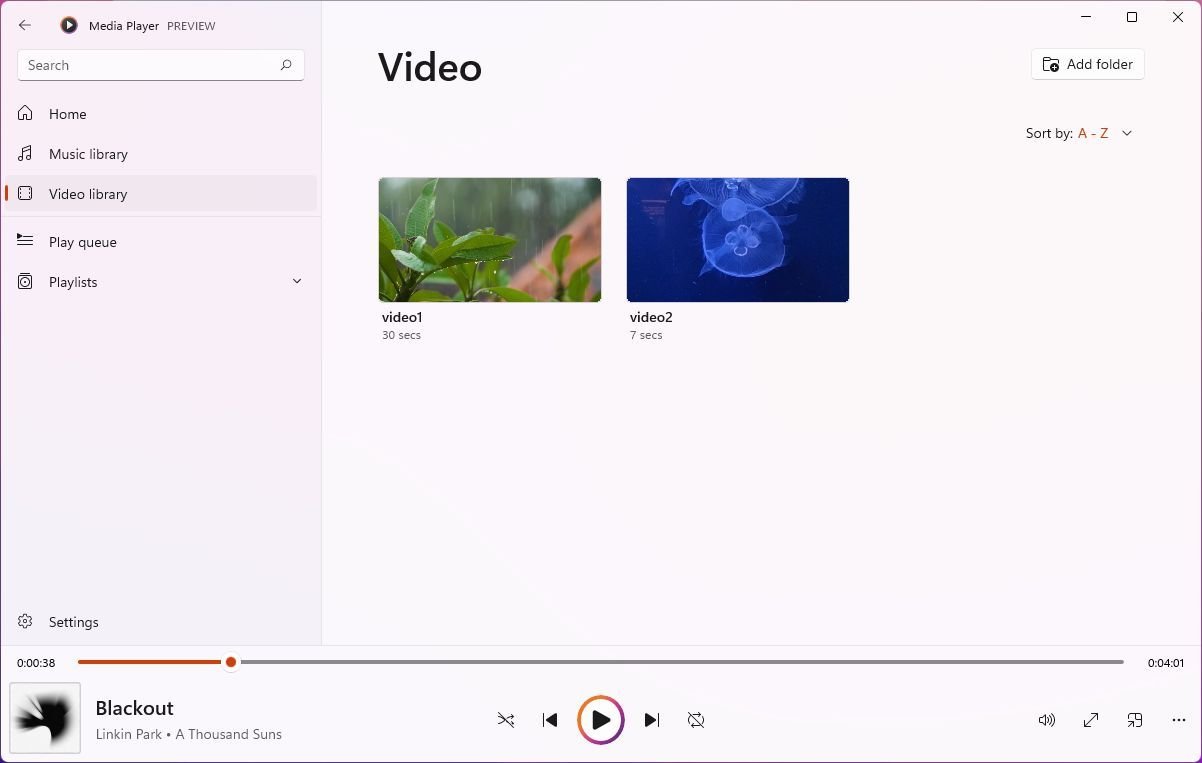
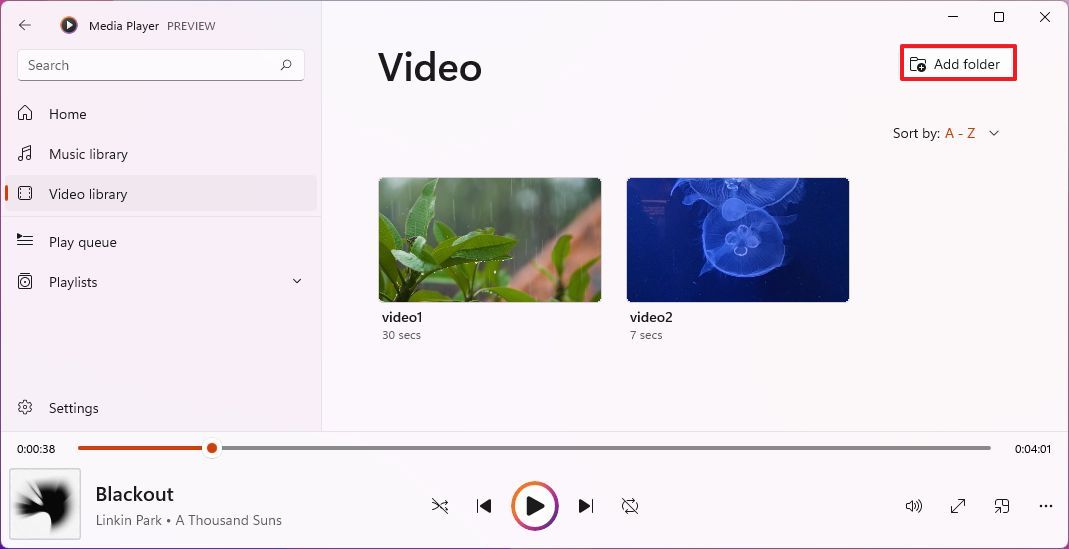
The Video library page is straightforward. It only lists the videos stored on your device or the network.
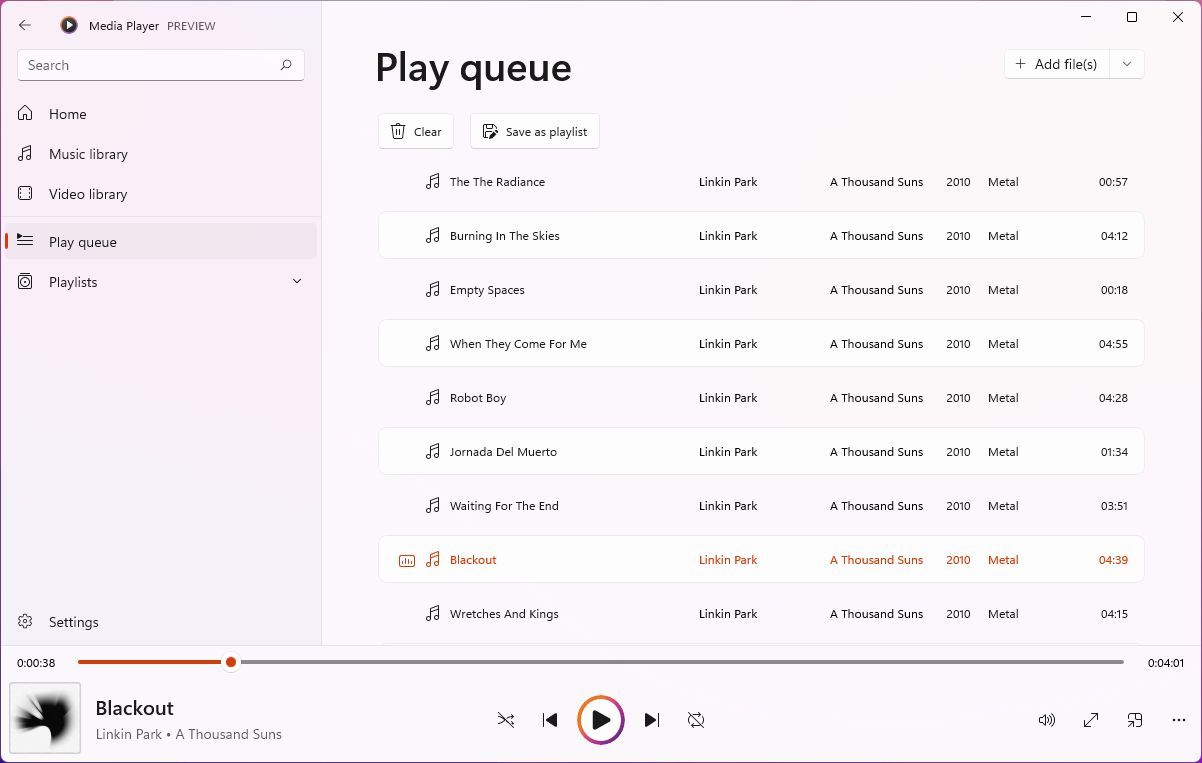
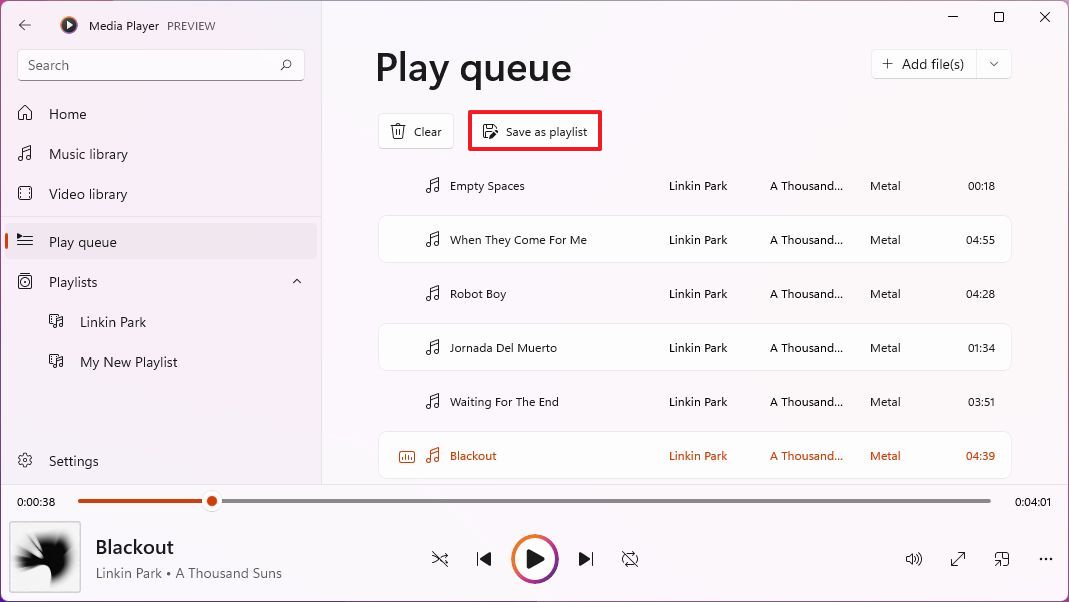
The Play queue page includes a list of the media you want to play, which you can save as a playlist. Also, right-clicking the items will give you the options to move the media file up, down, or remove it from the queue.
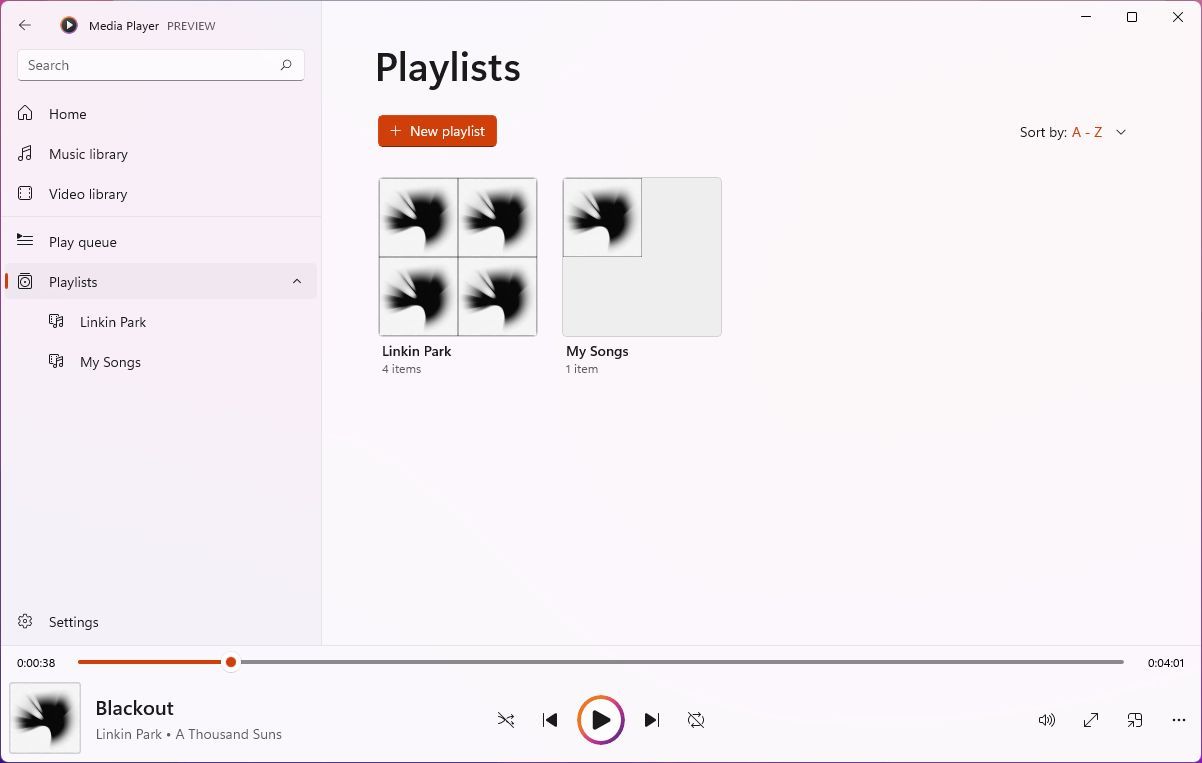
Finally, the Playlists page lets you create, edit, and delete playlists. Also, if you had playlists in the Groove Music app, they will be imported automatically to the new app.
How to add locations to Media Player app
The Media Player app will add the default folders where you store music and videos. However, you can also add additional locations to organize your media files from another drive on the computer or network shared folder.
Add music locations
To add music folder locations, use these steps:
- Open Media Player.
- Click on Music library.
- Click the Add folder button.
- Select the folder location.
- Click the Add this folder to Music button.
Alternatively, the same option can be found in the Settings page.
Add video locations
To add video folder locations, use these steps:
- Open Media Player.
- Click on Video library.
- Click the Add folder button.
- Select the folder location.
- Click the Add this folder to Video button.
After you complete the steps, the new locations will be added, and the app will scan and organize the contents.
How to use play queue on Media Player app
To add new media files to the queue, use these steps:
- Open Media Player.
- Click on Music library.
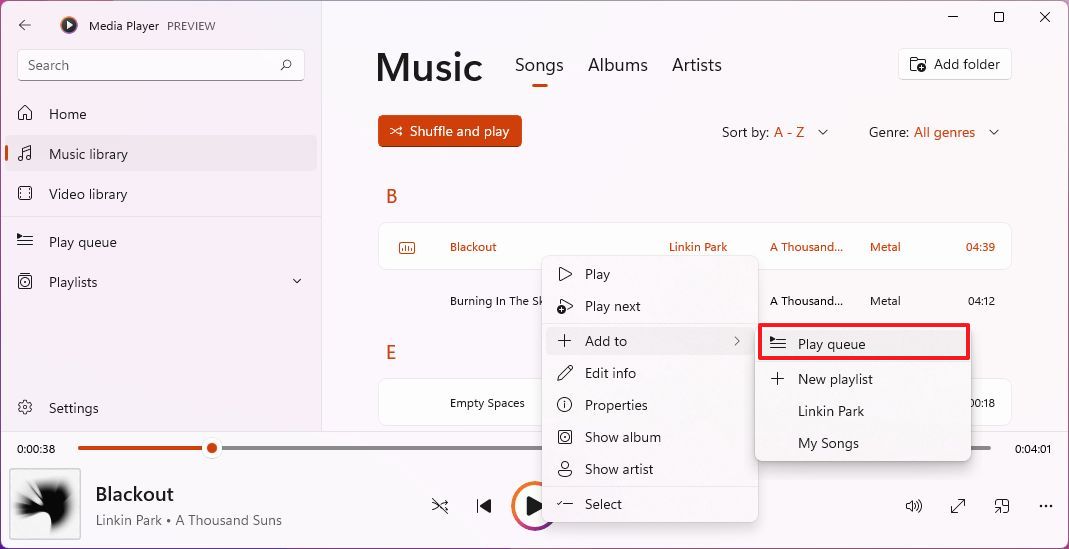
- Right-click the file, select the Add to menu, and choose the Play queue option.
- Click on Video library.
- Right-click the file, select the "Add to" menu, and choose the Play queue option.
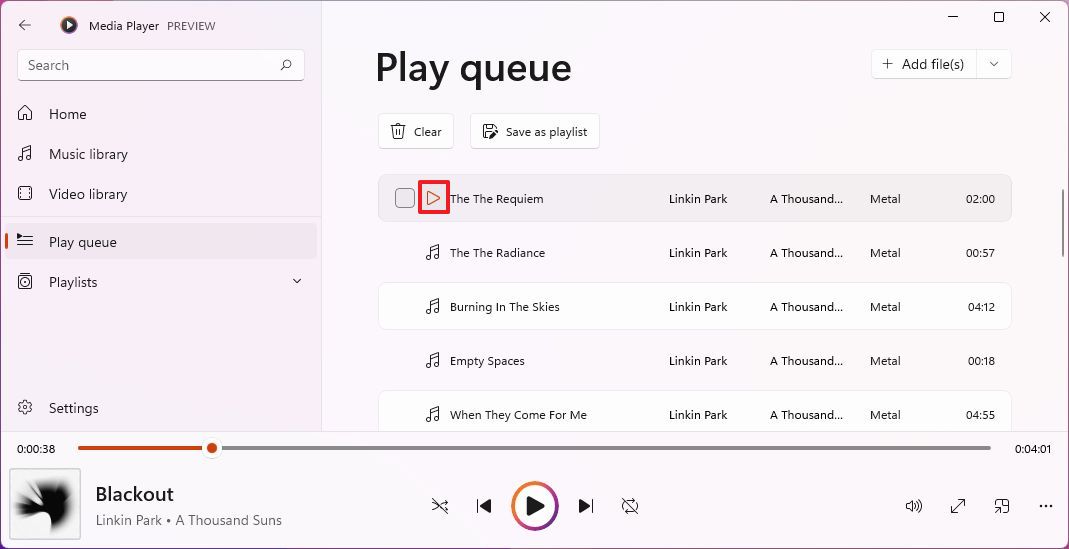
- Click on Play queue.
- Click the Play button to start the queue.
- (Optional) Click the Clear button to start a new queue.
Once you complete the steps, the files will be added to the queue.
How to create playlist on Media Player app
To create a playlist with the Media Player app, use these steps:
- Open Media Player.
- Click on Playlists.
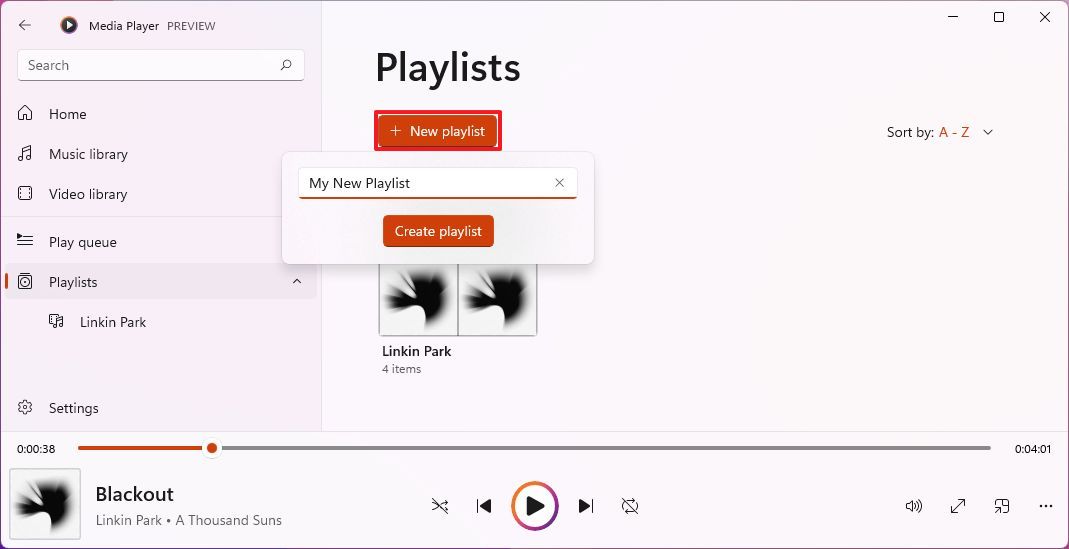
- Click the New playlist button.
- Confirm a name for the playlist.
- Click the Create playlist button.
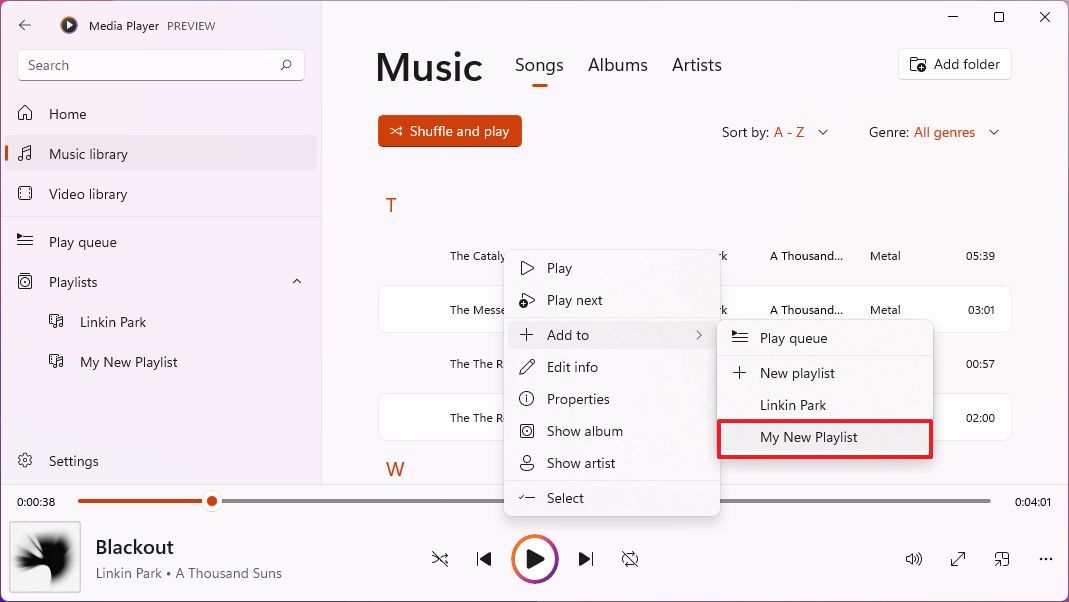
- Click on Music library.
- Right-click the file, select the Add to menu, and choose the playlist.
- Repeat step 7 to add more items to the playlist.
Alternatively, you can also create a playlist of the items available in the Play queue.
From Play queue
To create a playlist from the Play queue, use these steps:
- Open Media Player.
- Click on Music library.
- Right-click the file, select the Add to menu, and choose the Play queue option.
- Repeat step 4 to add more items to the queue.
- Click on Play queue.
- Click the Save as playlist button.
- Confirm a name for the playlist.
- Click the Save button.
After you complete the steps, the playlist will be created.
How to use mini mode on Media Player app
To use the Media Player mini mode to minimize clutter on the desktop, use these steps:
- Open Media Player.
- Click on Music or Video library.
- Play a media file (music or video).
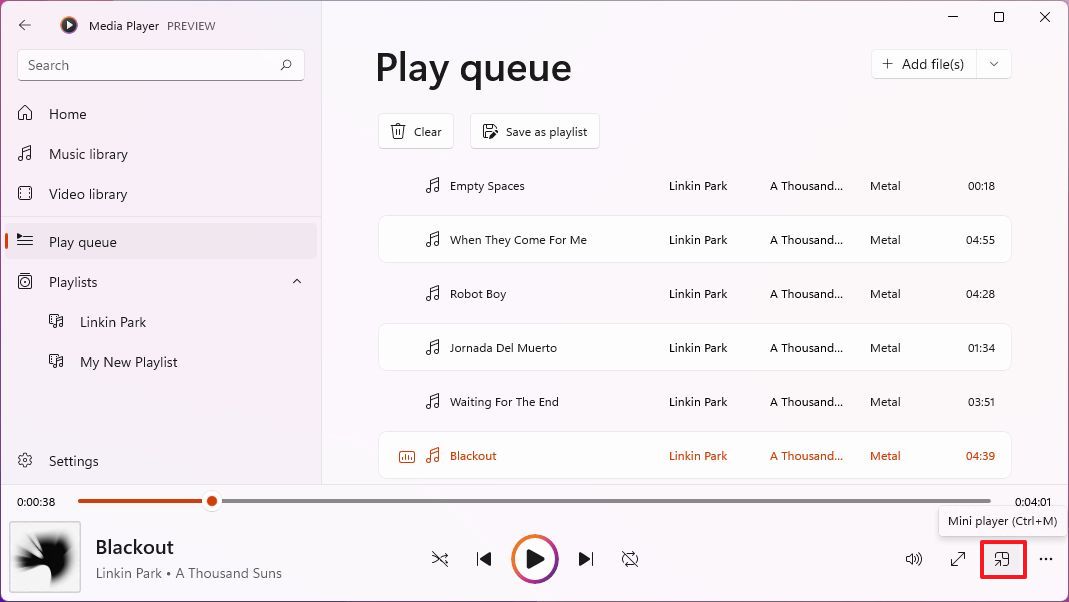
- Click the Mini player button in the bottom-right corner.Quick tip: You can also use the Ctrl + M keyboard shortcut to open the Mini player mode.
- Click the Mini player button again to return to normal mode.
Once you complete the steps, a small version of the interface will be displayed on the screen with the media controls and background image.
How to edit track and album info on Media Player app
To edit the information of a music file or album, use these steps:
- Open Media Player.
- Click on Music library.
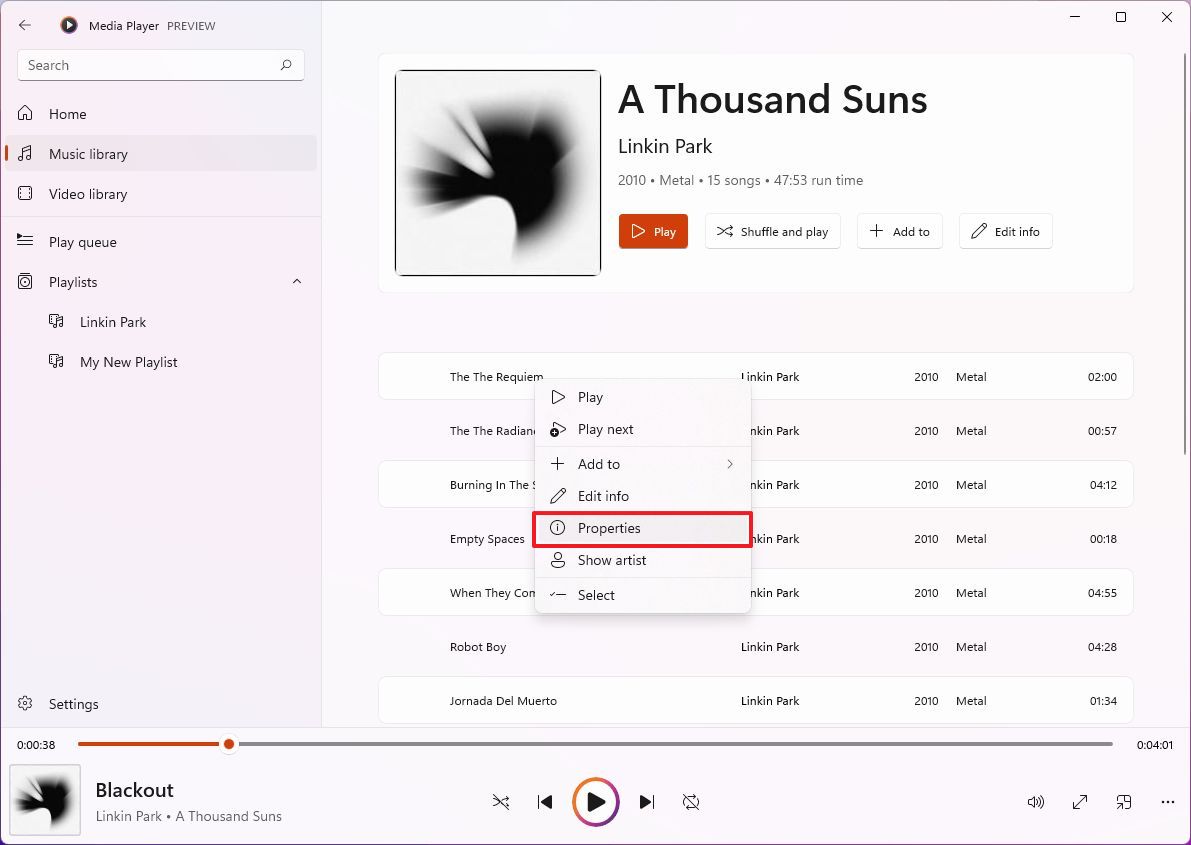
- (Optional) Right-click the song and select the Properties option to view the current information.
- Click the Close button.
- Right-click the song and select the Edit info option.
- Make the necessary edits like song title, track number, artist, year, genre, etc.
- Click the Save button.
- (Optional) Click the Albums tab.
- Open an album.
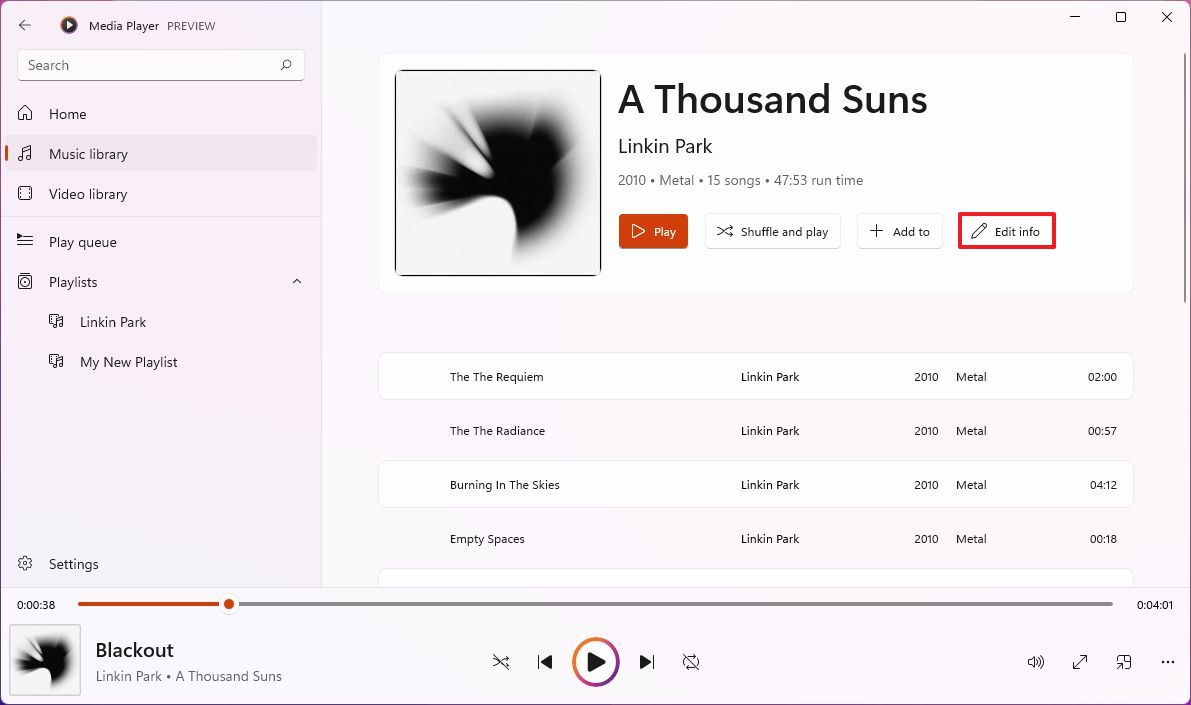
- Click the Edit info button.
- Make the necessary editions to the album, including changing the album name, year, artist, genre, album cover, etc.Quick tip: You can click the Update album info online option to fix the match using the app online database. Select the album to match the songs, and click the Save button.
- Click the Save button.
After you complete the steps, the track will save with the new information you provided.
How to view media file details on Media Player app
To view the media file details, use these steps:
- Open Media Player.
- Click on Music or Video library.
- Right-click the song and select the Properties option to view the media details.
- Review the item information.
- Click the Close button.
Once you complete the steps, you can repeat the instructions to view the information for other files in the libraries.
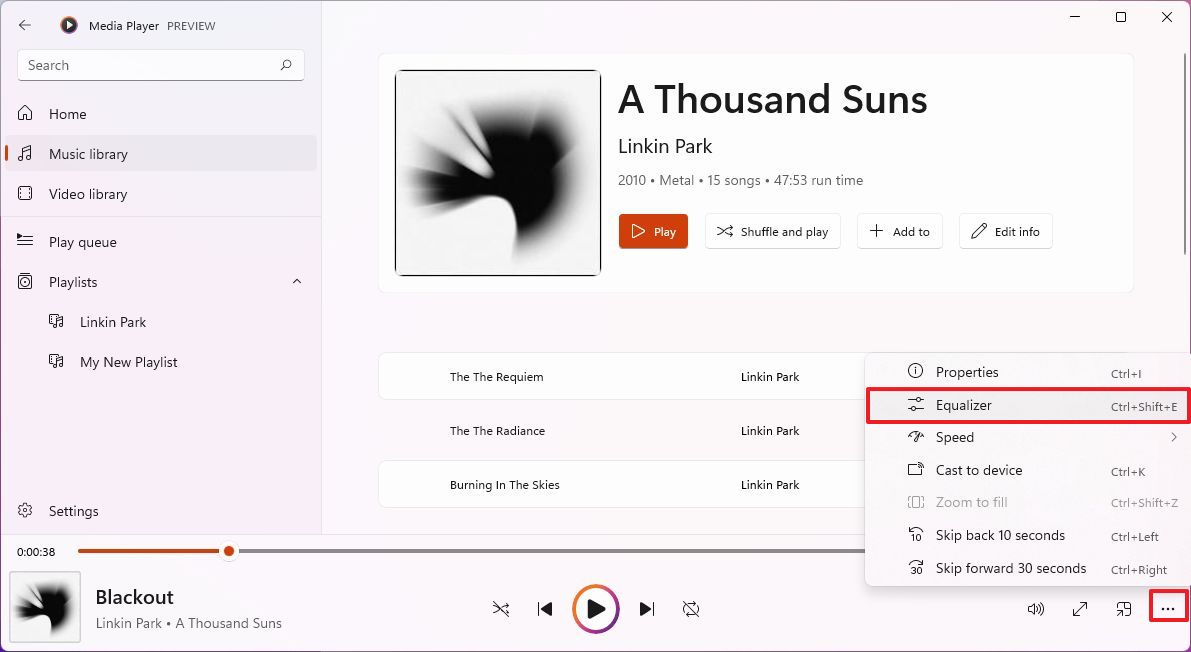
How to use equalizer on Media Player app
To adjust the equalizer for music and videos, use these steps:
- Open Media Player.
- Click on Music or Video library.
- Click the ellipsis (three-dotted) button in the bottom-right corner and select the Equalizer option.Quick tip: You can also use the Ctrl + Shift + E keyboard shortcut to open the Equalizer experience.
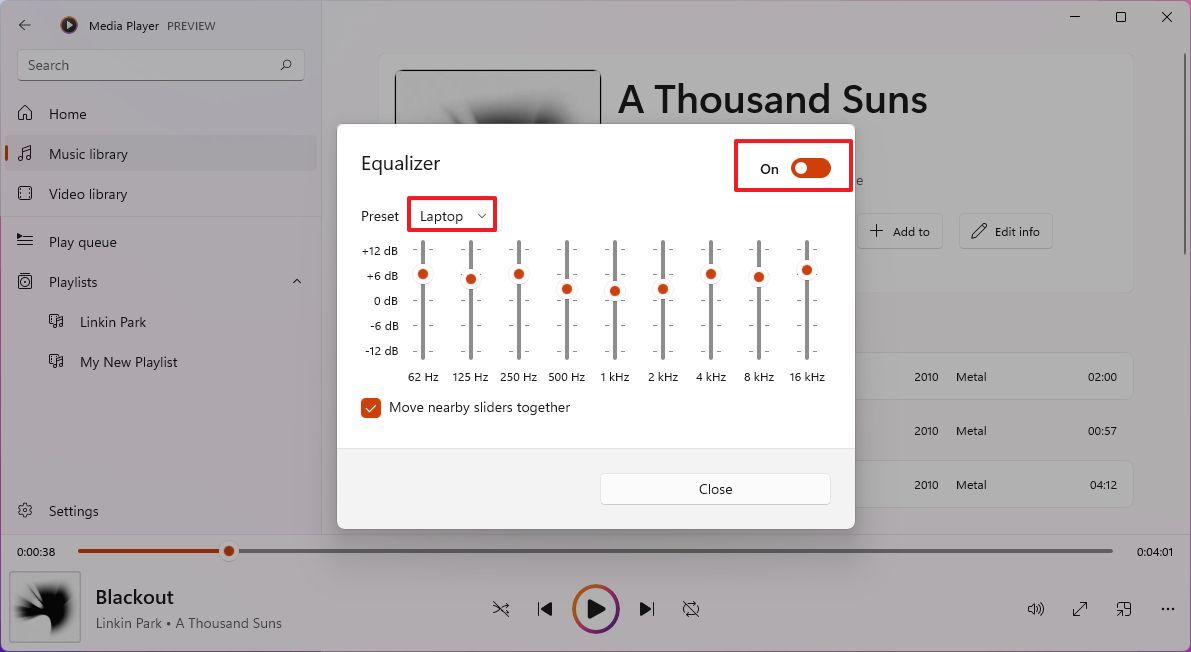
- Turn on the toggle switch to enable the equalizer.
- Use the Preset menu to select from one of the available configurations, including:
- Flat.
- Table boost.
- Bass boost.
- Headphones.
- Laptop.
- Portable speakers.
- Home stereo.
- TV.
- Car.
- Custom.
- Select the Custom option to create a custom preset.
- Use the available options to calibrate the equalizer to your preference.
- Click the Close button.
After you complete the steps, the media file will play with the settings you specified.
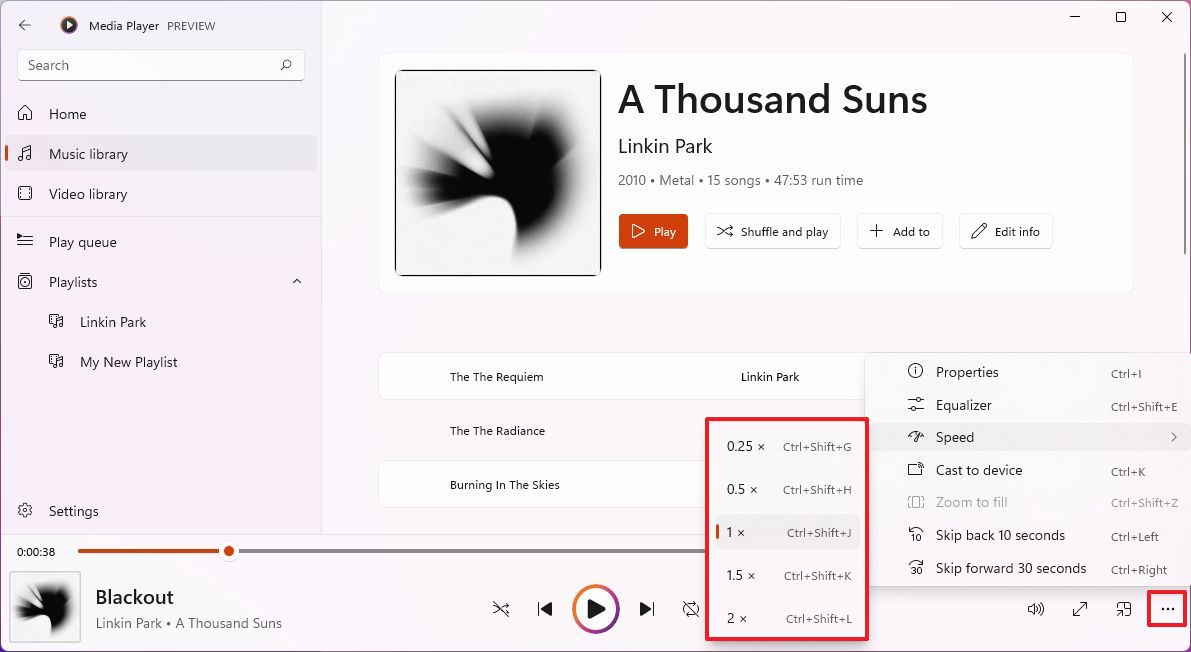
How to control media speed on Media Player app
To control the speed of the media files, use these steps:
- Open Media Player.
- Click on Music or Video library.
- Click the ellipsis (three-dotted) button in the bottom-right corner, select the Speed menu, and choose the speed of the media, including:
- 0.25 x.
- 0.5 x.
- 1 x.
- 1.5 x.
- 2 x.
Once you complete the steps, the content will play at the speed you selected.
How to enable closed captioning on Media Player app
To closed caption for video files, use these steps:
- Open Media Player.
- Click on Video library.
- Play the video file.
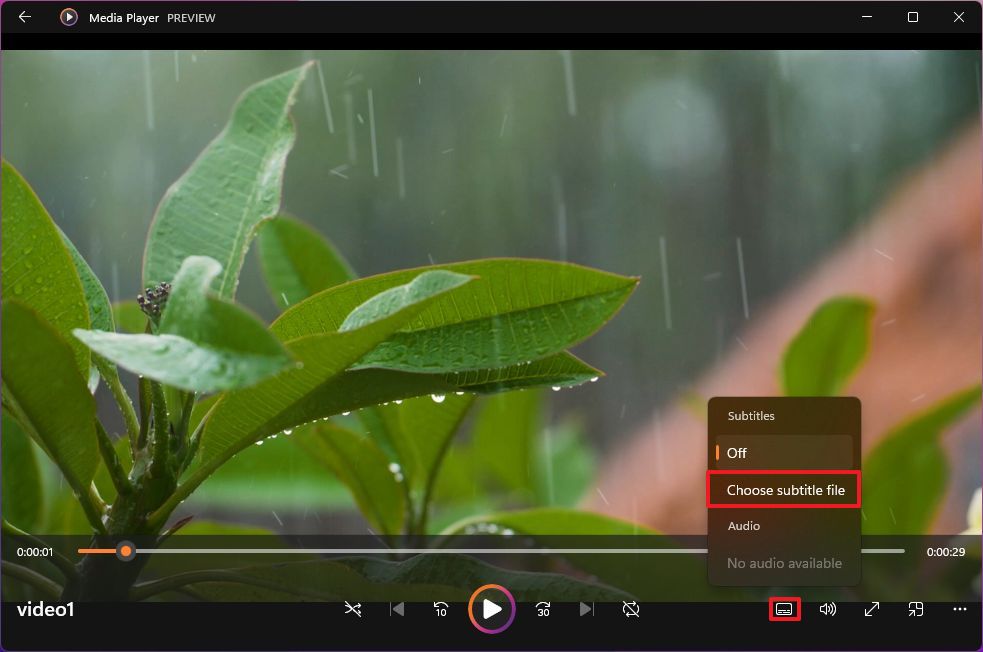
- Click the Languages and subtitles button in the bottom right.
- Select the closed caption option (if available).Quick tip: If you have the subtitles file, select the Choose subtitle file option to open it with the video.
After you complete the steps, the subtitle should appear on the screen.
How to open URL stream on Media Player app
To open remote streams with the Media Player app, use these steps:
- Open Media Player.
- Click on Home.
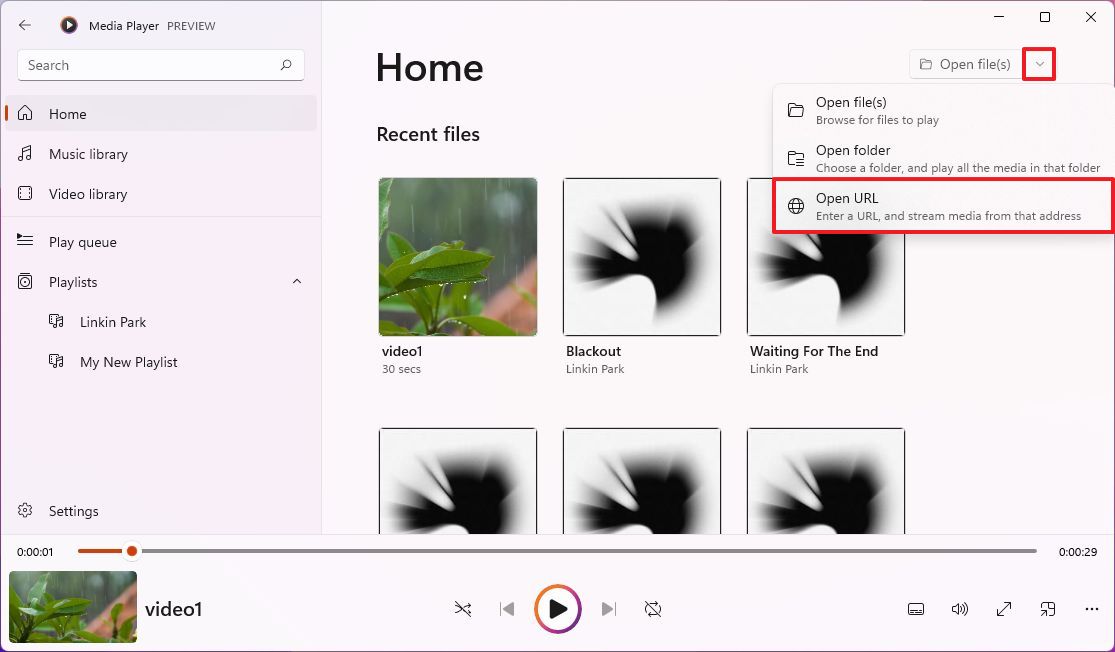
- Click the menu button next to "Open files."
- Select the Open URL option.
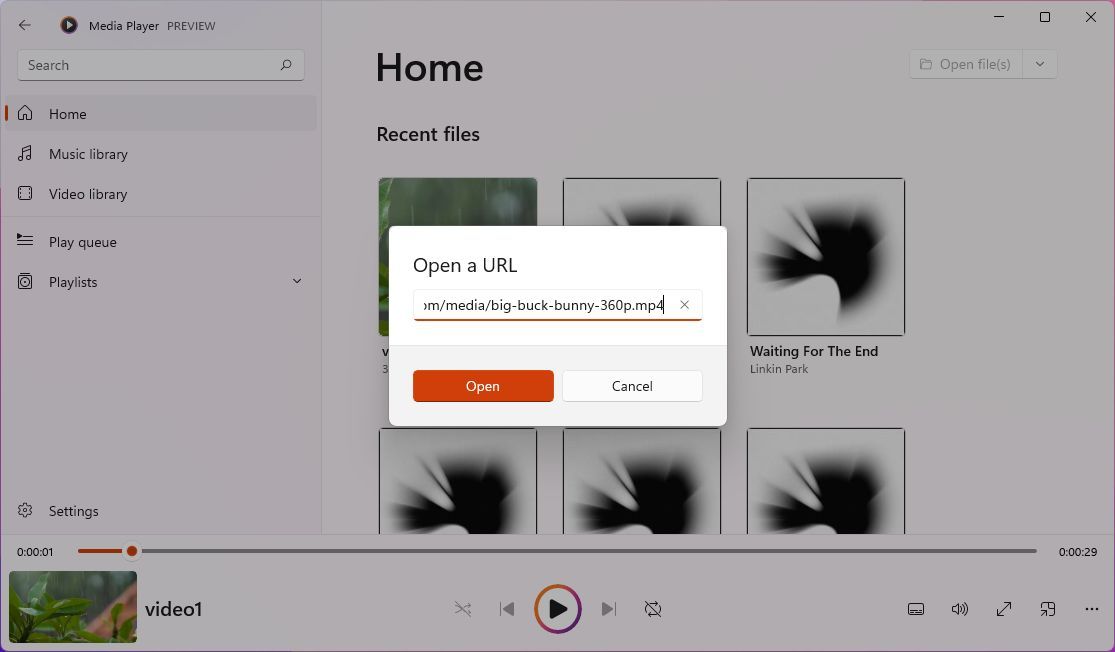
- Confirm the link to the stream, file, or playlist.
- Click the Open button.
Once you complete the steps, the network stream should connect and start playing with the Media Player app.
How to switch between light and dark theme on Media Player app
To use the Media Player app with the light or dark theme, use these steps:
- Open Media Player.
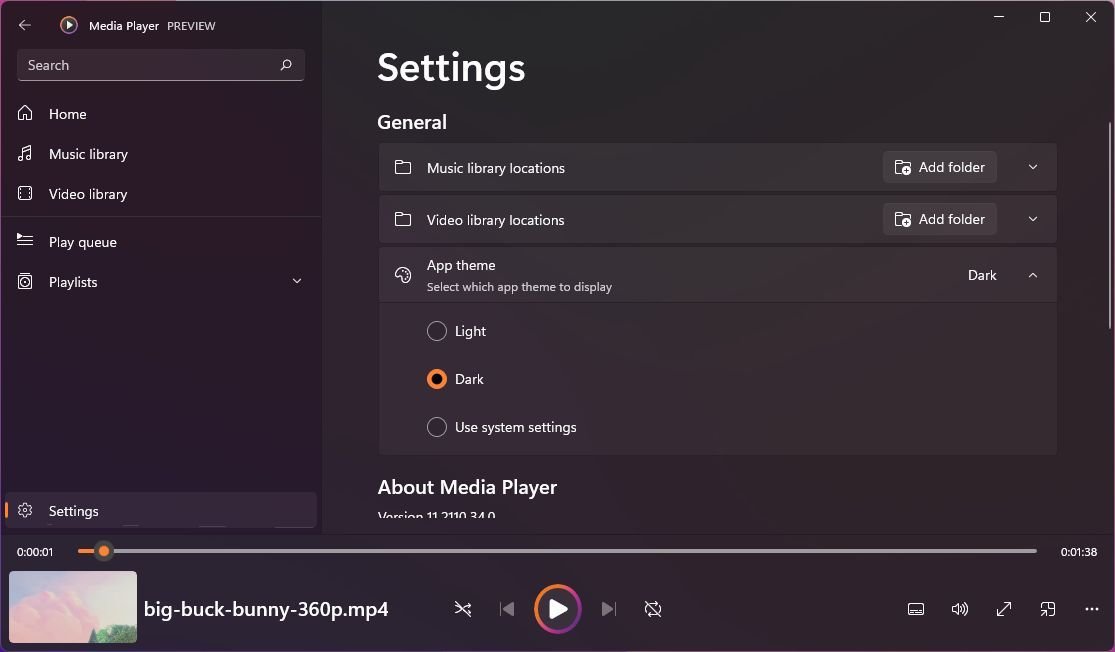
- Click on Settings.
- Click the App theme setting.
- Select one of the available options:
- Light.
- Dark.
- Use system settings.
After you complete the steps, the Media Player will apply the theme color you selected.
More Windows resources
For more helpful articles, coverage, and answers to common questions about Windows 10 and Windows 11, visit the following resources:
- Windows 11 on Windows Central — All you need to know
- Windows 11 help, tips, and tricks
- Windows 10 on Windows Central — All you need to know

Mauro Huculak has been a Windows How-To Expert contributor for WindowsCentral.com for nearly a decade and has over 22 years of combined experience in IT and technical writing. He holds various professional certifications from Microsoft, Cisco, VMware, and CompTIA and has been recognized as a Microsoft MVP for many years.
