How to fix Windows 10's Start menu and search after installing the KB4515384 update
If after installing the September 2019 update the Start menu and search aren't working, you can try this workaround to mitigate the problem until it's fixed.

It happened again.
On September 10, Microsoft began the rollout of the update KB4515384 to devices running the Windows 10 May 2019 Update (version 1903) to address several issues, including the high CPU usage due to a problem with SearchUI.exe service. However, even though processors don't seem to spike anymore, the update now appears to be causing other complications with the Start menu and search functionalities.
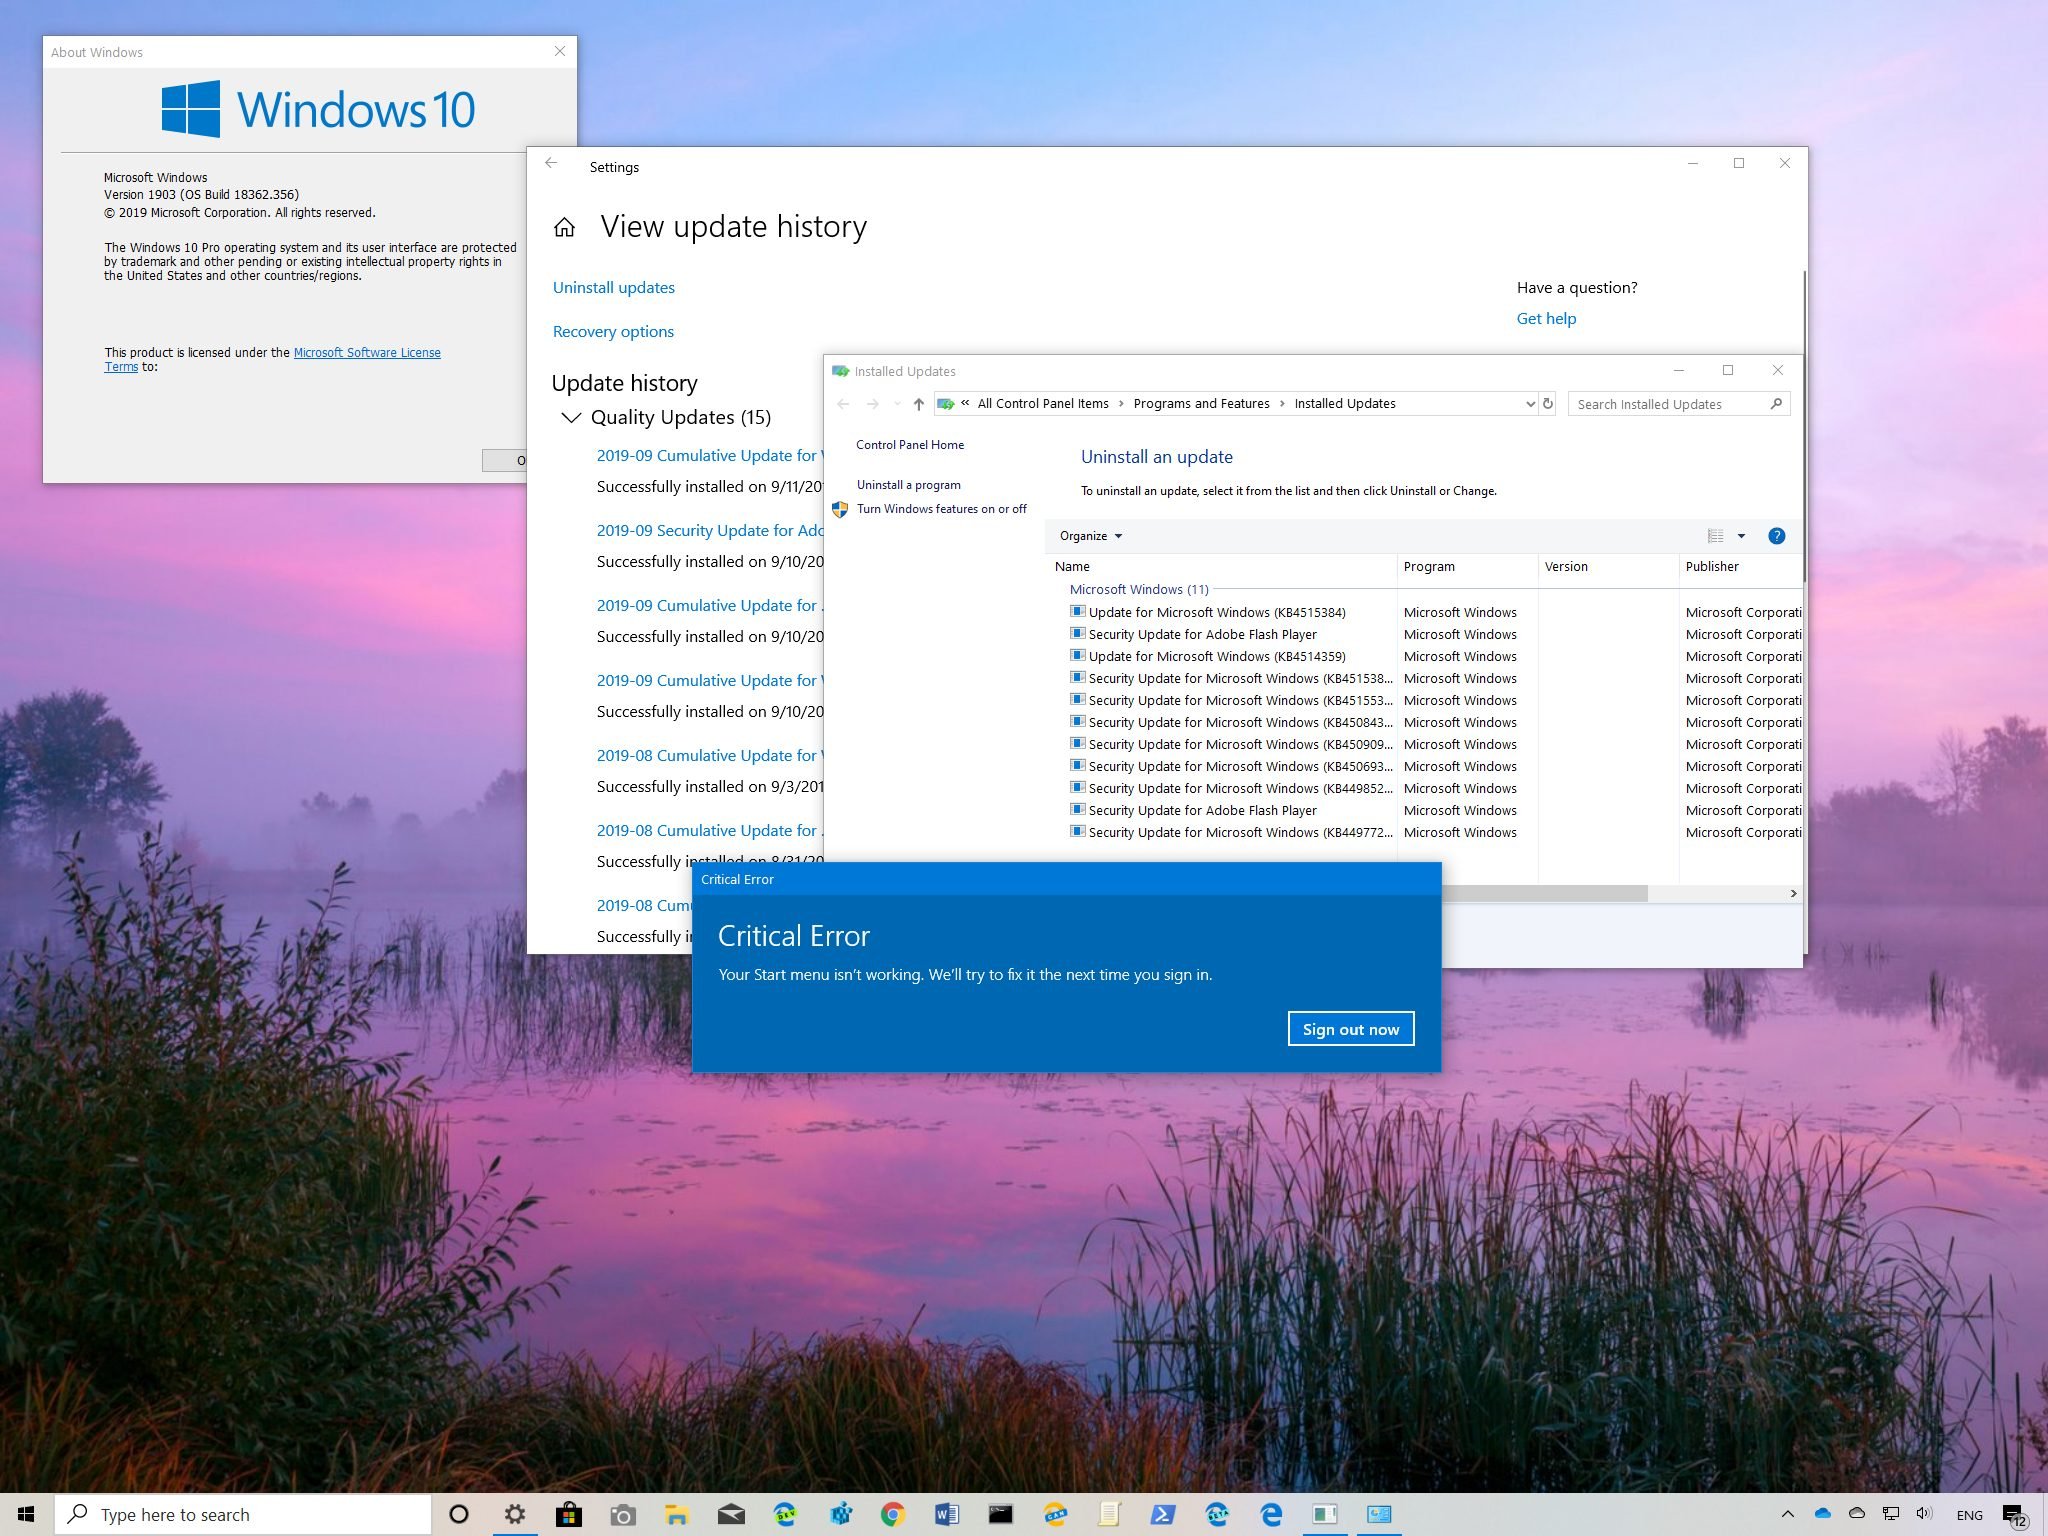
According to several complaints from users seen here, here, and here on Reddit, immediately after installing cumulative update KB4515384 — which bumps the version to build 18362.356 — the patch breaks the Start menu and Windows Search in the taskbar. Some users report that when typing in the Start menu nothing will appear, the menu will not open, or they get a "Critical Error, Your Start menu isn't working. We'll try to fix it the next time you sign in" message.
The new issue only appears to be affecting a select number of devices, and while it may seem to be related to the bug on build 18362.329, this time around enabling the "BingSearchEnabled" Registry key won't resolve the issue. Currently, the more permanent fix is to remove the update and hope the next release fixes it.
In this Windows 10 guide, we walk you through the steps to fix the Start menu and search features after installing build 18362.356.
How to fix Start menu and search by uninstalling update KB4515384
The easiest method to mitigate the issue breaking the Start menu and search on Windows 10 is to remove the update from your computer.
To uninstall update KB4515384 from Windows 10, use these steps:
Get the Windows Central Newsletter
All the latest news, reviews, and guides for Windows and Xbox diehards.
- Open Settings.Quick tip: Because the Start menu and Windows Search will be broken, you'll need to use alternative methods to open the Settings app, including right-clicking the Start button and selecting the Settings option, or using the Windows key + I keyboard shortcut.
- Click on Update & Security.
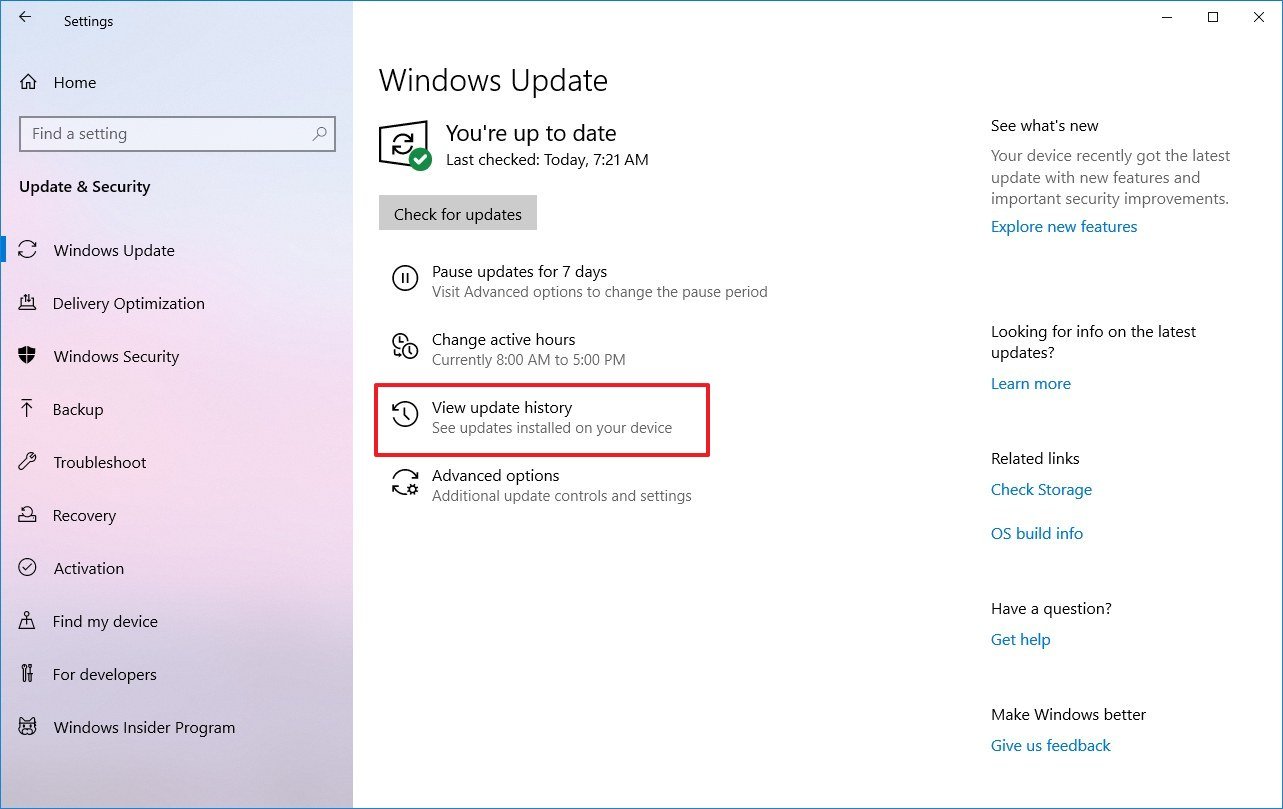
- Click on Windows Update.
- Click the View update history option.

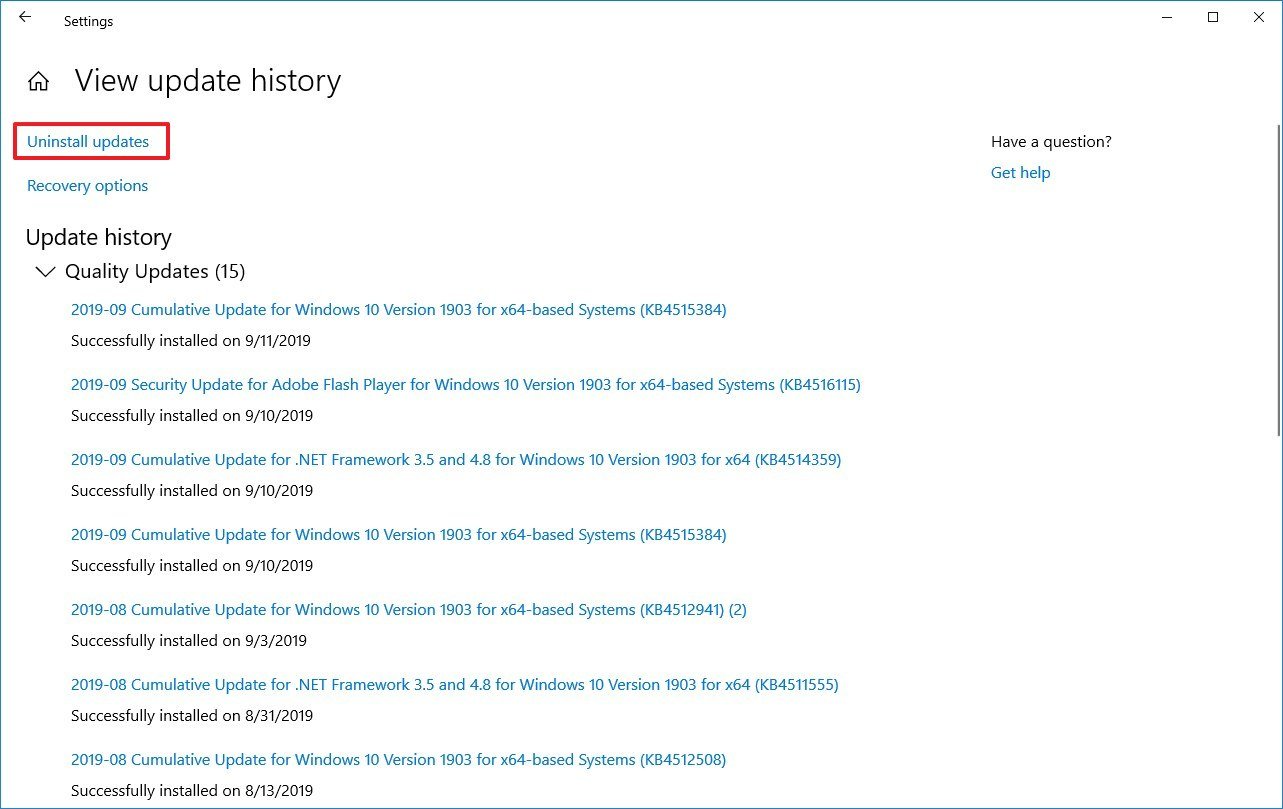
- Click the Uninstall updates option.

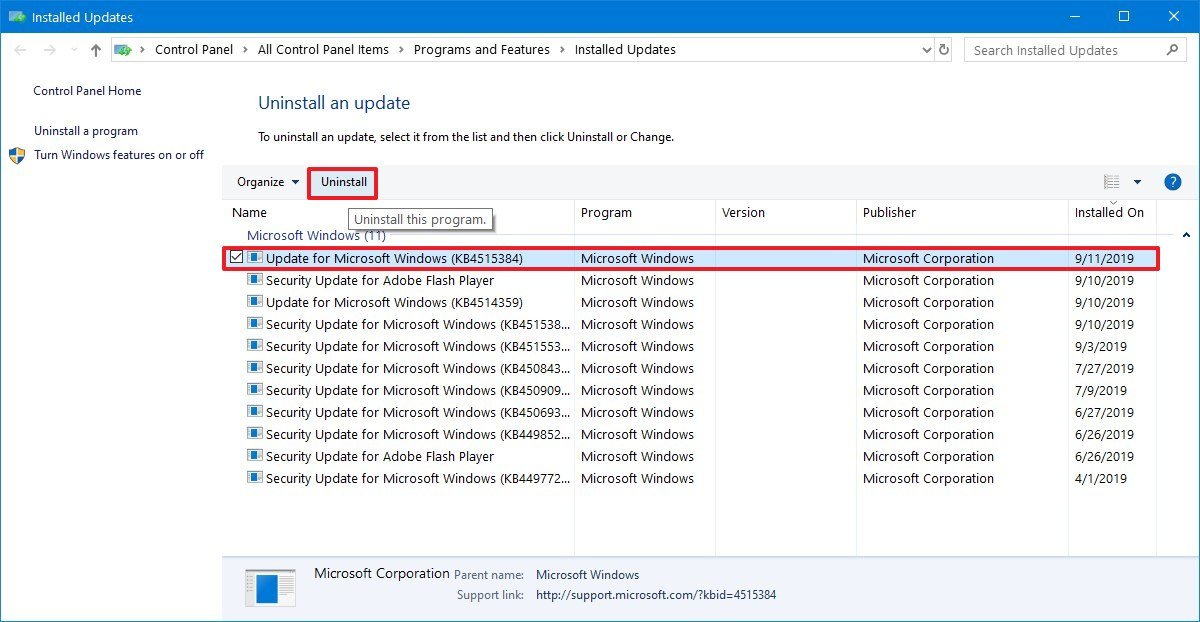
- Select the "Update for Microsoft Windows (KB4515384)" item.
- Click the Uninstall button.

- Click the Yes button.
- Click the Restart Now button.
Once you complete these steps, your laptop or desktop will roll back to the previous build, allowing you to continue using the Start menu and the search functionality.
If after removing KB4515384 your device goes back to build 18362.329, and you continue to have the same issue, make sure to follow the same instructions again, and remove update KB4512941 too, as this update also have similar problems.
Is your device having any related issues after applying Windows 10 update KB4515384? Tell us in the comments.
Mauro Huculak has been a Windows How-To Expert contributor for WindowsCentral.com for nearly a decade and has over 15 years of experience writing comprehensive guides. He also has an IT background and has achieved different professional certifications from Microsoft, Cisco, VMware, and CompTIA. He has been recognized as a Microsoft MVP for many years.

