How to fix your network adapter after installing update KB4515384 on Windows 10
Are you experiencing network connectivity issues after installing update KB4515384? Here's a workaround until there's a permanent fix on Windows 10.
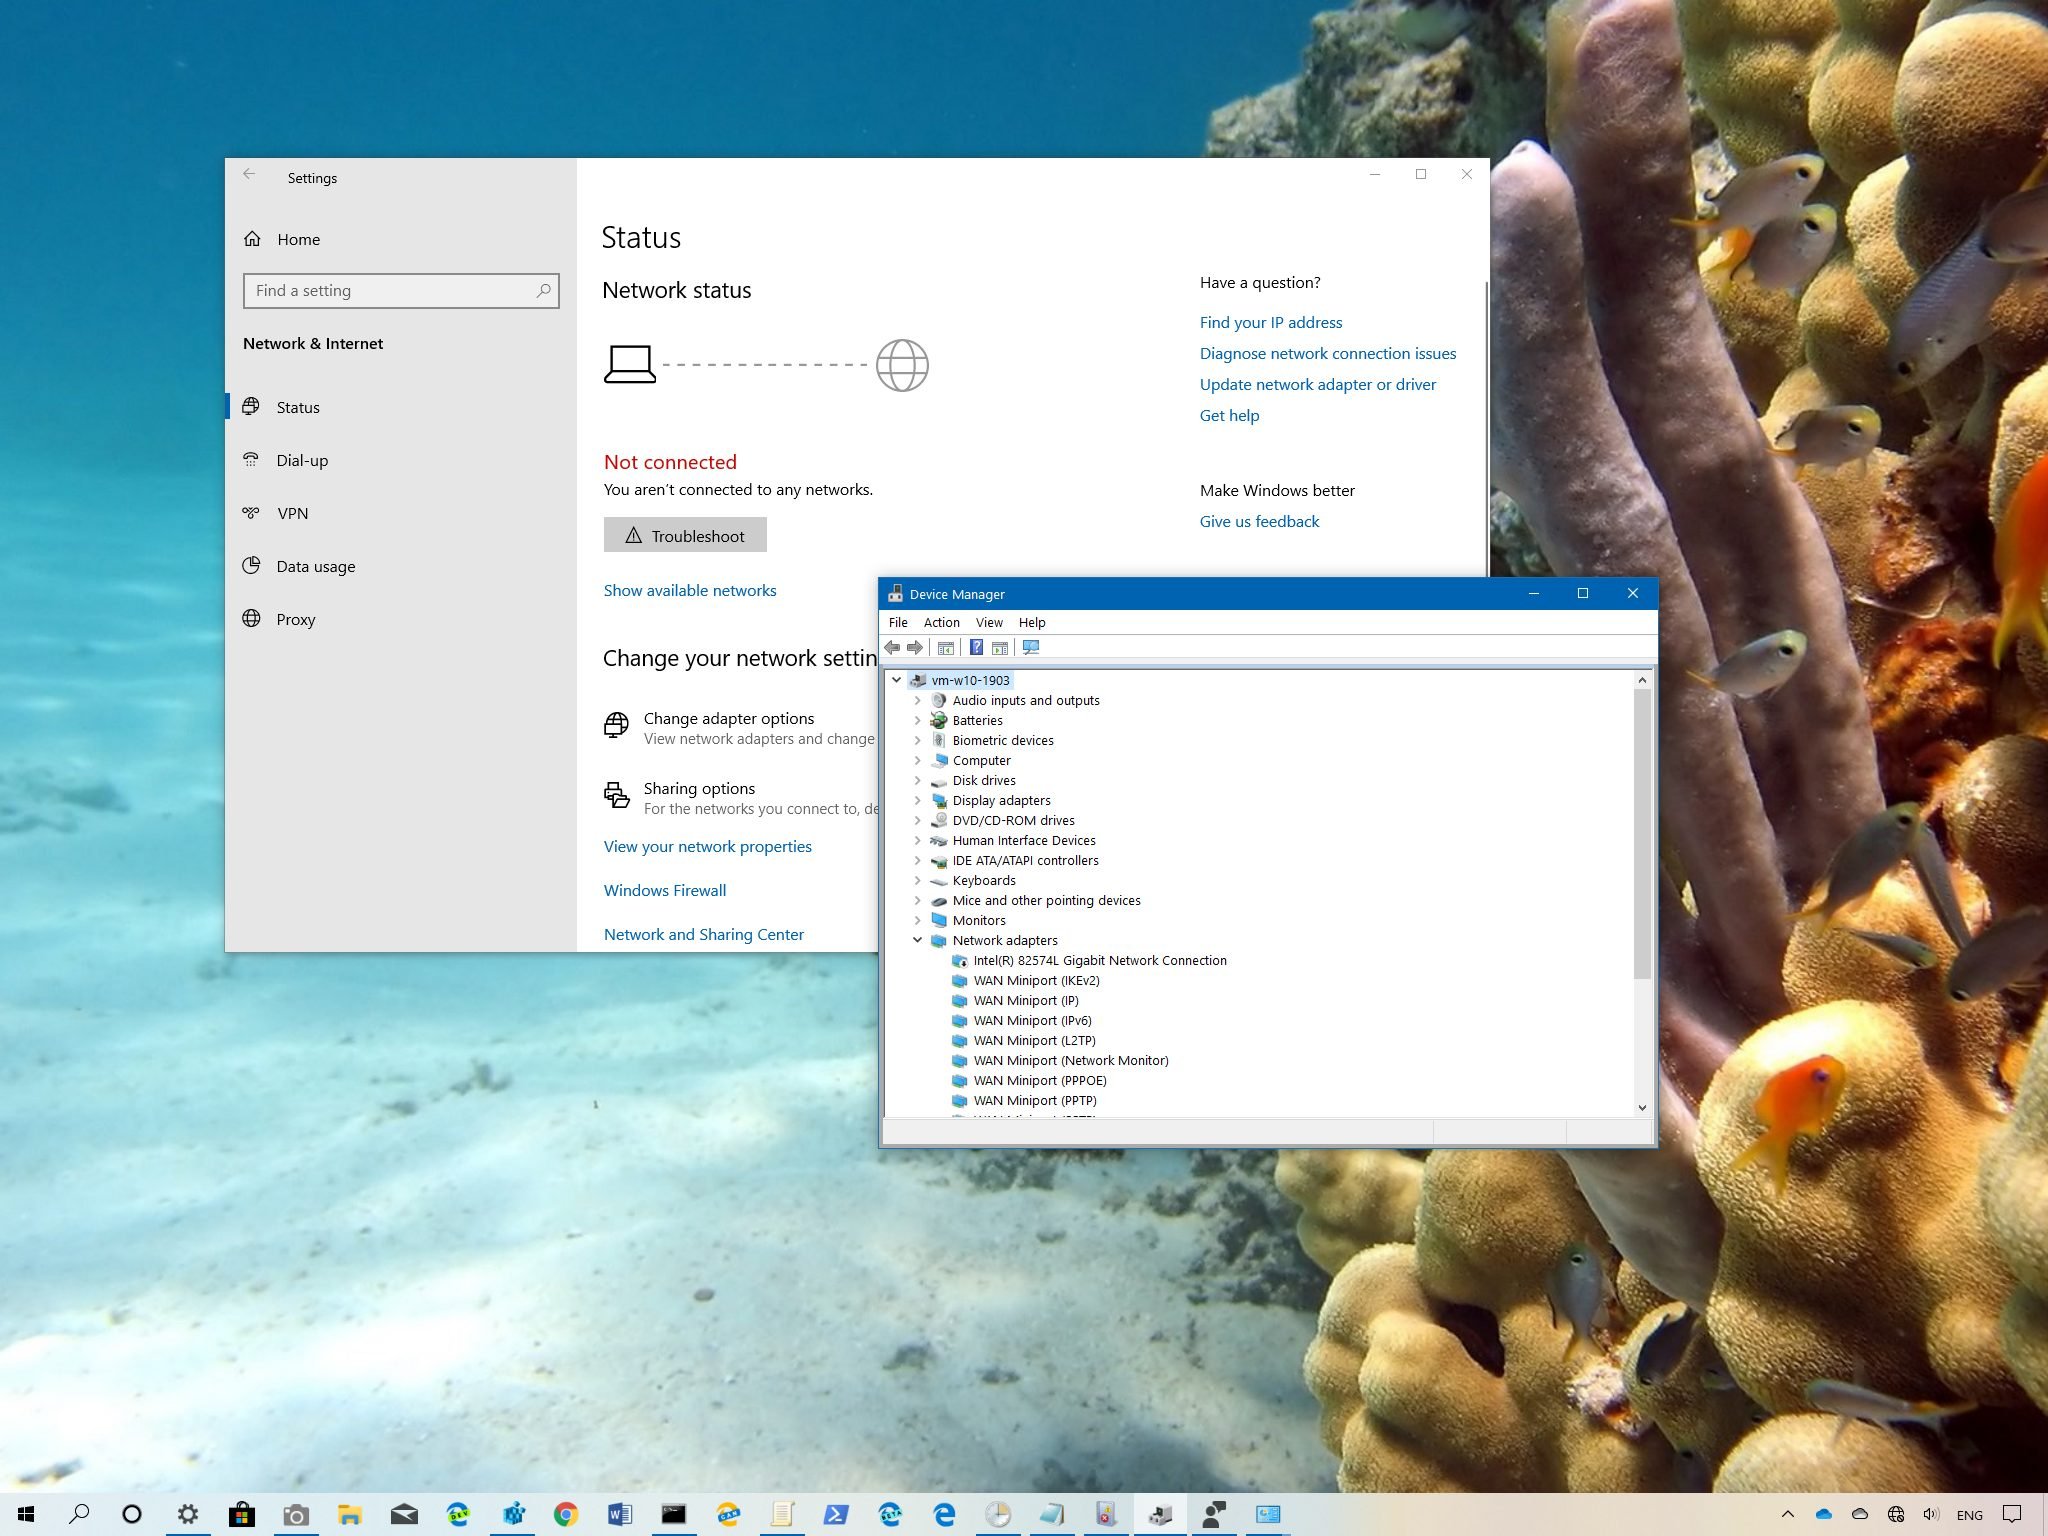
It's becoming clear that Microsoft is having a quality control problem when it comes to updating Windows 10. On September 10, the software giant began the rollout of update KB4515384 for devices running the May 2019 Update (version 1903), and shortly after the release a number of users started reporting problems with the Start menu and search, followed by
According to several reports on Reddit and Microsoft forums (via Neowin), after installing update KB4515384 on Windows 10, some wireless network adapters will stop working, and reinstalling the latest device driver doesn't fix the problem. Microsoft seems to have already acknowledged the issue and explains that the compatibility bug is happening with Intel Centrino 6205/6235 and Broadcom 802.11ac Wi-Fi adapters on specific models of NEC devices.
Although the company hasn't disclosed the update that originated the problem, the timing and symptoms match the issue some users are describing after installing KB4515384. Microsoft is currently working to resolve this issue, but if your device has been affected, you can either try the official workaround or remove the update to mitigate the networking problem.
In this Windows 10 guide, we'll walk you through the steps to fix the network adapter on your device after installing the build 18362.356.
- How to fix Wi-Fi adapter after update KB4515384 using Device Manager
- How to fix Wi-Fi adapter after update KB4515384 using Windows Update
How to fix Wi-Fi adapter after update KB4515384 using Device Manager
To mitigate the network adapter compatibility issue on version 1903, use these steps:
- Open Settings.
- Search for Device Manager and click the top result to open the app.
- Expand the Network Adapters branch.
- Right-click the Intel wireless adapter causing the issue, and select the Disable device option.
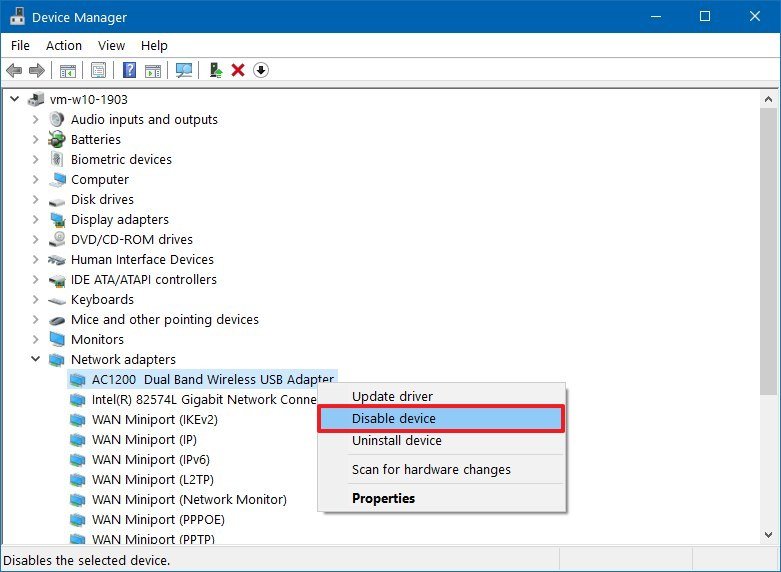
- Click the Yes button.
- Right-click the Intel wireless adapter again, and select the Enable device option.
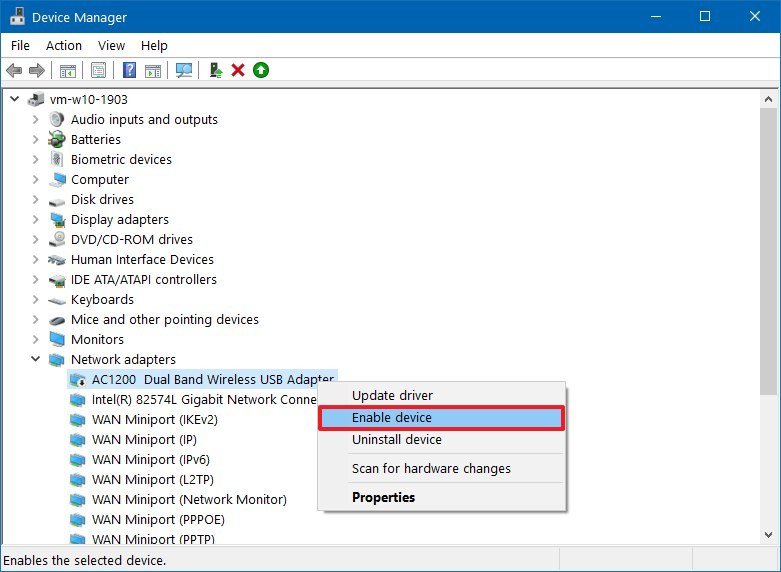
- Restart your computer.
Once you complete the steps, you should be able to connect to the wireless network after the reboot.
How to fix Wi-Fi adapter after update KB4515384 using Windows Update
If you're unable to connect to the network, you can alternatively remove the update until there's a permanent fix.
Get the Windows Central Newsletter
All the latest news, reviews, and guides for Windows and Xbox diehards.
To uninstall Windows 10 update KB4515384 to fix network adapter, use these steps:
- Open Settings.
- Click on Update & Security.
- Click on Windows Update.
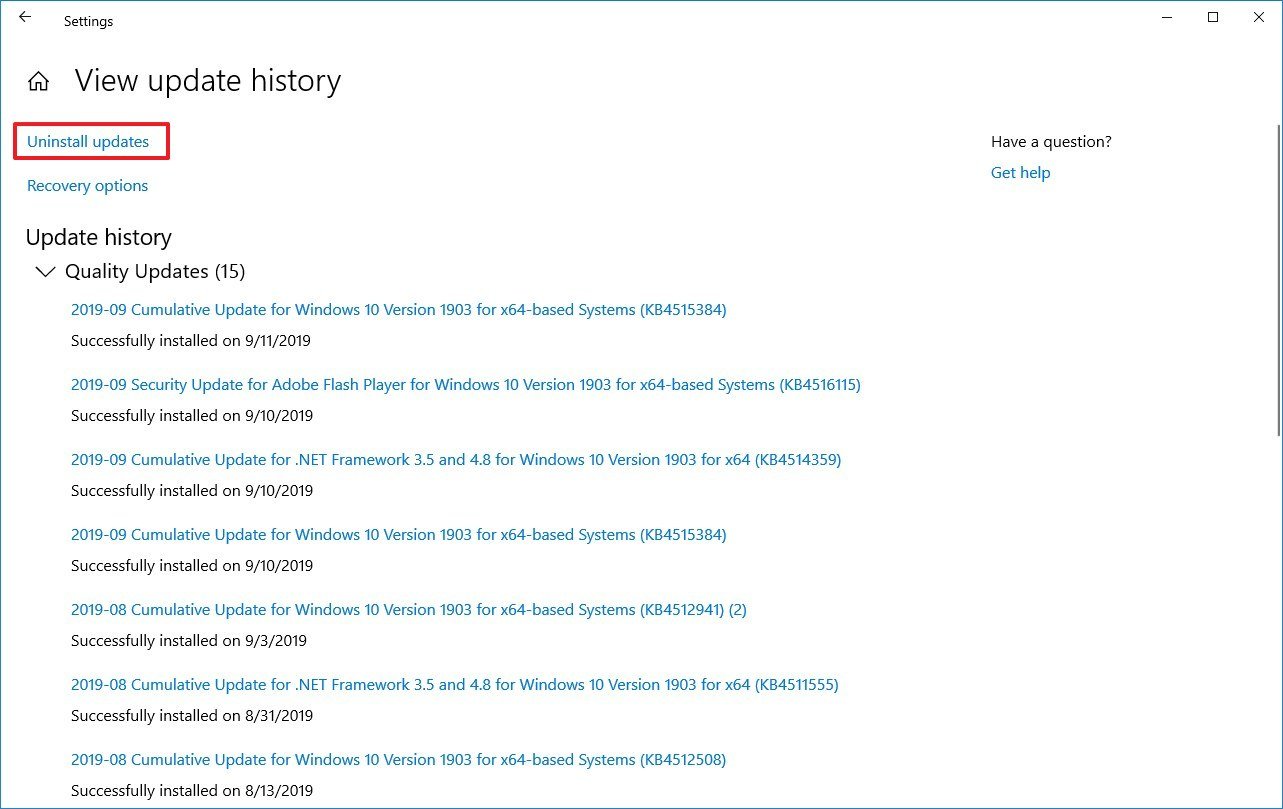
- Click the View update history option.
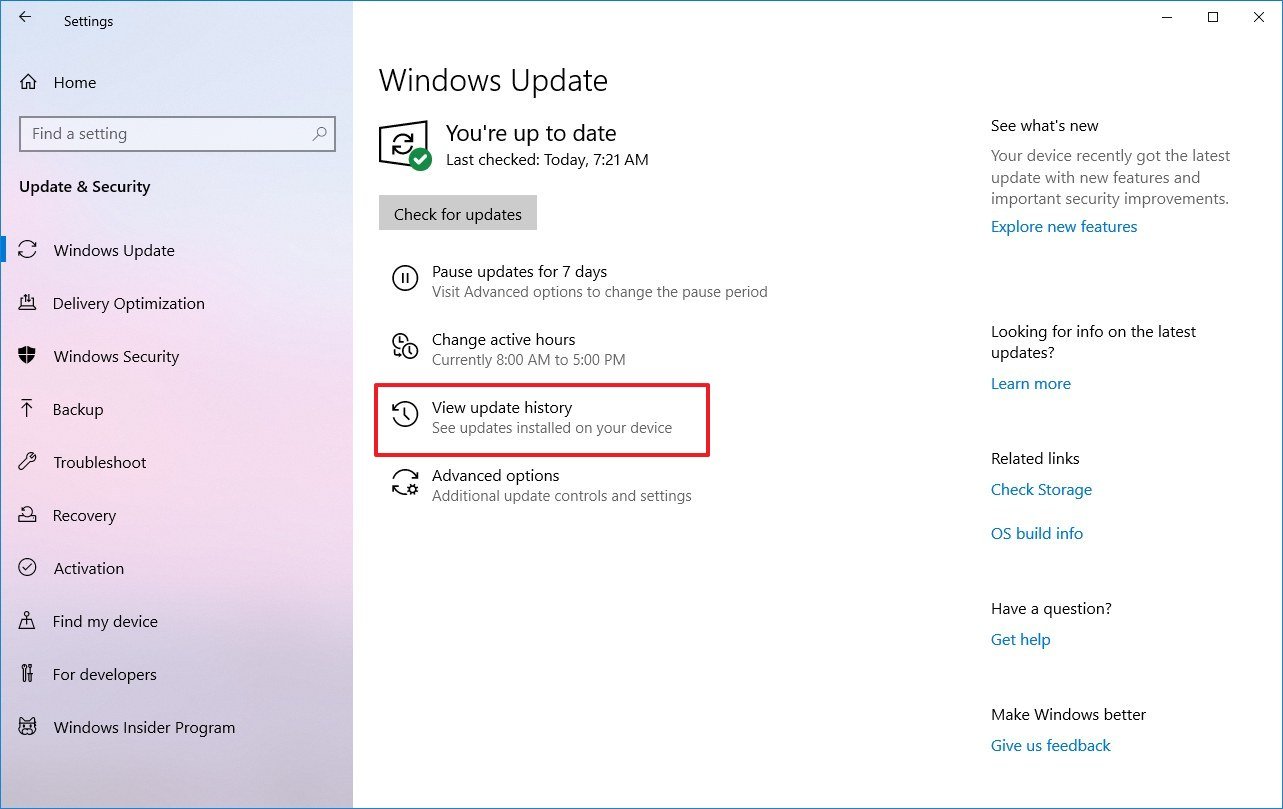
- Click the Uninstall updates option.
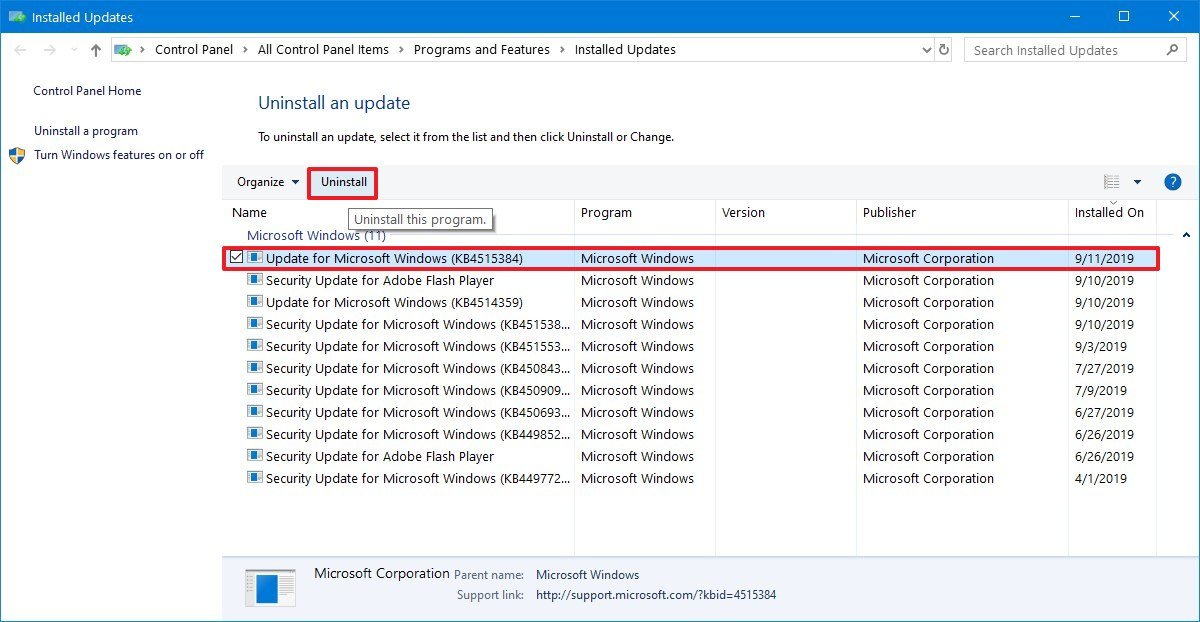
- Select the "Update for Microsoft Windows (KB4515384)" item.
- Click the Uninstall button.
- Click the Yes button.
- Click the Restart Now button.
After you complete the steps, your device should once again connect to the wireless network.
Mauro Huculak has been a Windows How-To Expert contributor for WindowsCentral.com for nearly a decade and has over 15 years of experience writing comprehensive guides. He also has an IT background and has achieved different professional certifications from Microsoft, Cisco, VMware, and CompTIA. He has been recognized as a Microsoft MVP for many years.

