How to fix mapped network drive problems on Windows 10 October 2018 Update
If you're having mapped network drive issues after the October 2018 Update, you're not the only one. Here's what you can do until Microsoft releases a permanent fix next year.
Just when you thought the mess with the Windows 10 October 2018 Update (version 1809) was over, bugs are still a headache for many users.
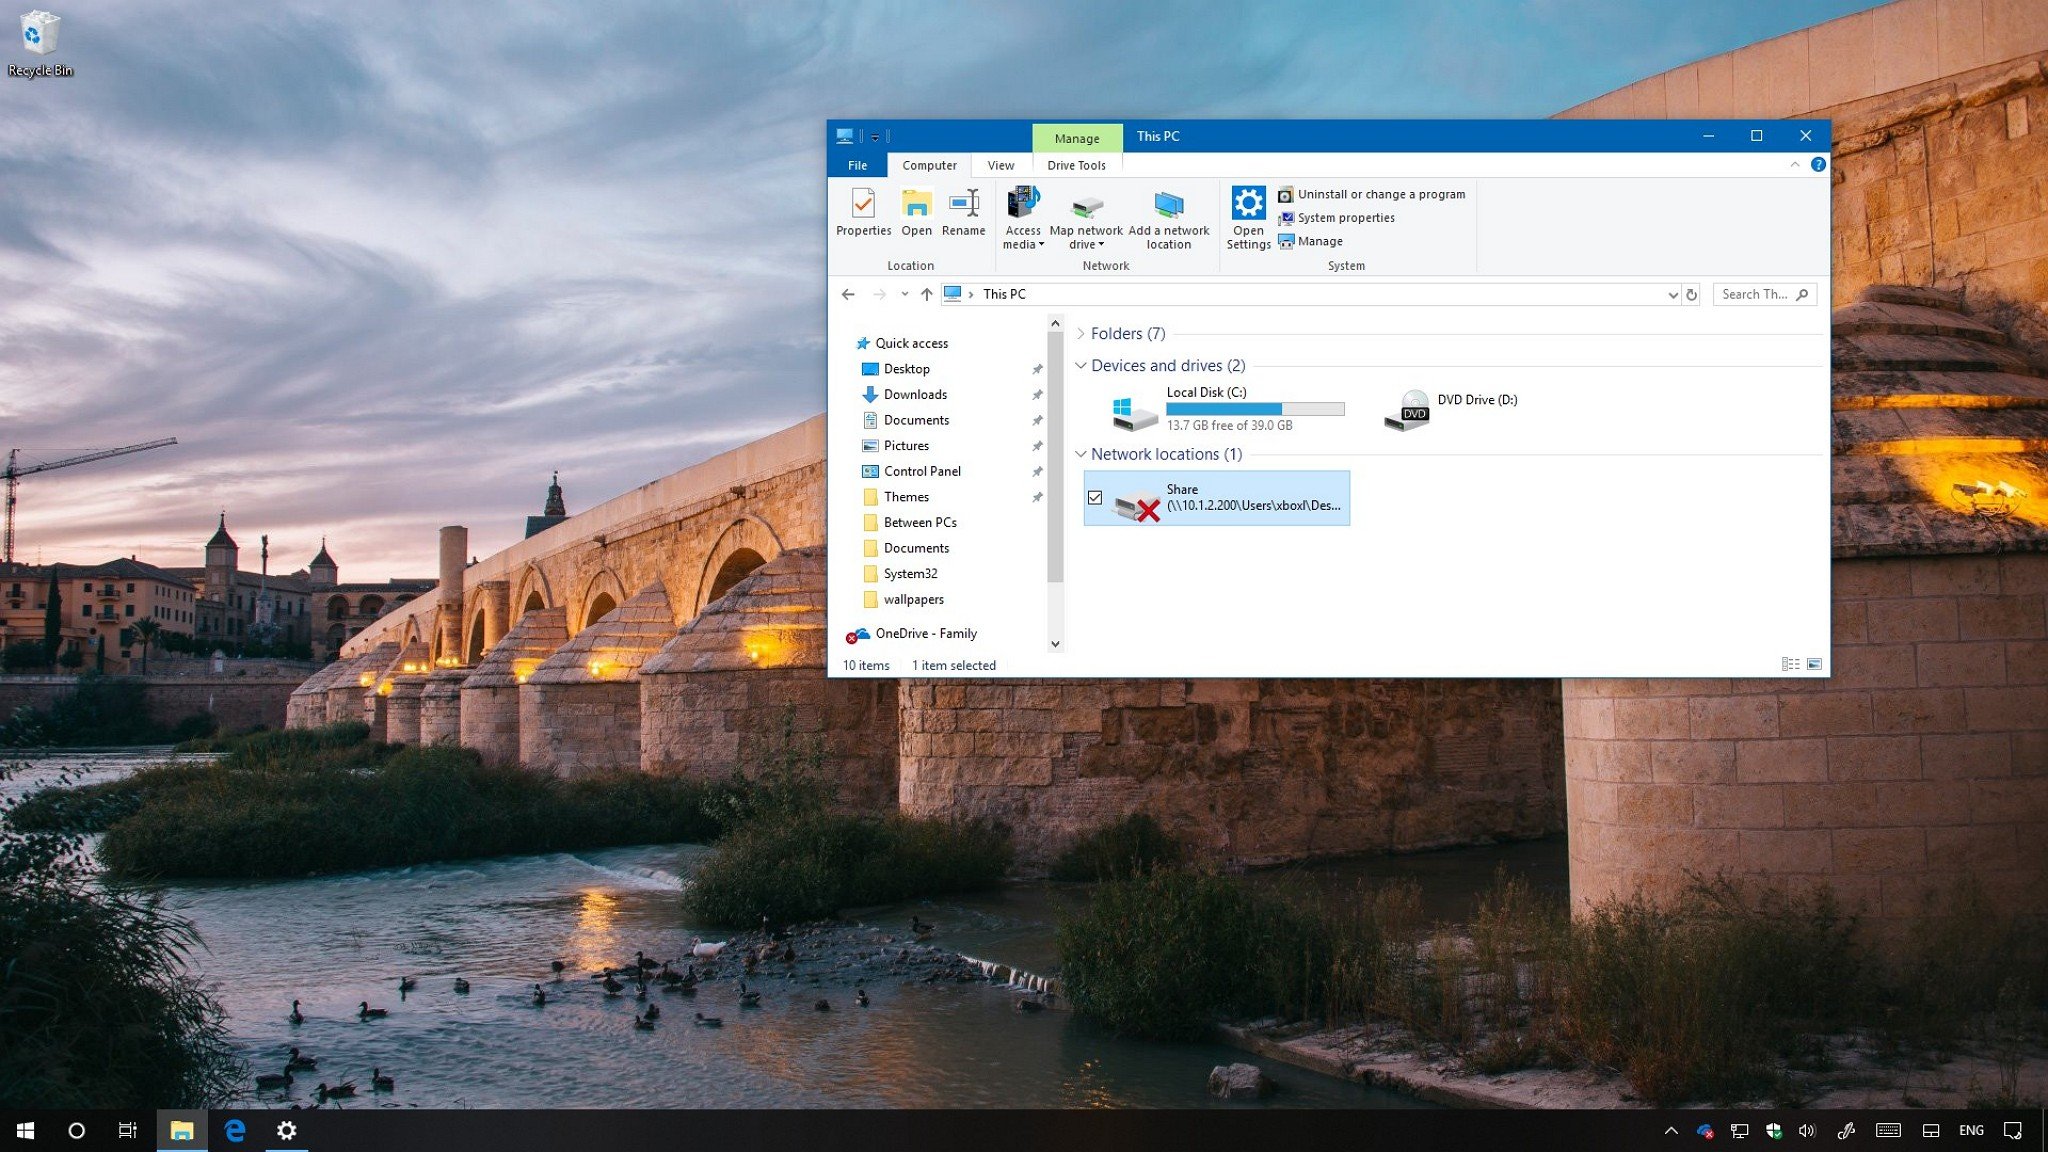
This time, a number of users have reported that after upgrading to version 1809, mapped network drives appear broken with a red "X" as if they were disconnected. Trying to map drives using the net use command show up as "Unavailable," and notifications pop with the "Could not reconnect all network drives" message.
Although trying to access the drives will still work, the problem is causing a lot of confusion among users, especially in environments managed by network administrators.
The drive mapping issue isn't new, it was discovered shortly after the feature update was originally released, but even after pulling it offline due to data loss and other issues, the bug is still part of Windows 10.
While Microsoft is aware of the problem, a permanent fix isn't expected until sometime in 2019. However, in the meantime, the company is offering a workaround to mitigate the bug.
In this Windows 10 guide, we'll walk you through the steps prevent mapped network drives problems after upgrading to the October 2018 Update.
How to fix mapped network drives problem on Windows 10
You can resolve the mapped network drives problem by creating and running two scripts either using the StartUp folder or running a task when the user signs into their account. If you're in an Active Directory domain, Microsoft also suggests reconfiguring the Group Policy settings.
All the latest news, reviews, and guides for Windows and Xbox diehards.
Alternatively, if you don't want to deal with this issue, you can also defer this feature update until a permanent fix becomes available.
Creating the scripts
Use the instructions outlined below to create the required scripts.
Creating the Command Prompt script
To create the Command Prompt script, use the following steps:
- Open Notepad.
- Copy and paste the following script in the text file:
PowerShell -Command "Set-ExecutionPolicy -Scope CurrentUser Unrestricted" >> "%TEMP%\StartupLog.txt" 2>&1 PowerShell -File "%SystemDrive%\Scripts\MapDrives.ps1" >> "%TEMP%\StartupLog.txt" 2>&1 - Click the File menu, and select the Save As option.
- Save the file using this name and extension: MapDrives.cmd.
Creating the PowerShell script
To create the PowerShell script, use the following steps:
- Open Notepad.
- Copy and paste the following script in the text file:
$i=3while($True){$error.clear()$MappedDrives = Get-SmbMapping |where -property Status -Value Unavailable -EQ | select LocalPath,RemotePathforeach( $MappedDrive in $MappedDrives){try {New-SmbMapping -LocalPath $MappedDrive.LocalPath -RemotePath $MappedDrive.RemotePath -Persistent $True} catch {Write-Host "There was an error mapping $MappedDrive.RemotePath to $MappedDrive.LocalPath"}}$i = $i - 1if($error.Count -eq 0 -Or $i -eq 0) {break}Start-Sleep -Seconds 30}- Click the File menu, and select the Save As option.
- Save the file using this name and extension: MapDrives.ps1.
Method 1: Run scripts using StartUp folder
After creating the Command Prompt and PowerShell command, you can use the following steps keep the mapped network drives connected:
Important: The following steps will only work if the device is connected to the network at login.
- Open File Explorer.
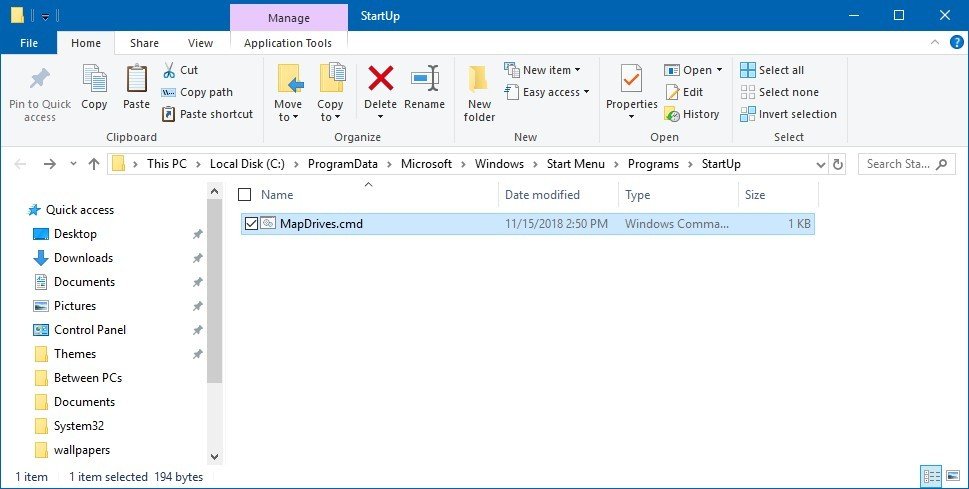
- Browse to the following location:
%ProgramData%\Microsoft\Windows\Start Menu\Programs\StartUp - In the "StartUp" folder, copy the MapDrives.cmd file.
- Browse to the following location:
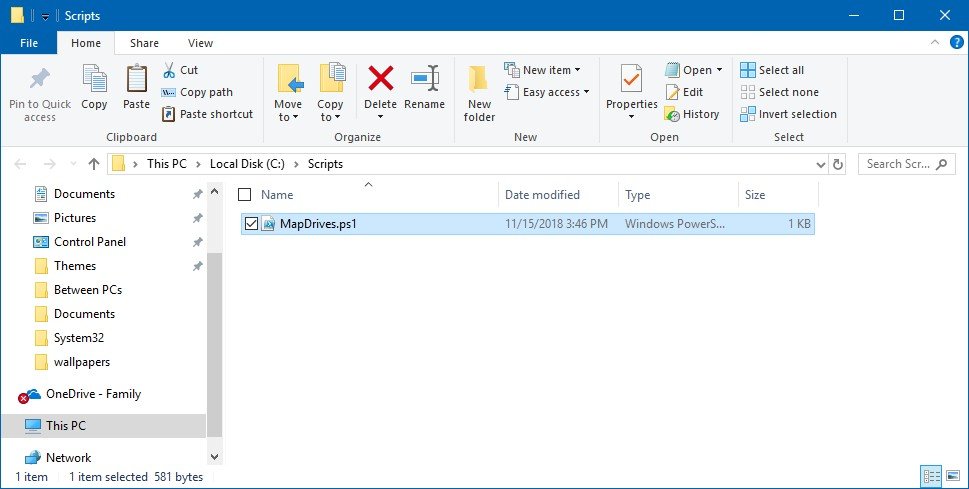
%SystemDrive%\ScriptsQuick Tip: If you don't have the Scripts folder, open the C drive with File Explorer, and use the Ctrl + Shift + N keyboard shortcut to create a new folder, and name it "Scripts". - In the "Scripts" folder, copy the MapDrives.ps1 file.
Once you've completed the steps, sign out and sign back into the account, and now the mapped drives should appear in File Explorer without problems.
In addition, the scripts will create a StartupLog.text file in the %TEMP% folder with log information about the process.
Method 2: Run scripts using Task Scheduler
Alternatively, you can use the Task Scheduler to create a task to reconnect the mapped network drive during login with these steps:
- Open File Explorer.
- Browse to the following location:
%SystemDrive%\ScriptsQuick Tip: If you don't have the Scripts folder, open the C drive with File Explorer, and use the Ctrl + Shift + N keyboard shortcut to create a new folder, and name it "Scripts". - In the "Scripts" folder, copy the MapDrives.ps1 file.
- Open Start.
- Search for Task Scheduler, click the top result to open the experience.
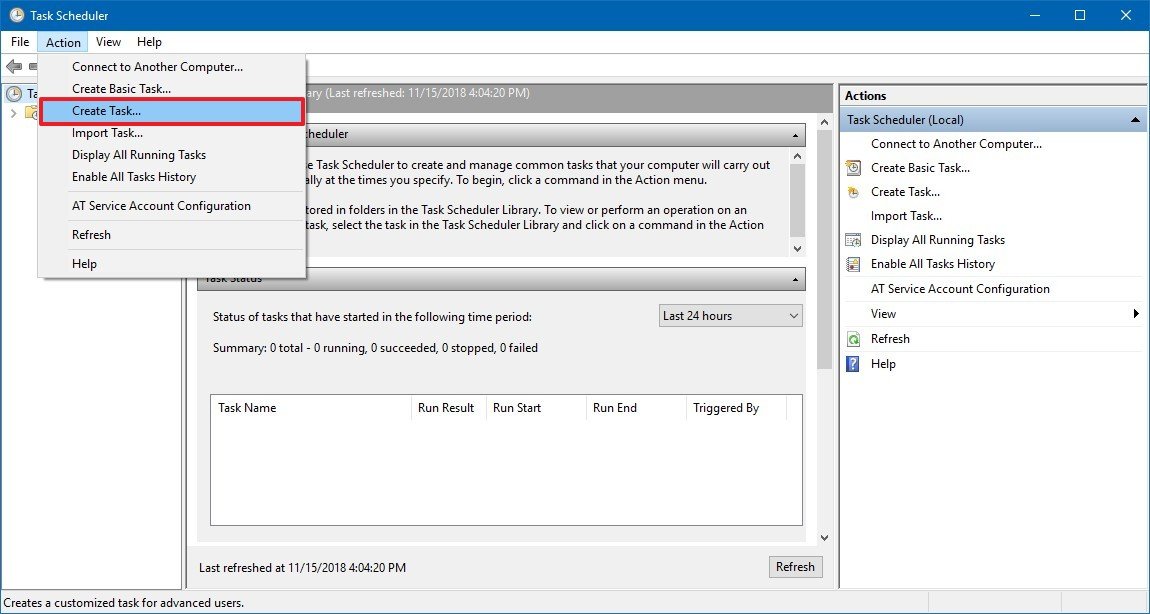
- Click the Action menu.
- Select the Create Task option.
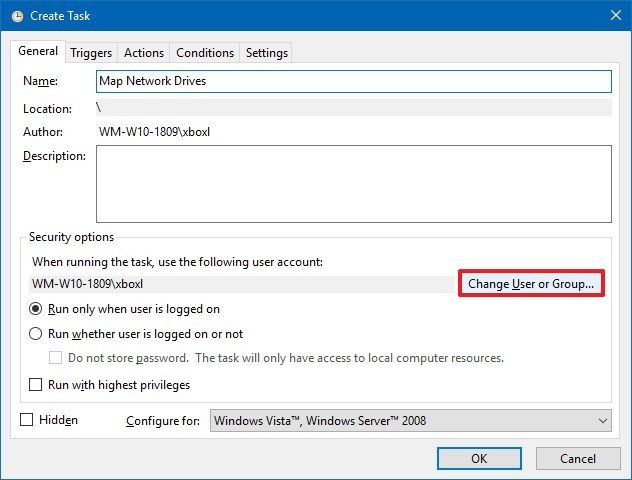
- Click the General tab.
- In the name field, type a name for the task. For example, Map Network Drives.
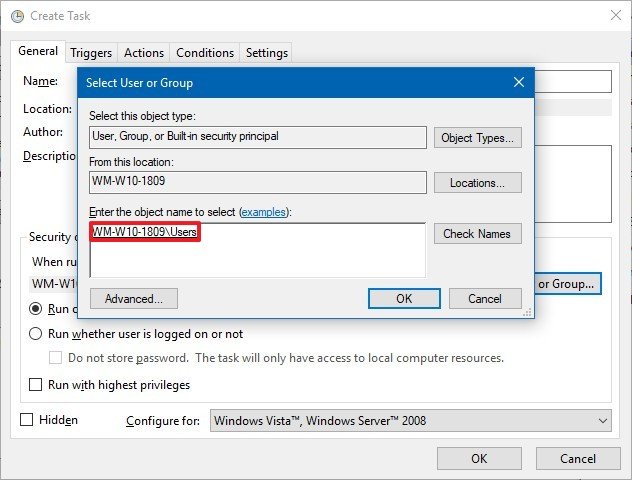
- Click the Change User or Group button.
- Select a local user or group. For example, Users.
- Click the OK button.
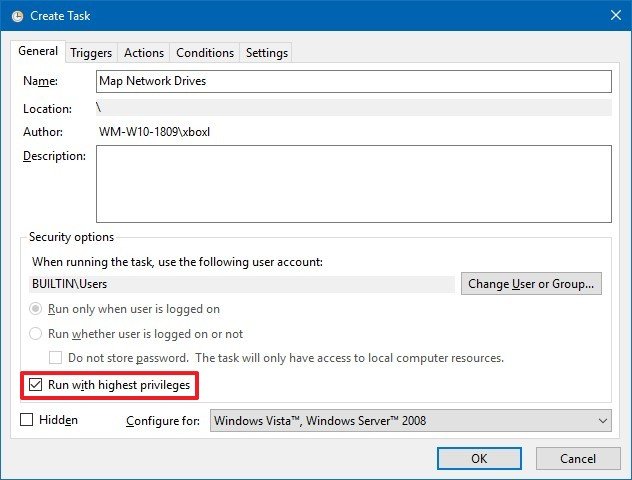
- Select the Run with highest privileges option.
- Click on the Triggers tab.
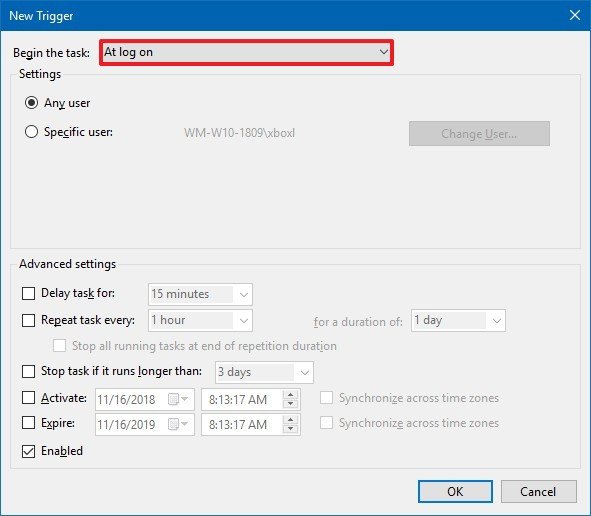
- Click the New button.
- Use the "Begin the task" drop-down menu, and select the At log on option.
- Click the OK button.
- Click on the Actions tab.
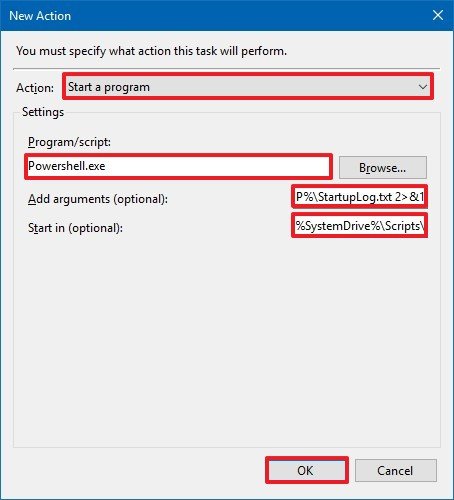
- Click the New button.
- Use the "Action" drop-down menu, and select the Start a program option.
- In the "Program/script box," type the following:
Powershell.exe - In the Add arguments (optional) box, type the following command:
-windowsstyle hidden -command .\MapDrives.ps1 >> %TEMP%\StartupLog.txt 2>&1 - In the Start in (optional) box, type the location of the script file:
%SystemDrive%\Scripts\ - Click the OK button.
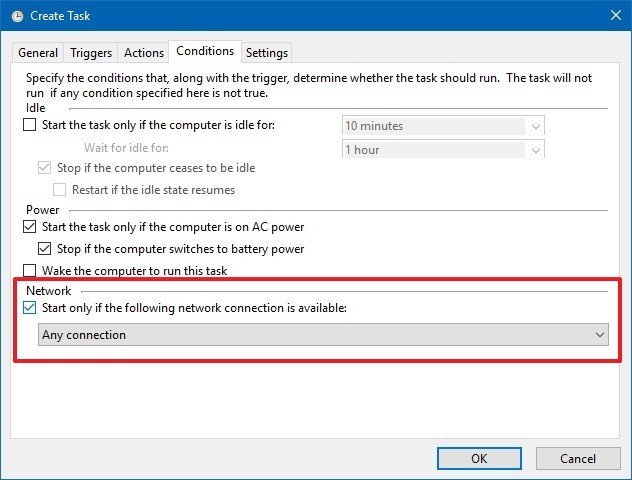
- Click on the Conditions tab.
- Select the Start only if the following network connection is available option.
- Select the Any connection option.
- Click the OK button.
After completing the steps, sign out and sign back into the account, and now the mapped drives should appear in File Explorer without problems.
Method 3: Update Group Policy settings
If you're a network administrator running an Active Directory domain, and you're using Group Policy to push settings to devices, Microsoft recommends editing the Group Policy Object (GPO) to map the drive and update its action to Replace.
Using the "Replace" option will delete the mapped drives, and it'll recreate them again when the user signs back in to the account.
Once you've completed the steps, make sure to restart the device, and a sign in again to verify that the mapped drives no longer appear disconnected in File Explorer.
Method 4: Defer the October 2018 Update
Alternatively, if you've not installed the Windows 10 October 2018 Update, you can avoid this and other problems configuring the device to defer this feature update until there's a permanent solution.
You can learn the steps to defer updates up to 16 months using these steps.
More Windows 10 resources
For more helpful articles, coverage, and answers to common questions about Windows 10, visit the following resources:
- Windows 10 on Windows Central – All you need to know
- Windows 10 help, tips, and tricks
- Windows 10 forums on Windows Central

Mauro Huculak has been a Windows How-To Expert contributor for WindowsCentral.com for nearly a decade and has over 22 years of combined experience in IT and technical writing. He holds various professional certifications from Microsoft, Cisco, VMware, and CompTIA and has been recognized as a Microsoft MVP for many years.
