How to change Lock screen timeout before display turn off on Windows 10
If you like to see the images and apps status on the Lock screen, but the display goes black in about a minute, then use this guide to change the Lock screen timeout setting on Windows 10.
On Windows 10, similar to Windows 8.1, the operating system features a Lock screen before you sign in to your account. The new experience showcases date and time, quick status for apps you choose, and more importantly a background image, which typically, users opt to display personal pictures or those from Windows Spotlight.
While the Lock screen provides useful information and beautiful pictures, you probably noticed that your computer's display turns off after 60 seconds when you lock your Windows 10 account. This happens even if you change the power options to never turn off the monitor or never put the computer to sleep.
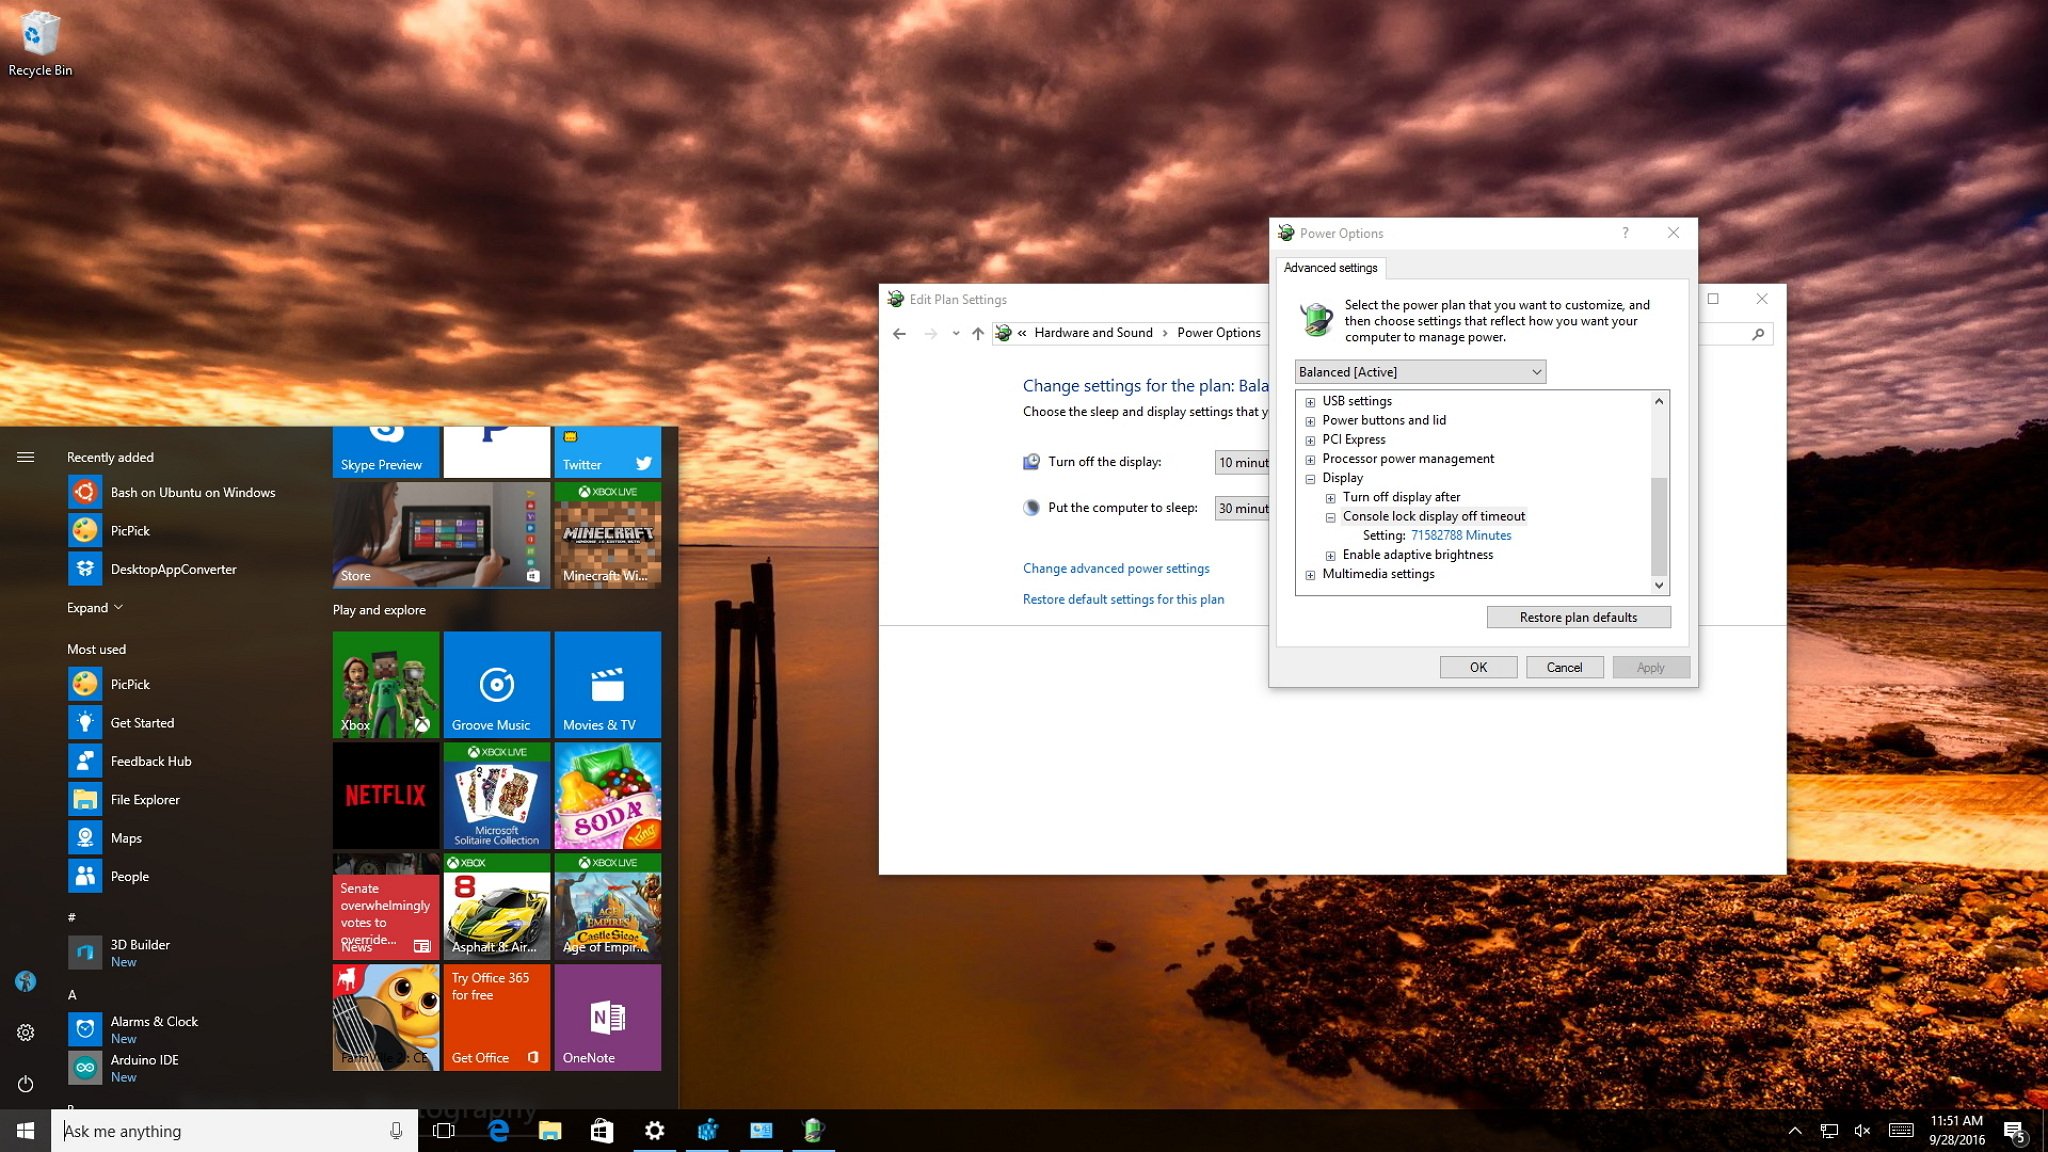
The reason is that by design, the operating system includes a function that detects when the device is locked and waits for 60 seconds. After the time expires, the computer screen goes black. This is a function, which for a mysterious reason, users can't customize in Control Panel or the Settings app. However, you can modify the Registry to enable a new option in the power settings to change the time to anything you want.
In this Windows 10 guide, we'll walk you through the steps to tweak the Registry (or Command Prompt) to customize the operating system should way until turning the display off, which will give you more time to see the background, status, and interact with Cortana on the Lock screen.
- How to change the time when the display turns off when your PC is locked
- How to change the Lock screen timeout using Command Prompt
How to change the time when the display turns off when your PC is locked
Important: Before diving into this guide, it's worth noting that editing the registry can be dangerous, and it can cause irreversible damage to your system if you don't do it correctly. It's highly recommended to make a full backup of your PC before proceeding. You've been warned!
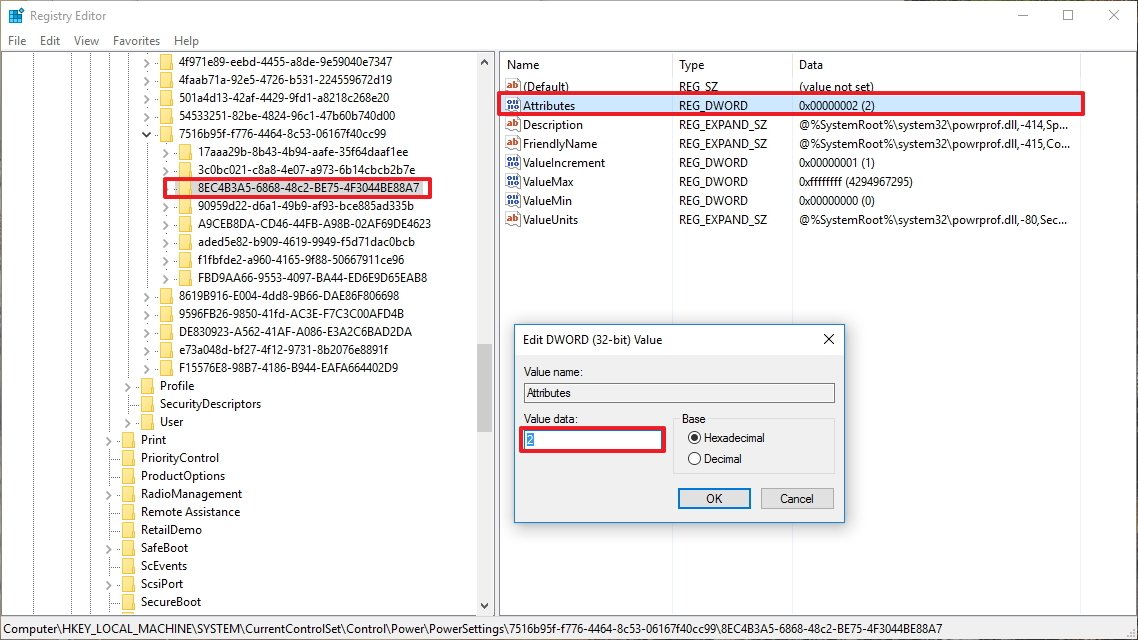
- Use the Windows key + R keyboard shortcut to open the Run command, type regedit, and click OK to open the registry.
- Browse the following path:
HKEYLOCAL_MACHINE\SYSTEM\CurrentControlSet\Control\Power\PowerSettings\7516b95f-f776-4464-8c53-06167f40cc99\8EC4B3A5-6868-48c2-BE75-4F3044BE88A7 - On the right side, double-click the Attributes DWORD.
- Change the value from 1 to 2.
- Click OK.
These steps only enabled the option on Windows 10 called "Console lock display off timeout." Now the only thing left to do is to customize this option to any time you want. To do this, use these instructions:
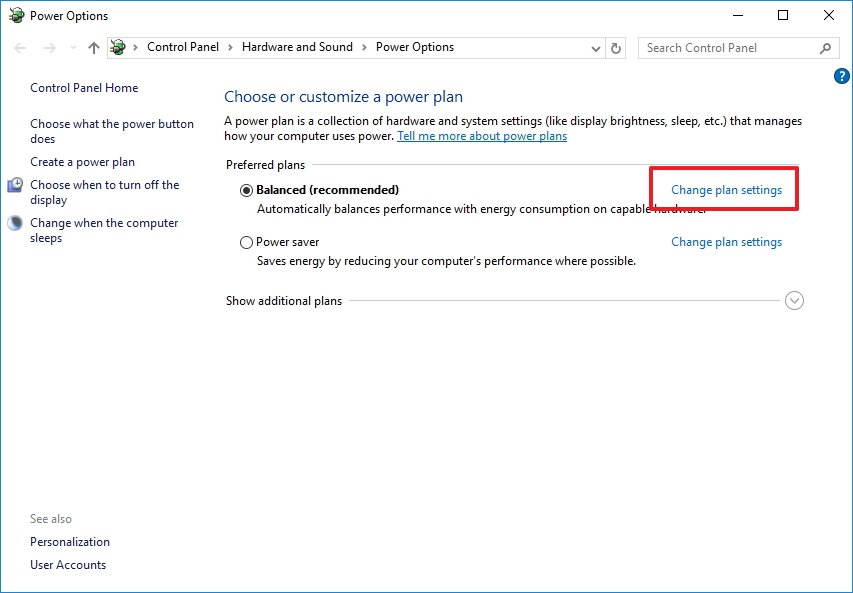
- Use the Windows key + X keyboard shortcut to open the Power User menu and select Power Options.
- Click the Change plan settings link for the selected plan.
- Click the Change advanced power settings link.
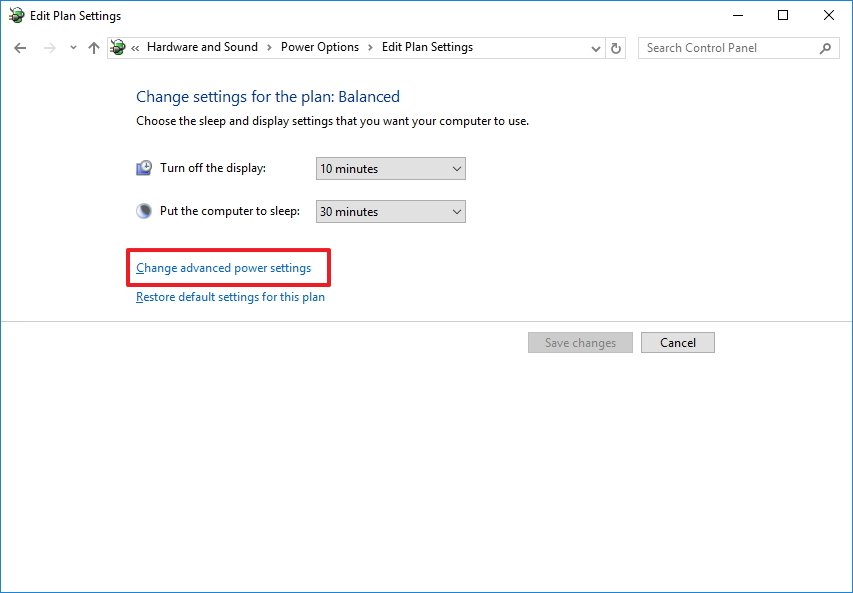
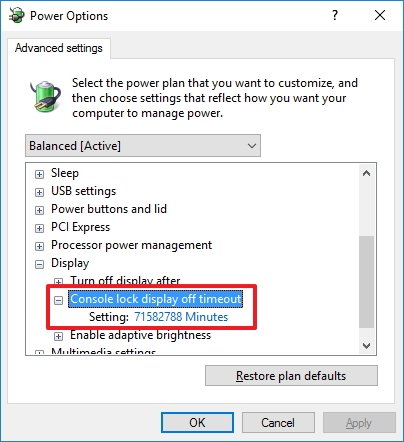
- On Advanced settings, scroll down and expand the Display settings.
- You should now see the Console lock display off timeout option, double-click to expand.
- Change the default time of 1 minute to the time you want, in minutes.
- Click Apply.
- Click OK to complete the task.
Once you complete the steps, you can test the new settings by locking your computer (Windows key + L keyboard shortcut), and now the screen shouldn't turn off until the time you set expires.
Get the Windows Central Newsletter
All the latest news, reviews, and guides for Windows and Xbox diehards.
At any time, you can revert the changes by following the previous steps, but this time, on step 4 change the registry value key from 2 to 1.
How to change the Lock screen timeout using Command Prompt
The beauty of Windows is that you can configure the same feature in a number of ways. Alternatively, you can use the PowerCfg.exe utility to change you display timeout setting when your computer is locked. When it's connected to AC power or when your device is running on battery (DC power).
To change the Lock screen timeout using Command Prompt, do the following:
- Use the Windows key + X keyboard shortcut to open the Power User menu and select Command Prompt (admin).
- Type the following command and press Enter:
powercfg.exe /SETACVALUEINDEX SCHEME_CURRENT SUB_VIDEO VIDEOCONLOCK 60Important: You must change "60" in the command-line with the timeout time you want to use, in seconds. For example, if you want the screen to turned on for 5 minutes, then you need to use 300 at the end of the command. - Type the following command and press Enter:
powercfg.exe /SETACTIVE SCHEME_CURRENT

- Use the Windows key + L keyboard shortcut to lock your PC and see if the new settings work.
The command mentioned in step 2 will work when your computer is using AC power. You must replace /SETACVALUEINDEX for /SETDCVALUEINDEX if you want to change the timeout setting on your laptop or tablet running on battery.
It's worth noting that while changing the Registry settings is an advanced task, during my test, I have found that sometimes using the command lines may settings may not work as expected, but it's an alternative.
On the other hand, changing the Registry worked perfectly, and after making the tweak, I can simply go to the Power Options settings in Control Panel and adjust the Lock screen timeout without having to use any commands.
More Windows 10 resources
For more help articles, coverage, and answers on Windows 10, you can visit the following resources:
- Windows 10 on Windows Central – All you need to know
- Windows 10 help, tips, and tricks
- Windows 10 forums on Windows Central
Mauro Huculak has been a Windows How-To Expert contributor for WindowsCentral.com for nearly a decade and has over 15 years of experience writing comprehensive guides. He also has an IT background and has achieved different professional certifications from Microsoft, Cisco, VMware, and CompTIA. He has been recognized as a Microsoft MVP for many years.

