How to export and import scheduled tasks on Windows 10
You can export and import your tasks in Task Scheduler on Windows 10. This is how.
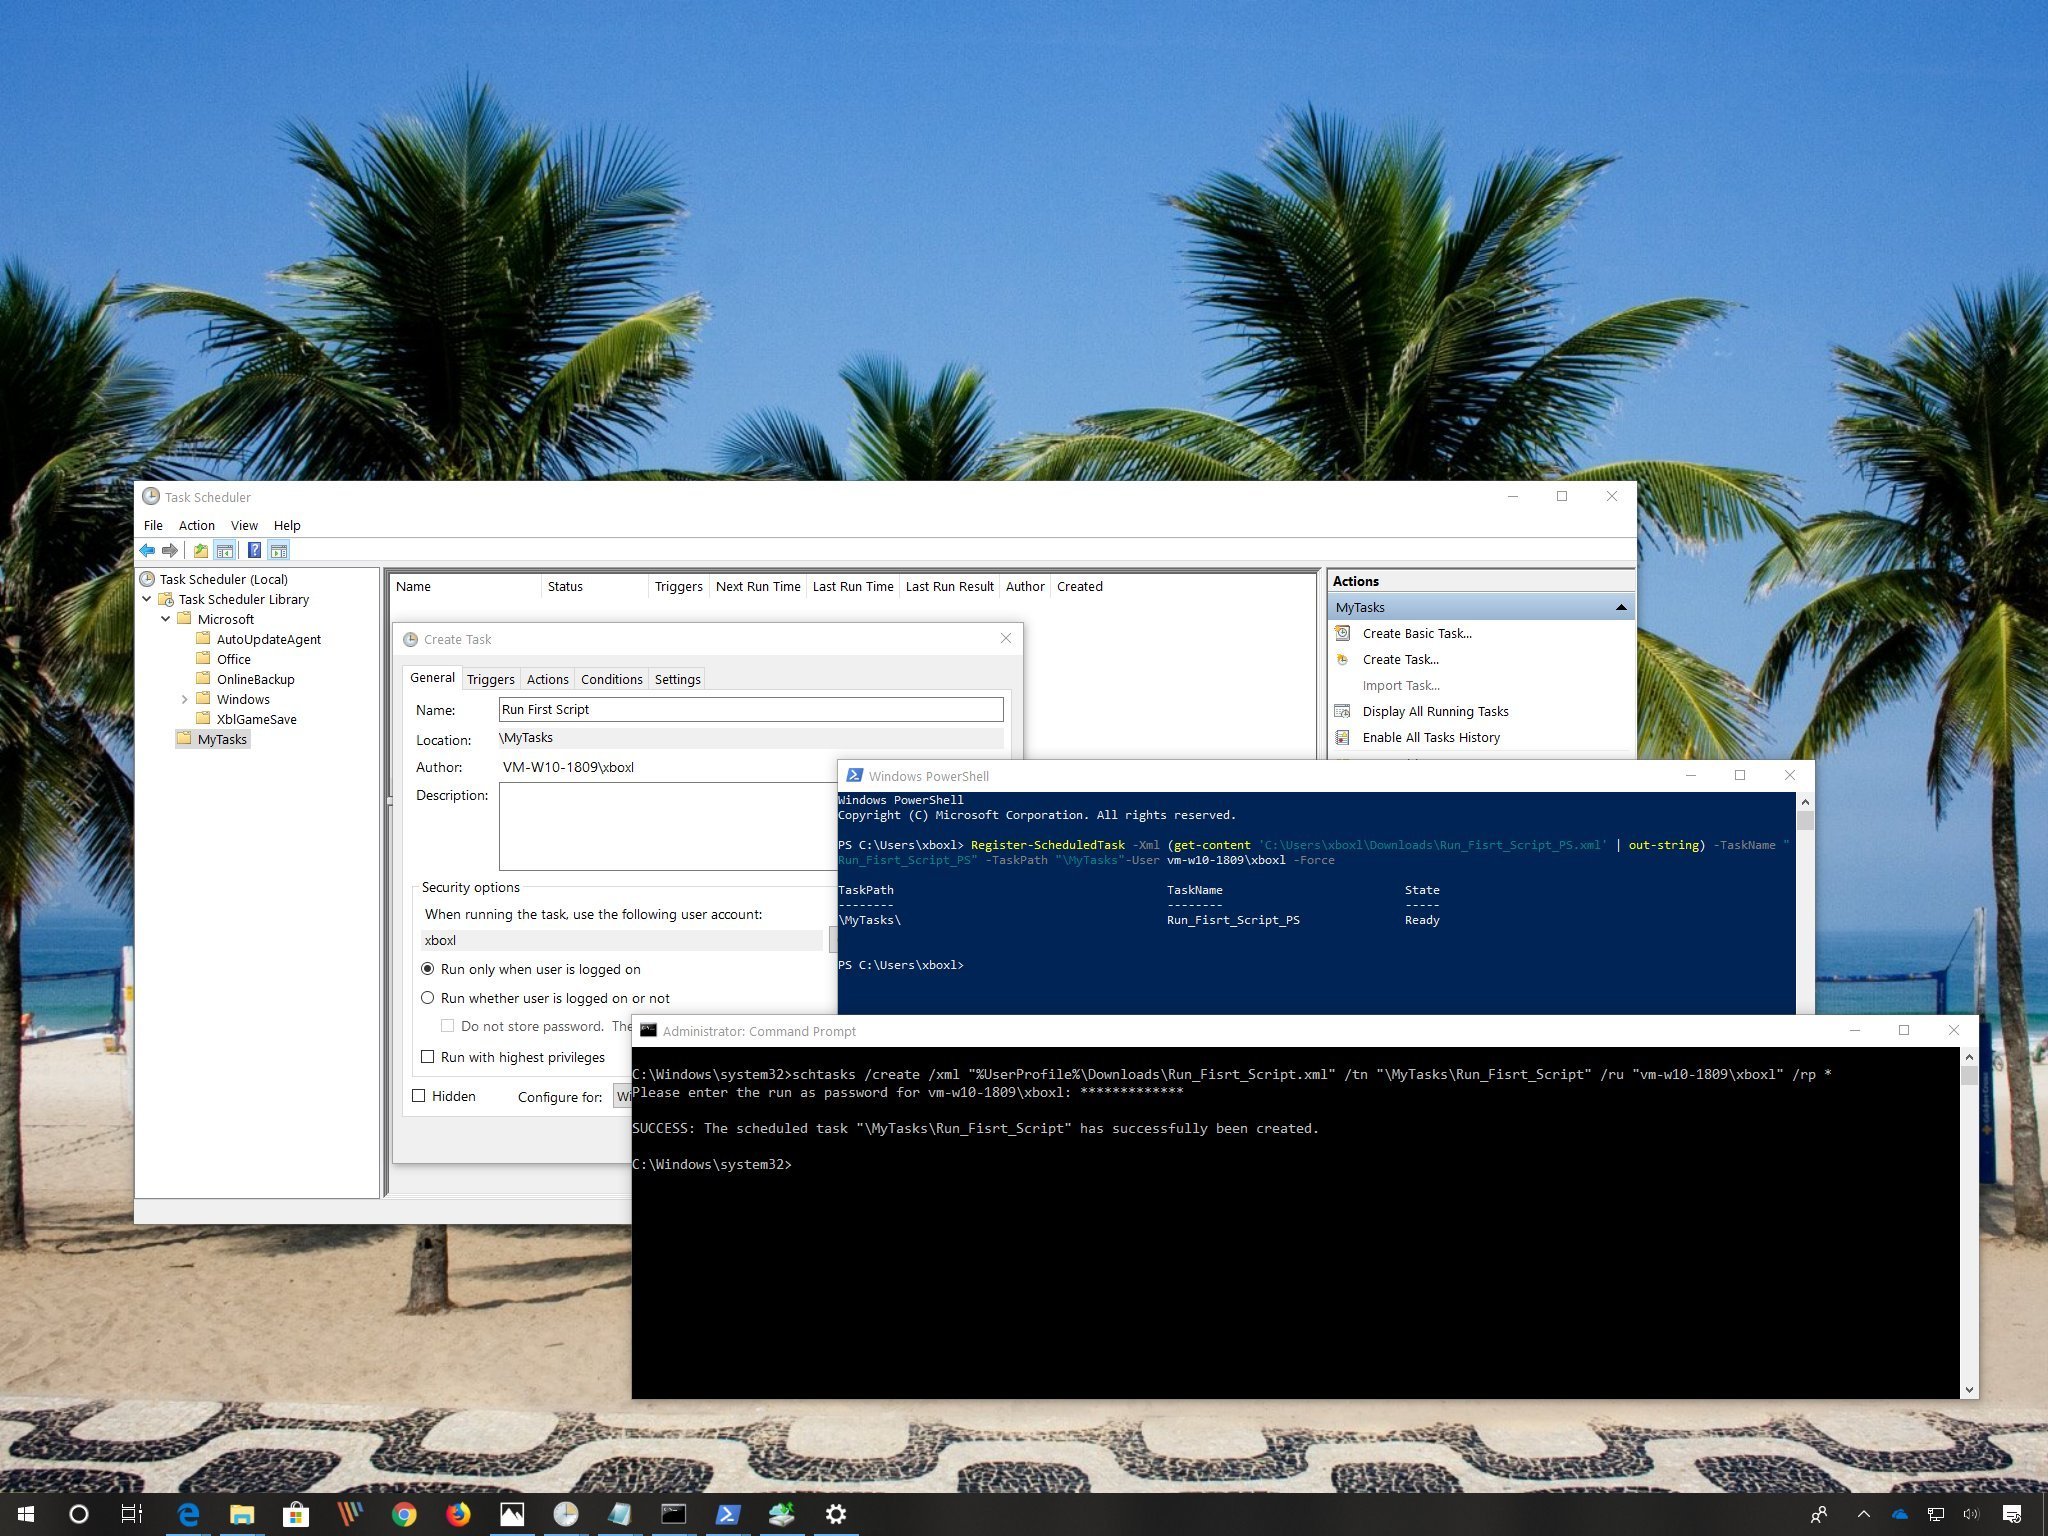
Task Scheduler on Windows 10 allows you to quickly create and run tasks automatically. Using this tool, you can launch apps, run scripts, or execute commands at a particular day and time, or even during a specific event.
If you already created one or multiple scheduled tasks, another benefit of Task Scheduler is the ability to quickly export and import your tasks in at least three different ways using the console, Command Prompt, and PowerShell. This is particularly useful when moving to a new installation of Windows 10, to prevent having to recreate them from scratch, or to save time when you need to deploy the same job on many computers in your organization.
In this Windows 10 guide, we'll walk you through the steps to export and import scheduled tasks to the same or different computer.
- How to export and import scheduled tasks using Task Scheduler
- How to export and import scheduled tasks using Command Prompt
- How to export and import scheduled tasks using PowerShell
How to export and import scheduled tasks using Task Scheduler
The easiest way to export and import scheduled tasks on Windows 10 is to use Task Scheduler and the instructions below.
Exporting tasks with Task Scheduler
To export a scheduled task using Task Scheduler, use these steps:
- Open Start.
- Search for Task Scheduler, and click the top result to open the experience.
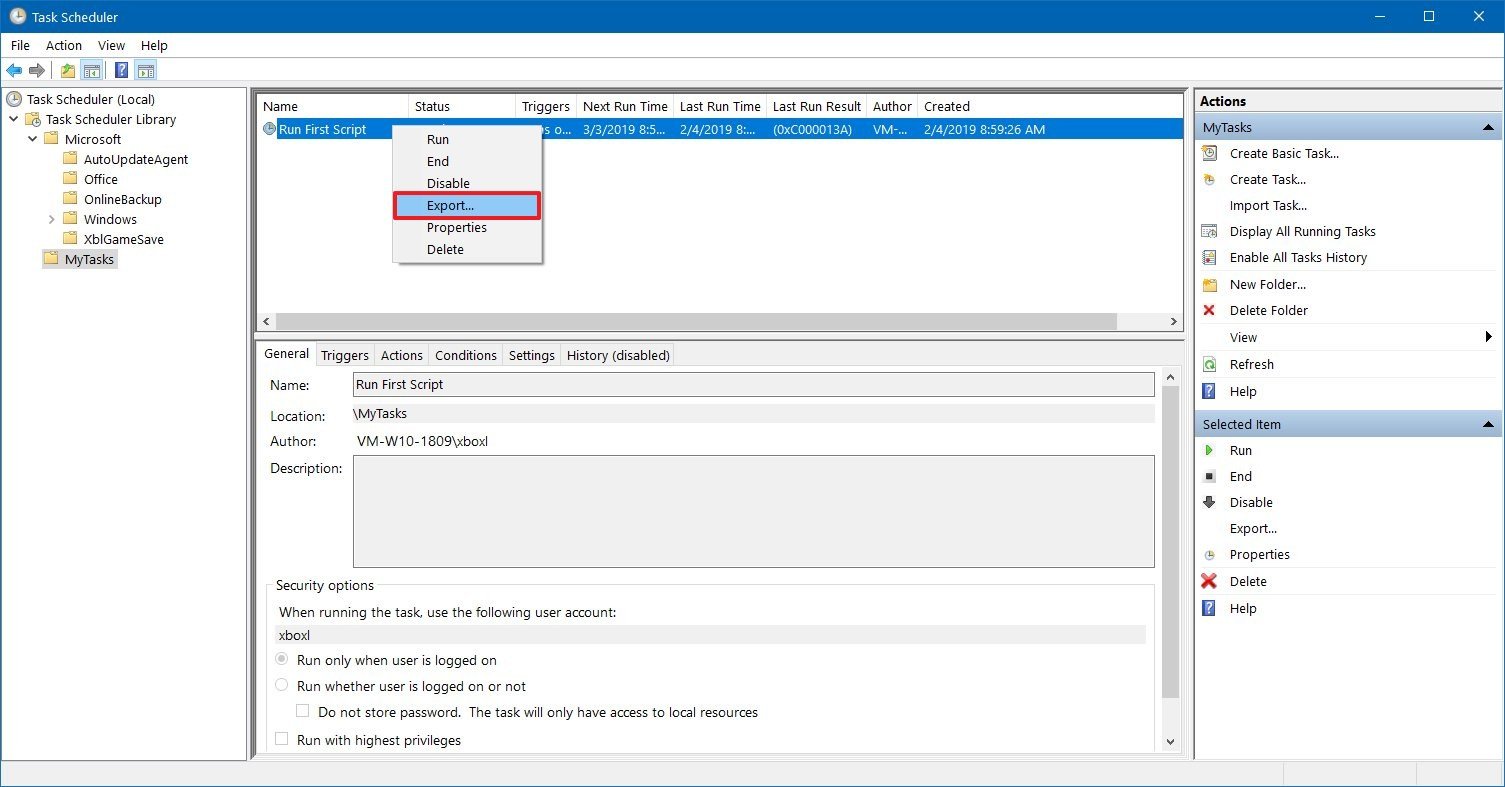
- Browse to the location of the scheduled task that you want to export.
- Right-click the item, and select the Export option.
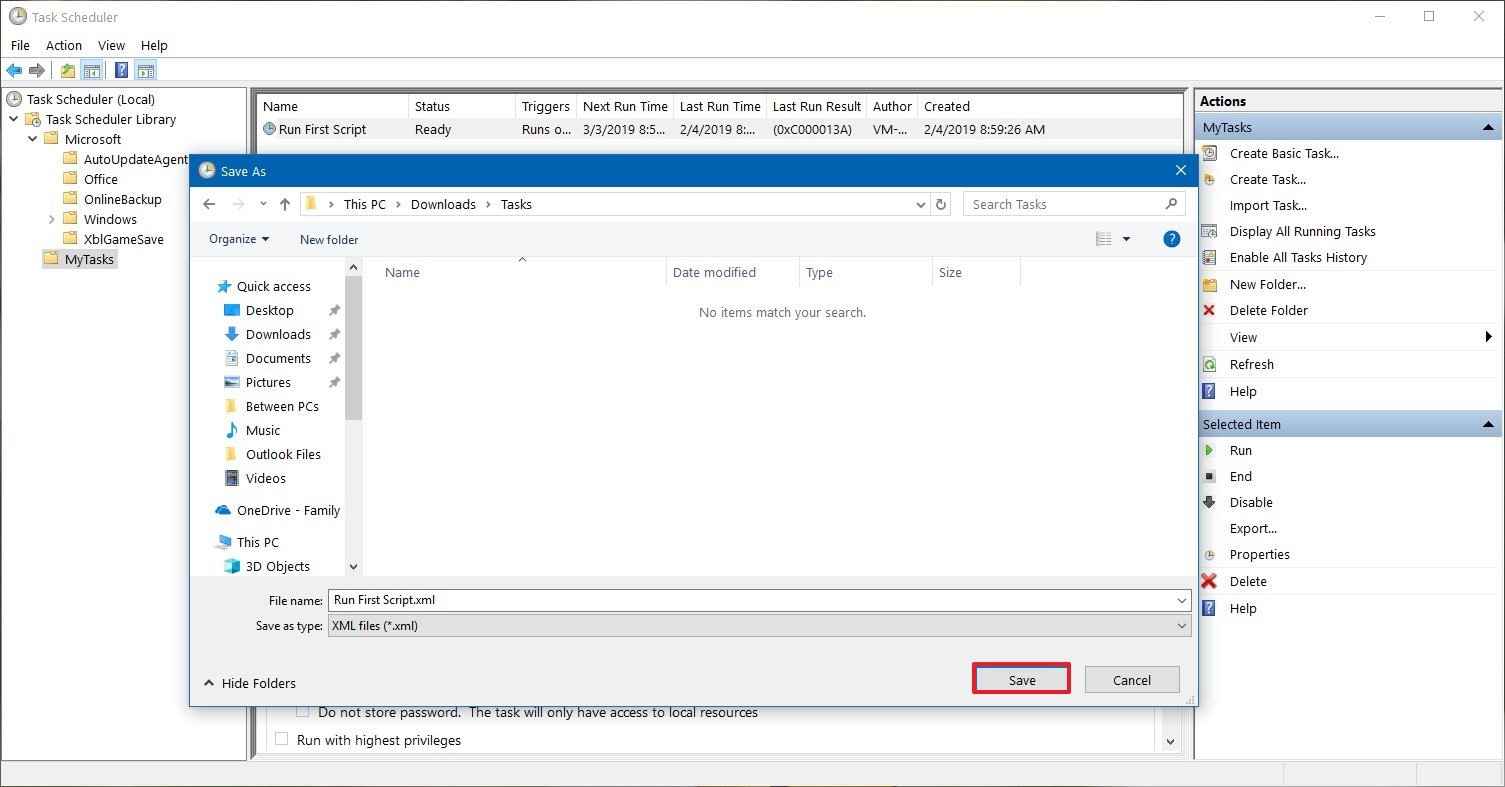
- Browse and open the folder to export the task.
- Click the Save button.
Once you complete these steps, you'll end up with a .xml file that you can then import to another machine or another installation of Windows 10.
Using Task Scheduler, you can only export (or import) one task at a time, as such you'll need to repeat the steps to export additional scheduled tasks.
All the latest news, reviews, and guides for Windows and Xbox diehards.
Importing tasks with Task Scheduler
To import a scheduled task on Windows 10, use these steps:
Important: This option will only restore the task; it'll not restore the script or application that the task will execute. If you're importing a task that runs a script or starts an application, you need to make sure that those resources exist on the device before proceeding with the steps below. Otherwise, the scheduled task will fail.
- Open Start.
- Search for Task Scheduler, and click the top result to open the experience.
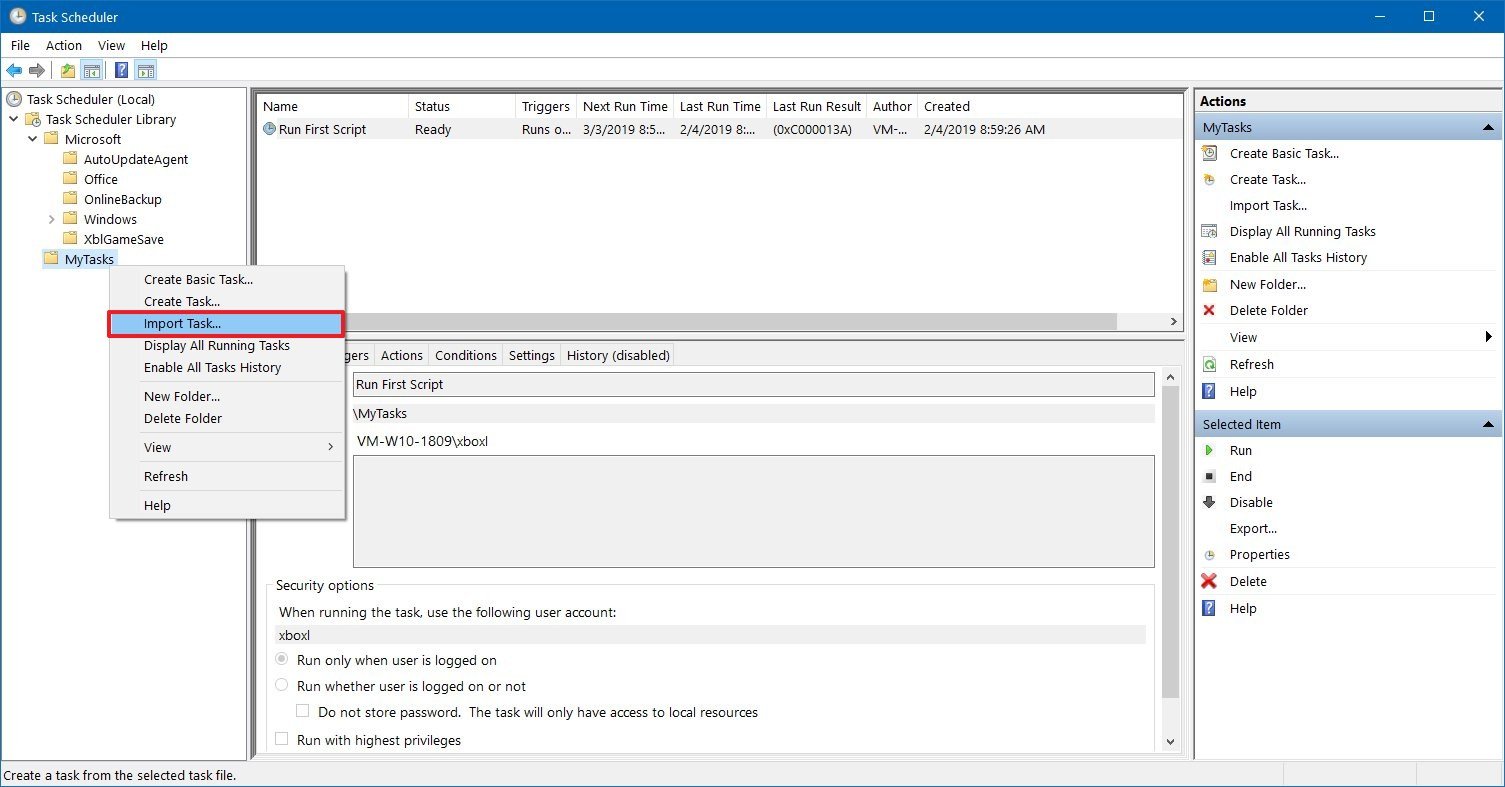
- Browse to the import location.
- Right-click the folder, and select the Import Task option.
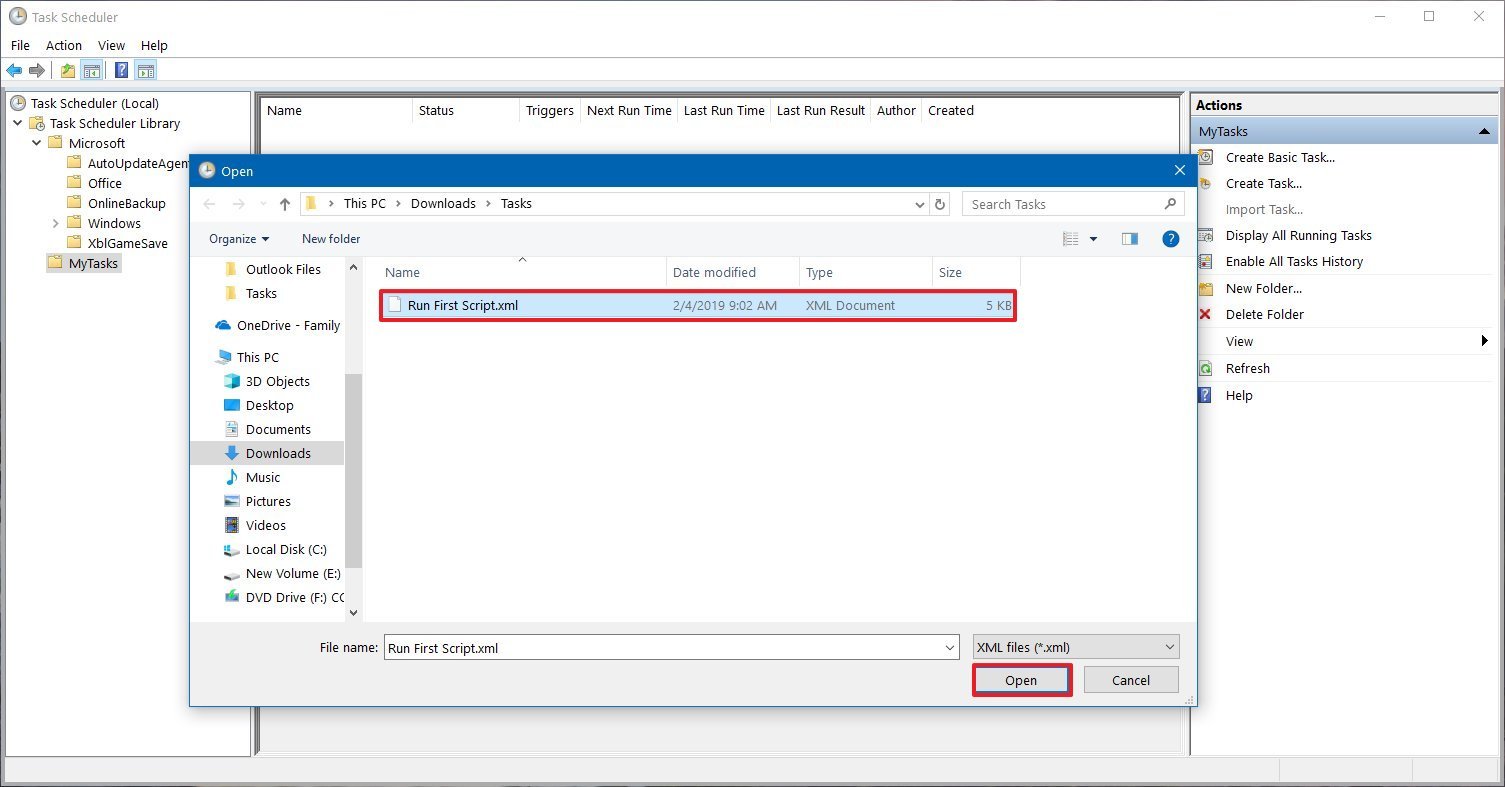
- Browse and open the folder with the scheduled task.
- Select the task.
- Click the Open button.
- Optional: Update the scheduled task settings as necessary.
- Click the OK button.
After completing the steps, the task will import automatically on your device.
How to export and import scheduled tasks using Command Prompt
Alternatively, you can also use Command Prompt to export and import scheduled tasks, which could be a better option when working with multiple computers.
Exporting tasks with Command Prompt
To export a task using Command Prompt on Windows 10, use these steps:
- Open Start.
- Search for Command Prompt, right-click the top result, and select the Run as administrator option.
- Type the following command to export a scheduled task and press Enter:
schtasks /query /xml /tn "\TASK-PATH-TASKSCHEDULER\TASK-NAME" > "%UserProfile%\EXPORT-FOLDER-PATH\TASK-EXPORT-NAME.xml"In the command, make sure to update the command ("\TASK-PATH-TASKSCHEDULER\TASK-NAME," "%UserProfile%\EXPORT-FOLDER-PATH\TASK-EXPORT-NAME.xml) with your device details.
Once you complete the steps, the task will be exported as a .xml file in the location you specified.
Import tasks with Command Prompt
Command Prompt does not offer an import option. Instead, you'll need to use the "create" flag to create and schedule a new task using the exported settings in the .xml file.
To import a task, use these steps:
- Open Start.
- Search for Command Prompt, right-click the top result, and select the Run as administrator option.
- Type the following command to import a scheduled task and press Enter:
schtasks /create /xml "%UserProfile%\IMPORTED-FOLDER-PATH\TASK-INPORT-NAME.xml" /tn "\TASKSCHEDULER-FOLDER-PATH\TASK-INPORT-NAME" /ru "COMPUTER-NAME\USER-NAME"In the command, make sure to update the command ("%UserProfile%\IMPORTED-FOLDER-PATH\TASK-INPORT-NAME.xml," "\TASKSCHEDULER-FOLDER-PATH\TASK-INPORT-NAME," "COMPUTER-NAME\USER-NAME") with your device details.Quick tip: If the command fails or you don't want to enter the password manually, make sure to append the/rp ACCOUNT-PASSWORD(replacing "ACCOUNT-PASSWORD" with your actual password) after specifying the "COMPUTER-NAME\USER-NAME" parameters.
- Type your account password and press Enter.
After you complete the steps, the new scheduled task will be created using the exported settings in the location you specified in Task Scheduler.
How to export and import scheduled tasks using PowerShell
Similar to the Command Prompt option, you can also export and import tasks using PowerShell.
Exporting tasks with PowerShell
To export a scheduled task with PowerShell, use these steps:
- Open Start.
- Search for PowerShell, right-click the top result, and select the Run as administrator option.
- Type the following command to export a scheduled task and press Enter:
Export-ScheduledTask -TaskName "TASK-NAME" -TaskPath "\TASK-PATH-TASKSCHEDULER\" | out-file C:\PATH\TO\EXPORT-FOLDER\TASK-EXPORT-NAME.xmlIn the command, make sure to update the command ("TASK-NAME," "\TASK-PATH-TASKSCHEDULER\," "C:\PATH\TO\EXPORT-FOLDER\TASK-EXPORT-NAME.xml") with your device details.
Once you complete these steps, the task will export into a file using a .xml extension, which you can then use to import the same task on the same or another computer or installation.
Importing tasks with PowerShell
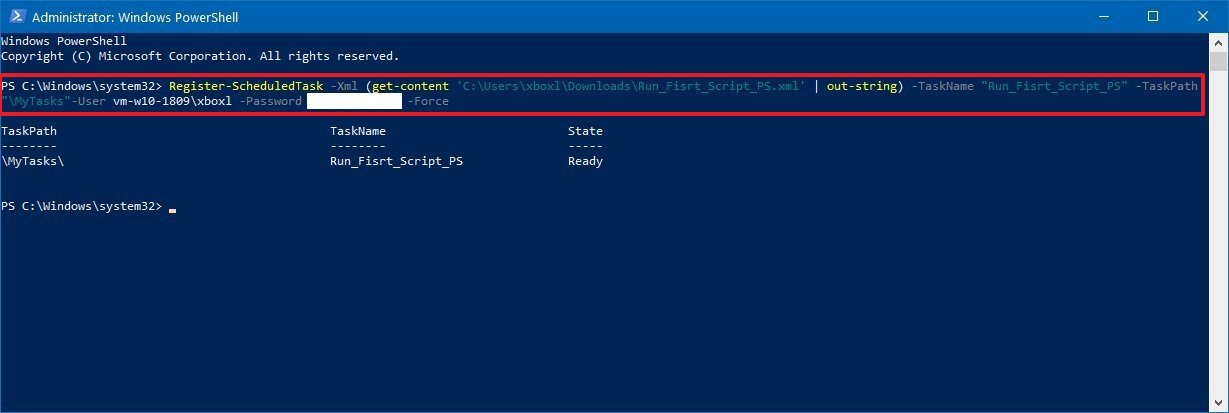
Although there is an "Export" cmdlet, you won't find an "Import" cmdlet variant using PowerShell. Instead, you'll need to register a new task that will import the same settings included in the exported .xml file.
To import a task with PowerShell, use these steps:
- Open Start.
- Search for PowerShell, right-click the top result, and select the Run as administrator option.
- Type the following command to import a scheduled task and press Enter:
Register-ScheduledTask -xml (Get-Content 'C:\PATH\TO\IMPORTED-FOLDER-PATH\TASK-INPORT-NAME.xml' | Out-String) -TaskName "TASK-IMPORT-NAME" -TaskPath "\TASK-PATH-TASKSCHEDULER\" -User COMPUTER-NAME\USER-NAME –ForceIn the command make sure to update the command ("C:\PATH\TO\IMPORTED-FOLDER-PATH\TASK-INPORT-NAME.xml," "TASK-IMPORT-NAME," "\TASK-PATH-TASKSCHEDULER\," "COMPUTER-NAME\USER-NAME") with your device details.Quick tip: If the command fails or you don't want to enter the password manually, make sure to append the-Password ACCOUNT-PASSWORD(replacing "ACCOUNT-PASSWORD" with your actual password) after specifying the "COMPUTER-NAME\USER-NAME" parameters.
After completing these steps, the exported scheduled task will be imported to the location you specified in Task Scheduler.
While this guide is focused on Windows 10, the ability to export and import scheduled tasks has been around for a long time, and you can also refer to these instructions if you're running Windows 8.1 or Windows 7.
More Windows 10 resources
For more helpful articles, coverage, and answers to common questions about Windows 10, visit the following resources:
- Windows 10 on Windows Central – All you need to know
- Windows 10 help, tips, and tricks
- Windows 10 forums on Windows Central

Mauro Huculak has been a Windows How-To Expert contributor for WindowsCentral.com for nearly a decade and has over 22 years of combined experience in IT and technical writing. He holds various professional certifications from Microsoft, Cisco, VMware, and CompTIA and has been recognized as a Microsoft MVP for many years.
