How to enable Secure Boot on PC to install Windows 11
Windows 11 requires Secure Boot, and in this guide, we'll show you how to check and enable the feature.
As part of the system requirements, alongside a Trusted Platform Module (TPM), a computer must be capable of "Secure Boot" to install Windows 11.
Secure Boot is a security feature available on most modern hardware with Unified Extensible Firmware Interface (UEFI) that provides a secure environment to start the operating system and prevent malware from hijacking the system during the boot process.
In other words, Secure Boot allows the computer to boot only with trusted software from the Original Equipment Manufacturer (OEM).
The benefit of this feature is a more secure experience, which is one of the reasons Microsoft has made it a prerequisite to install Windows 11. However, it's worth noting that Secure Boot is more of a recommendation than a strict enforcement. You can still install and run the operating system without enabling this feature.
Also, enabling Secure Boot may prevent the installation of alternative operating systems like Linux, unless those systems are configured to work with it.
In this how-to guide, I'll outline the steps to check and enable Secure Boot to meet the requirements as you upgrade from Windows 10 to 11.
These instructions have been updated to ensure accuracy and reflect changes to the process in the operating system.
How to check Secure Boot state on Windows 10
To check the Secure Boot state on Windows 10, use these steps:
All the latest news, reviews, and guides for Windows and Xbox diehards.
- Open Start.
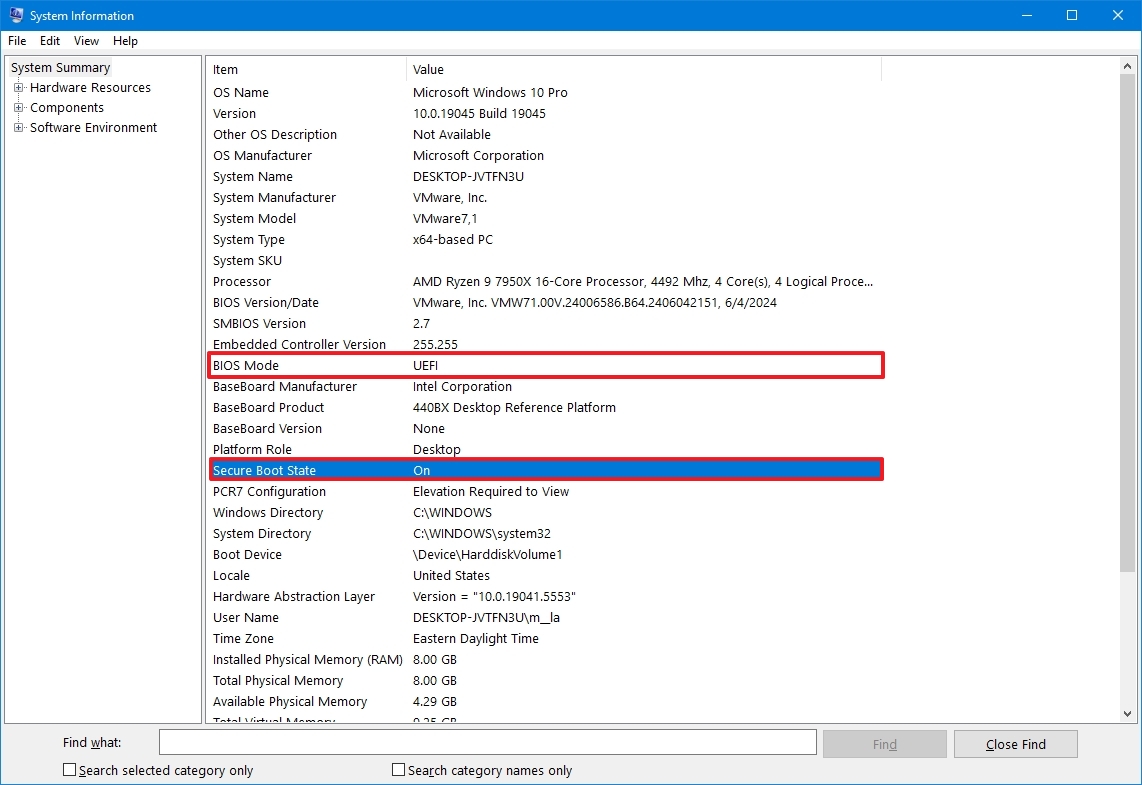
- Search for System Information and click the top result to open the app.
- Click on System Summary on the left pane.
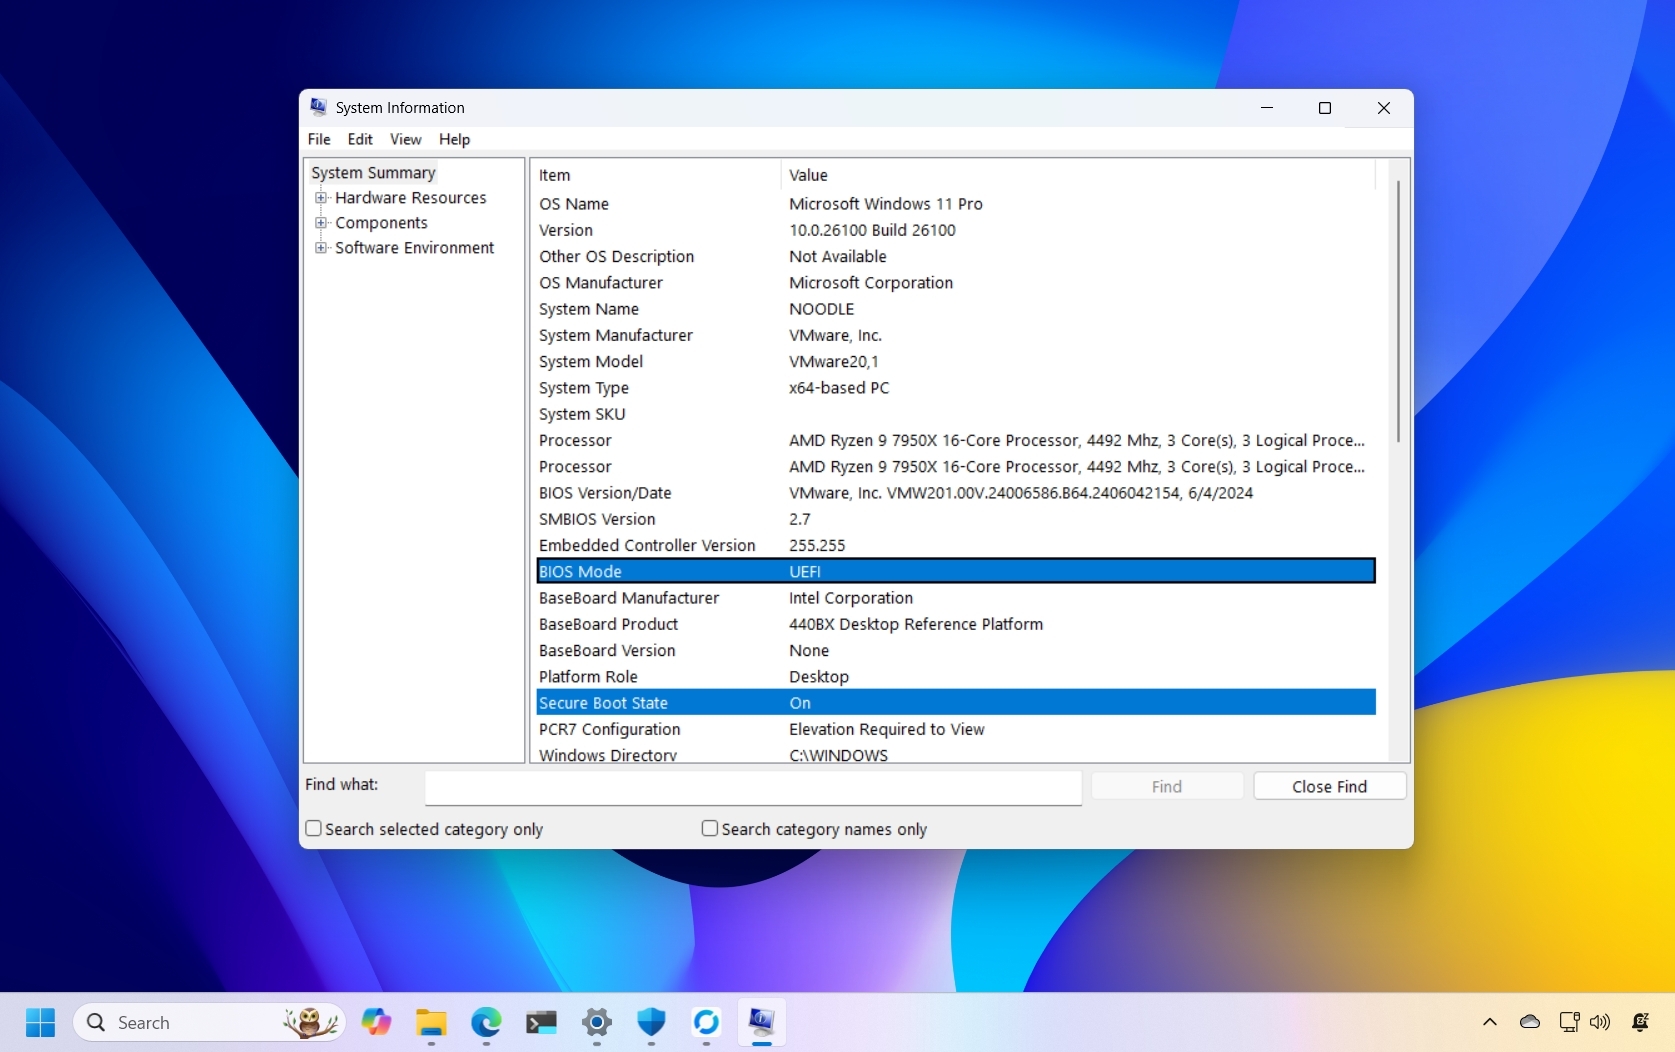
- Check the "Secure Boot State" information:
- On — the feature is enabled.
- Off — the feature is disabled or not supported.
- Check the "BIOS Mode" information:
- UEFI — indicates you can enable Secure Boot.
- Legacy (BIOS) — indicates you can enable the feature, but it will require additional steps.
Once you complete the steps, if the "Secure Boot State" is Off and "BIOS Mode" is UEFI, you can use the steps outlined below to enable a more secure experience and comply with the Windows 11 requirements.
If the "Secure Boot State" is set to Off and "BIOS Mode" to Legacy, then you want to create a backup of your computer, use the following instructions to convert the installation from MBR to GPT, and then continue with the steps to enable Secure Boot.
How to convert MBR to GTP drive on Windows 10
If you plan to upgrade Windows 10 to Windows 11 on older hardware that supports UEFI, you must first convert the drive from the legacy MBR partition style to GPT in order to switch the system firmware type properly. Otherwise, the computer will no longer start correctly.
On Windows 10, you can use the MBR2GPT command-line tool to change the partition type from MBR to GPT without reinstalling Windows.
Check MBR or GPT partition style
To check the current drive partition style, use these steps:
- Open Start.
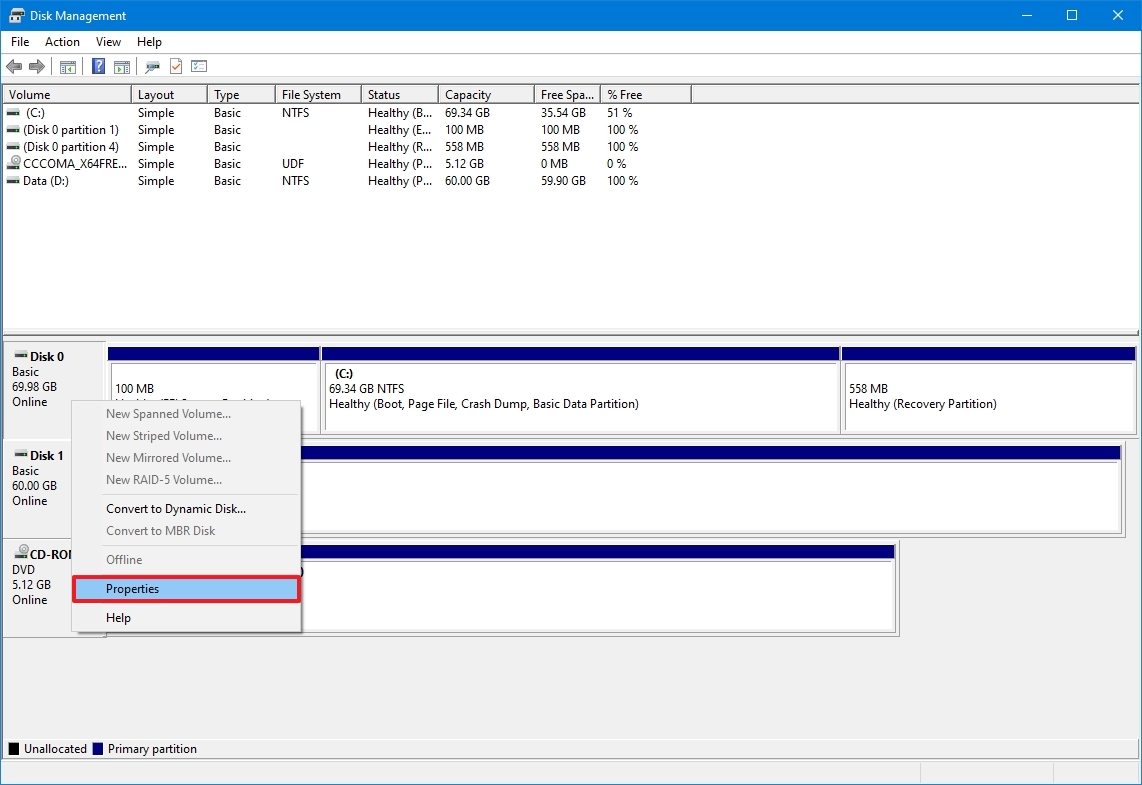
- Search for Disk Management and click the top result to open the experience.
- Right-click the Windows 10 disk (not the volume) and select the Properties option.
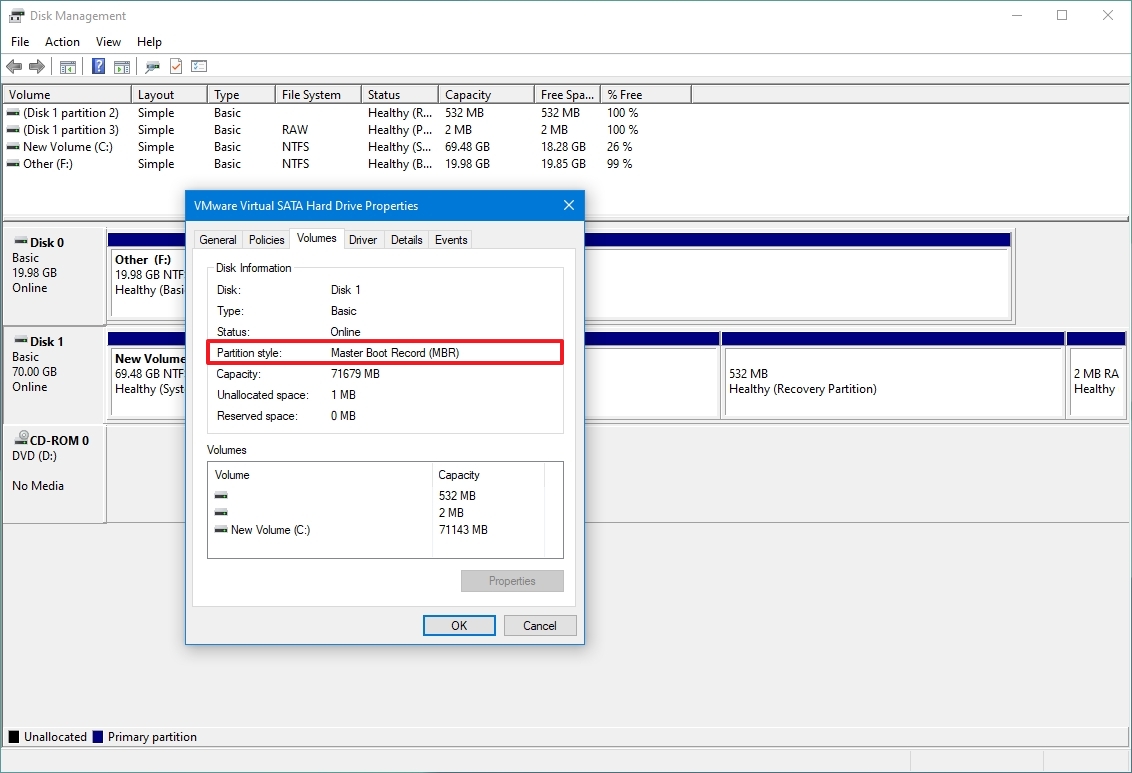
- Click on the Volumes tab.
- Under the "Partition style" field, if the field reads GUID Partition Table (GPT), the drive does not need conversion, but if you see the Master Boot Record (MBR) label, you can use the conversion tool to switch.
- Click the Cancel button.
Once you complete the steps, if the drive needs conversion, use the instructions outlined below.
Convert MBR to GPT partition style
To convert MBR to GPT partition style on Windows 10, use these steps:
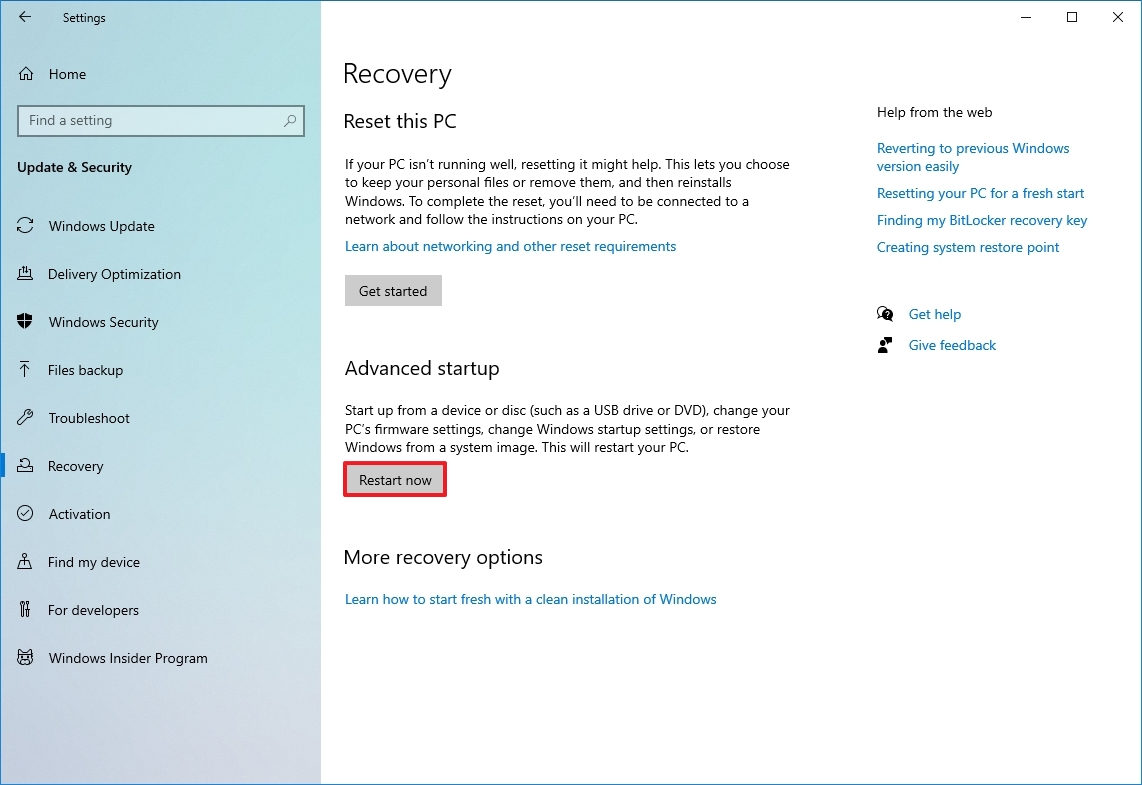
- Open Settings.
- Click on Update & Security.
- Click on Recovery.
- Click the Restart now button under the "Advanced startup" section.
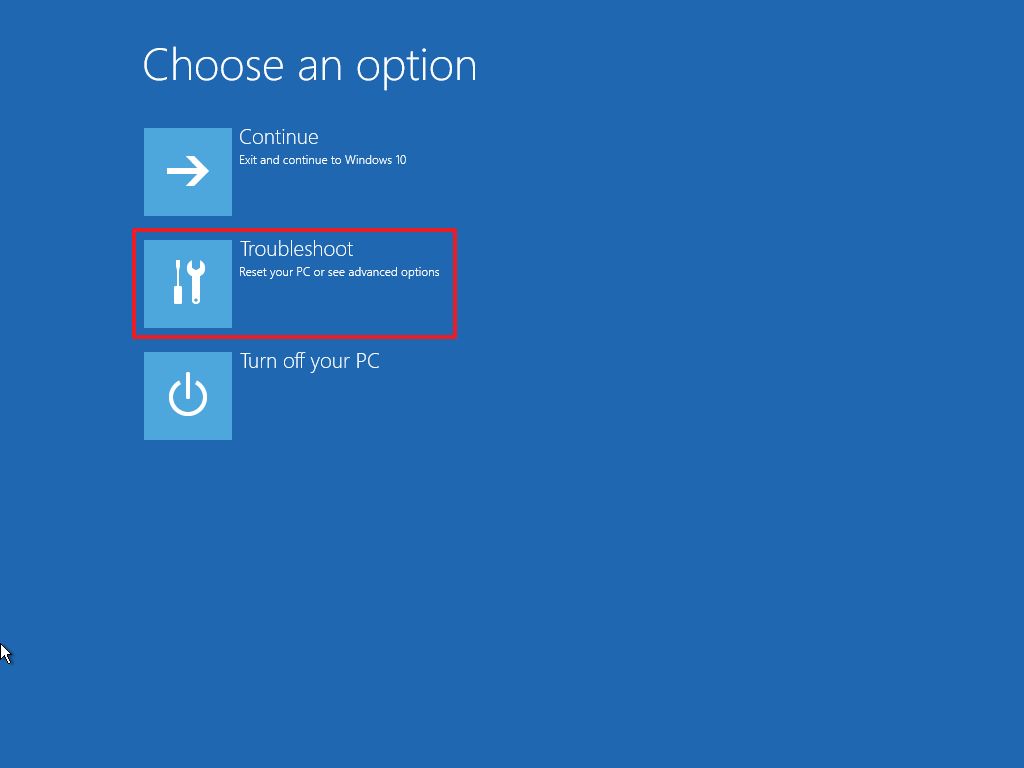
- Click the Troubleshoot option.
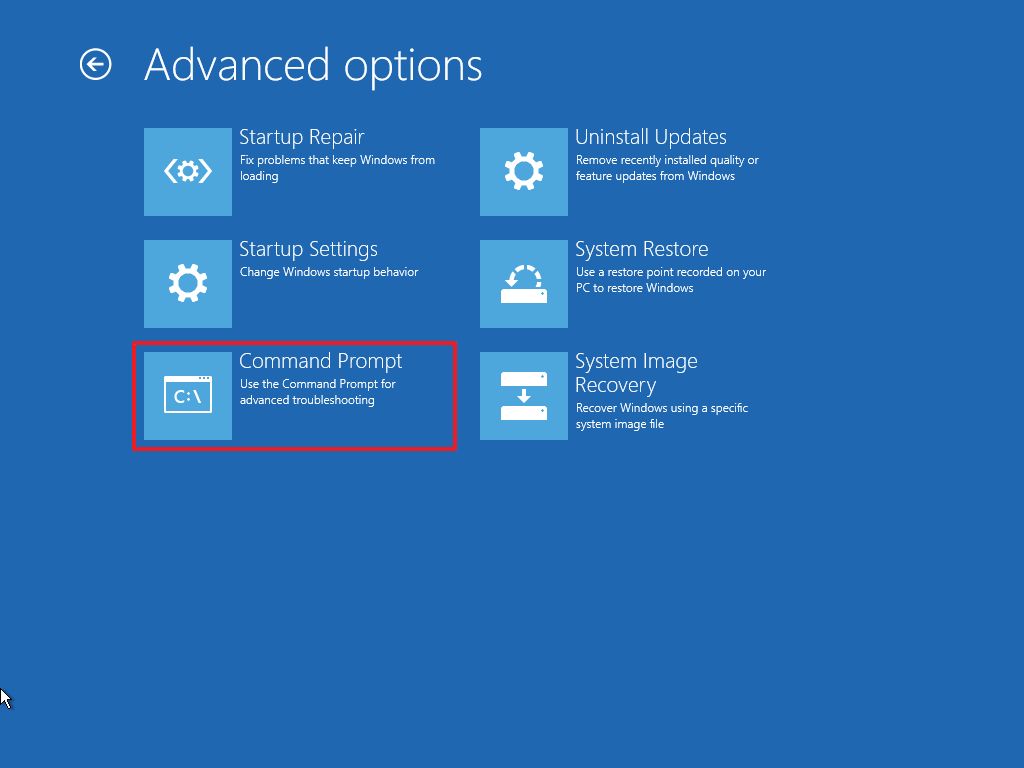
- Click on Advanced options.
- Click the Command Prompt option.
- Select your administrator account and sign in (if applicable).
- Type the following command to validate that the drive meets the requirements and press Enter: mbr2gpt /validate
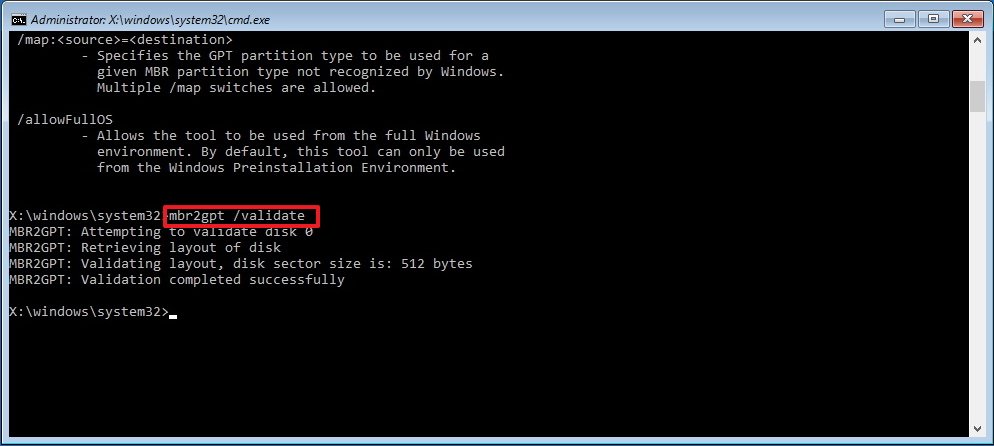
- Quick tip: The mbr2gpt.exe is located in the "System32" folder inside the "Windows" folder. If you want to see all the available options, use the mbr2gpt /? command.
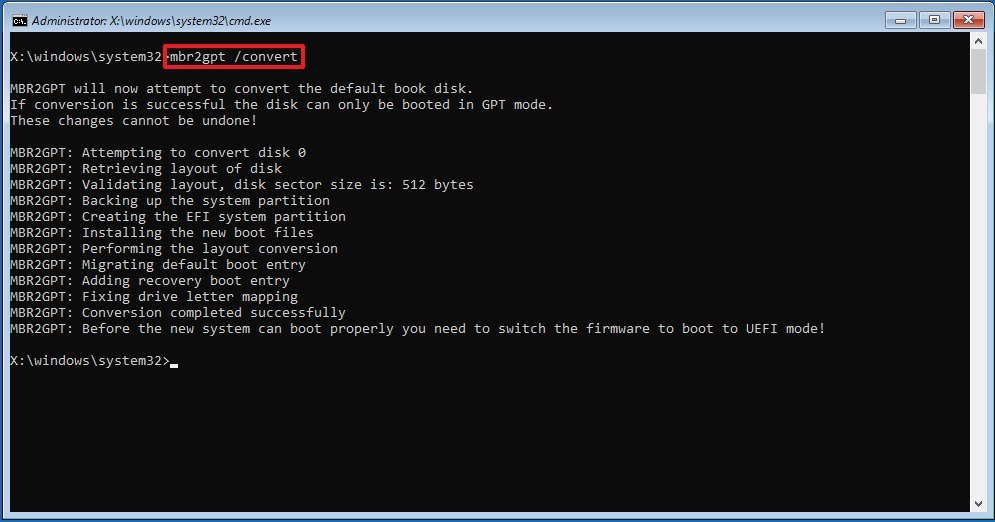
- Type the following command to convert the drive from MBR to GPT and press Enter: mbr2gpt /convert
- Click the Close button.
- Click the Turn off your PC option.
After you complete the steps, the command-line tool will change the partition type to GPT to comply with the requirements to use Windows 11.
If the conversion is successful, the return code should be "0," but if the process fails, you may see one of the 11 error codes.
How to enable Secure Boot on Windows 10
Changing the incorrect firmware settings can prevent a computer from starting correctly. You should access the motherboard settings only when you have a good reason. It's assumed you know what you're doing.
Also, these steps assume the device is already running with UEFI firmware. If the computer is still in the legacy BIOS, you may first need to convert the drive using MBR to GPT (see the above steps). The conversion is unnecessary if you plan to perform a clean installation, but you must go through the conversion before an in-place upgrade. Converting the drive partition should not affect the installation, but creating a backup is always recommended before proceeding.
To enable Secure Boot on a computer with UEFI firmware, use these steps:
- Open Settings.
- Click on Update & Security.
- Click on Recovery.
- Click the Restart now button under the "Advanced startup" section.
- Click on Troubleshoot.
- Click on Advanced options.
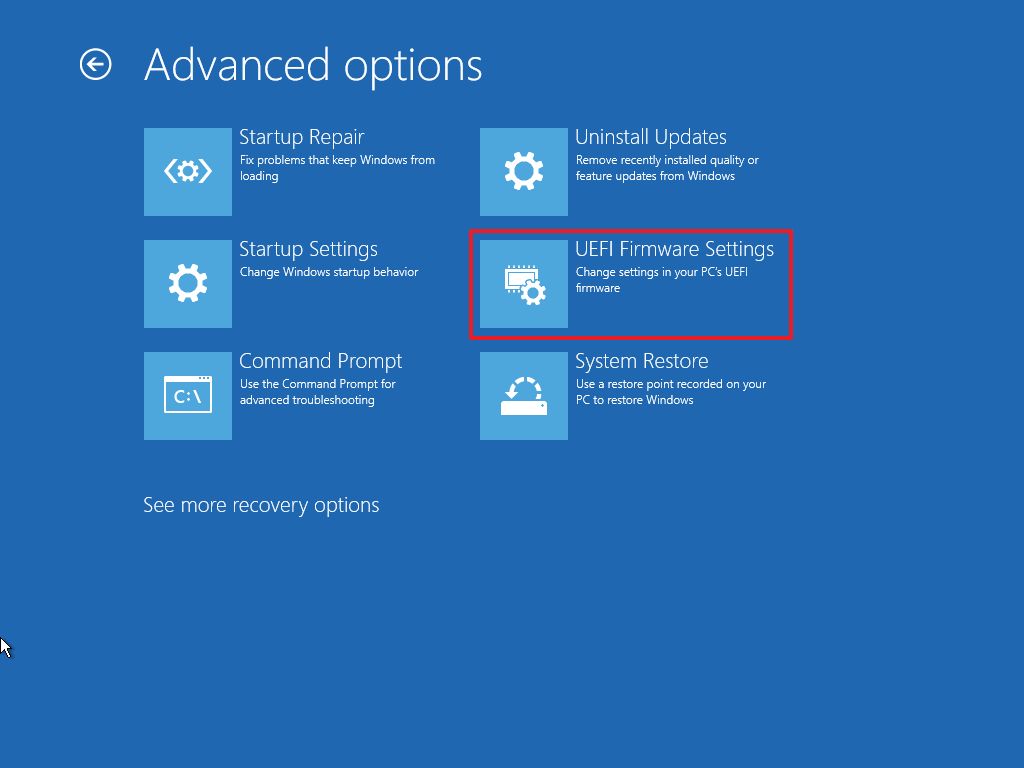
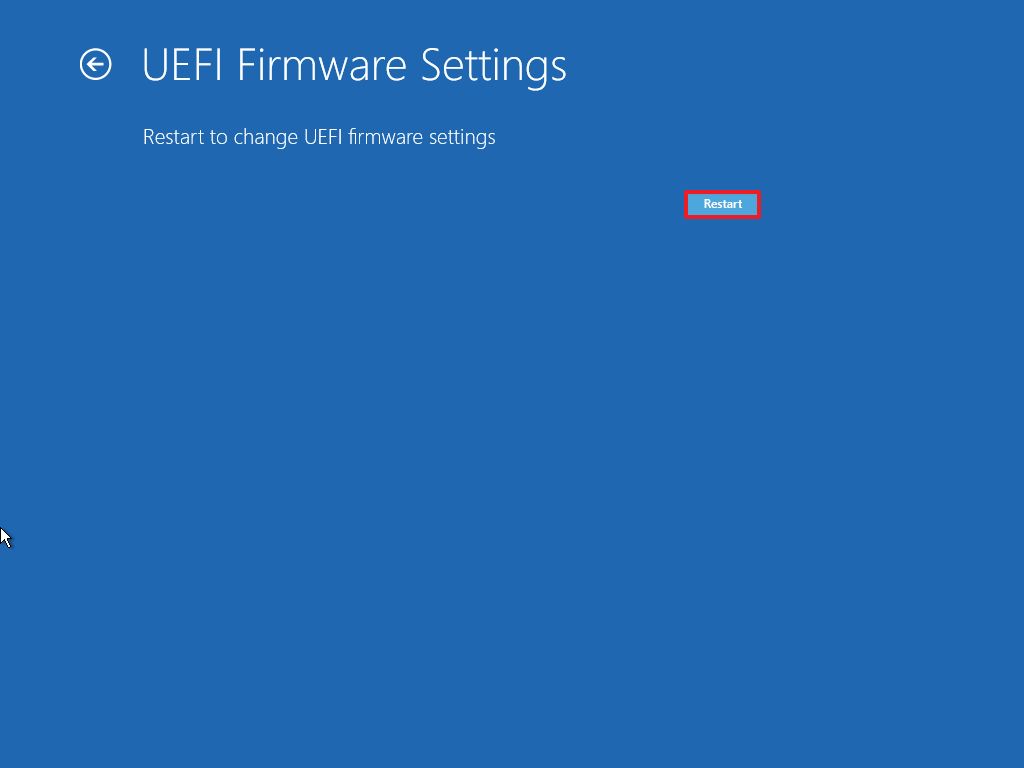
- Click the "UEFI Firmware Settings" option.
- Quick tip: If you have a legacy BIOS, the option will not be available.
- Click the Restart button.
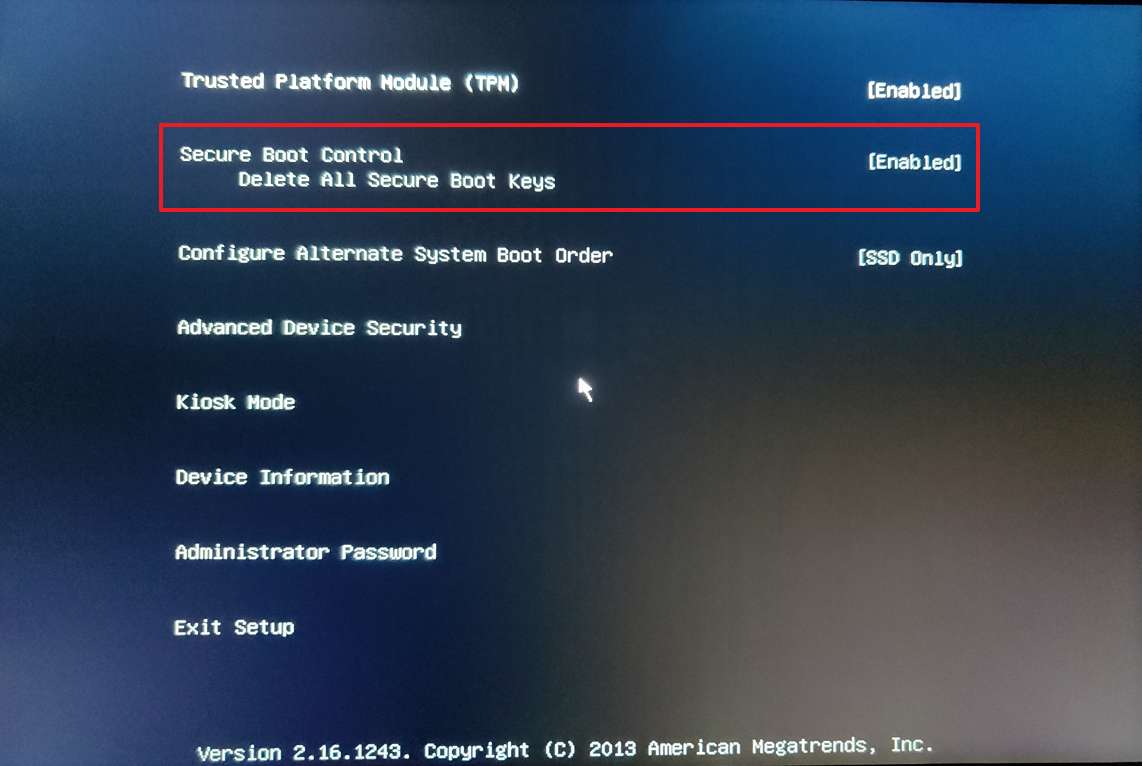
- Open the boot or security settings page.
- Quick note: The UEFI settings are different per manufacturer and even per computer model. You may need to check the manufacturer's support website for more specific details to find the settings.
- Select the Secure Boot option and press Enter.
- Select the Enabled option and press Enter.
- Exit the UEFI settings.
- Confirm the changes to restart the device.
After you complete the steps, the computer will start using the Secure Boot feature to comply with the system requirements.
How to enable Secure Boot during startup
You can also enable Secure Boot on the computer during startup instead of using the Settings app.
To access the device firmware during the boot process on Windows, use these steps:
- Press the Power button.
- See the screen splash to identify the key you must press to enter the firmware (if applicable).
- Press the required key repeatedly until you enter the setup mode. Usually, you need to press the Esc, Delete, or one of the Function keys (F1, F2, F10, etc.).
- Open the boot or security settings page (as needed).
- Select the Secure Boot option and press Enter.
- Select the Enabled option and press Enter.
- Exit the UEFI settings.
- Confirm the changes to restart the device.
Once you complete the steps, Secure Boot will enable you to support the installation of Windows 11.
If you cannot access the keyboard's firmware, you may need to check the manufacturer's support page to find the keyboard key to use during boot. Here are some brands and their respective keys to access the motherboard's firmware:
- Dell: F2 or F12.
- HP: Esc or F10.
- Acer: F2 or Delete.
- ASUS: F2 or Delete.
- Lenovo: F1 or F2.
- MSI: Delete.
- Toshiba: F2.
- Samsung: F2.
- Surface: Press and hold the volume up button.
More resources
For more helpful articles, coverage, and answers to common questions about Windows 10 and Windows 11, visit the following resources:

Mauro Huculak has been a Windows How-To Expert contributor for WindowsCentral.com for nearly a decade and has over 22 years of combined experience in IT and technical writing. He holds various professional certifications from Microsoft, Cisco, VMware, and CompTIA and has been recognized as a Microsoft MVP for many years.
You must confirm your public display name before commenting
Please logout and then login again, you will then be prompted to enter your display name.
