How to enable Performance Mode on Microsoft Edge
Microsoft is building a new mode for its Edge browser designed to improve performance, and in this guide, we'll show you the steps to enable it.
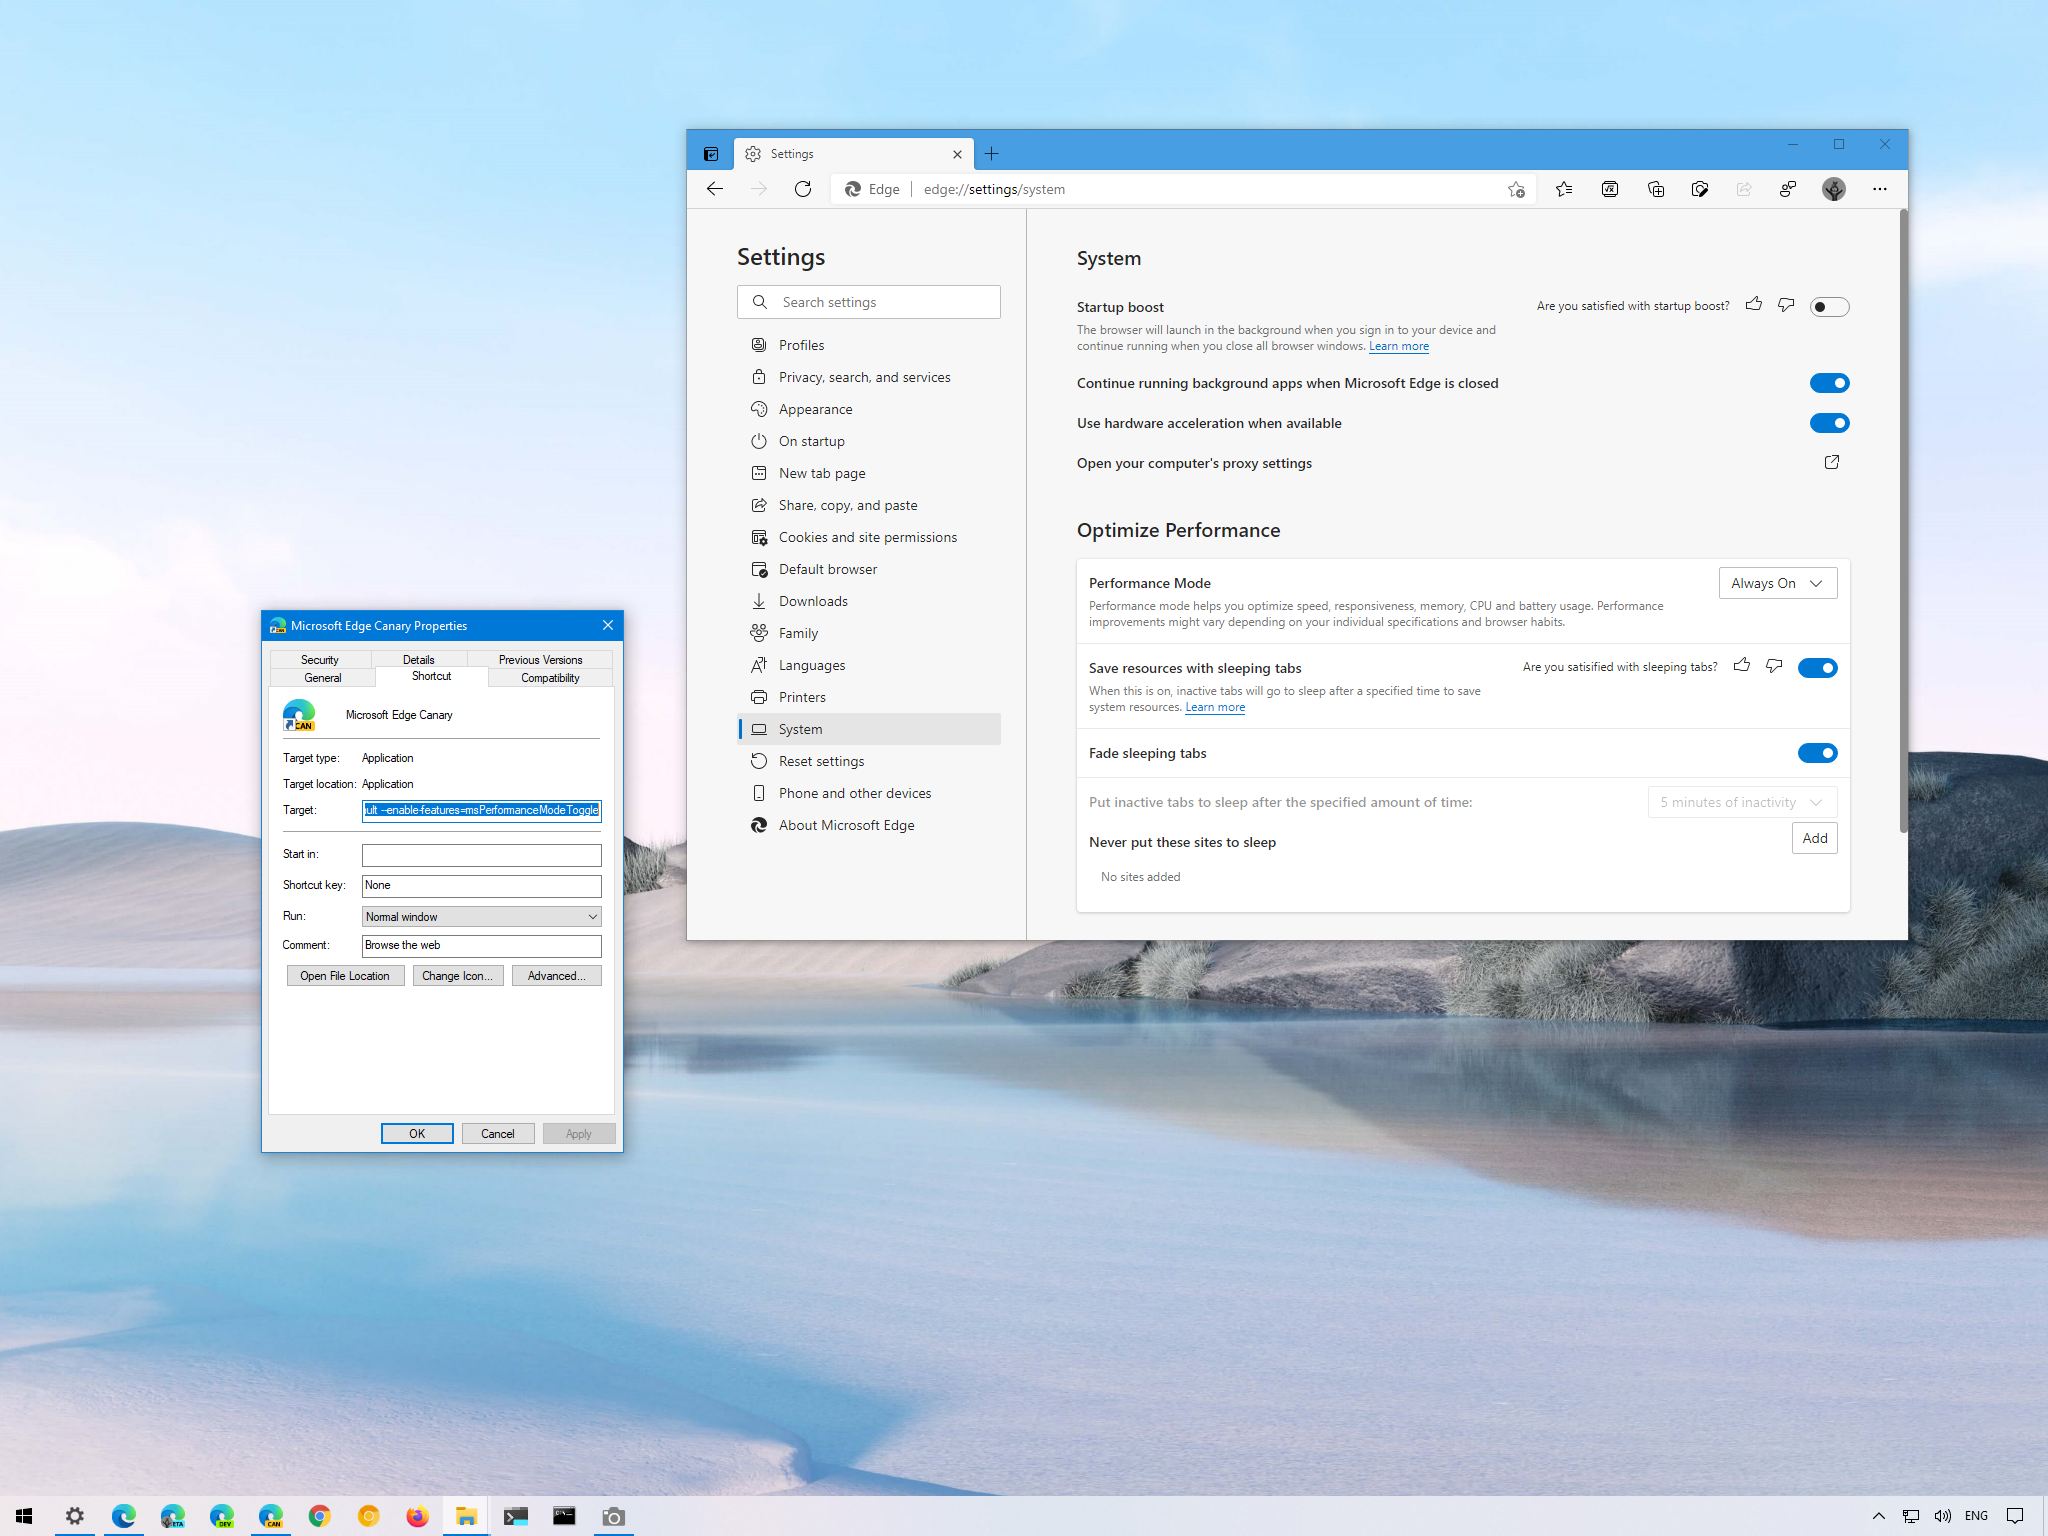
Performance Mode on Microsoft Edge is a new feature the software giant is building that allows the browser to use less memory, processor, and battery to boost system performance, which will be especially helpful on the best Windows laptops.
Microsoft is not detailing a lot of information. However, the new option is part of the Optimize Performance settings and works alongside Sleeping Tabs (another feature on the Chromium version of the browser that helps reduce system resources by putting inactive tabs to sleep until you return to them) since enabling Performance Mode will deactivate the timeout setting and configure tabs to sleep after five minutes of inactivity.
The feature is not yet available in the stable release of Edge. Instead, Microsoft is making it available with version 91.0.856.0 in the Canary channel as a controlled feature, which means that only a select number of testers are getting it automatically. However, the company is making it possible for anyone to enable the feature with a specific line of code.
In this Windows 10 guide, we will walk you through the steps to enable and configure the new Performance Mode on Microsoft Edge.
How to enable Performance Mode feature on Microsoft Edge
To enable Performance Mode on Microsoft Edge, use these steps:
- Open Microsoft Edge (version 91 or higher).
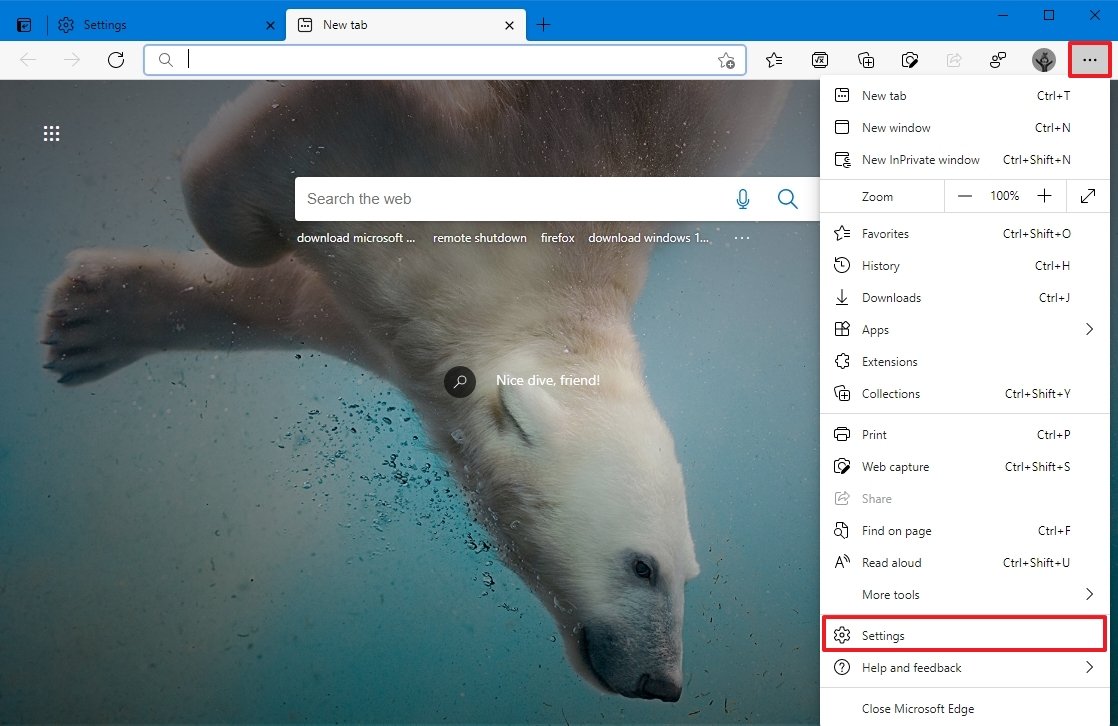
- Click the Settings and more (three-dotted) menu.
- Click the Settings option.
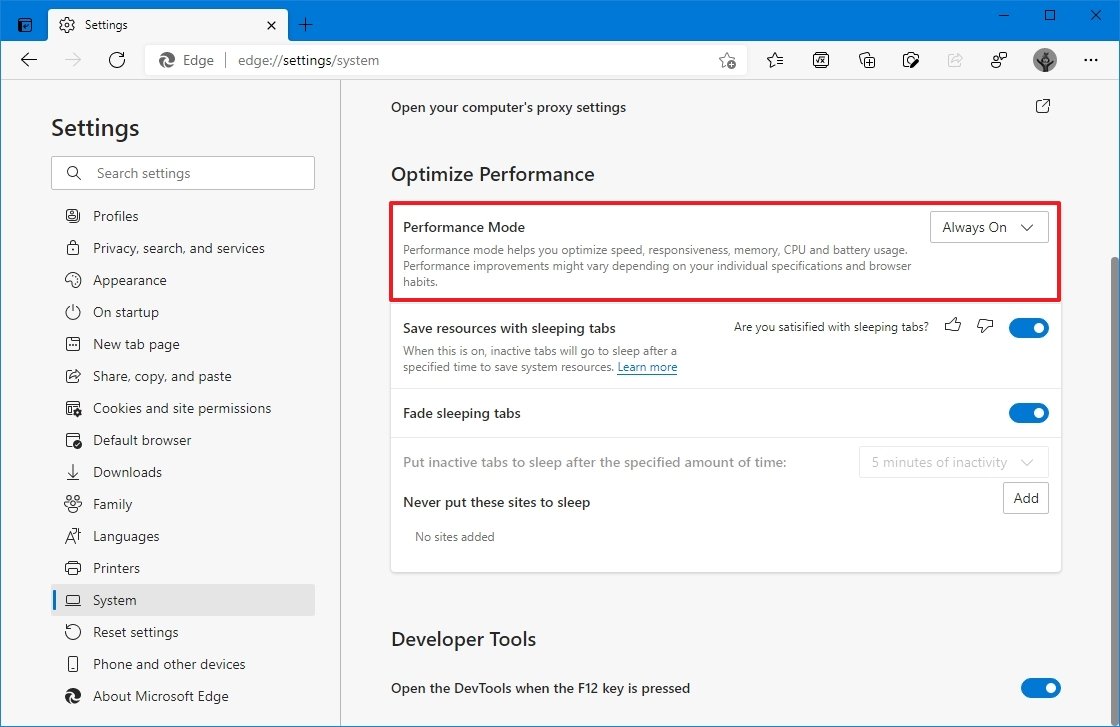
- Click on System.
- Under the "Optimize Performance" section, use the Performance Mode drop-down menu and select the Always On option.
Once you complete the steps, Microsoft Edge will load a specific set of configurations and leverage the Sleeping Tab feature to improve the system performance while browsing.
If you no longer want to use the feature, you can use the same instructions to disable it, but on step 5, make sure to select the Always off option.
All the latest news, reviews, and guides for Windows and Xbox diehards.
How to turn on Performance Mode setting on Microsoft Edge
The new performance feature is still a work in progress, but it is rolling out as a controlled feature, which means that not everyone will get it automatically during the initial testing phase. However, you can force the browser to make the option available with a simple piece of code.
To turn on the Performance Mode option in the Edge settings page, use these steps:
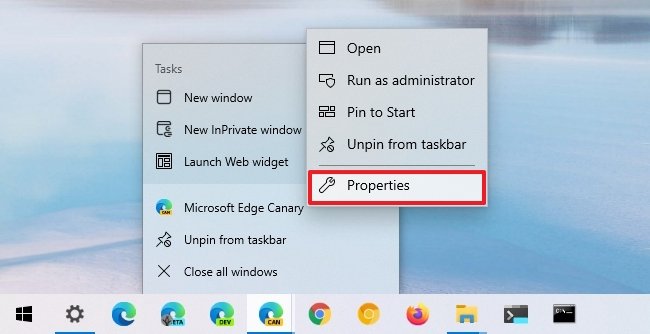
- Right-click the Microsoft Edge icon and select the Properties option.Quick note: If you have the icon pinned to the taskbar, right-click it, right-click the Microsoft Edge Canary item, and then select the Properties option.
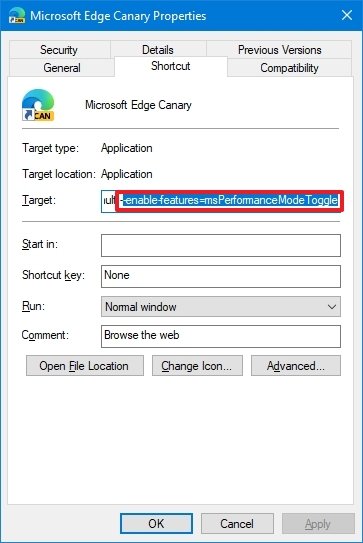
- Click the Shortcut tab.
- In the "Target" field, at the end of the path, add an space, and append this line of code:
--enable-features=msPerformanceModeToggleThe line should look like this:"C:\Users\USERACCOUNT\AppData\Local\Microsoft\Edge SxS\Application\msedge.exe" --profile-directory=Default --enable-features=msPerformanceModeToggle
- Click the Apply button.
- Click the OK button.
After you complete the steps, you can use the previous instructions to enable the feature on the browser.
If you want to revert the changes, you can use the instructions outlined above, but on step 3, make sure to remove the
--enable-features=msPerformanceModeToggleline of code.
How to install Canary version of Microsoft Edge
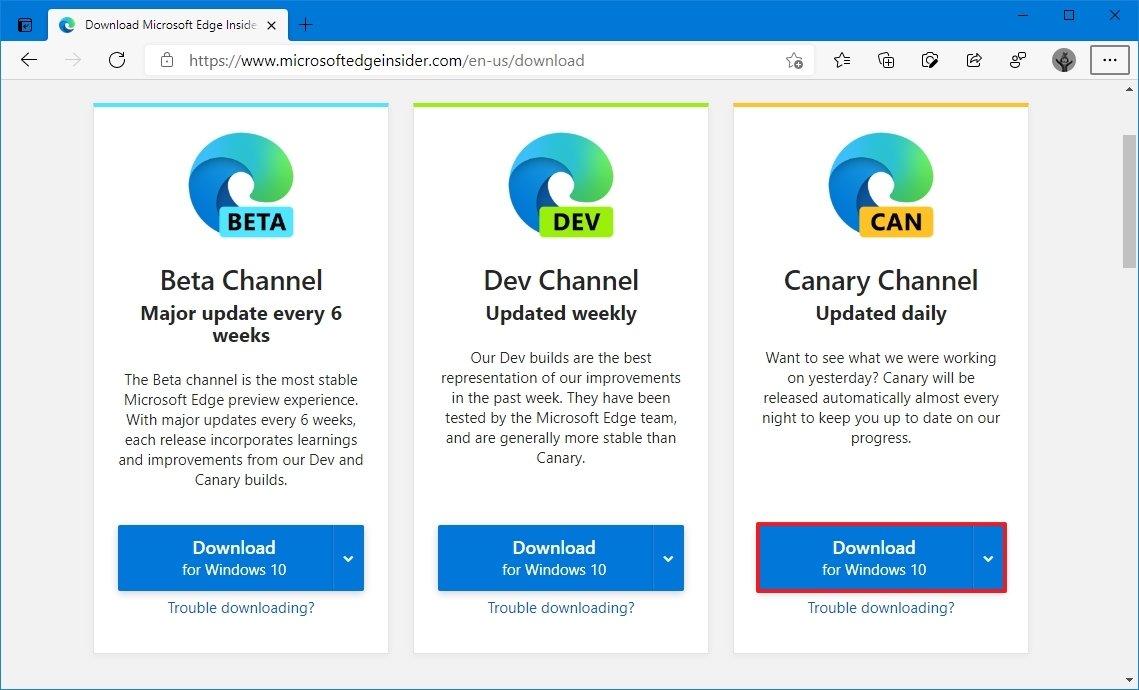
If you do not have the version of the browser, you can download it from the Microsoft Edge Insider Channels page.
To install Edge Canary on Windows 10, use these steps:
- Open Edge Insider page.
- Under the "Canary Channel" section, click the Download button for Windows 10.
- Click the Accept and download button.
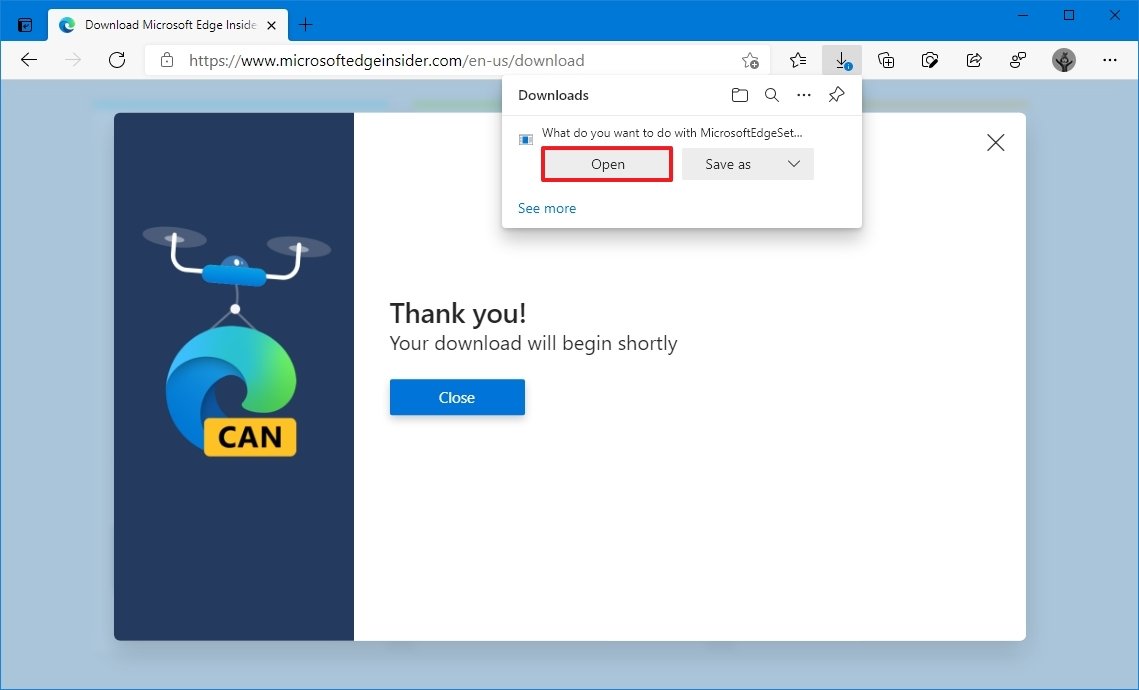
- Click the Open button to launch the installer.
- Click the Close button.
Once you complete the steps, the Canary version of the browser will download and install automatically on the device. If you plan to use this version for a while, you can right-click the icon and select the "Pinned to taskbar" option.
More Windows 10 resources
For more helpful articles, coverage, and answers to common questions about Windows 10, visit the following resources:
- Windows 10 on Windows Central – All you need to know
- Windows 10 help, tips, and tricks
- Windows 10 forums on Windows Central

Mauro Huculak has been a Windows How-To Expert contributor for WindowsCentral.com for nearly a decade and has over 22 years of combined experience in IT and technical writing. He holds various professional certifications from Microsoft, Cisco, VMware, and CompTIA and has been recognized as a Microsoft MVP for many years.
