How to connect to Hotspot 2.0 Wi-Fi networks on Windows 10
In this guide, we explain the new "Hotspot 2.0" Wi-Fi standard and its benefits, and show you how to connect to the networks using Windows 10.

Hotspot 2.0 (HS2) is a new networking standard designed to make the process of connecting to public wireless hotspots easier and more secure with seamless authentication and encryption between your device and access points.
Also known as "Passpoint," or "Next Generation Hotspot," this new approach is based on the IEEE 802.11u standard, and it improves the way you currently discover and connect to network hotspots.
If you're in places such as airports, coffee shops or hotels, you'll see a lot of Wi-Fi networks, and it's not always easy to recognize which ones are safe and which are fake, with malicious users trying to pry into your internet activities.
Hotspot 2.0 networks use WPA2-Enterprise for authentication and encryption between clients and access points. In addition, you don't have to look through multiple networks anymore trying to find out which ones you can connect to with your credentials. Windows 10 automatically discovers and connects to the correct Hotspot 2.0 network on your behalf.
How to tell if your PC supports Hotspot 2.0
Hotspot 2.0 is relatively new, and it's available on Windows 10 devices with compatible hardware.
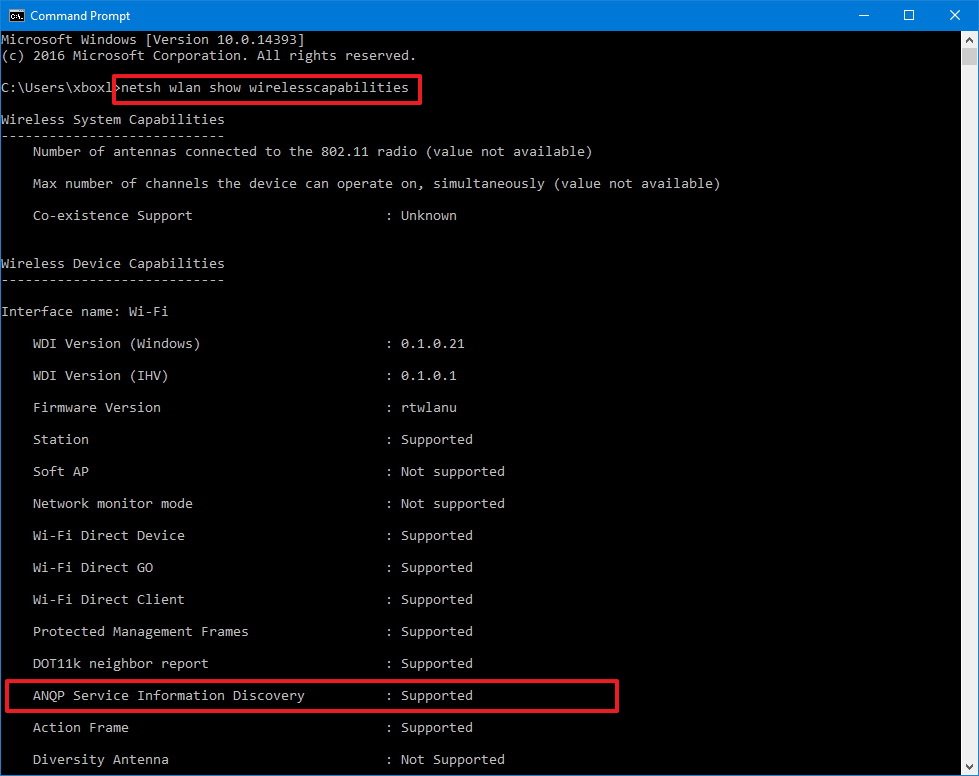
You can quickly check to see if your device supports Hotspot 2.0, using the following steps:
- Open Start.
- Search for Command Prompt and click the result.
- Type the following command and press Enter:
netsh wlan show wirelesscapabilities

If the command output shows that your PC supports ANQP Service Information Discovery, you can connect to Hotspot 2.0 networks.
Get the Windows Central Newsletter
All the latest news, reviews, and guides for Windows and Xbox diehards.
How to enable Hotspot 2.0 networks
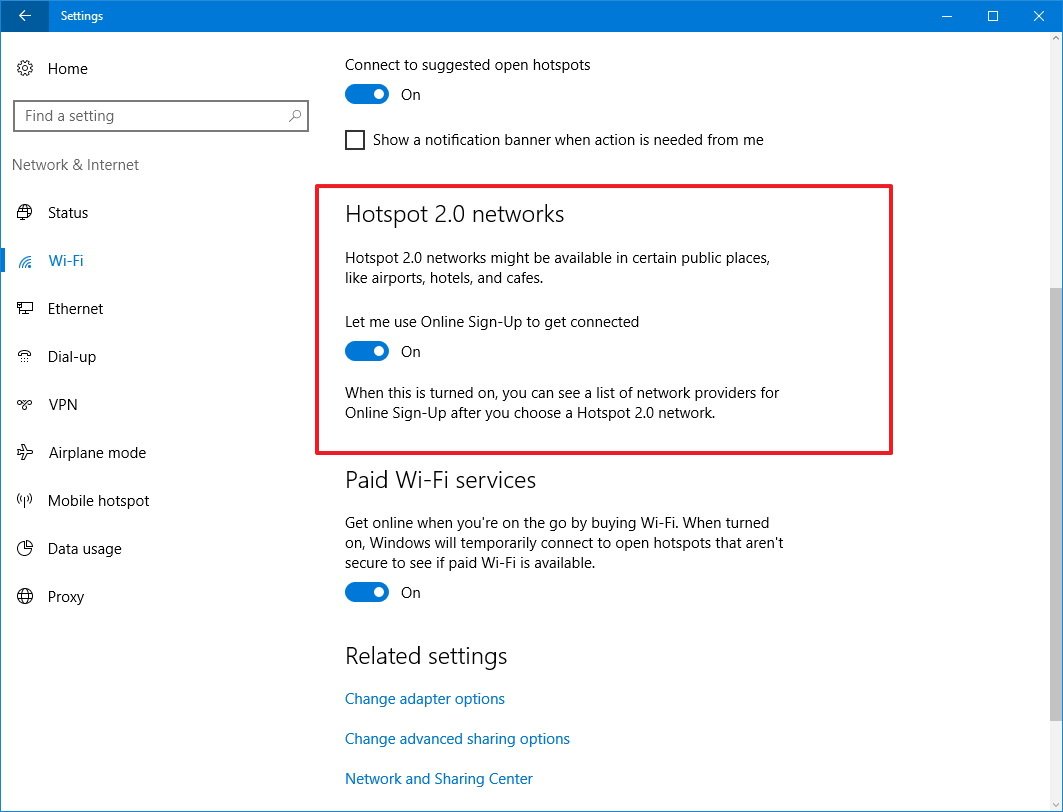
Once you know your device works with the new standard, you can use the following steps to turn on the feature so that it lists the providers when you're trying to connect after selecting a Hotspot 2.0 network.
- Open Settings.
- Click on Network & Internet.
- Click on Wi-Fi.
- Under the "Hotspot 2.0 networks", turn on the Let me use Online Sign-Up to get connected toggle switch.

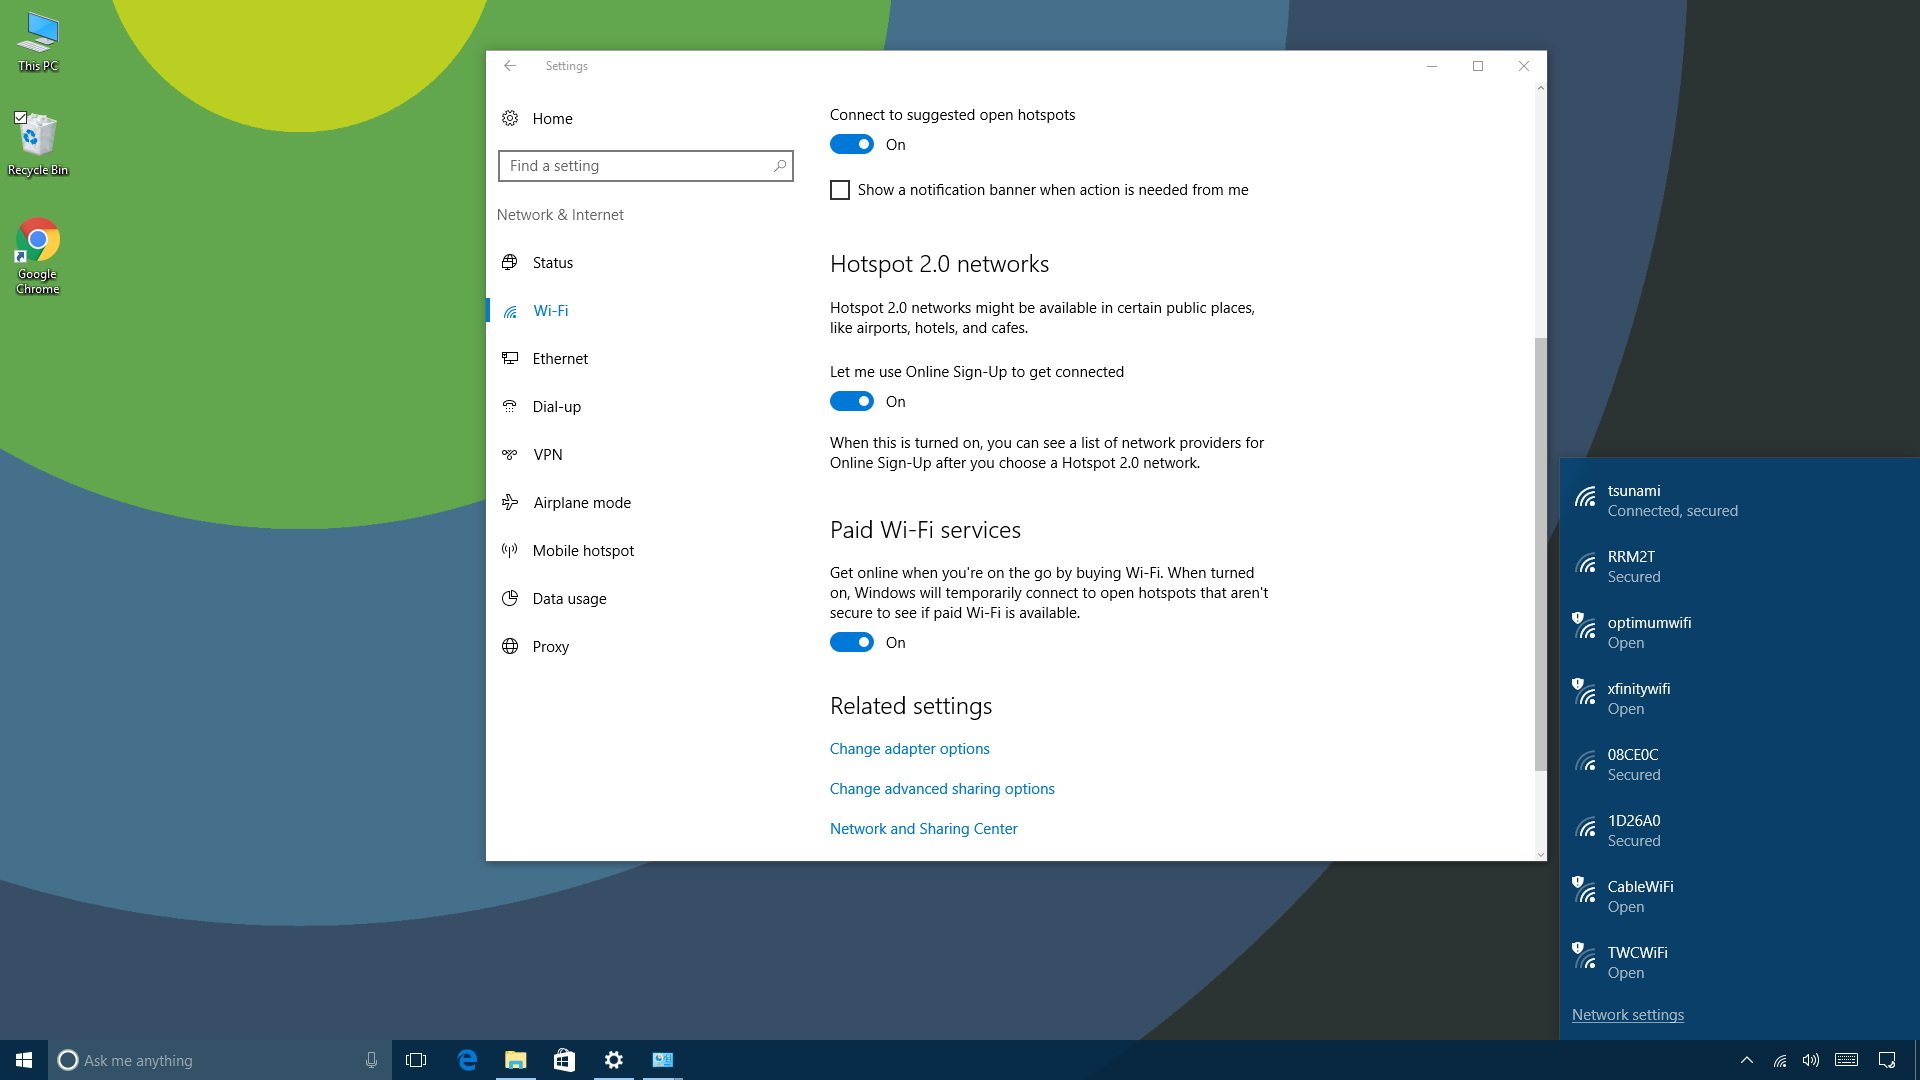
When the option is enabled, Hotspot 2.0 networks appear in your list of Wi-Fi networks when they're available.
How to connect to Hotspot 2.0 networks
The connection process is very simple. You just click the network from the list and hit the Connect button. You'll then get a sign-in prompt to connect to your provider. This is a one-time sign-in process, and after entering your credentials, your device will connect online automatically when a Hotspot 2.0 network is available.
It's also possible for providers to offer profiles to make the process even easier to connect to a Hotspot 2.0 network. For example, Boingo is a mobile wireless provider that allows you to download and install a profile using your web browser to connect automatically to a number of airport hotspots using affiliated networks.
Quick Tip: Once you download a profile, you must disconnect from your current Wi-Fi network and reconnect for the new profile to work.
Perhaps the most interesting aspect of Hotspot 2.0 networks is that providers can partner to allow customers to quickly and securely connect online through different providers.
For example, if you're on the go while subscribed to provider "A", which partners with providers "B" and "C" to offer Hotspot 2.0, but provider "A" is not available at your current location, you can connect online using provider "B" or "C" automatically without extra steps, just like roaming on your phone.
Wrapping things up
We're still in the early days of Hotspot 2.0, which means that not every network you try to connect to in places such as airports, hotels and coffee shops will offer this technology. However, as internet providers continue to adopt it, you're going to start seeing more places offer Hotspot 2.0. Once you set it up, you'll never need to go through the process of finding a network or signing in again to securely connect online.
The technology is not only available on Windows 10 but also on Apple's macOS, starting with version 10.9, and iOS 7, as well as Google Android 6.0 and later.
More Windows 10 resources
For more help articles, coverage, and answers to common questions about Windows 10, visit the following resources:
- Windows 10 on Windows Central – All you need to know
- Windows 10 help, tips, and tricks
- Windows 10 forums on Windows Central
Mauro Huculak has been a Windows How-To Expert contributor for WindowsCentral.com for nearly a decade and has over 15 years of experience writing comprehensive guides. He also has an IT background and has achieved different professional certifications from Microsoft, Cisco, VMware, and CompTIA. He has been recognized as a Microsoft MVP for many years.

