How to enable high-contrast themes on Windows 11
Windows 11 has a high-contrast mode that makes the experience more usable for people with low vision. Here's how to use the feature.
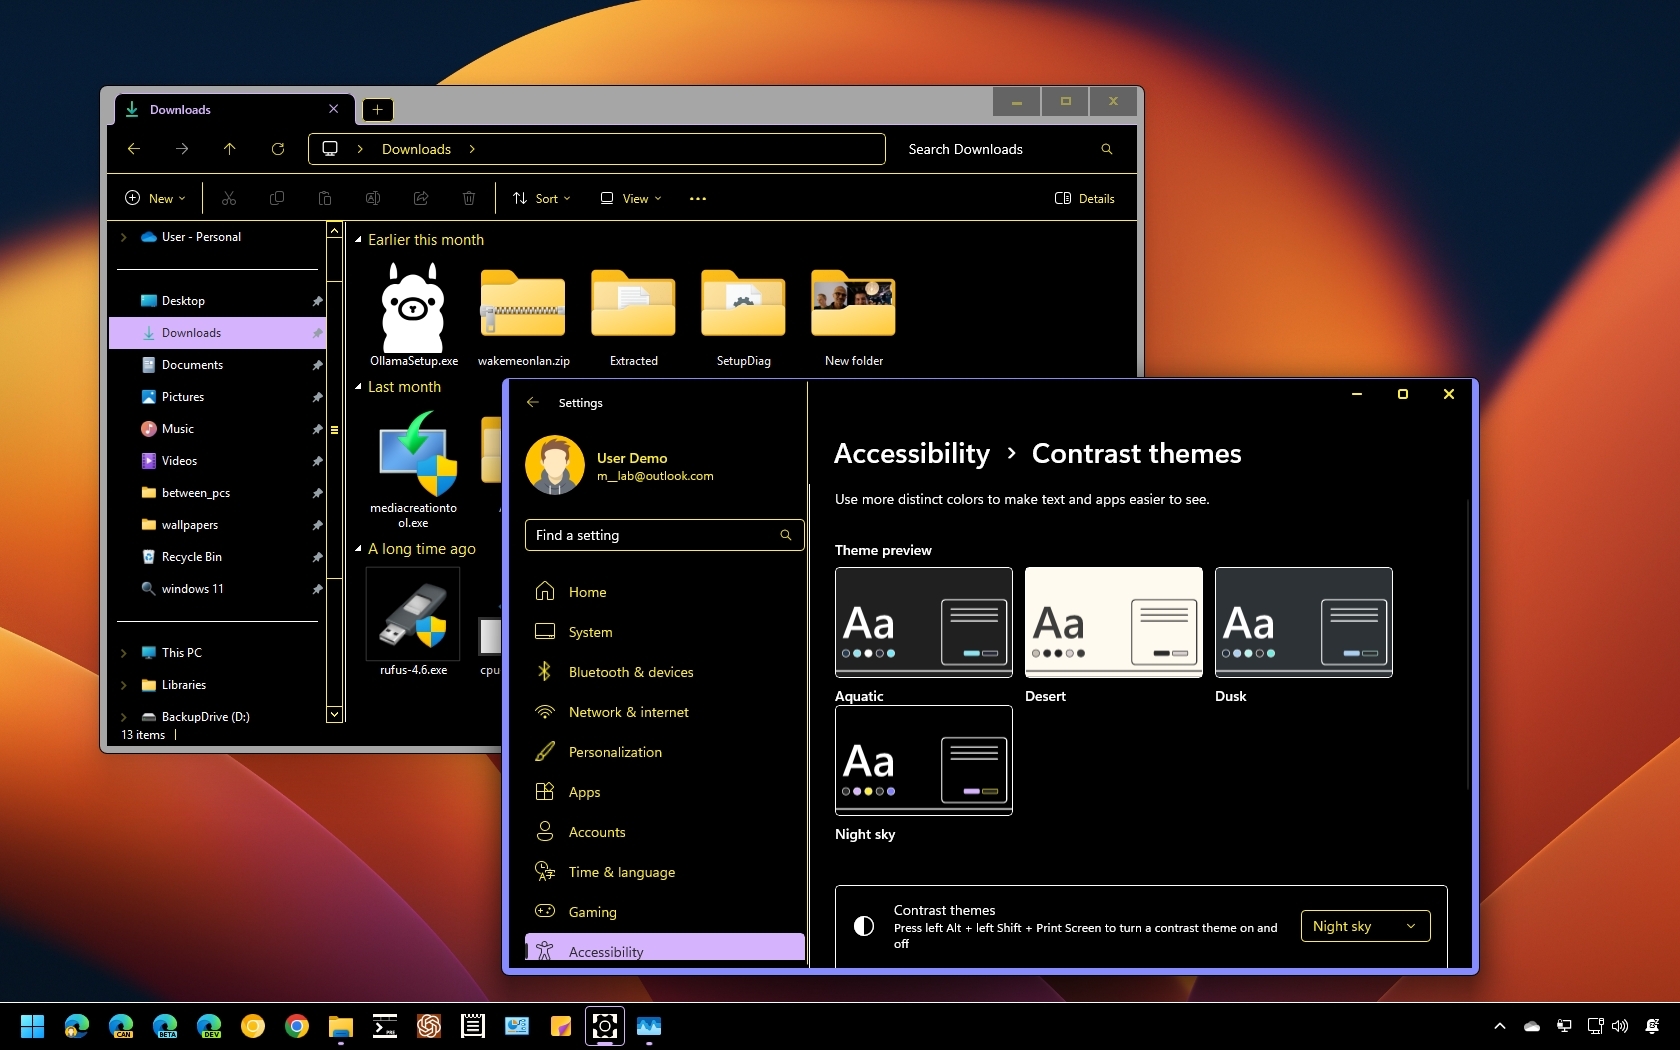
Although Windows 11's default system color scheme suits most users, it also offers four high-contrast themes tailored for individuals with low vision. However, anyone can benefit from these themes. Activating these themes adjust elements like text, links, buttons, and backgrounds to specific high-contrast colors, enhancing readability both on Windows 11 and online. Additionally, you can create and apply a custom theme with colors that meet your specific needs.
In this how-to guide, I'll explain how to enable and configure high-contrast mode on your laptop or desktop computer.
These instructions has been updated to ensure accuracy and reflect changes to the process in the operating system.
How to enable high-contrast mode on Windows 11
To switch to one of the contrast Windows 11 themes, use these steps:
- Open Settings.
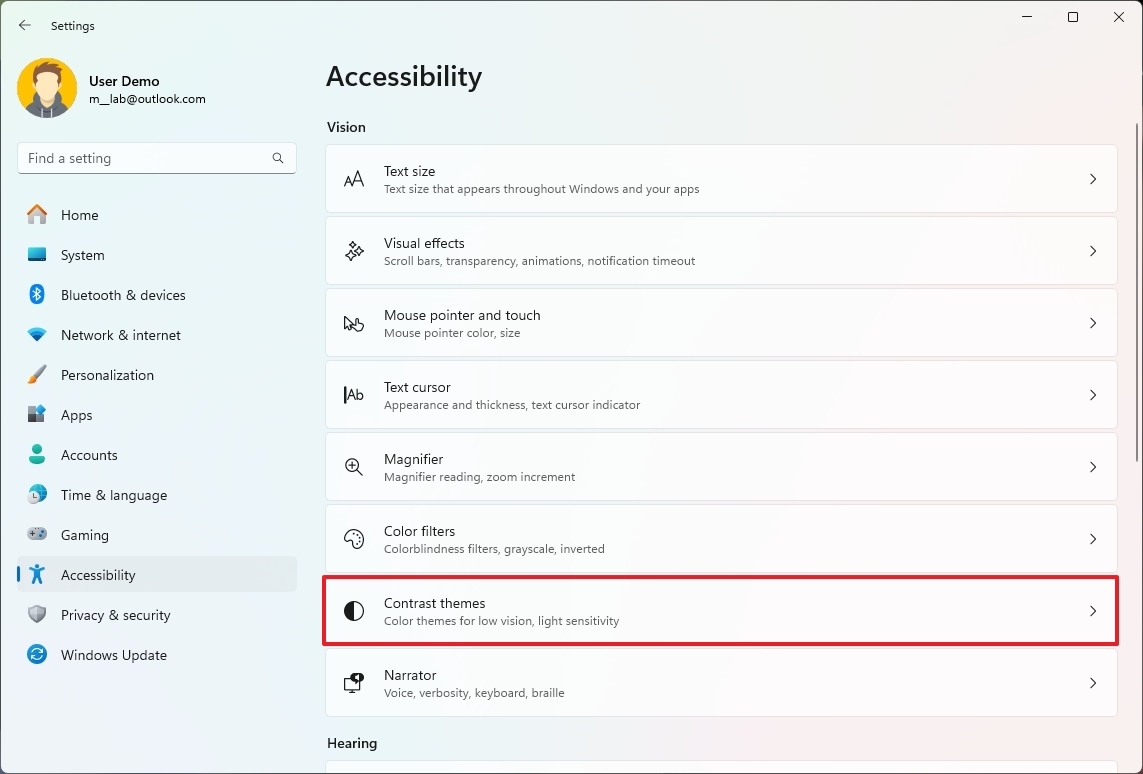
- Click on Accessibility.
- Click the Contrast themes page on the right side.
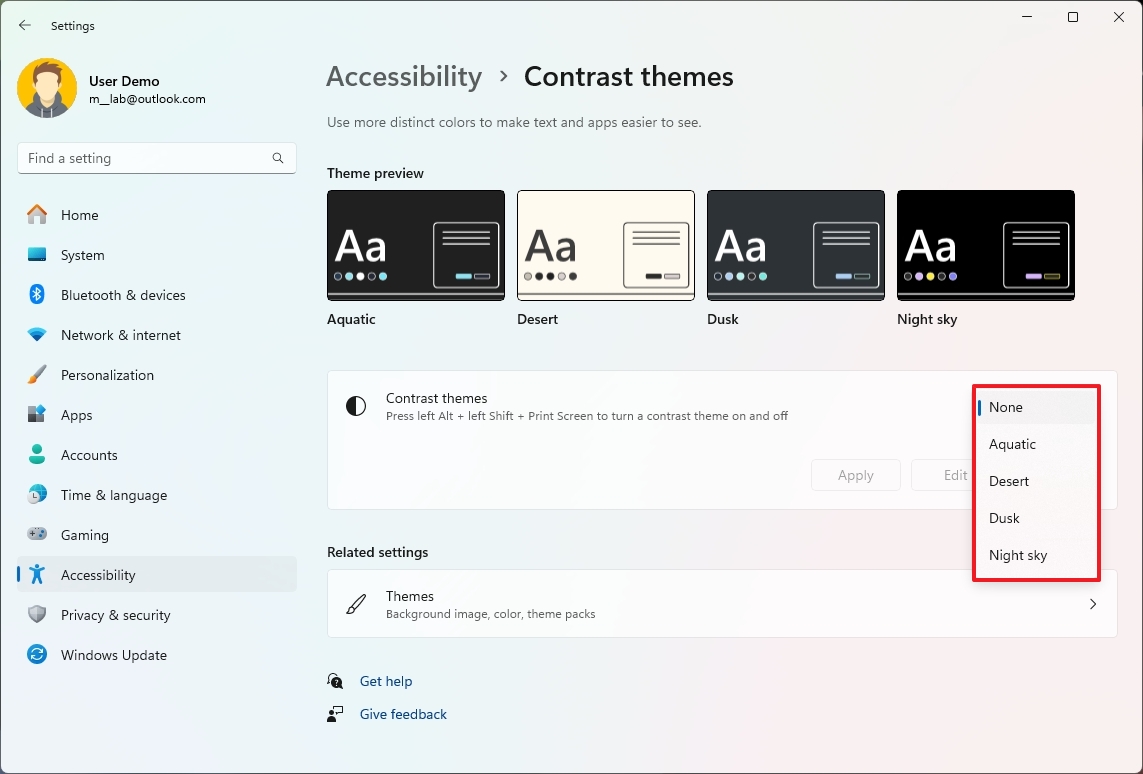
- Select one of the available themes under the "Contrast themes" setting:
- Aquatic.
- Desert.
- Dusk.
- Night sky.
- Click the Apply button.
- (Optional) Use the "Left Alt key + Left Shift key + Print screen" keyboard shortcut to enable or disable the contrast theme.
Once you complete the steps, the Windows experience will switch to the high-contrast mode. When applying a high-contrast theme, it's normal to see a "Please wait" screen for a few seconds while the system applies the changes.
How to create custom high-contrast mode on Windows 11
To create a custom high-contrast theme, use these steps:
- Open Settings.
- Click on Accessibility.
- Click the Contrast themes page on the right side.
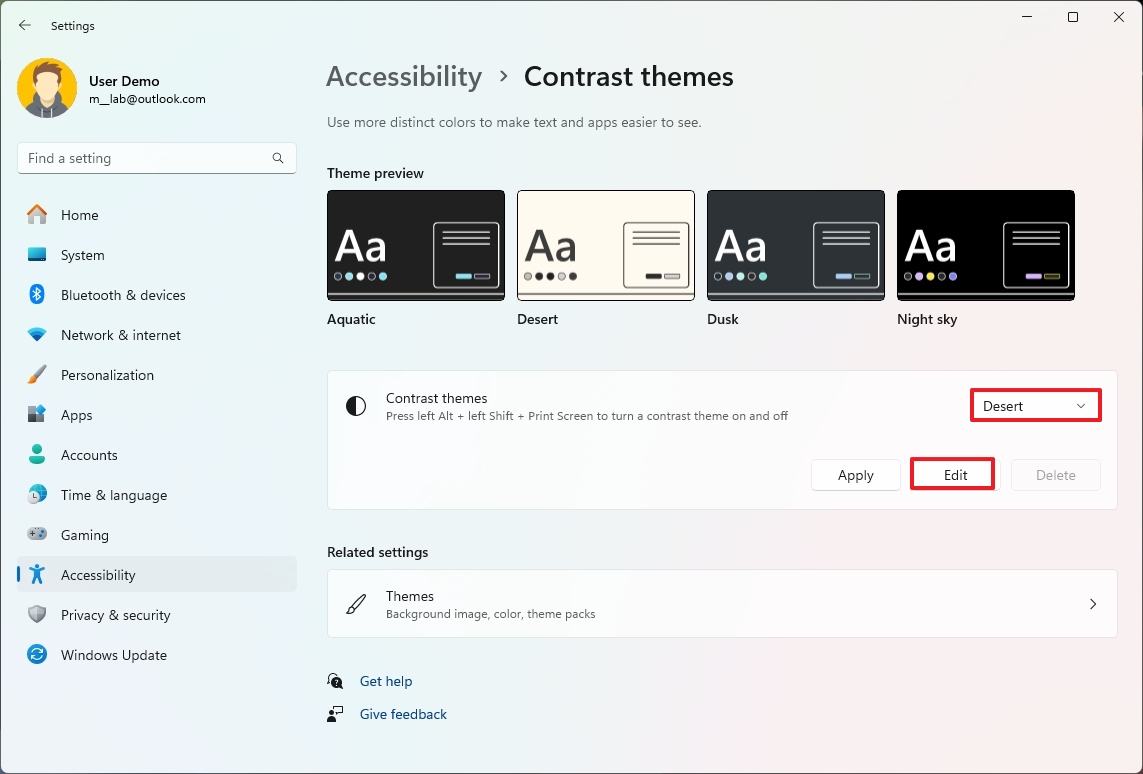
- Select one of the available themes under the "Contrast themes" setting — for example, Desert.
- Click the Edit button.
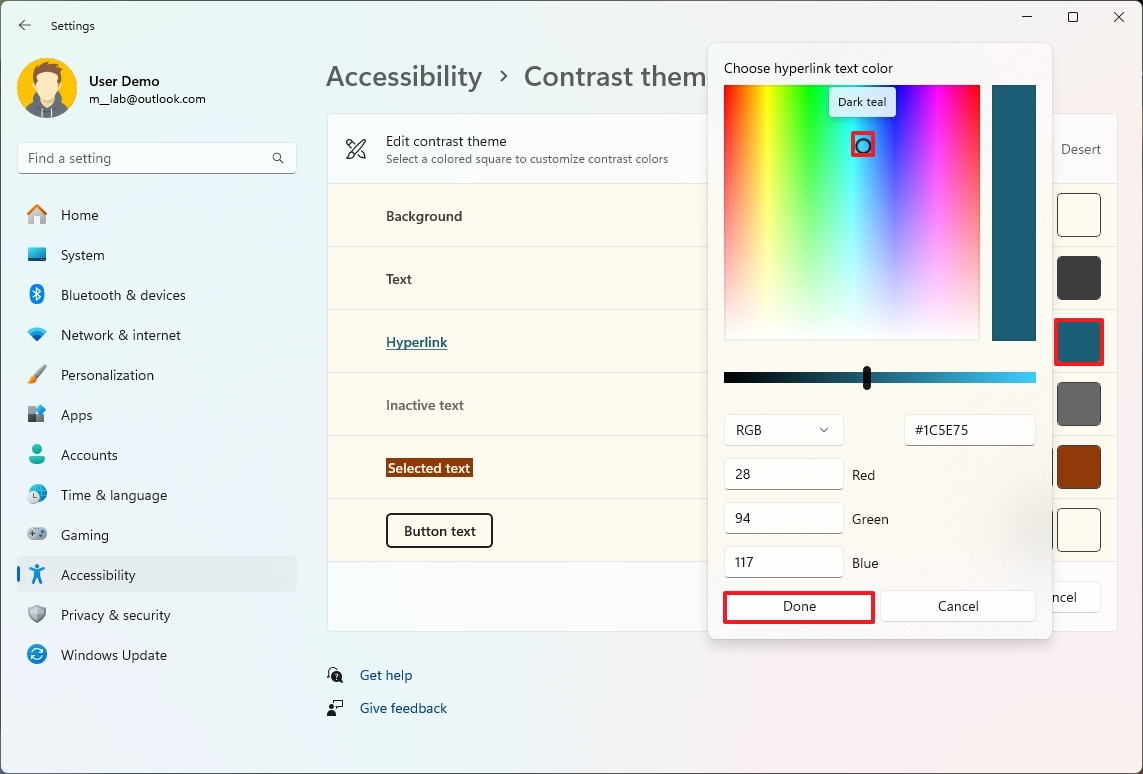
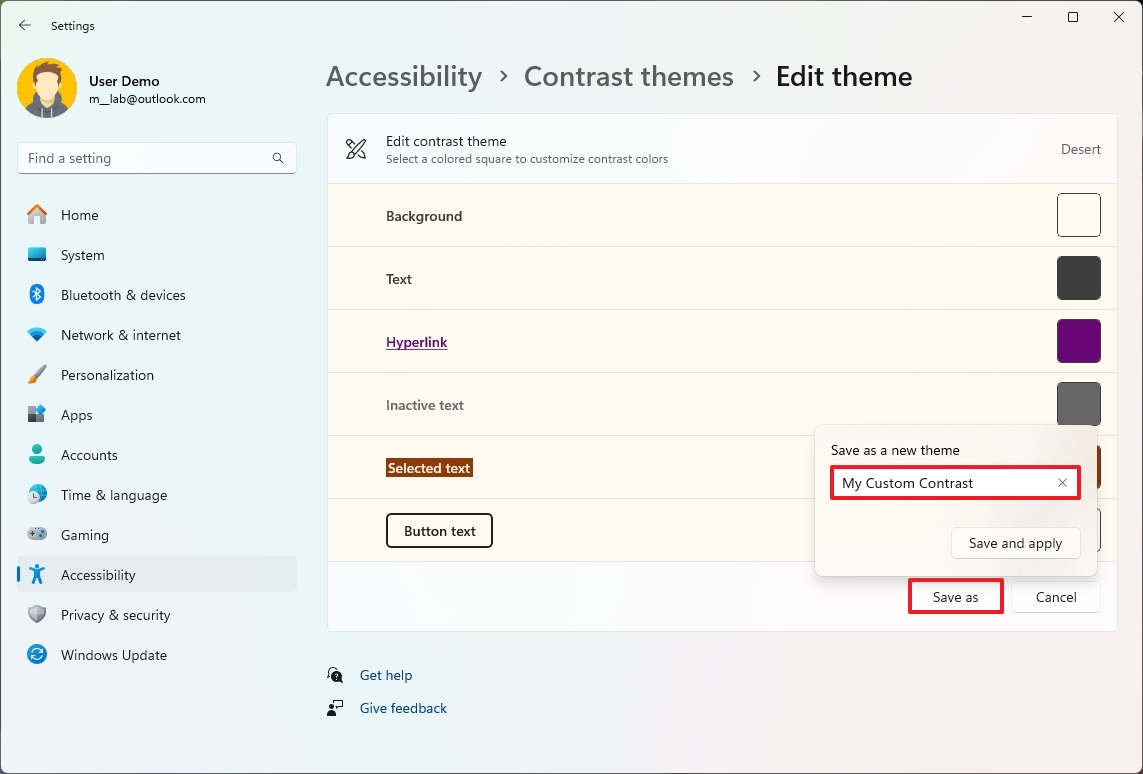
- Use the Background setting to set the background for the elements that show text on Windows 11.
- Use the Text setting to set the text color for Windows 11 and web pages.
- Use the Hyperlink setting to set the text color of links available on Windows 11 or web pages.
- Use the Inactive text setting to change the text color for inactive text across the experience.
- Use the Selected text setting to choose the text color for text selection.
- Use the Button text to set the color for buttons and text inside the buttons.
- Click the Save as button.
- Confirm a name for the new custom theme.
- Click the "Save and apply" button.
As you make the changes, you will see a preview in the setting. After you complete the steps, the theme will apply immediately with all the custom settings.
More resources
For more helpful articles, coverage, and answers to common questions about Windows 10 and Windows 11, visit the following resources:
All the latest news, reviews, and guides for Windows and Xbox diehards.

Mauro Huculak has been a Windows How-To Expert contributor for WindowsCentral.com for nearly a decade and has over 22 years of combined experience in IT and technical writing. He holds various professional certifications from Microsoft, Cisco, VMware, and CompTIA and has been recognized as a Microsoft MVP for many years.
You must confirm your public display name before commenting
Please logout and then login again, you will then be prompted to enter your display name.
