How to enable file compression on Windows 11
Yes, you can use file compression to save space on Windows 11, and here's how.
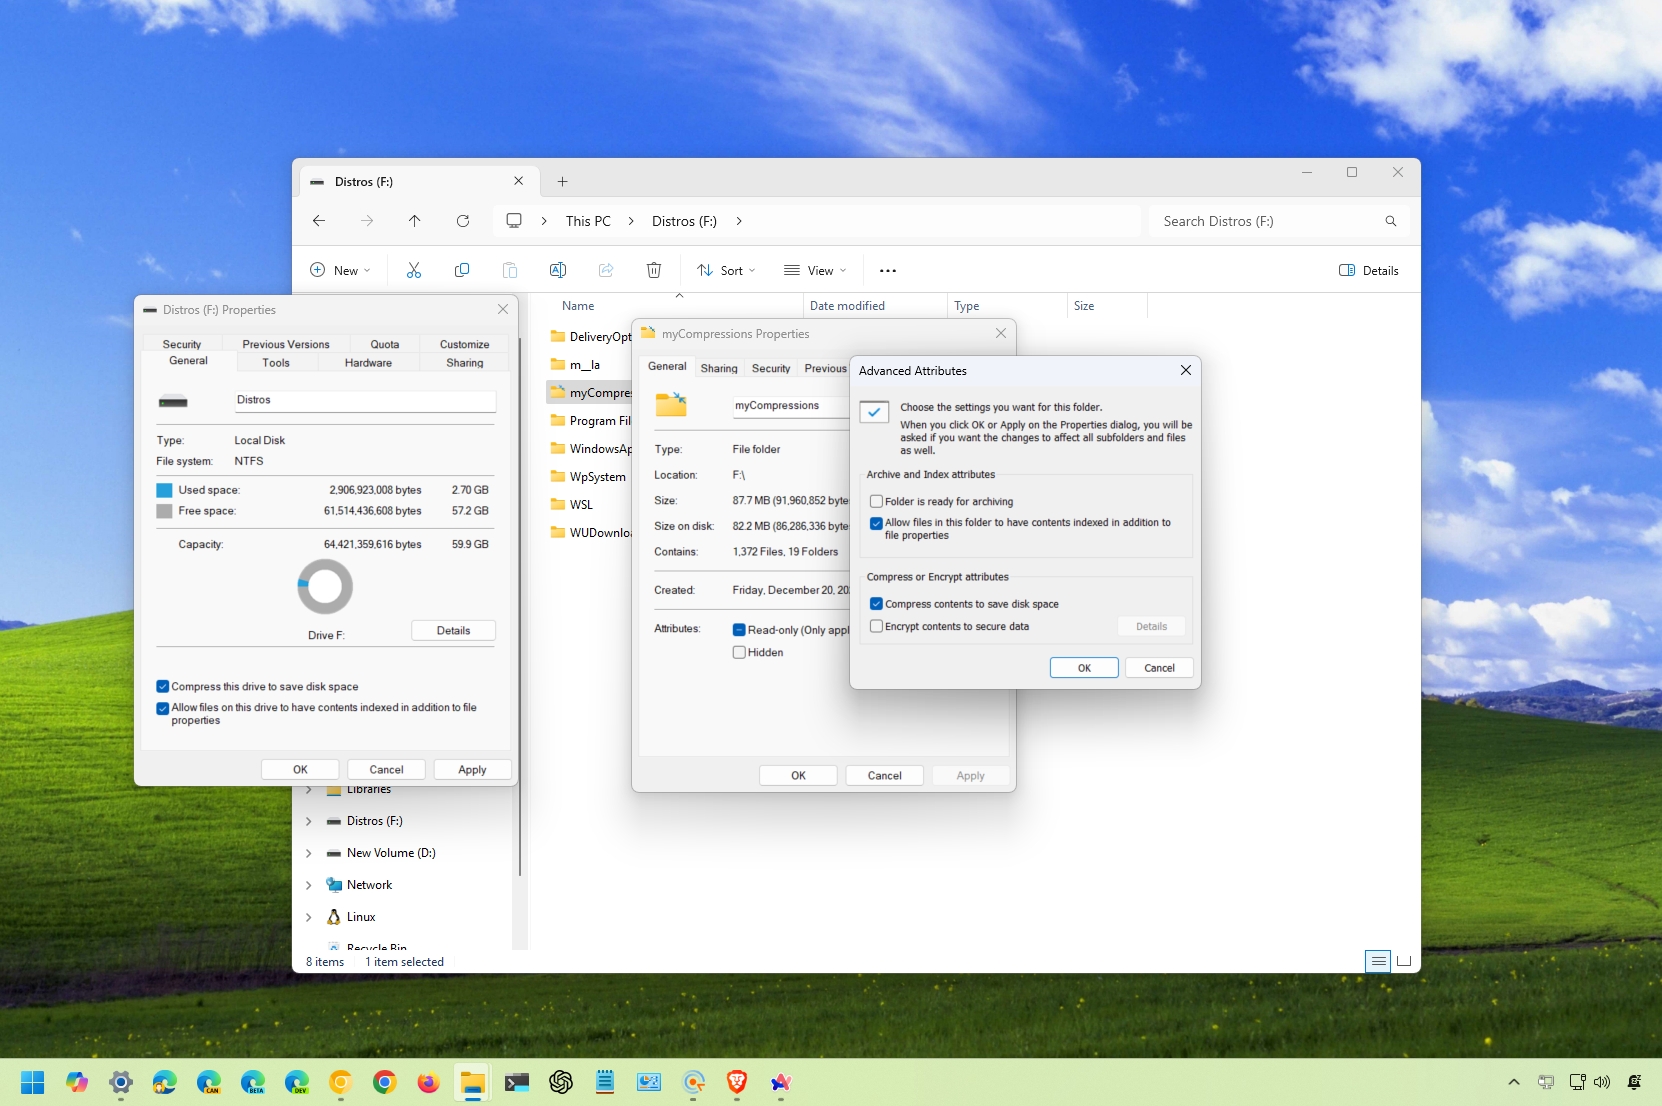
On Windows 11, you can use the New Technology File System (NTFS) lightweight file compression feature to shrink the size of files to save space without manual compression and decompression, which is something often required when using other containers.
The only caveat is that the NTFS file compression requires additional resources to process decompression and recompression every time you access content on the drive, which could impact performance on low-end devices. However, you can still find many scenarios in which to use this feature. For instance, it could be another option to reduce space usage if running low on disk space. You could use the feature to archive files you don't use often. You can also enable lightweight file compression from NTFS in a folder or drive you to store files that won't significantly degrade performance, such as documents and pictures.
Regardless of the reason, Windows 11 includes multiple ways to enable compression at the file level or entire drive using NTFS.
In this how-to guide, I'll walk you through the steps to compress files without third-party tools.
How to compress files with NTFS on Windows 11
On Windows 11, NTFS offers the most convenient method of compressing files to save storage space without the need for zipping them.
To compress files and folders with NTFS on Windows 11, use these steps:
- Open File Explorer.
- Open the folder to store the files with compression.
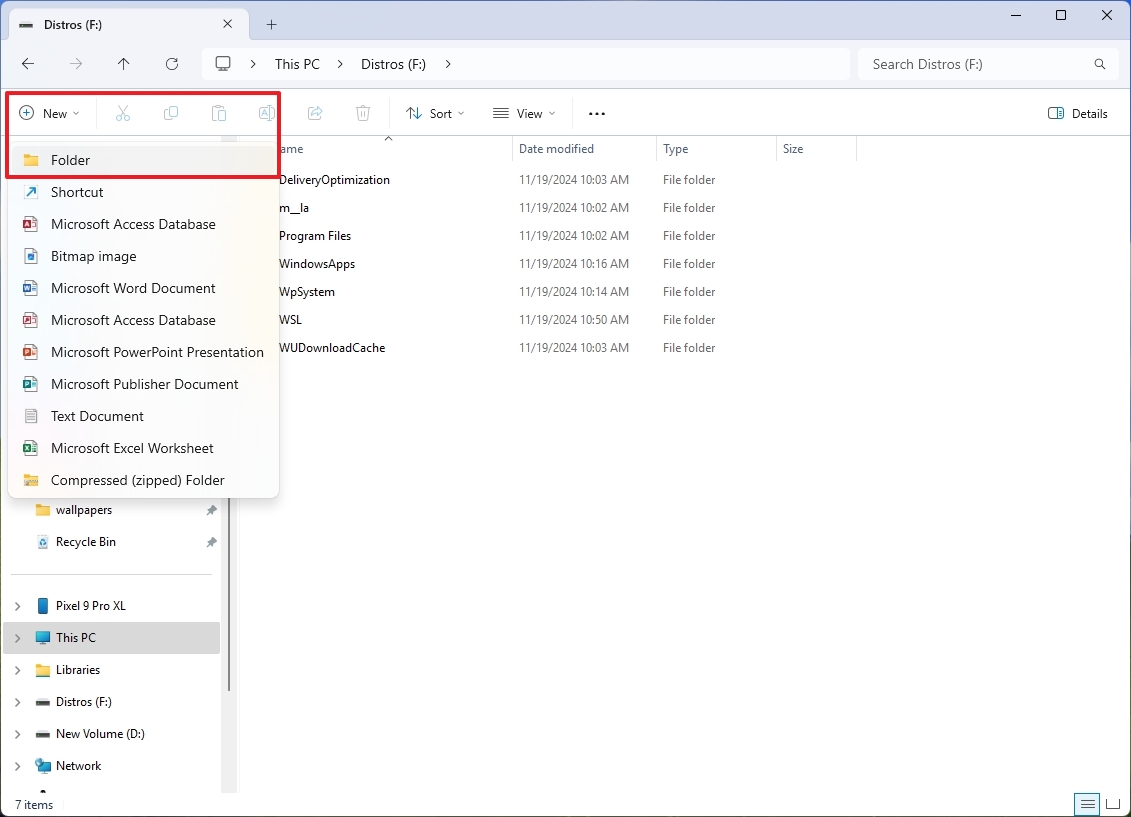
- Click the New button and select the Folder option.
- Quick tip: You can use the "Ctrl + Shift + N" keyboard shortcut to create a new folder faster.
- Type a name for the folder and press Enter.
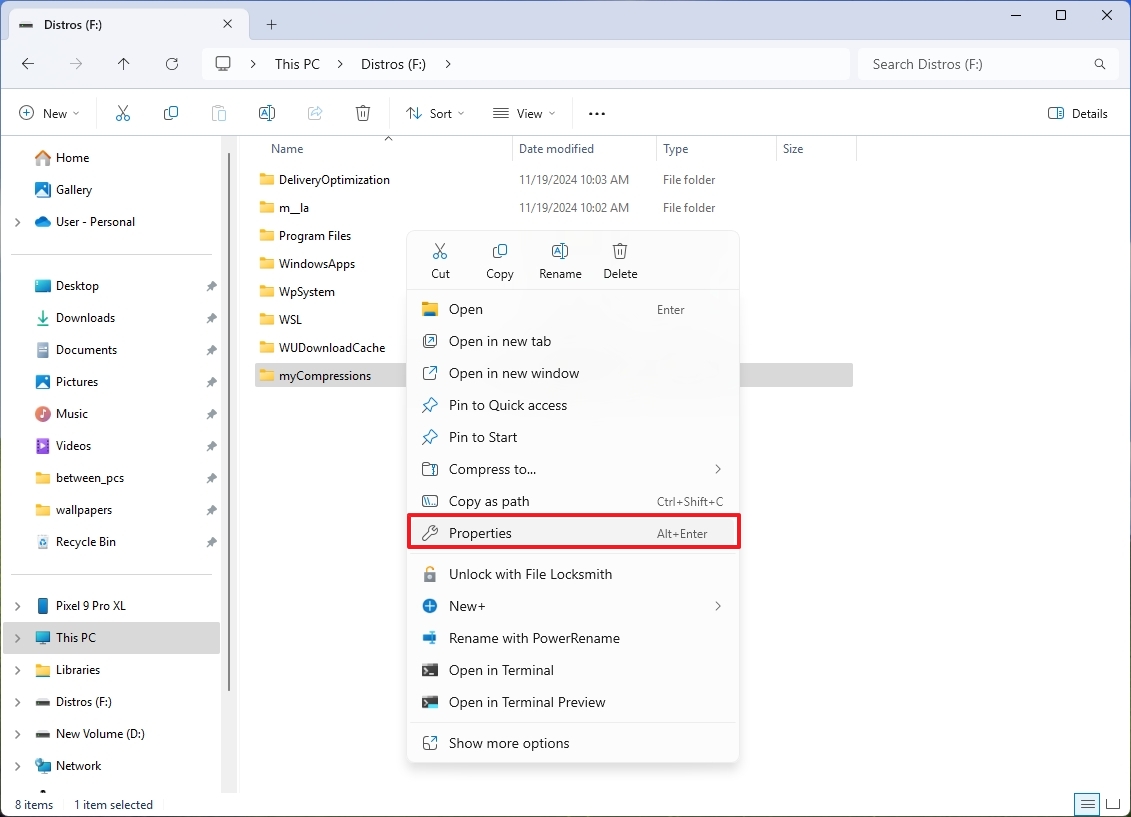
- Right-click the newly created folder and select the Properties option.
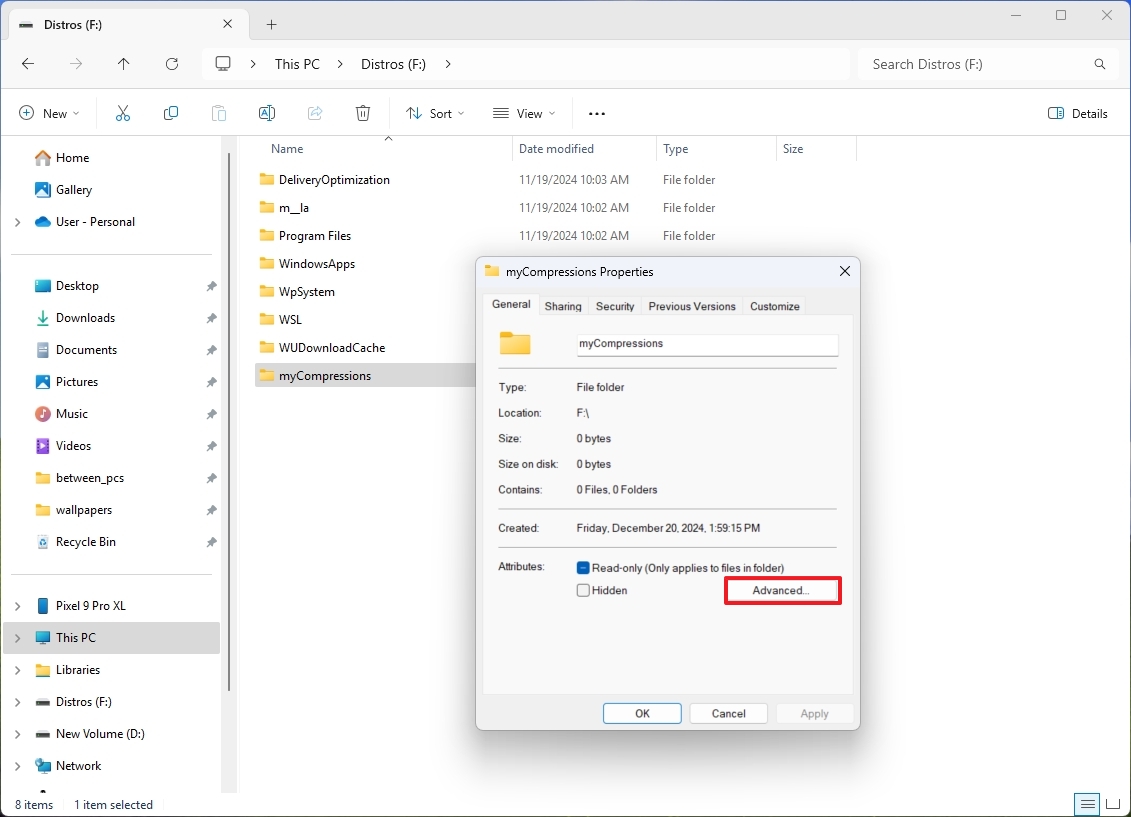
- Click on the General tab.
- Click the Advanced button.
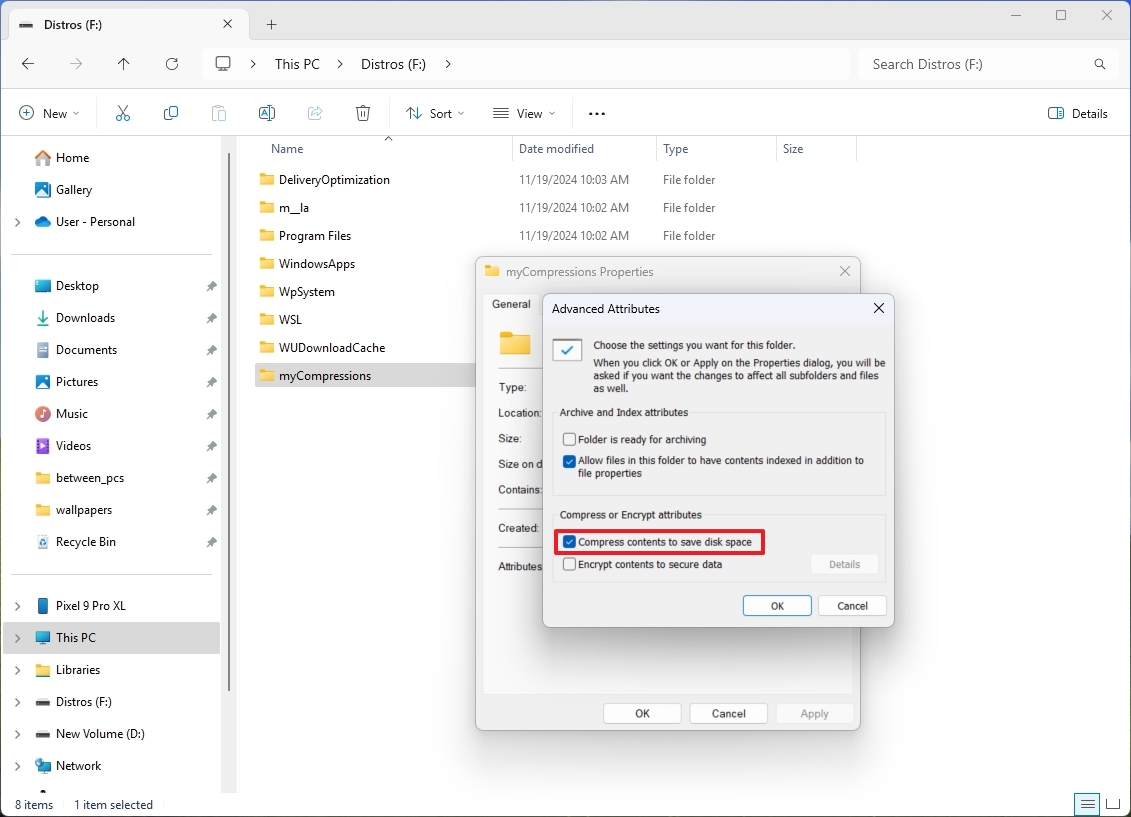
- Check the "Compress contents to save disk space" option under the "Compress or Encrypt attributes" section.
- Click the OK button.
- Click the Apply button.
- Select the "Apply changes to this folder, subfolders, and files" option (if applicable).
- Click the OK button.
Once you complete the steps, compression will be enabled inside the folder, reducing the size of existing and future files in this location. You can also use the steps to compress a single file.
All the latest news, reviews, and guides for Windows and Xbox diehards.
If compression is working, an icon with two arrows pointing to each other will appear in the top-right corner of the folder.
You can always revert the changes with the same instructions, but in step 8, clear the "Compress this drive to save disk space" option.
Check storage-saving
To view the amount of space file compression is saving, use these steps:
- Open File Explorer.
- Open the folder location with the file compression.
- Right-click the folder and select the Properties option.
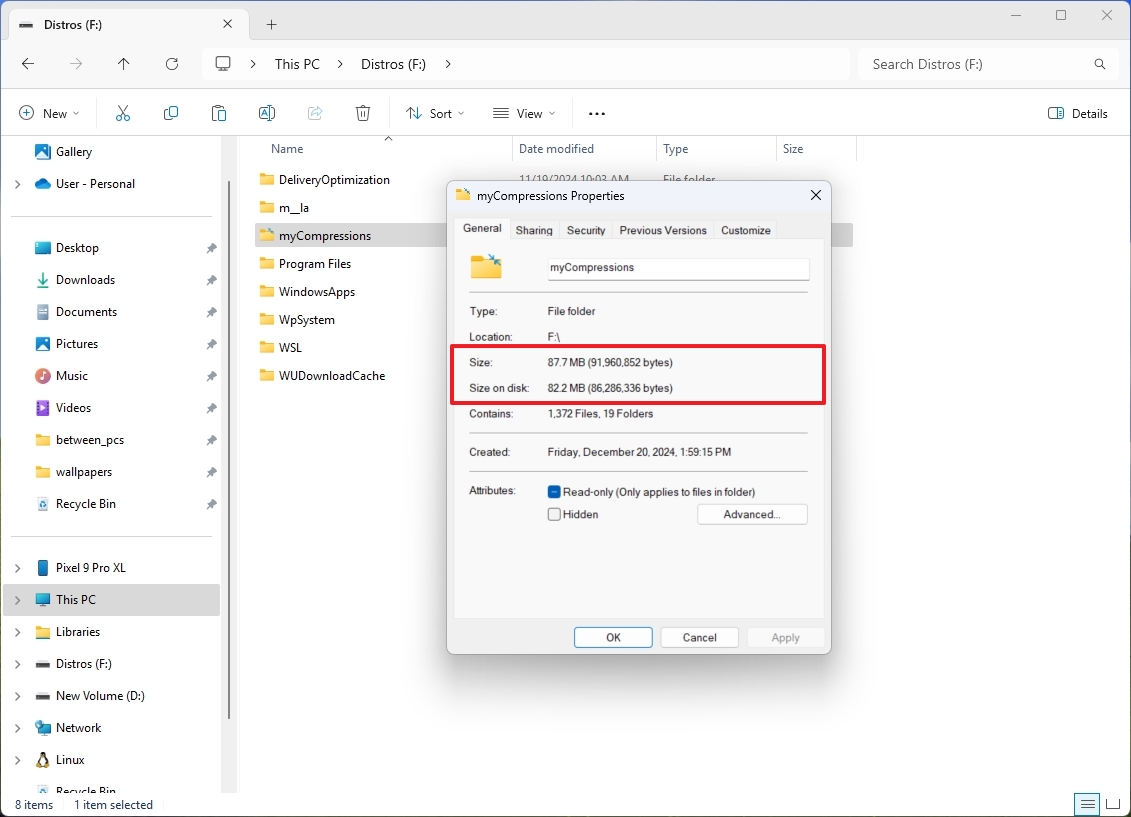
- Confirm on Size the size of the item without compression.
- Confirm on "Size on disk" the item's size with compression.
After you complete the steps, you will have a better understanding about the storage-saving using the feature.
How to compress drive with NTFS on Windows 11
On Windows 11, you can also use the NTFS feature to compress an entire drive instead of a single folder or file.
To enable NTFS compression on the entire drive, use these steps:
- Open File Explorer.
- Click on This PC from the left pane.
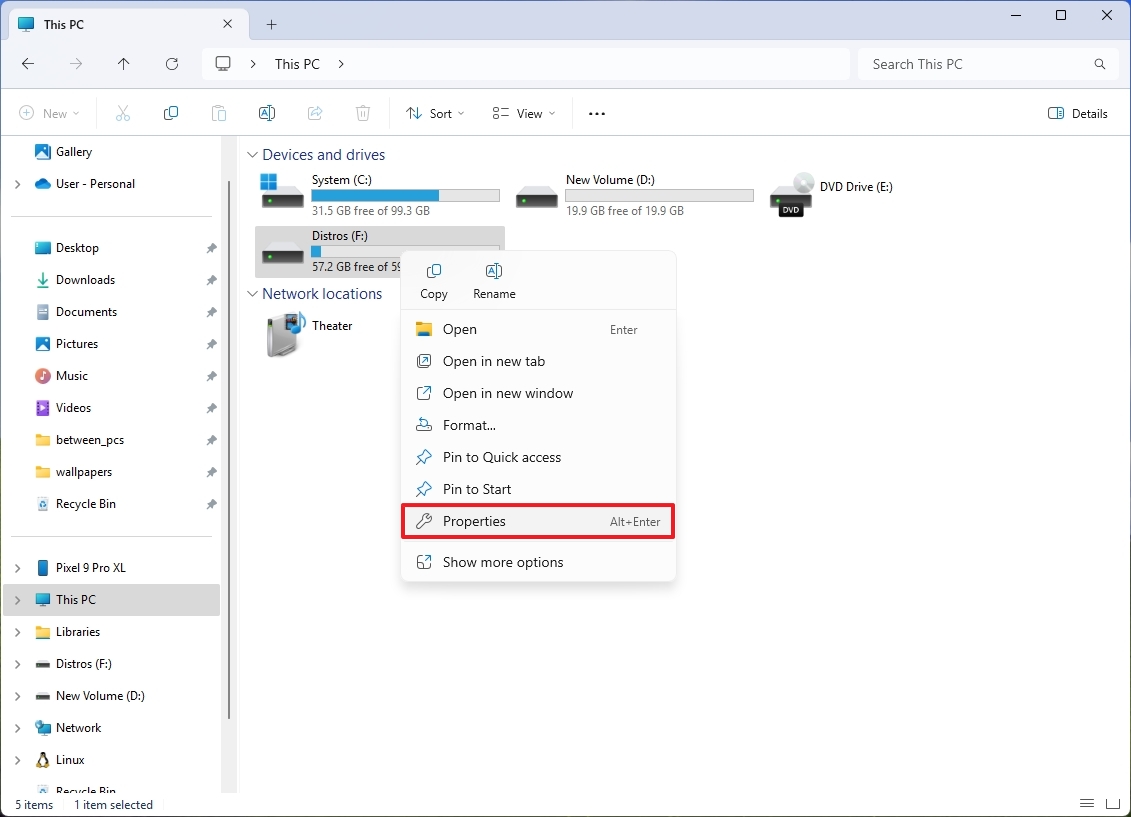
- Right-click the storage you wish to compress and select the Properties option under the "Devices and drives" section.
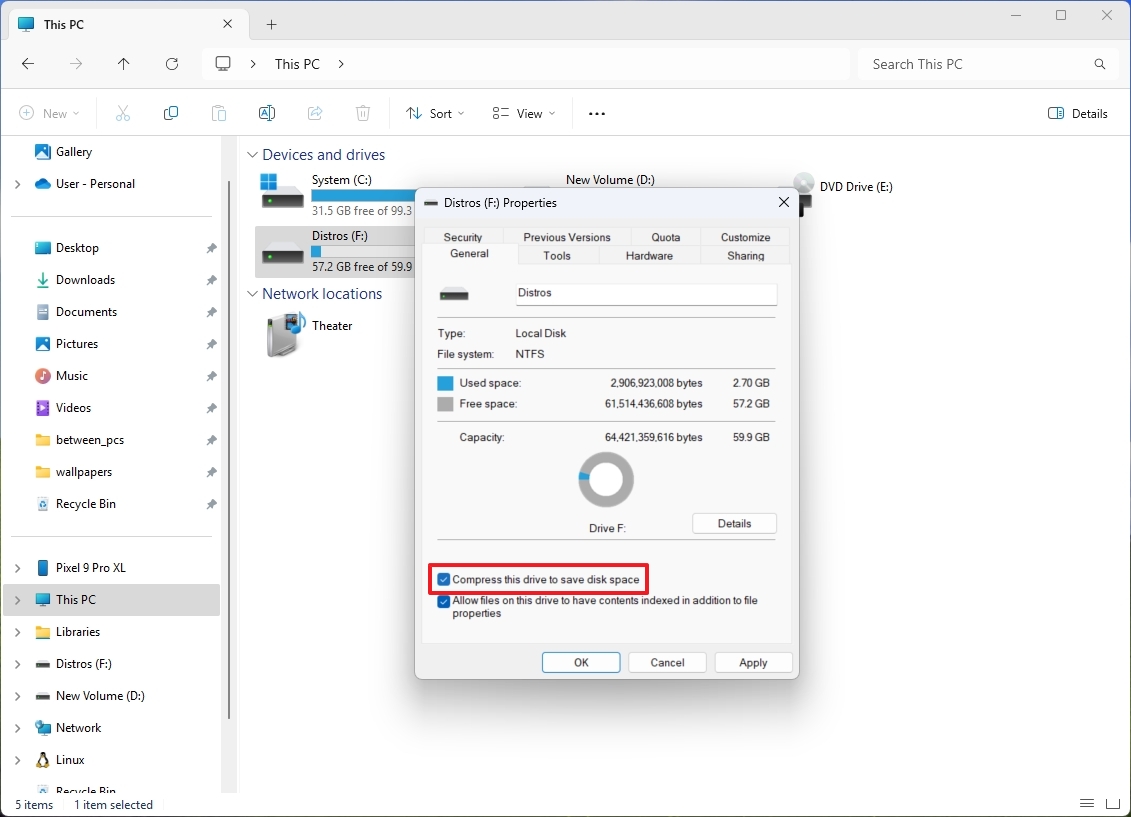
- Check the "Compress the drive to save disk space" option.
- Click the Apply button.
- Select the "Apply changes to drive (drive letter), subfolders, and files" option (if applicable).
- Click the OK button.
- Click the OK button again.
Once you complete the steps, the feature will enable compression on the storage.
You can enable NTFS compression on an empty drive or storage with content. However, if the disk already has contents, the NTFS compression will need to spend extra time compressing the existing files.
If you want to undo the changes, you can use the same instructions outlined above, but on step 4, clear the "Compress this drive to save disk space" option.
When you should and shouldn't use file compression on Windows 11
You need to know a few things when using NTFS compression. For instance, you can enable compression on the Windows 11 installation drive, but it's not recommended because it may impact system performance.
Although you can compress files on any drive, for best results, you should only consider using this feature on a fast drive like solid-state drives (SSDs) and only on a computer with modern hardware. Also, you should avoid enabling compression on USB flash drives and SD cards.
If you have relatively old hardware, you shouldn't use compression. Instead, you should upgrade the storage with an external hard drive. Switching to a larger drive means more space to save files without extra resources to compress and decompress the data.
The savings with NTFS compression will depend on the data and other factors. Since the feature was created to be lightweight, the compression ratio will be less than using different tools.
Compressed files (such as .mp3, .zip, and .mp4 files) will not further reduce storage usage when using this space-saving feature. Also, decompression is required to send the files over the network, which means the feature will not save bandwidth and will take more time to complete. If you want to send files using compression, you should use another compression container (such as ZIP) or the SMB compression feature for file transmissions.
More resources
For more in-depth insights, troubleshooting tips, and the latest updates on Windows 11 and 10, be sure to explore these resources:

Mauro Huculak has been a Windows How-To Expert contributor for WindowsCentral.com for nearly a decade and has over 22 years of combined experience in IT and technical writing. He holds various professional certifications from Microsoft, Cisco, VMware, and CompTIA and has been recognized as a Microsoft MVP for many years.
