How to enable and disable Reset Protection on Windows 10 Mobile
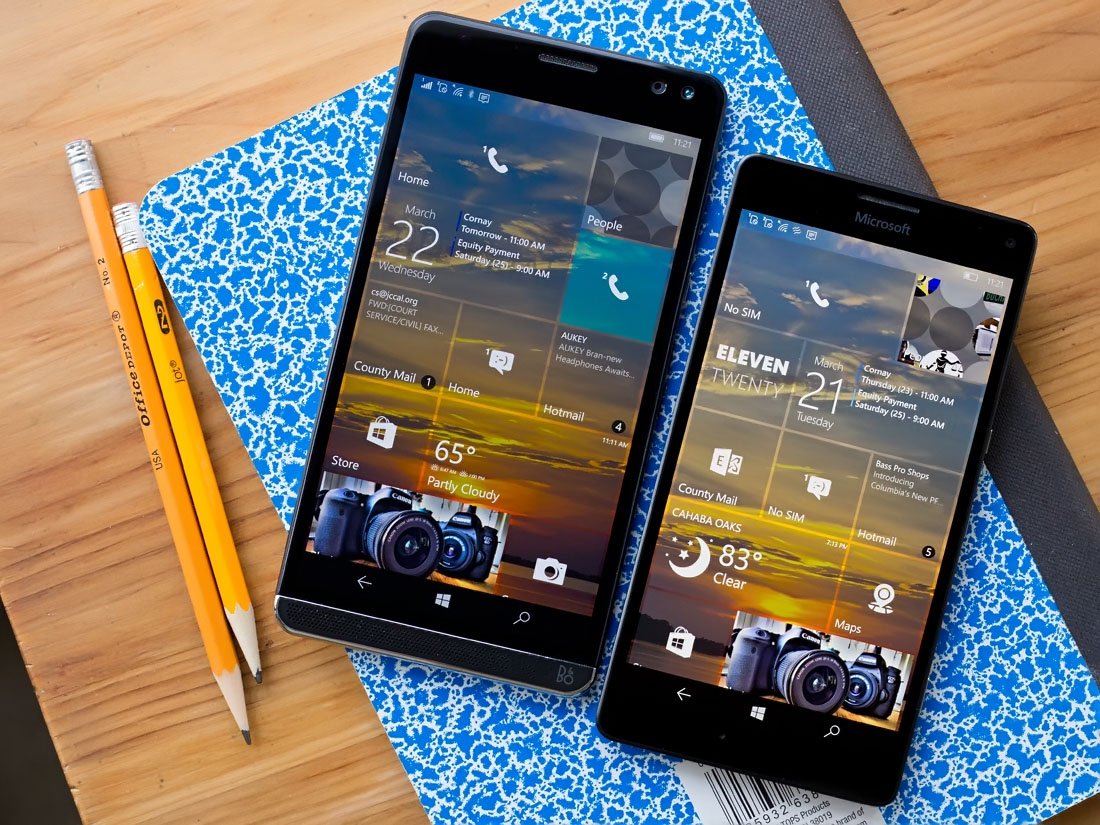
Windows 10 Mobile has built-in Reset Protection that can stop someone who gets their hands on your phone from resetting it and making it their own. Reset Protection isn't available for all Windows phones; only some newer phones that have build 8.10.15127.138 or later installed. Here's how to enable and disable Reset Protection when you still have your phone, and also how to disable Reset Protection.
How to enable Reset Protection on Windows 10 Mobile
The first time you set up your Windows phone, you'll be asked if you'd like to accept some recommended settings. If you accept the settings and your phone supports Reset Protection, it will be turned on automatically.
If you didn't choose to go with recommended settings during setup, or if you chose to initially forego Reset Protection, you can still enable it.
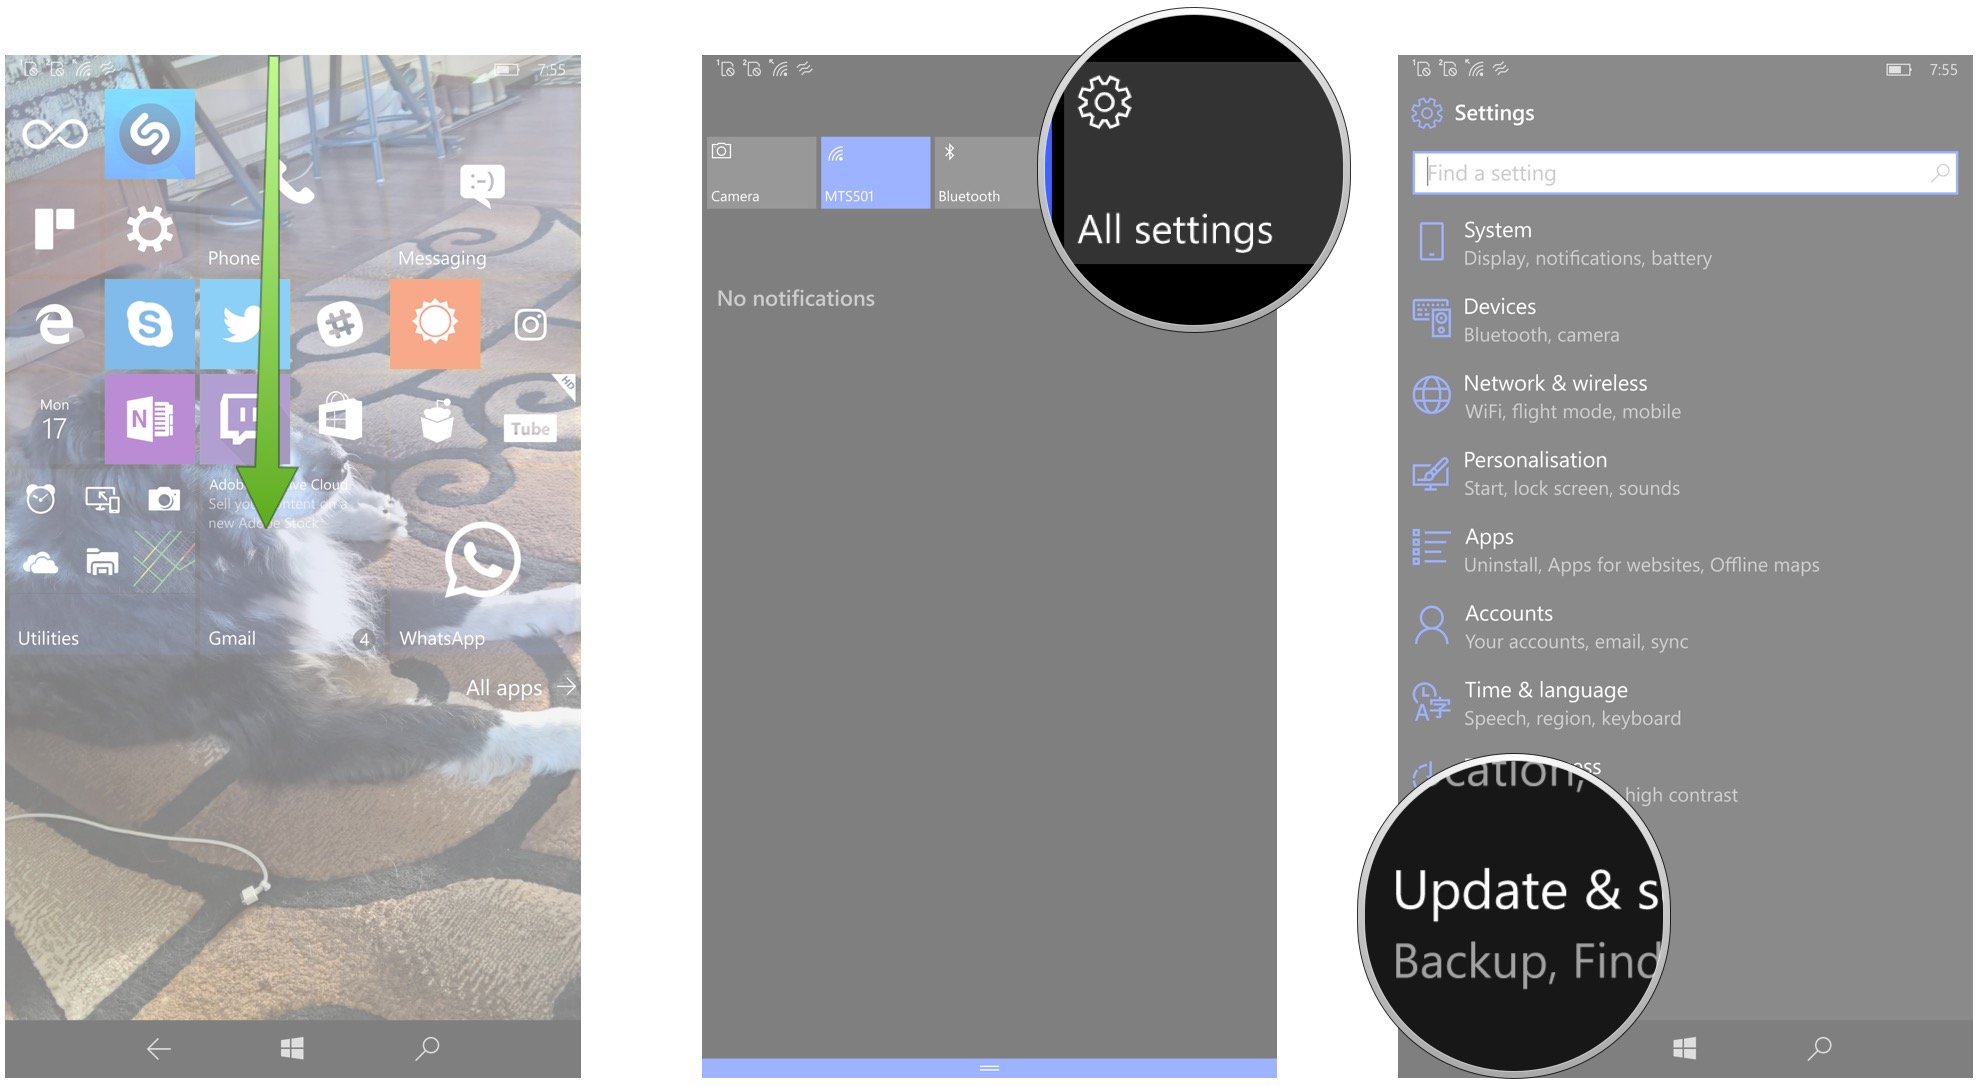
- Swipe down from the top of the screen.
- Tap All Settings.
- Tap Update & security.
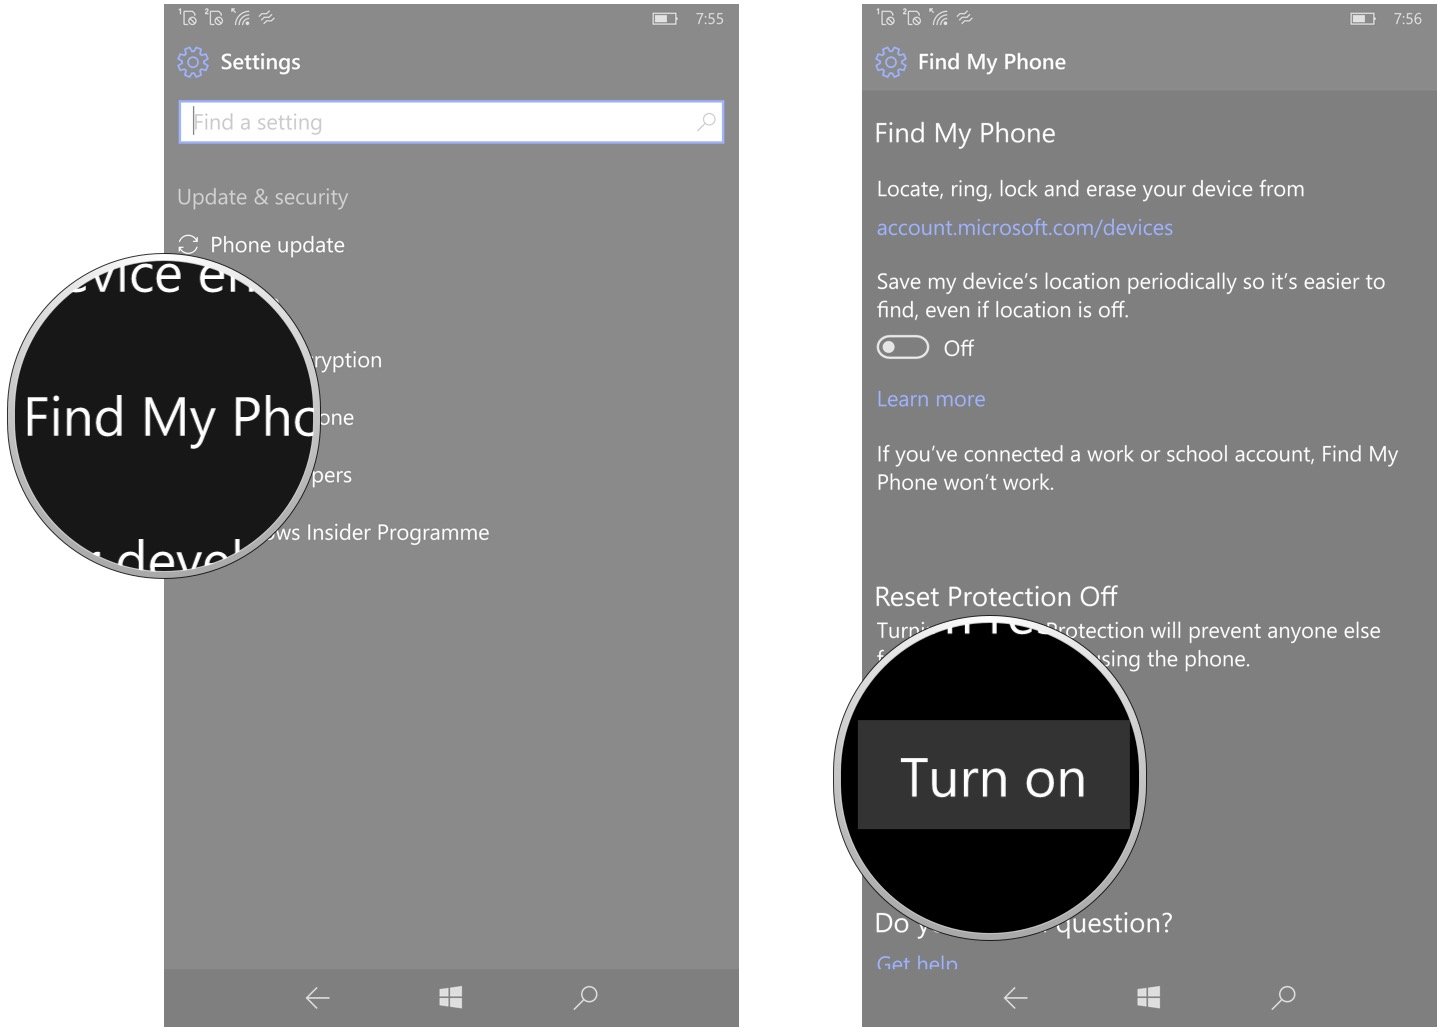
- Tap Find My Phone.
- Tap Turn on. (You might be asked to enter your phone's PIN.)
That's all there is to it. You will receive an email regarding Reset Protection. It mentions the fact that if you have account two-factor authentication set up on your phone, you should add an email as an alternative.
How to disable Reset Protection on Windows 10 Mobile
If you're getting rid of your Windows phone, you should first disable Reset Protection. This is also the case if you're deleting your Microsoft account. (Note: Turning off Reset Protection requires you to completely wipe the phone, so only do so if you've backed up all your data.)
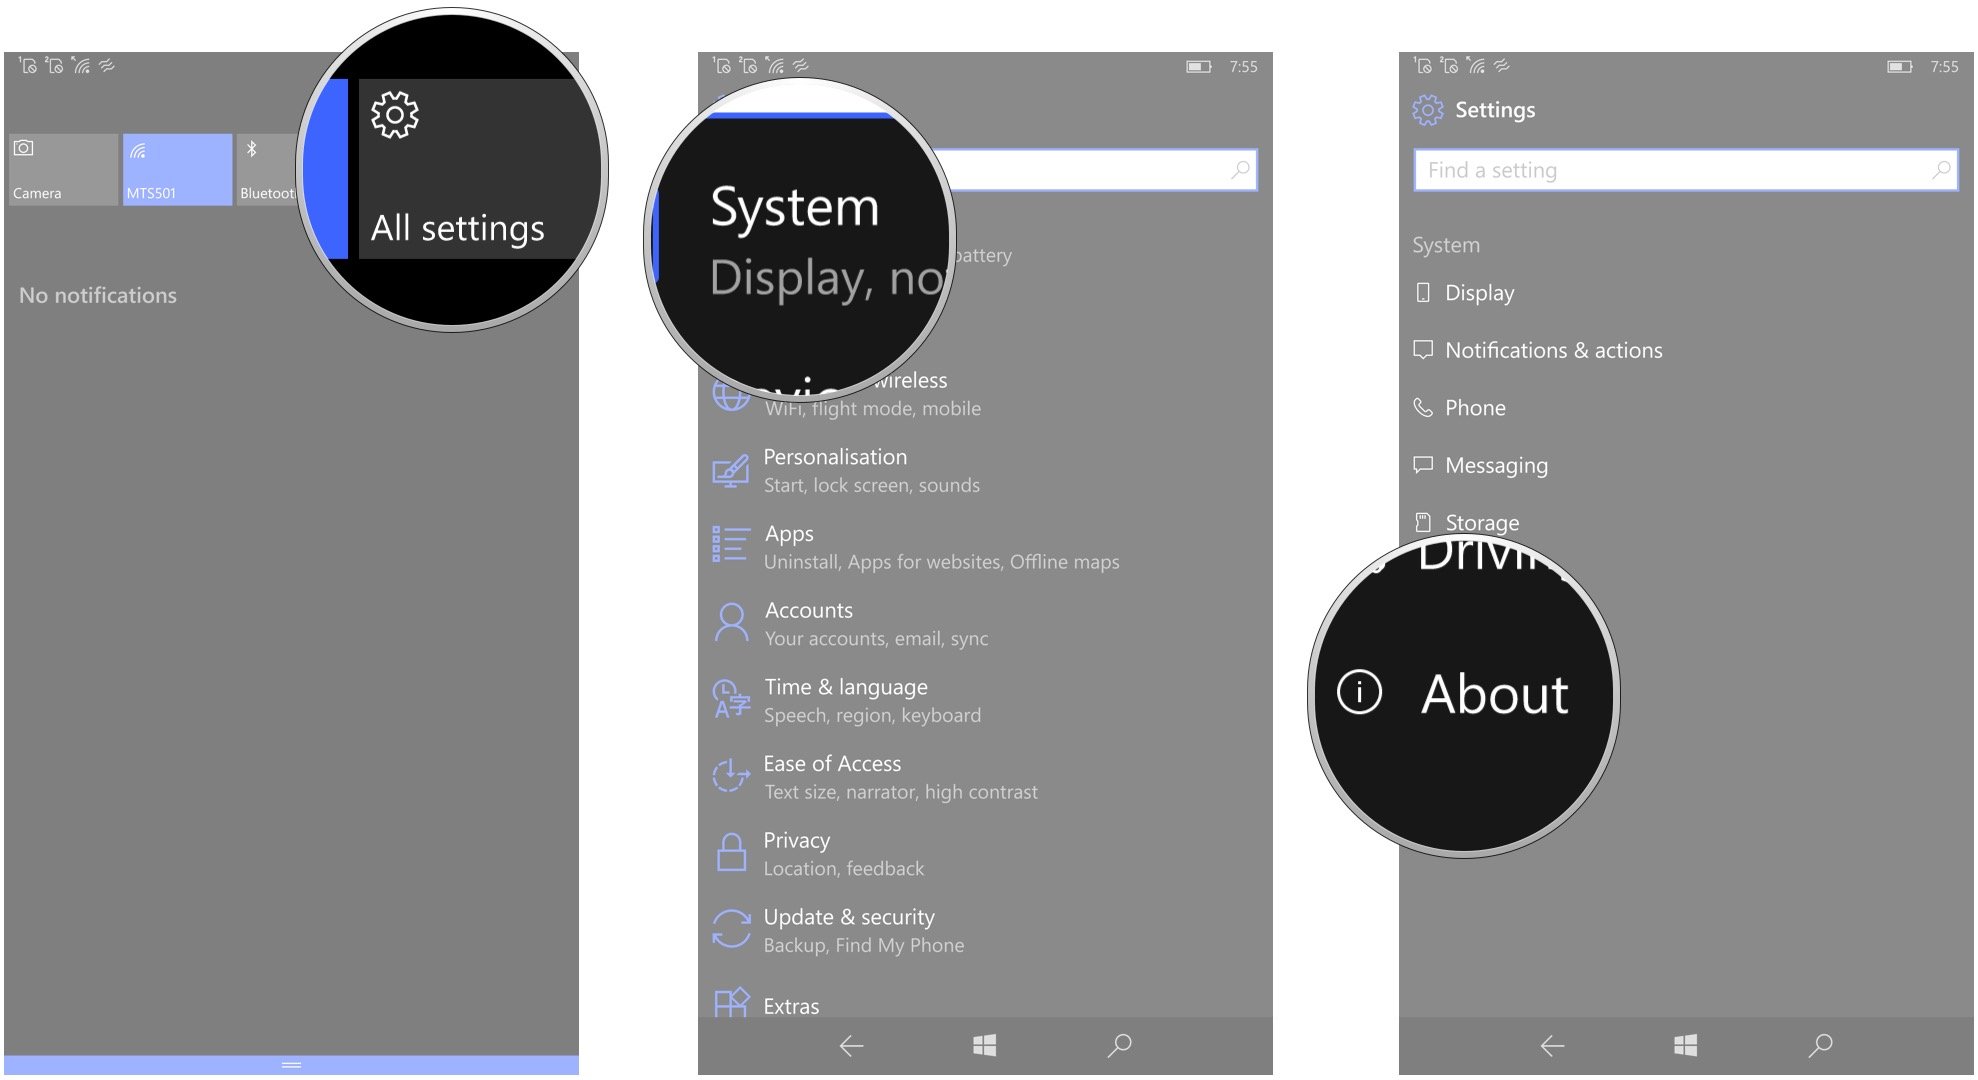
- Swipe down from the top of the screen.
- Tap All Settings.
- Tap System.
- Tap About.
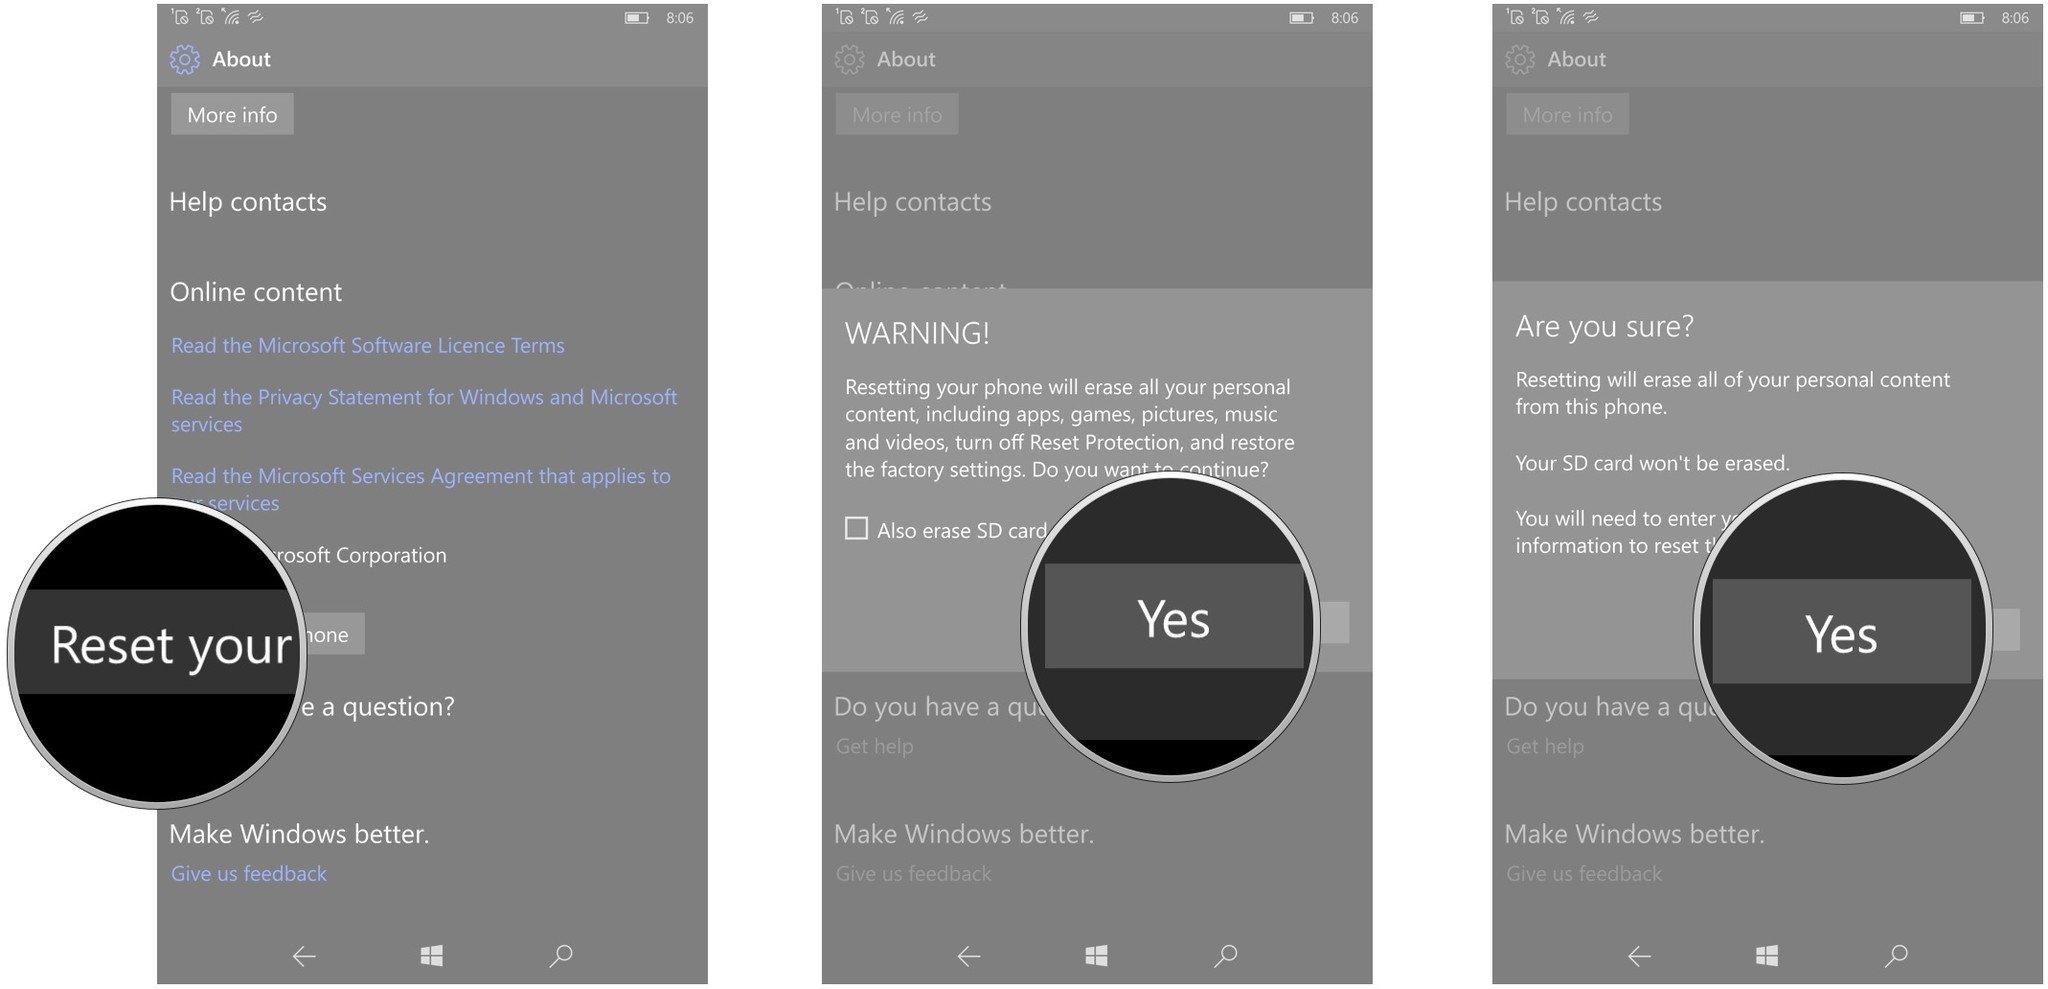
- Tap Reset your phone.
- Tap Yes.
- Tap Yes again.
This will turn off Reset Protection, but it will also completely reset your phone and wipe all of your data.
How to disable Reset Protection when you no longer have your phone
Phone already out of your hands and you now realize you forgot to turn off Reset Protection? As long as your Microsoft account is still active, you can disable it remotely.
All the latest news, reviews, and guides for Windows and Xbox diehards.
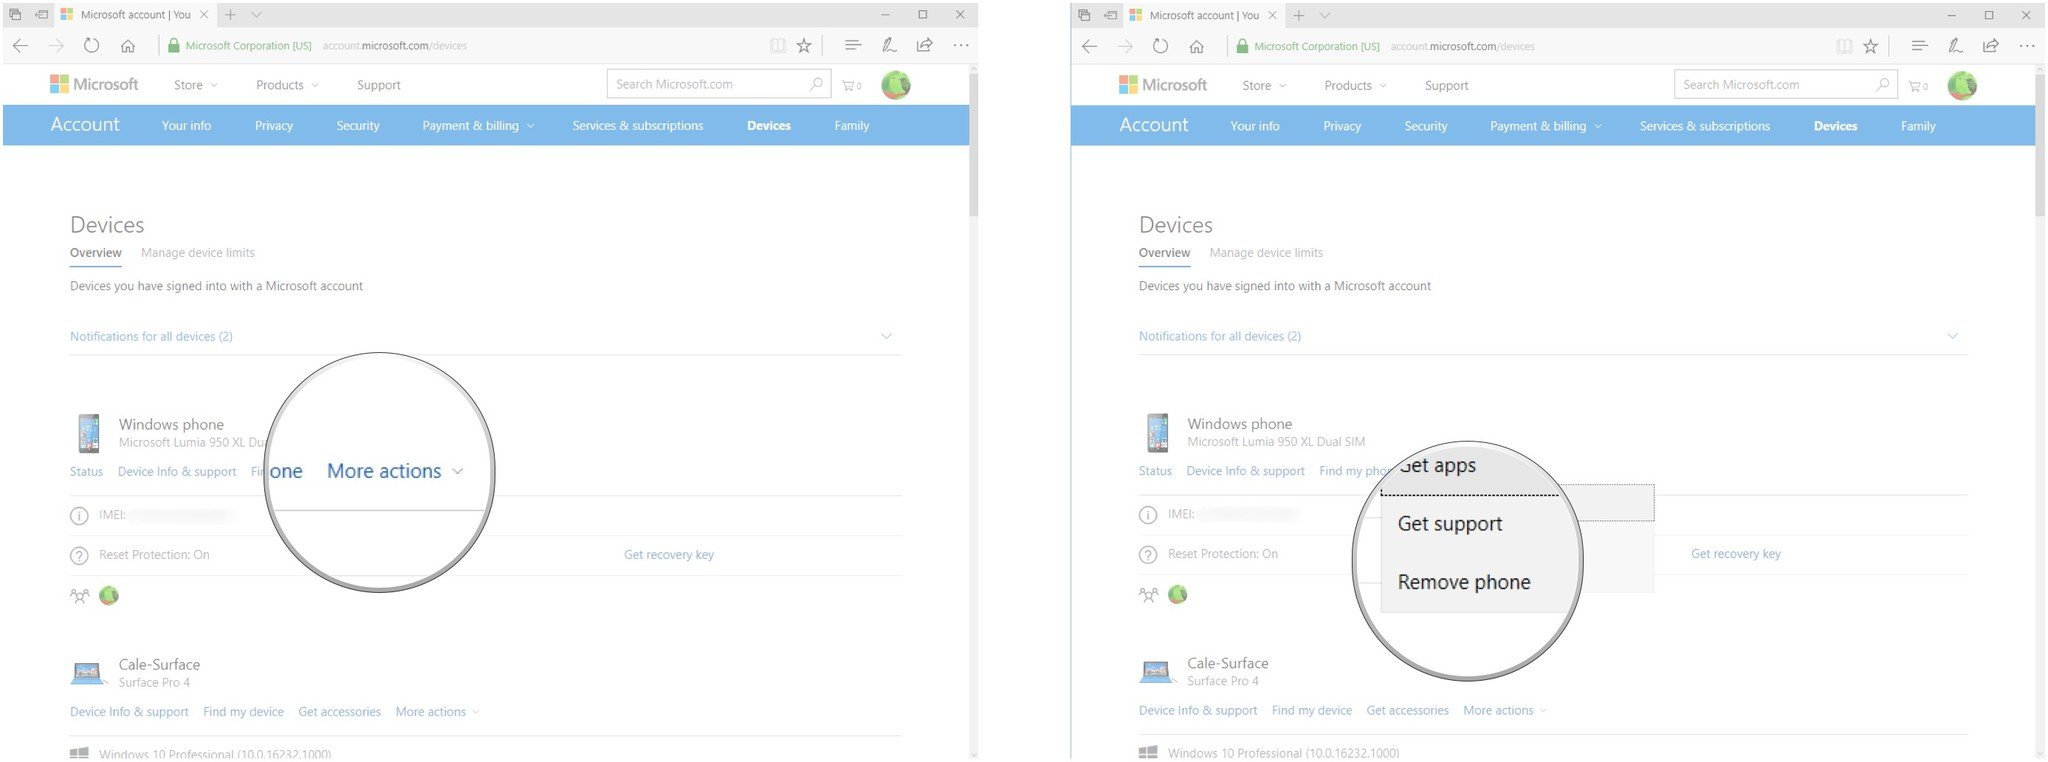
- Navigate to Microsoft's account/device page.
- Click More actions next to the phone you no longer have.
- Click Remove phone.
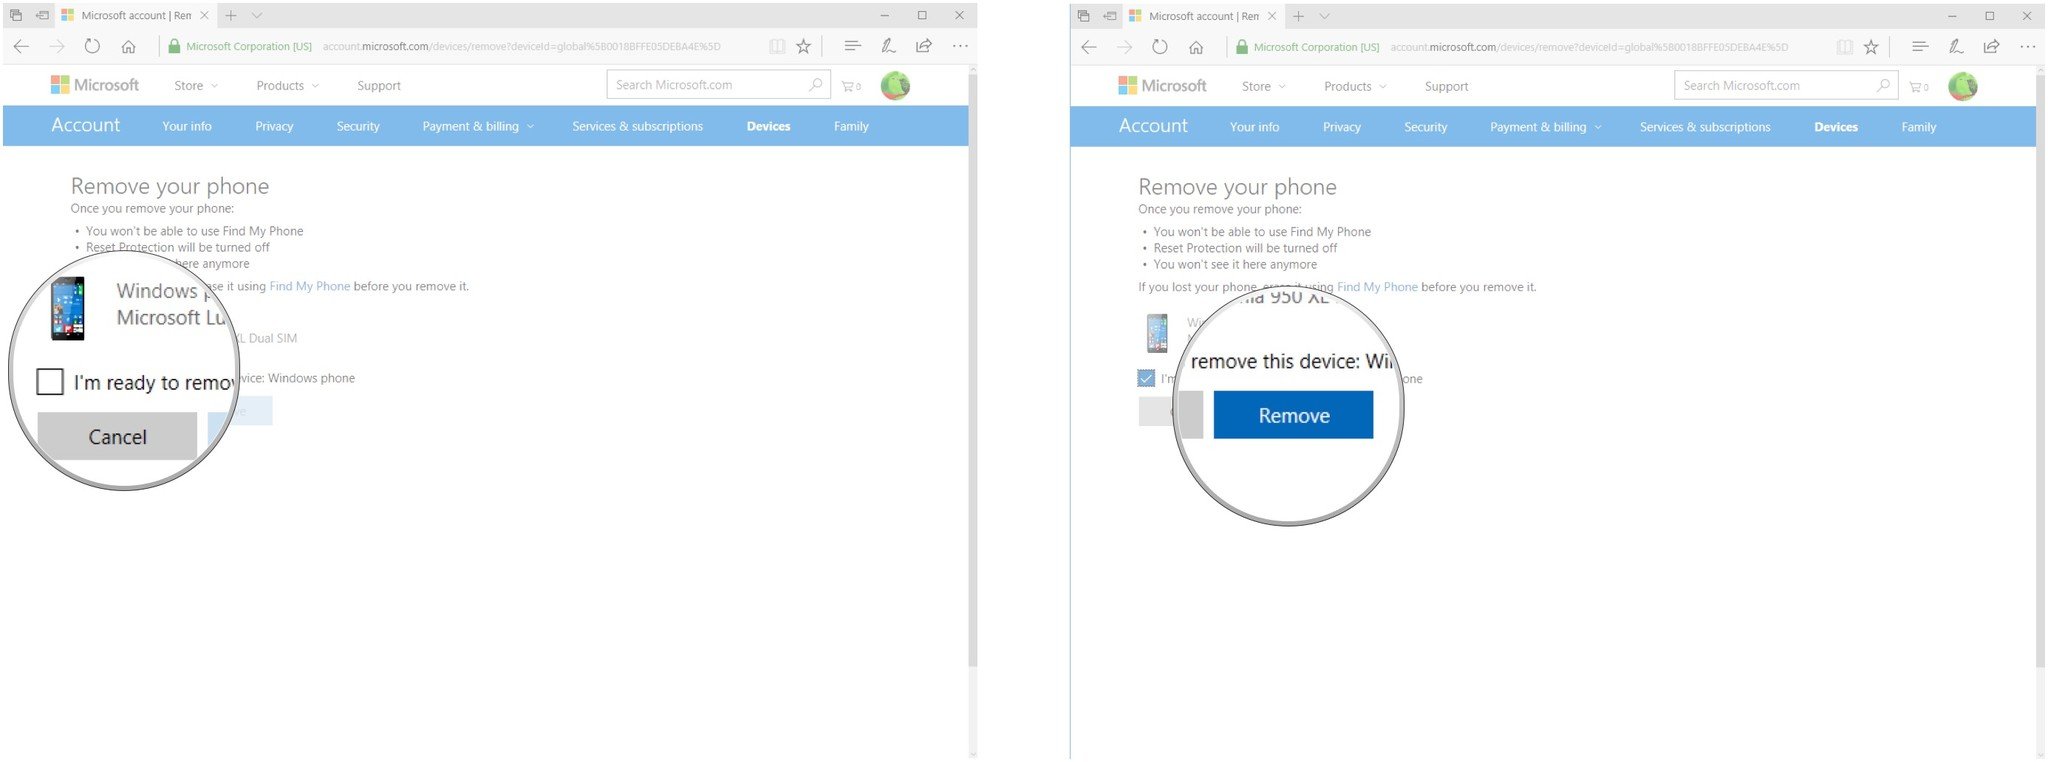
- Click the checkbox next to I'm ready to remove this device.
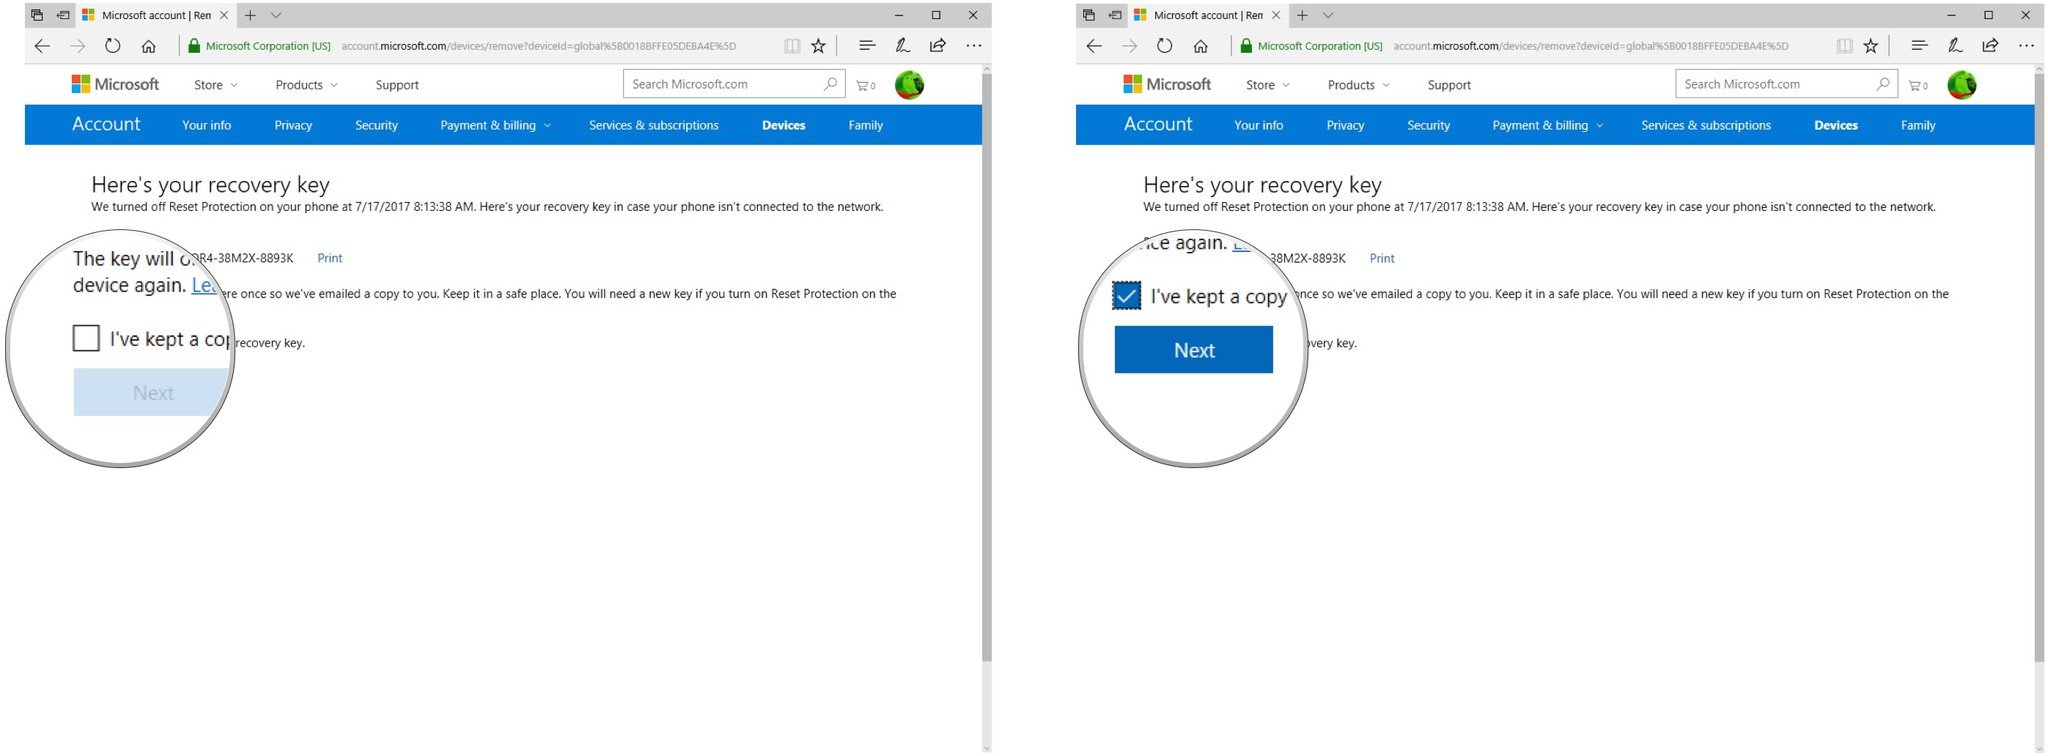
- Click Remove. (You should receive an email containing your recovery key. It will also be displayed in your browser.)
- Click the checkbox next to I've kept a copy of the recovery key.
- Click Next.
That's it. Done and done.

Cale Hunt brings to Windows Central more than nine years of experience writing about laptops, PCs, accessories, games, and beyond. If it runs Windows or in some way complements the hardware, there’s a good chance he knows about it, has written about it, or is already busy testing it.
