How to disable thumbnails on Windows 10
If you have no use for files thumbnails or got them disabled by mistake, use these steps to disable or enable the feature on Windows 10.
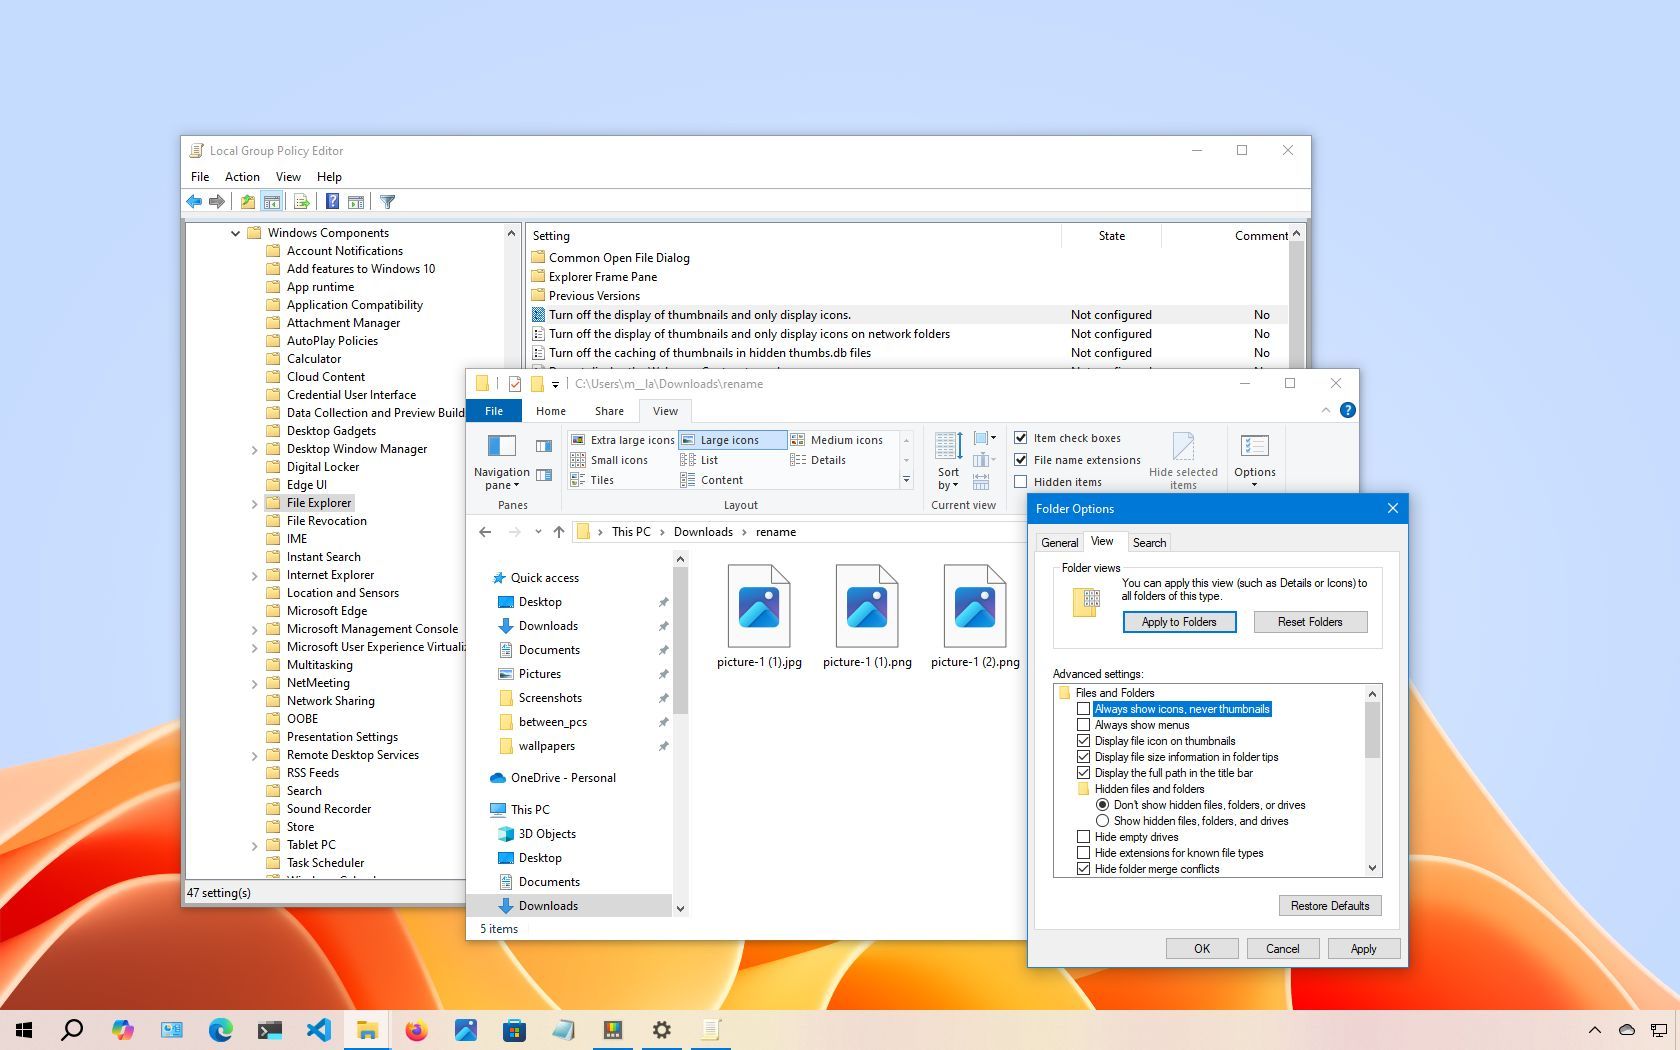
On Windows 10, File Explorer can display various sizes of thumbnail images for files, folders, documents, pictures, and videos. This feature provides a quick preview of content without the need to open each item.
While this visual aid allows for faster file identification without referencing file names, rendering and caching these previews can consume system resources. This is particularly noticeable in directories containing a large number of images.
If your device experiences delays when loading these previews, if you're troubleshooting an issue, or if you prefer not to use this feature, Windows 10 offers multiple methods to disable thumbnails. By doing so, File Explorer will display default file icons instead. You can complete this configuration through File Explorer settings, the Settings app, or Group Policy.
In this how-to guide, I'll outline the steps to disable (and enable) thumbnails for files on File Explorer.
Recent updates
These instructions has been updated to ensure accuracy and reflect changes to the process in the operating system.
How to enable or disable thumbnails using File Explorer
On Windows 10, the easiest way to turn thumbnail previews for files on or off is to use the File Explorer settings.
Disable file thumbnails
To disable thumbnails, use these steps:
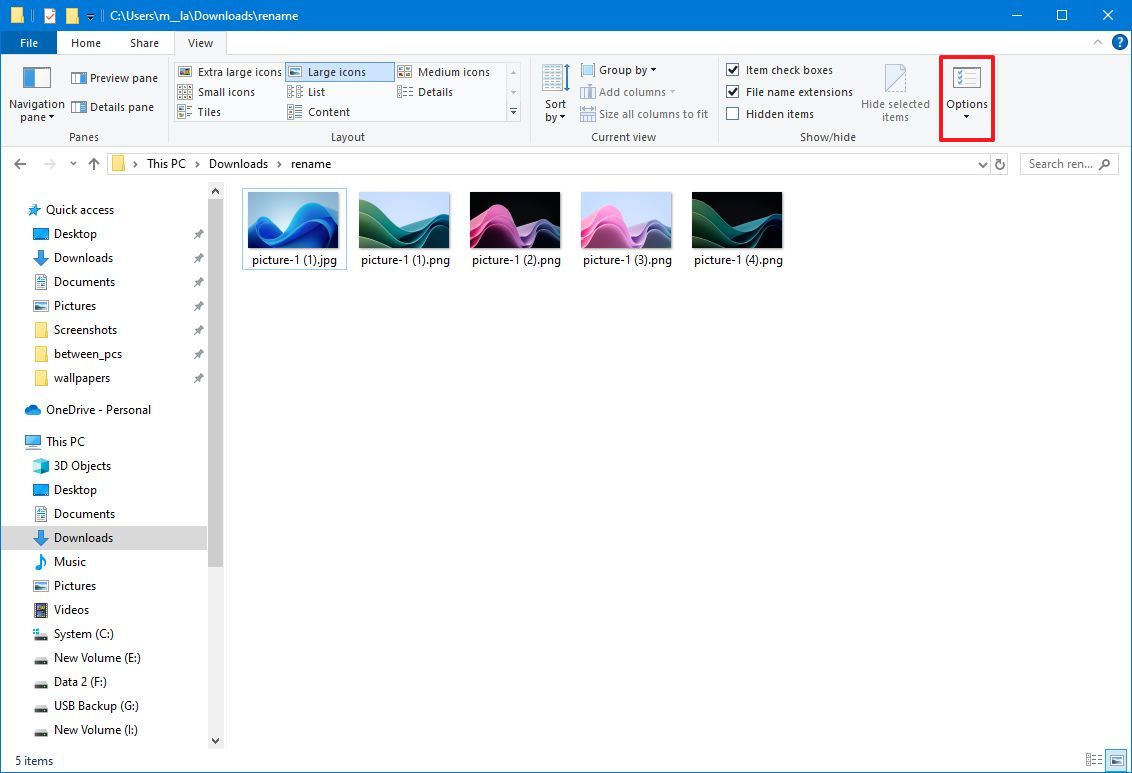
- Open File Explorer.
- Click the View tab.
- Click the Options button.
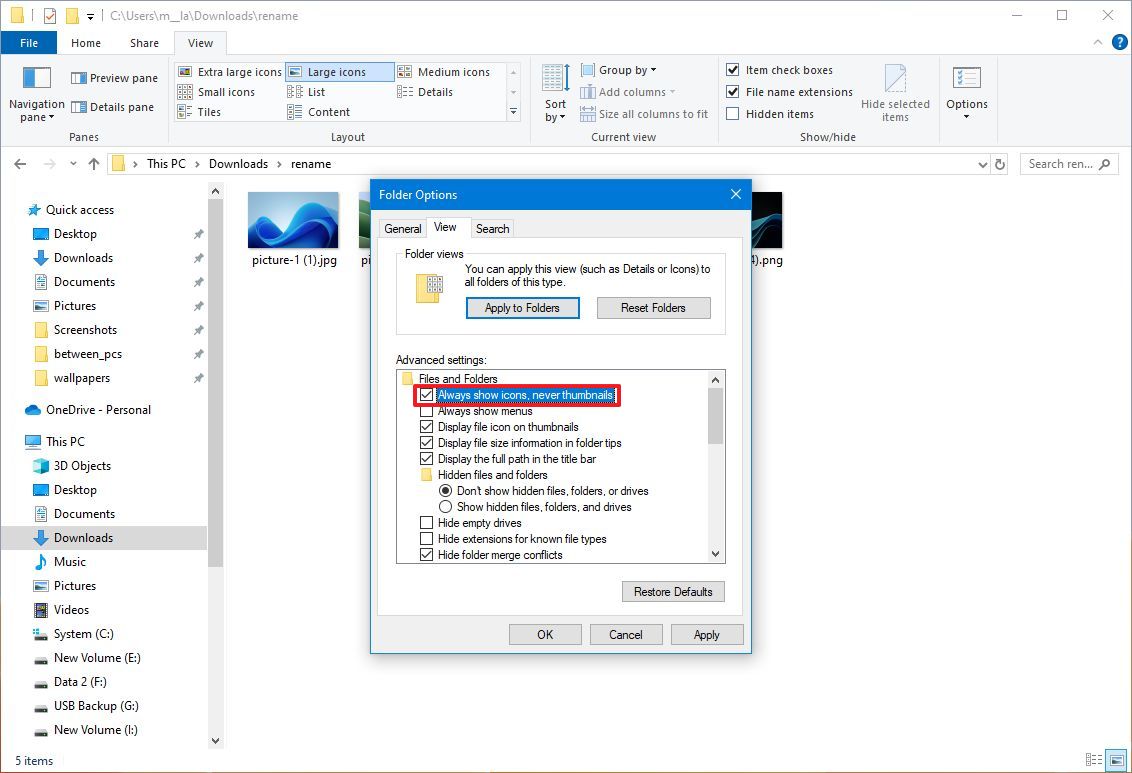
- Click the View tab.
- Check the "Always show icons, never thumbnails" option under the "Advanced settings" section to disable the feature.
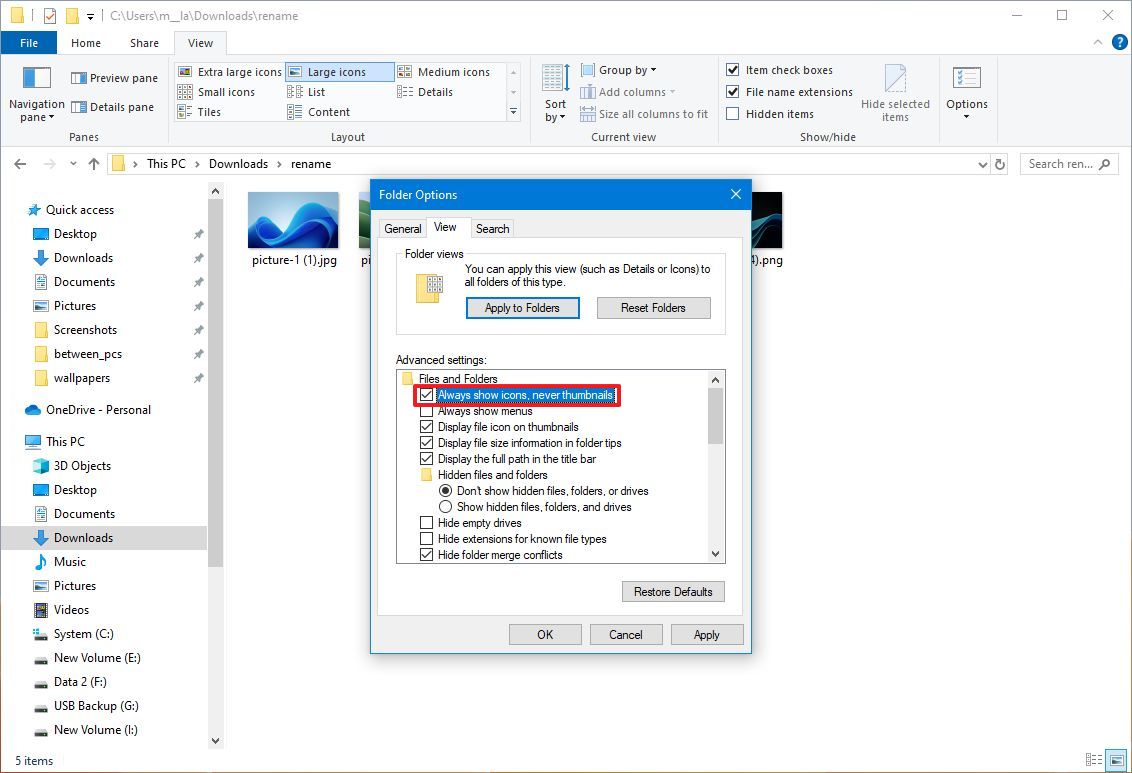
- Click the Apply button.
- Click the OK button.
Once you complete the steps, files will appear as icons without previews.
Get the Windows Central Newsletter
All the latest news, reviews, and guides for Windows and Xbox diehards.
Enable file thumbnails
If you ended up in this guide because thumbnails are not showing on File Explorer, it's possible that the feature was accidentally disabled, either because of a system update or some other reason.
To enable thumbnails for files on Windows 10, use these steps:
- Open File Explorer.
- Click the View tab.
- Click the Options button.

- Click the View tab.
- Clear the "Always show icons, never thumbnails" option under the "Advanced settings" section to enable the feature.
- Click the Apply button.
- Click the OK button.
After you complete the steps, previews will now appear for files in File Explorer. If, after adjusting the settings, you don't see the thumbnails, then restart File Explorer and repeat the instructions one more time.
How to enable or disable thumbnails using Settings
You can also use the Settings app to access the visual effects settings that allow you to enable or disable thumbnail previews, among other appearance and performance effects.
Disable file thumbnails
To disable the thumbnails for files using the visual effects settings, use these steps:
- Open Settings.
- Click on System.
- Click on About.
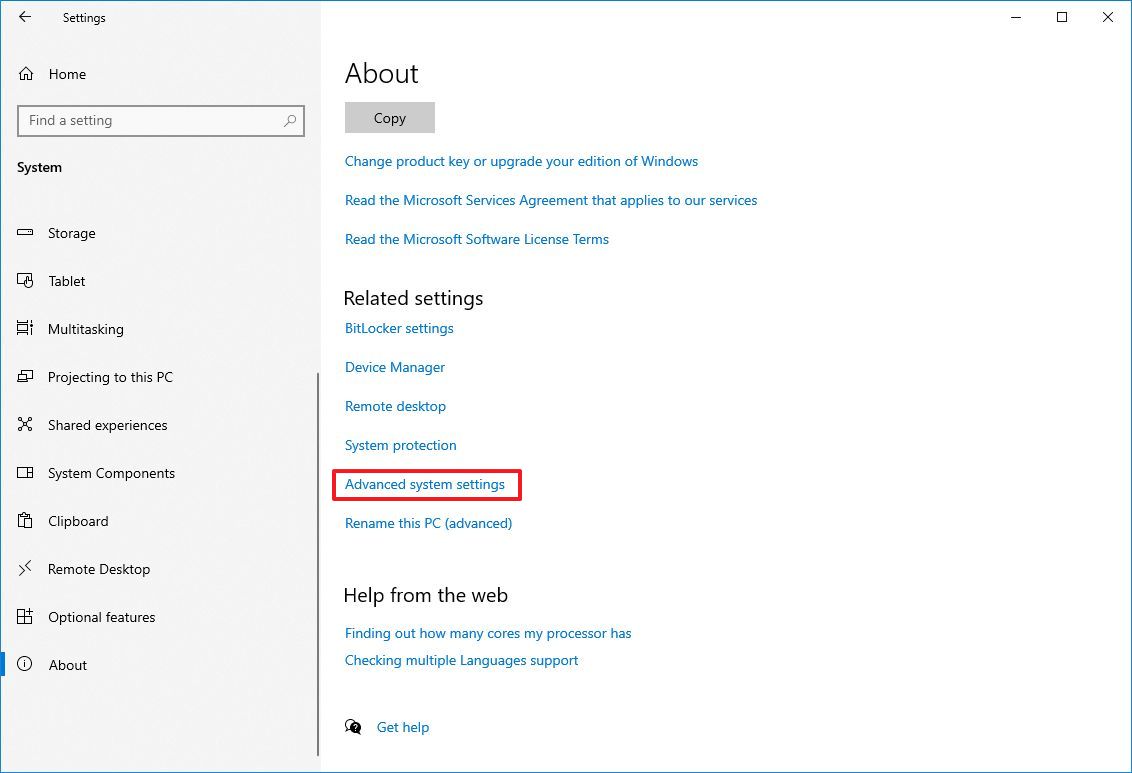
- Click the Advanced system settings option in the right pane under the "Related settings" section.
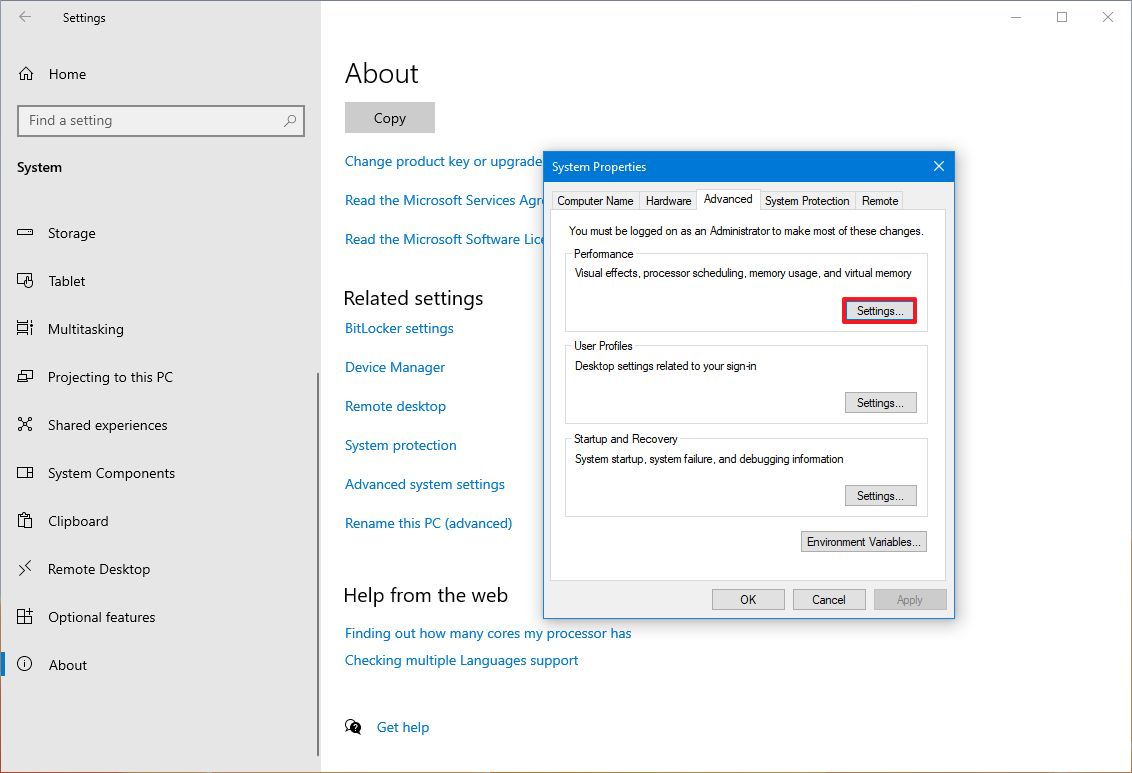
- Click the Advanced tab.
- Click the Settings button under the "Performance" section.
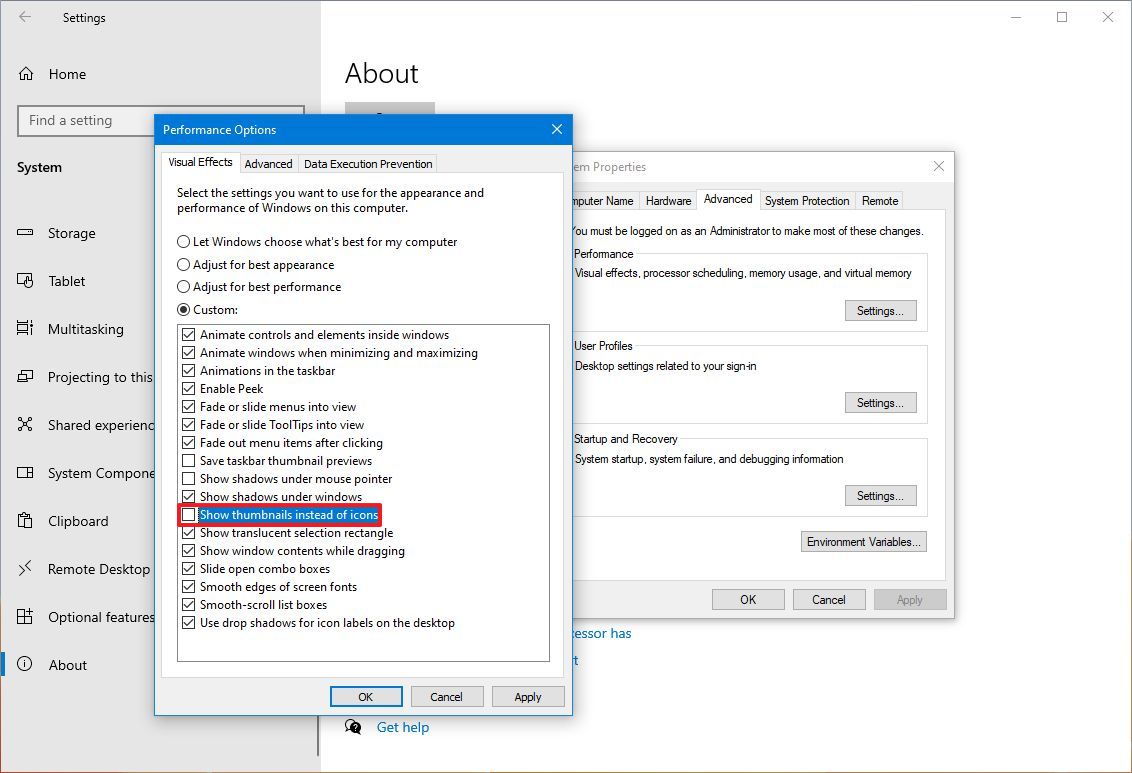
- Click the Visual Effects tab.
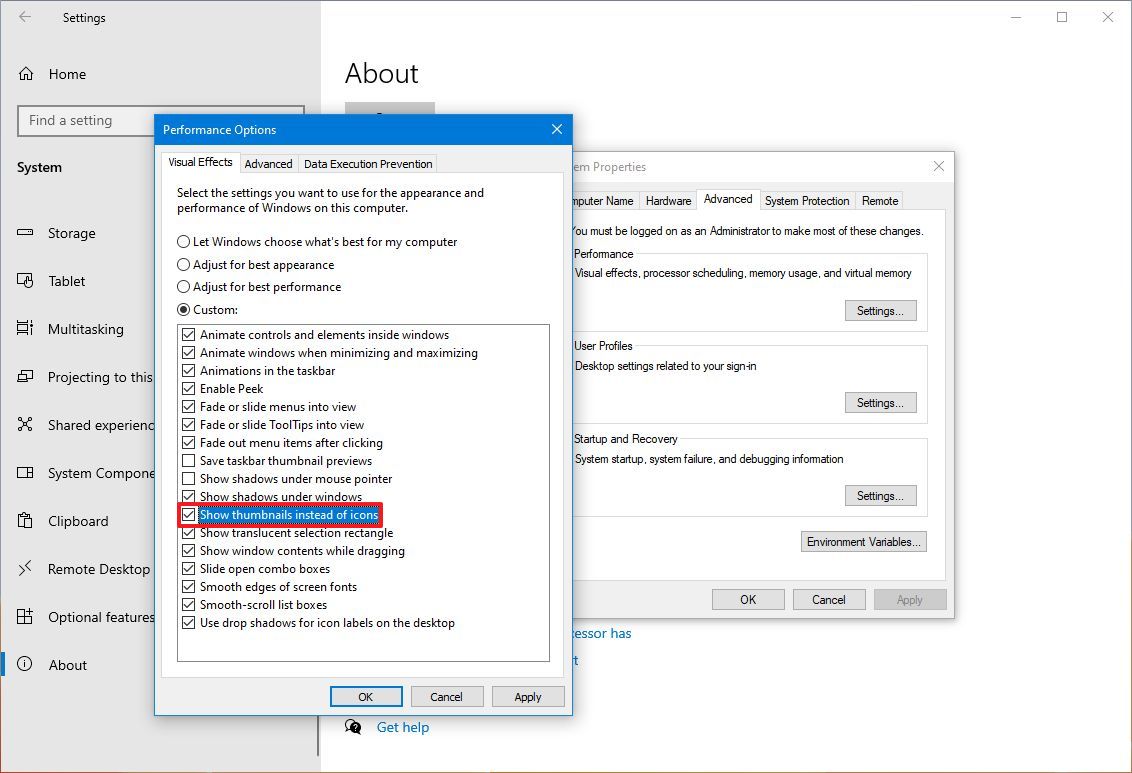
- Clear the "Show thumbnails instead of icons" option.
- Click the Apply button.
- Click the OK button.
Once you complete the steps, File Explorer will no longer show thumbnails for files.
Enable file thumbnails
To use the visual effects settings to re-enable thumbnails, use these steps:
- Open Settings.
- Click on System.
- Click on About.
- Click the Advanced system settings option in the right pane under the "Related settings" section.

- Click the Advanced tab.
- Click the Settings button under the "Performance" section.

- Click the Visual Effects tab.
- Check the "Show thumbnails instead of icons" option.
- Click the Apply button.
- Click the OK button.
After you complete the steps, files should appear with the respective previews in File Explorer.
How to enable or disable thumbnails using Group Policy
Alternatively, you can even manage the display of thumbnail previews using Group Policy.
Disable file thumbnails
To disable thumbnails with Group Policy, use these steps:
- Open Start.
- Search for gpedit.msc and click OK to open the Local Group Policy Editor.
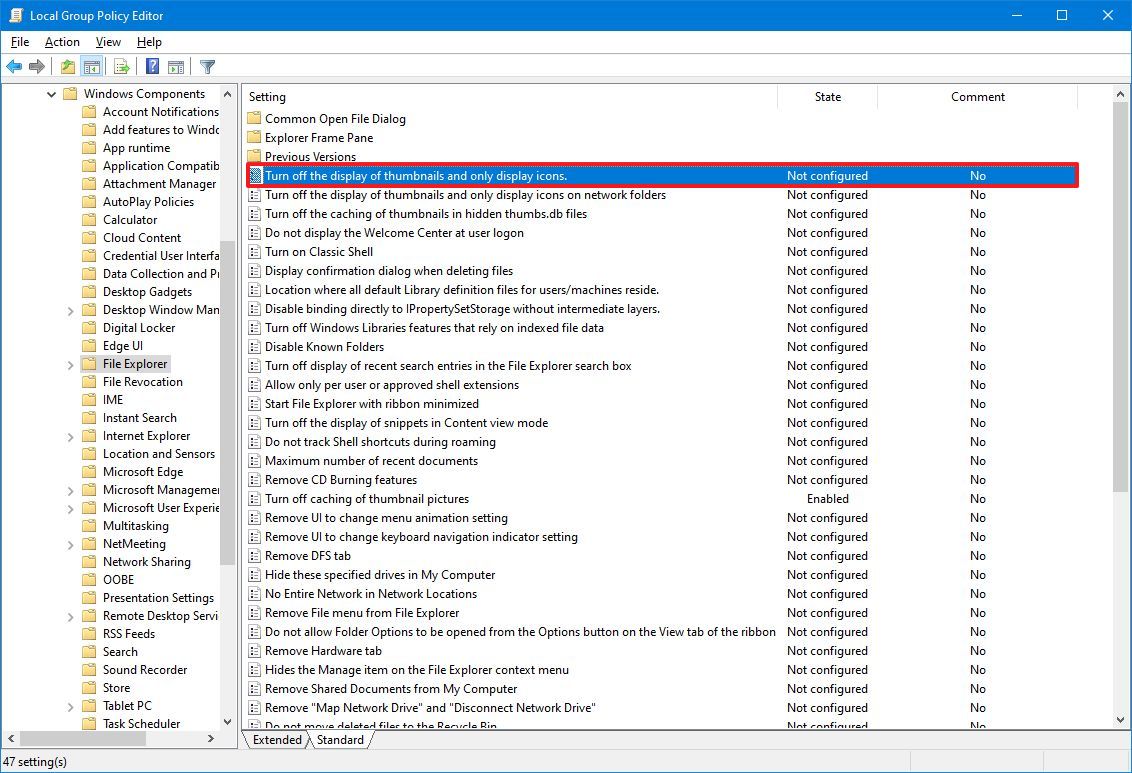
- Browse the following path: User Configuration > Administrative Templates > Windows Components > File Explorer
- On the right side, double-click the "Turn off the display of thumbnails and only display icons" policy.
- Quick note: Using Group Policy, you can also choose to only disable thumbnails for network folders with the "Turn off the display of thumbnails and only display icons on network folders" policy.
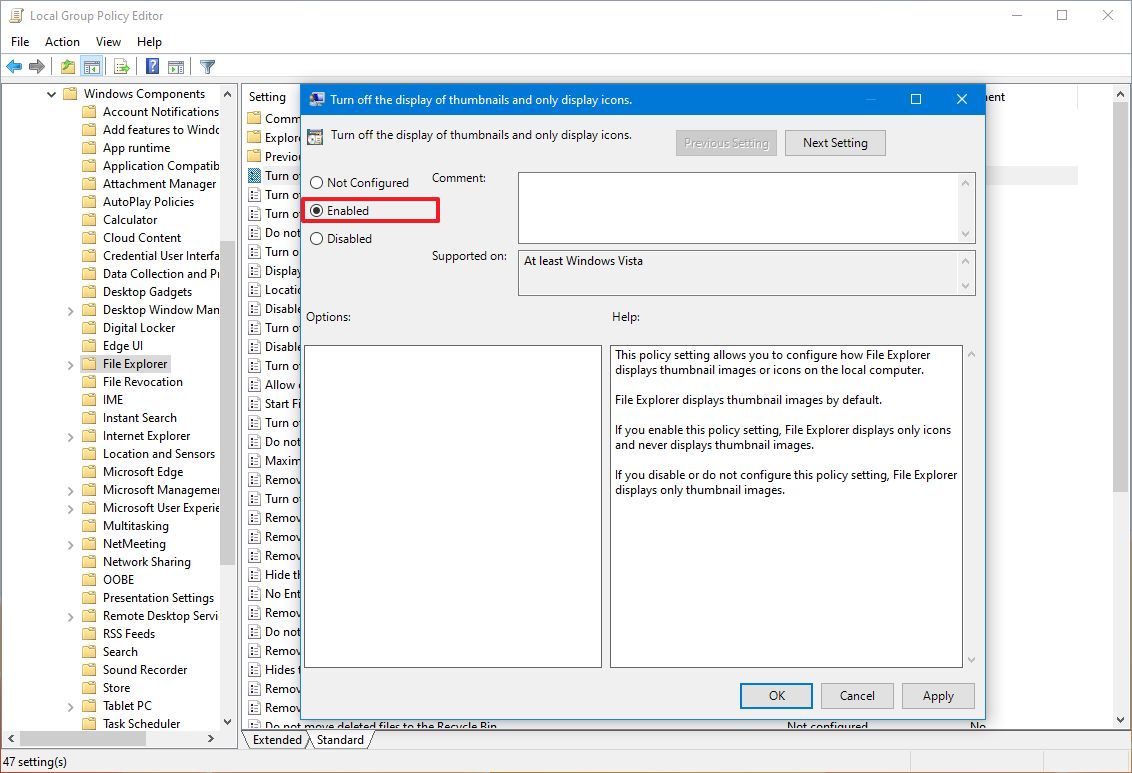
- Select the Enabled option.
- Click Apply.
- Click OK.
Once you complete the steps, users will no longer see thumbnails for files while the policy remains enabled.
Enable file thumbnails
To show previews for files with Group Policy, use these steps:
- Open Start.
- Search for gpedit.msc and click OK to open the Local Group Policy Editor.
- Browse the following path: User Configuration > Administrative Templates > Windows Components > File Explorer
- On the right side, double-click the "Turn off the display of thumbnails and only display icons" policy.

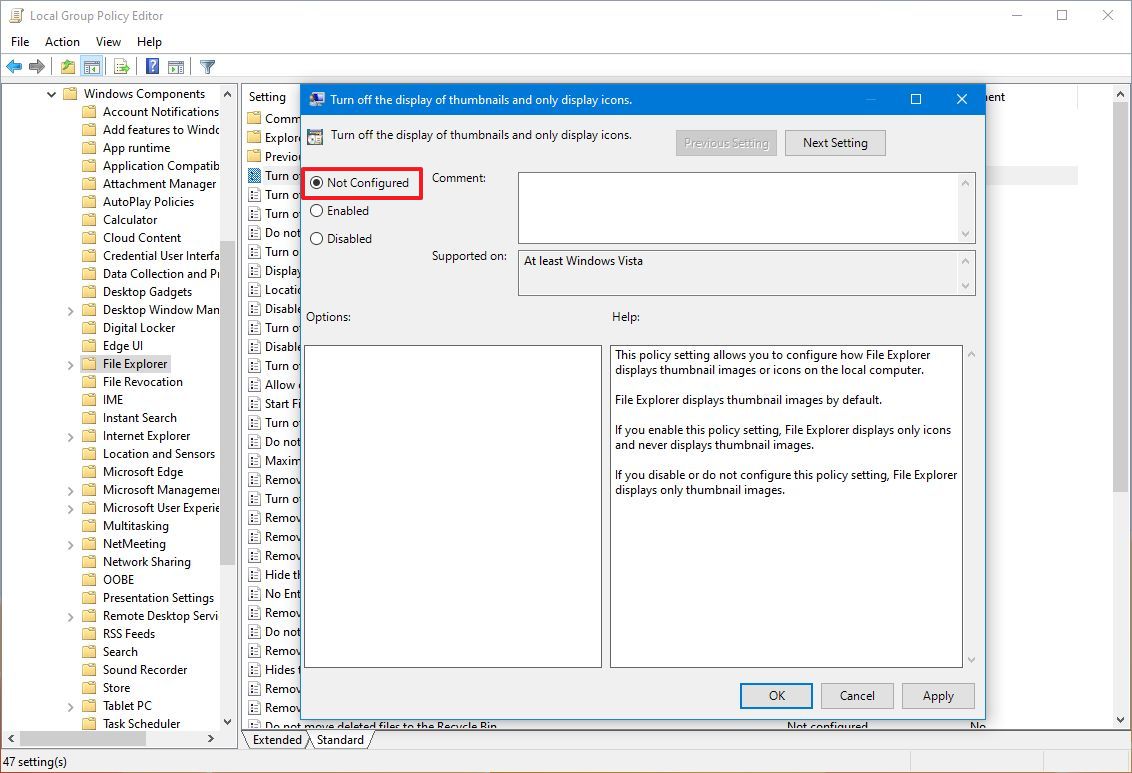
- Select the Not configured option.
- Click Apply.
- Click OK.
After you complete the steps, thumbnail previews will be available for files in File Explorer. If you can't see the previews, you may need to restart the device to apply the changes.
Whatever method you choose to disable thumbnails, remember to use the same method to re-enable the feature. If you still have problems displaying previews, these steps may resolve the issue.
More resources
Find in-depth guides, troubleshooting tips, and the latest updates on Windows 11 and 10 here:
Mauro Huculak has been a Windows How-To Expert contributor for WindowsCentral.com for nearly a decade and has over 15 years of experience writing comprehensive guides. He also has an IT background and has achieved different professional certifications from Microsoft, Cisco, VMware, and CompTIA. He has been recognized as a Microsoft MVP for many years.
You must confirm your public display name before commenting
Please logout and then login again, you will then be prompted to enter your display name.

