How to disable Windows 10's Remote Assistance feature
If you don't usually need remote assistance, you should consider disabling the feature on Windows 10. Here's how to do it.
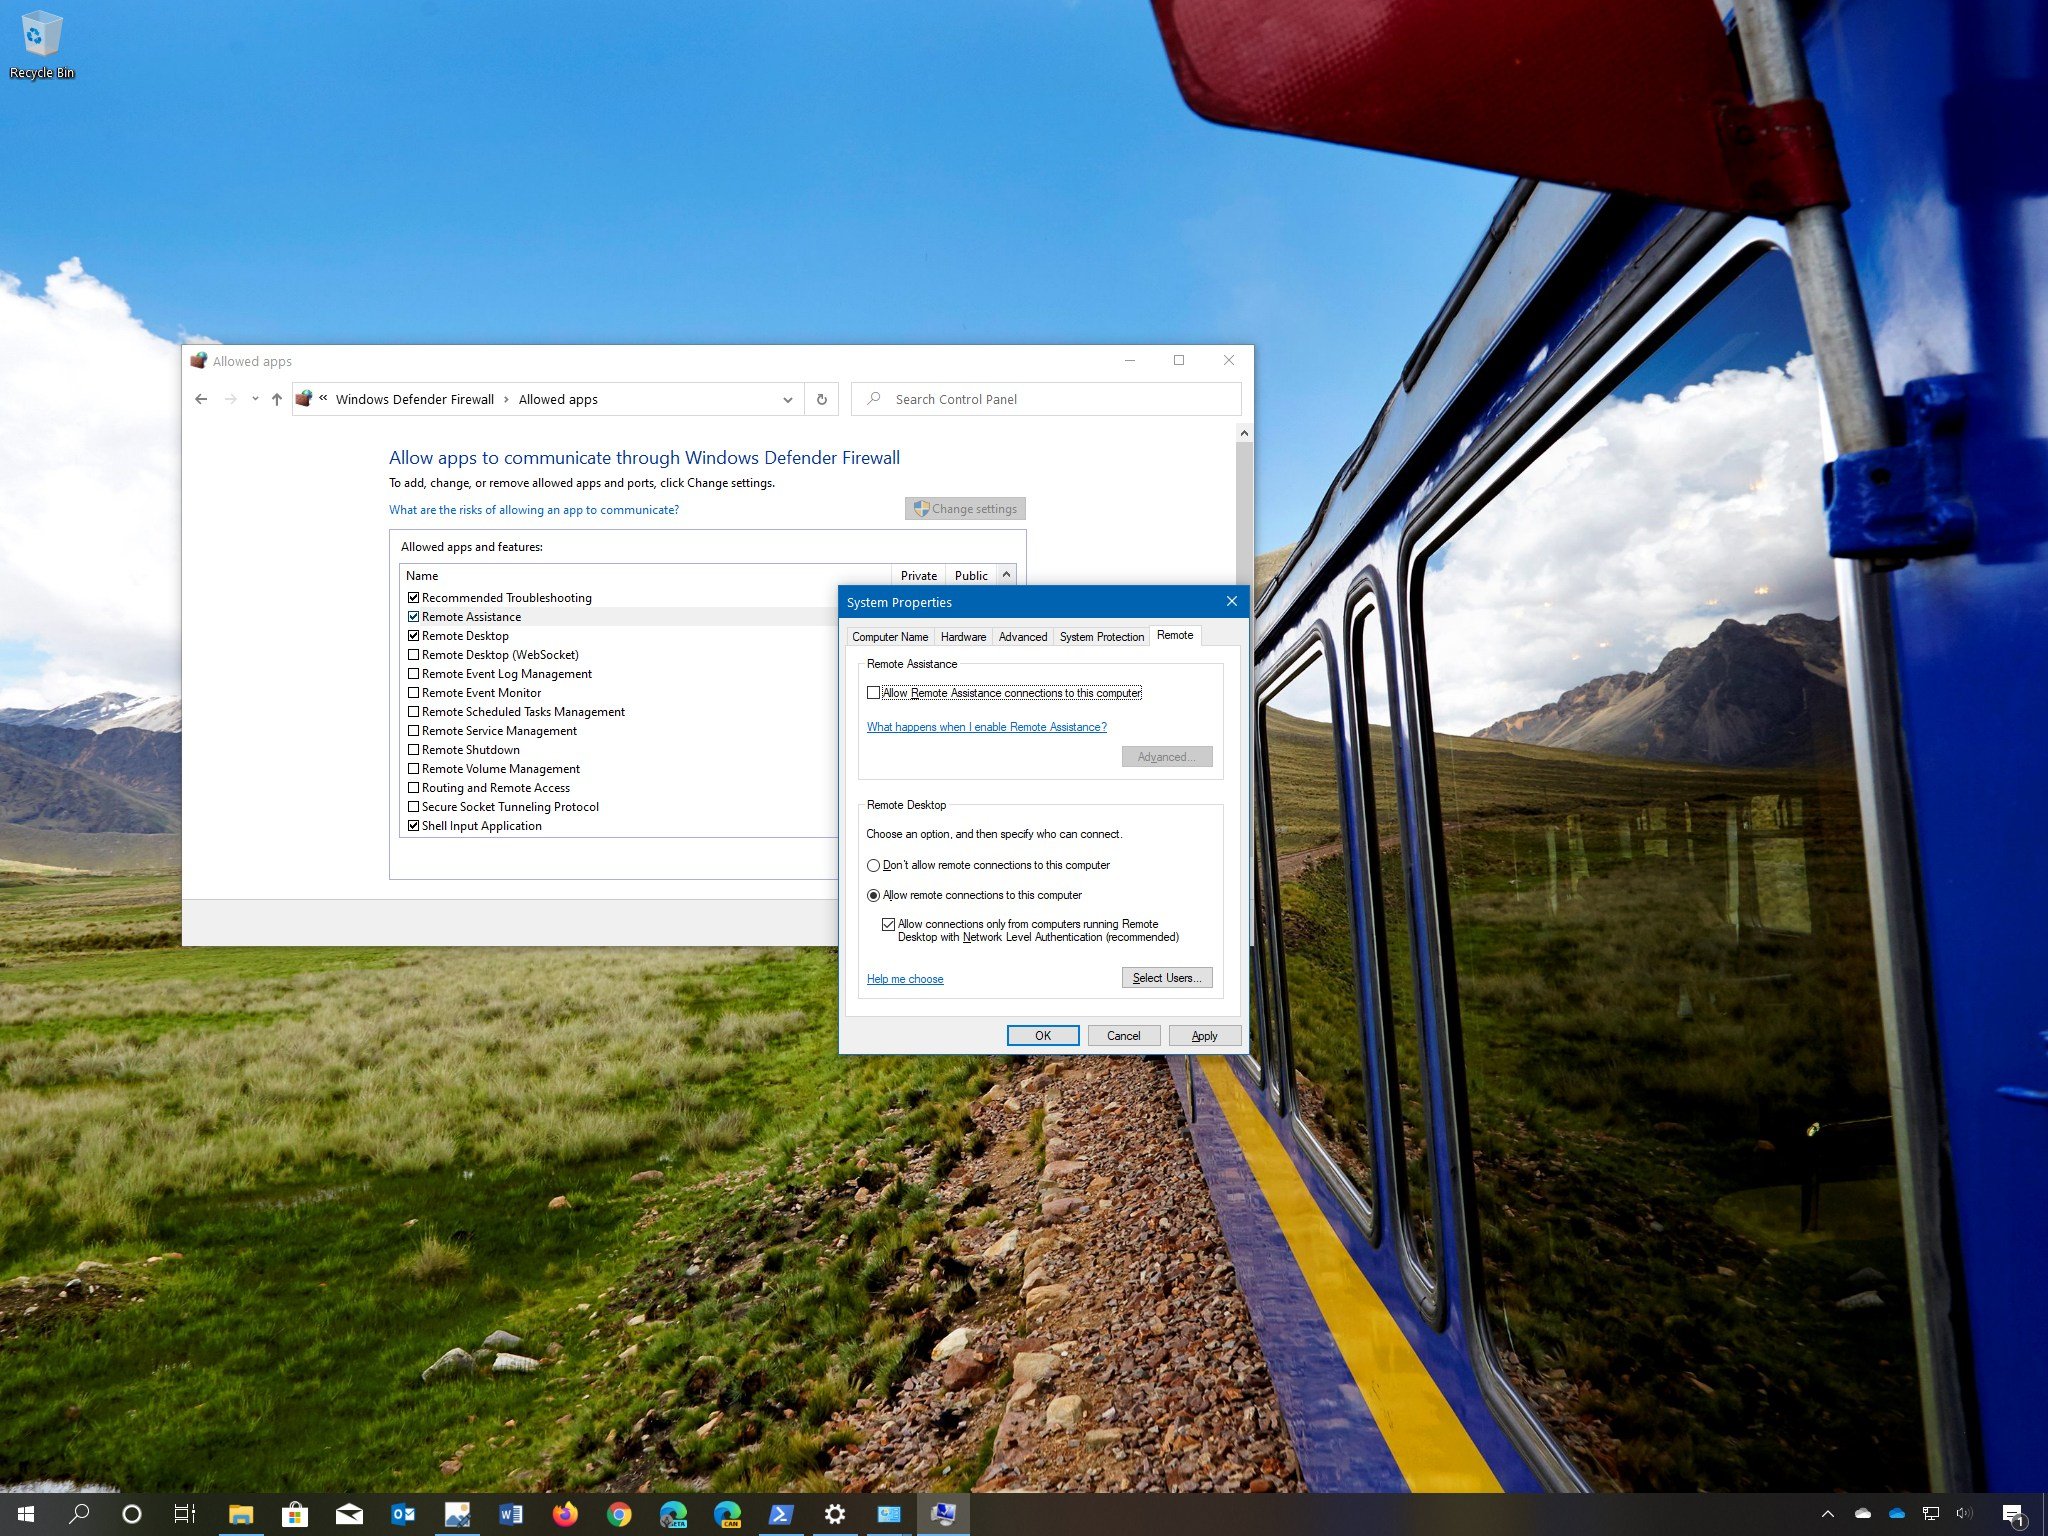
On Windows 10, Remote Assistance is a feature that has been around for a long time, and it's designed to allow someone you know and trust to access your device remotely through the internet.
Usually, it's a handy tool to let technical support, family members, or friends access your desktop to help you troubleshoot and resolve a problem, set up a program, or modify system settings without the person having to be physically at the location.
However, it's a feature that comes enabled by default on Windows 10, and if you don't use it or you need to comply with the security policies in your organization, we recommend disabling it to make your device a little more secure.
In this Windows 10 guide, we walk you through the steps to disable the Remote Assistance feature to prevent your device from being more vulnerable to potential remote attacks.
How to disable Remote Assistance on Windows 10
To disable Remote Assistance on Windows 10, use these steps:
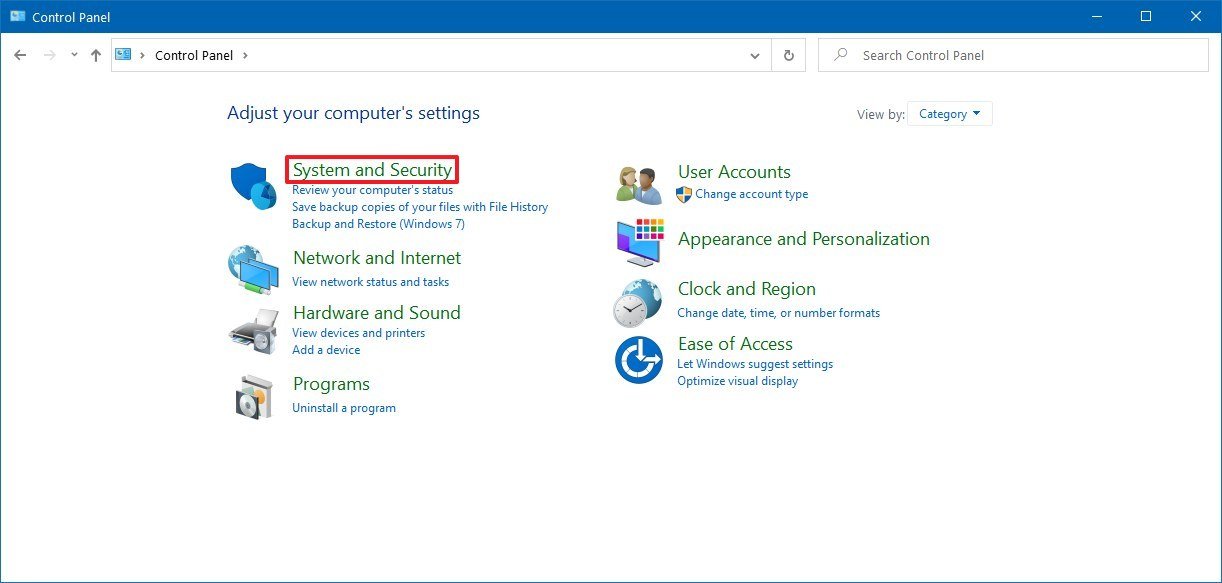
- Open Control Panel.
- Click on System and Security.
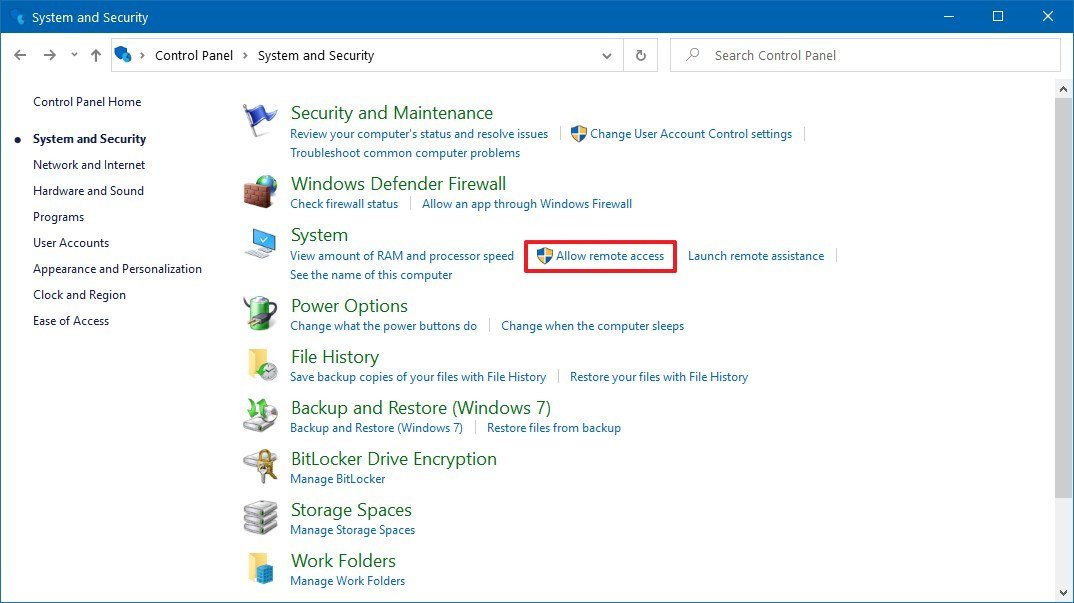
- Under the "System" section, click the Allow remote access option.
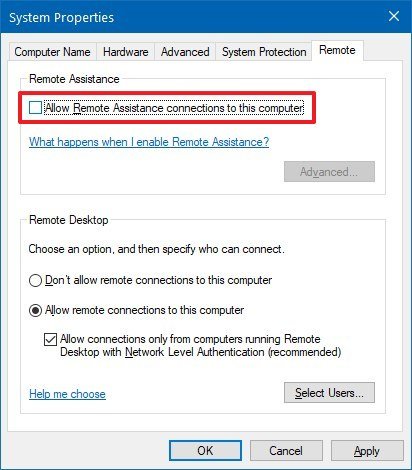
- Click the Remote tab.
- Under the "Remote Assistance" section, clear the Allow Remote Assistance connection to this computer option.
- Click the Apply button.
- Click the OK button.
Once you complete these steps, the remote connection feature will no longer run on your computer.
If you ever need help resolving an issue on your device, you can enable Remote Assistance again using the same instructions, but on step No. 5, make sure to check the Allow Remote Assistance connection to this computer option.
All the latest news, reviews, and guides for Windows and Xbox diehards.
Closing firewall ports
In addition to disabling the feature, you should also close the service's firewall ports with these steps:
- Open Control Panel.
- Click on System and Security.
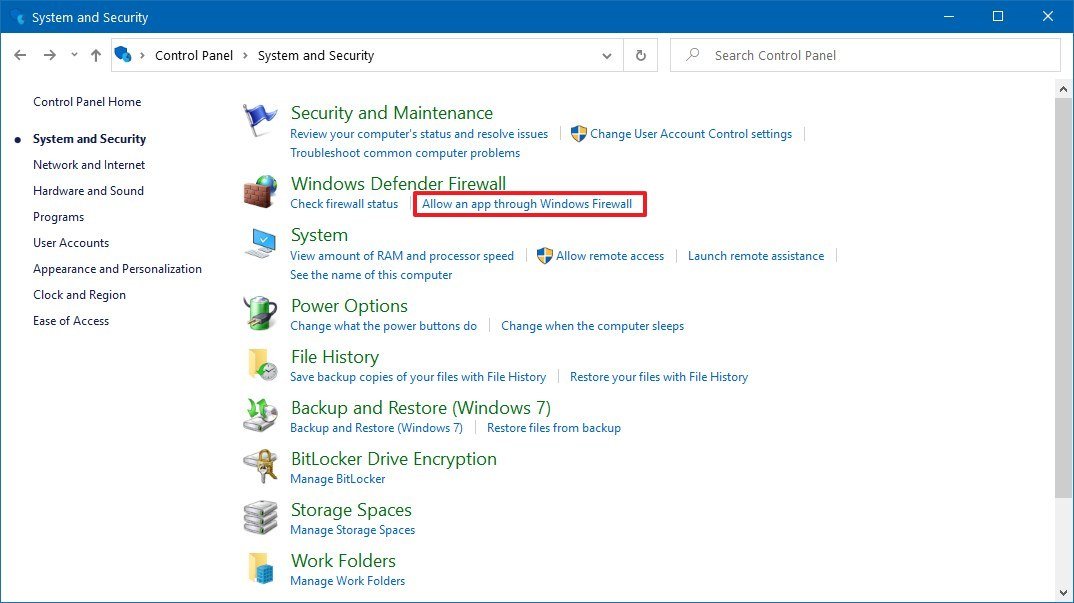
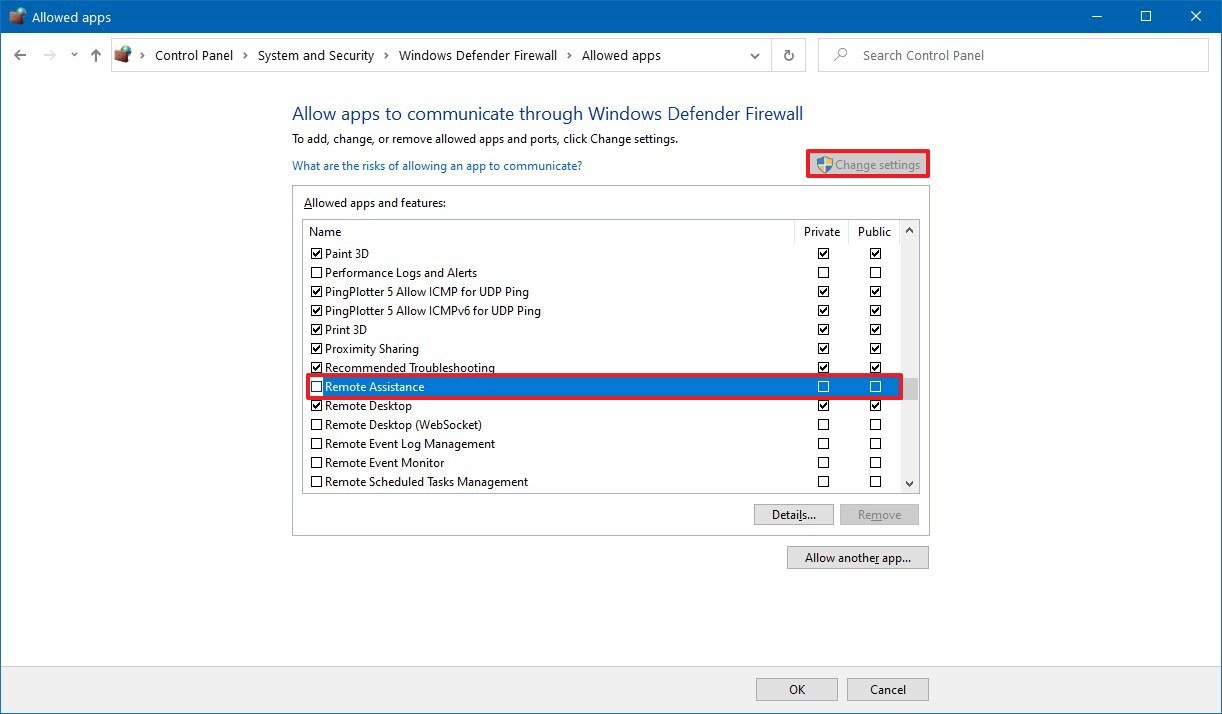
- Under the "Windows Defender Firewall" section, click the Allow an app through Windows Firewall option.
- Click the Change settings button.
- Clear the Remote Assistance option.
- Click the OK button.
After you complete these steps, the ports in the firewall that allow the service to run will close to prevent potential security breaches.
You can also always use the same instructions to revert the changes, but on step No. 5, make sure to check the Remote Assistance option and select in which type of networks ("Private" and/or "Public") you want to allow the service to run.
This guide is focused on Windows 10, but these steps should also work on Windows 8 and Windows 7.

Mauro Huculak has been a Windows How-To Expert contributor for WindowsCentral.com for nearly a decade and has over 22 years of combined experience in IT and technical writing. He holds various professional certifications from Microsoft, Cisco, VMware, and CompTIA and has been recognized as a Microsoft MVP for many years.
