How to disable real-time protection on Microsoft Defender Antivirus
You can temporarily disable the Microsoft Defender protection on your device, and in this guide, we'll show you two ways to complete this task.

Windows 10 comes with Microsoft Defender Antivirus to protect your device and files against unwanted viruses, ransomware, spyware, rootkits, and other forms of malware and hackers. Although it offers robust protection, the anti-malware sometimes can interfere with certain tasks even though they're safe. For example, the feature may block a specific file that you're trying to open and you know is safe, or it can prevent the installation of an app that you know comes from a trusted source.
If you must perform a task that is getting blocked by the default antivirus, on Windows 10, there are at least two ways to temporarily disable the Microsoft Defender protection using Windows Security and PowerShell.
In this Windows 10 guide, we'll walk you through the steps to temporarily disable the real-time protection on Microsoft Defender Antivirus.
- How to disable Microsoft Defender protection using Windows Security
- How to disable Microsoft Defender protection using PowerShell
How to disable Microsoft Defender protection using Windows Security
To disable the real-time protection on Microsoft Defender, use these steps:
- Open Start.
- Search for Windows Security and click the top result to open the app.
- Click on Virus & threat protection.
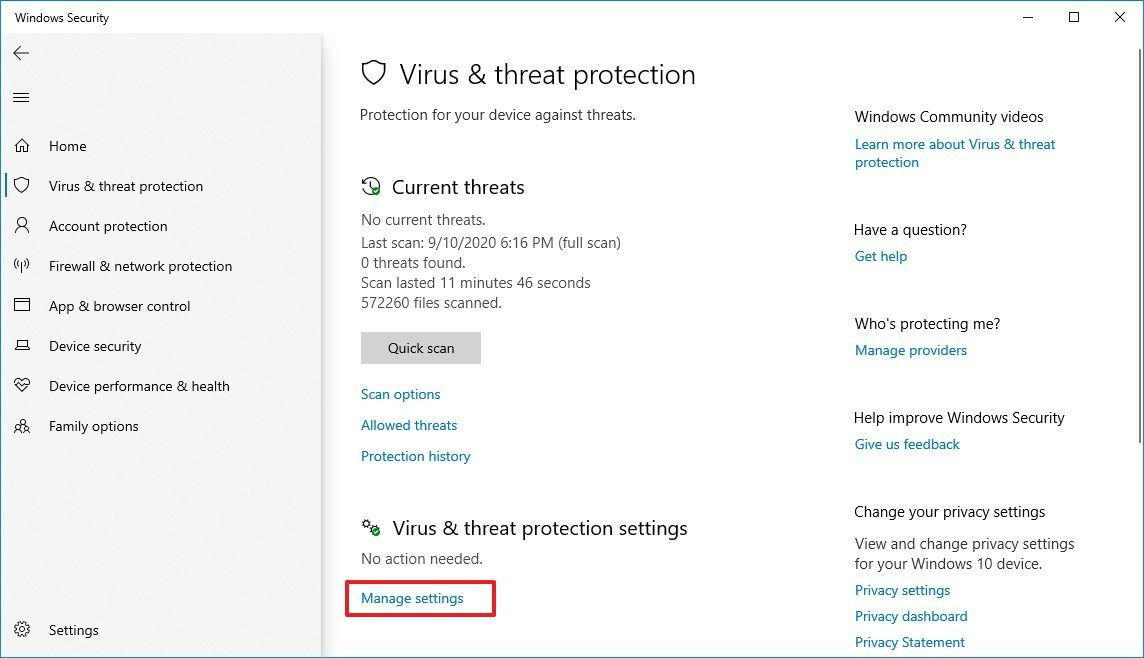
- Under the "Virus & threat protection settings" section, click the Manage settings option.

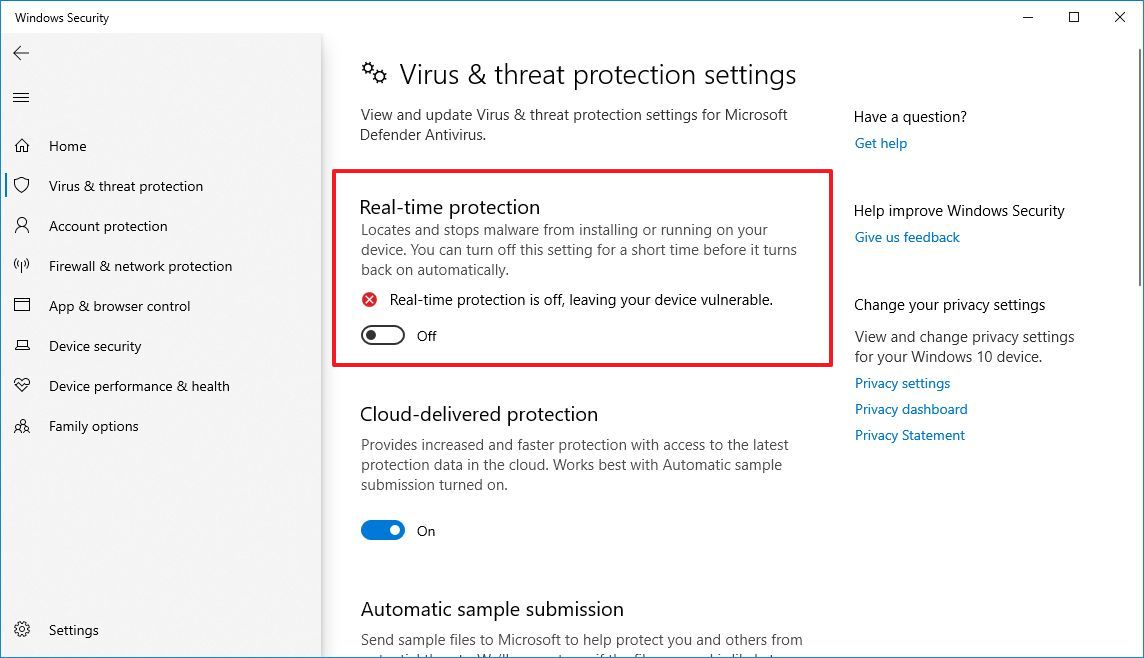
- Turn off the Real-time protection toggle switch.

Once you complete the steps, the Microsoft Defender Antivirus protection will temporarily disable, allowing you to complete a specific task, which otherwise will be blocked by the antivirus.
If you want to re-enable the protection, you can either restart the computer or use the same instructions outlined above, but on step No. 5, make sure to turn on the Real-time protection toggle switch.
In the case that you're trying to disable the Windows 10 default antivirus permanently, you can use these instructions.
All the latest news, reviews, and guides for Windows and Xbox diehards.
How to disable Microsoft Defender protection using PowerShell
Microsoft Defender Antivirus ships with a command to temporarily disable real-time protection, but the "Tamper Protection" feature shields any attempt to modify the antivirus settings from outside of Windows Security. This means that if you want to use PowerShell to turn off the feature, you first need to disable Tamper Protection on Windows Security > Virus & threat protection > Virus & threat protection settings.
To disable the Windows 10 antivirus real-time protection with PowerShell, use these steps:
- Open Start.
- Search for PowerShell, right-click the top result, and select the Run as administrator option.
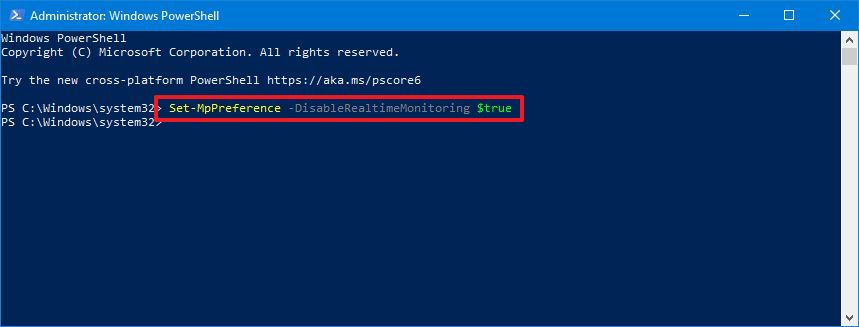
- Type the following command to disable Microsoft Defender Antivirus real-time protection and press Enter:
Set-MpPreference -DisableRealtimeMonitoring $true

After you complete the steps, the protection will be disabled until the next time you restart the device or run the command to enable real-time protection:
Set-MpPreference -DisableRealtimeMonitoring $false.
You can also manage virtually any aspect of the Microsoft Defender Antivirus using PowerShell commands. You can check this guide to learn more.

Mauro Huculak has been a Windows How-To Expert contributor for WindowsCentral.com for nearly a decade and has over 22 years of combined experience in IT and technical writing. He holds various professional certifications from Microsoft, Cisco, VMware, and CompTIA and has been recognized as a Microsoft MVP for many years.
