How to disable Microsoft Edge InPrivate browsing on Windows 10
You can disable InPrivate browsing on Microsoft Edge to make sure you can keep an eye on web activities on a shared PC, or if it's a requirement in your corporate network.
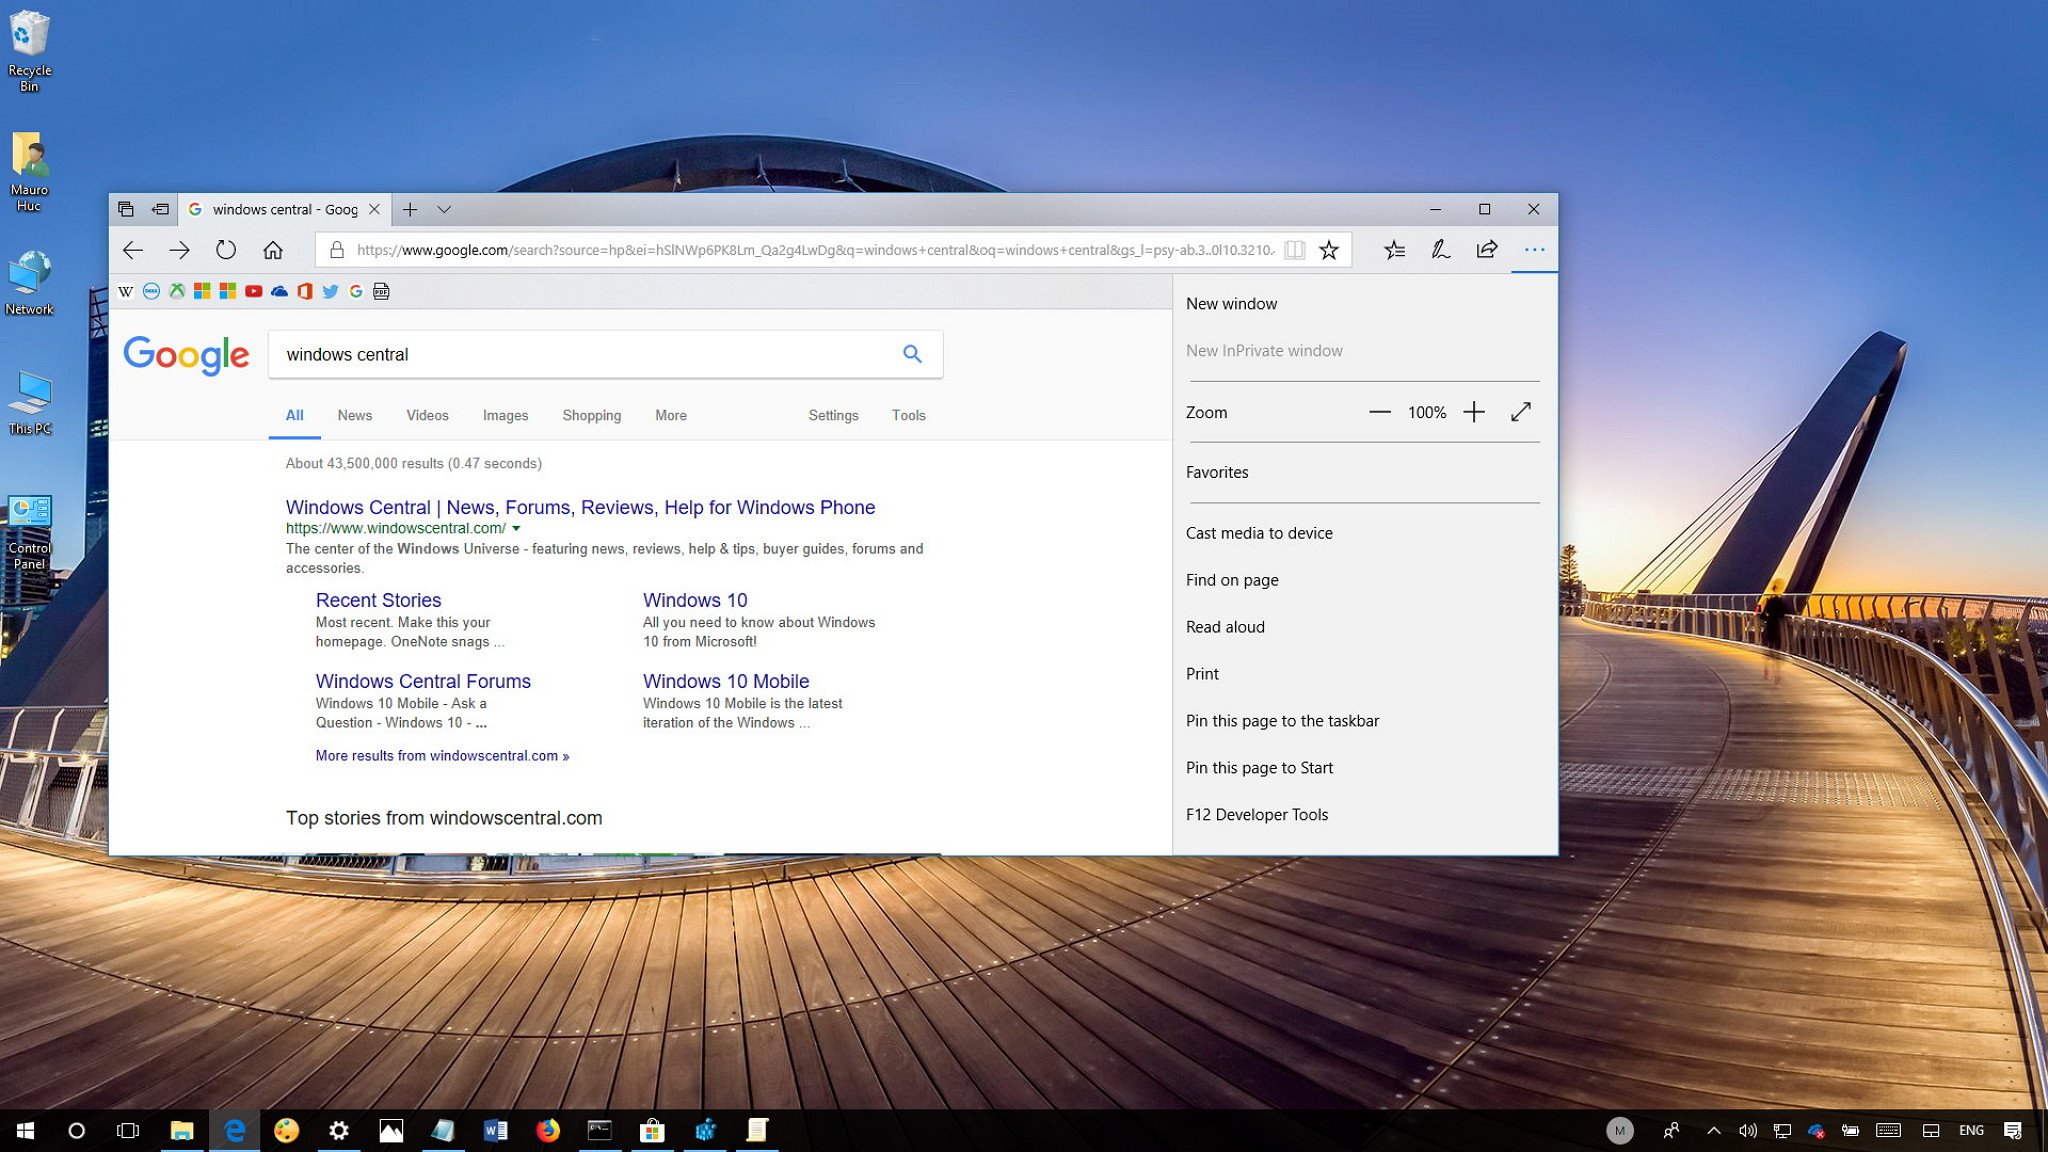
On Windows 10, Microsoft Edge (like in most browsers) caches online data, such as history, cookies, and internet files to speed up the experience and other purposes. However, because this data can also expose user activities (e.g., online history and search queries), the browser also provides the InPrivate experience to keep users data private.
When using an InPrivate tab, your browsing data is not stored on the device, which in terms helps you to cover your tracks. Though it's a useful feature, it may not be something suited for all environments. For example, if your company has a strict online policy, or you want to prevent users from accessing the experience to track online activities on a shared PC.
If you must disable InPrivate on Edge in your local or corporate network, you can do this in at least two different ways using the Local Group Policy Editor and the Registry.
In this Windows 10 guide, we'll walk you through the steps to disable the InPrivate browsing feature in the Microsoft Edge browser.
- How to disable Edge InPrivate browsing using Group Policy
- How to disable Edge InPrivate browsing using Registry
How to disable Edge InPrivate browsing using Group Policy
On Windows 10 Pro or Enterprise, the quickest way to remove the InPrivate browsing experience on Edge is to use the Local Group Policy Editor.
- Use the Windows key + R keyboard shortcut to open the Run command.
- Type gpedit.msc and click OK to open the Local Group Policy Editor.
- Browse the following path:
Computer Configuration > Administrative Templates > Windows Components > Microsoft Edge - On the right side, double-click the Allow InPrivate browsing policy.
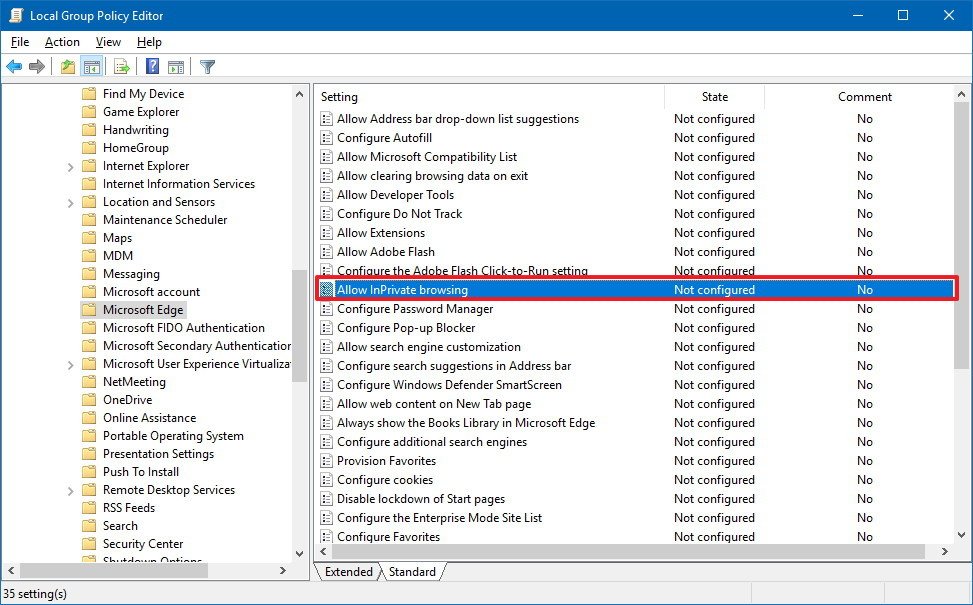
- Select the Disabled option.
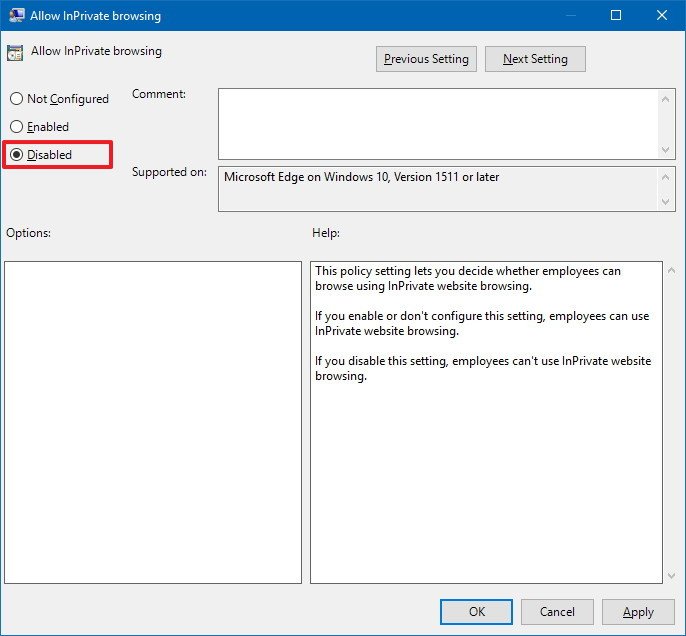
- Click Apply.
- Click OK.
Once you've completed the steps, the "New InPrivate window" option will appear grayed out in the Microsoft Edge main menu, and no one will be able to start the experience.
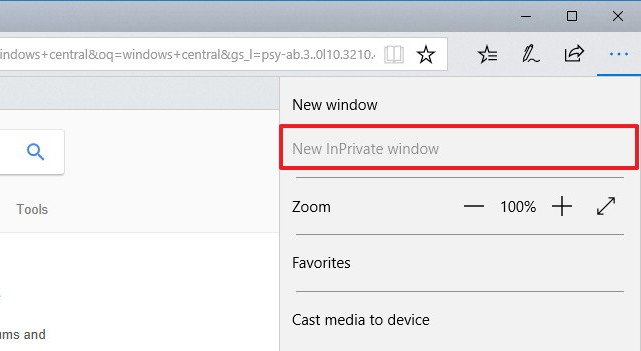
At any time, it's possible to revert the changes by following the same instructions, but on step No. 5, make sure to select the Not Configured option.
Get the Windows Central Newsletter
All the latest news, reviews, and guides for Windows and Xbox diehards.
How to disable Edge InPrivate browsing using Registry
In the case that you're using Windows 10 Home, you won't have access to the Local Group Policy Editor, but you can still disable the InPrivate experience using the Registry.
Warning: This is a friendly reminder that editing the Registry is risky, and it can cause irreversible damage to your installation if you don't do it correctly. It's recommended to make a full backup of your PC before proceeding.
- Use the Windows key + R keyboard shortcut to open the Run command.
- Type regedit, and click OK to open the Registry.
- Browse the following path:
HKEY_LOCAL_MACHINE\SOFTWARE\Policies\Microsoft- Quick Tip: On the Windows 10 Creators Update, you can now copy and paste the path in the new Registry's address bar to quickly jump to the key destination.
- Right-click the Microsoft (folder) key, select New, and click on Key.
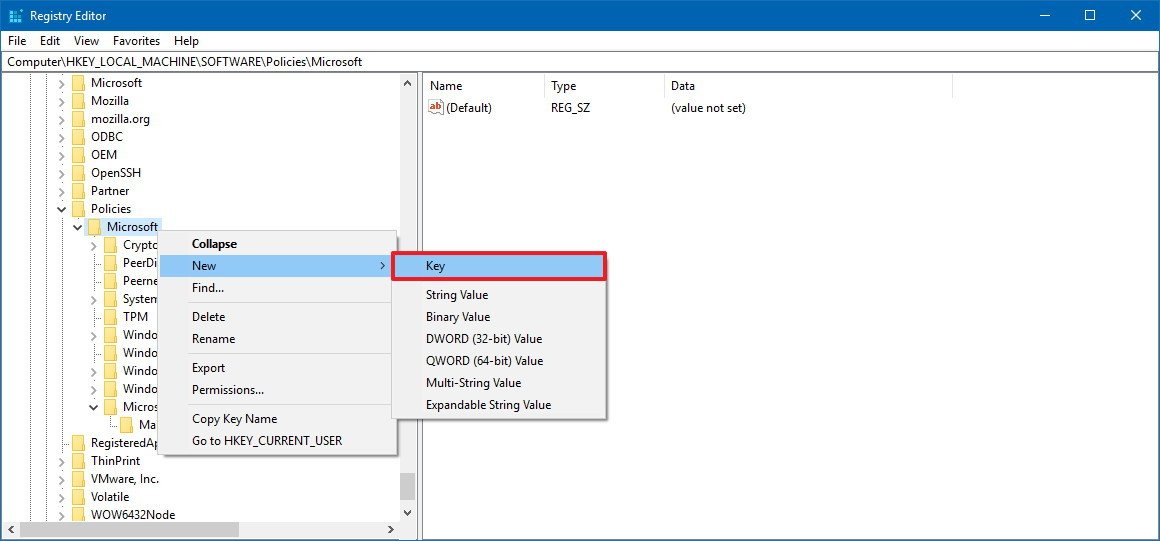
- Name the key MicrosoftEdge and press Enter.
- Right-click the newly created key, select New, and click on Key.

- Name the key Main and press Enter.
- Right-click the newly created key, select New, and click on DWORD (32-bit) Value.

- Name the key AllowInPrivate and press Enter.
- Double-click the newly created DWORD and make sure the value is set to 0.

- Click OK.
After completing the steps, Microsoft Edge will continue to show the "New InPrivate window" option, but it'll be grayed out, and users won't be able to launch the experience.

If you want to re-enable the privacy feature, you can use the same instructions, but on step No. 5, make sure to right-click the MicrosoftEdge key and click Delete to remove the configuration that prevents the use of InPrivate browsing.
More Windows 10 resources
For more helpful articles, coverage, and answers to common questions about Windows 10, visit the following resources:
- Windows 10 on Windows Central – All you need to know
- Windows 10 help, tips, and tricks
- Windows 10 forums on Windows Central
Mauro Huculak has been a Windows How-To Expert contributor for WindowsCentral.com for nearly a decade and has over 15 years of experience writing comprehensive guides. He also has an IT background and has achieved different professional certifications from Microsoft, Cisco, VMware, and CompTIA. He has been recognized as a Microsoft MVP for many years.

