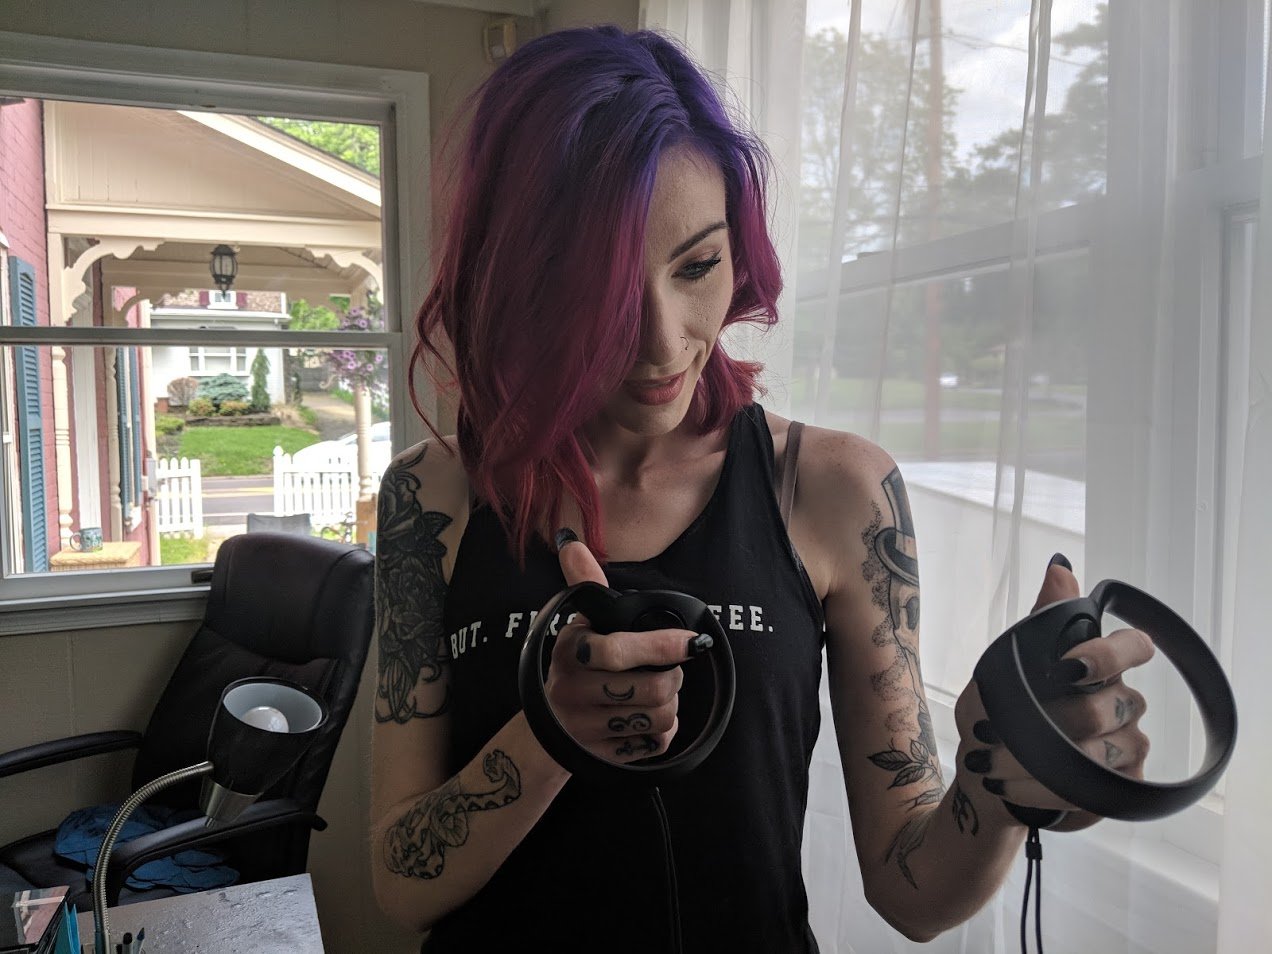
In an attempt to broaden the accessibility spectrum when it comes to VR and its controllers, SteamVR has introduced custom keybindings. In the past, though SteamVR supports HTC Vive, Oculus Rift, and Windows Mixed Reality (WMR), apps sometimes didn't offer support for the different motion controllers. From here on out, VR apps will be able to support any compatible controllers (including gamepads) without having to worry about buttons not matching up.
This also opens the door to anyone who's left-handed, living with a disability, or who prefers to play a game a certain way. If you're ready to create your own custom keybindings for different VR controllers, I've put together this guide to help you get started.
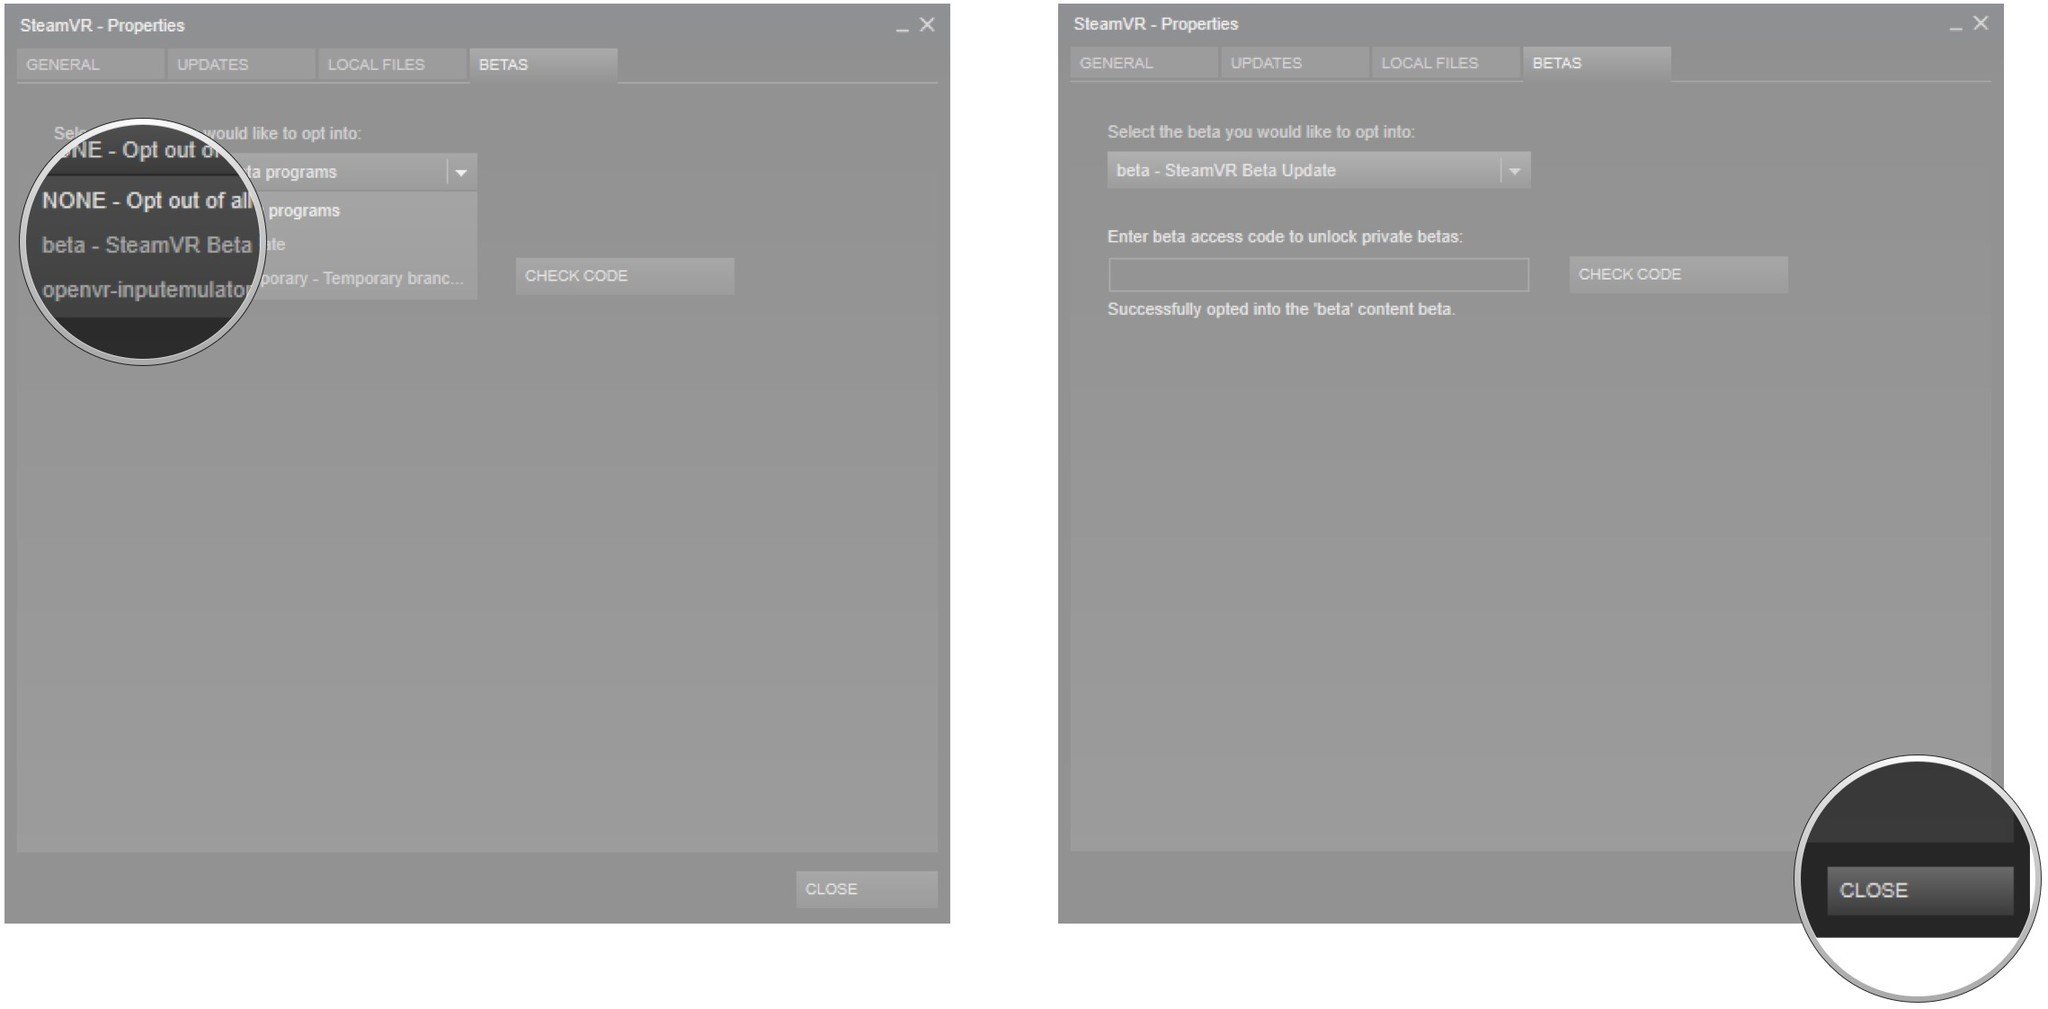
How to opt into the SteamVR beta
In order to test the keybindings system, you'll need to first opt into the SteamVR beta. Here's how.
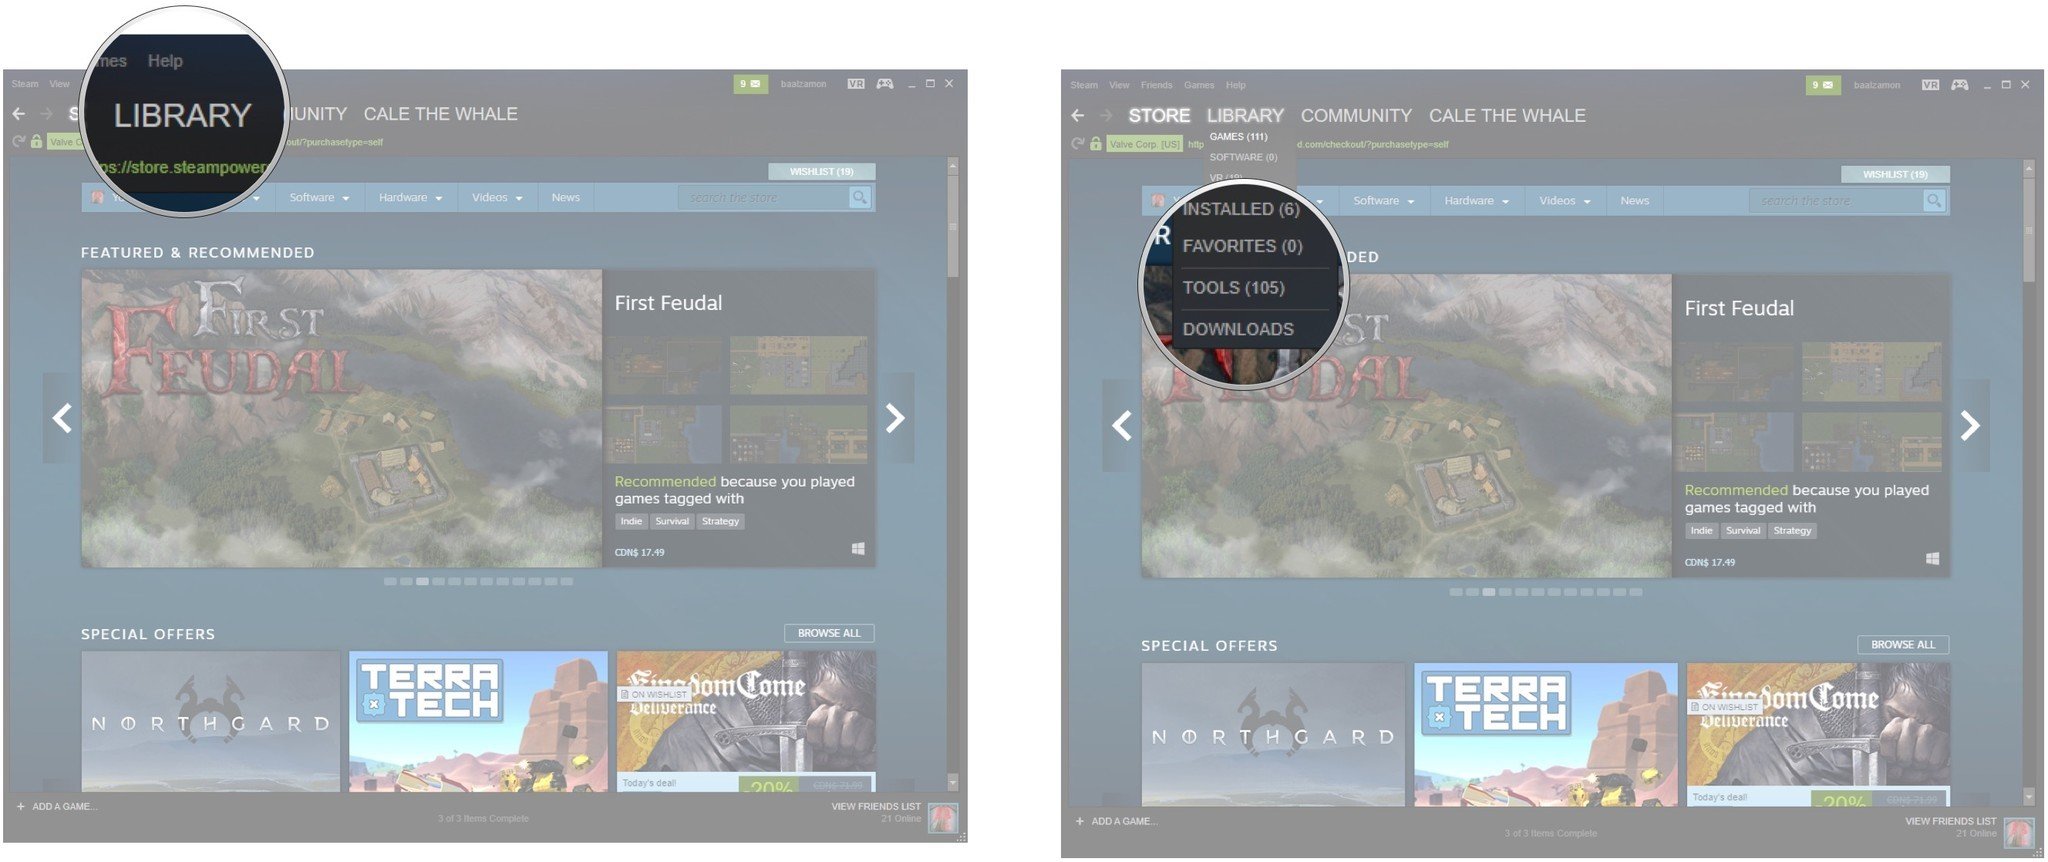
- Launch Steam from your Start menu, desktop, or taskbar.
- Hover your cursor over Library.
- Click Tools.
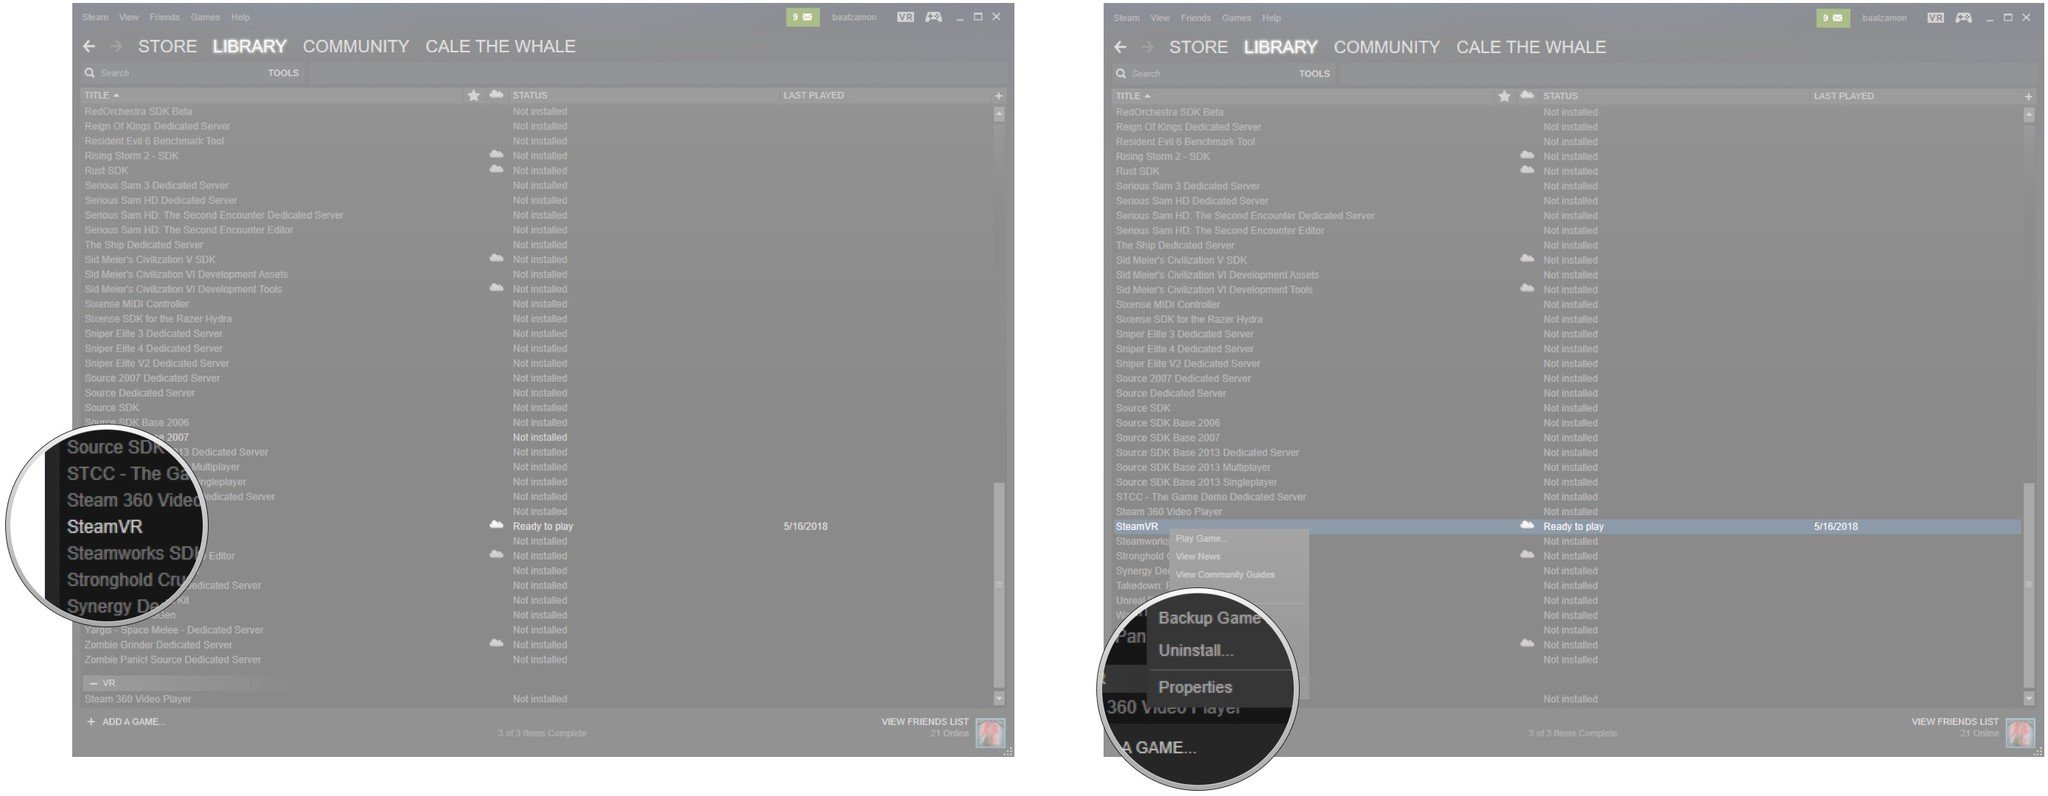
- Right-click SteamVR. You might have to scroll down a bit to find it.
- Click Properties.
- Click the Betas tab.
- Click the dropdown menu.
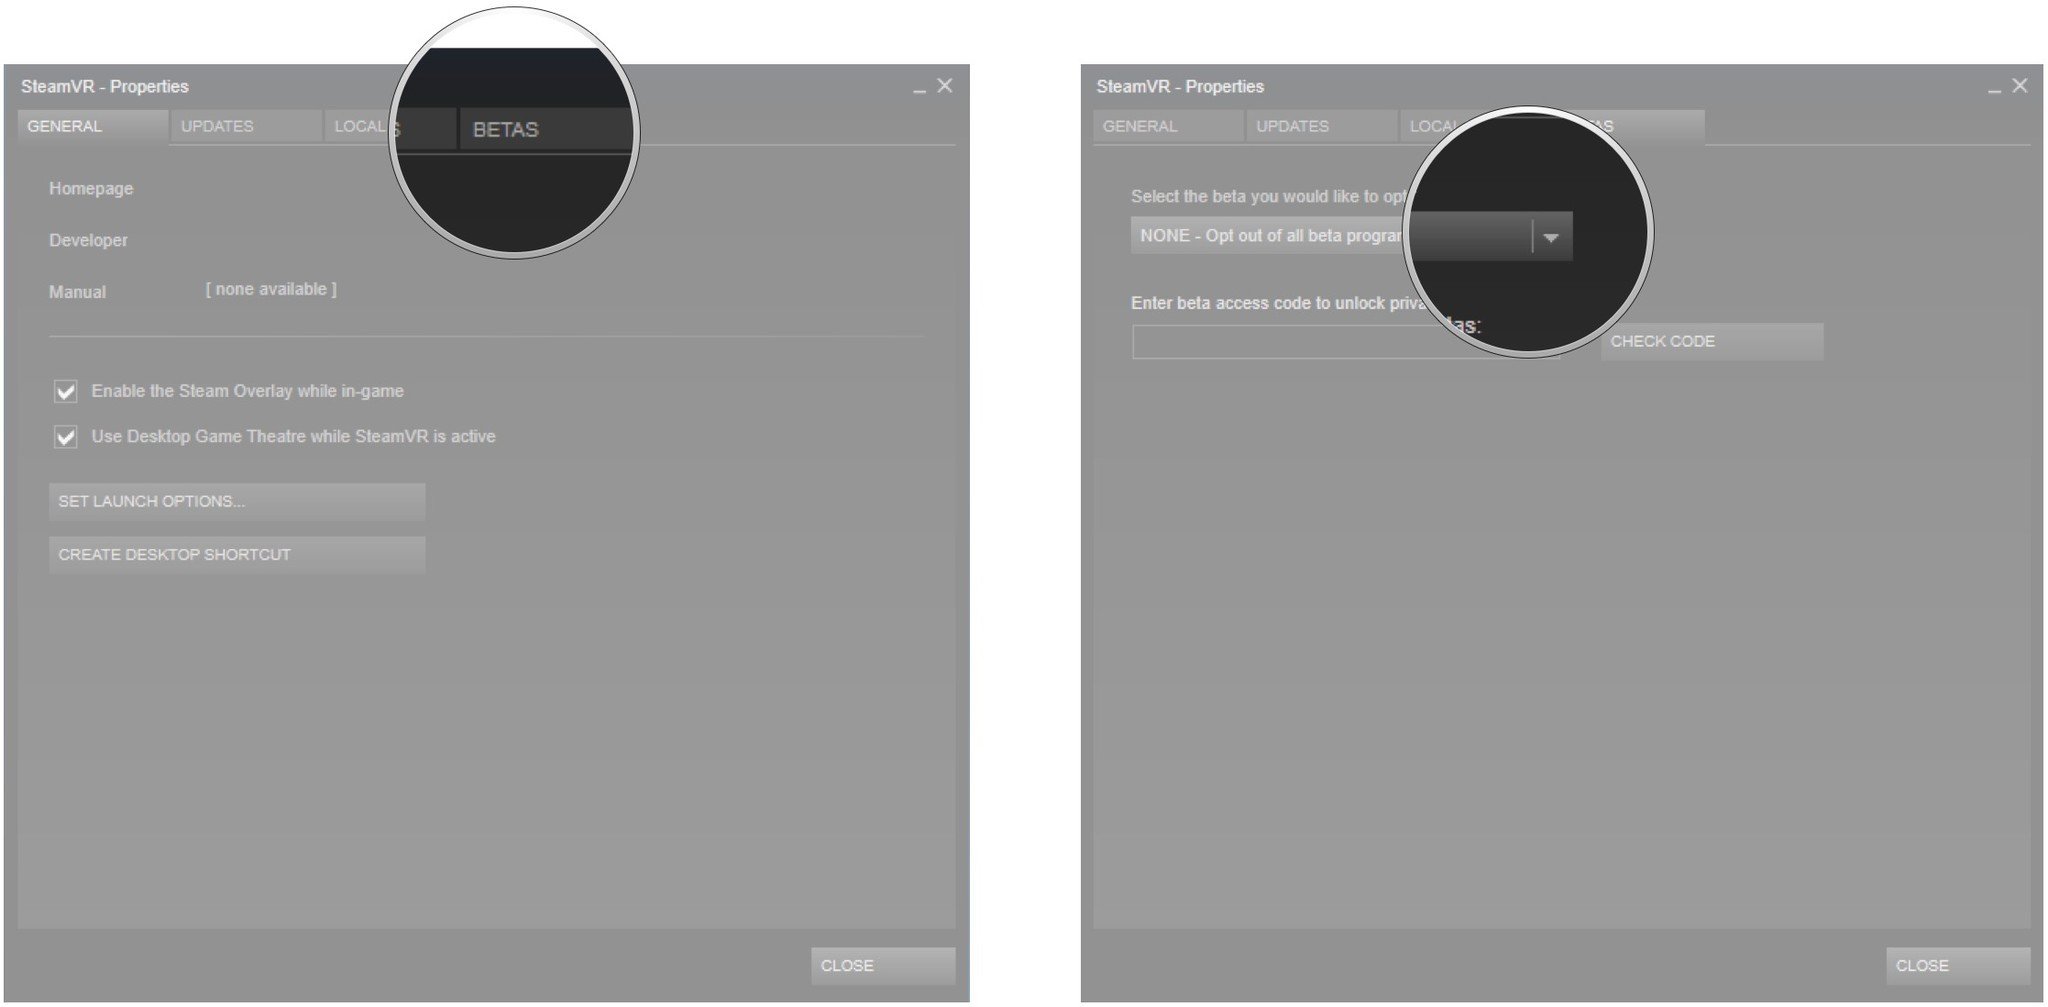
- Click beta - SteamVR Beta Update.
- Click Close. The beta software will automatically download.
How to access the SteamVR Controller Binding section
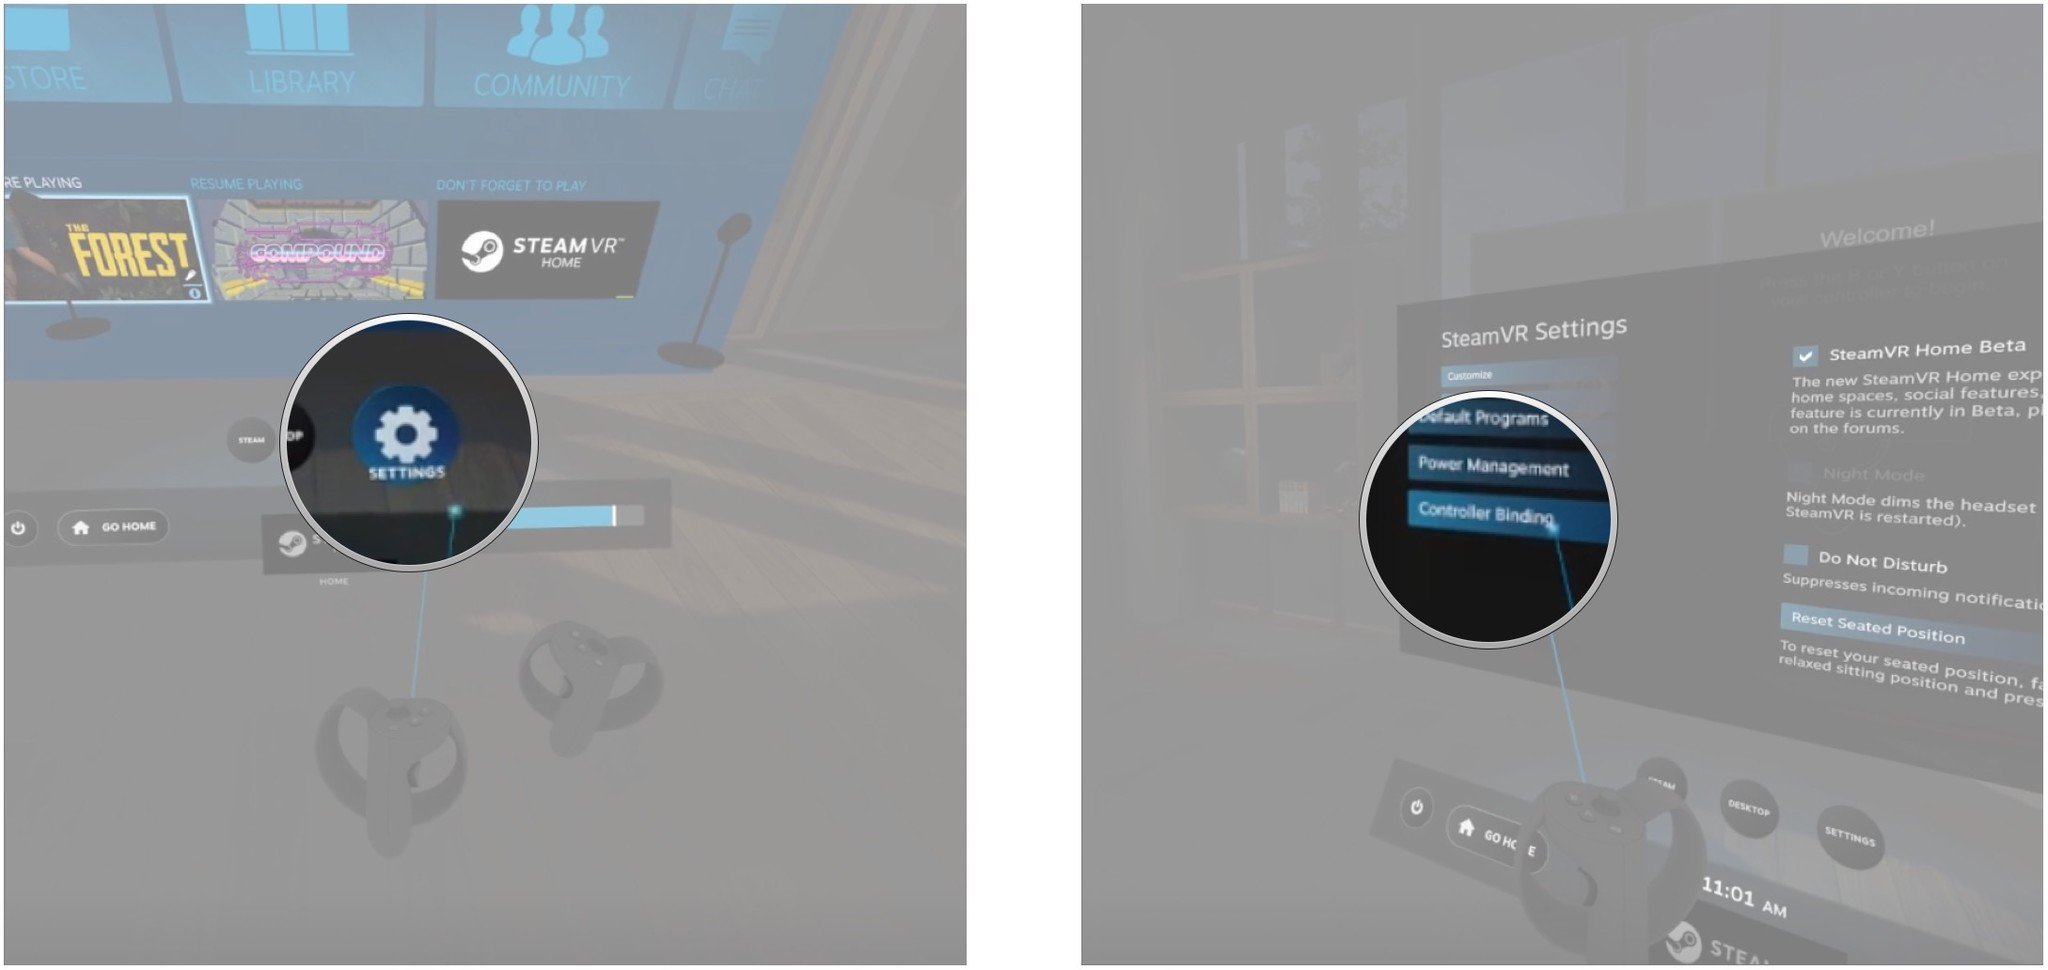
Once you've opted into the SteamVR beta, you should be able to access the SteamVR Controller Binding option inside your headset.
- Open the SteamVR overlay menu by clicking the menu button on your motion controller.
- Select Settings.
- Select Controller Binding.
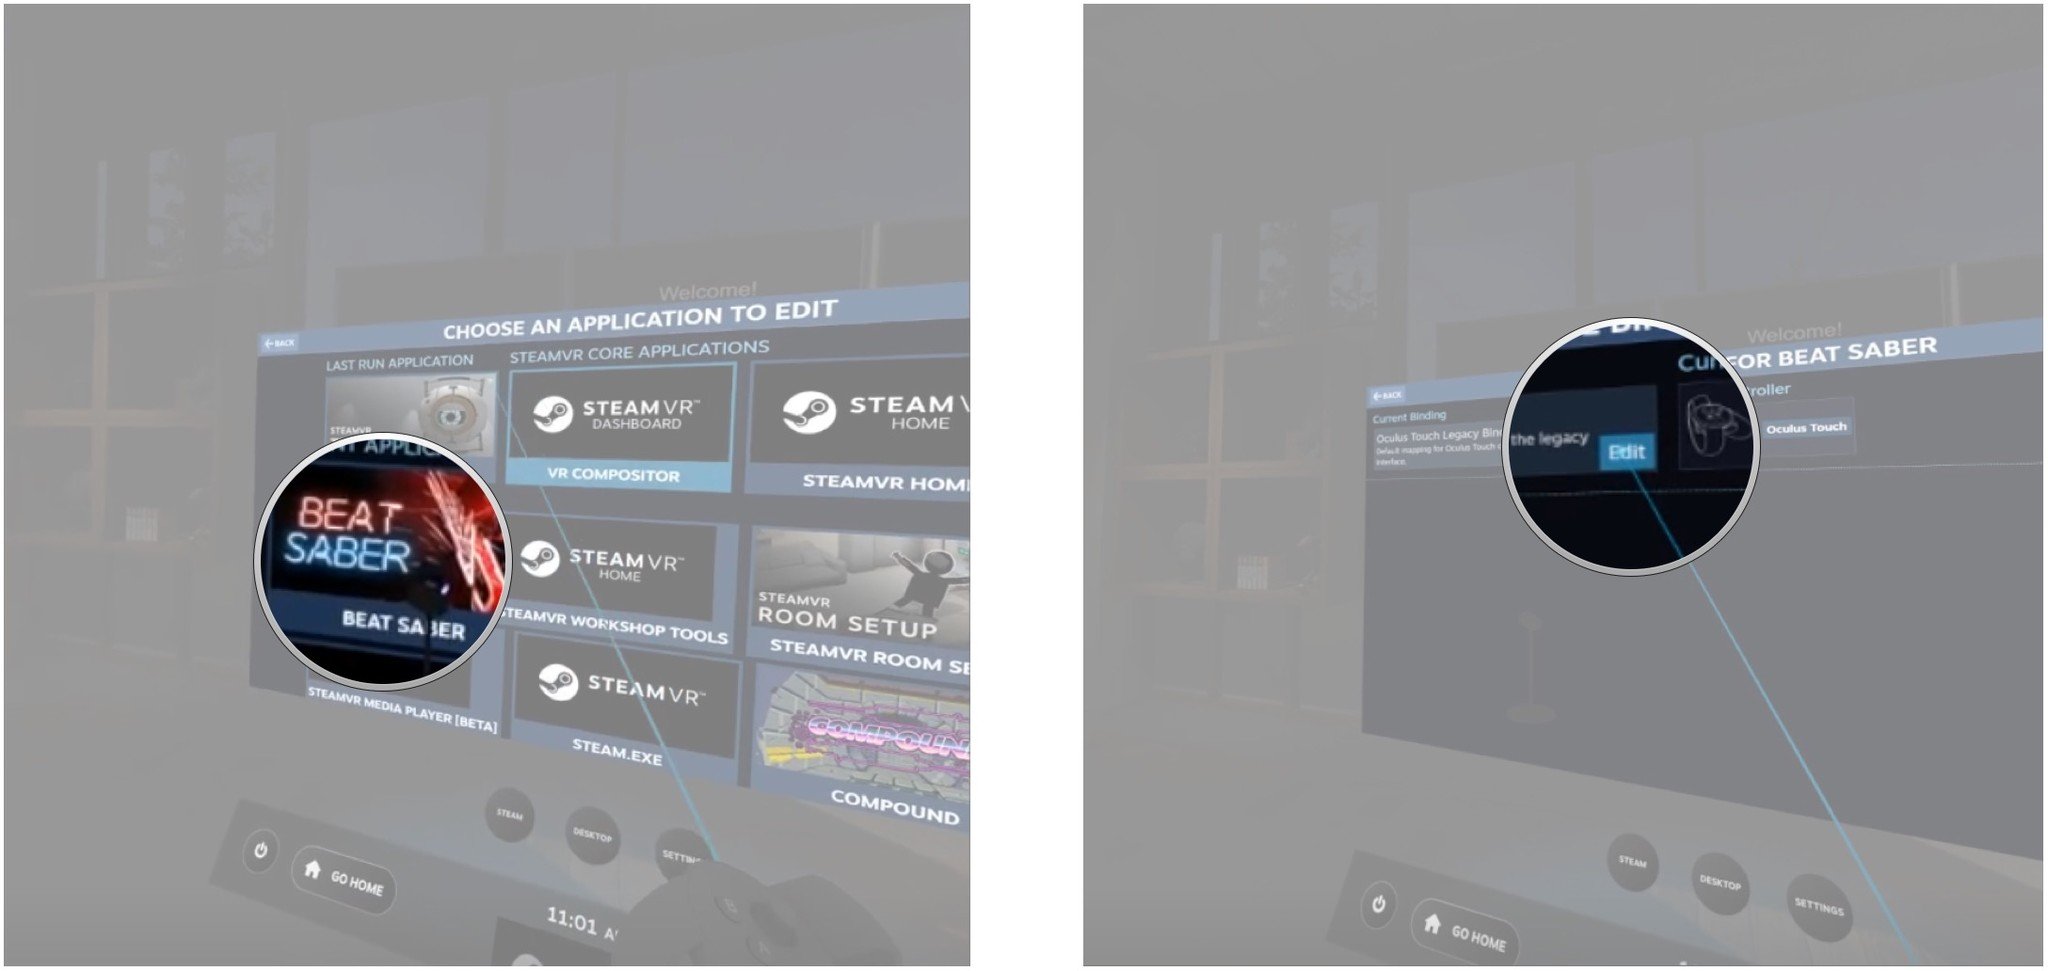
- Select a game or experience for which you'd like to create custom bindings.
- Select the Edit button. This will allow you to edit the legacy controller bindings and will allow you to save as something new without overwriting.
How to create custom SteamVR keybindings
You'll now be shown a layout of the controllers that you'd like to customize. In this case, I'm using Oculus Touch, but you'll see here whatever controller you're using at the moment. Each button, trigger, touchpad, or joystick on the controller is laid out here with the associated legacy actions.
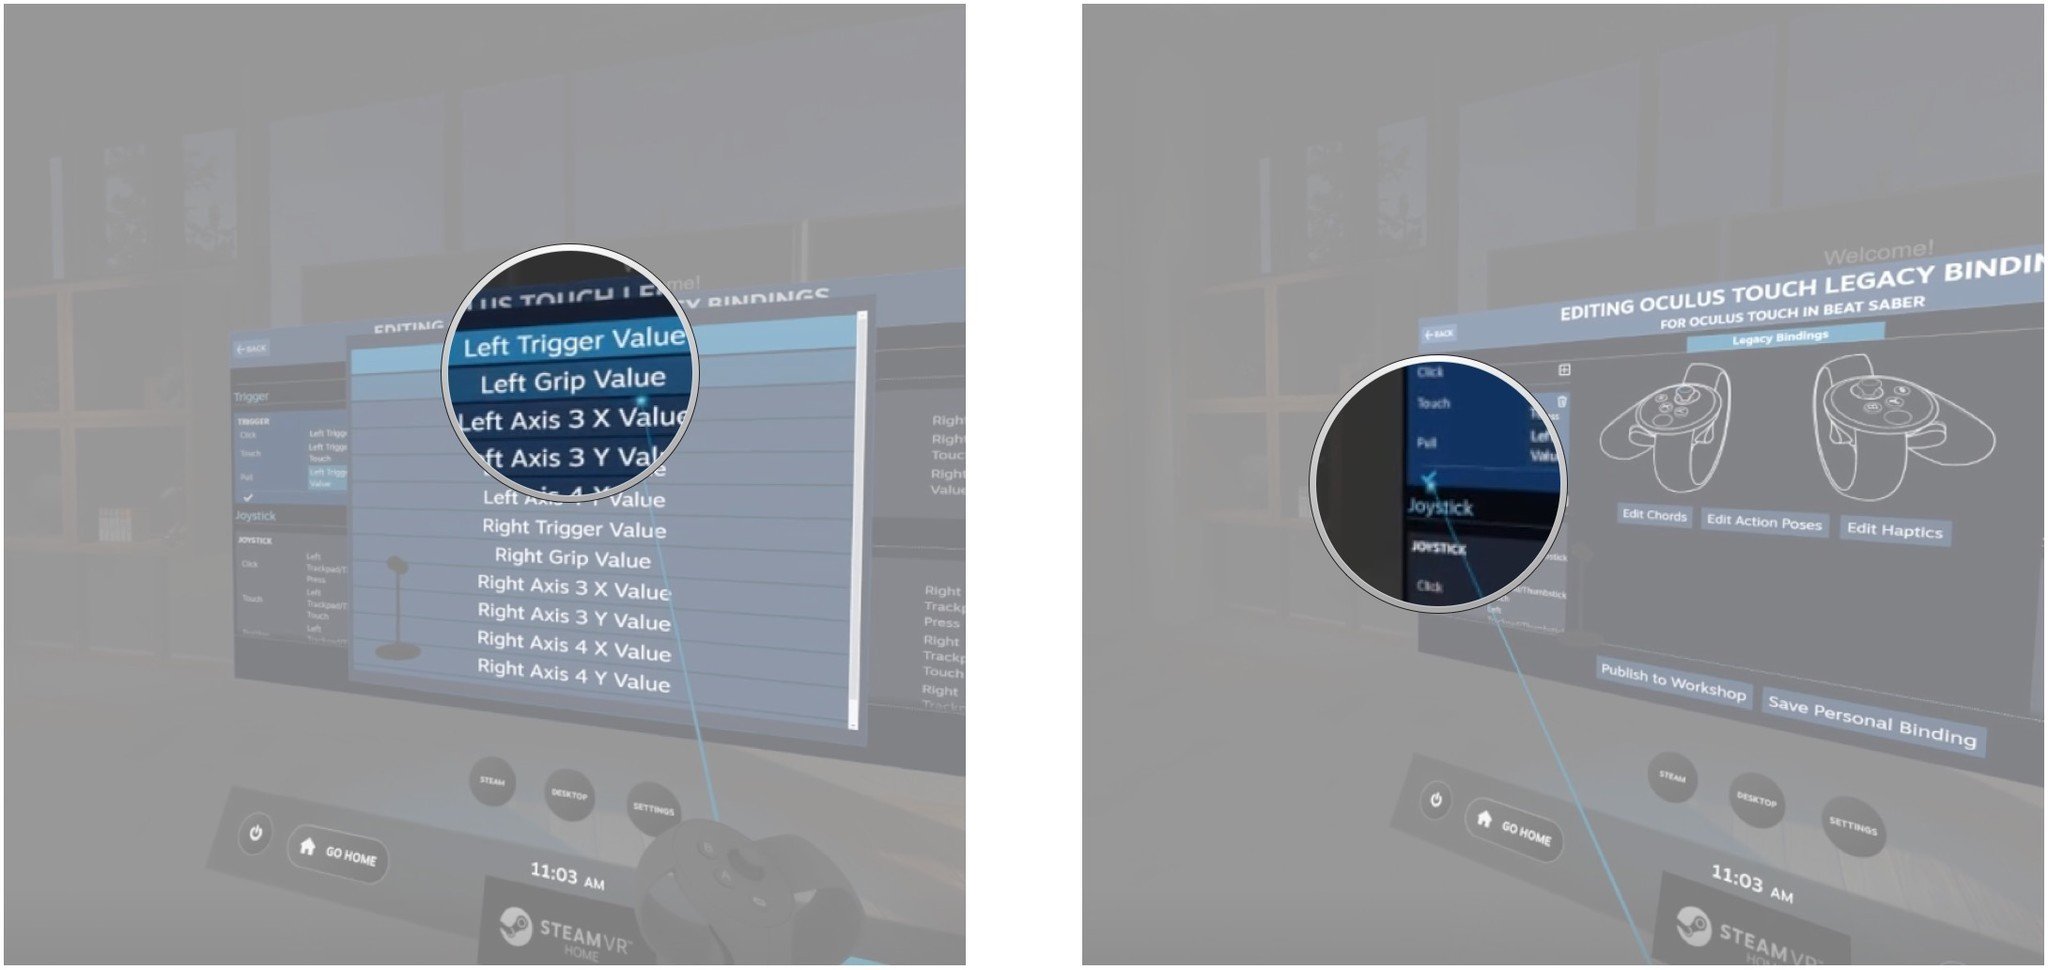
- Select the Edit button in the bottom-left corner. It looks like a pencil.
- Select an action associated with a button. The trigger, for example, has three associated actions that can all be customized: click, touch, or pull.
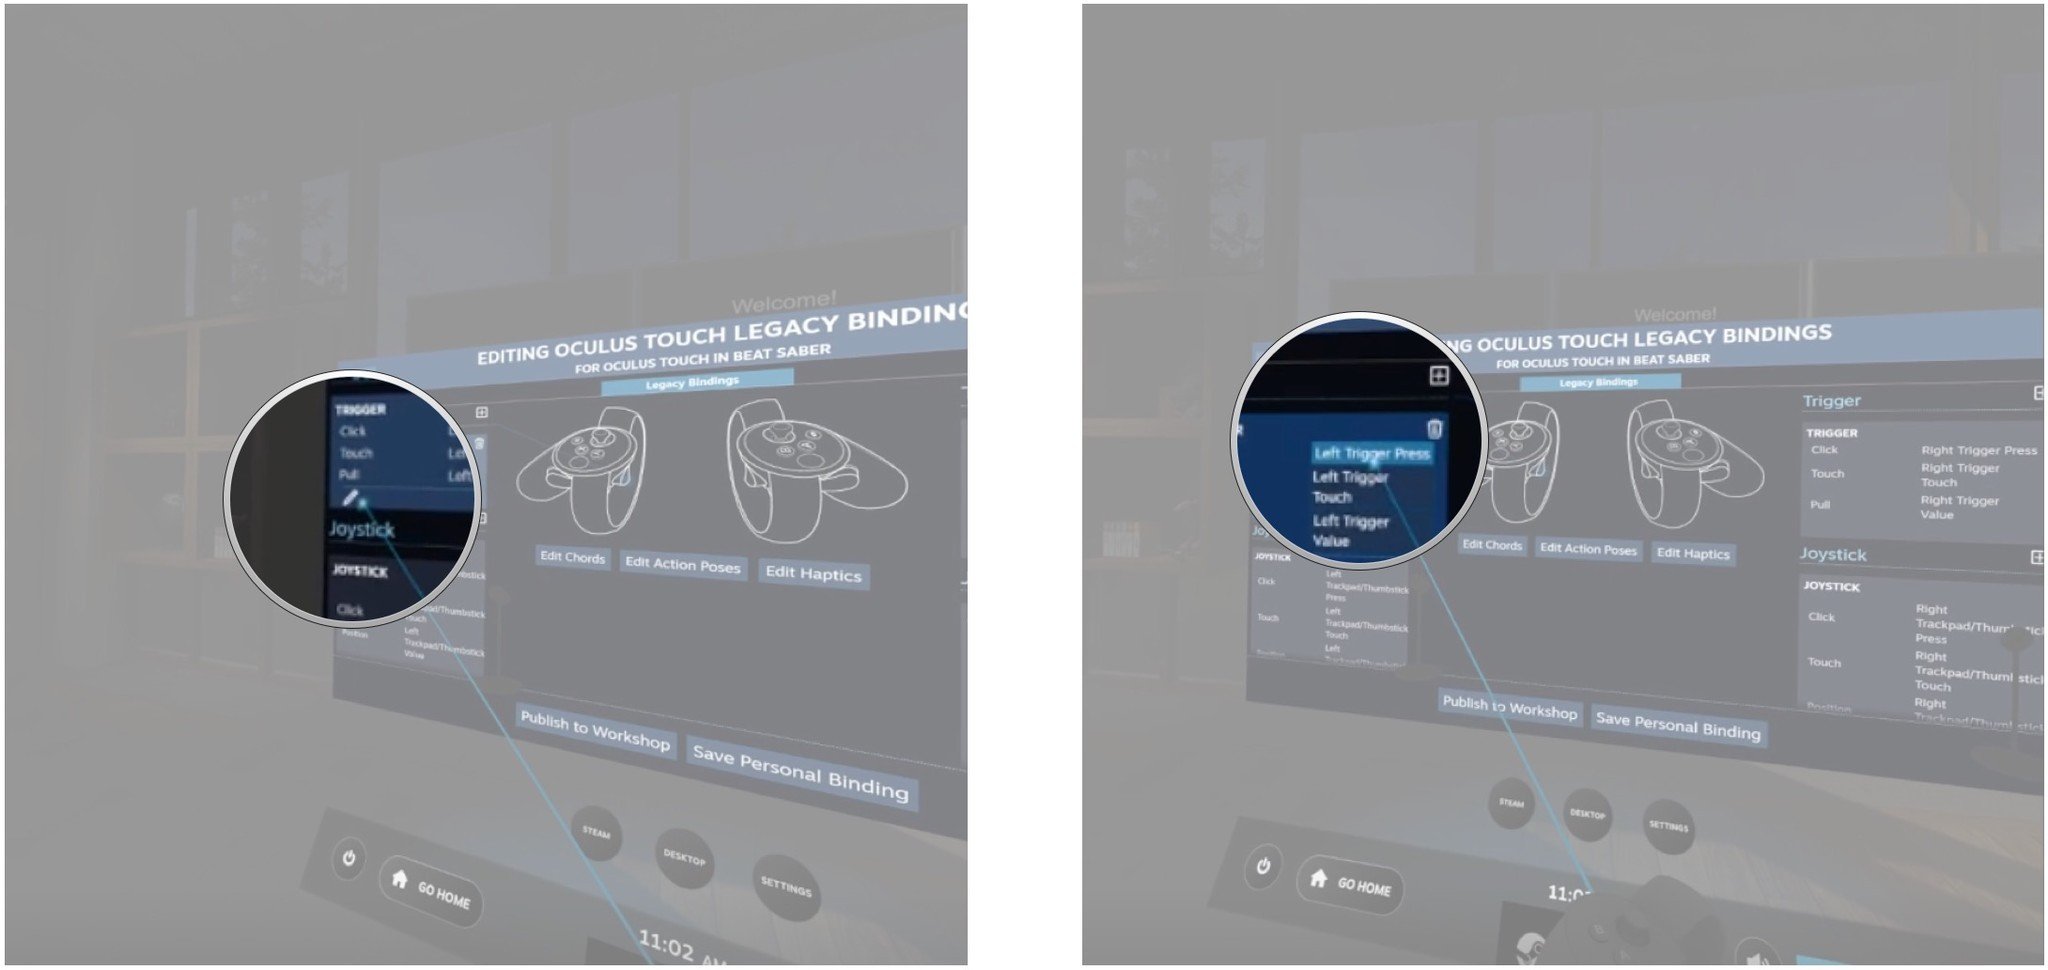
- Select a new key bind to go along with the action you chose.
- Select the Done button in the bottom-left corner when satisfied with your new keybindings. It looks like a checkmark. This process of selecting new bindings for a button and its actions can be repeated for all inputs on a controller.
Creating new actions for a button
You can likewise create entirely new actions for a certain button.
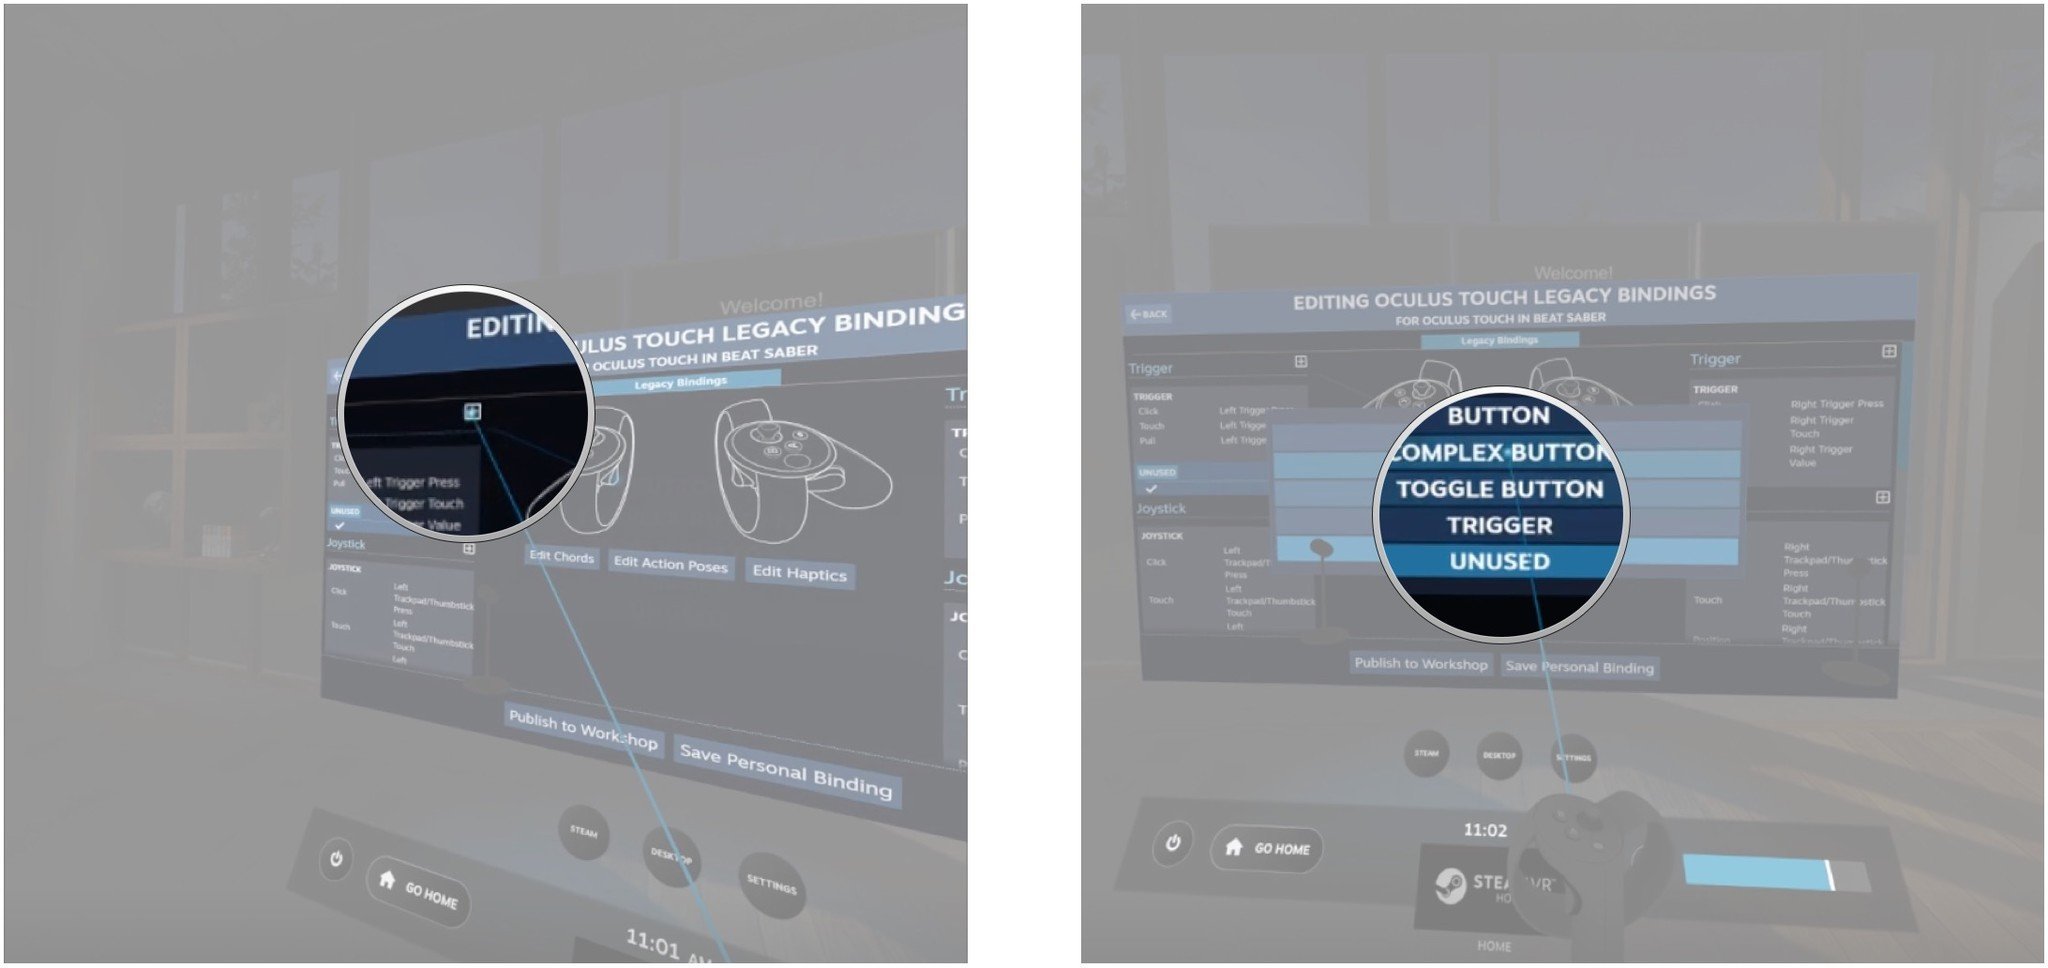
- Select the Add button in the top-right corner of a button's field. It looks like a plus sign.
- Select a new way for this button to act. In this case, I'll choose the trigger to act as a Complex Button, making it possible to use the trigger for far more than just a simple selection button.
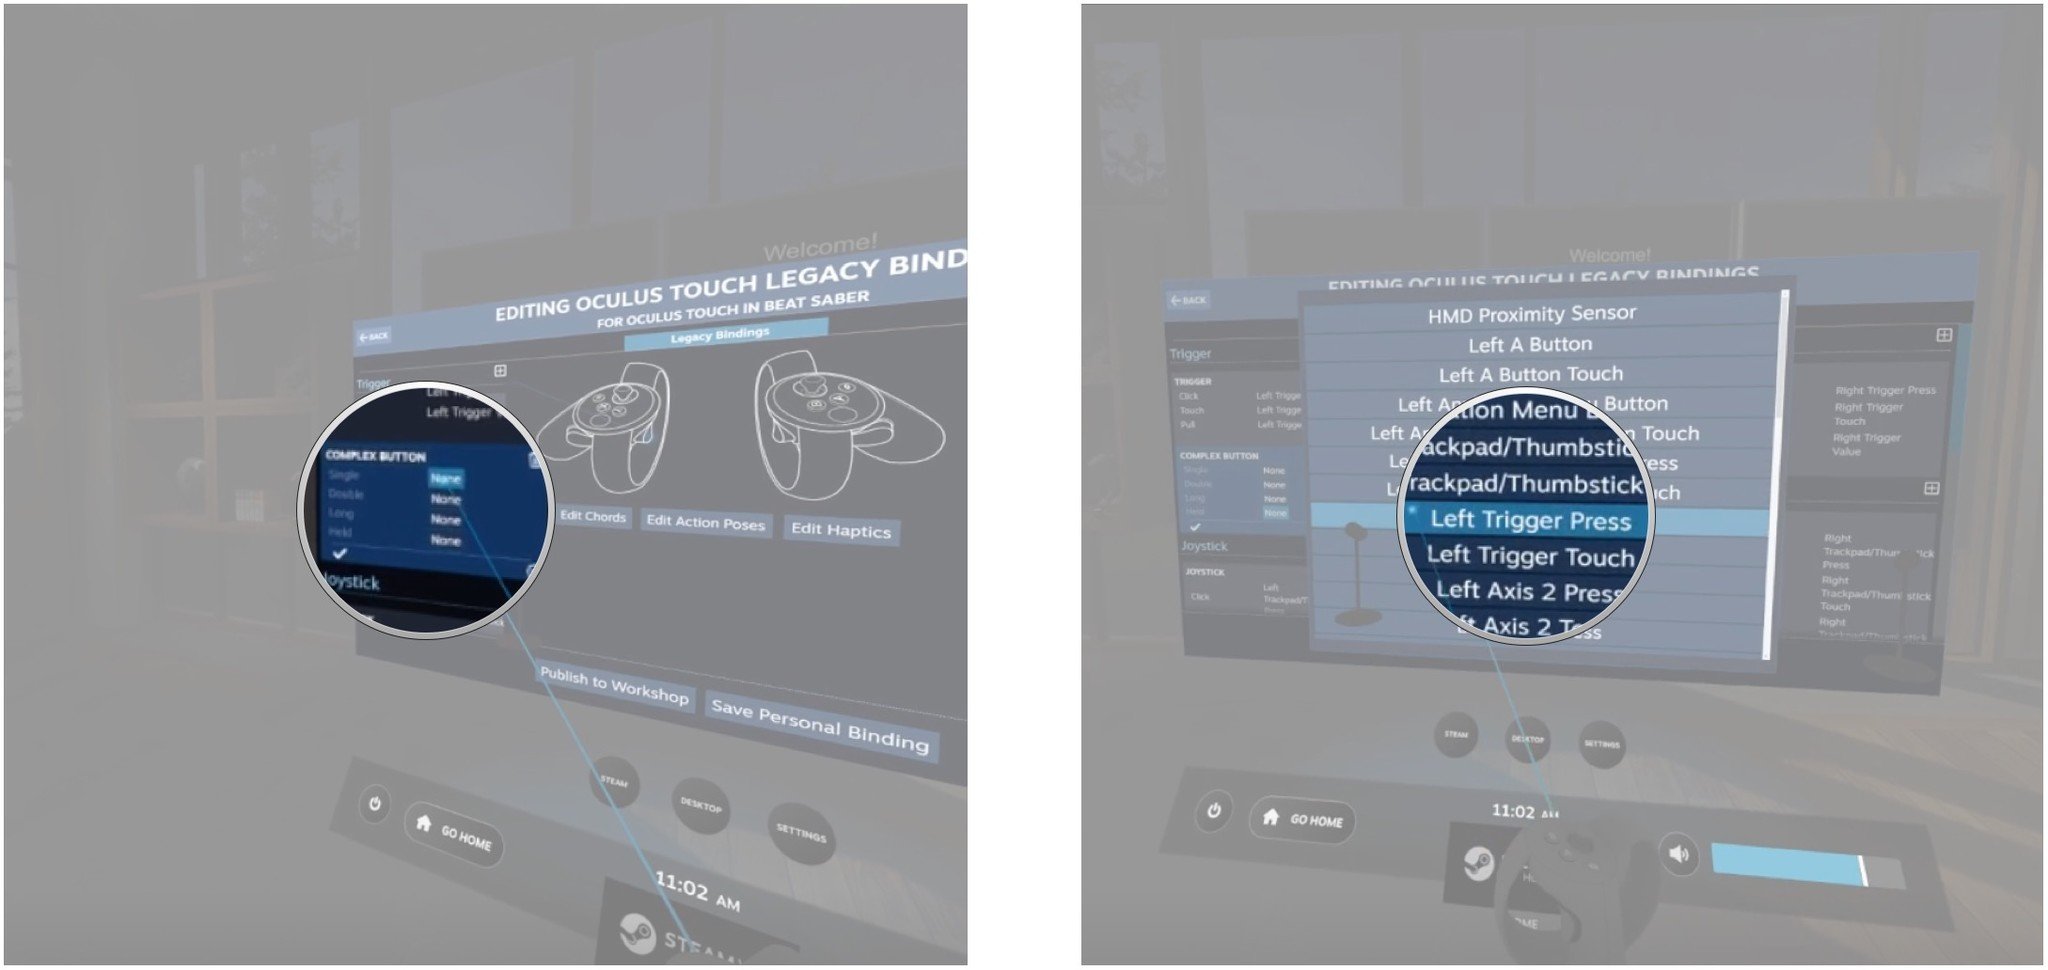
- Select None next to an action. This will allow you to add a specific keybinding.
- Select a specific keybind to add to the action.
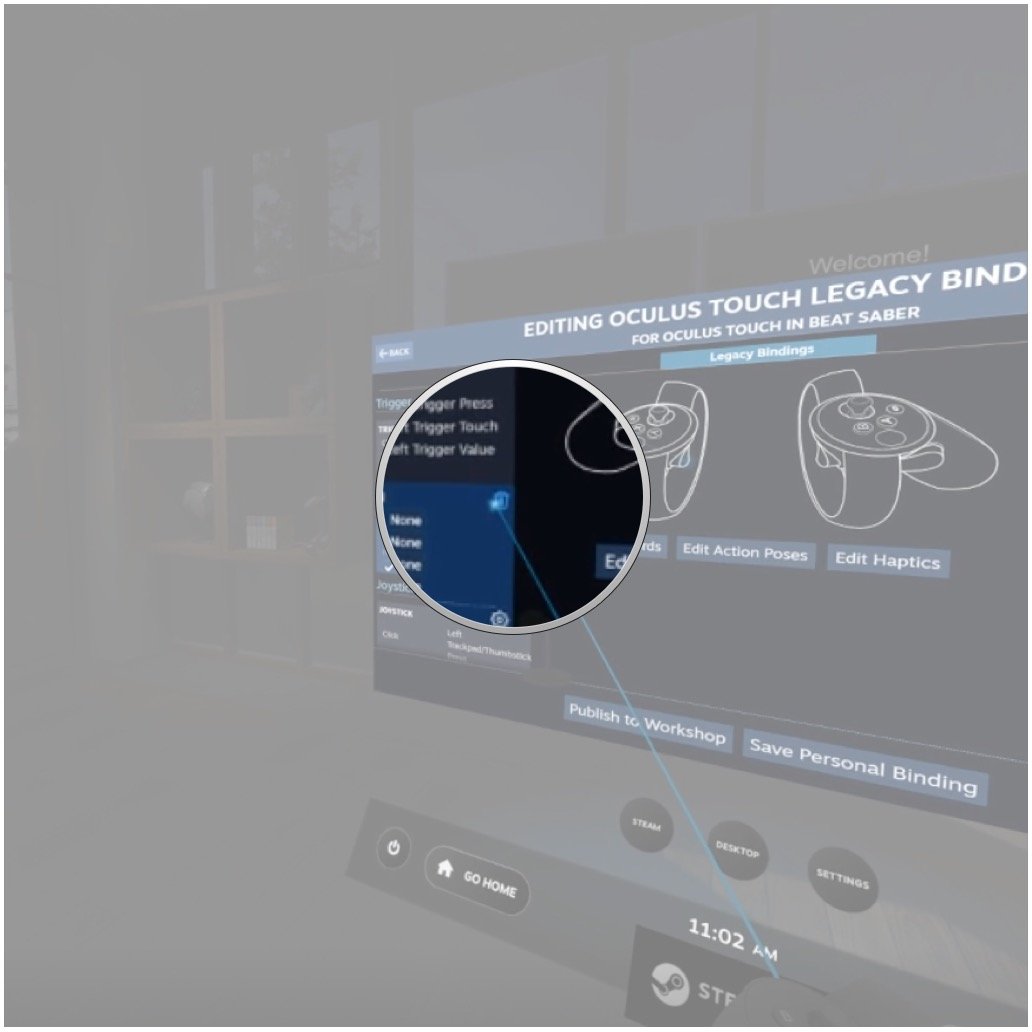
- Select the Delete button to get rid of any unwanted fields that you've created. It looks like a trash can and is located in the top-right corner.
How to save and share your personal SteamVR keybindings
Once you've created a set of keybindings that you're happy with, you can save the layout for personal use. You can also choose to share it with the rest of SteamVR.
Get the Windows Central Newsletter
All the latest news, reviews, and guides for Windows and Xbox diehards.
- Select the Save Personal Binding button.
- Select the Name field.
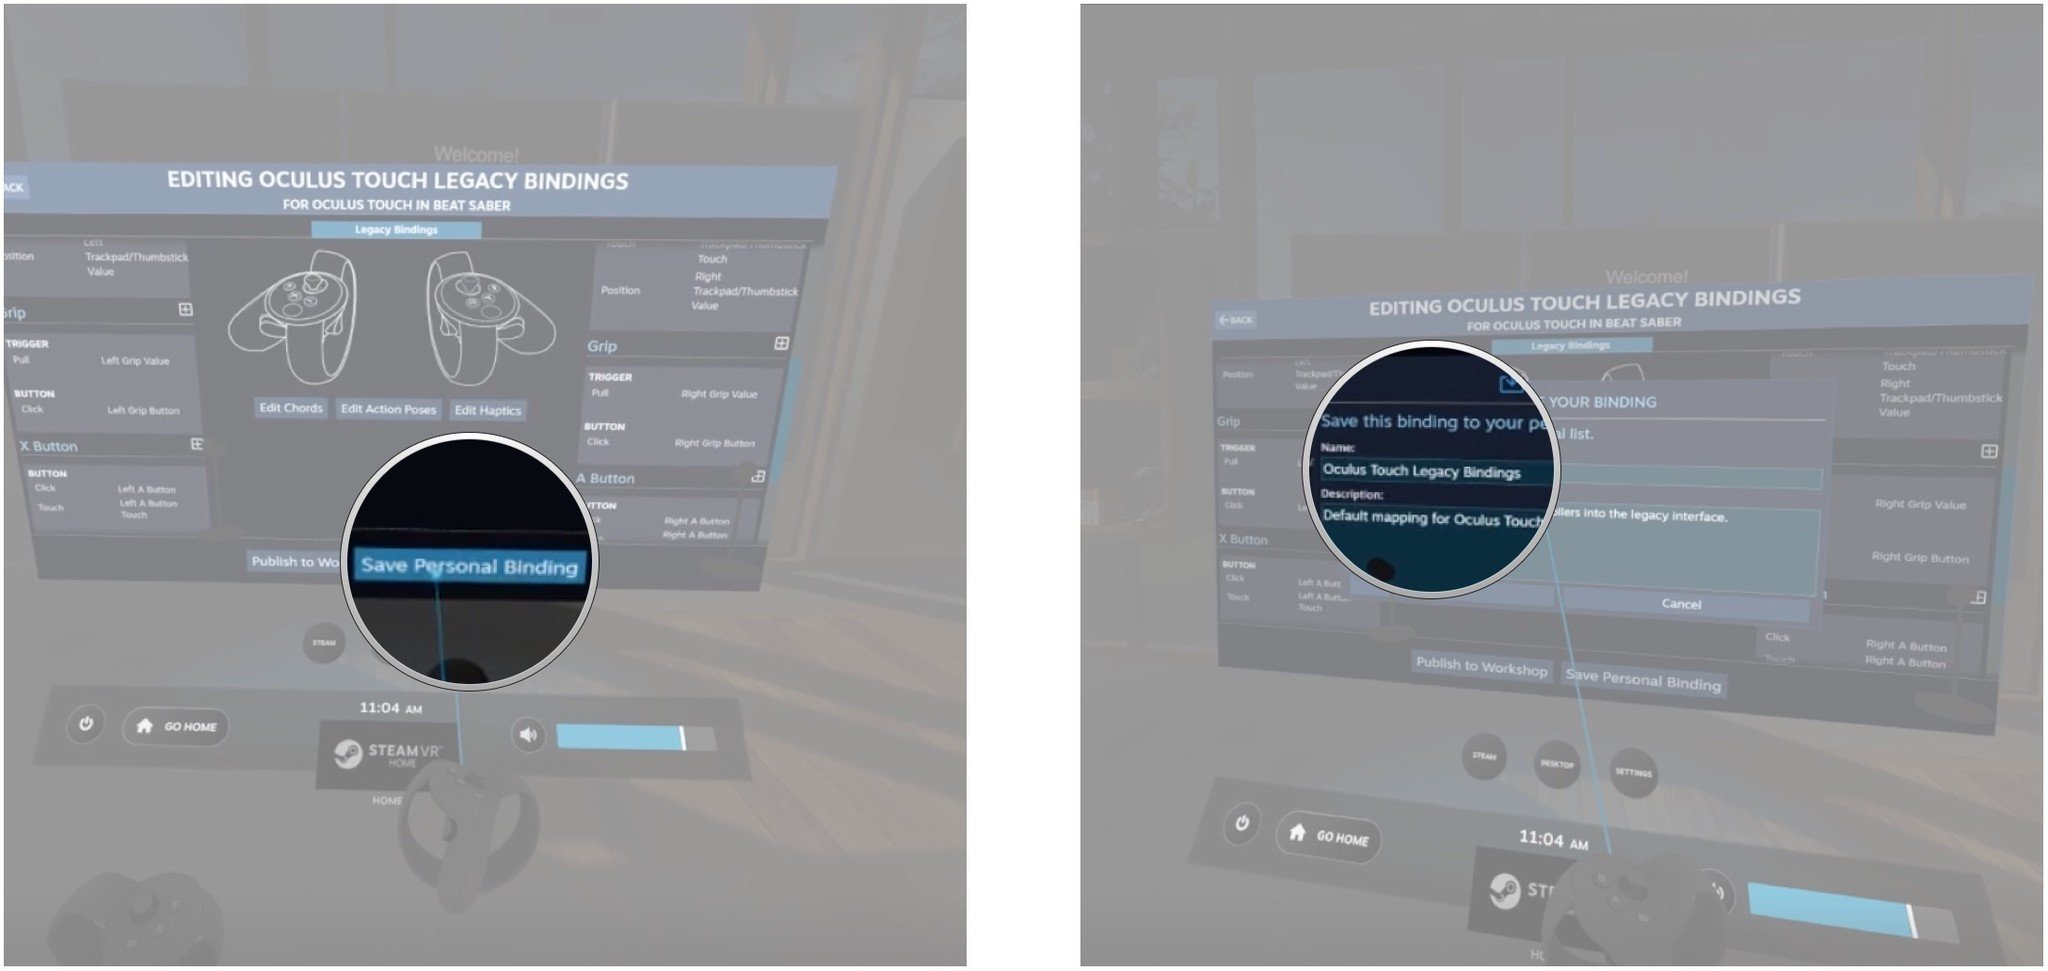
- Type a new name.
- Select the Done button.
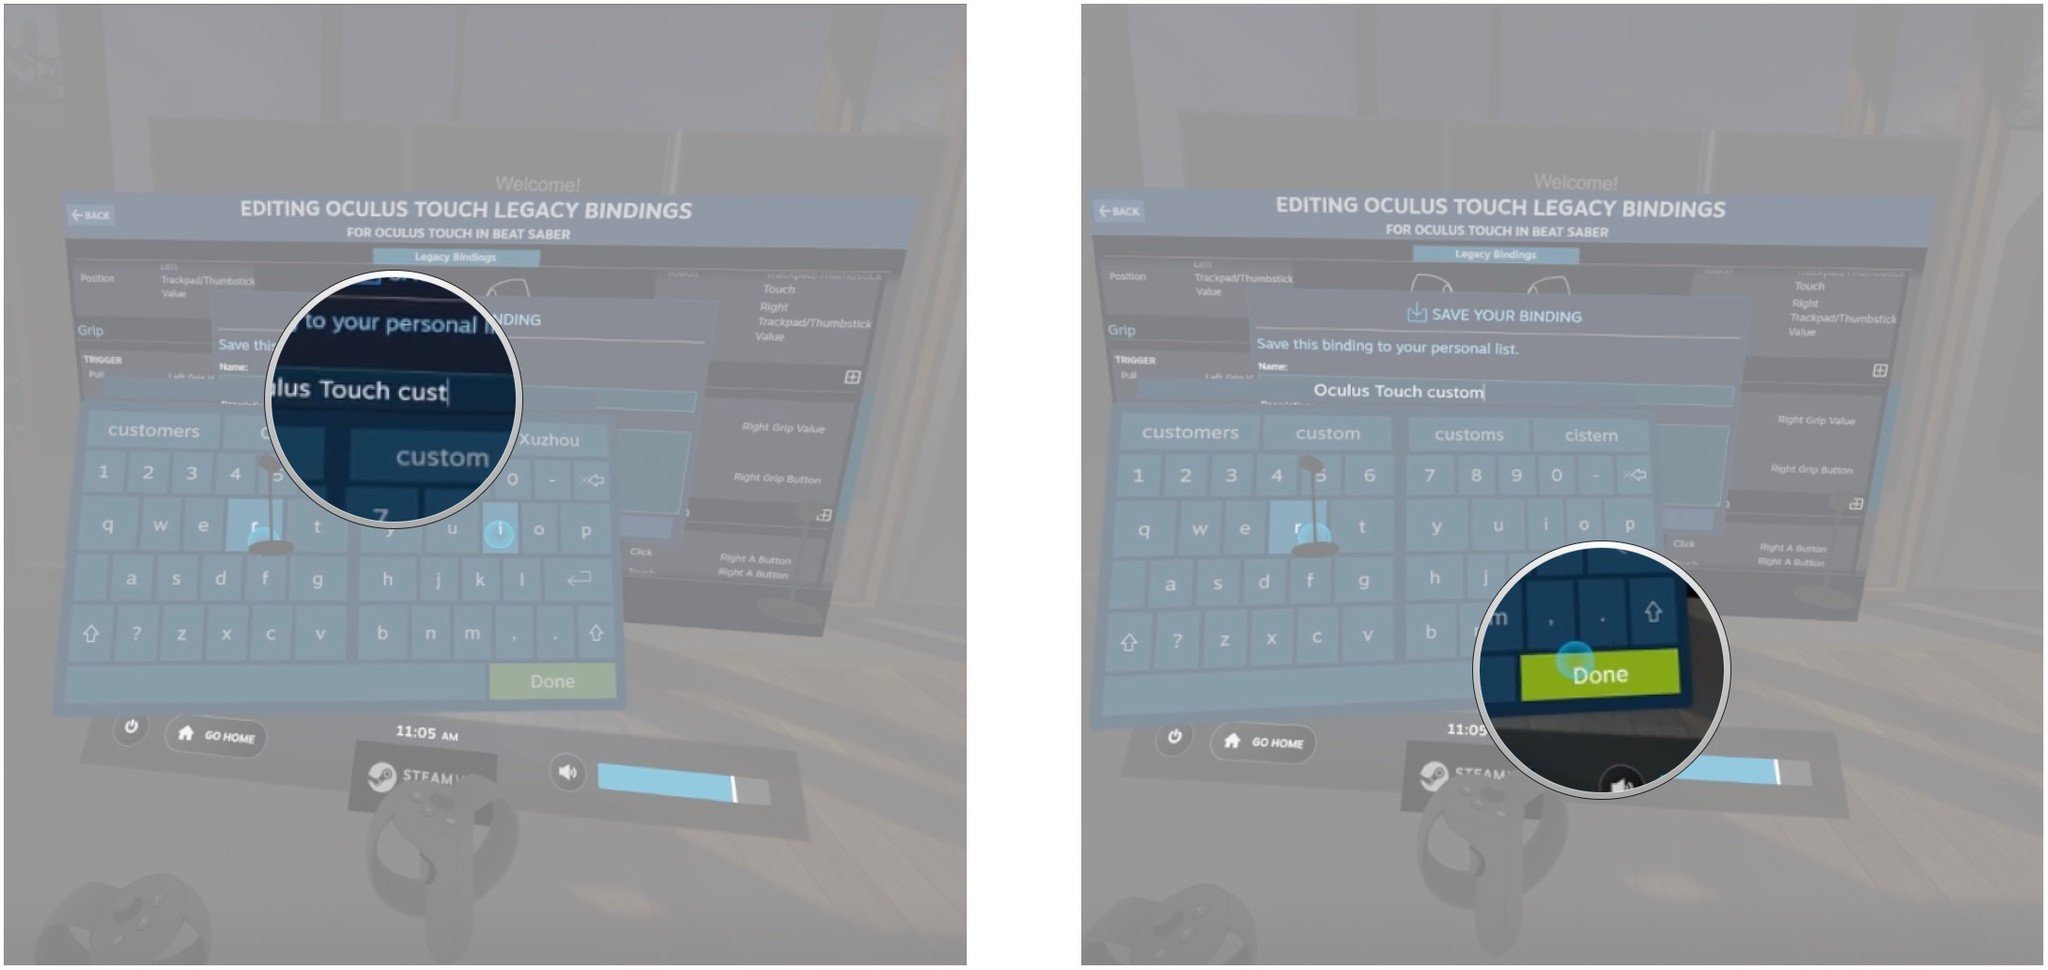
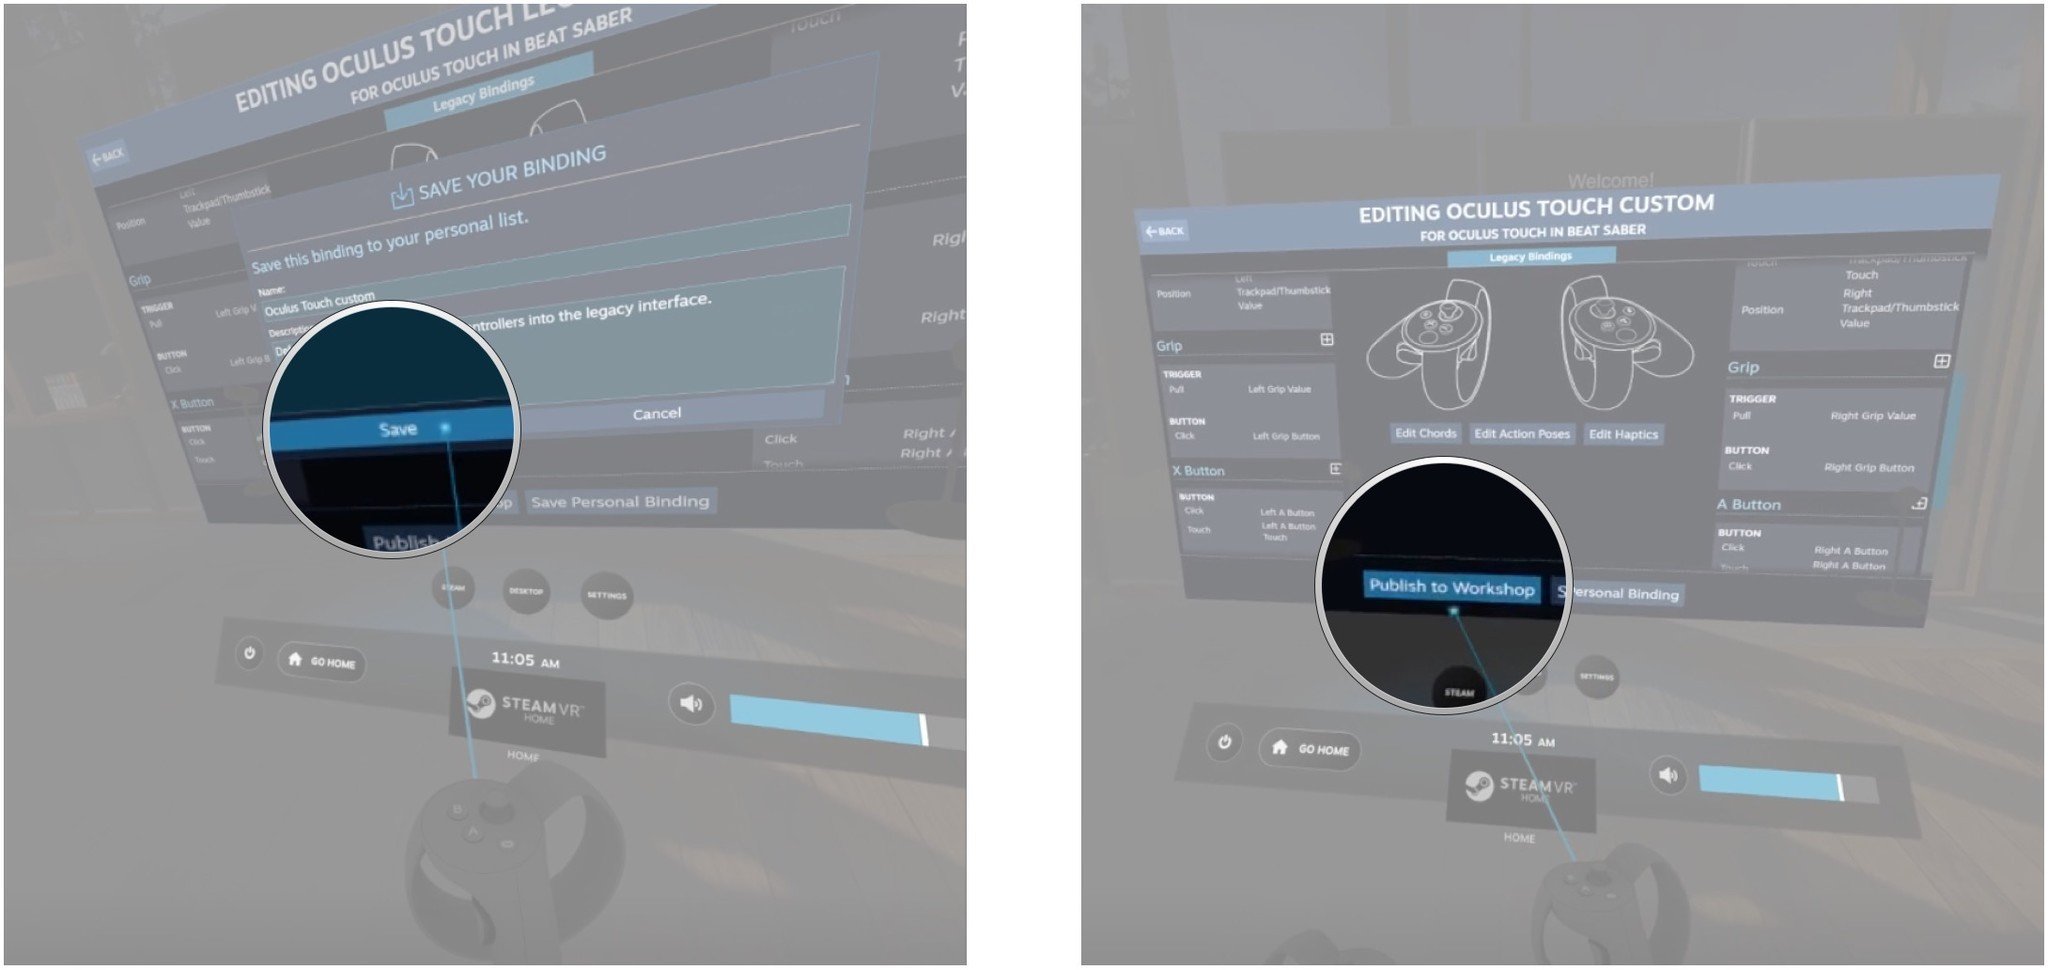
- Select the Save button.
- Select the Publish to Workshop button to share your layout. There doesn't yet seem to be a way to find other custom keybinding packages within the headset, but hopefully that will come in the near future.
How to change which SteamVR keybinding is in use
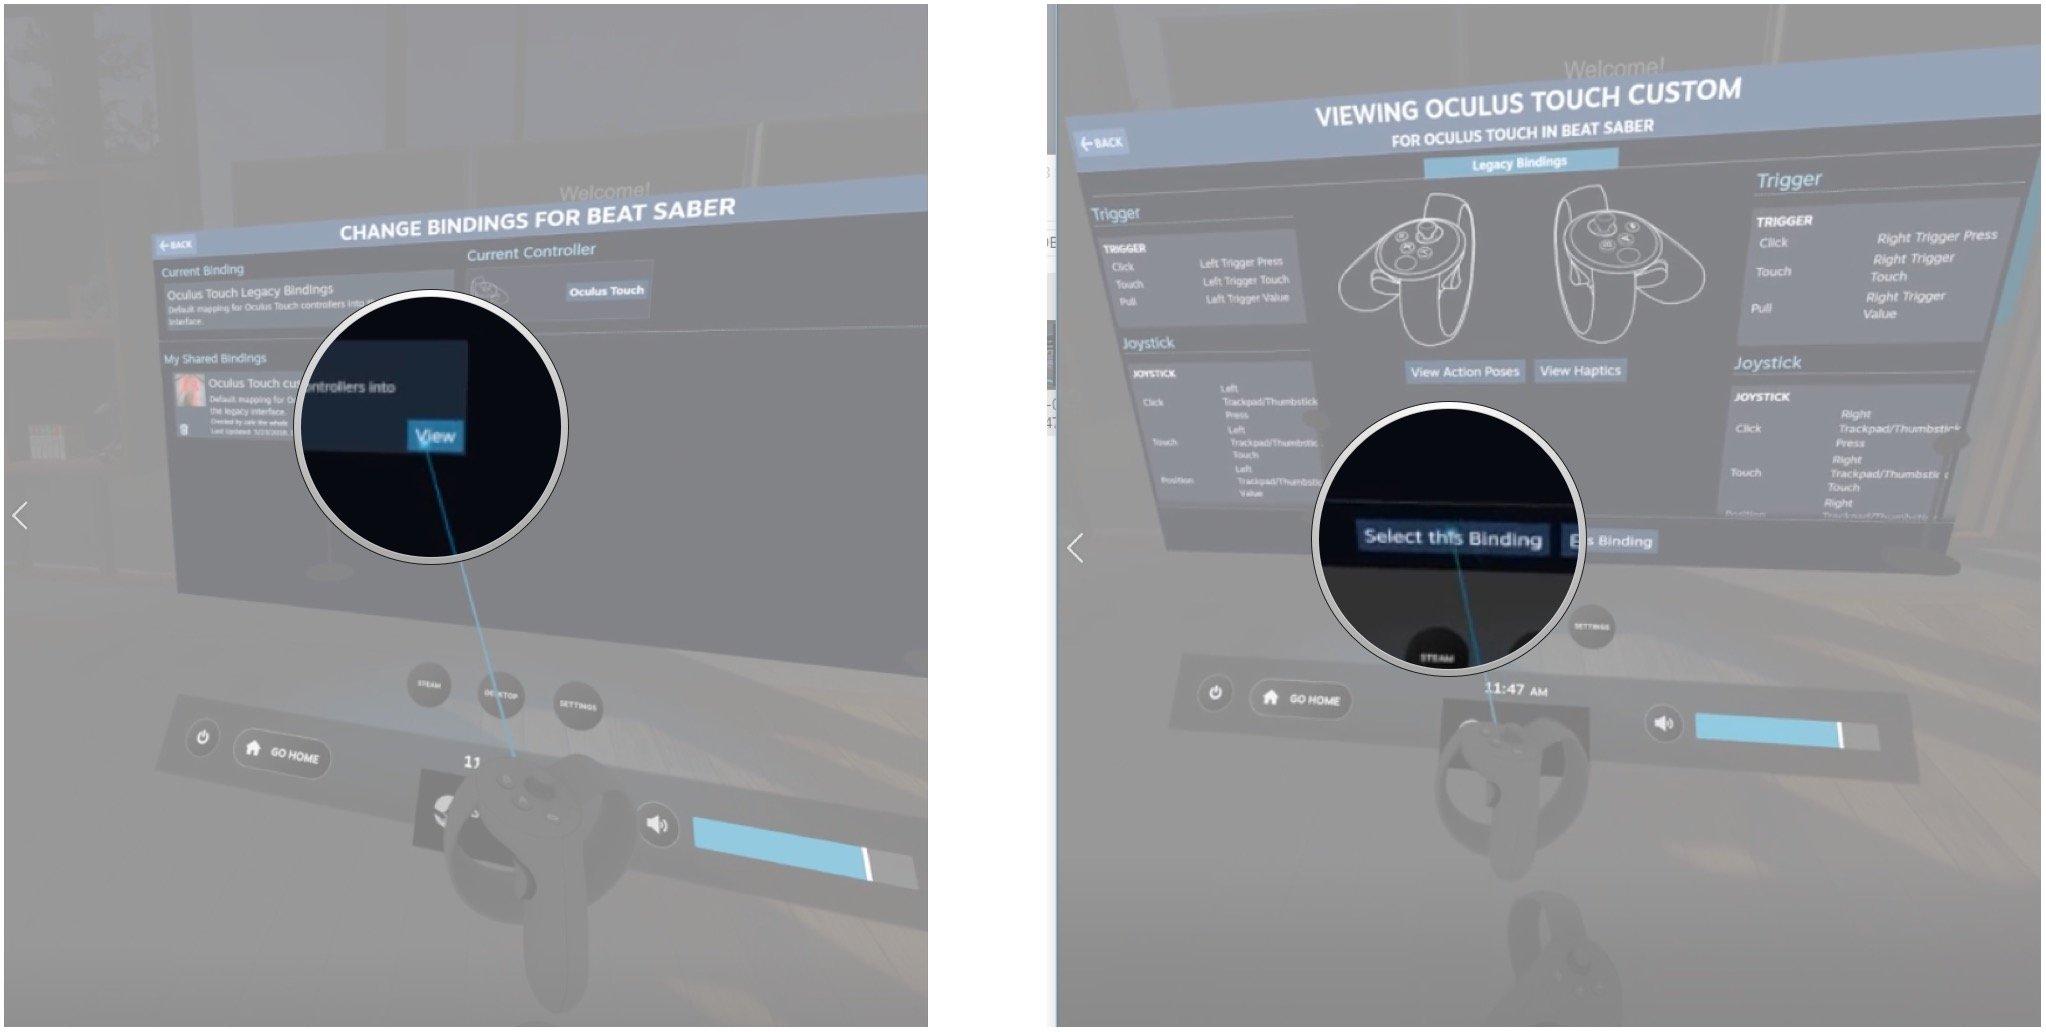
Depending on who's playing, you might have a few different custom keybinding packages created. You can quickly switch between them while on the go. The binding that you're currently using will always be displayed in the top-left corner of the window under the name Current Binding. Other bindings that you've created will be listed below the one currently in use.
- Select the View button.
- Select the Select this Binding button. This will set the binding you're looking at as the active binding.
More resources
- Best SteamVR games for Windows Mixed Reality in 2018
- How to use SteamVR with Windows Mixed Reality

Cale Hunt brings to Windows Central more than eight years of experience writing about laptops, PCs, accessories, games, and beyond. If it runs Windows or in some way complements the hardware, there’s a good chance he knows about it, has written about it, or is already busy testing it.
