Write and run your own PowerShell script on Windows 11 or 10 — bypass a common error and ditch Command Prompt now
Are you getting started with PowerShell? If so, this guide will help you to create and run your first script on Windows.
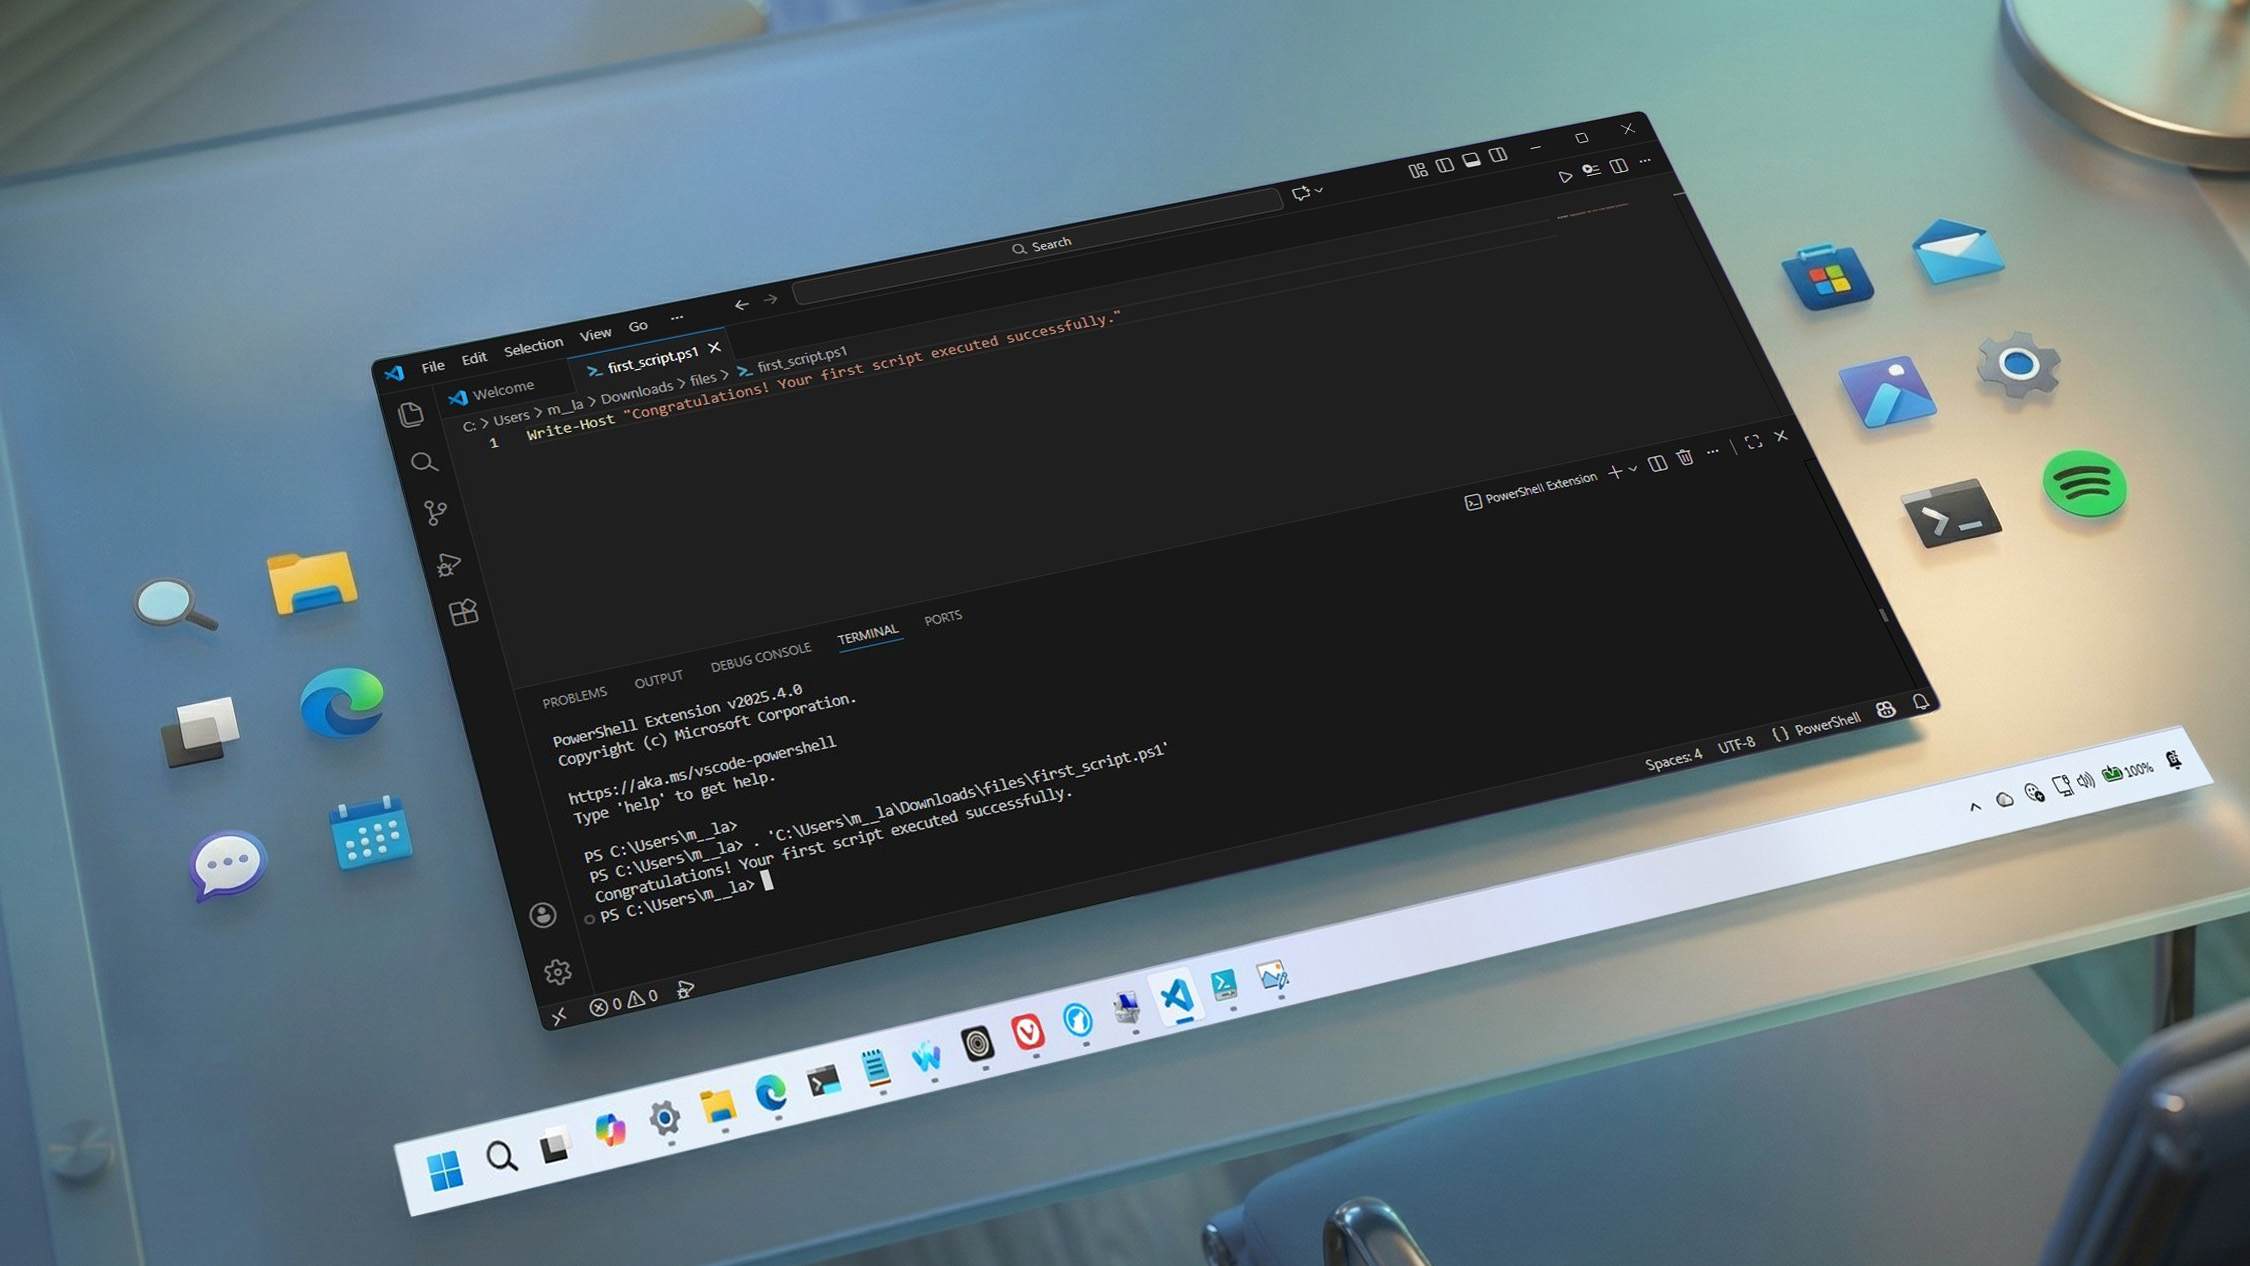
On Windows 11 (and Windows 10), PowerShell is a powerful command-line interface designed to run commands and scripts that automate tasks and manage system settings. While it serves a similar purpose to Command Prompt, PowerShell is significantly more capable, offering advanced scripting, automation, and system management features. Unlike Command Prompt, PowerShell is also cross-platform, available on Windows, macOS, and Linux.
A PowerShell script is a text file containing a sequence of commands that PowerShell can execute in order. These files use the .ps1 extension and allow you to automate repetitive tasks, configure system settings, and perform complex operations with a single command.
By default, Windows 11 blocks PowerShell scripts from running as a security measure. When you double-click a .ps1 file, nothing happens, and attempting to run the script from PowerShell results in the "cannot be loaded because running scripts is disabled on this system" error message.
This behavior is intentional and helps protect your system from untrusted or malicious scripts. However, if you need to run trusted scripts, you can do so by changing the PowerShell execution policy, which controls when and how scripts are permitted to run on your device.
In this how-to guide, I will walk you through the steps to create and run your first script file on PowerShell using Visual Studio Code, Notepad, and the PowerShell Integrated Scripting Environment (ISE) console, whether you use Windows 10 or 11.
These instructions have been updated to ensure accuracy and reflect changes to the process in the operating system.
How to create PowerShell script file on Windows 11 and 10
It's possible to create PowerShell script files using any text editor or the legacy ISE application. However, Visual Studio Code is the preferred editor for writing scripts going forward.
Create a script with VS Code
Visual Studio Code (VS Code) is a free, extensible, cross-platform code editor that supports virtually any programming language. And when adding the PowerShell extension, you get an interactive scripting editing experience, which even comes with IntelliSense (code-completion) support.
All the latest news, reviews, and guides for Windows and Xbox diehards.
You can still use PowerShell ISE, but Visual Studio Code with the PowerShell extension is the new default experience. Also, consider that the legacy experience won't get any new features and doesn't support PowerShell 7 or future releases.
Install VS Code
To install Visual Studio Code on Windows 11 (or 10), use these steps:
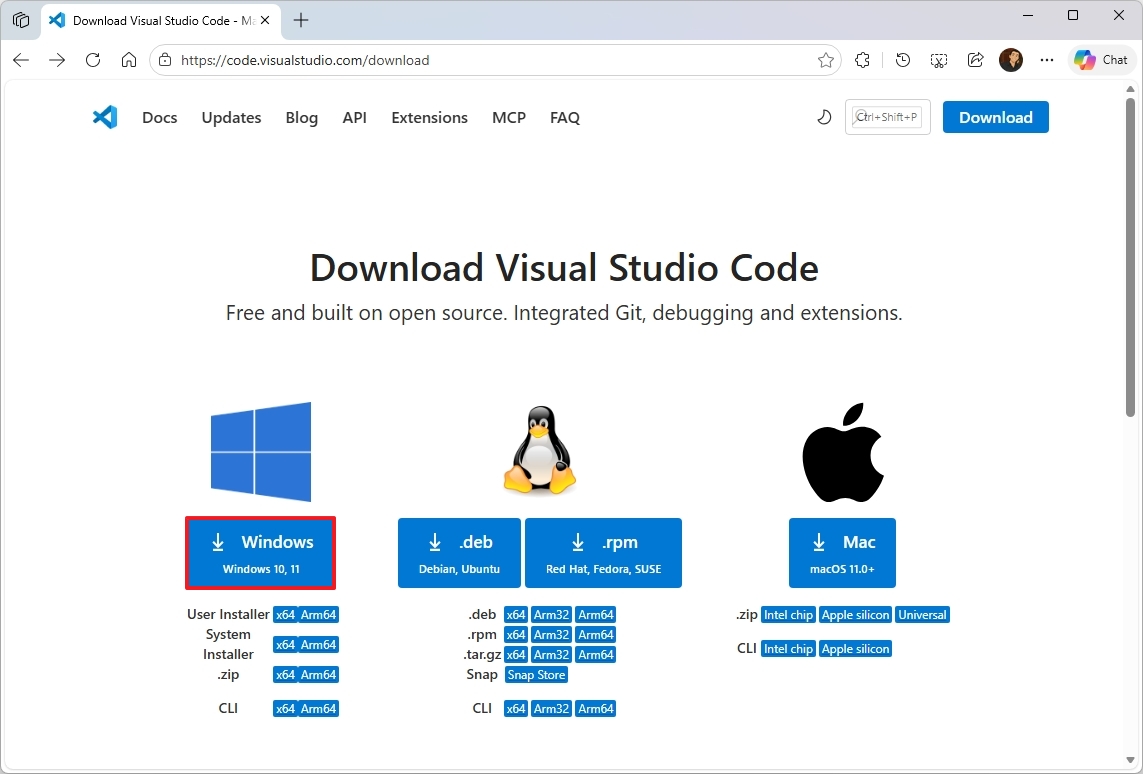
- Open the Visual Studio Download page.
- Click the Windows button to download the installation file.
- Double-click the installer to begin the process.
- Select the "I accept the agreement" option.
- Click the Next button.
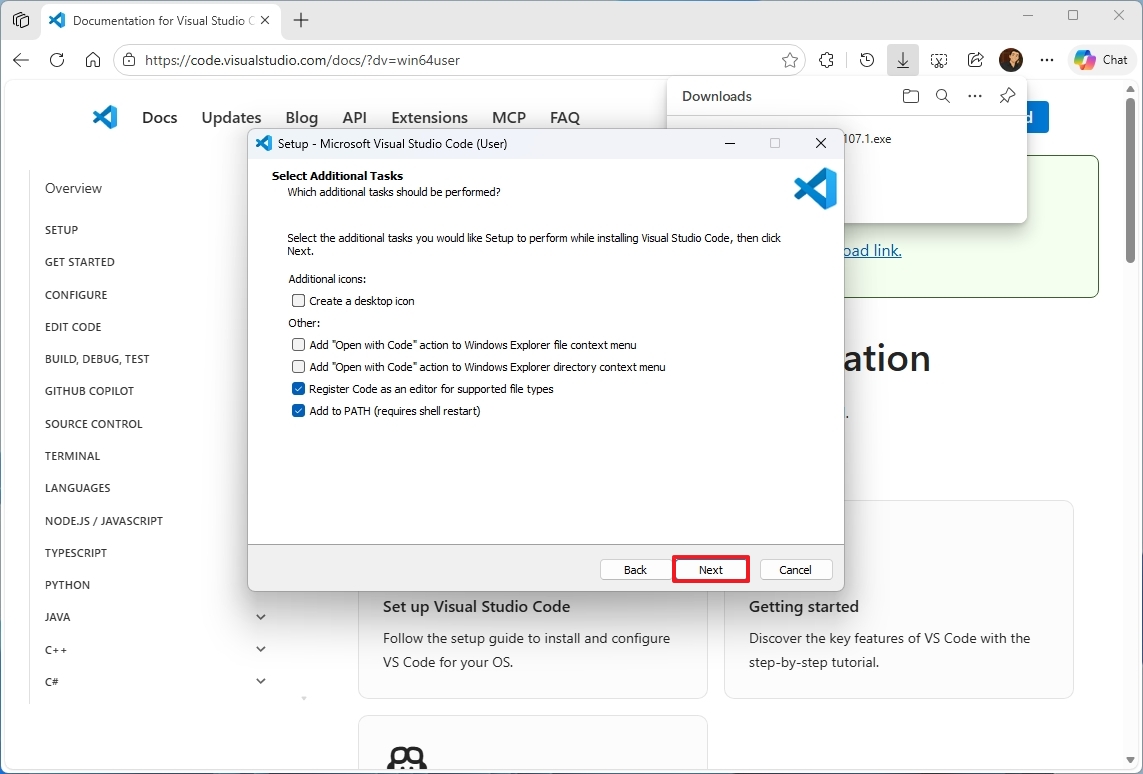
- Confirm additional tasks as necessary.
- Click the Next button again.
- Click the Install button.
- Click the Finish button.
Once you complete the steps, you can continue installing the PowerShell extension for VS Code.
Install PowerShell extension
To install the PowerShell extension on VS Code, use these steps:
- Open VS Code.
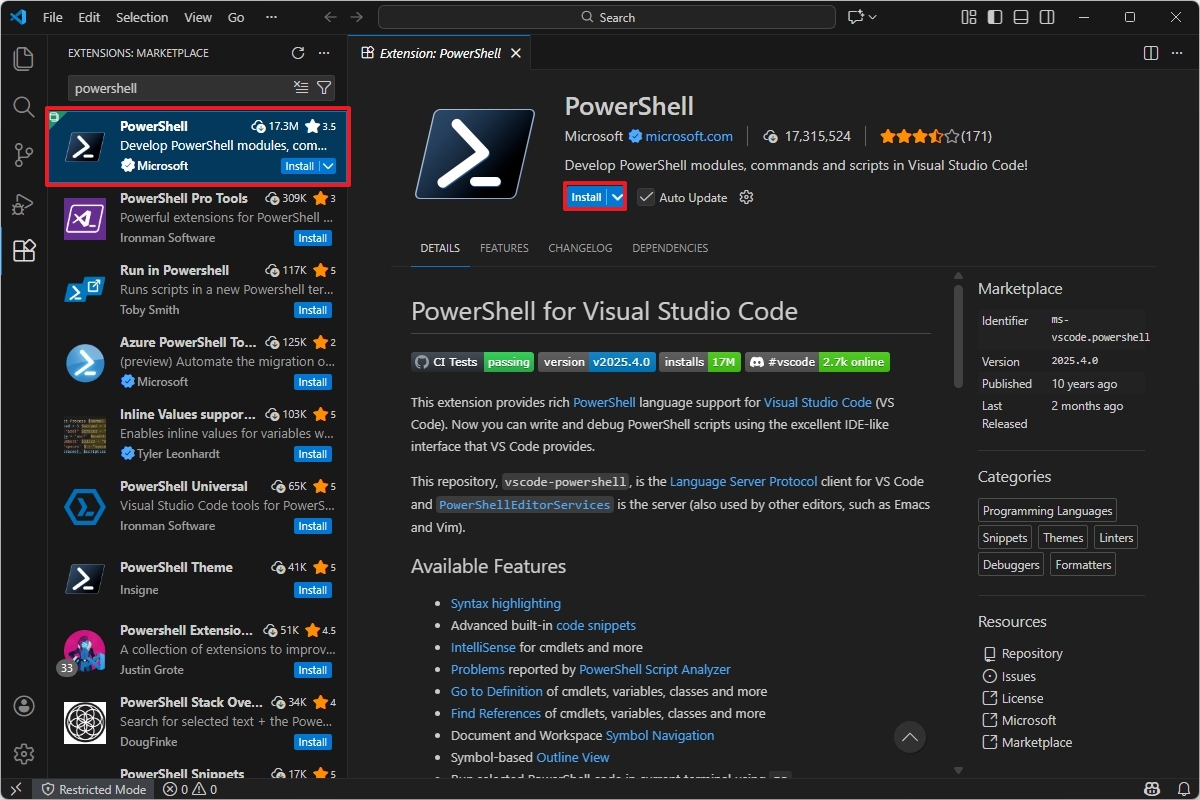
- Click the Extensions tab ("Ctrl + Shift + X" keyboard shortcut) from the left pane.
- Search for PowerShell and select the top result.
- Click the Install button.
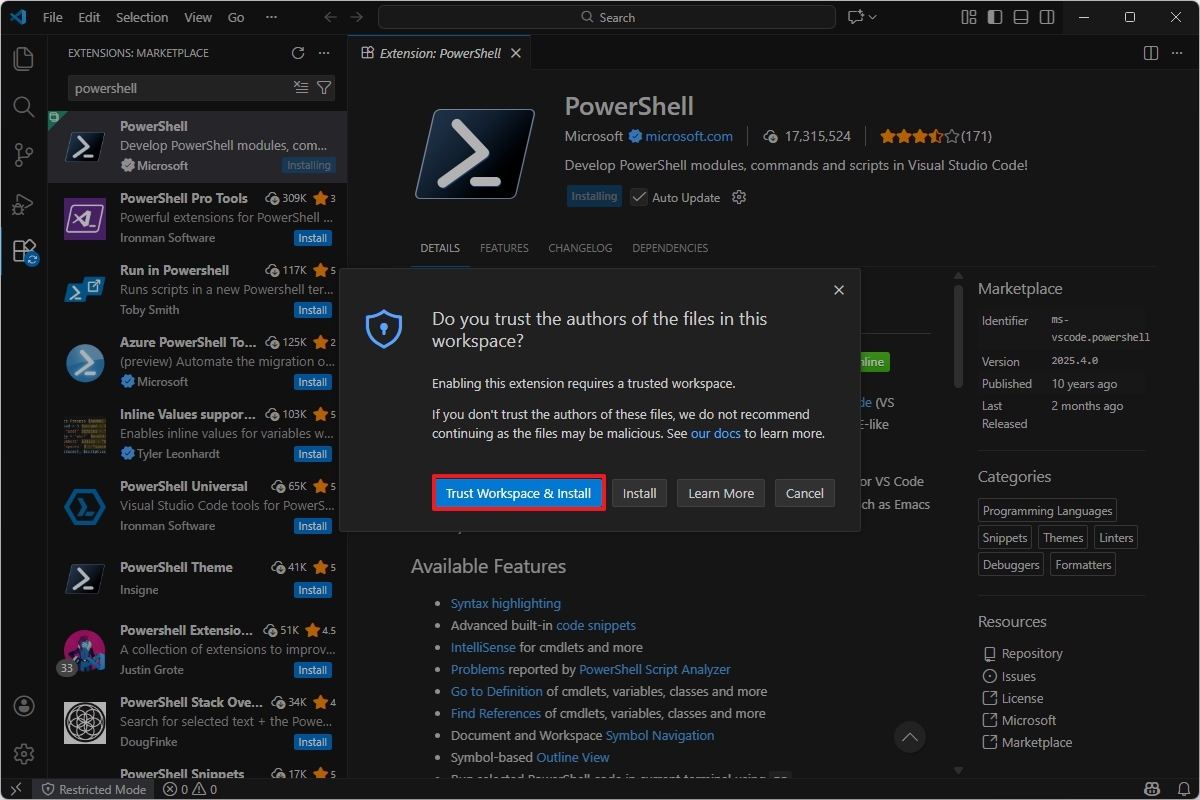
- Click the "Trust Workspace & Install" button.
After you complete the steps, you can start writing PowerShell scripts from Visual Studio Code.
Create PowerShell script with Visual Studio Code
To create a script with Visual Basic Code on Windows 11 (or 10), use these steps:
- Open VS Code.
- Click the File menu and select the "New Text File" option.
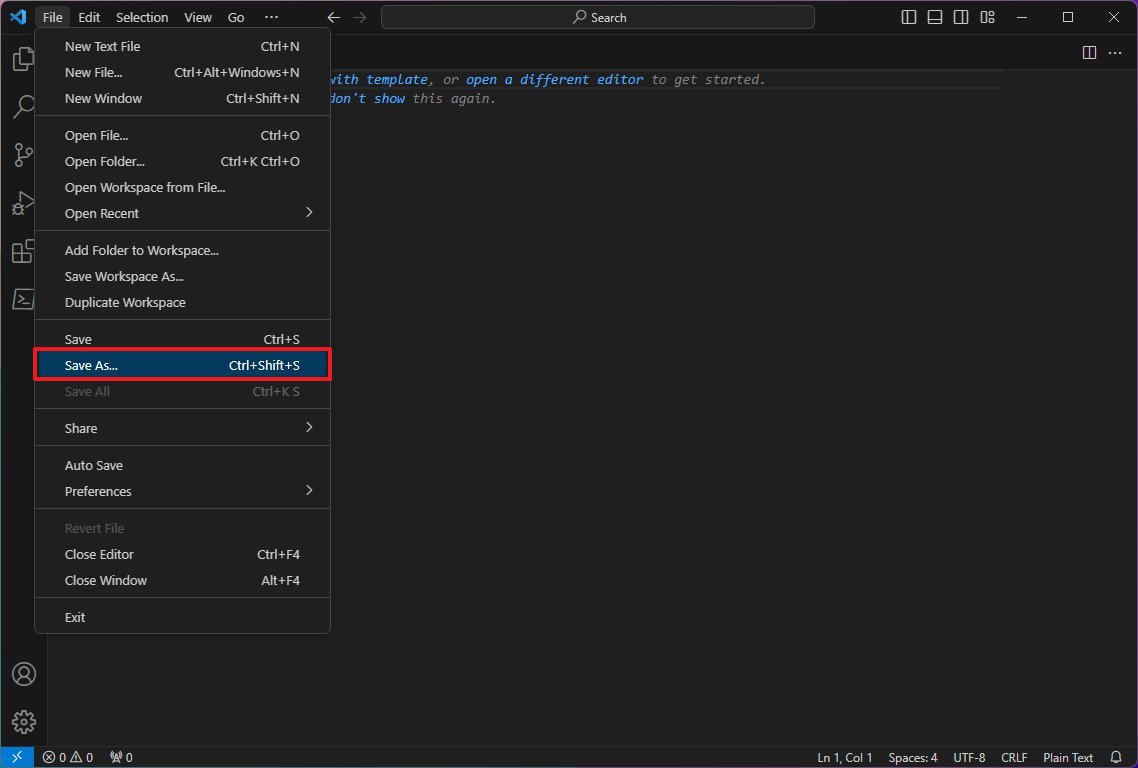
- Click the File menu and select the Save As option.
- In the "File name" field, specify a name for the file with the ".ps1" extension — for example, first_script.ps1.
- Click the Save button.
- Write a new or paste the script you want to run — for example, Write-Host "Congratulations! Your first script executed successfully"
- Quick note: The above script will output on the screen that says: "Congratulations! Your first script executed successfully."
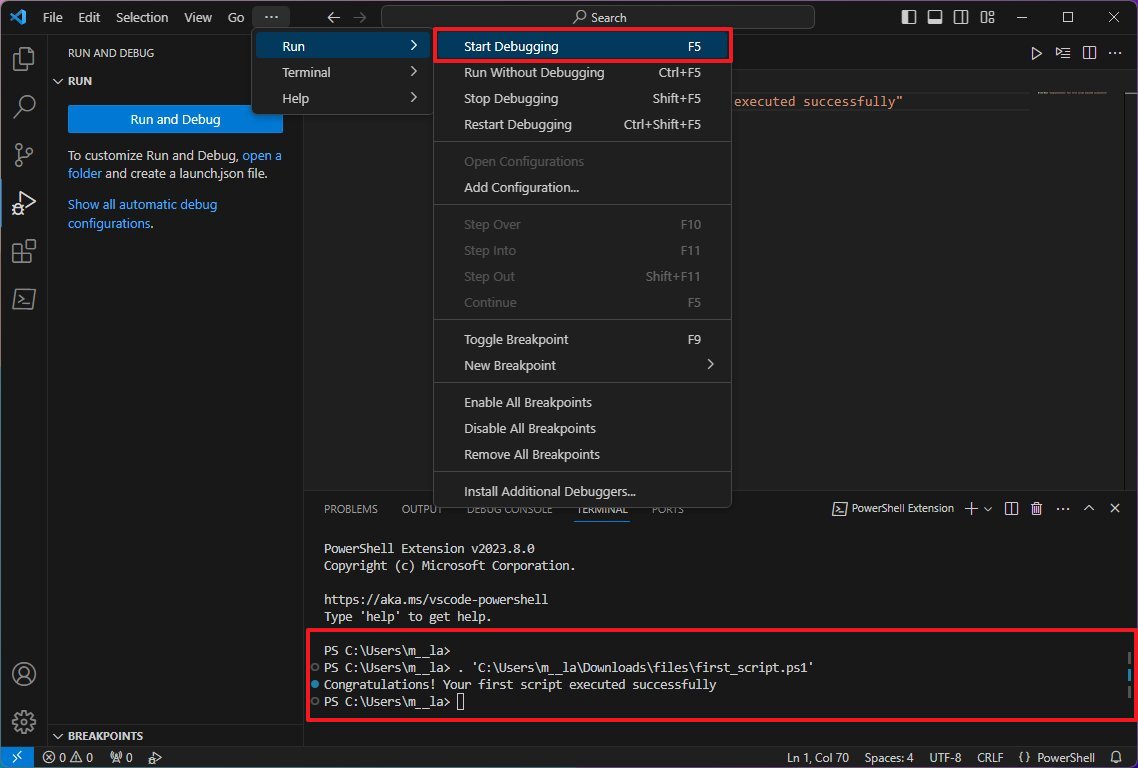
- (Optional) Open the Run menu, select the Start Debugging option from the command bar, or press the F5 key) to run the script.
- Click the File menu.
- Click the Save option.
Create PowerShell script with Notepad
To create a PowerShell script with the Notepad app, use these steps:
- Open Start.
- Search for Notepad, and click the top result to open the app.
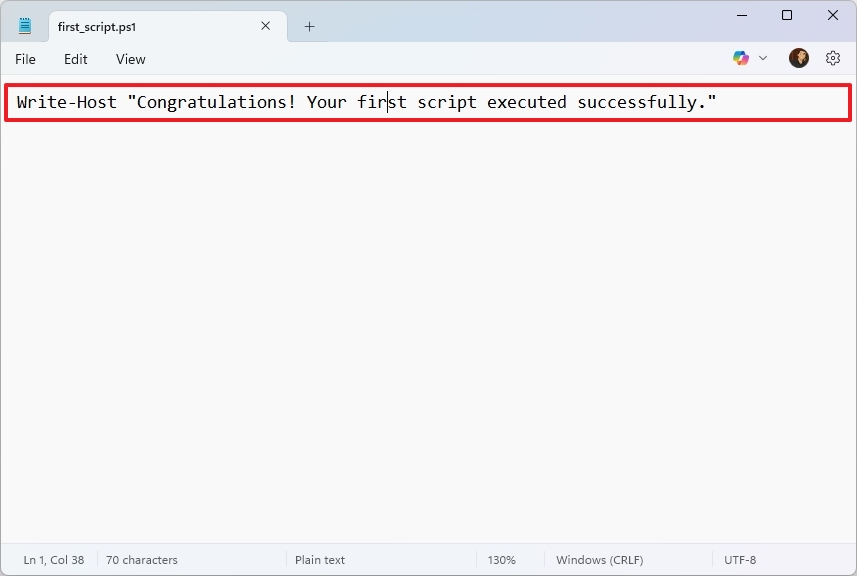
- Write a new script or paste your script into the text file – for example, Write-Host "Congratulations! Your first script executed successfully."
- Quick note: Although the Notepad app looks slightly different on Windows 11, the instructions still apply.
- Click the File menu.
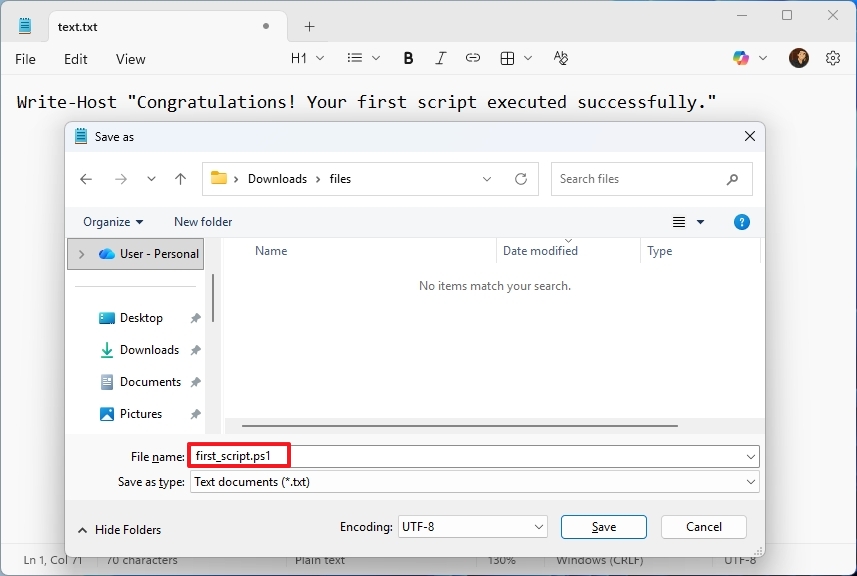
- Select the Save As option.
- Confirm a descriptive name for the script – for example, first_script.ps1.
- Click the Save button.
Create PowerShell script with Integrated Scripting Environment
You can also use the built-in PowerShell ISE app to code your scripts on Windows.
The Integrated Scripting Environment (ISE) is a complex tool, but you can get started using these easy steps:
- Open Start.
- Search for Windows PowerShell ISE, right-click the top result, and select the Run as administrator option.
- Click the File menu.
- Select the New option to create a new empty ".ps1" file.
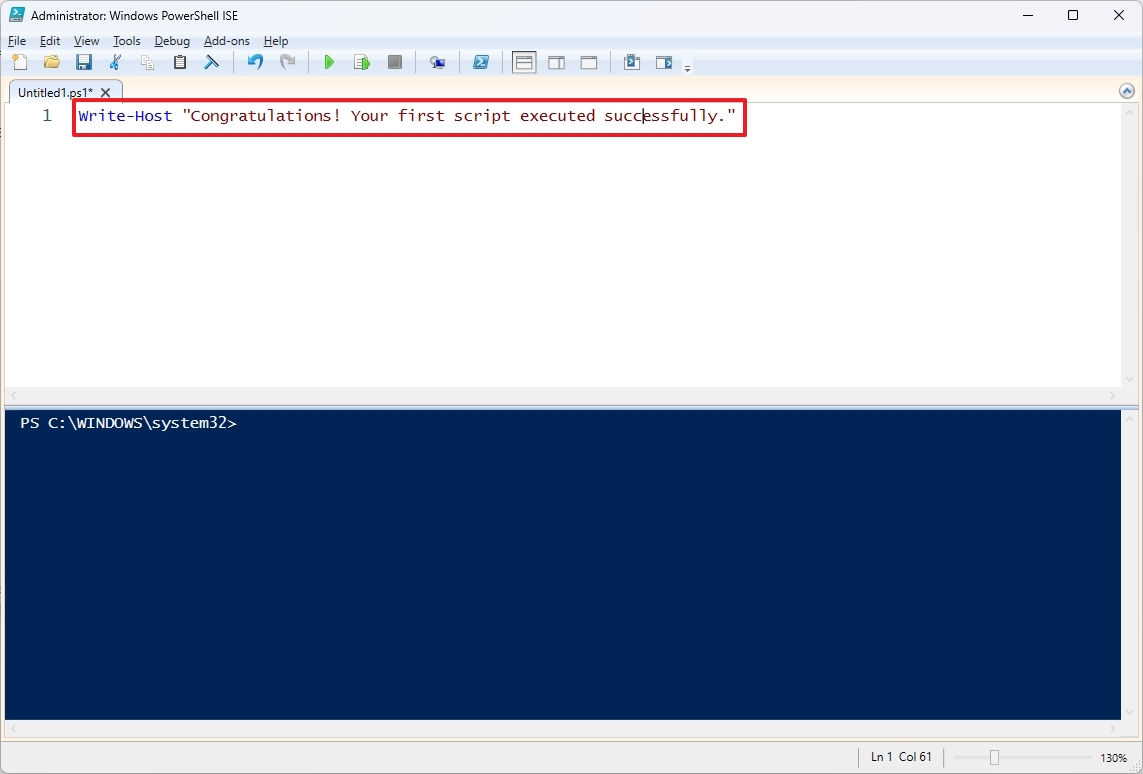
- Write a new script or paste the script you want to run — for example, Write-Host "Congratulations! Your first script executed successfully."
- Click the File menu.
- Click the Save option.
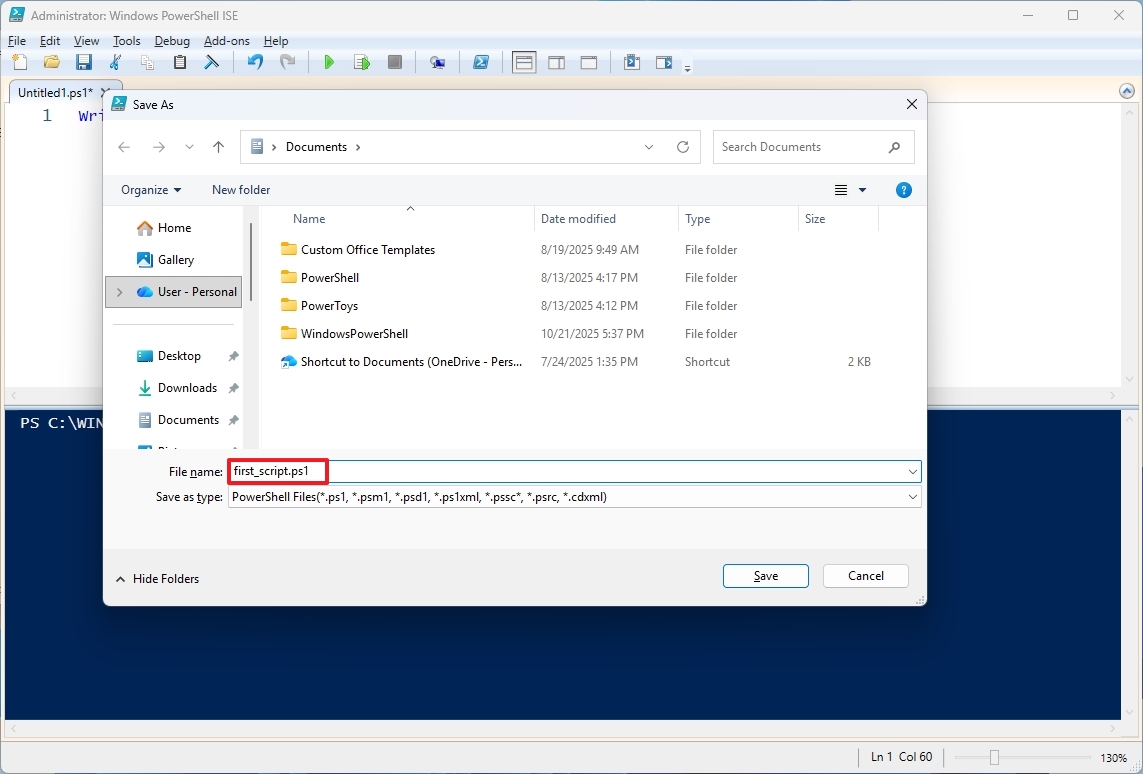
- Type a name for the script – for example, first_script.ps1.
- Select the folder to save the script file.
- Click the Save button.
- (Optional) Click the Run button on the top-right side (or press the F5 key) to run the script.
Once you complete the steps using Notepad, Visual Studio Code, or PowerShell ISE, the script will be ready to run, but it will fail due to the default system settings. The reason is that the default PowerShell settings are configured to block the execution of any script. (The only exception is if you run the script's contents within Visual Studio Code or PowerShell ISE.)
How to run PowerShell script file on Windows 11 and 10
Whether you use Windows 11 or 10 on your computer, you must change the execution policy to run a script with PowerShell.
To change the execution policy to run PowerShell scripts on Windows 11 (or 10), use these steps:
- Open Start.
- Search for PowerShell, right-click the top result, and select the Run as administrator option.
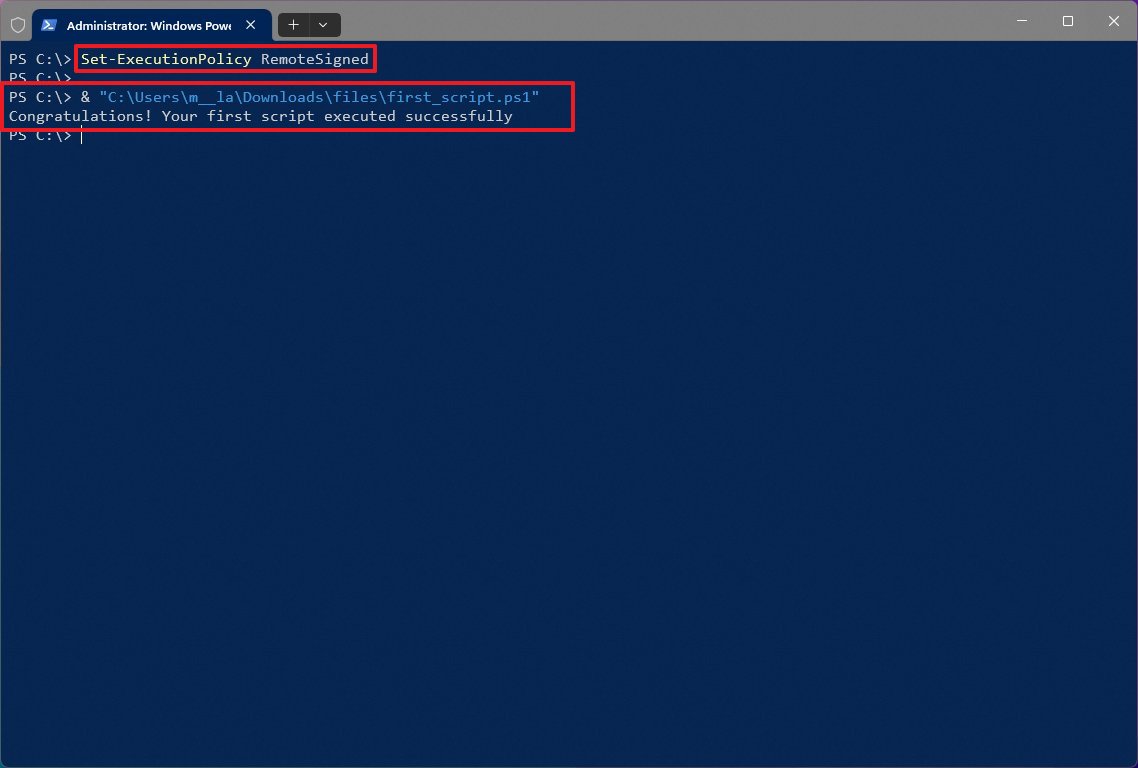
- Type the following command to allow scripts to run and press Enter: Set-ExecutionPolicy RemoteSigned
- Type "A" and press Enter (if applicable).
- Type the following command to run the script and press Enter: & "C:\PATH\TO\SCRIPT\first_script.ps1"
In the above command, change "PATH\TO\SCRIPT" to the location of your script. For example, this command runs a script stored in the "Downloads" folder: & "C:\Users\username\Downloads\first_script.ps1"
After you complete the steps, the script will run, and if it was written correctly, you should see its output on the screen without issues.
PowerShell includes four execution policies that apply to the operating system:
- Restricted – Prevents any script from running.
- RemoteSigned – Allows scripts created on the computer, but scripts created on another device won't run unless they include a trusted publisher's signature.
- AllSigned – All the scripts will run, but only if a trusted publisher has signed them.
- Unrestricted – Runs any script without any restrictions.
It's recommended to allow local scripts to run a script only from a trusted source. If you don't plan to run scripts regularly, it's best to restore the default settings to block untrusted scripts using the same instructions outlined above, but in step 4, use the "Set-ExecutionPolicy Restricted" command.
FAQs about creating a PowerShell script
These are common questions regarding the creation of a PowerShell script.
What is a PowerShell script?
A PowerShell script is a plain text file that contains one or more PowerShell commands executed in sequence. Scripts use the ".ps1" file extension and are commonly used to automate repetitive tasks, manage system settings, and perform administrative actions on Windows.
Why won’t my PowerShell script run when I double-click it?
By default, the operating system blocks PowerShell scripts from running as a security precaution. Double-clicking a ".ps1" file does nothing because the execution policy prevents scripts from running unless explicitly allowed.
What does the "running scripts is disabled on this system" error mean?
This error indicates that the current PowerShell execution policy is set to Restricted, which blocks all scripts. You must change the execution policy to allow trusted scripts to run.
Is it safe to change the PowerShell execution policy?
Yes, if you choose a safe option. The "RemoteSigned" policy is recommended because it allows locally created scripts to run while still blocking unsigned scripts downloaded from the internet. You should avoid "Unrestricted" unless you fully understand the risks.
Can I run PowerShell scripts without changing the execution policy?
Yes, but only in limited scenarios. Scripts can run inside Visual Studio Code or PowerShell ISE without changing the system execution policy because the script content is executed interactively rather than as a file.
Do I need administrator privileges to run PowerShell scripts?
You need administrator privileges to change the execution policy at the system level. Running a script itself may or may not require admin rights, depending on what the script does.
What is the difference between PowerShell and Command Prompt?
PowerShell is a more advanced command-line environment than Command Prompt. It supports scripting, object-based output, automation, and system management. Command Prompt is text-based and limited to basic commands.
Is PowerShell the same as Windows PowerShell?
Not exactly. Windows PowerShell (version 5.1) is the legacy version included with Windows. PowerShell 7 is the modern, cross-platform version built on .NET and supported going forward. Visual Studio Code supports both.
Should I still use PowerShell ISE?
PowerShell ISE still works on Windows 10 and 11, but it is deprecated and no longer receiving new features. Microsoft recommends using Visual Studio Code with the PowerShell extension for all new scripting work.
Can PowerShell scripts harm my computer?
Yes, if they come from untrusted sources. PowerShell is a powerful administrative tool, which is why the operating system blocks scripts by default. You should only run scripts you wrote yourself or obtained from trusted and verified sources.
How do I restore the default PowerShell security settings?
You can restore the default behavior by setting the execution policy back to "Restricted" using an elevated PowerShell console. This blocks all scripts again and is recommended if you no longer need scripting enabled.
Why does Visual Studio Code run scripts that PowerShell blocks?
Visual Studio Code executes scripts through an integrated PowerShell session, which bypasses the file-level execution restriction using the -ExecutionPolicy Bypass option. This behavior allows testing and debugging without modifying system-wide security settings.
More resources
For more helpful articles, coverage, and answers to common questions about Windows 10 and Windows 11, visit the following resources:
- Windows 11 on Windows Central — All you need to know
- Windows 10 on Windows Central — All you need to know

Mauro Huculak has been a Windows How-To Expert contributor for WindowsCentral.com for nearly a decade and has over 22 years of combined experience in IT and technical writing. He holds various professional certifications from Microsoft, Cisco, VMware, and CompTIA and has been recognized as a Microsoft MVP for many years.
You must confirm your public display name before commenting
Please logout and then login again, you will then be prompted to enter your display name.
