How to connect your wireless printer to Windows 10
Did you get a new wireless printer? These are the instructions to connect it to Windows 10.
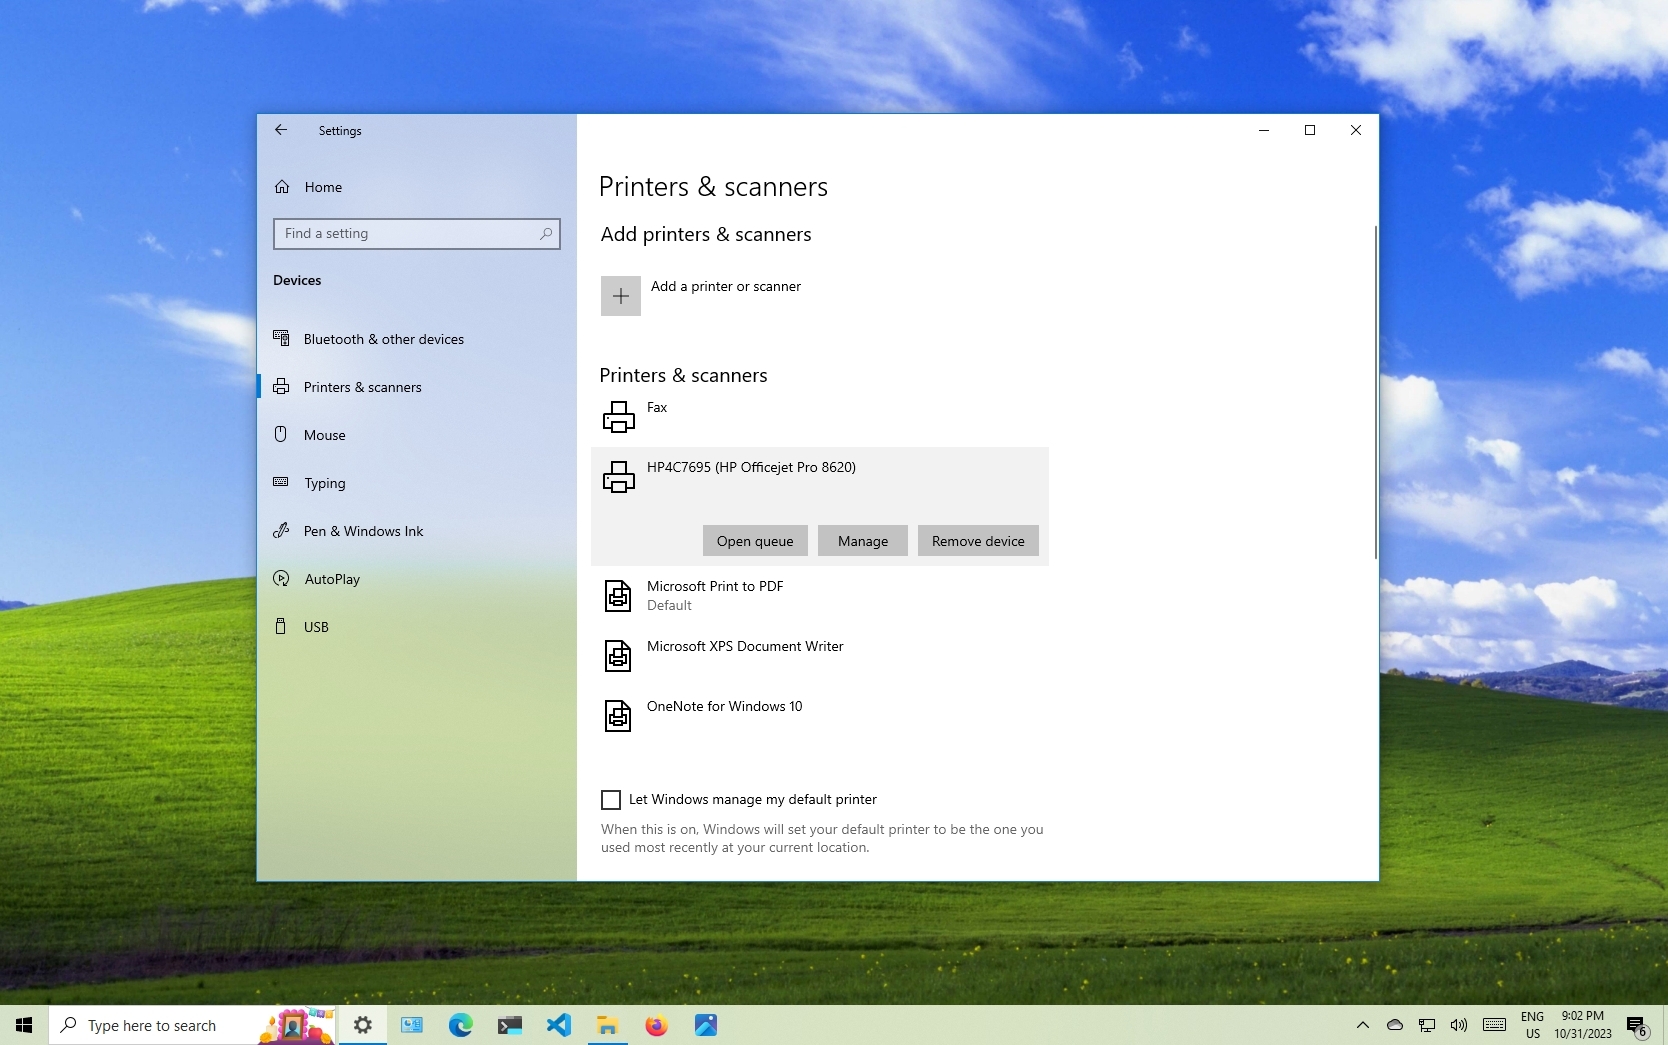
On Windows 10, the process of connecting to a wireless printer is straightforward, and in this guide, I'll outline the steps you have to follow to complete this configuration.
Don't you despise when you need to print something quickly, but your printer is packed away somewhere, or you need to keep plugging in a pesky USB cable? To improve your workflow, it's worth picking up a wireless printer. This will unlock remote access, enabling Windows 10 to print, fax, and scan without being physically attached to the unit (depending on the capabilities of the device).
In this how-to guide, I'll walk you through the steps to set up your wireless printer in Windows 10.
How to connect your printer
To connect to a wireless printer on Windows 11, use these steps:
- Open Settings.
- Click on Devices.
- Click on "Printers & scanners."
- Power on the printer.
- Refer to the manual to connect it to your Wi-Fi network.
- Quick note: This process varies per manufacturer and per device. As a result, it's recommended to check your printer manufacturer for more specific details.
- Click the "Add a printer or scanner" button.
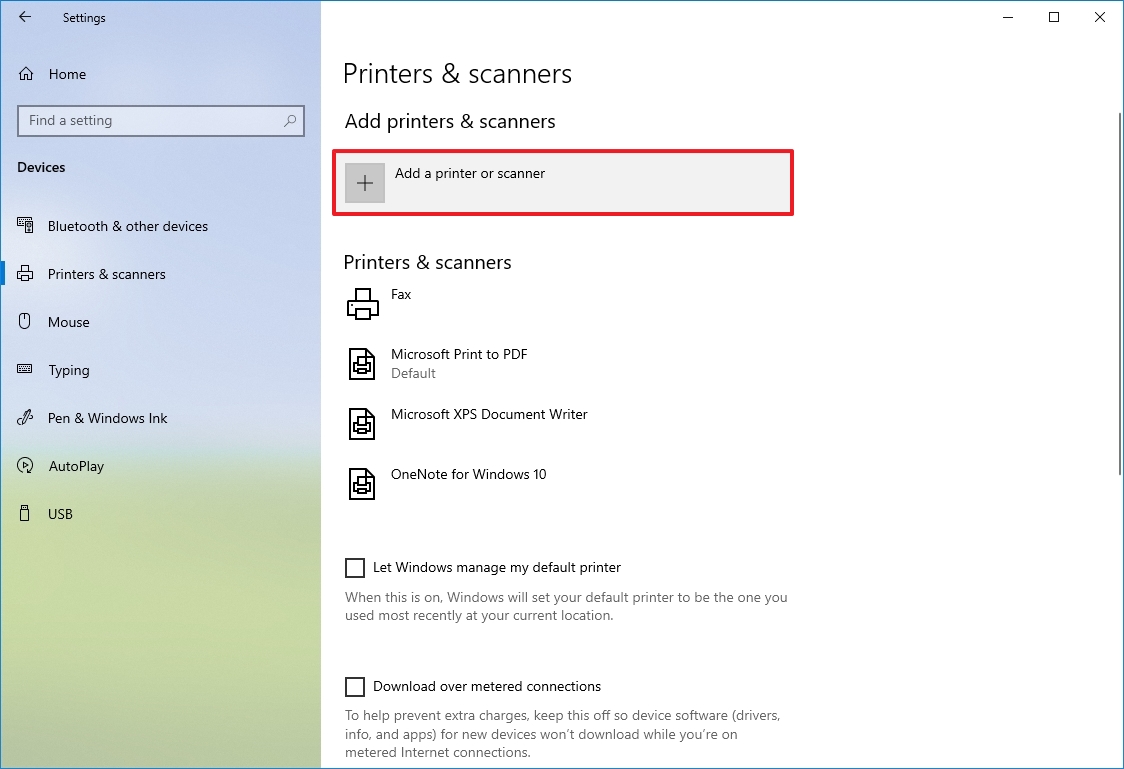
- Select the printer from the results.
- Click the Add device button.
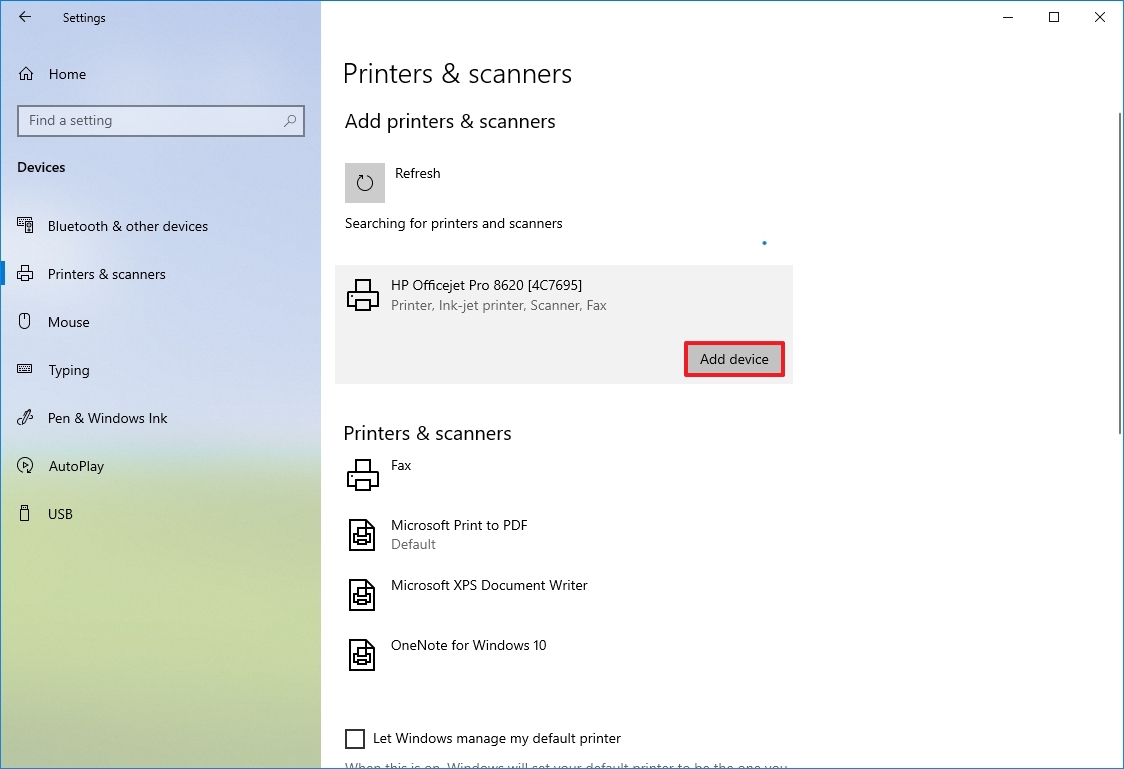
You should be now good to go. This process will also work with wired printers. Simply plug in the unit and follow the steps above.
Can't find your printer?
If the system is unable to locate your printer, the issue could be easily rectified by attempting to connect the device to Windows 10 manually.
To connect a printer manually, use these steps:
Get the Windows Central Newsletter
All the latest news, reviews, and guides for Windows and Xbox diehards.
- Open Settings.
- Click on Devices.
- Click on "Printers & scanners."
- Click the "Add a printer or scanner" button.

- Click on "The printer that I want isn't listed."
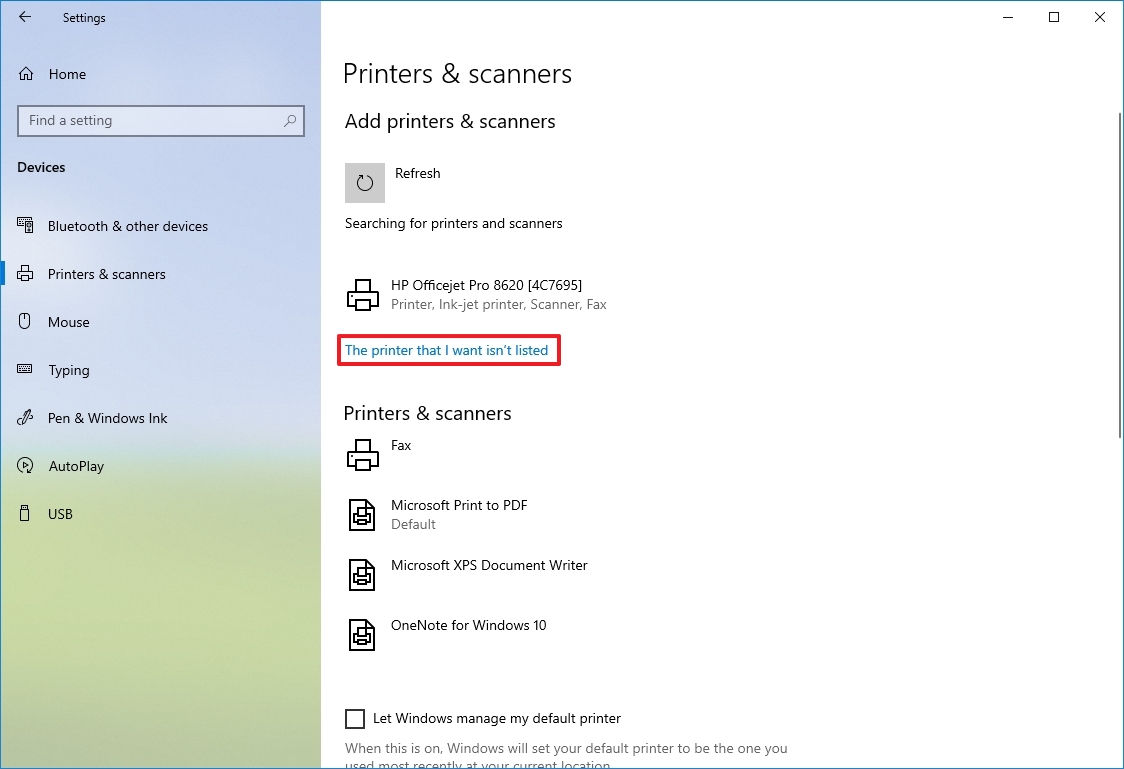
- Check the "Add a Bluetooth, wireless or network discoverable printer" option.
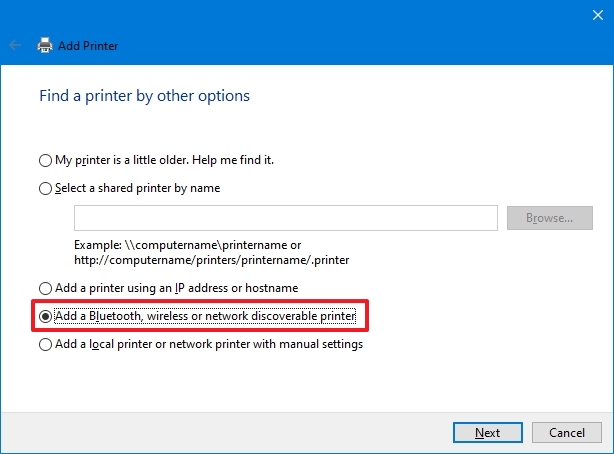
- Click the Next button.
- Choose the connected printer.
- Click the Next button.
- Continue with the on-screen directions (if applicable).
If you're still unable to see your printer, ensure it's switched on, and both the printer and your Windows 10 PC are on the same local network.
Change the default printer
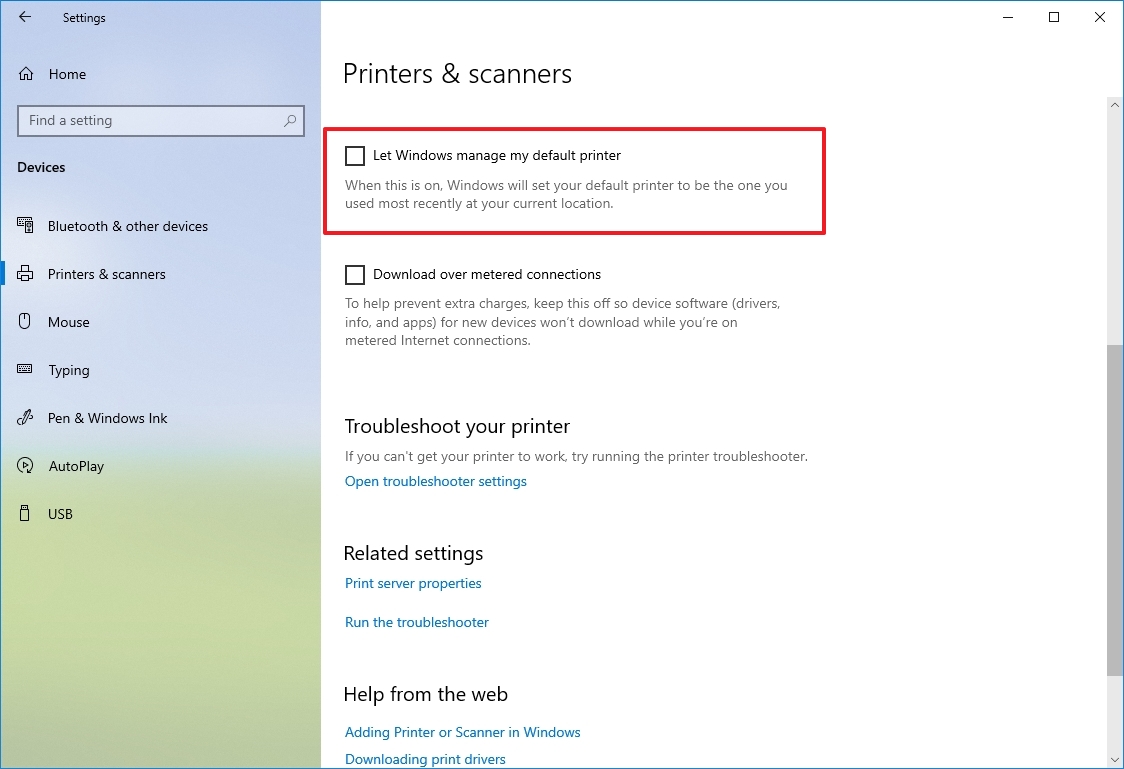
The operating system will attempt to set the default printer by selecting the most recently used on the connected network. This is toggled on by default, meaning the system can remember the printer to use when switching between networks. Not everyone needs or wants this functionality, and luckily, it's straightforward to turn it off.
- Open Settings.
- Click on Devices.
- Click on "Printers & scanners."
- Clear the "Let Windows manage my default printer" option.
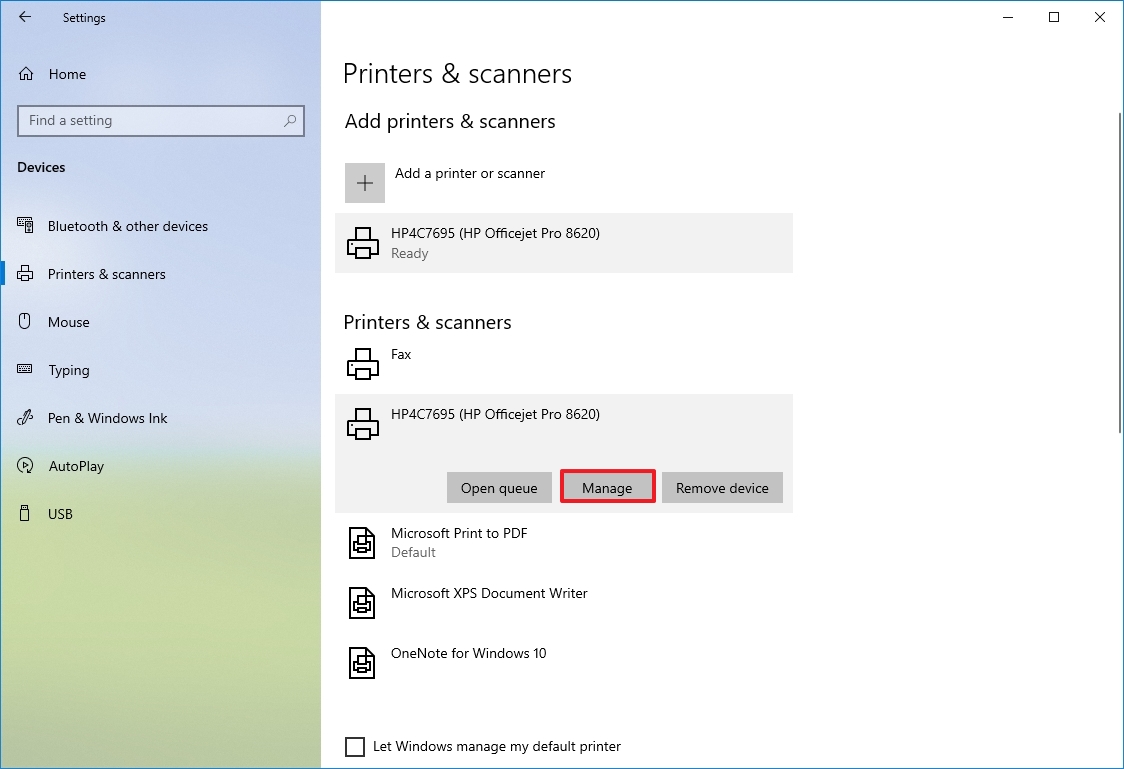
- Choose the printer to set as default from the list of devices.
- Select the Manage button.
- Click the "Set as default" button.
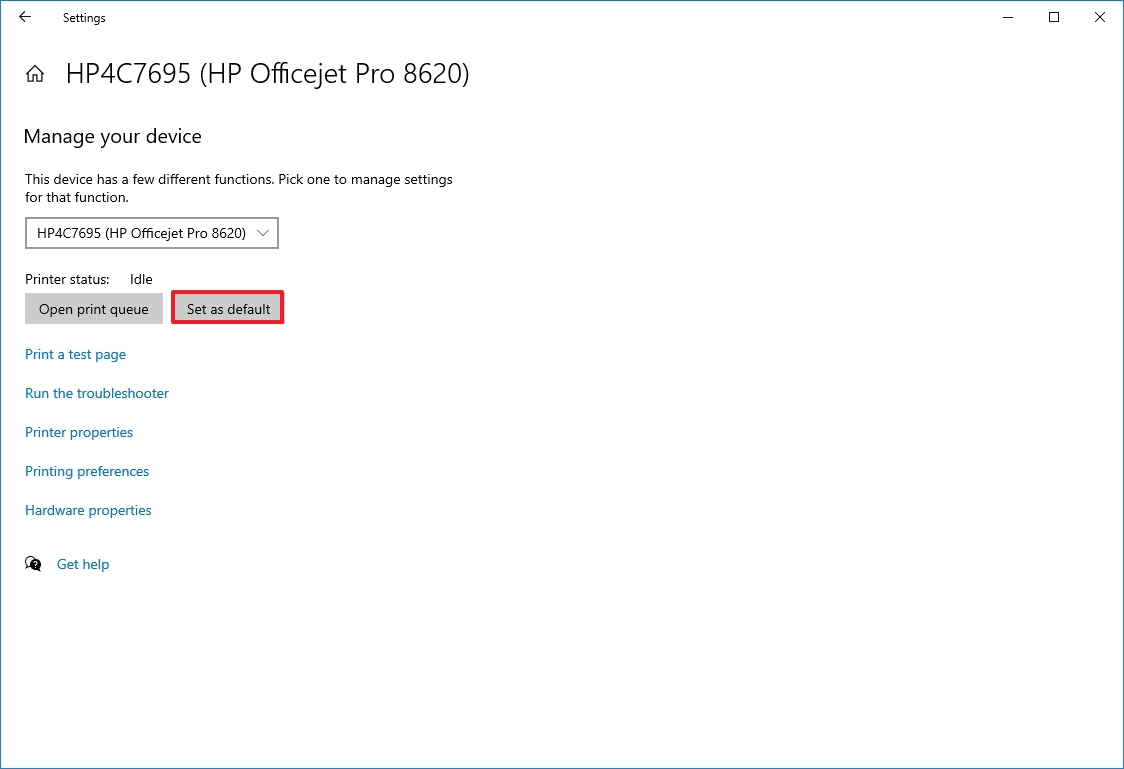
Your wireless printer should now be set up and ready to go.

Rich Edmonds was formerly a Senior Editor of PC hardware at Windows Central, covering everything related to PC components and NAS. He's been involved in technology for more than a decade and knows a thing or two about the magic inside a PC chassis. You can follow him on Twitter at @RichEdmonds.
