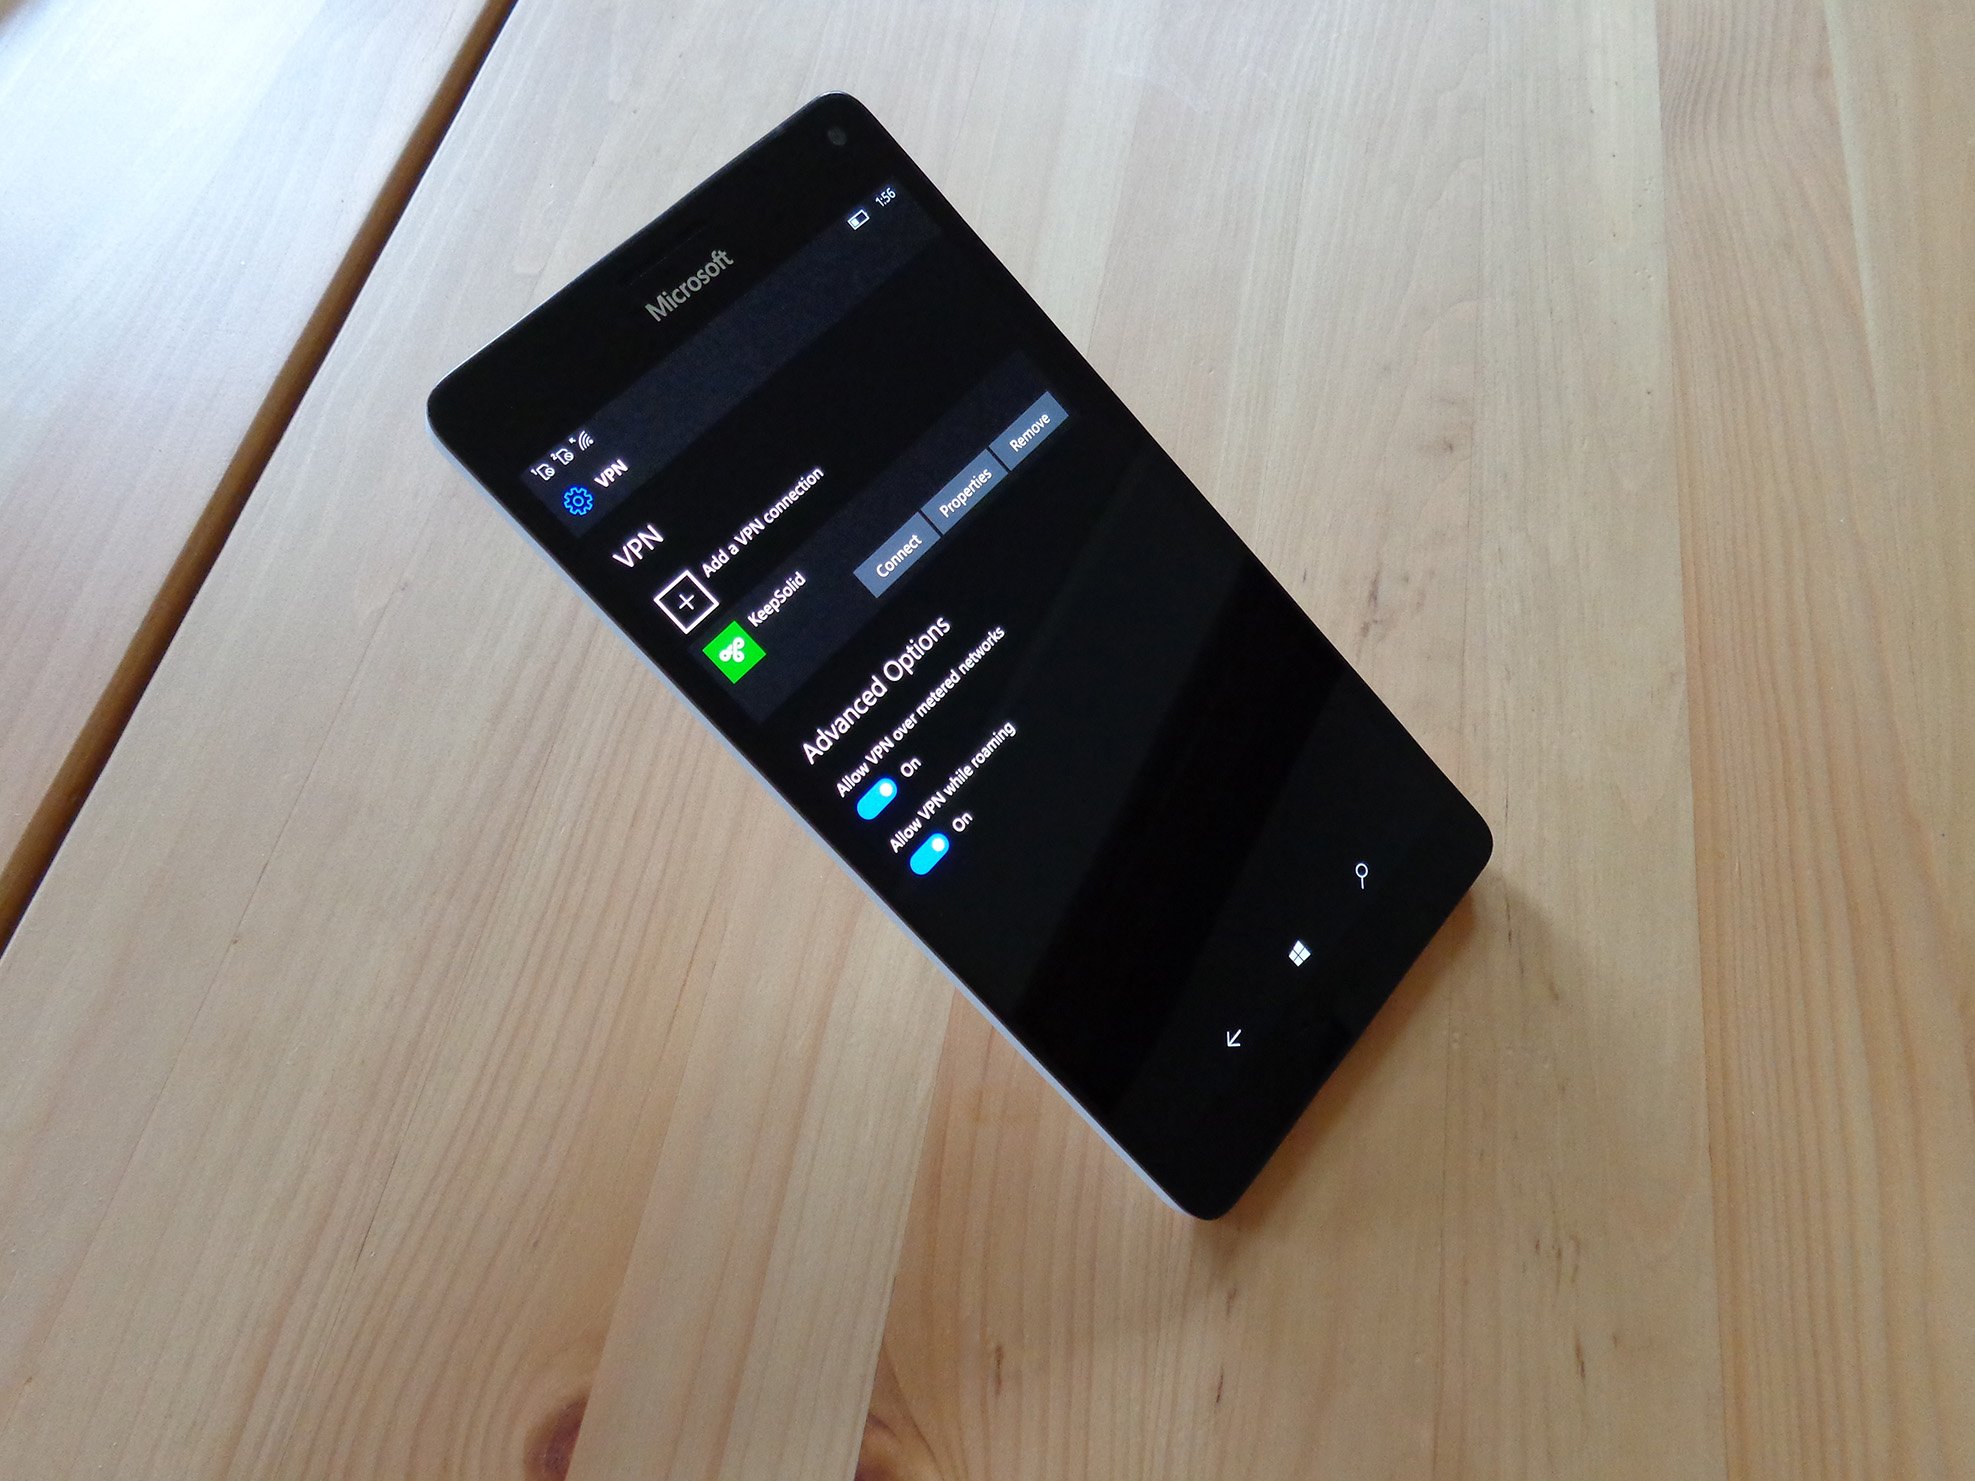
Privacy on the internet is being eroded every day, and many people are turning to solutions that help mask their activity online. Virtual Private Networks (VPN) are becoming ever more popular thanks to their ease-of-use and relatively low cost. For more information on what a VPN can do for you, check out our guide to the best VPNs and how they compare to proxy servers.
What's the difference between a proxy server and a VPN?
If you're in the market for a VPN and are not sure where to start, we also have a roundup of the best VPN services available now.
See the Best VPN Services for 2017
So you've purchased a VPN, and now you want to use it on your phone. Here's everything you need to know about configuring a VPN on Windows 10 Mobile.
- Information needed before you begin
- How to add and connect to a VPN on Windows 10 Mobile
- How to disconnect and remove a VPN on Windows 10 Mobile
Information needed before you begin
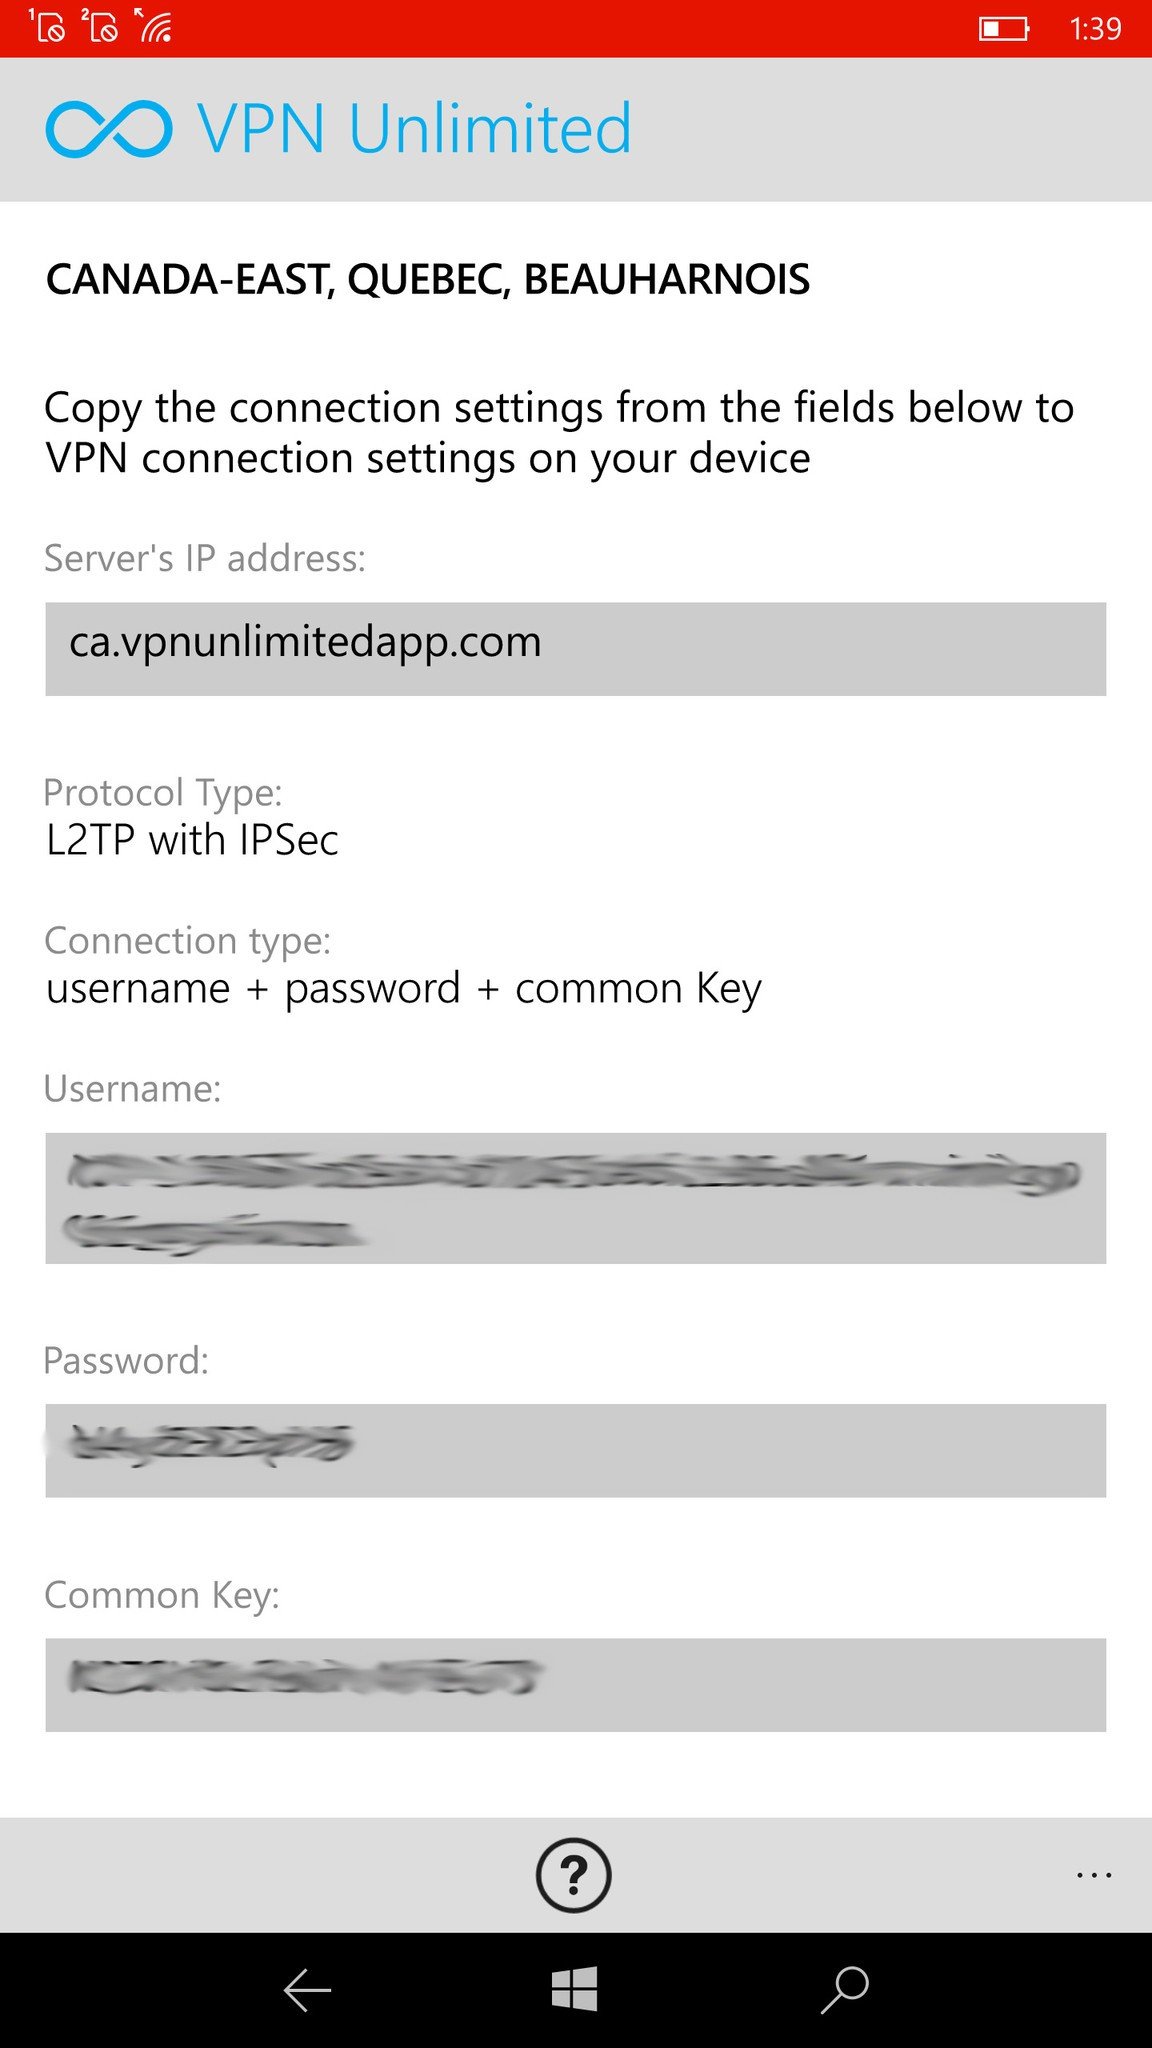
Before heading into your phone's settings to set everything up, you need to gather some information from your VPN provider. Popular VPN services, like KeepSolid, provide all this information in the app you download on your phone. If your VPN of choice doesn't have an app, this information can generally be found in your account settings on their website.
In the case of KeepSolid's VPN Unlimited, which is the VPN we are configuring here, this is the information presented to you in their app:
Get the Windows Central Newsletter
All the latest news, reviews, and guides for Windows and Xbox diehards.
- Server name or IP address
- Whether you're using L2TP or PPTP to connect (if you can, always go with the safer L2TP)
- Username
- Password
- Preshared key (this can change to a certificate or other key depending on your VPN service)
How to add and connect to a VPN on Windows 10 Mobile
With the required information now in hand, you can head into your phone's settings to configure the VPN.
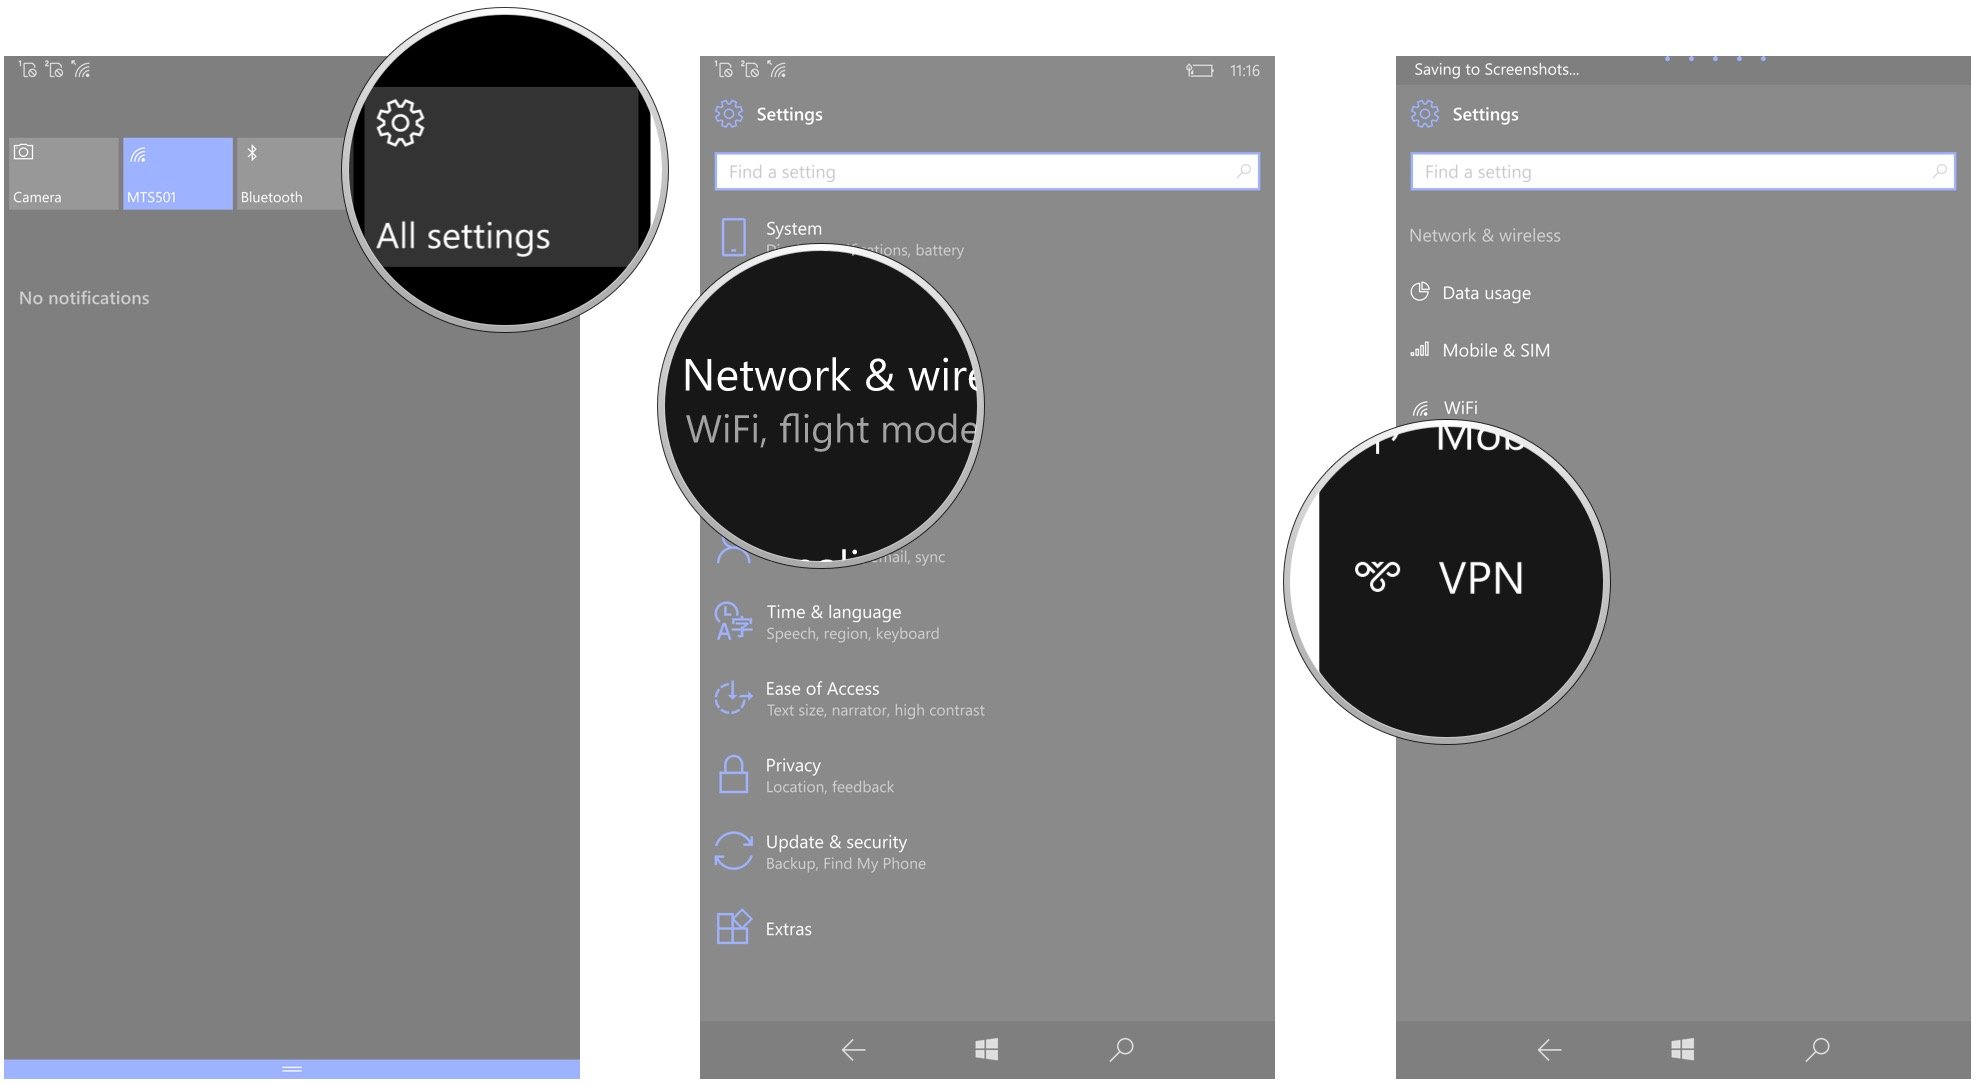
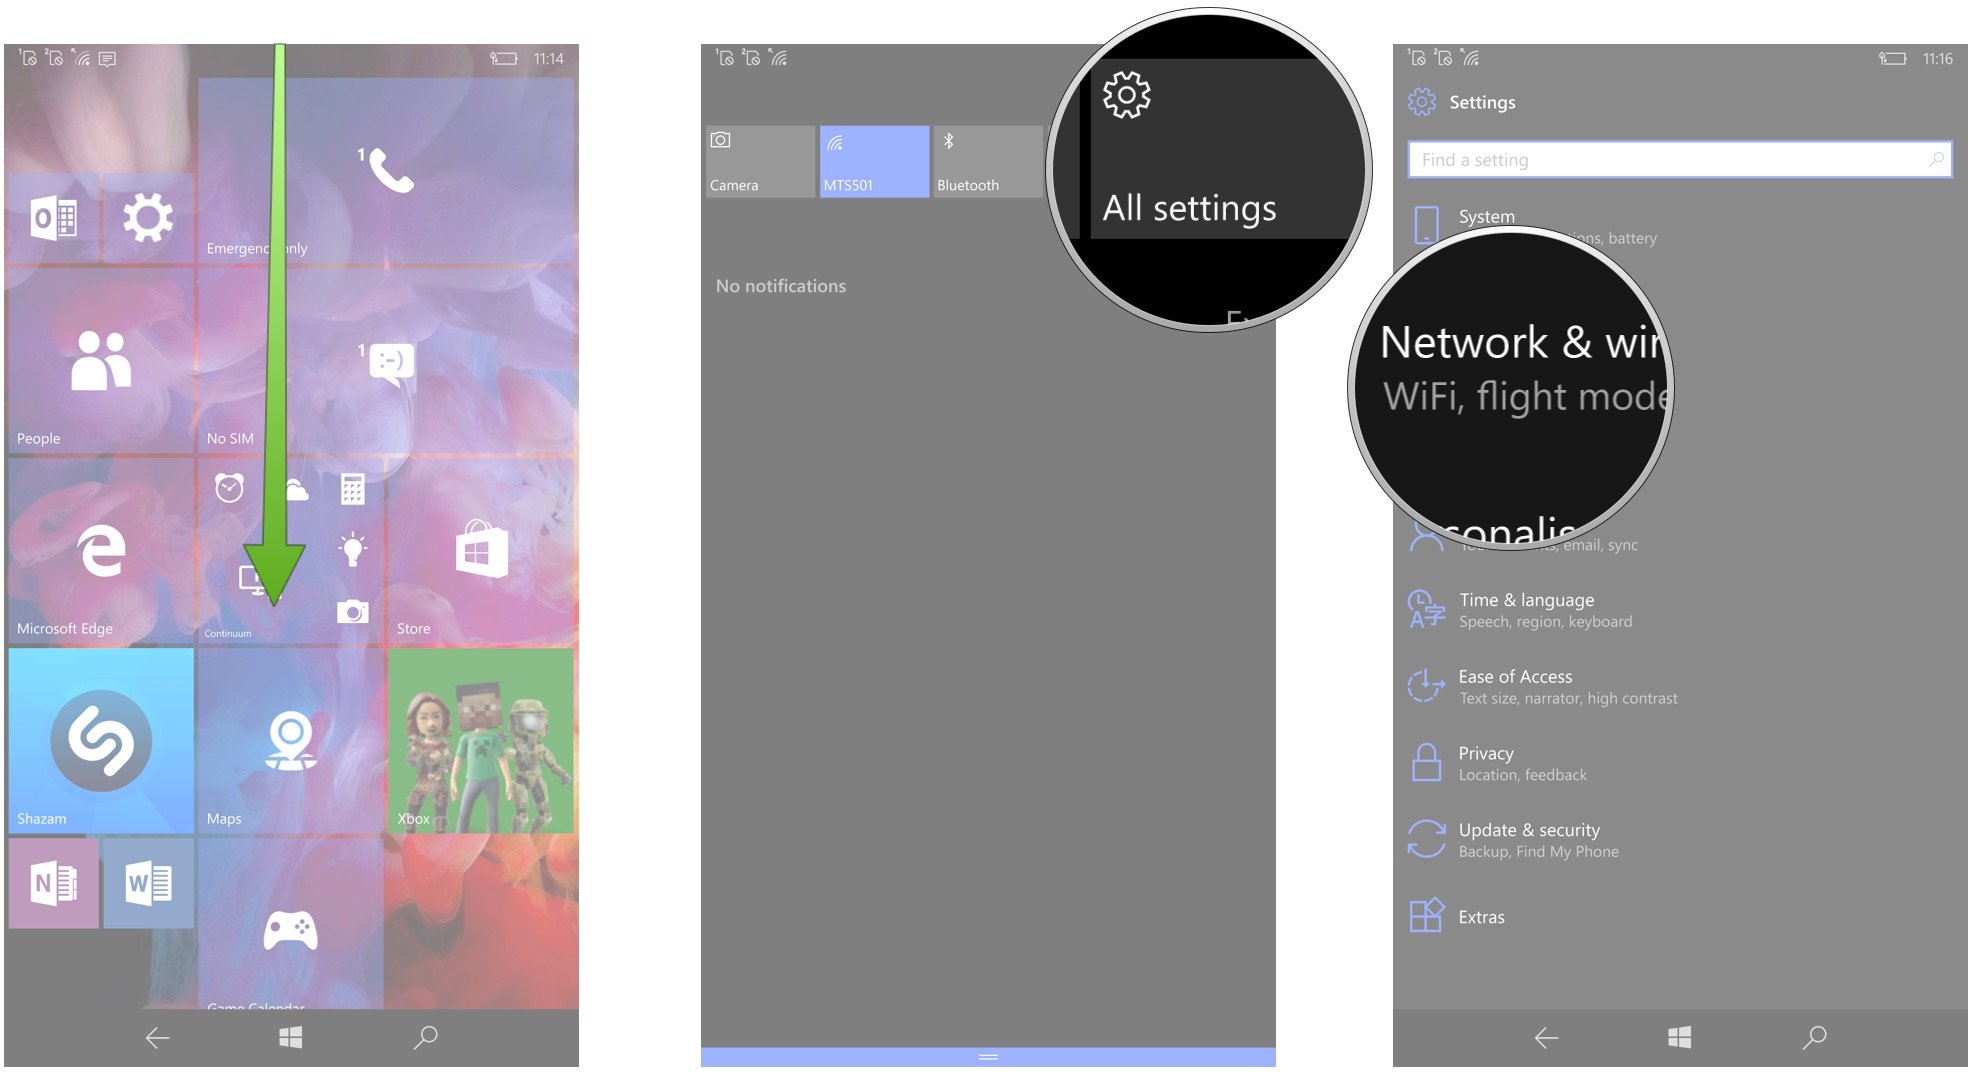
- Swipe down from the top of your screen.
- Tap All Settings.
- Tap Network & wireless.
- Tap VPN.
- Tap Add a VPN connection.
- Tap the dropdown arrow below VPN provider.
- Tap Windows (built-in).
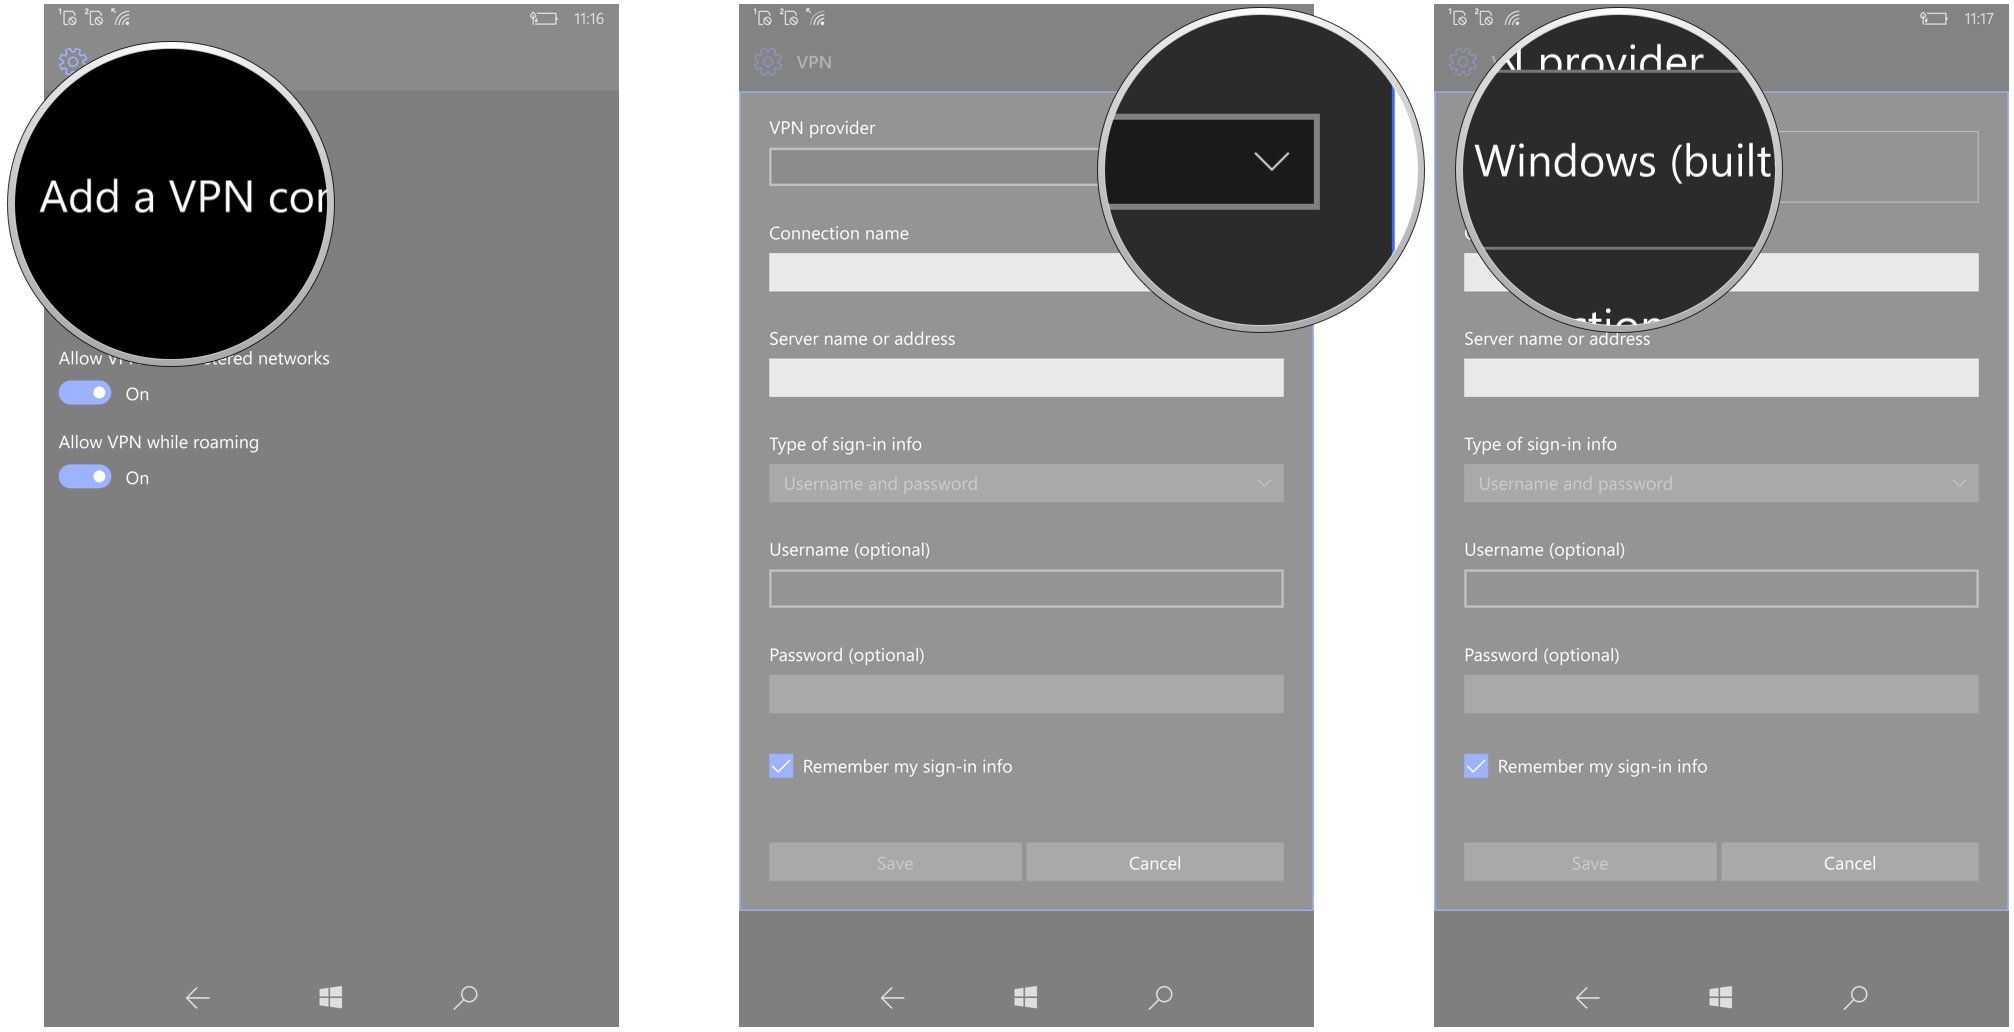
- Tap the Connection name field.
- Type a name. This is solely for you to identify the VPN so you can use any name you prefer.
- Tap the Server name or address field.
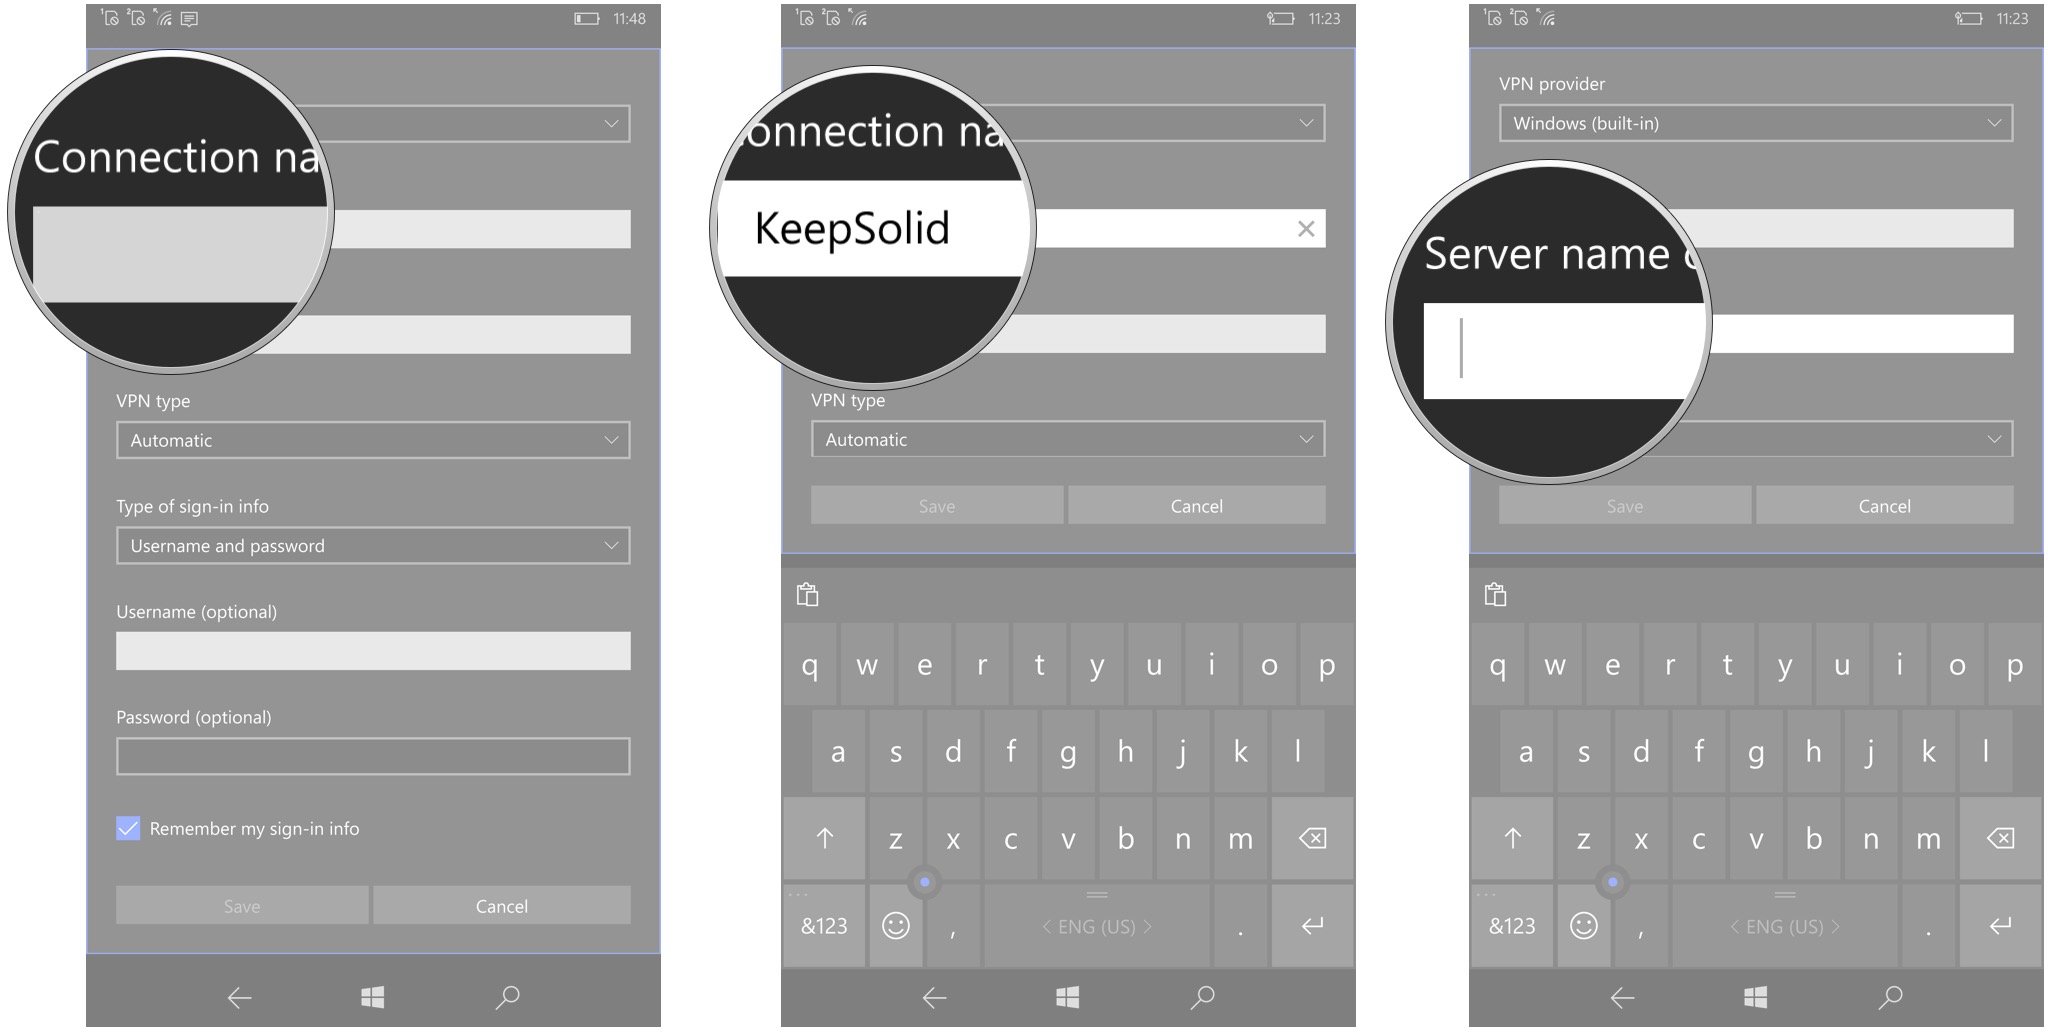
- Type the server name.
- Tap the dropdown arrow beneath VPN type.
- Tap the VPN type. This will change depending on the VPN service you subscribe to. In this case, we choose L2TP/IPsec with pre-shared key.
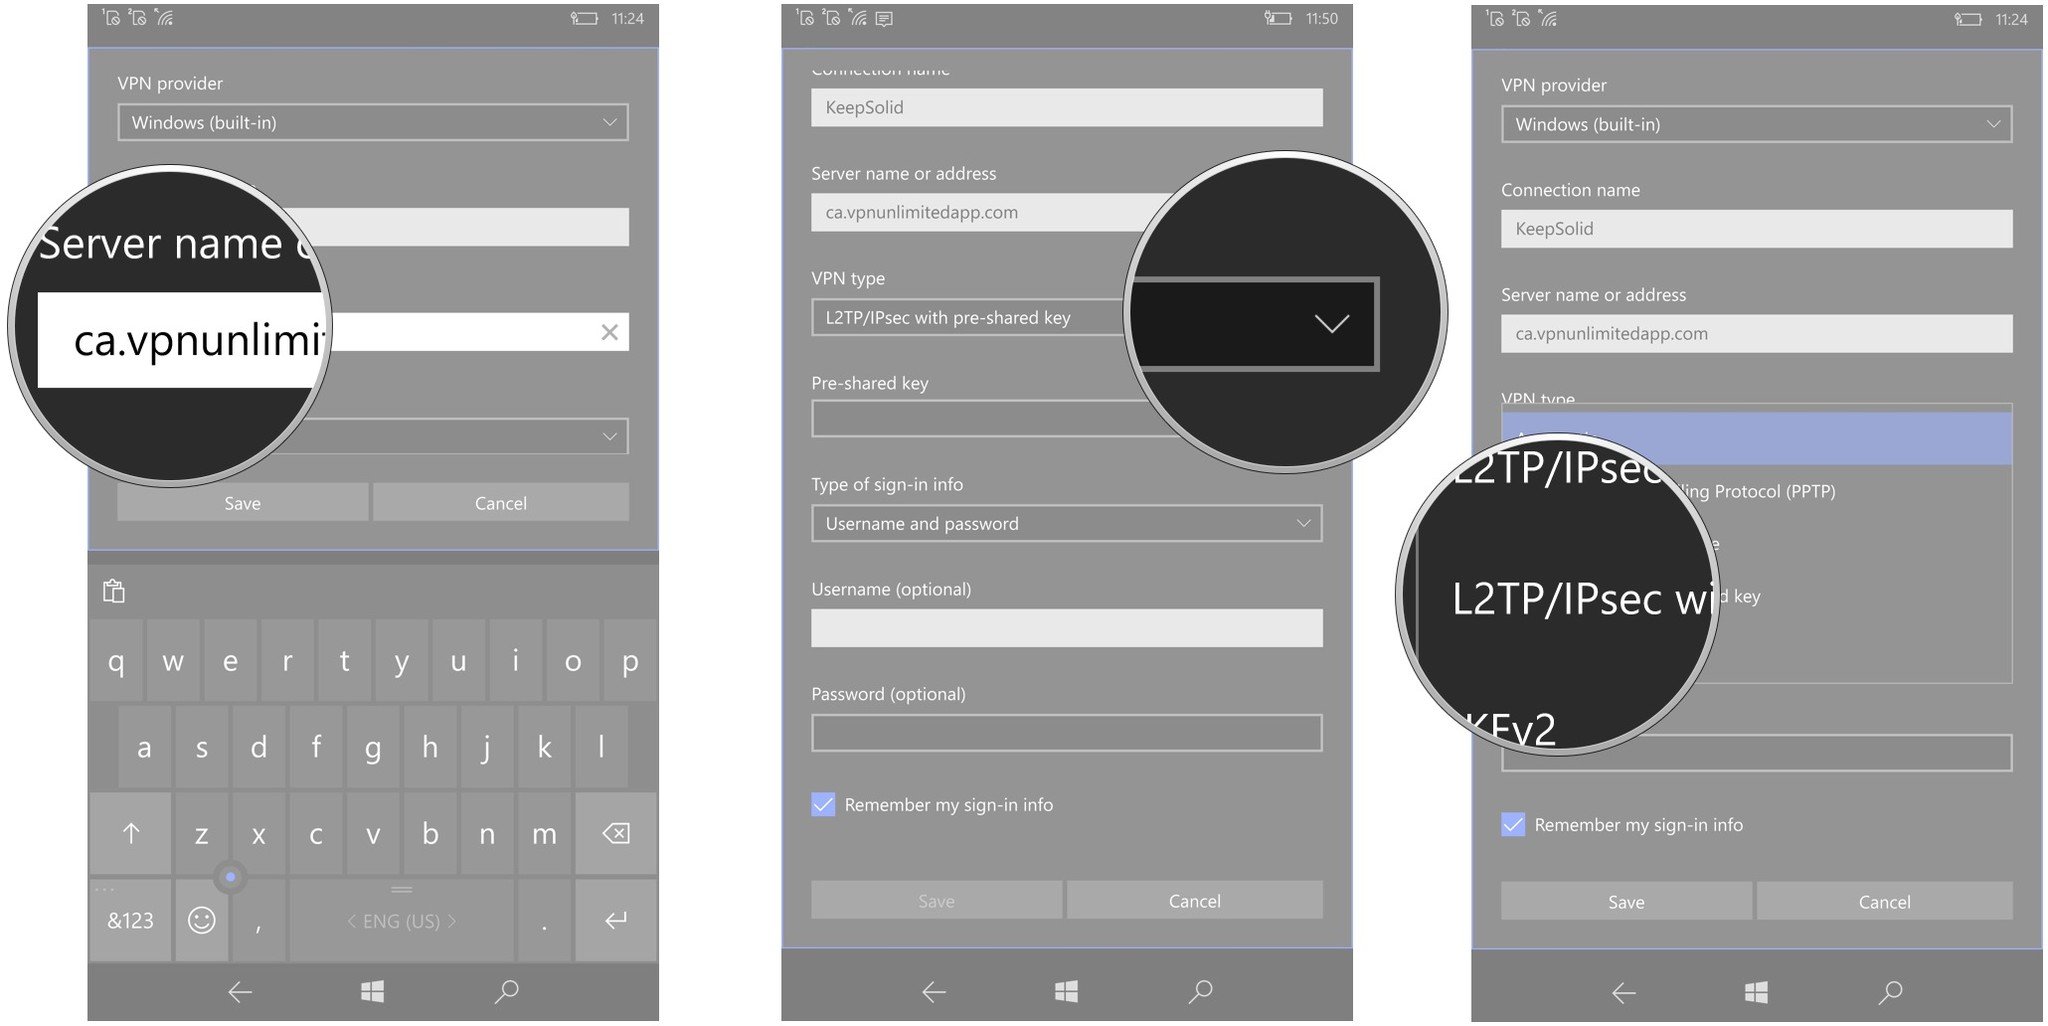
- Tap the Pre-shared key field.
- Type the pre-shared key.
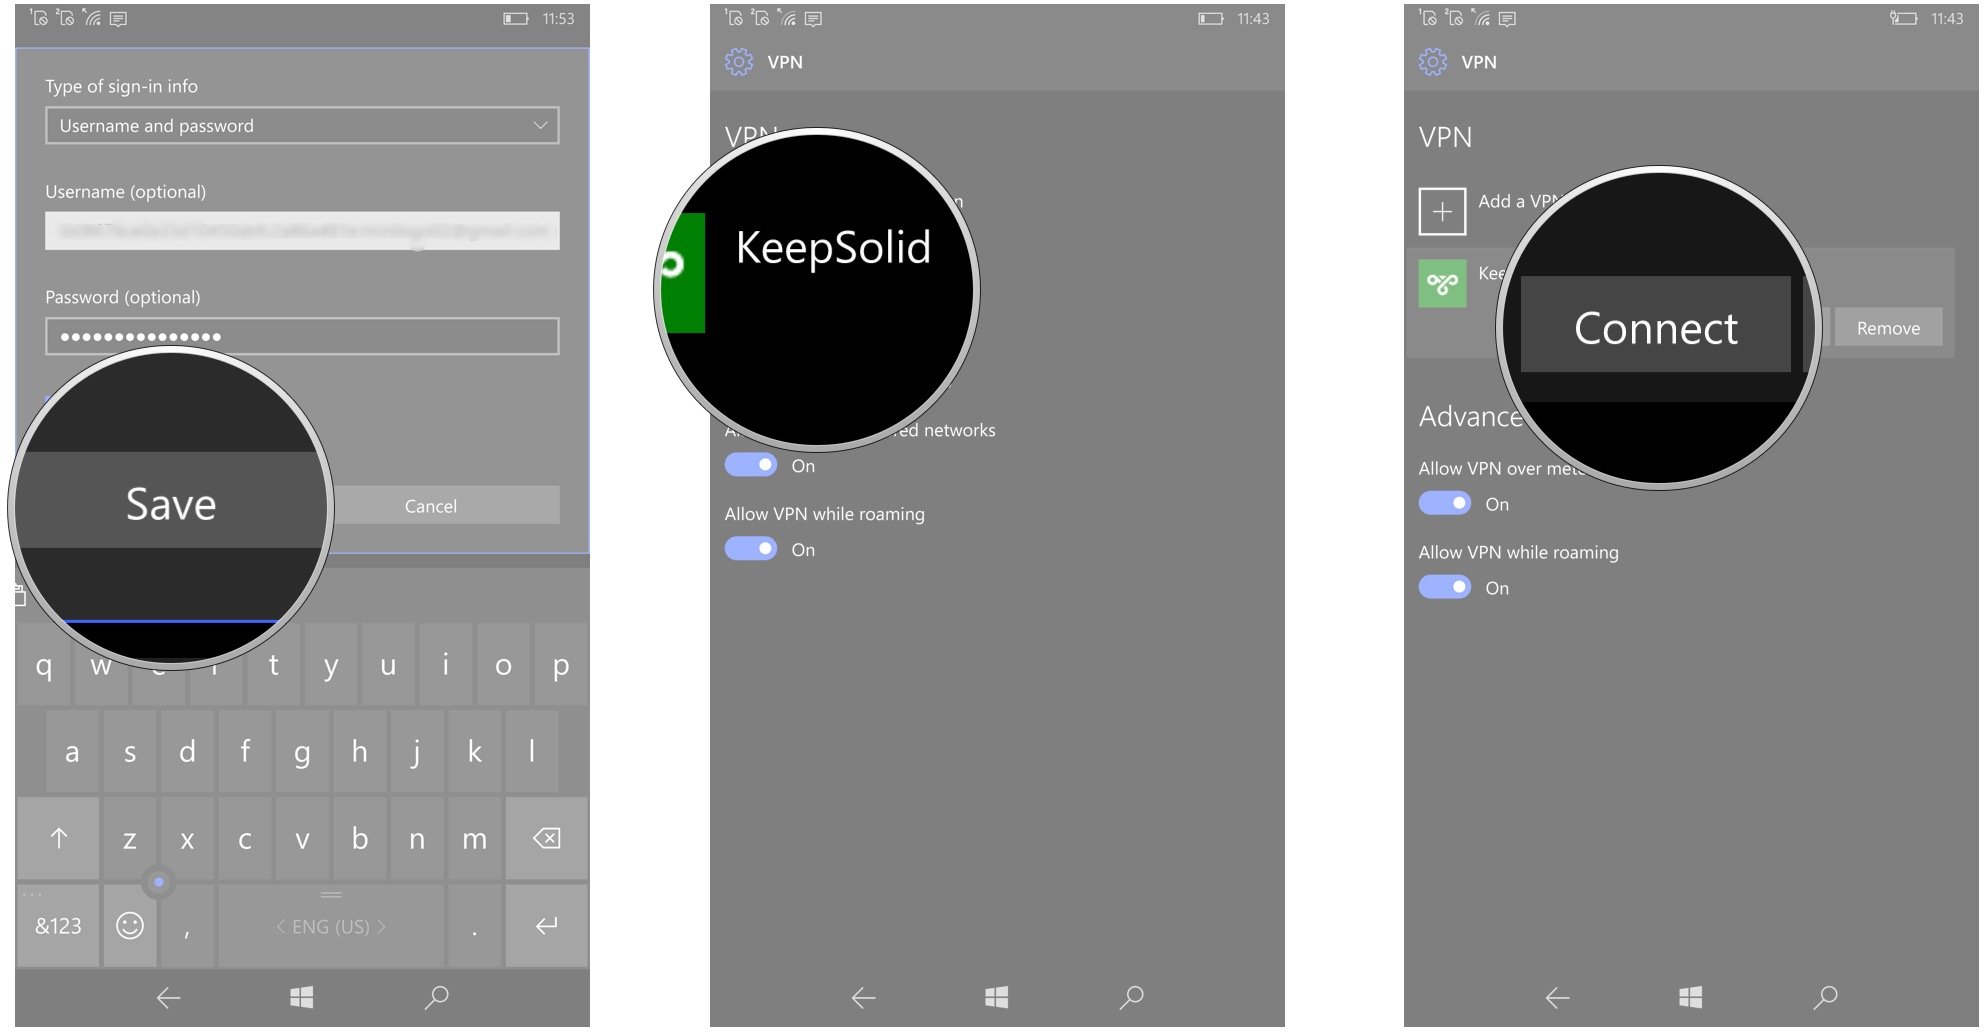
- Tap the username field.
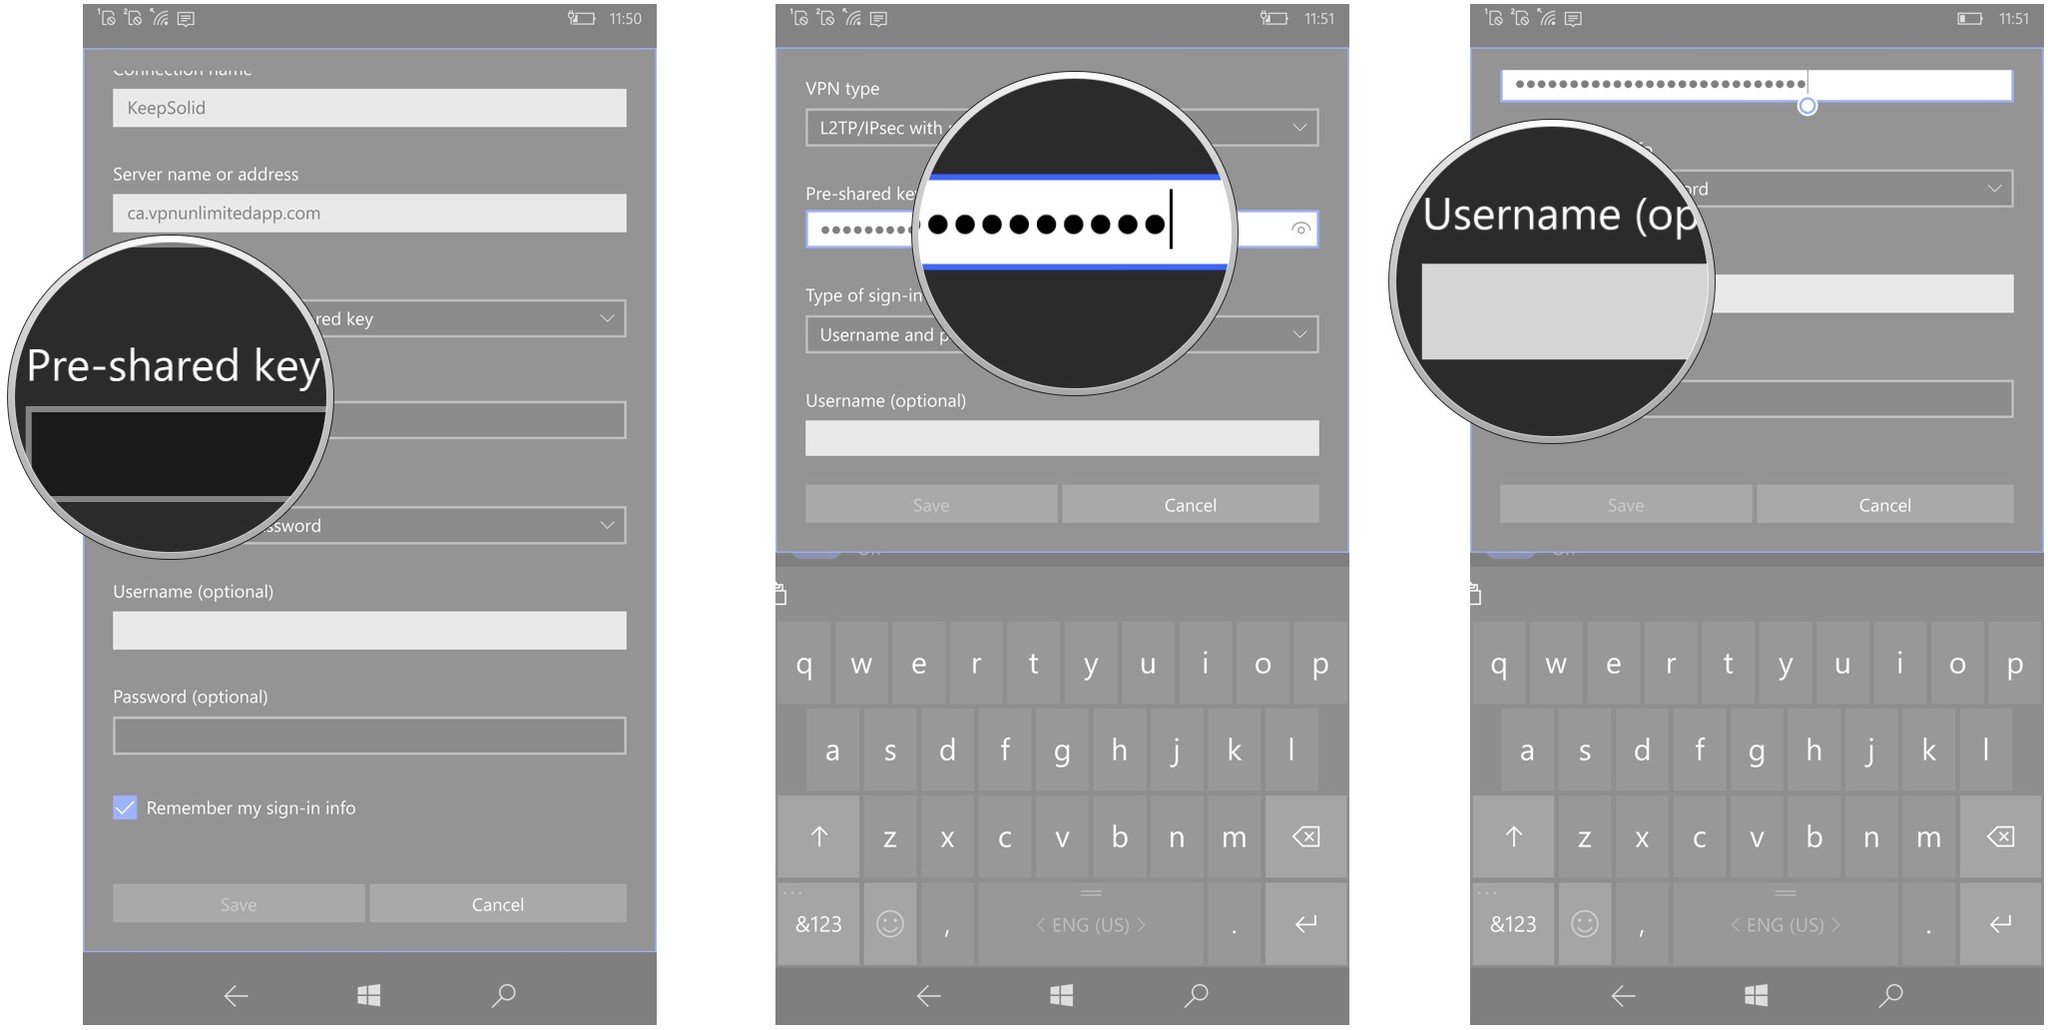
- Type your username.
- Tap the password field.
- Type your password.
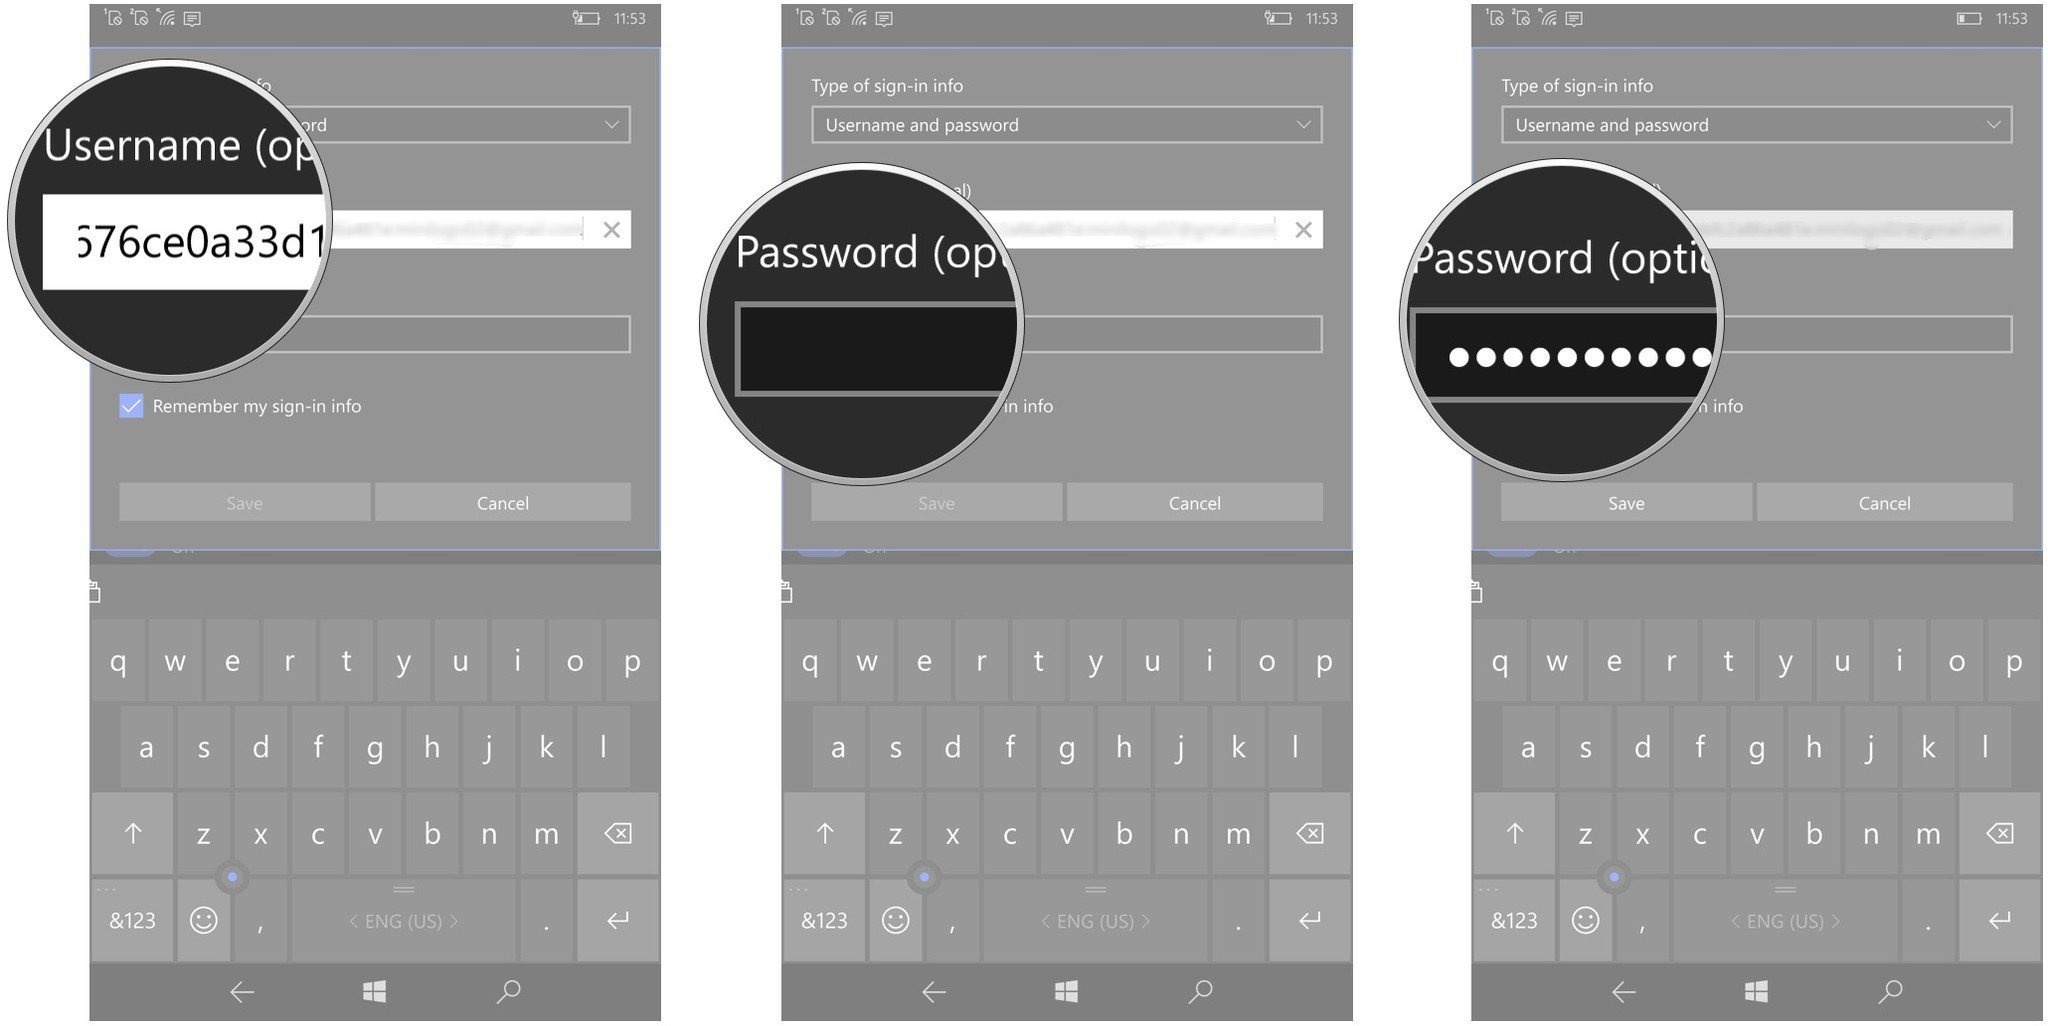
- Tap Save. Your VPN provider should now show up in the list of VPNs.
- Tap your VPN.
- Tap Connect.
How to disconnect and remove a VPN on Windows 10 Mobile
Don't need your VPN anymore? Here's how to disconnect it and remove it from your phone.
- Swipe down from the top of your screen.
- Tap All Settings.
- Tap Network & wireless.
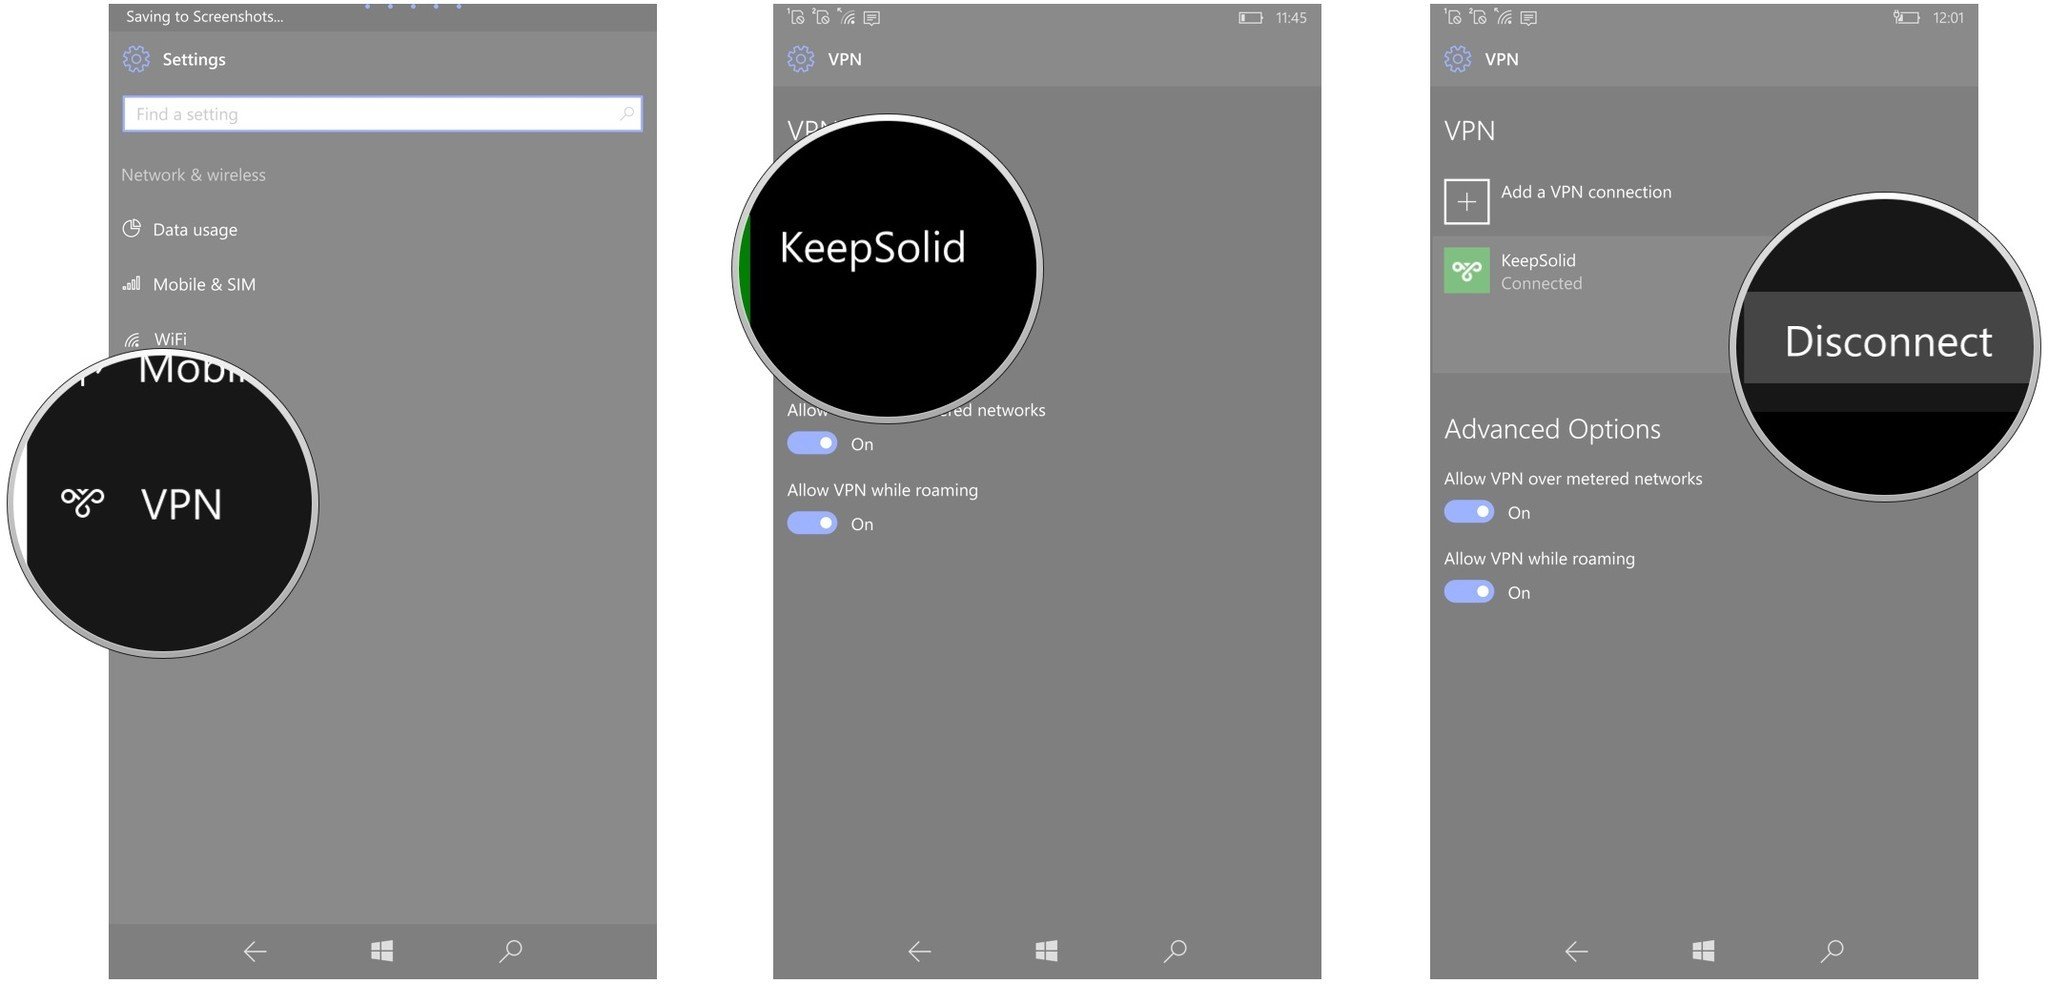
- Tap VPN.
- Tap your VPN.
- Tap Disconnect.
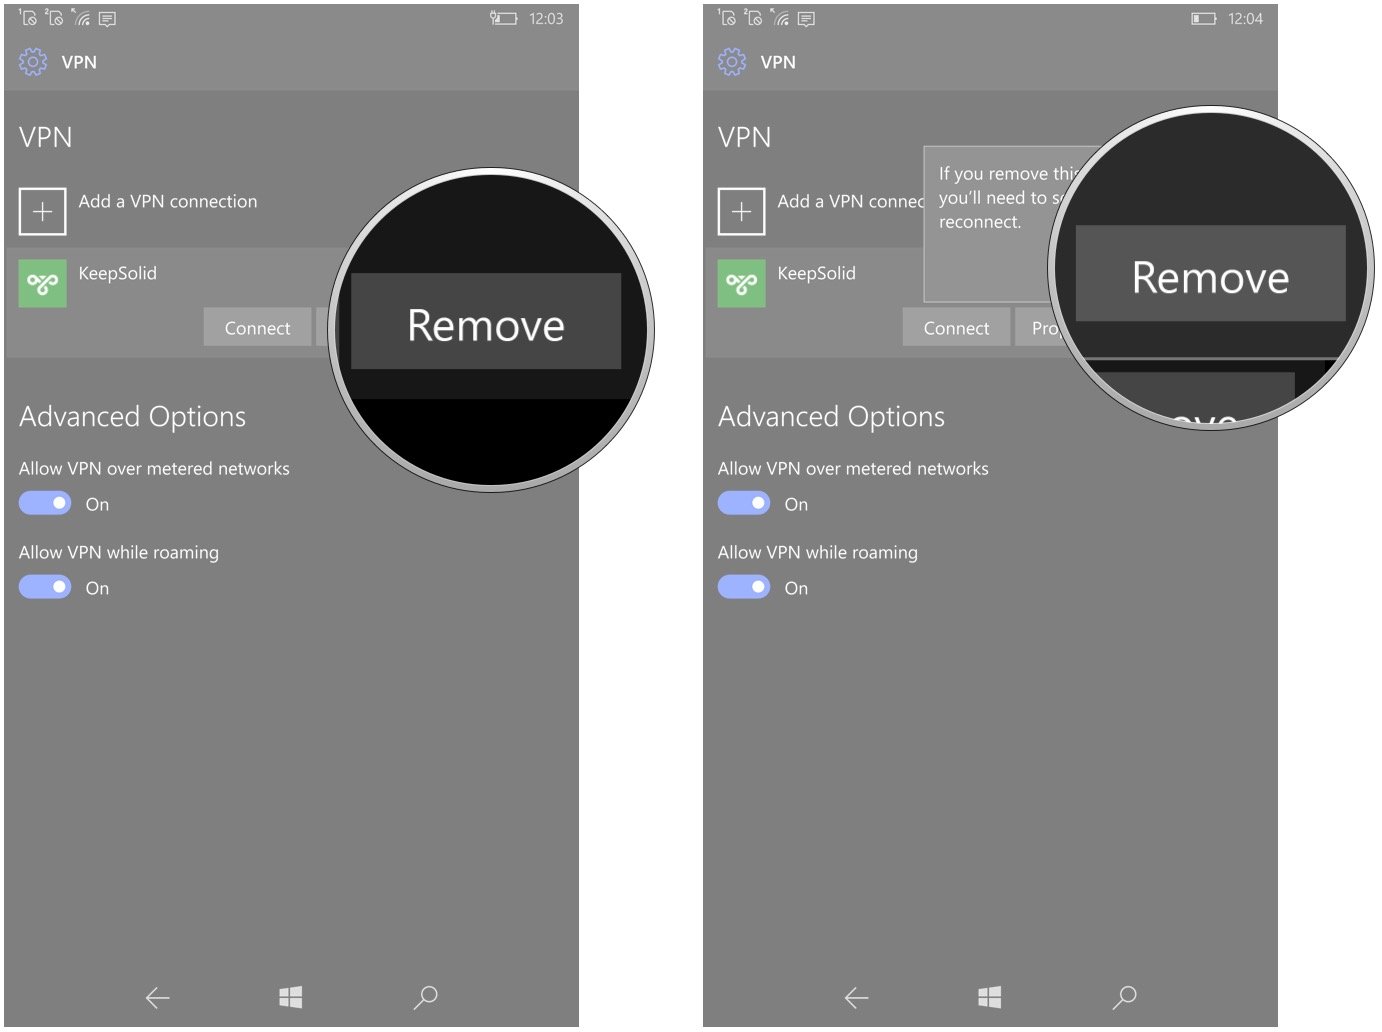
- Tap Remove.
- Tap Remove again to confirm.
Your privacy
Are you using a VPN while you use the internet? Which one are you using? If you're wondering which VPN is best for you, don't forget to head over to our buyer's guide.
See the Best VPN Services for 2017

Cale Hunt brings to Windows Central more than eight years of experience writing about laptops, PCs, accessories, games, and beyond. If it runs Windows or in some way complements the hardware, there’s a good chance he knows about it, has written about it, or is already busy testing it.
