How to configure active hours on Windows 11
You can avoid sudden Windows 11 reboots to apply updates. Here's how.
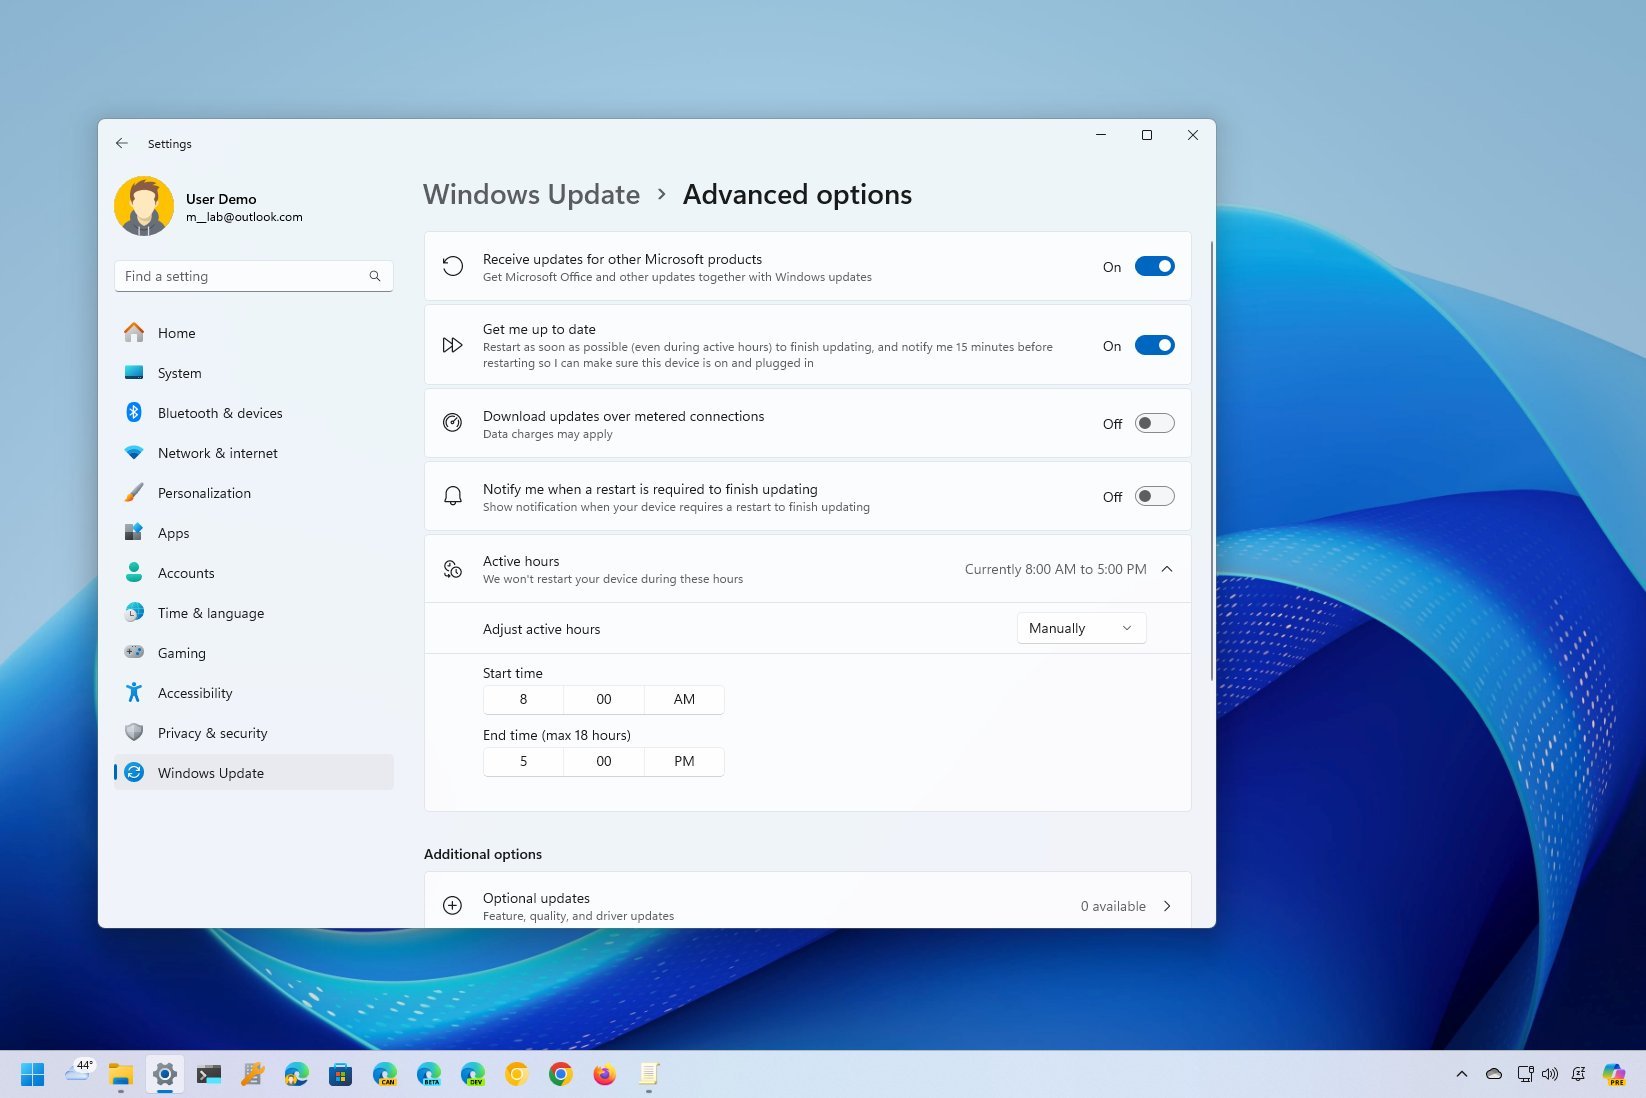
On Windows 11, "active hours" is a feature that helps to minimize the chances of sudden reboots to apply system updates. The feature works by tracking and figuring out when you are actively using the computer and scheduling reboots when the computer is not in use.
The caveat is that "active hours" are not flawless, and the device can still reboot unexpectedly. If this already happened to you, or you want to avoid unexpected reboots, Windows 11 includes an option to set the active hours time range manually.
In this how-to guide, we will walk you through the steps to configure active hours to avoid sudden restarts as you are actively using your device.
How to configure Windows 11 active hours from Settings
To change the active hours settings manually on Windows 11, use these steps:
- Open Settings.
- Click on Windows Update.
- Click the Advanced options page on the right.
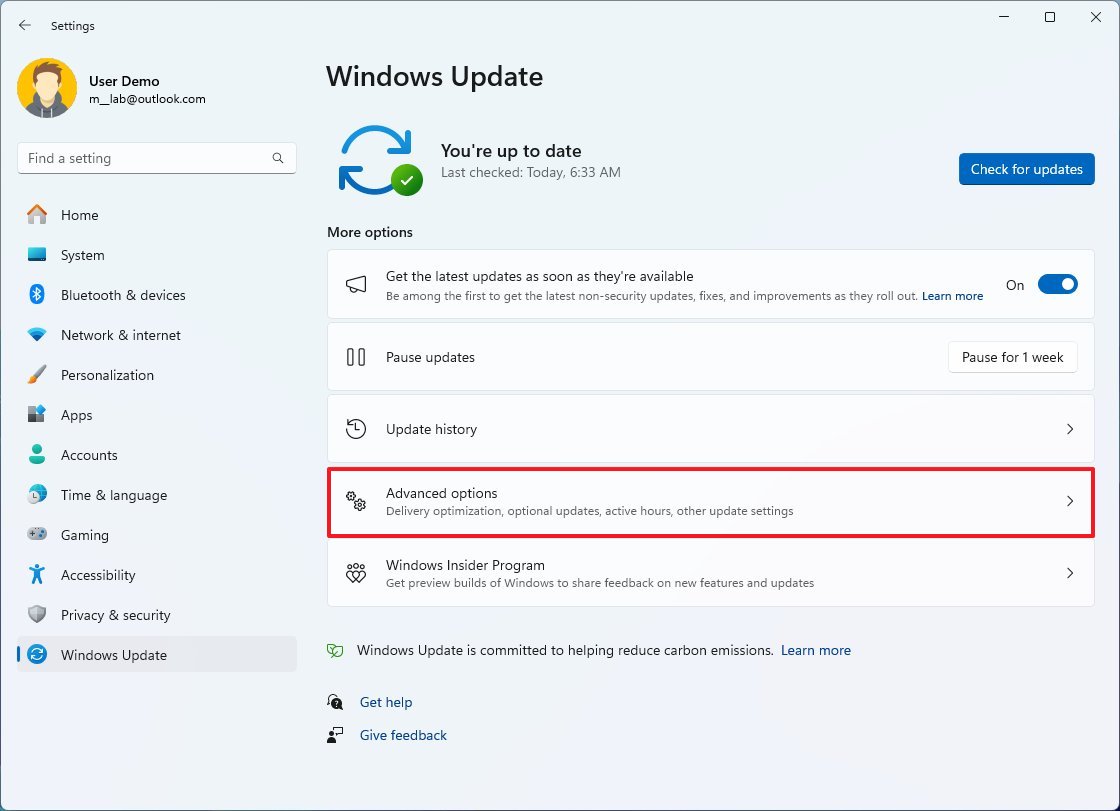
- Click the Active hours setting.
- Select the Manually option from the drop-down menu.
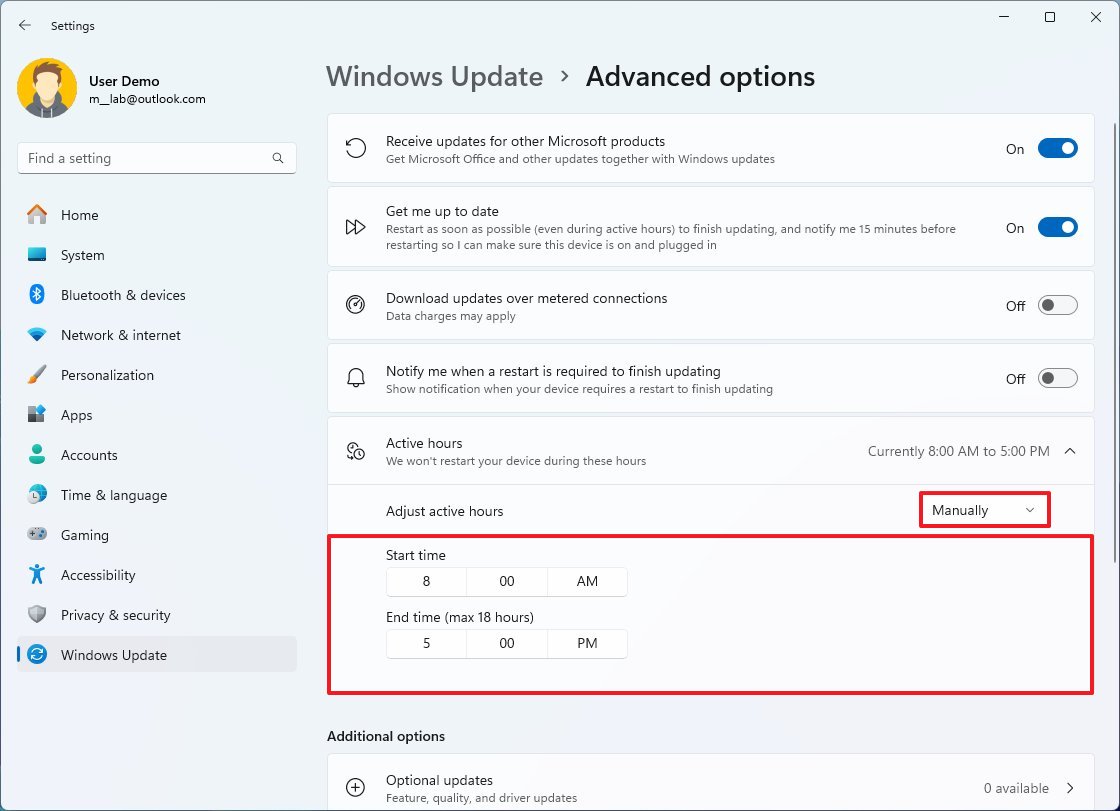
- Select the Start time when you will be using the computer.
- Select the End time (up to 18 hours) when you will no longer be using the computer.
Once you complete the steps, when an update is pending for installation, Windows 11 won't reboot the system during the start and end time range specified in the feature.
If you want to revert the changes to allow the system to determine when your computer should restart, use the instructions mentioned above, but in step 5, select the "Automatic" option.
How to configure Windows 11 active hours from Group Policy
To change the active hours settings through Group Policy, use these steps:
All the latest news, reviews, and guides for Windows and Xbox diehards.
- Open Start.
- Search for gpedit.msc and click the top result to open the Local Group Policy Editor.
- Browse the following path: Computer Configuration > Administrative Templates > Windows Update > Manage end user experience
- On the right side, double-click the "Turn off auto-restart for updates during active hours" policy.
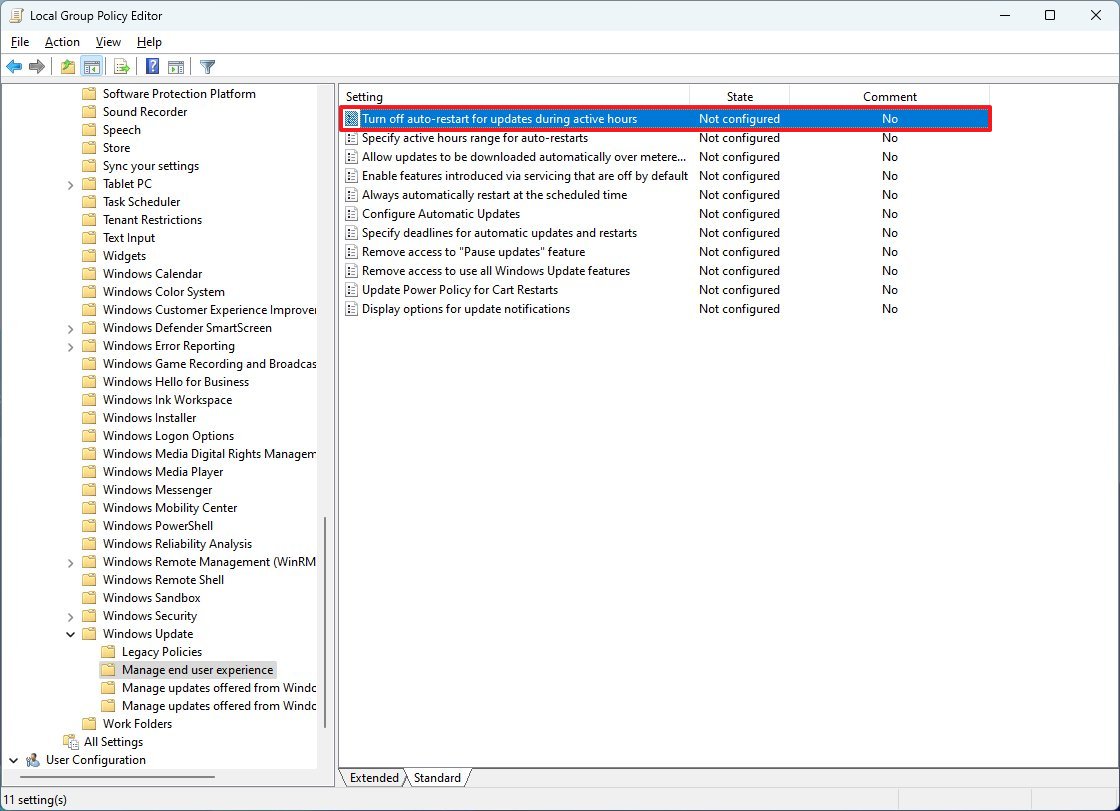
- Select the Enabled option.
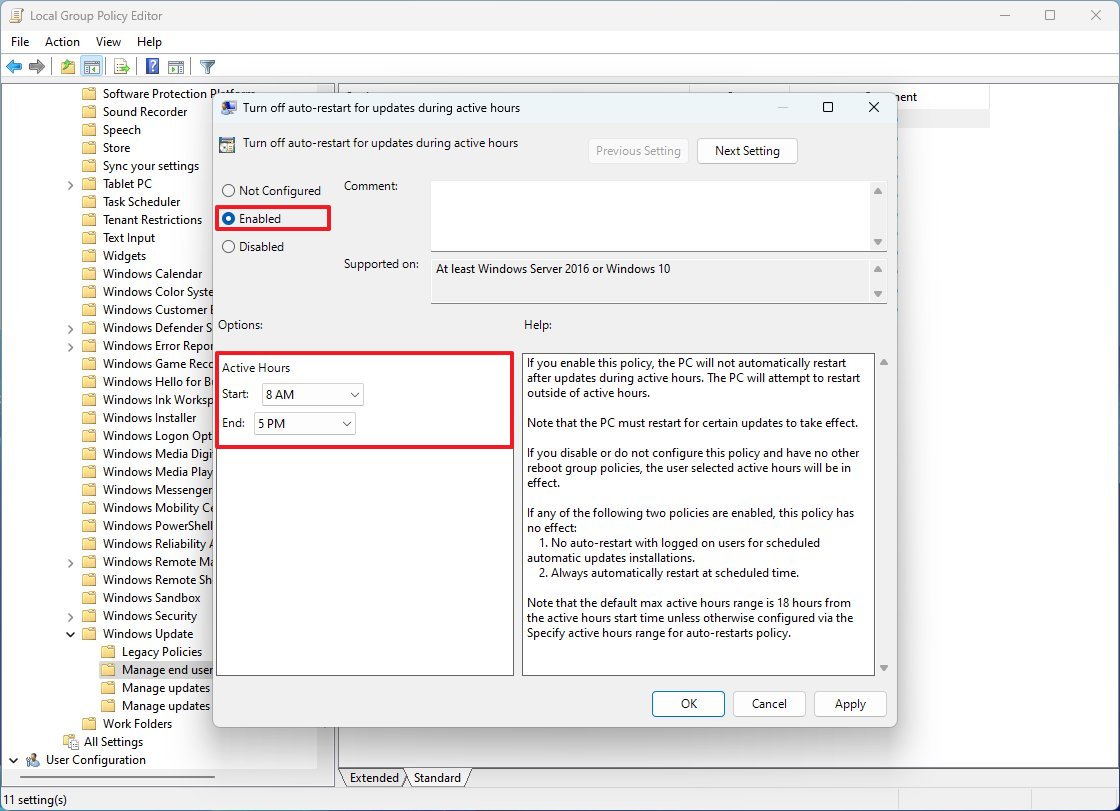
- In the Active Hours setting, use the Start and End options to specify when you will use the computer to prevent automatic restarts under the "Options" section.
- Click the Apply button.
- Click the OK button.
After you complete the steps, active hours will use the specified time range, and users won't be able to modify the configuration through the Settings app until you undo the policy.
If you want to undo the changes, you can use the instructions outlined above, but in Step 5, select the "Not configured" option.
Although you can still adjust the active hour settings, disabling the features is no longer possible as it was on Windows 10.
How to reschedule Windows 11 automatic restart using Settings
To schedule a restart to finish applying an update, use these steps:
- Open Settings.
- Click on Windows Update.
- Click the down-arrow button next to the "Restart now" button and choose the "Schedule restart" option.
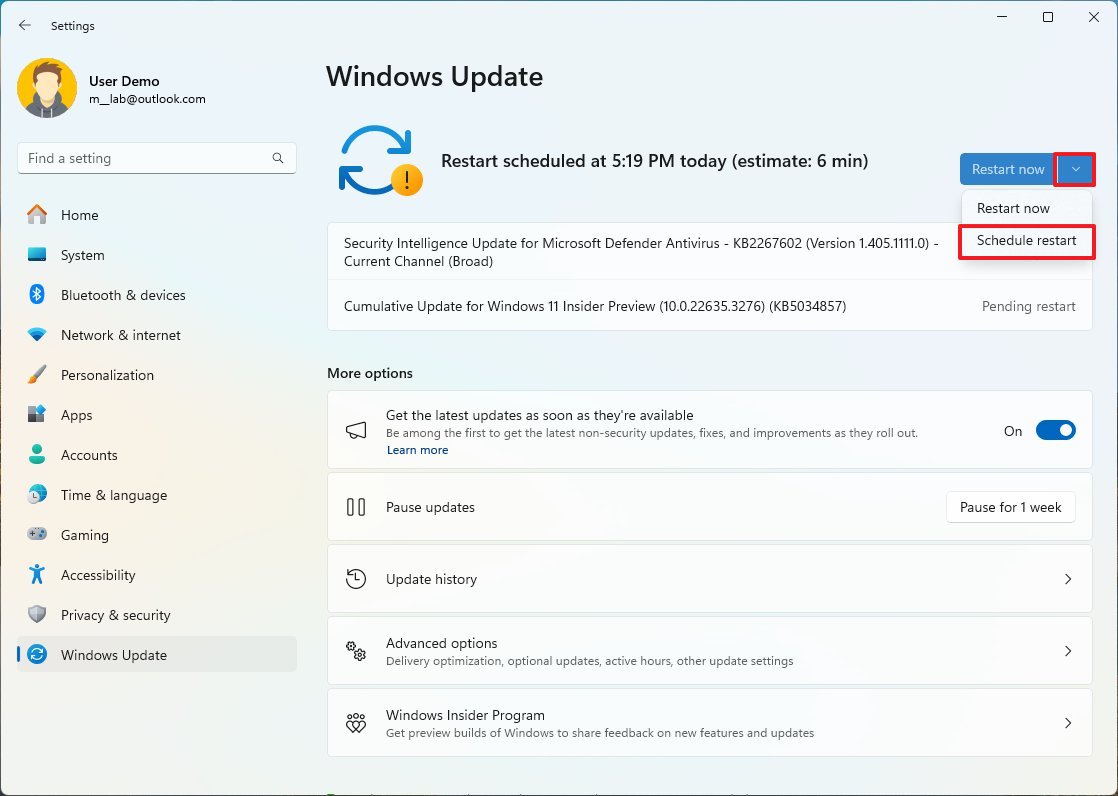
- Quick note: The option is only available when a reboot is already pending.
- Choose the restart schedule.
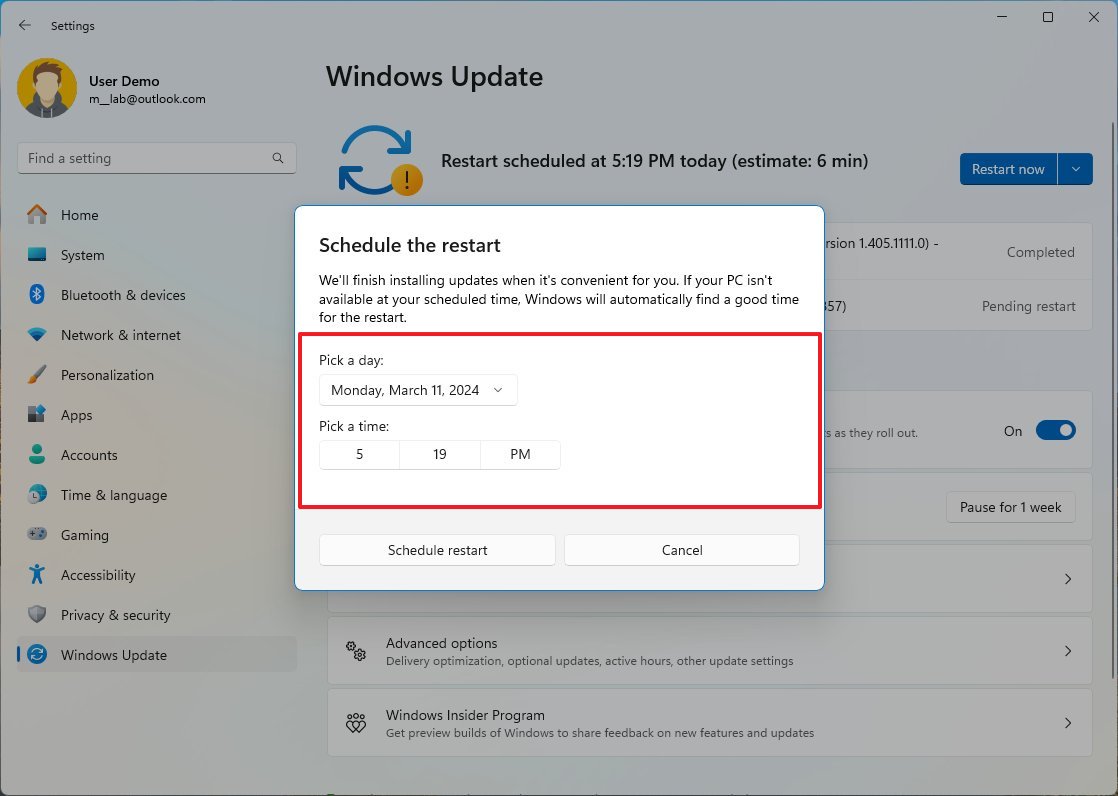
- Click the Schedule restart button.
Once you complete the steps, the computer won't reboot until you specify the schedule in the settings.
How to configure Windows 11 automatic restart deadline from Group Policy
Alternatively, you can use the Local Group Policy Editor to specify a new default schedule that the computer may use to apply new updates automatically. The only caveat is that you need to consider that configuring this option may restart the device during active hours.
To change the deadline to restart the device to apply updates through Group Policy, use these steps:
- Open Start.
- Search for gpedit.msc and click the top result to open the Local Group Policy Editor.
- Navigate the following path: Computer Configuration > Administrative Templates > Windows Update > Legacy Policies
- Double-click the "Specify deadline before auto-restart for update installation" policy on the right side.
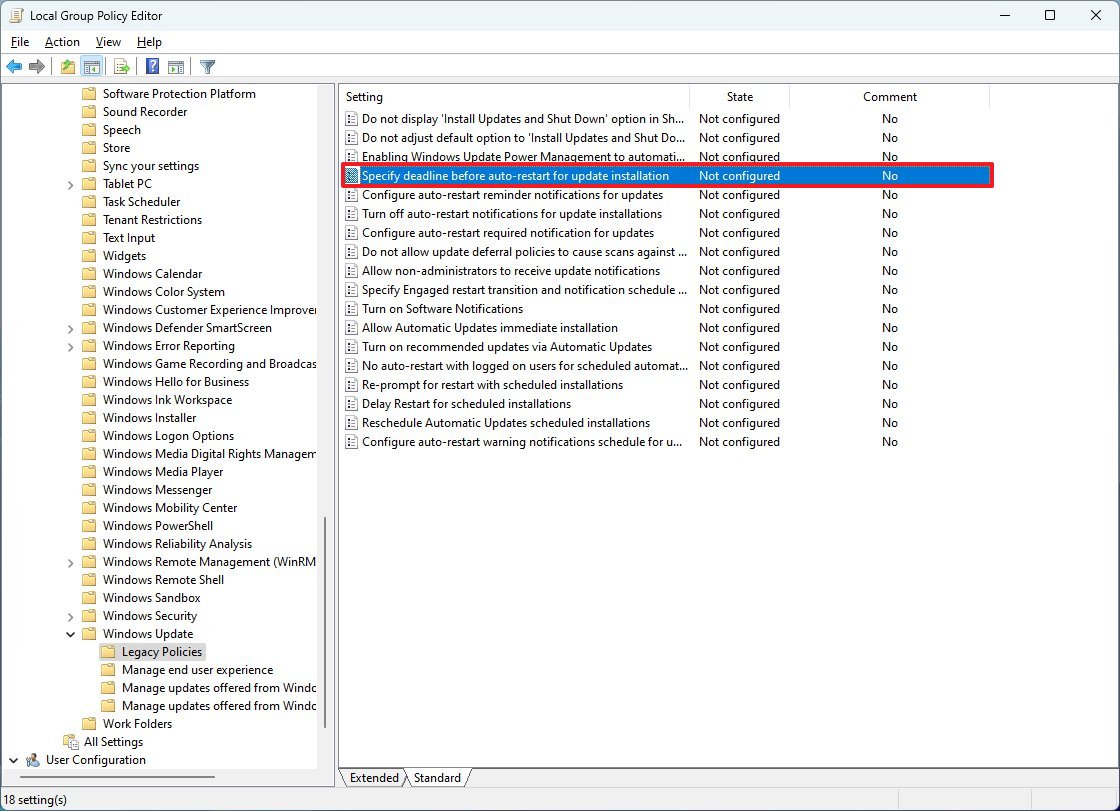
- Quick note: Although the option lasts 30 days, the policy says you can use any number between 2 and 14. Also, you have to ensure that the "No auto-restart with logged-on users for scheduled automatic updates installations" and "Always automatically restart at scheduled time" policies are not enabled for the policy to work.
- Select the Enabled option.
- Under "Options," use the drop-down menu to specify the number of days to wait before your computer restarts automatically to finish installing quality and feature updates.
- Click the Apply button.
- Click the OK button.
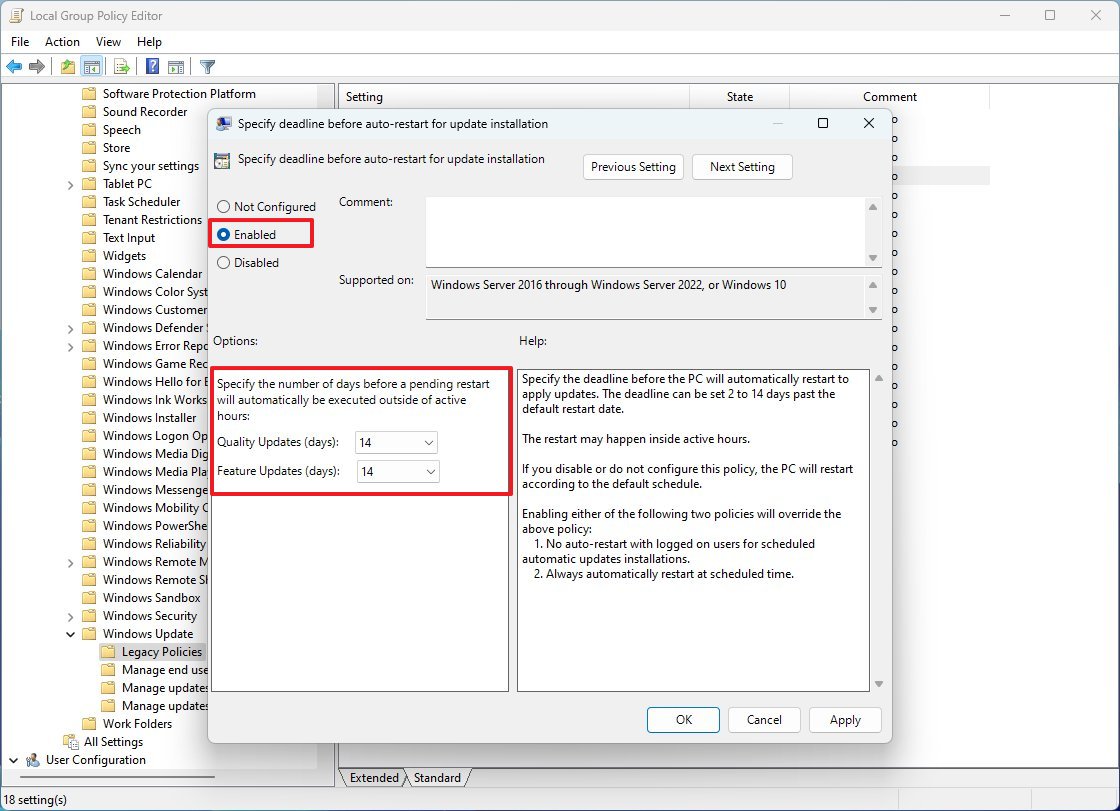
After completing the steps, the computer will reboot automatically on the specified schedule.
If you change your mind, you can revert the changes using the same instructions, but in Step 5, select the "Not Configured" option.
More resources
For more helpful articles, coverage, and answers to common questions about Windows 10 and Windows 11, visit the following resources:
- Windows 11 on Windows Central — All you need to know
- Windows 10 on Windows Central — All you need to know

Mauro Huculak has been a Windows How-To Expert contributor for WindowsCentral.com for nearly a decade and has over 22 years of combined experience in IT and technical writing. He holds various professional certifications from Microsoft, Cisco, VMware, and CompTIA and has been recognized as a Microsoft MVP for many years.
