How to change which folders appear in the Windows 10 Start Menu

The Start Menu coming back with Windows 10 is a big deal for a lot of people. There are a few things you can do to customize your experience, one of which is adding or removing which folders are displayed in there. By default you'll get "File Explorer" and "Settings," but there's more than that on offer.
You just have to know where to find them. Here's what you need to know.
- Click on the Start Menu and open up "Settings."
- Then click on "Personalization."
- In the left hand pane you now want the option for "Start."
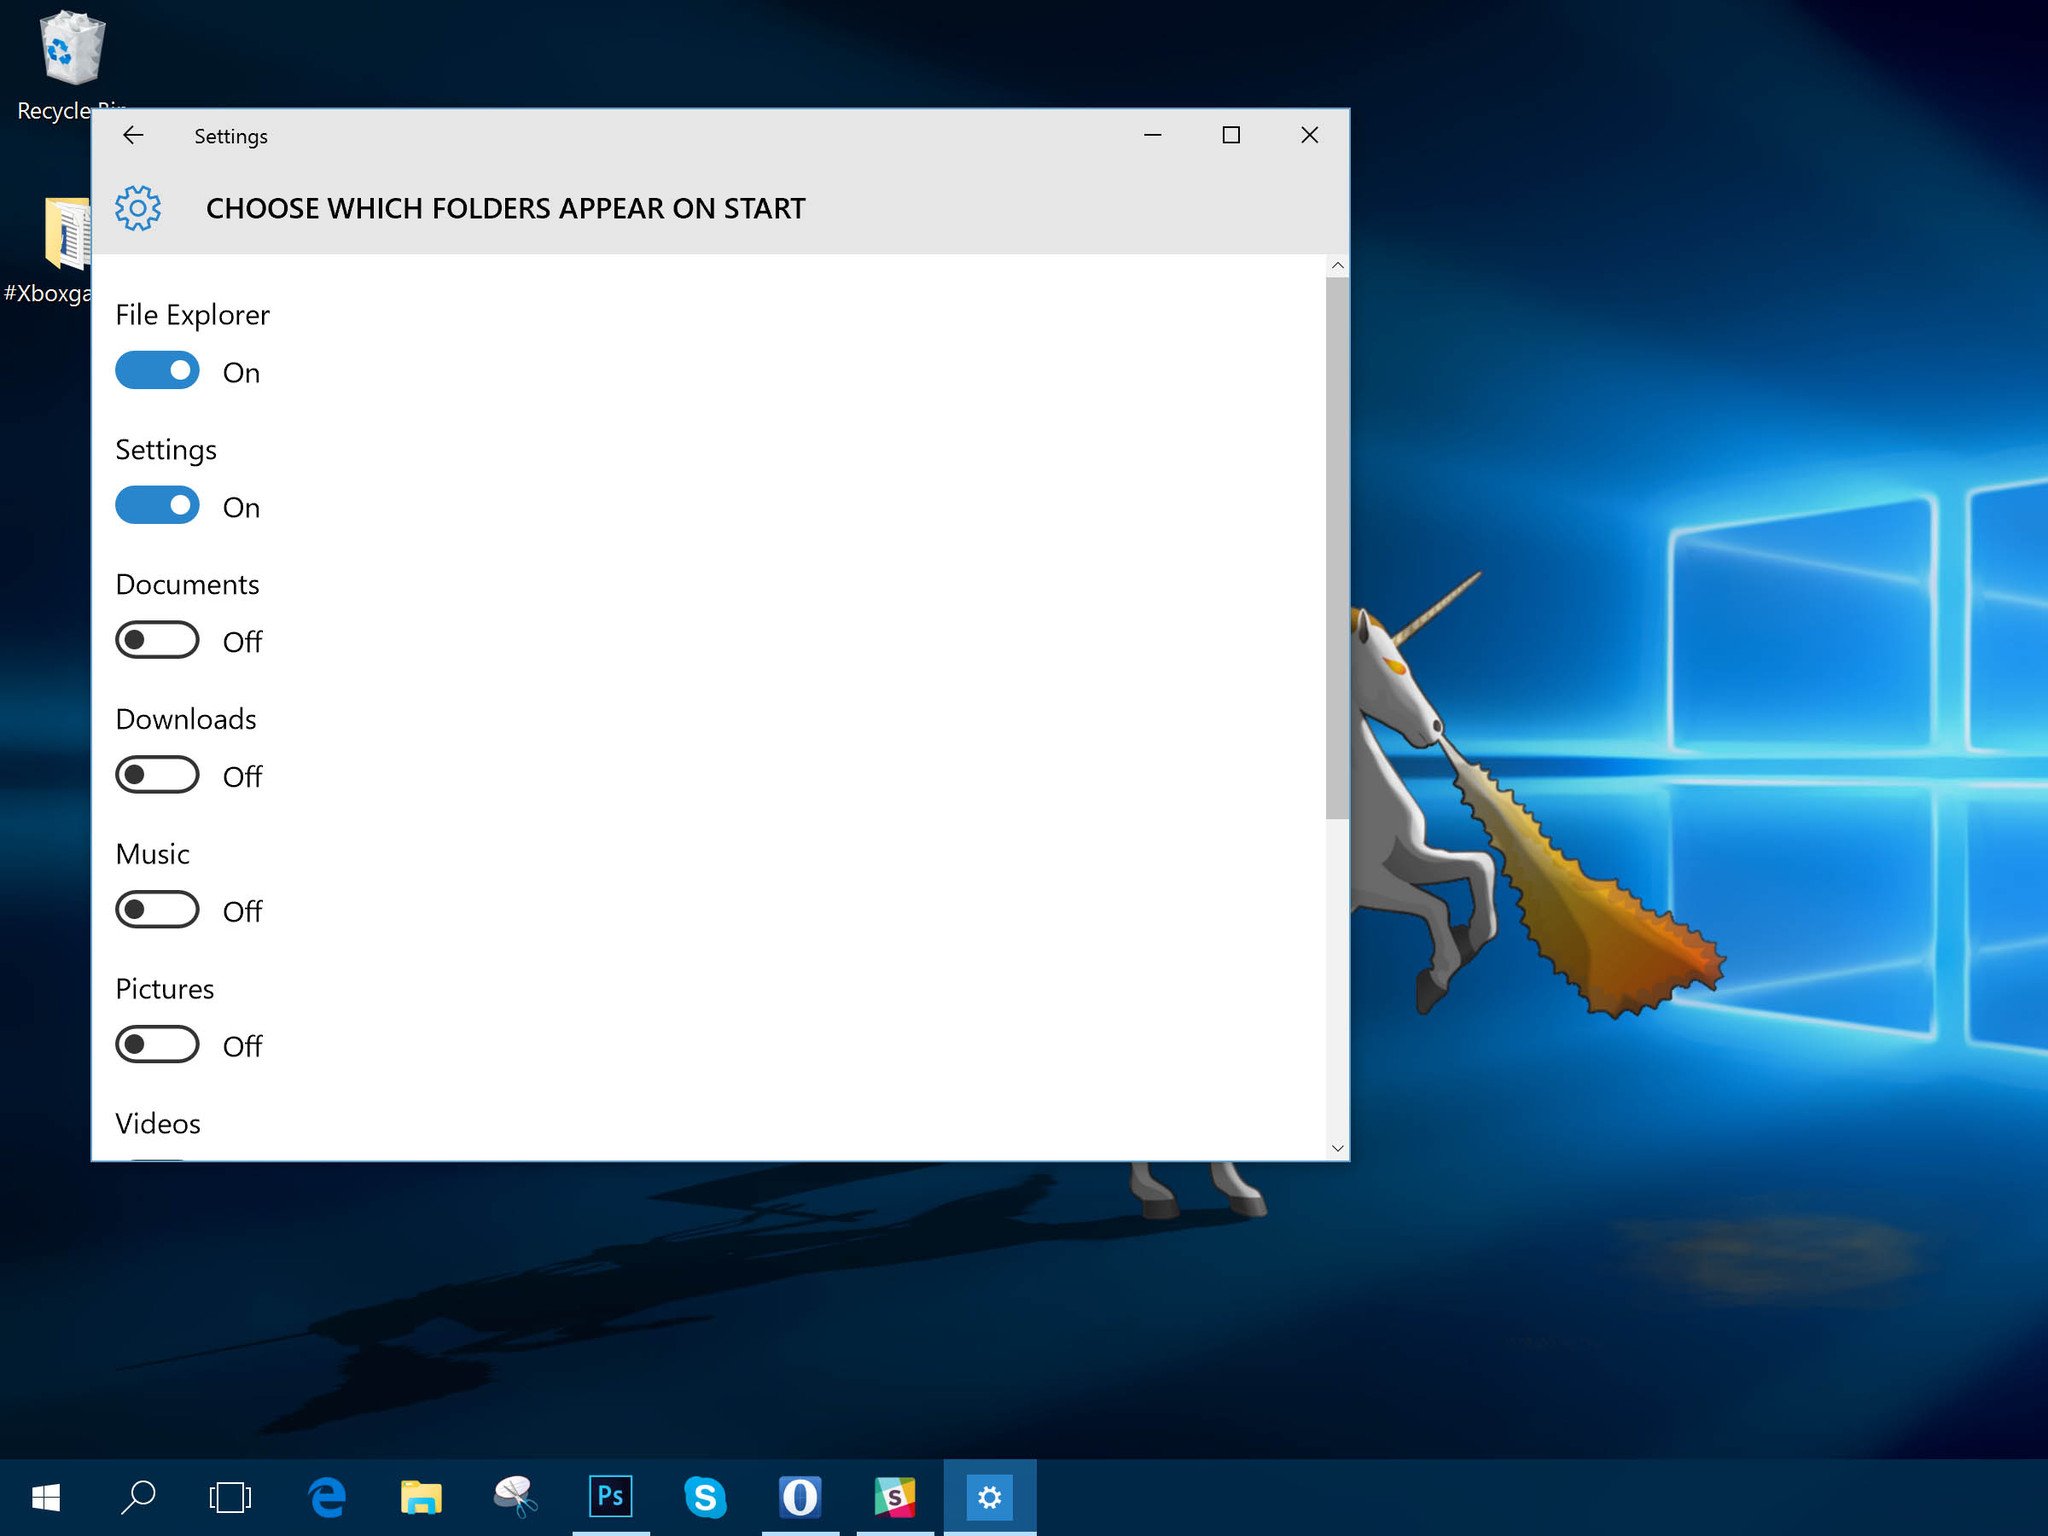
- At the bottom you'll see some text which says "Choose which folders appear on Start." Click on the text.
- You'll now see the list of folders that can be displayed. Set the relevant toggles to on or off depending on what you want to see.
Alternatively you can type "Start settings" into the Cortana search box to get to step 4 directly from the desktop. But it's always good to know where things live.
With these easy steps you can remove Settings or File Explorer if you don't want to see them or add things like Music and Pictures for quick access to your media.
For more Windows 10 tips be sure to drop by our dedicated page here
Get the Windows Central Newsletter
All the latest news, reviews, and guides for Windows and Xbox diehards.

Richard Devine is a Managing Editor at Windows Central with over a decade of experience. A former Project Manager and long-term tech addict, he joined Mobile Nations in 2011 and has been found on Android Central and iMore as well as Windows Central. Currently, you'll find him steering the site's coverage of all manner of PC hardware and reviews. Find him on Mastodon at mstdn.social/@richdevine
