How to change a Windows 10 user account type and why you might want to
If you have to extend or restrict user control on a device, you can quickly complete this task by changing the account type, and here's how on Windows 10.
How to change user account type using Control Panel
To change an account type using Control Panel, use these steps:
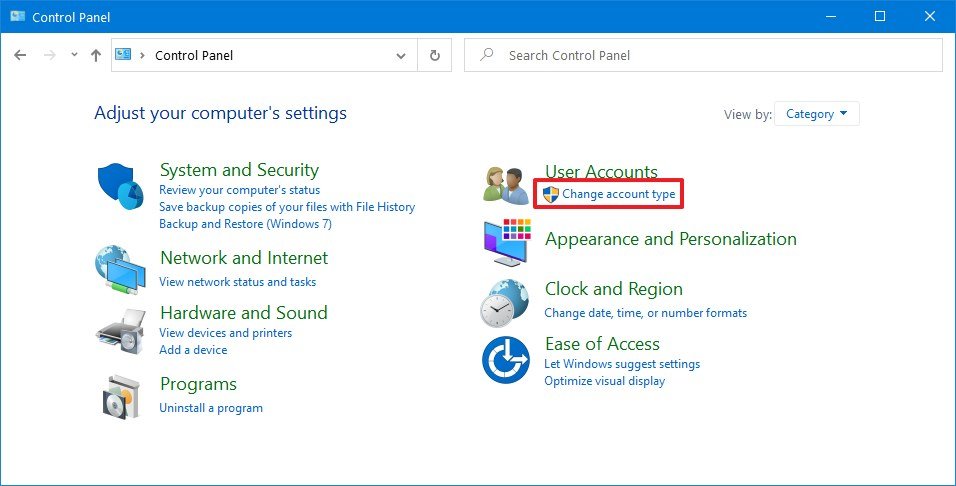
- Open Control Panel.
- Under the "User Accounts" section, click the Change account type option.

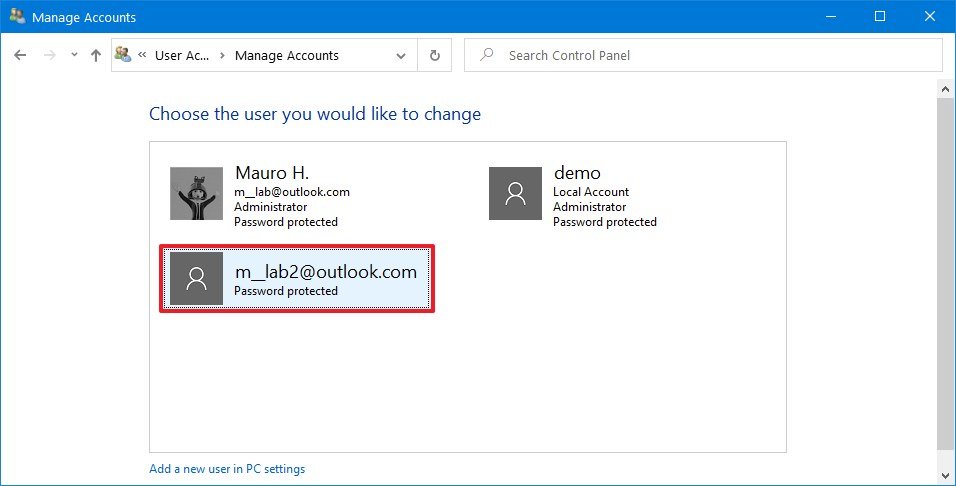
- Select the account that you want to change.

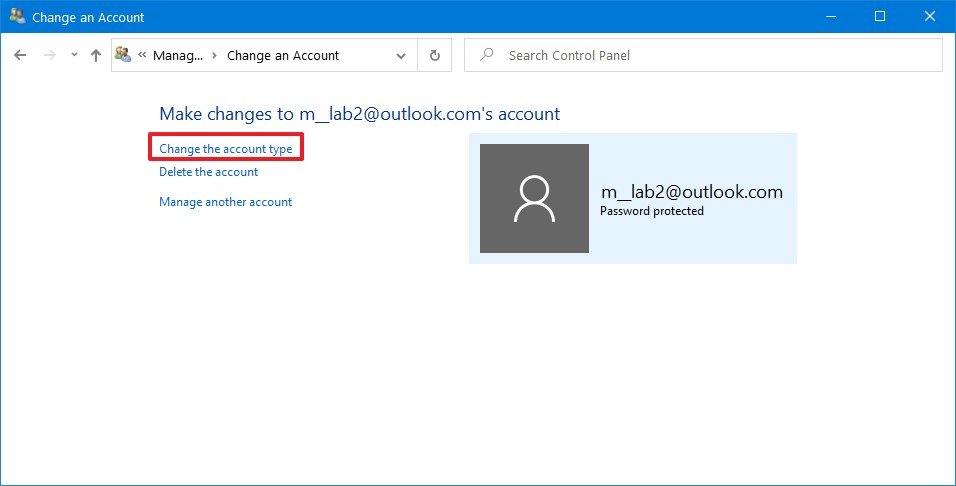
- Click the Change the account type option.

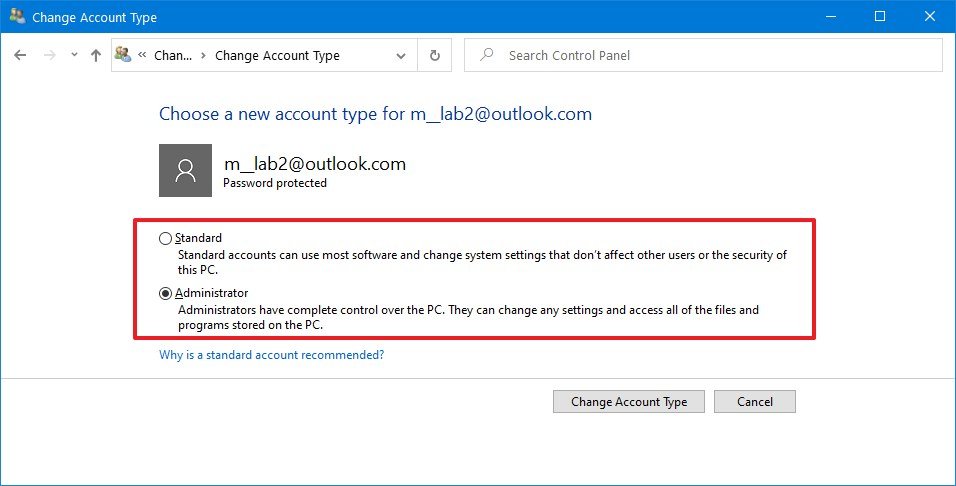
- Select either Standard or Administrator as required.

- Click the Change Account Type button.
After you complete the steps, the next time the user signs in to the account, it'll be limited to the permissions allowed by the user group that you specified.
Get the Windows Central Newsletter
All the latest news, reviews, and guides for Windows and Xbox diehards.
Mauro Huculak has been a Windows How-To Expert contributor for WindowsCentral.com for nearly a decade and has over 15 years of experience writing comprehensive guides. He also has an IT background and has achieved different professional certifications from Microsoft, Cisco, VMware, and CompTIA. He has been recognized as a Microsoft MVP for many years.

