How to change boot menu list time on Windows 10
Do you have a dual-boot system? If so, you can change the default boot manager timer, and here's how.
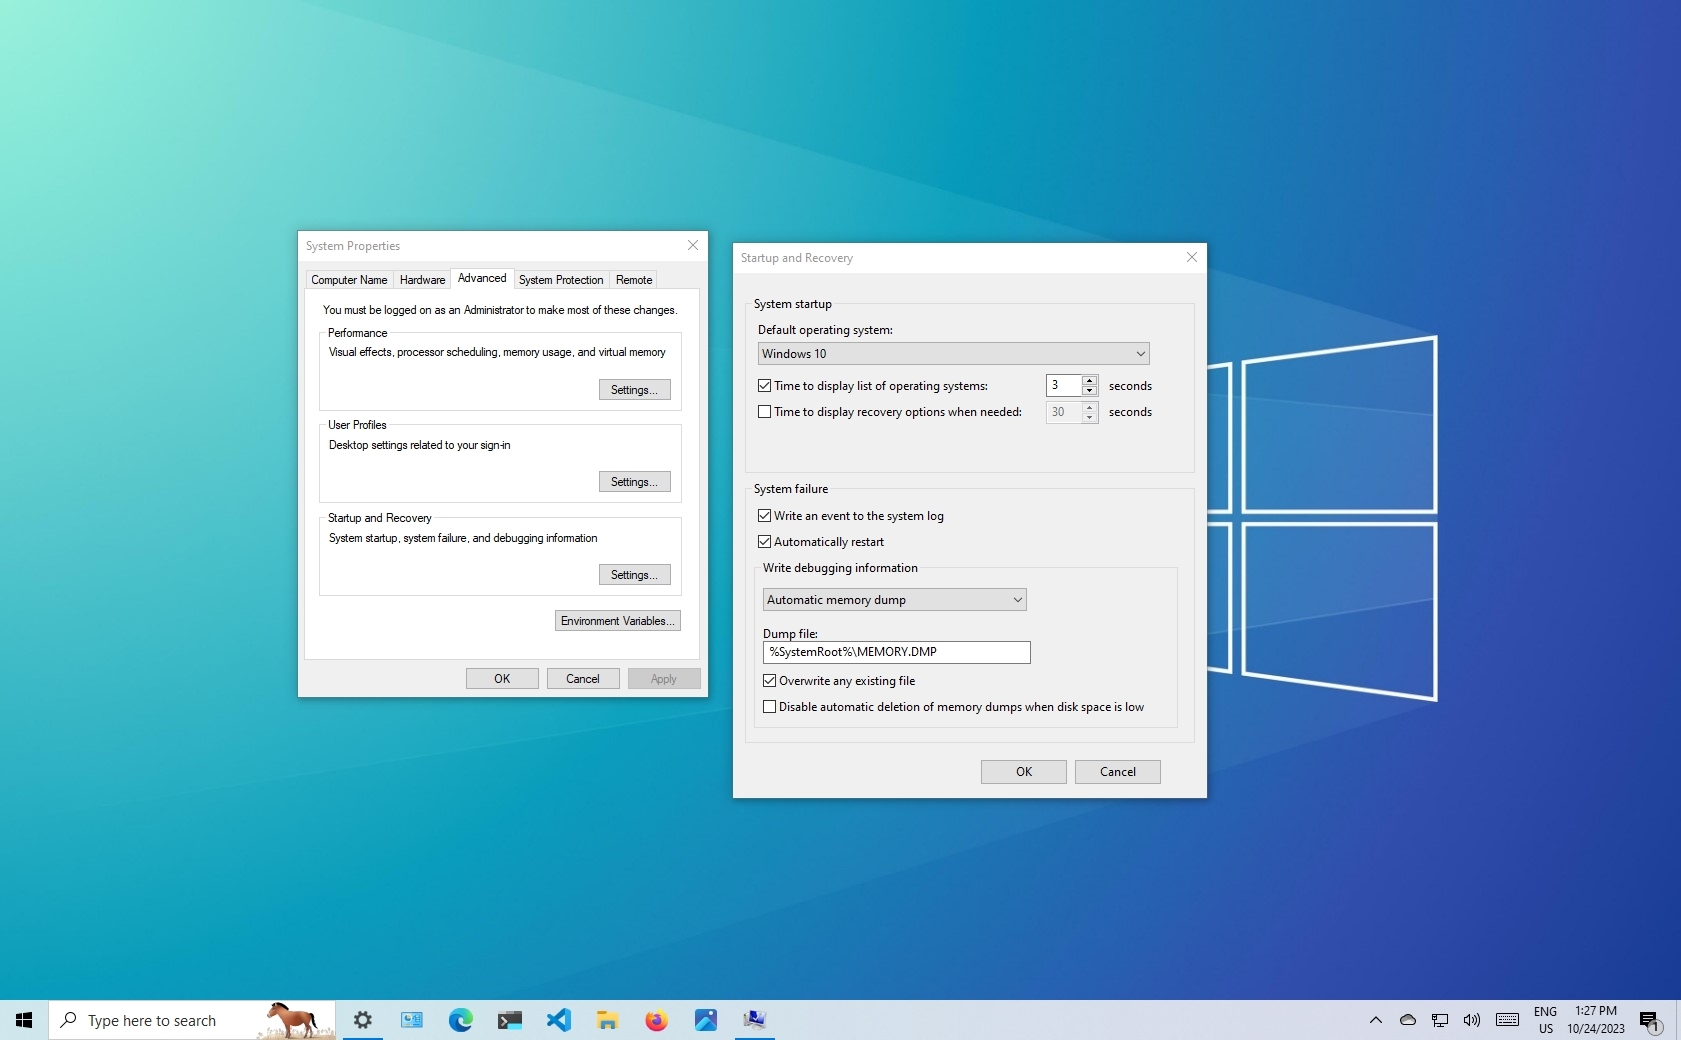
On Windows 10, the system can detect another installation in the device. When this happens, the boot manager will appear on startup with a list of the available operating systems. If no interaction occurs during the first 30 seconds, the default installation (the one at the top) will start automatically.
While this is a convenient feature to switch between different systems using a single hardware configuration, if you need more time to interact with the boot menu, or you need to start the default setup a little faster on a dual-boot system, Windows 10 allows you to change the timeout to a different value to suit your situation.
In this how-to guide, we will walk you through the steps to increase or decrease the number of seconds the boot menu appears before starting the default operating system.
How to change boot menu timeout from Settings
To change the boot menu timeout on Windows 10, use these steps:
- Open Settings.
- Click on System.
- Click on About.
- Under the "Related settings" section, click the "Advanced system settings" option.
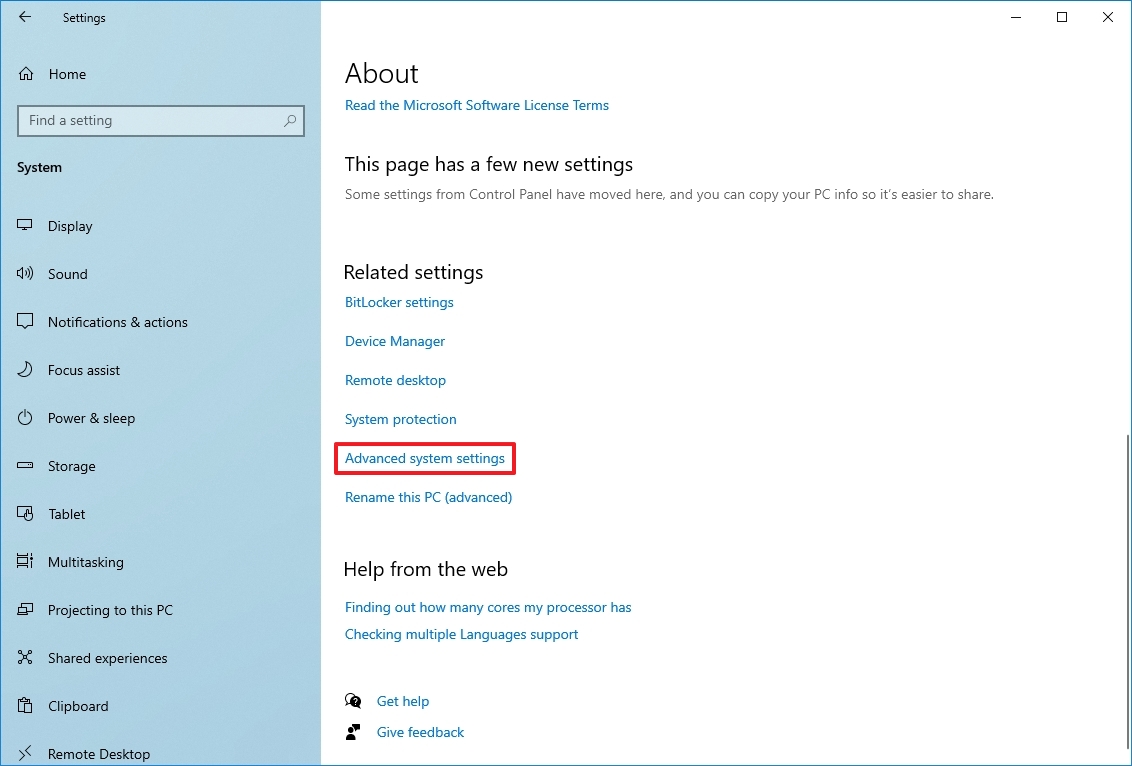
- Click the Advanced tab.
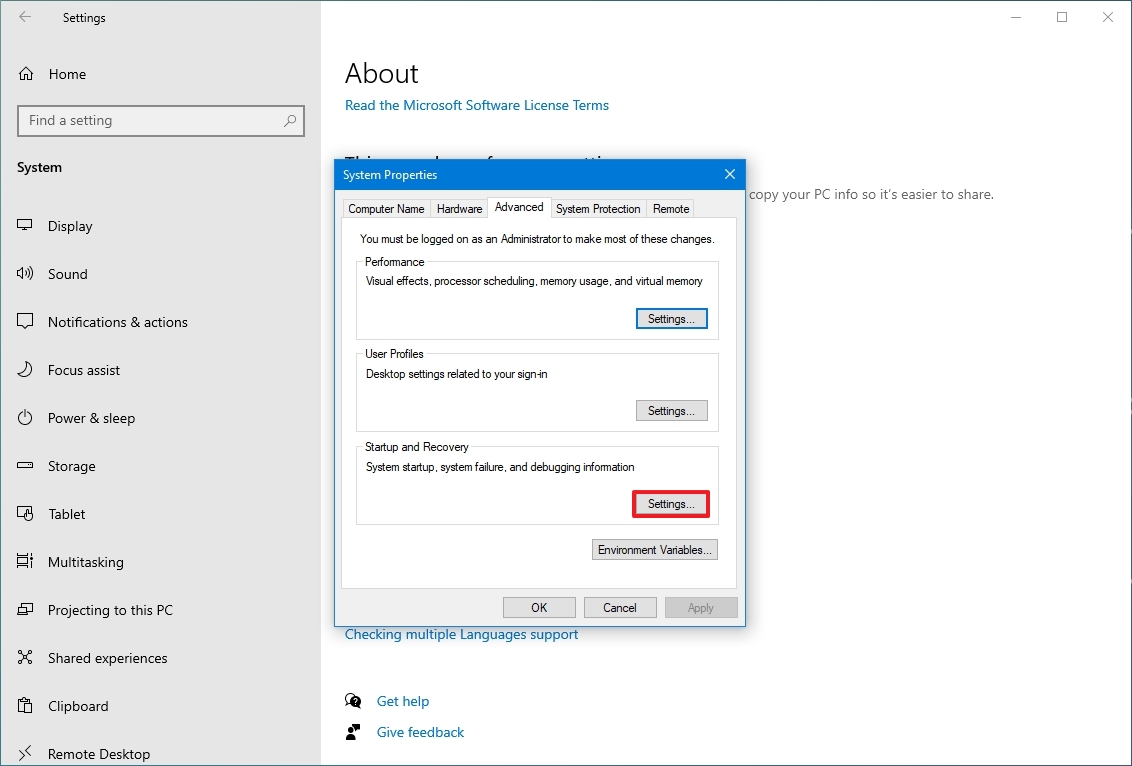
- Under the "Startup and Recovery" section, click the Settings button.
- Under the "System startup" section, use the "Default operating system" drop-down menu and select which operating system should be the default pick after the time expires in the boot menu.
- Check the "Time to display list of operating systems" option.
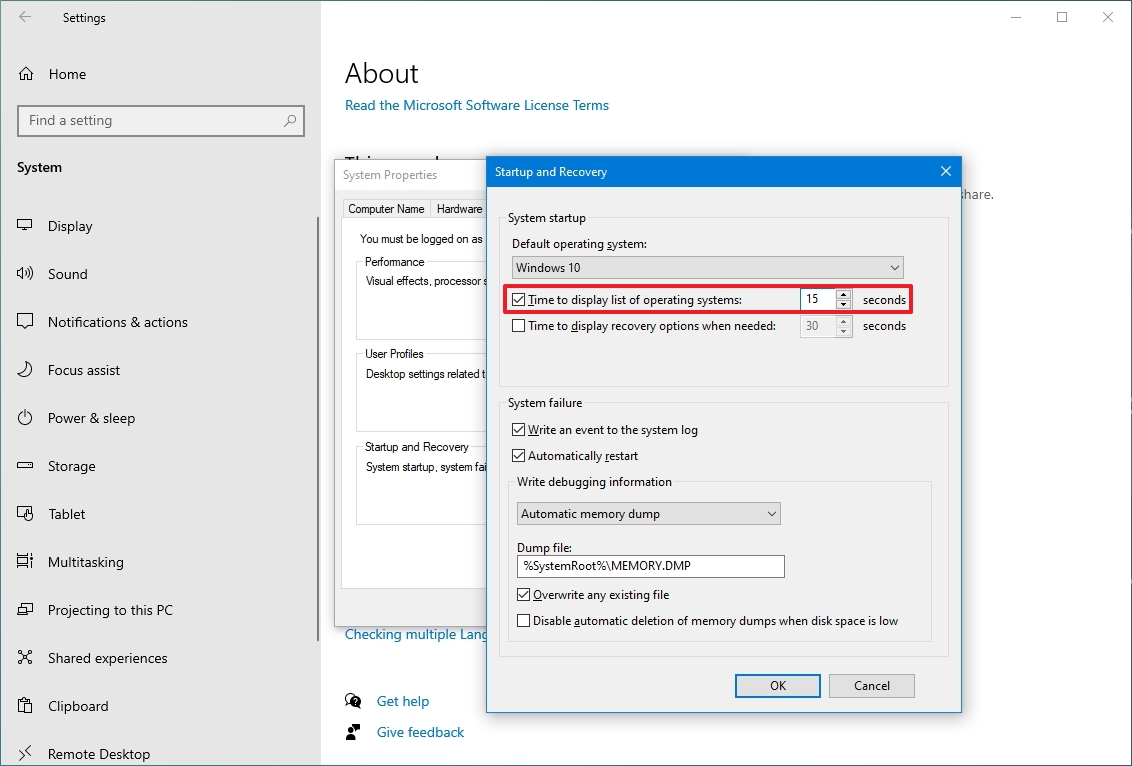
- Specify the time (in seconds) before starting the default setup.
- Click the OK button.
Once you complete the steps, the boot menu on systems with two or more operating systems will time out according to your configuration.
How to change boot menu timeout from System Configuration
To increase or decrease the timeout for the startup menu in a dual-boot system, use these steps:
- Open Start.
- Search for System Configuration and click the top result to open the legacy MSConfig settings.
- Click the Boot tab.
- In the "Timeout" text box, specify the time in seconds before timing out the boot menu and starting the default setup.
- Check the "Make all boot settings permanent" option.
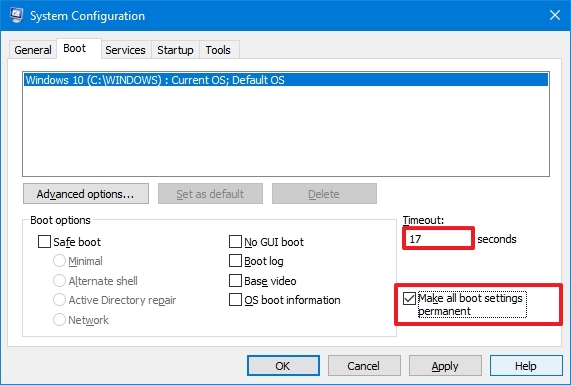
- Click the Apply button.
- Click the OK button.
After you complete the steps, the boot manager will reflect the new list time you specified.
Get the Windows Central Newsletter
All the latest news, reviews, and guides for Windows and Xbox diehards.
How to change boot menu timeout from Command Prompt
To adjust the countdown timer in the boot menu with commands, use these steps:
- Open Start.
- Search for Command Prompt, right-click the top result, and select the Run as administrator option.
- Type the following command to change the timeout setting for the boot menu and press Enter: bcdedit /timeout NEW-TIME-SECONDS
In the command, replace the NEW-TIME-SECONDS with the number of seconds you want to use during the boot process. This example decreases the timeout to three seconds: bcdedit /timeout 3
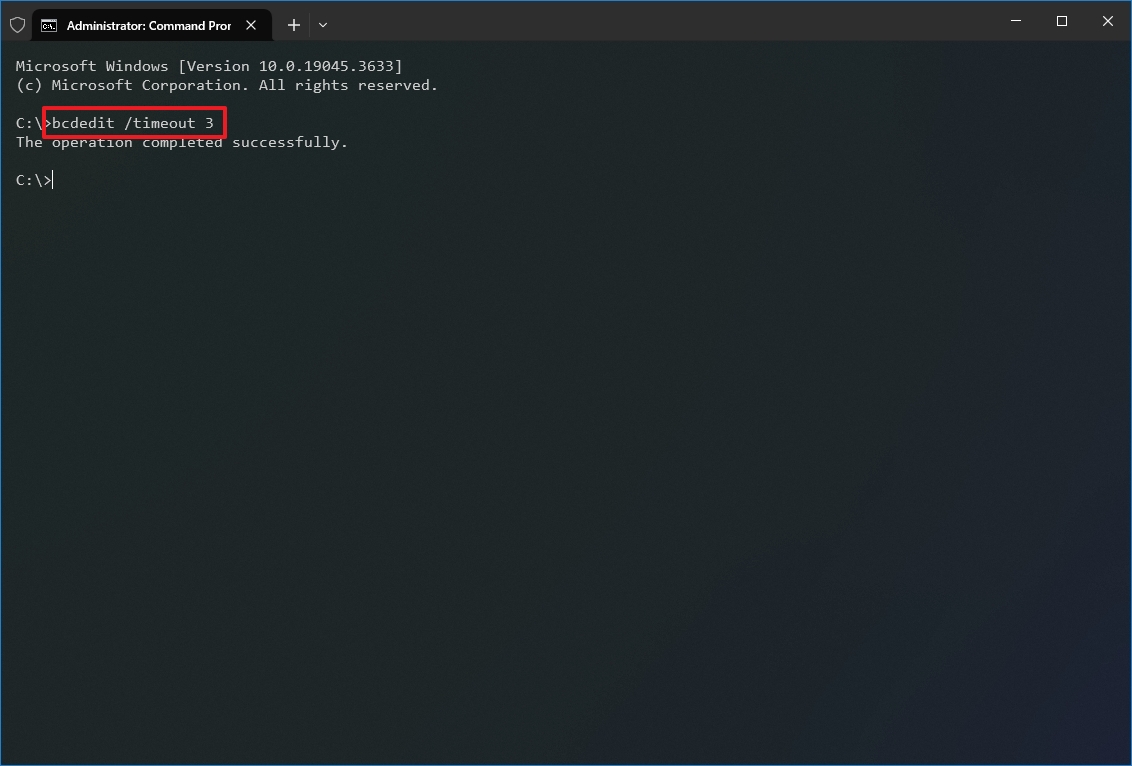
Once you complete the steps, the list time will change to the number of seconds you specified in the command.
How to change boot menu timeout from Advanced options
To alter the boot menu timeout with the Advanced options on a dual-boot system, use these steps:
- Turn on the computer.
- Click the "Change defaults or choose other options" setting in the boot menu.
- Quick tip: If the menu is set to a low timeout number, you can quickly use the arrow buttons to cancel the countdown and select the option.
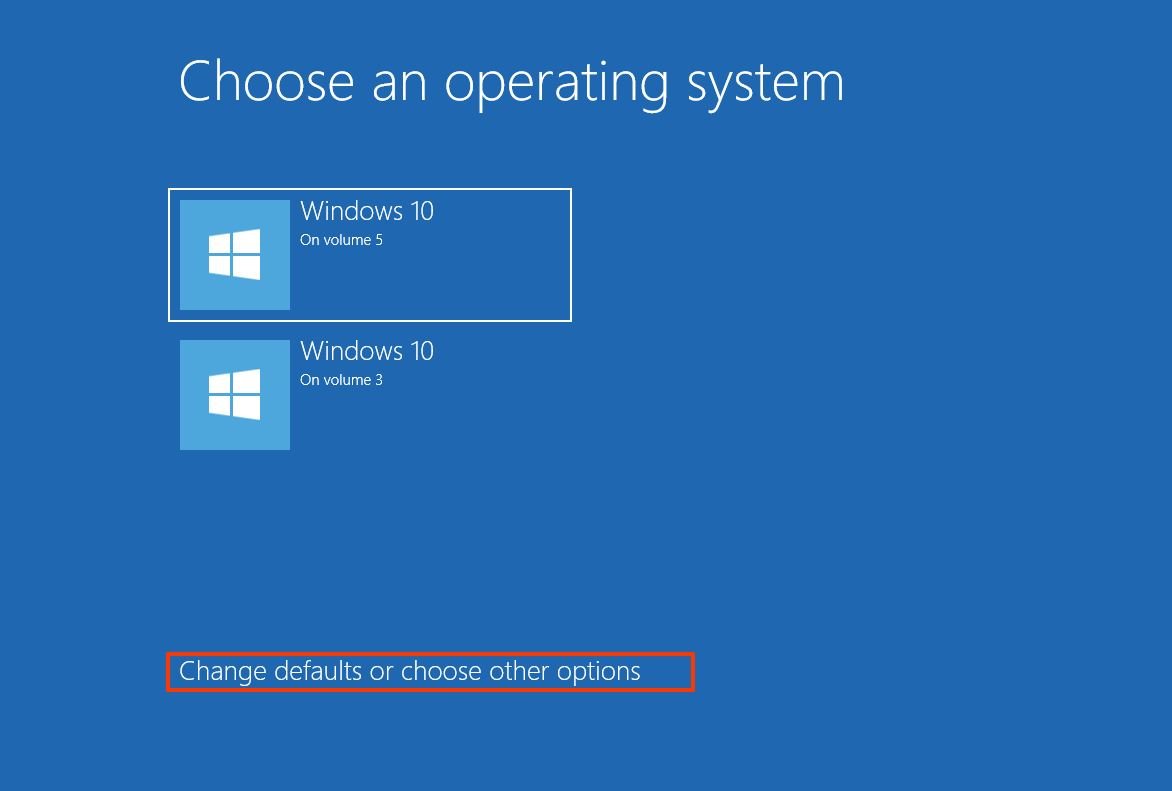
- Click the "Change the time" button.
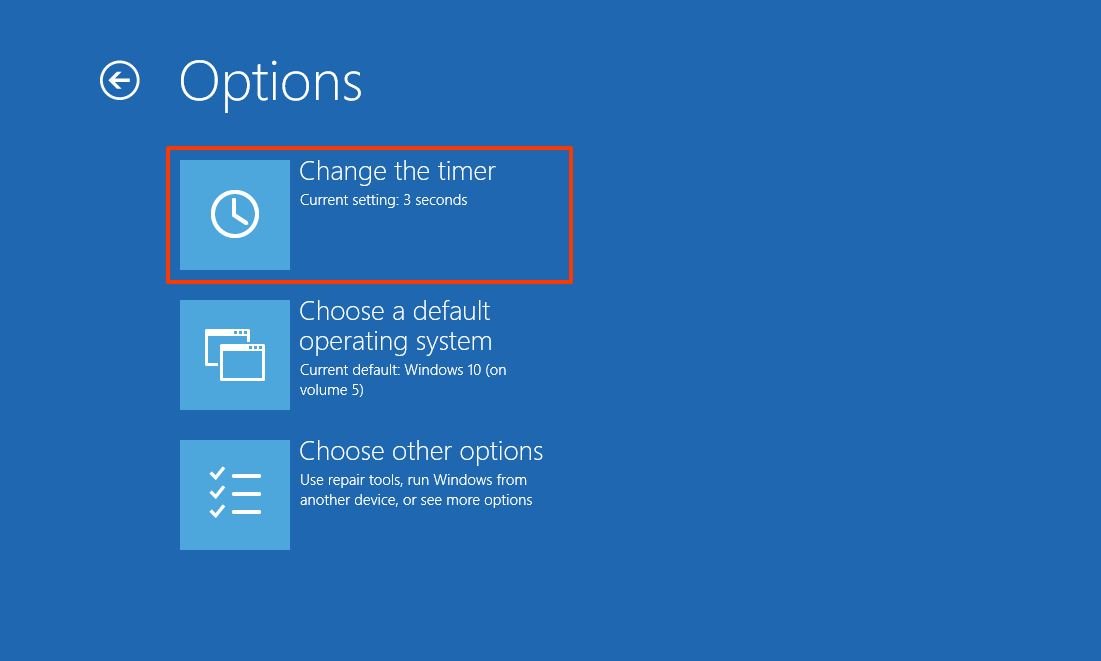
- Select one of the available times — for example, 5 or 30 seconds.
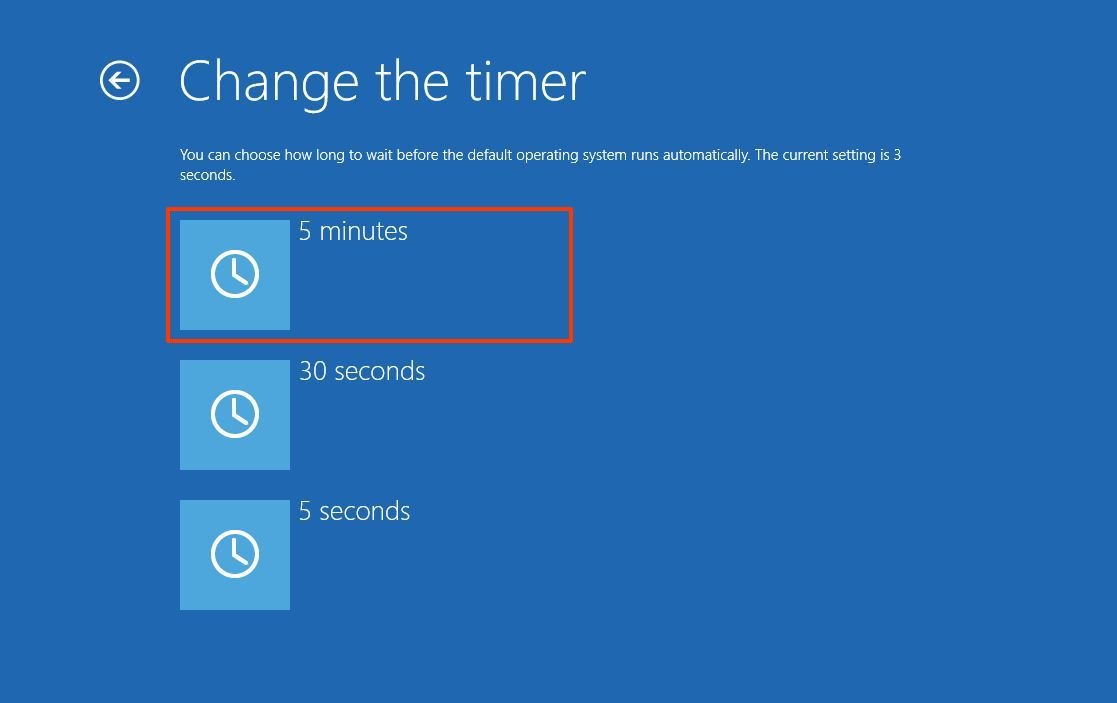
After you complete the steps, the next time the computer boots, the menu will reflect the timeout you selected. If you want to set a more specific time, you should use one of the available options outlined above.
More resources
For more helpful articles, coverage, and answers to common questions about Windows 10 and Windows 11, visit the following resources:
Mauro Huculak has been a Windows How-To Expert contributor for WindowsCentral.com for nearly a decade and has over 15 years of experience writing comprehensive guides. He also has an IT background and has achieved different professional certifications from Microsoft, Cisco, VMware, and CompTIA. He has been recognized as a Microsoft MVP for many years.

