How to change Windows 10's Game DVR Captures folder location
You can change the Windows 10 Game DVR feature's Captures folder location to avoid running out of space on your system drive. Here's how.
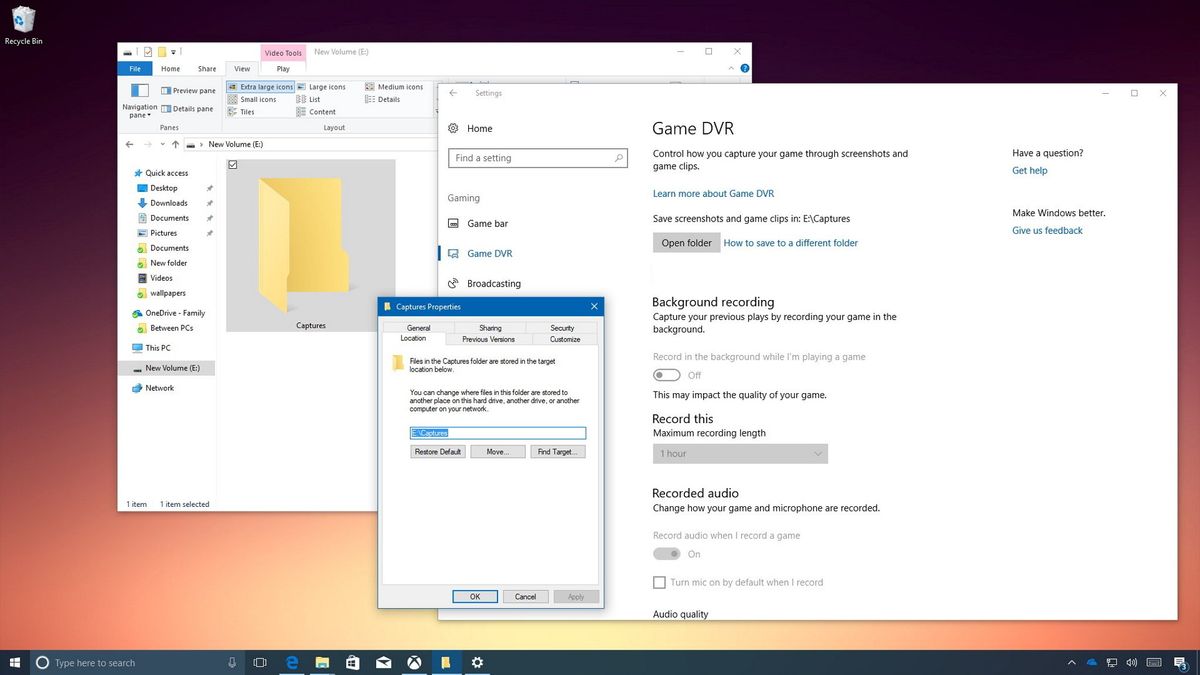
On Windows 10, Game DVR is a feature that allows you to quickly and easily capture the best moments in your games by recording clips and taking screenshots, which you can then share on Twitter, Facebook, and other social networks.
The only caveat is that by default Game DVR saves all your screenshots and clips in the Captures folder inside Videos in your account, and Windows 10 doesn't include an option in Settings, or in the Xbox app, to change this default location.
If you rarely play games on your PC, you probably don't need to worry, but gamers who often record clips will notice that their system drives will fill up quickly, especially people who run Windows 10 on a Solid-State Drive (SSD), which are quite fast but also expensive and limited on capacity.
Fortunately, it's possible to change and move the content of the Captures folder to another location to prevent running out of space on your primary system drive using this simple workaround.
In this Windows 10 guide, we walk you through the steps to change and move the Captures folder that Game DVR uses to save your clips and screenshots by default to another drive location.
How to change the Captures folder for Windows Game DVR
In order to change the default location where your game clips and screenshots are saved on Windows 10, use the following steps:
- Open File Explorer.
- Click on This PC.
- Browse the following path:
C:\Users\%username%\Videos - Right-click the Captures folder and select Properties.
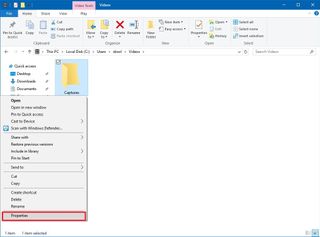
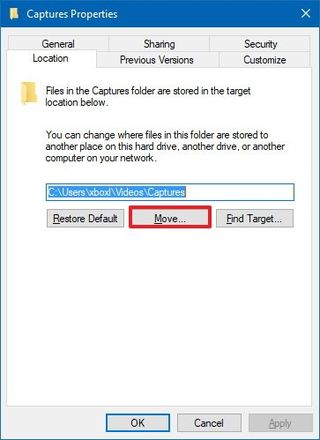
- Click the on the Location tab.
- Click the Move button.
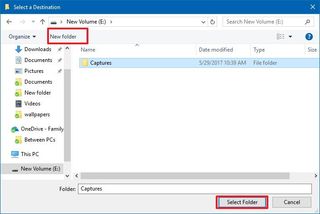
- Browse to the new location to store your Captures folder.
- On the top-left corner, click the New folder button.
- Name the folder Captures and press Enter.
- Select the newly created folder, and click Select Folder.
- Quick Tip: Avoid selecting the root of a drive (for example, E:), as you will get an error message trying to restore your default settings in the future. In addition, using the default Game DVR settings, it's also possible to select a network share folder as the new location, if you have a network-attached storage (NAS) or a computer in your local network with more available storage. While this works over a Wi-Fi connection, you'll get better performance using an Ethernet (wired) network connection.
- Click Apply.
- Click Yes to confirm the move.
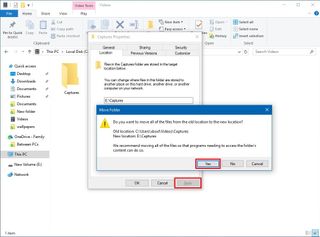
- Click OK.
Using these instructions, you're only changing and moving the Captures folder, and it's not necessary to relocate the Videos folder and all its content, which you may still want to keep in the same location. Once you complete the steps, Game DVR will automatically continue to save your screenshots and clips in the new location without additional configurations in Settings or in the Xbox app.
Get the Windows Central Newsletter
All the latest news, reviews, and guides for Windows and Xbox diehards.
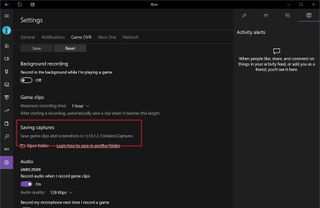
You can quickly confirm that Game DVR is using the new location on Settings > Gaming > Game DVR, and then checking the folder path for screenshots and games clips, which now should reflect the new location. Or in the Xbox app, you can go to Settings > Game DVR, and check the location for Saving captures.
How to restore Game DVR Captures folder location settings
At any time, you can revert the changes to restore the default Game DVR settings using the following steps:
- Open File Explorer.
- Browse to the Captures folder location.
- Right-click the Captures folder and select Properties.
- Click the Location tab.
- Click the Restore Defaults button.
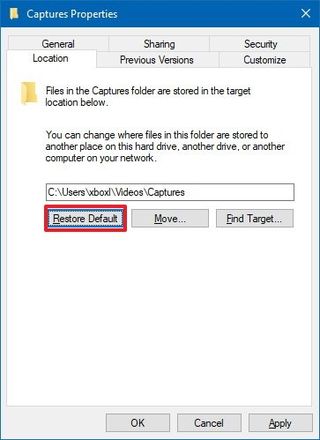
- Click Apply.
- Click Yes to recreate the folder in the old location.
- Click Yes to move the content of the Captures folder to the old location, and wait a few moments.
- Click OK.
After you've completed the steps, the Captures folder will return with all its content to its default location: C:\Users\%username%\Videos\Captures.
More Windows 10 resources
For more help articles, coverage, and answers to common questions about Windows 10, visit the following resources:
- Windows 10 on Windows Central – All you need to know
- Windows 10 help, tips, and tricks
- Windows 10 forums on Windows Central
Mauro Huculak has been a Windows How-To Expert contributor for WindowsCentral.com for nearly a decade and has over 15 years of experience writing comprehensive guides. He also has an IT background and has achieved different professional certifications from Microsoft, Cisco, VMware, and CompTIA. He has been recognized as a Microsoft MVP for many years.
