How to be more productive using Desktops on Windows 11
You can organize and separate your work using virtual desktops, and in this guide, you will learn how on Windows 11.
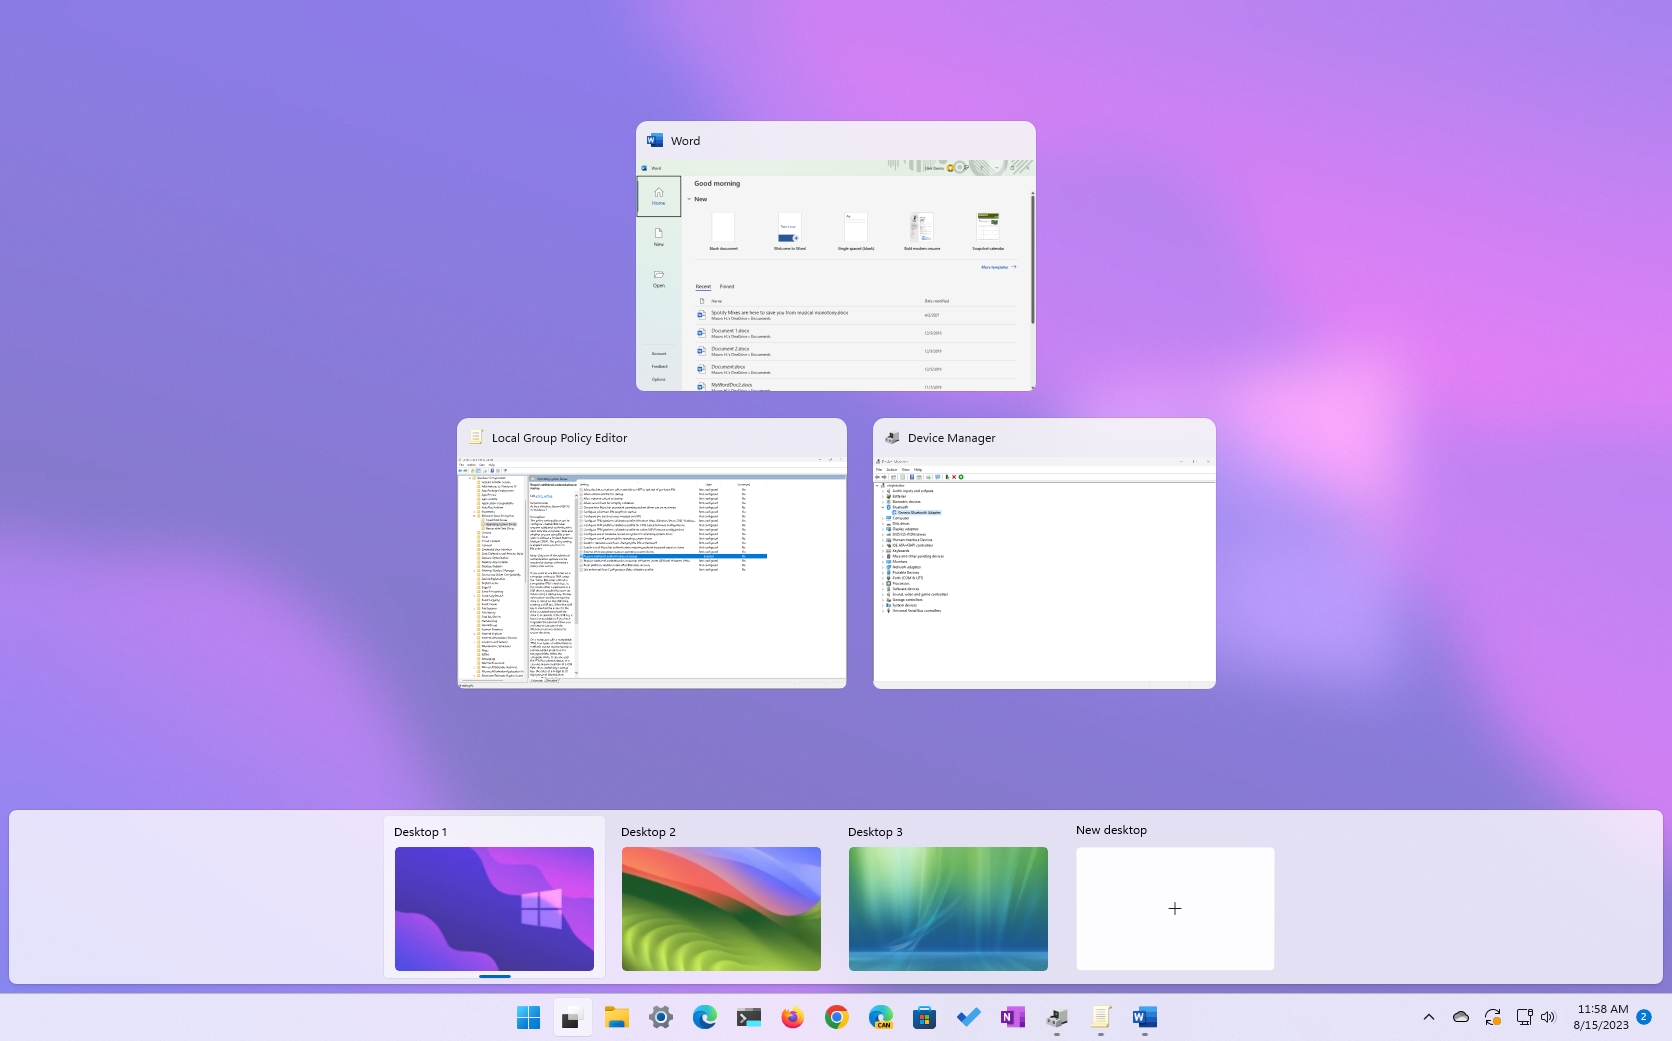
On Windows 11, "Desktops" is the new name for "Virtual Desktops," a feature that allows you to organize and group your tasks more meaningfully to help you be a little more productive. Typically, this is a handy feature to expand the screen's real state when you only have one monitor. However, even with a multiple-monitor setup, you can use Desktops to create different virtual spaces to separate your work, personal, and gaming areas.
This how-to guide will walk you through the steps to start with Desktops to group your tasks on different virtual spaces to be more organized and productive on Windows 11.
How to create desktop on Windows 11
To create a new desktop on Windows 11, use these steps:
- Click the Task View button.
- Quick note: You can also hover over the "Task View" button to access the view, or you can use the "Windows key + Tab" keyboard shortcut.
- Click the New desktop (+) button on the right side.
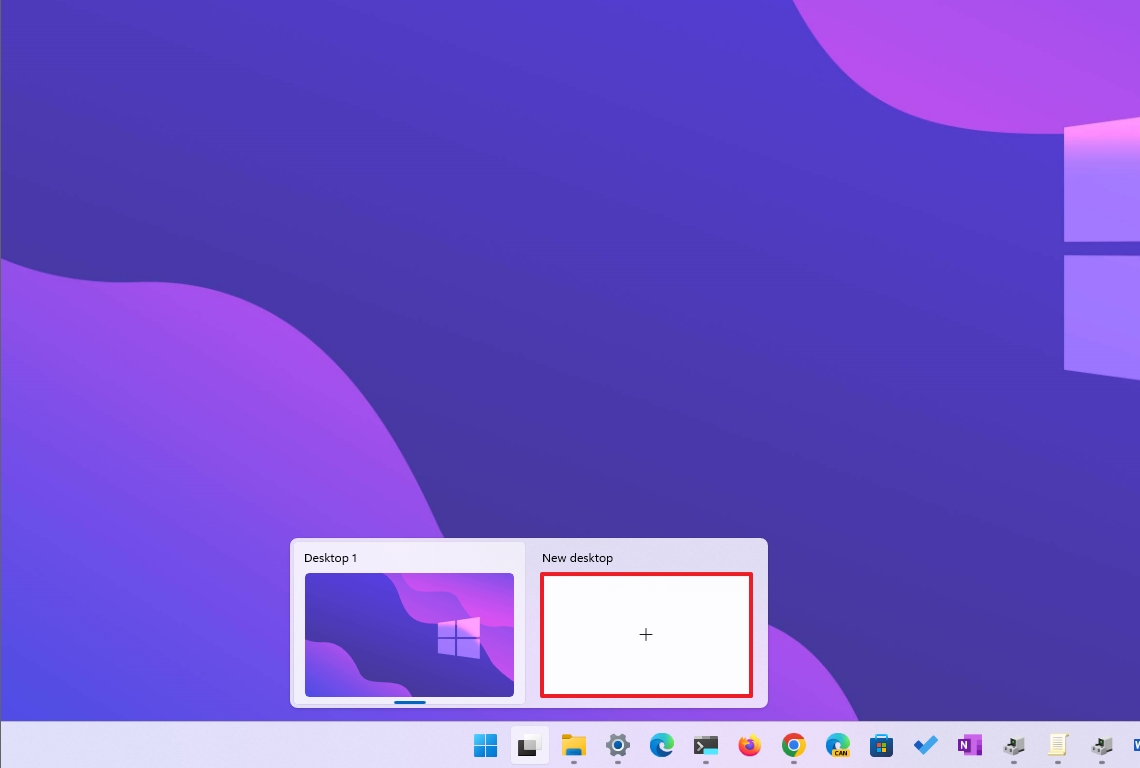
- Repeat steps 1 and 2 to create as many desktops as you need.
Once you complete the steps, you can start grouping your work into different spaces. On Windows 11, you can create as many desktops as you need. They will remain active (even after restarting the device) until you close them.
How to customize desktops on Windows 11
On Windows 11, you can customize Desktops in various ways. You can rename the virtual desktop to anything that makes sense to you. It's possible to change the background image on each desktop. And you can arrange the virtual spaces in any order.
Rename
To rename a Windows 11 Desktop, use these steps:
Get the Windows Central Newsletter
All the latest news, reviews, and guides for Windows and Xbox diehards.
- Click the Task View button.
- Right-click the desktop and select the Rename option.
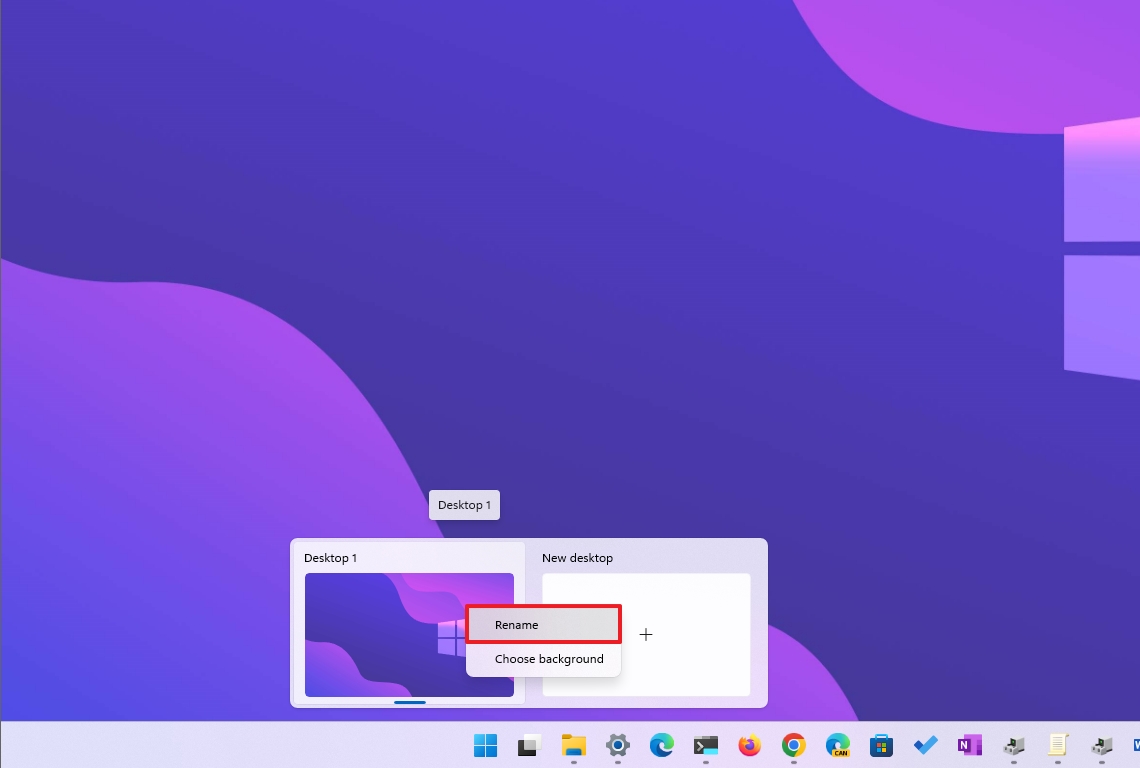
- Confirm the new name and press Enter.
After you complete the steps, the virtual space will refresh the new name.
Change background
To apply a different background image to each desktop, use these steps:
- Click the Task View button.
- Right-click the desktop and select the Change background option.
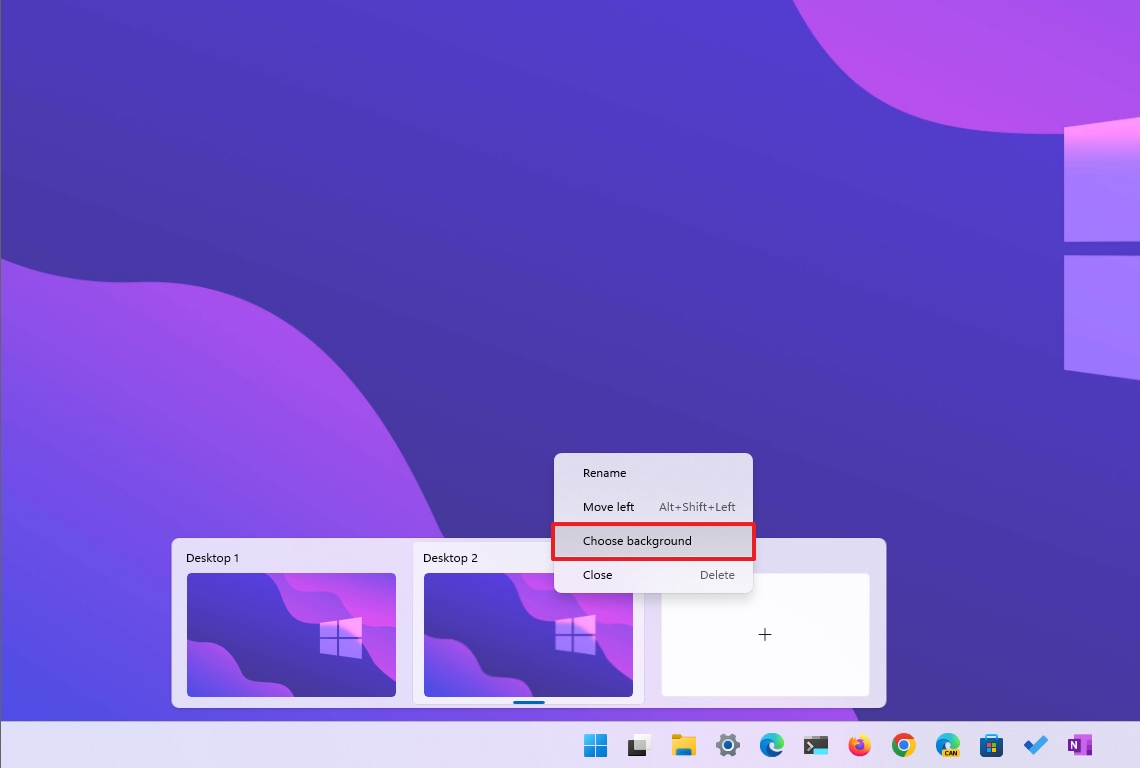
- In the "Background" page, use the "Personalize your desktop" setting to select a background option — for example, Picture.
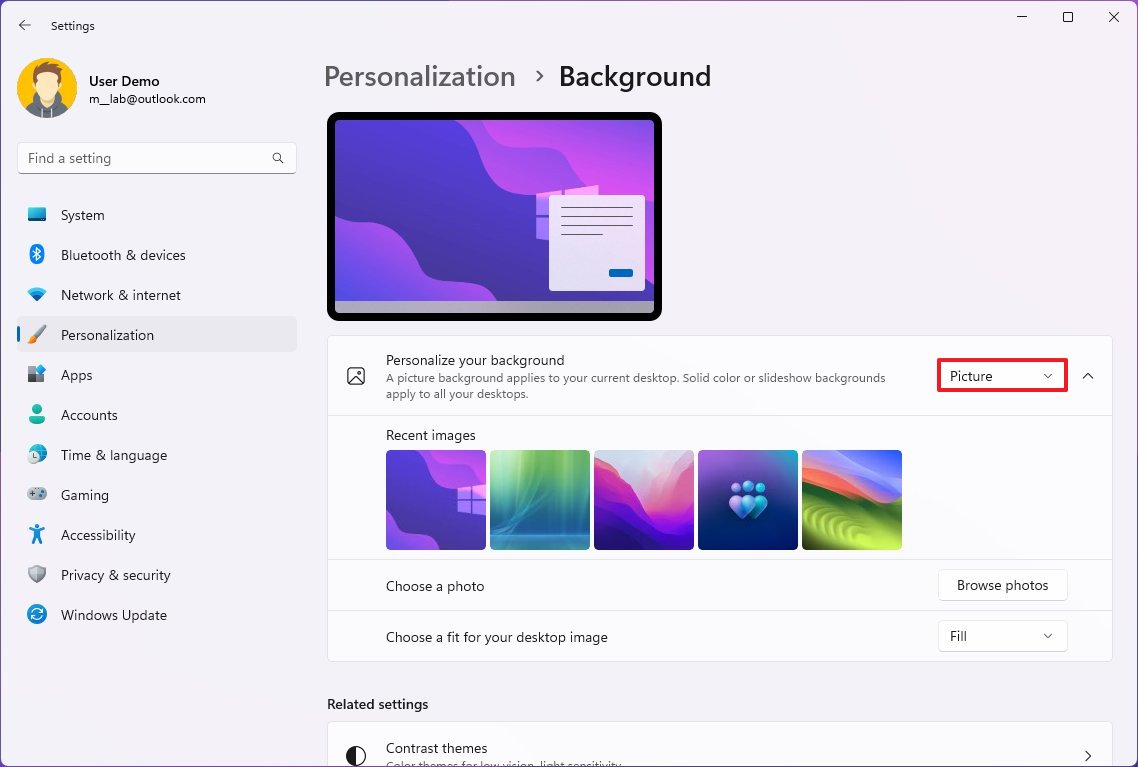
- Select the image to set as background.
Once you complete the steps, each desktop will reflect the specified background image.
Organize desktops
To rearrange the desktops, use these steps:
- Click the Task View button.
- Right-click the desktop and select the Move left or Move right option.
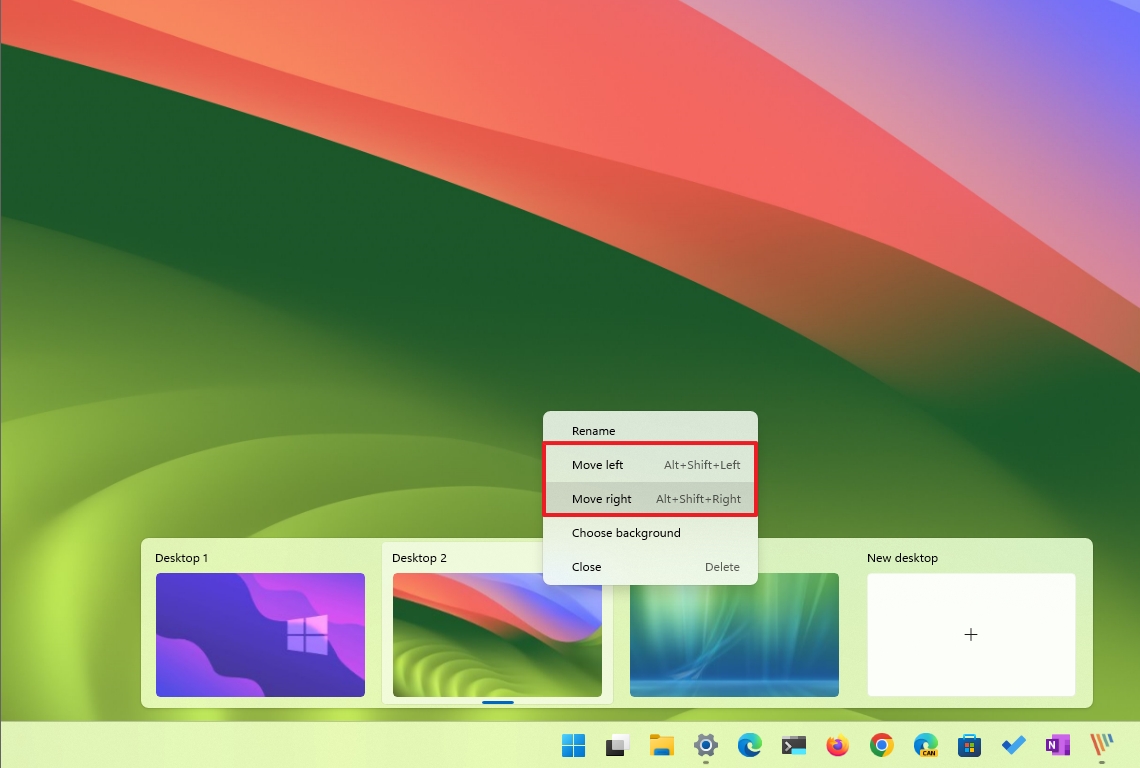
Alternatively, you can always drag and drop the desktop in the order you want.
How to navigate desktops on Windows 11
You also have different ways to interact with your desktops. You can switch between desktops, move apps to another space, and you can replicate a window for an app on all the desktops.
Jump to a different desktop
To move to a different desktop, use these steps:
- Click the Task View button.
- Select the desktop you want to switch to.
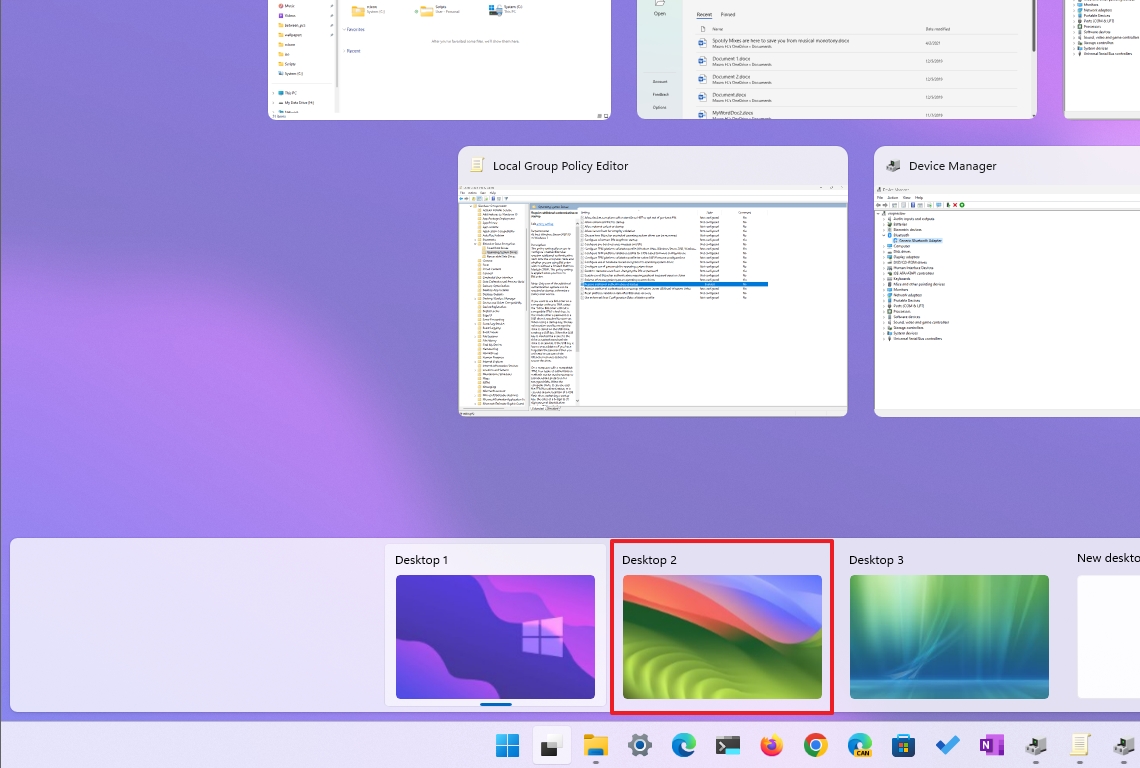
You can also use the "Windows key + Ctrl + Left" or "Windows key + Ctrl + Right" to switch between desktops.
Move apps to a different desktop
To move apps to another desktop, use these steps:
- Click the Task View button.
- Right-click the app and select the Move to submenu.
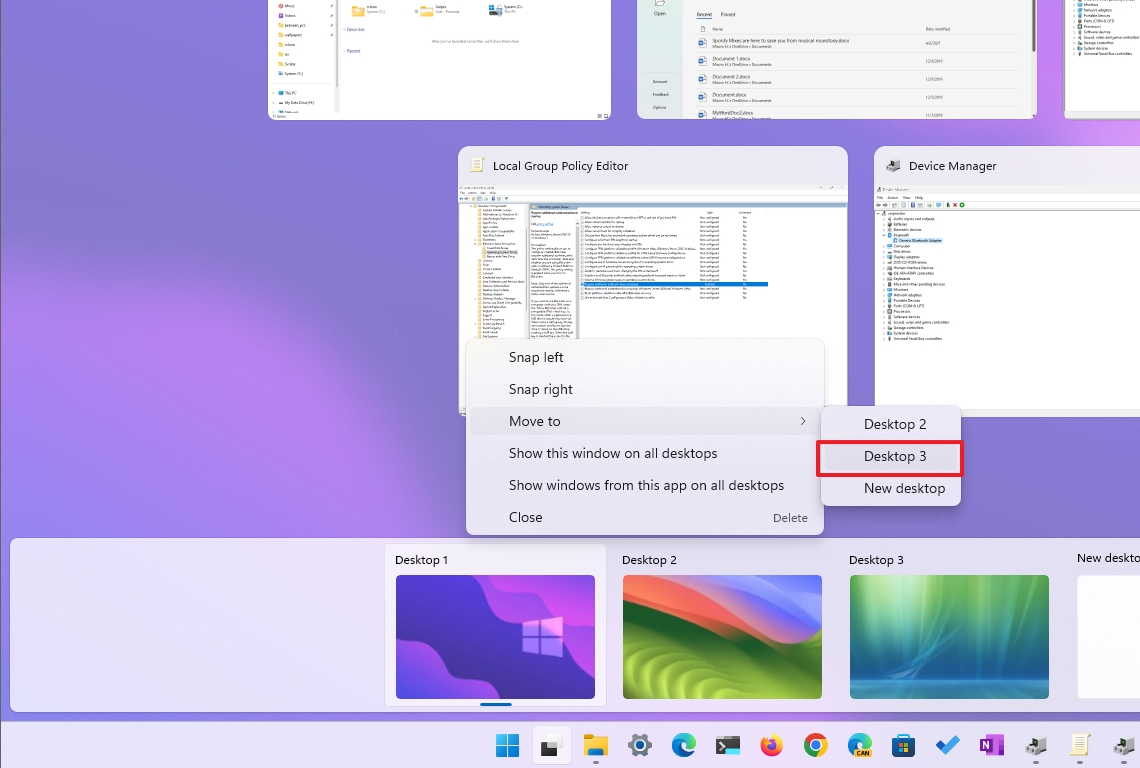
- Choose the desktop to send the application.
While in Task View, you can also drag and drop the app to the desktop you want.
Show app on all desktops
To show an app on all desktops, use these steps:
- Click the Task View button.
- Right-click the app and select the "Show this window on all desktops" option.
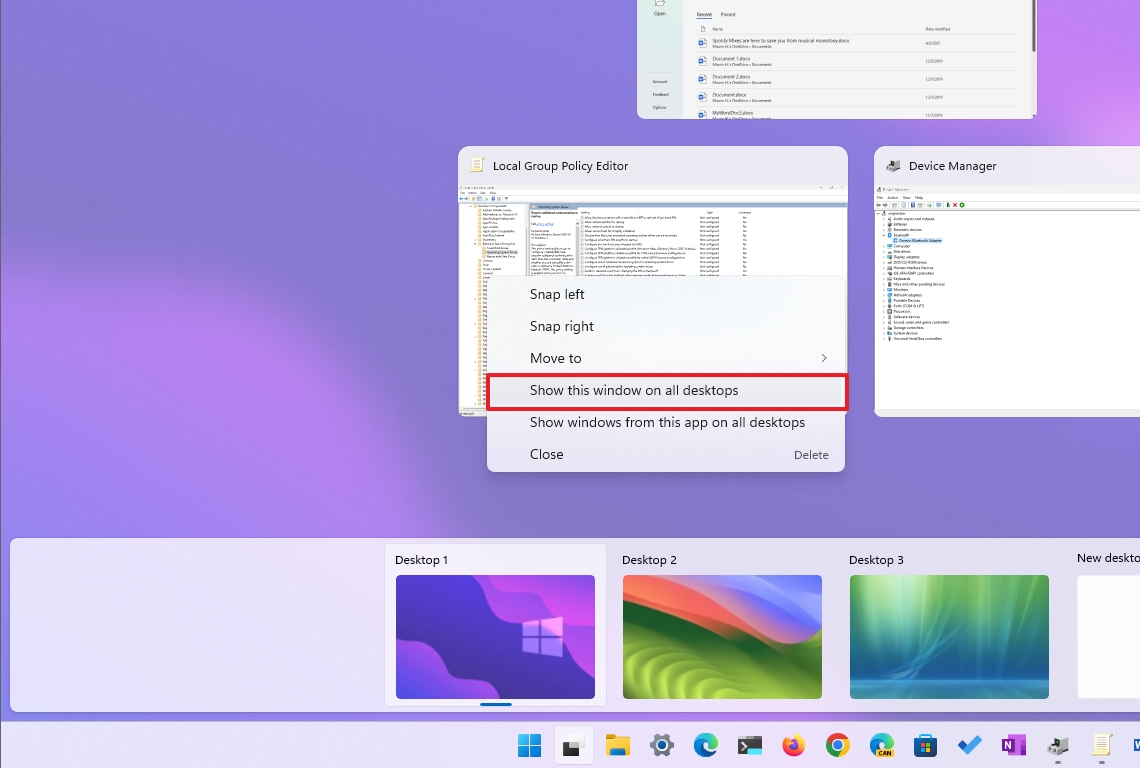
- (Optional) Right-click the app and select the "Show windows from this app on all desktops" option.
After you complete the steps, the app will appear on all the desktops.
How to close desktop on Windows 11
To close or remove a Windows 11 desktop, use these steps:
- Click the Task View button.
- Right-click the desktop and select the Close option or Close button.
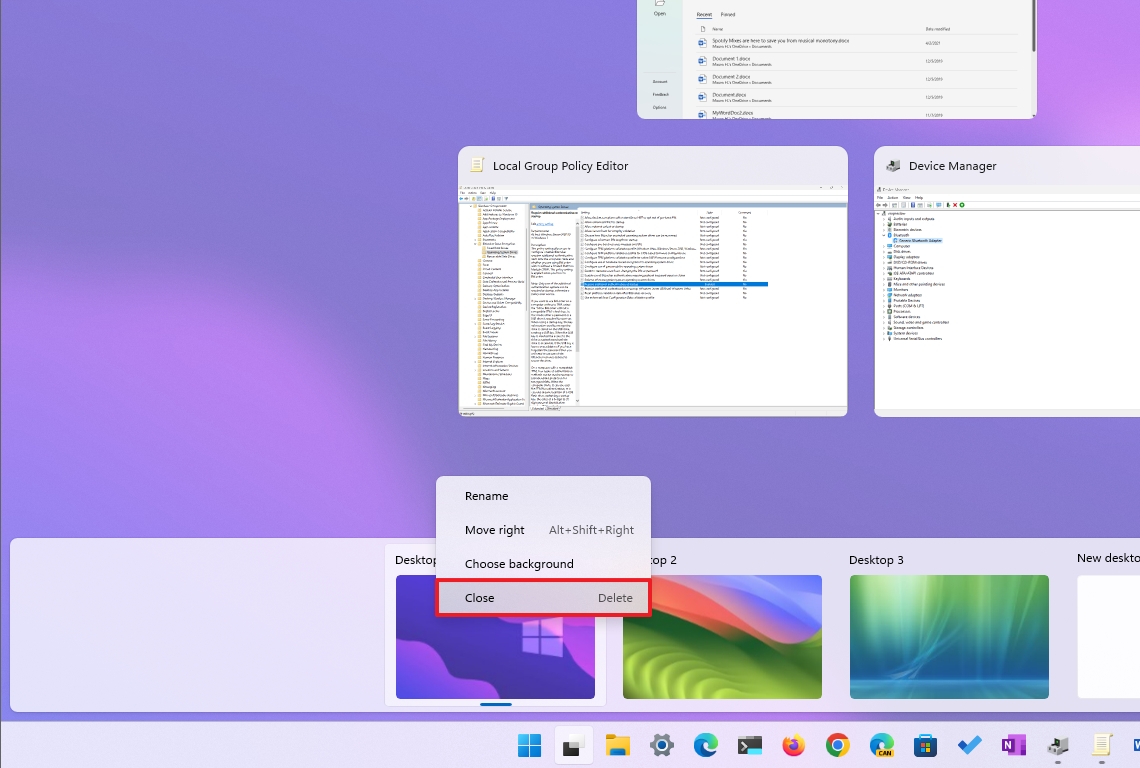
- Repeat steps 1 and 2 to close any remaining desktop.
Once you complete the steps, the desktop will be removed from the system. If you don't close the apps, they will be moved to the next available virtual desktop.
More resources
For more helpful articles, coverage, and answers to common questions about Windows 10 and Windows 11, visit the following resources:
Mauro Huculak has been a Windows How-To Expert contributor for WindowsCentral.com for nearly a decade and has over 15 years of experience writing comprehensive guides. He also has an IT background and has achieved different professional certifications from Microsoft, Cisco, VMware, and CompTIA. He has been recognized as a Microsoft MVP for many years.

