How to adjust display scale settings in Windows 11
If elements are too small and text too hard to read, you probably need to adjust the scale settings.
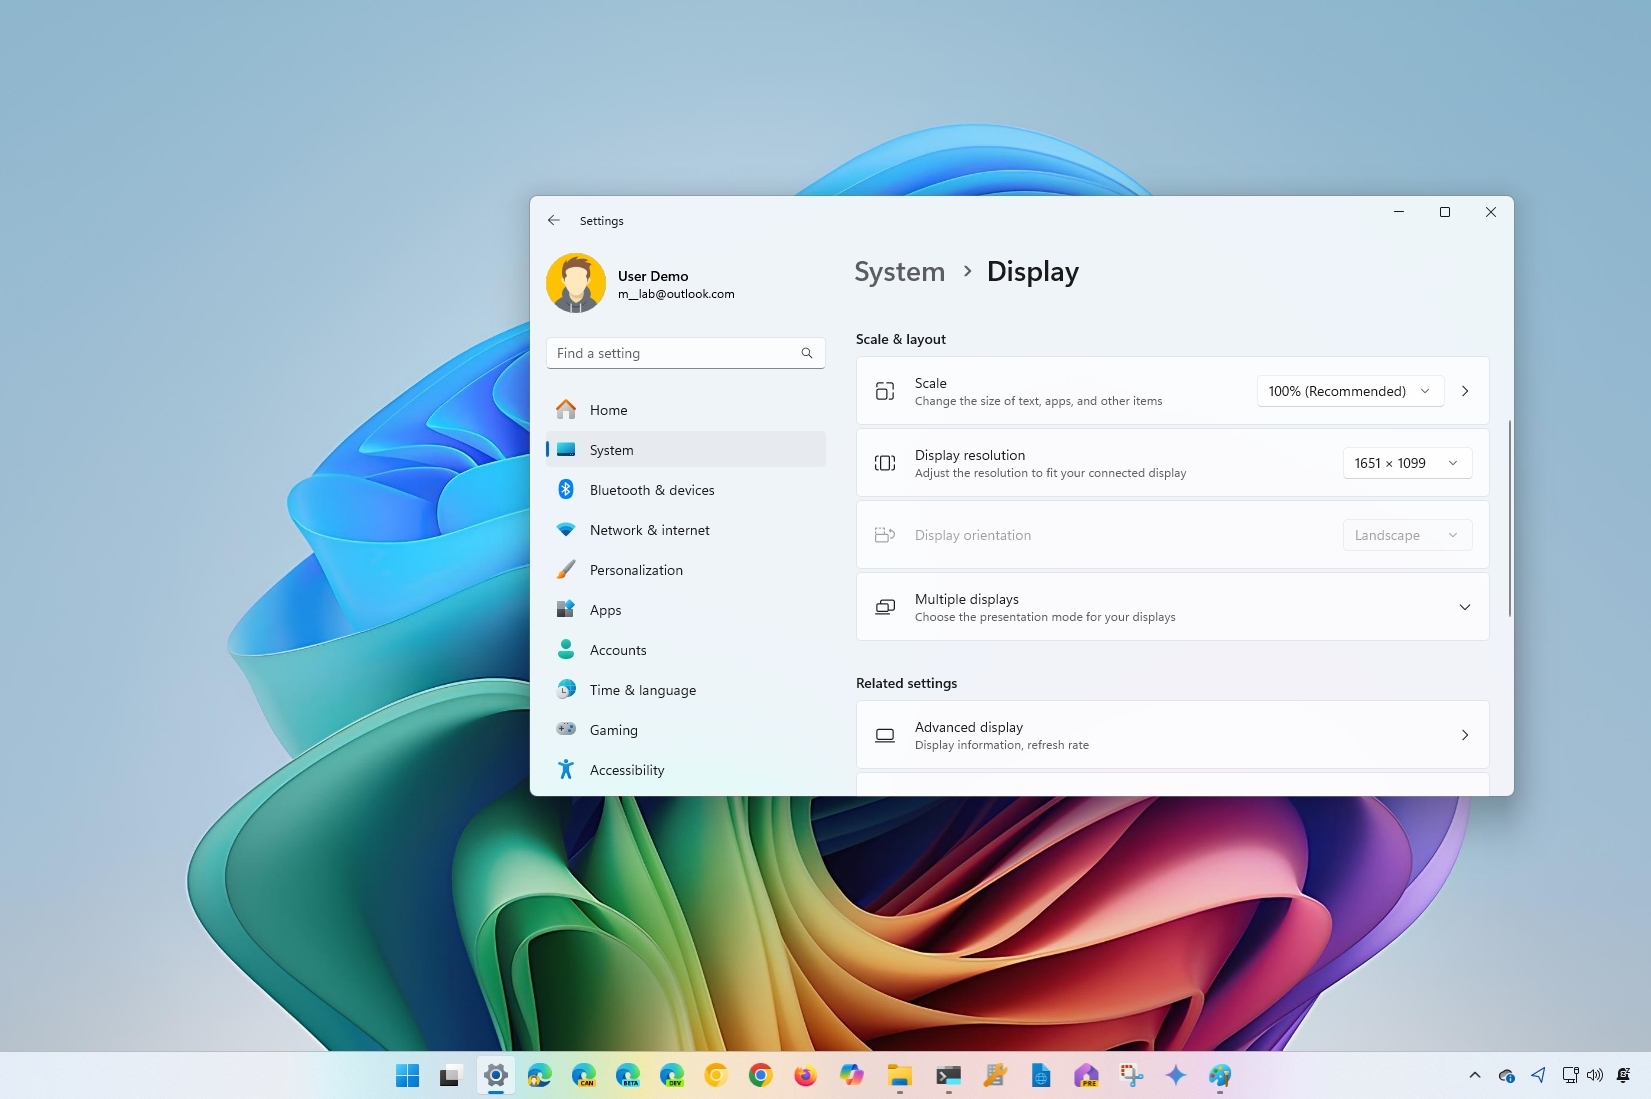
Although Windows 11 can automatically adjust the display scaling settings to ensure that elements (text, icons, navigations, and others) are the right size and readable, it's not perfect, and sometimes, adjusting the settings manually may be necessary.
For example, if you do not have perfect eyesight, making the elements bigger on the screen could make things easier to see and use, avoiding stressing your eyes. If you connect an external monitor, using a custom scale setting can help increase the size of the text, icons, and menus across the displays. Changing the display scale may also improve content visibility while showing a PowerPoint presentation on a projector.
In this how-to guide, I will explain how to change the scale settings on a desktop monitor or laptop display.
This guide has been updated to reflect changes and make sure the instructions are still accurate.
How to change display scale with recommended settings on Windows 11
To change a Windows 11 display scale size using the recommended settings, use these steps:
- Open Settings.
- Click on System.
- Click the Display page on the right side.
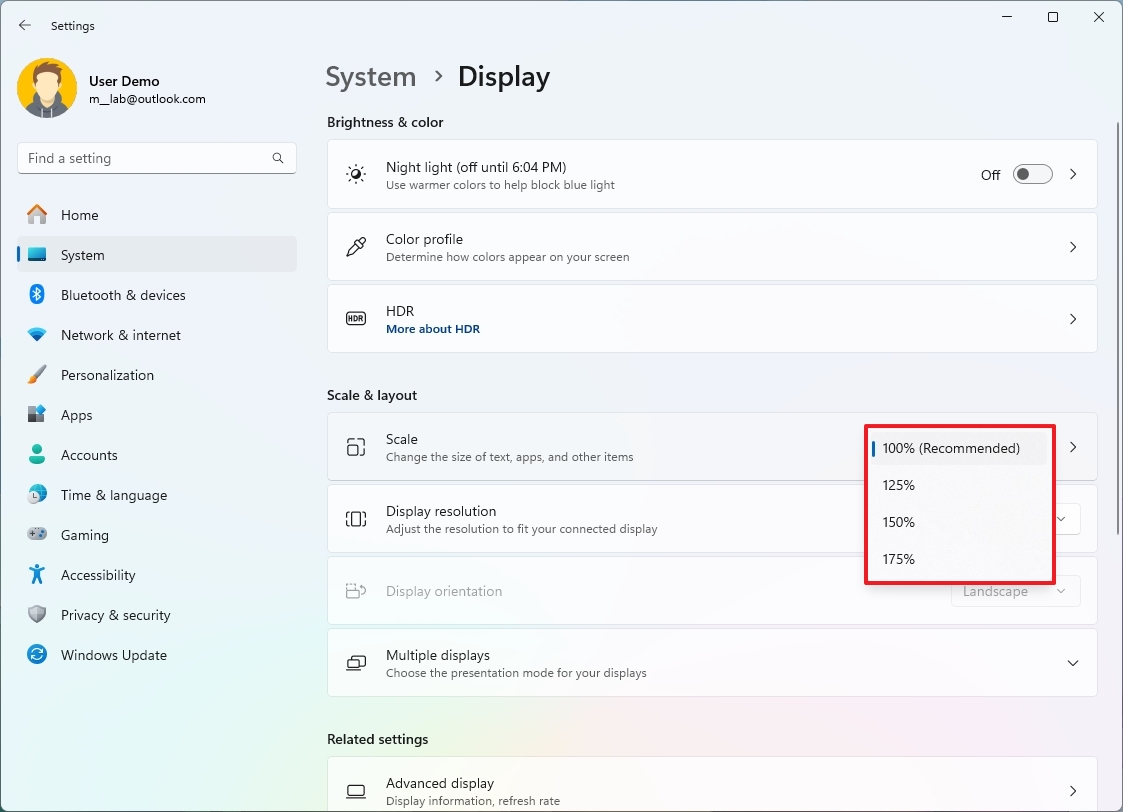
- Under the "Scale & layout" section, use the Scale drop-down menu and select the scale setting — for example, 100%, 125%, 150%, and 175%.
Once you complete the steps, the new scale configuration will apply. Although it's not required, you may need to restart the computer to make sure the setting applies correctly for all supported applications.
How to change display scale with custom settings on Windows 11
You shouldn't change the scale settings using custom values because it affects the viewing experience. However, if it's necessary, and you do it correctly, it may help you hit that sweet spot.
To set a custom scale size of a display, use these steps:
All the latest news, reviews, and guides for Windows and Xbox diehards.
- Open Settings.
- Click on System.
- Click the Display page on the right side.
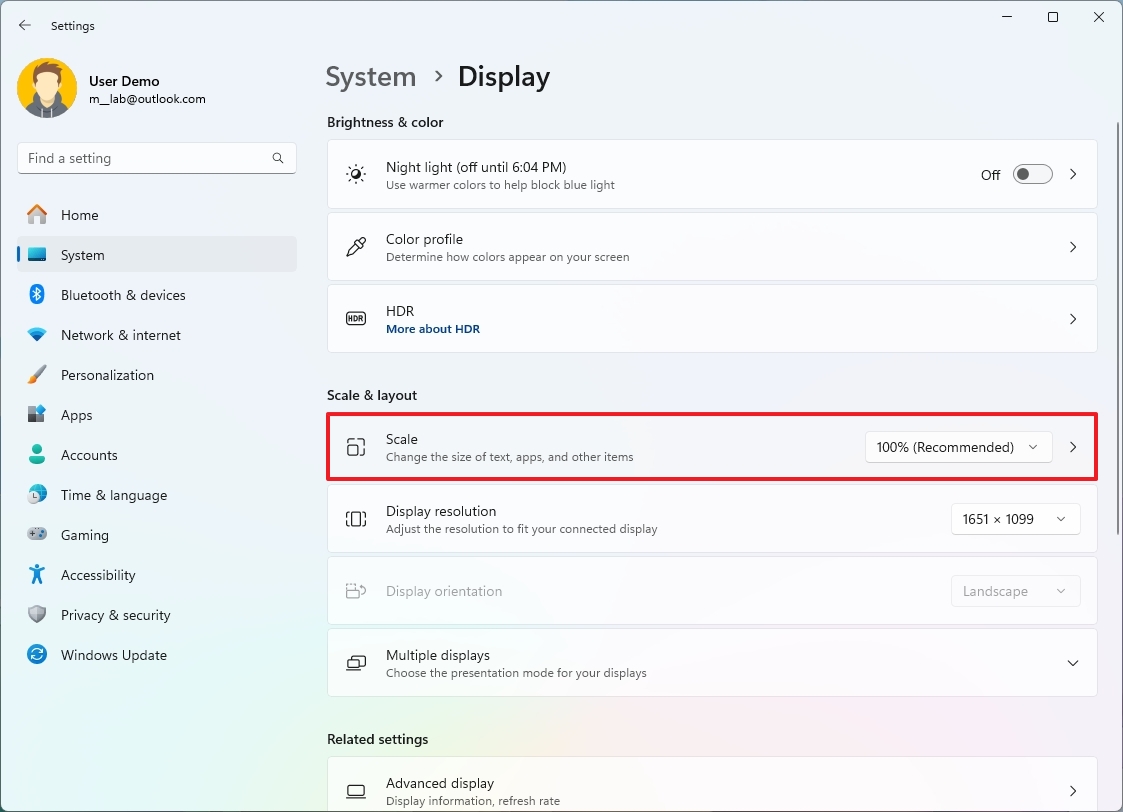
- Select the Scale setting under the "Scale & layout" section.
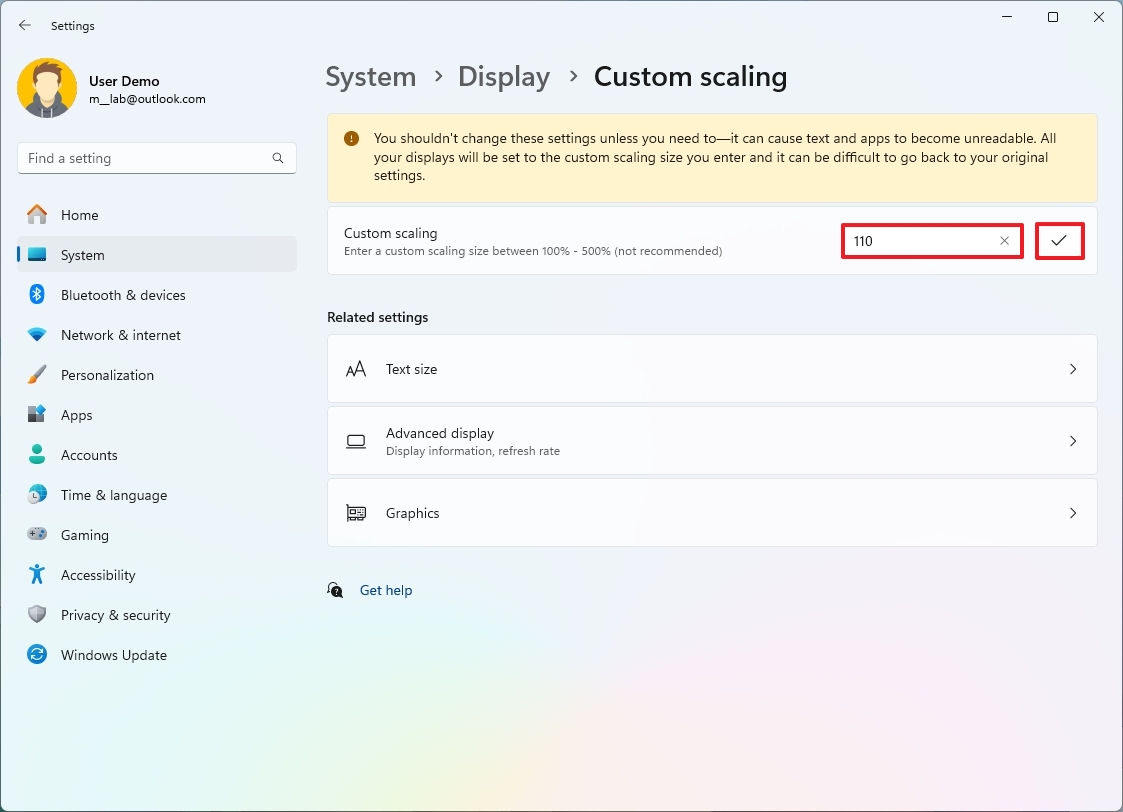
- Configure a custom scaling size between 100% and 500% under the "Custom scaling" section.
- Quick tip: If you want to increase the size of text, apps, and other items, you can try using 110% as the new scale value.
- Click the Check button.
- Click the Sign out now button.
- Sign back into the account.
After you complete the steps, the system will apply the setting you specified.
If the system isn't scaling elements correctly, repeat the steps to select a different value to increase or decrease the scaling value until you reach the correct configuration.
You can always revert the changes using the same instructions outlined above, but in step 4, click the "Turn off custom scaling and sign out" option.
How to make text bigger without changing scale settings on Windows 11
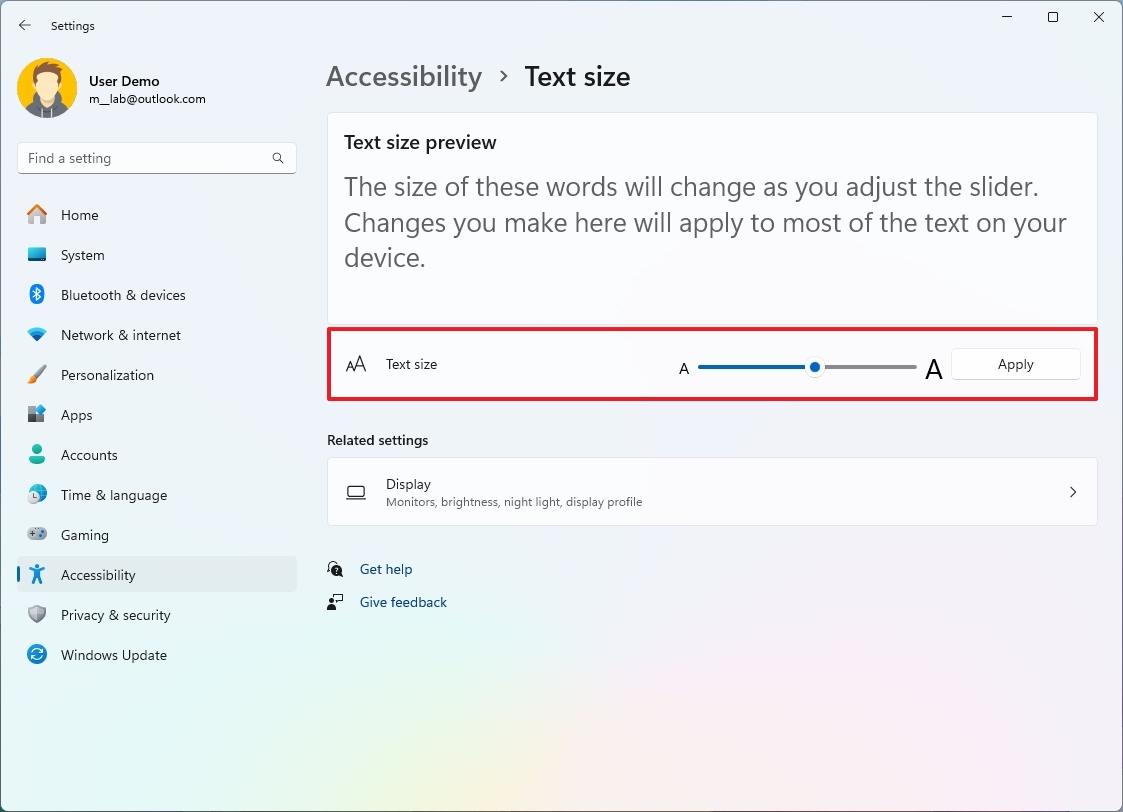
If you want to make the text more readable, you should not adjust the scale settings. Instead, you should change the text size settings.
To make text bigger across the desktop, use these steps:
- Open Settings.
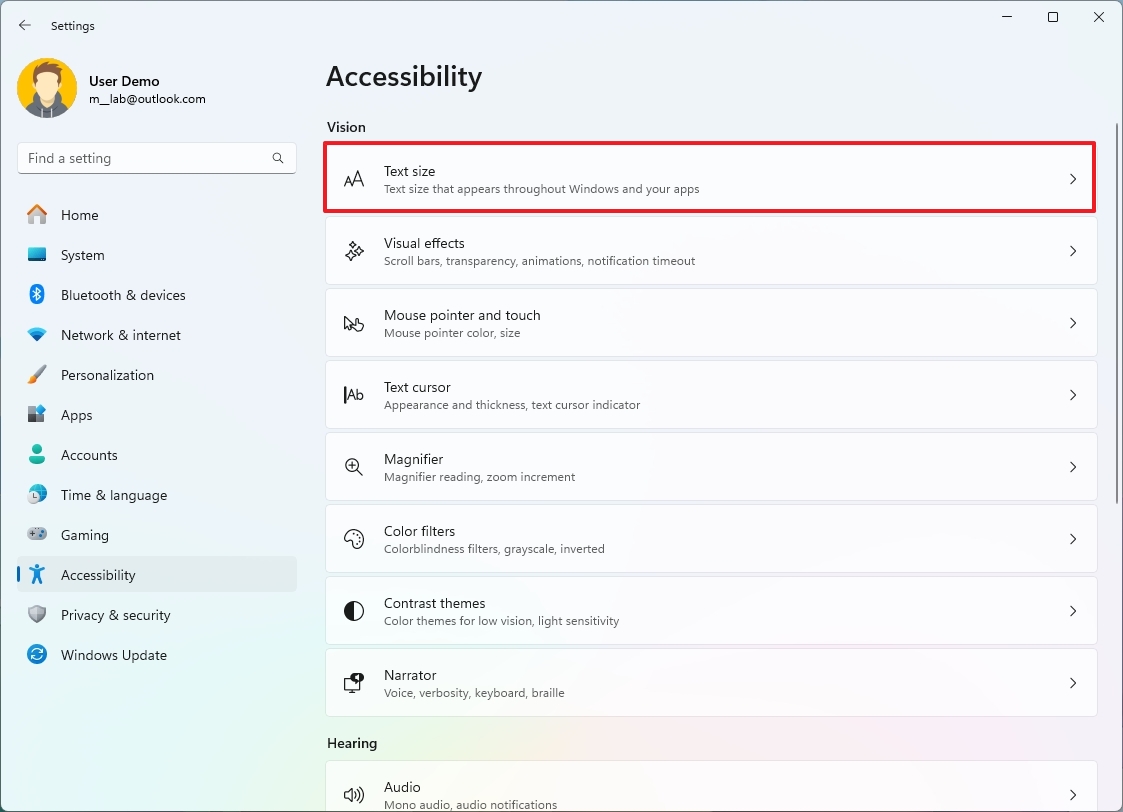
- Click on Accessibility.
- Click the Text size page on the right side.
- Use the "Text size" slider to make the font size across the desktop bigger.
- Click the Apply button.
Once you complete the steps, the screen will flash a "Please wait" message to apply the new text size.
More resources
For more helpful articles, coverage, and answers to common questions about Windows 10 and Windows 11, visit the following resources:
- Windows 11 on Windows Central — All you need to know
- Windows 10 on Windows Central — All you need to know

Mauro Huculak has been a Windows How-To Expert contributor for WindowsCentral.com for nearly a decade and has over 22 years of combined experience in IT and technical writing. He holds various professional certifications from Microsoft, Cisco, VMware, and CompTIA and has been recognized as a Microsoft MVP for many years.
