How to add or remove Quick Settings icons on Windows 11
Are you missing Quick Settings items or not using some of them? Here's how to customize the flyout on Windows 11.
All the latest news, reviews, and guides for Windows and Xbox diehards.
You are now subscribed
Your newsletter sign-up was successful
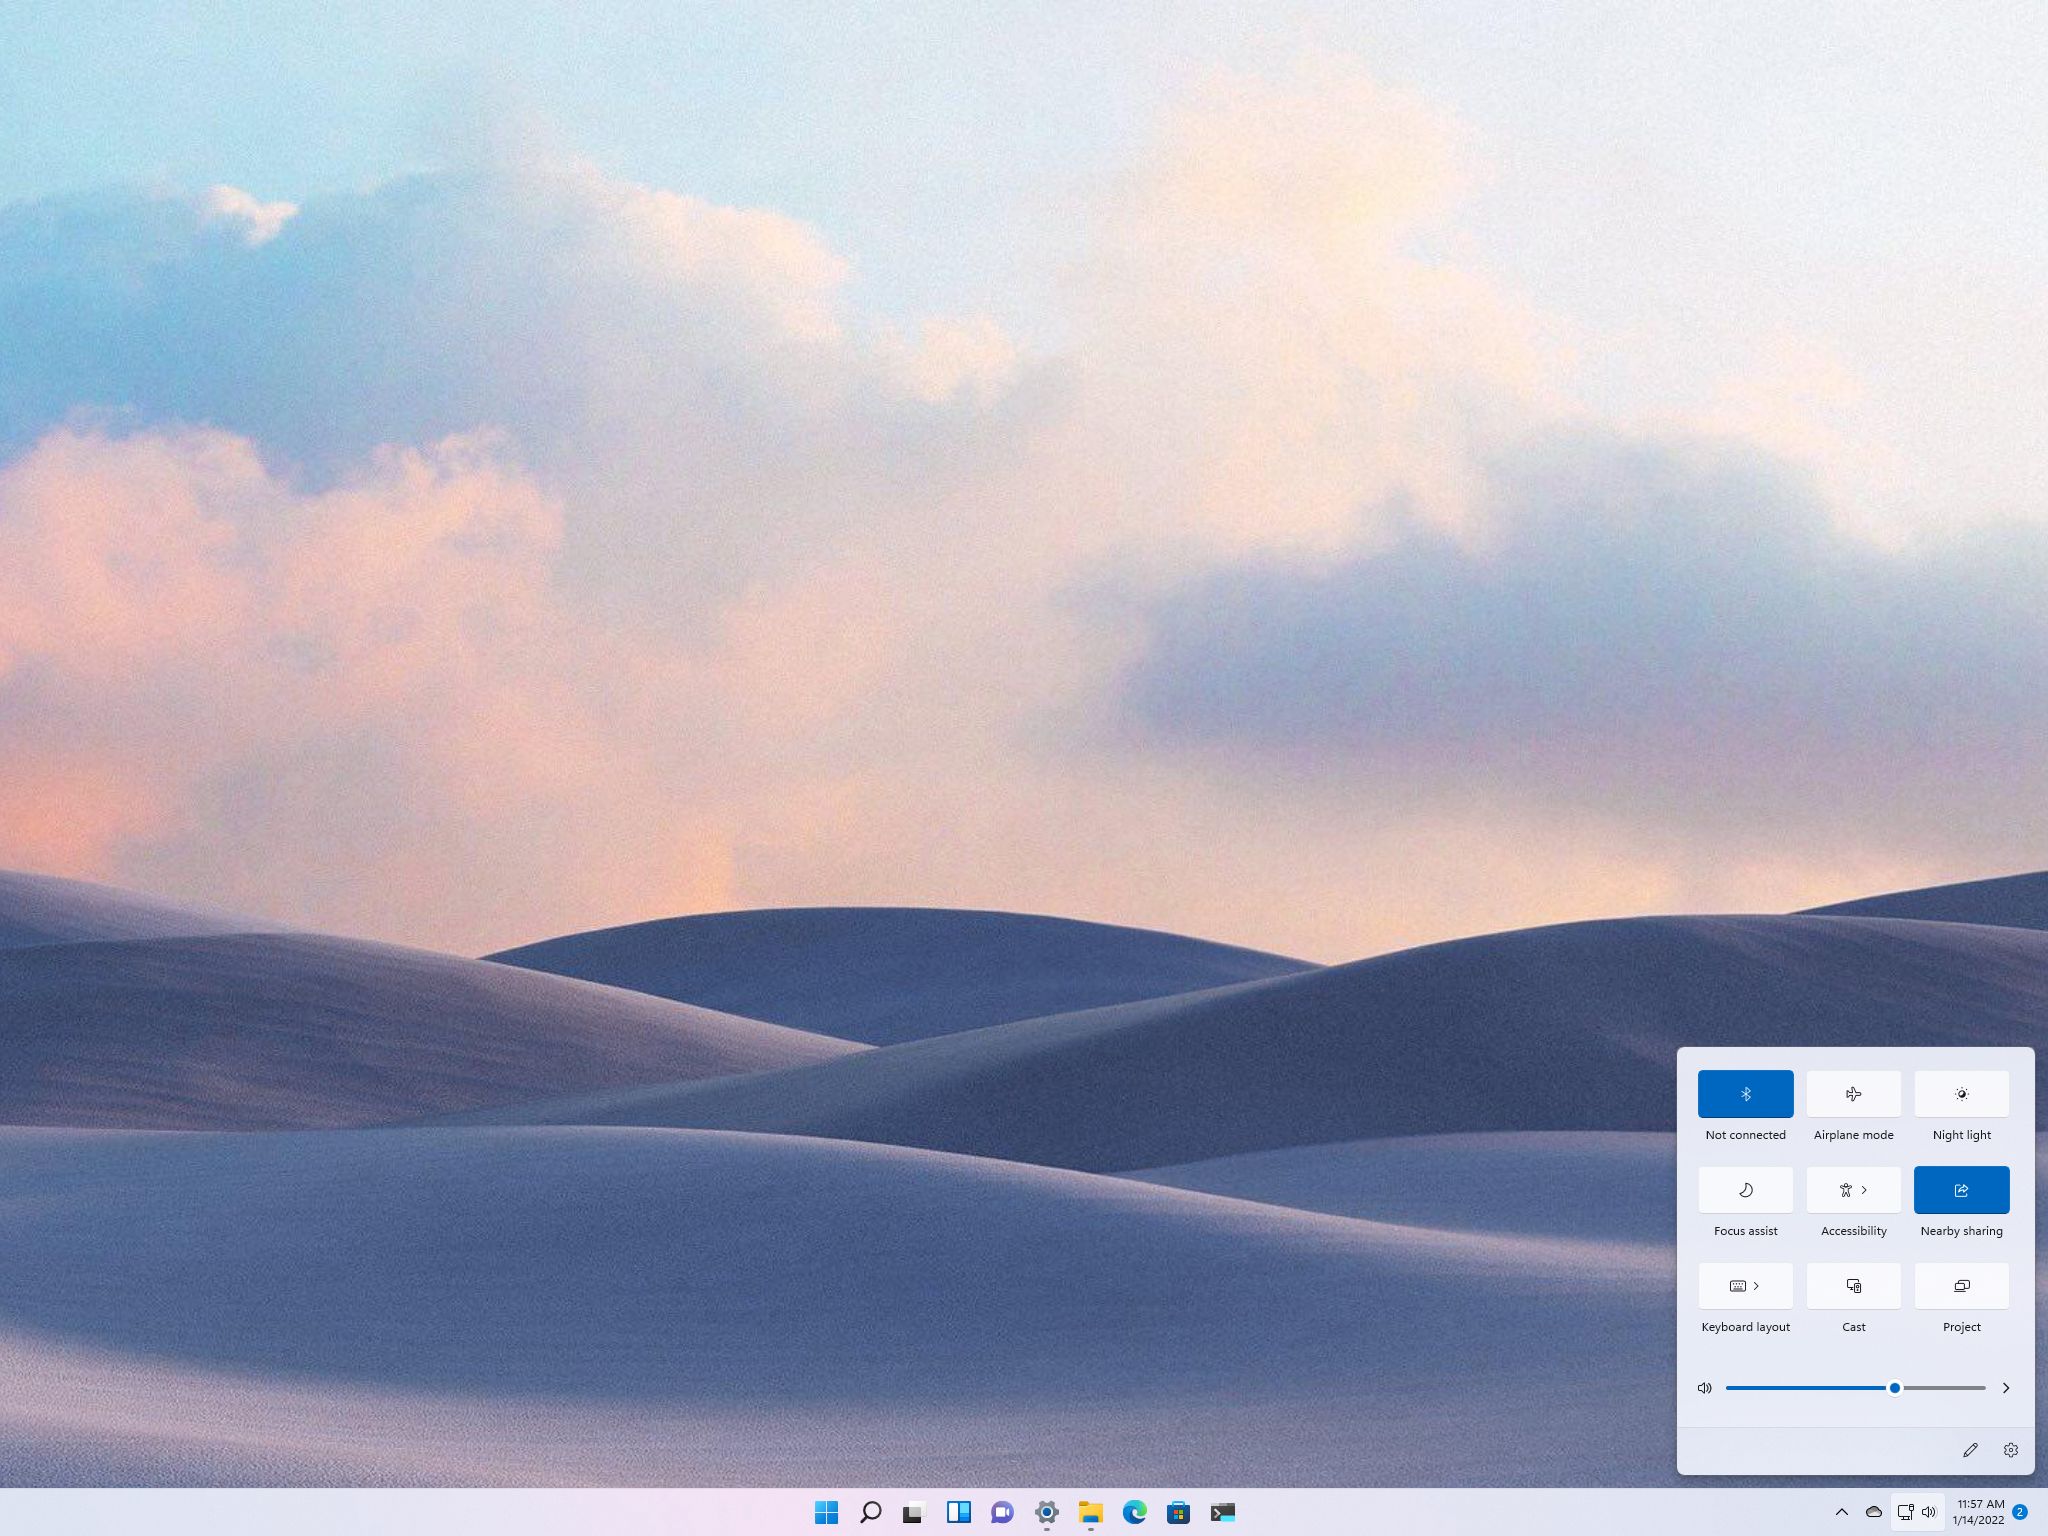
On Windows 11, the Quick Settings flyout (Windows key + A) gives you quick access to enable, manage, and disable common features, including Wi-Fi, Bluetooth, Airplane mode, Battery saver, Focus Assist, Night light, Alarms only, Accessibility, Cast, Nearby sharing, Mobile hotspot, Keyboard layout, and Project.
The only caveat is that by default, the flyout doesn't show all the available items, which means that if you are missing an option or have items that you don't use, you have to customize the experience manually.
In this Windows 11 guide, we will walk you through the steps to add and remove items from the Quick Settings flyout.
- How to add Quick Settings icons on Windows 11
- How to rearrange Quick Settings icons on Windows 11
- How to remove Quick Settings icons on Windows 11
How to add Quick Settings icons on Windows 11
To add more or missing items to the Quick Settings flyout on Windows 11, use these steps:
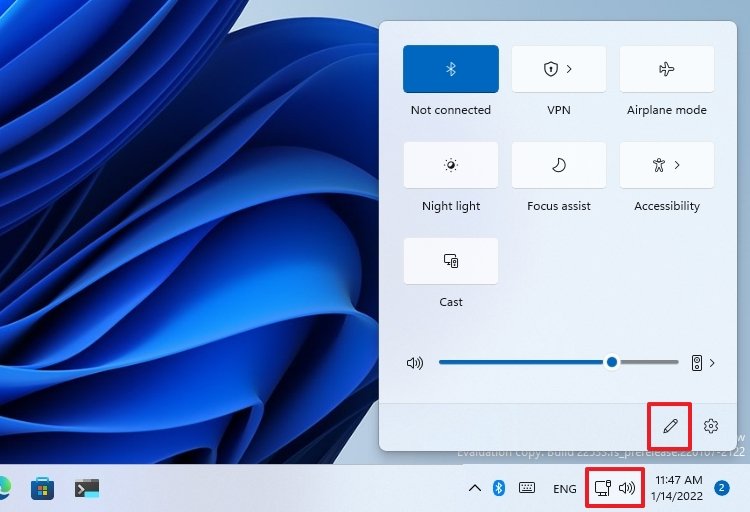
- Invoke the Windows key + A keyboard shortcut to open Quick Settings.Quick tip: Alternatively, you can always click the network, battery, volume combo icon in the Taskbar system tray.
- Click the Edit quick settings (pen) button.
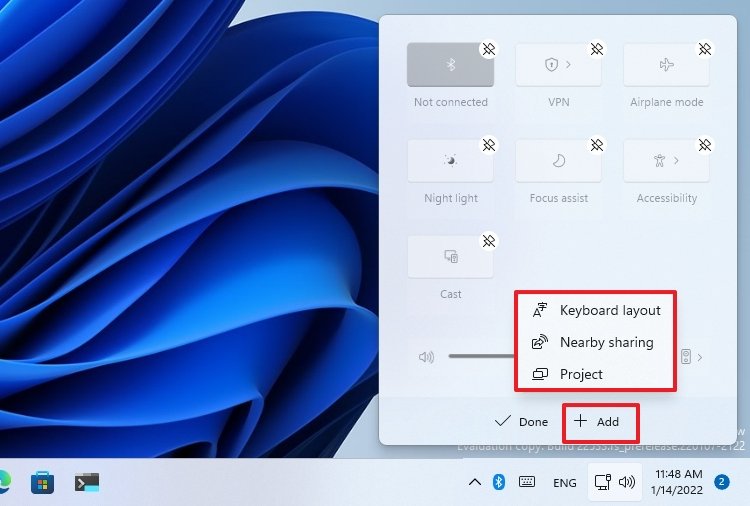
- Click the Add button.
- Select the items you want to include in the flyout.
- Repeat steps 3 and 4 to add more items.
- Click the Done button.
Once you complete the steps, the new items will appear in the Quick Settings flyout.
How to rearrange Quick Settings icons on Windows 11
To change the Quick Settings icons order, use these steps:
- Invoke the Windows key + A keyboard shortcut to open Quick Settings.
- Click the Edit quick settings (pen) button.
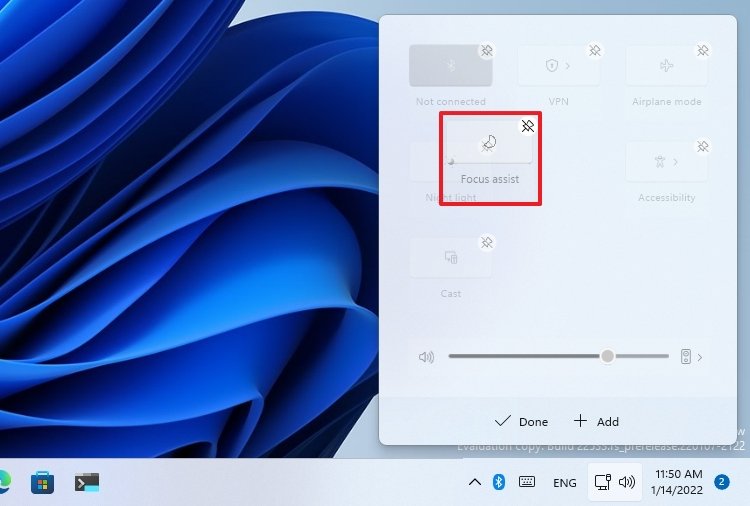
- Drag and drop the items in the order you want.
- Click the Done button.
After you complete the steps, the flyout will reflect the changes.
All the latest news, reviews, and guides for Windows and Xbox diehards.
How to remove Quick Settings icons on Windows 11
To remove Quick Settings items, use these steps:
- Invoke the Windows key + A keyboard shortcut to open Quick Settings.
- Click the Edit quick settings (pen) button.
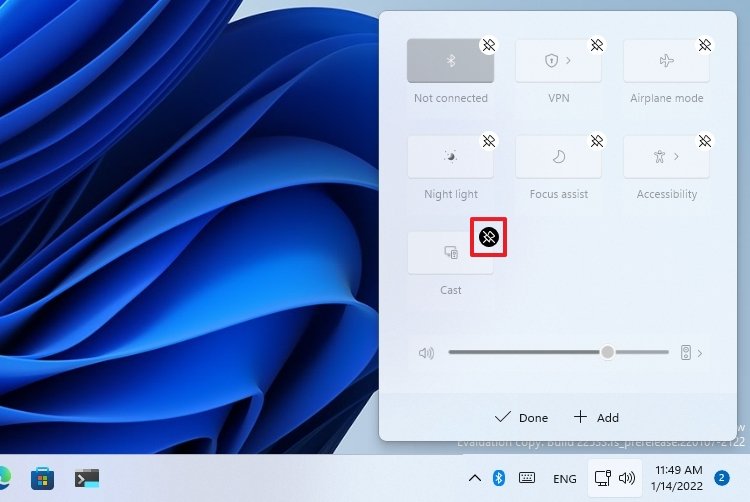
- Click the unpin button in the icon.
- Repeat step 3 to remove more items.
- Click the Done button.
Once you complete the steps, the removed items will no longer appear in the Quick Settings flyout.
More Windows resources
For more helpful articles, coverage, and answers to common questions about Windows 10 and Windows 11, visit the following resources:
- Windows 11 on Windows Central — All you need to know
- Windows 11 help, tips, and tricks
- Windows 10 on Windows Central — All you need to know

Mauro Huculak has been a Windows How-To Expert contributor for WindowsCentral.com for nearly a decade and has over 22 years of combined experience in IT and technical writing. He holds various professional certifications from Microsoft, Cisco, VMware, and CompTIA and has been recognized as a Microsoft MVP for many years.
