How to add or remove optional features on Windows 11
Here are the steps to manage optional features on your Windows 11 installation.
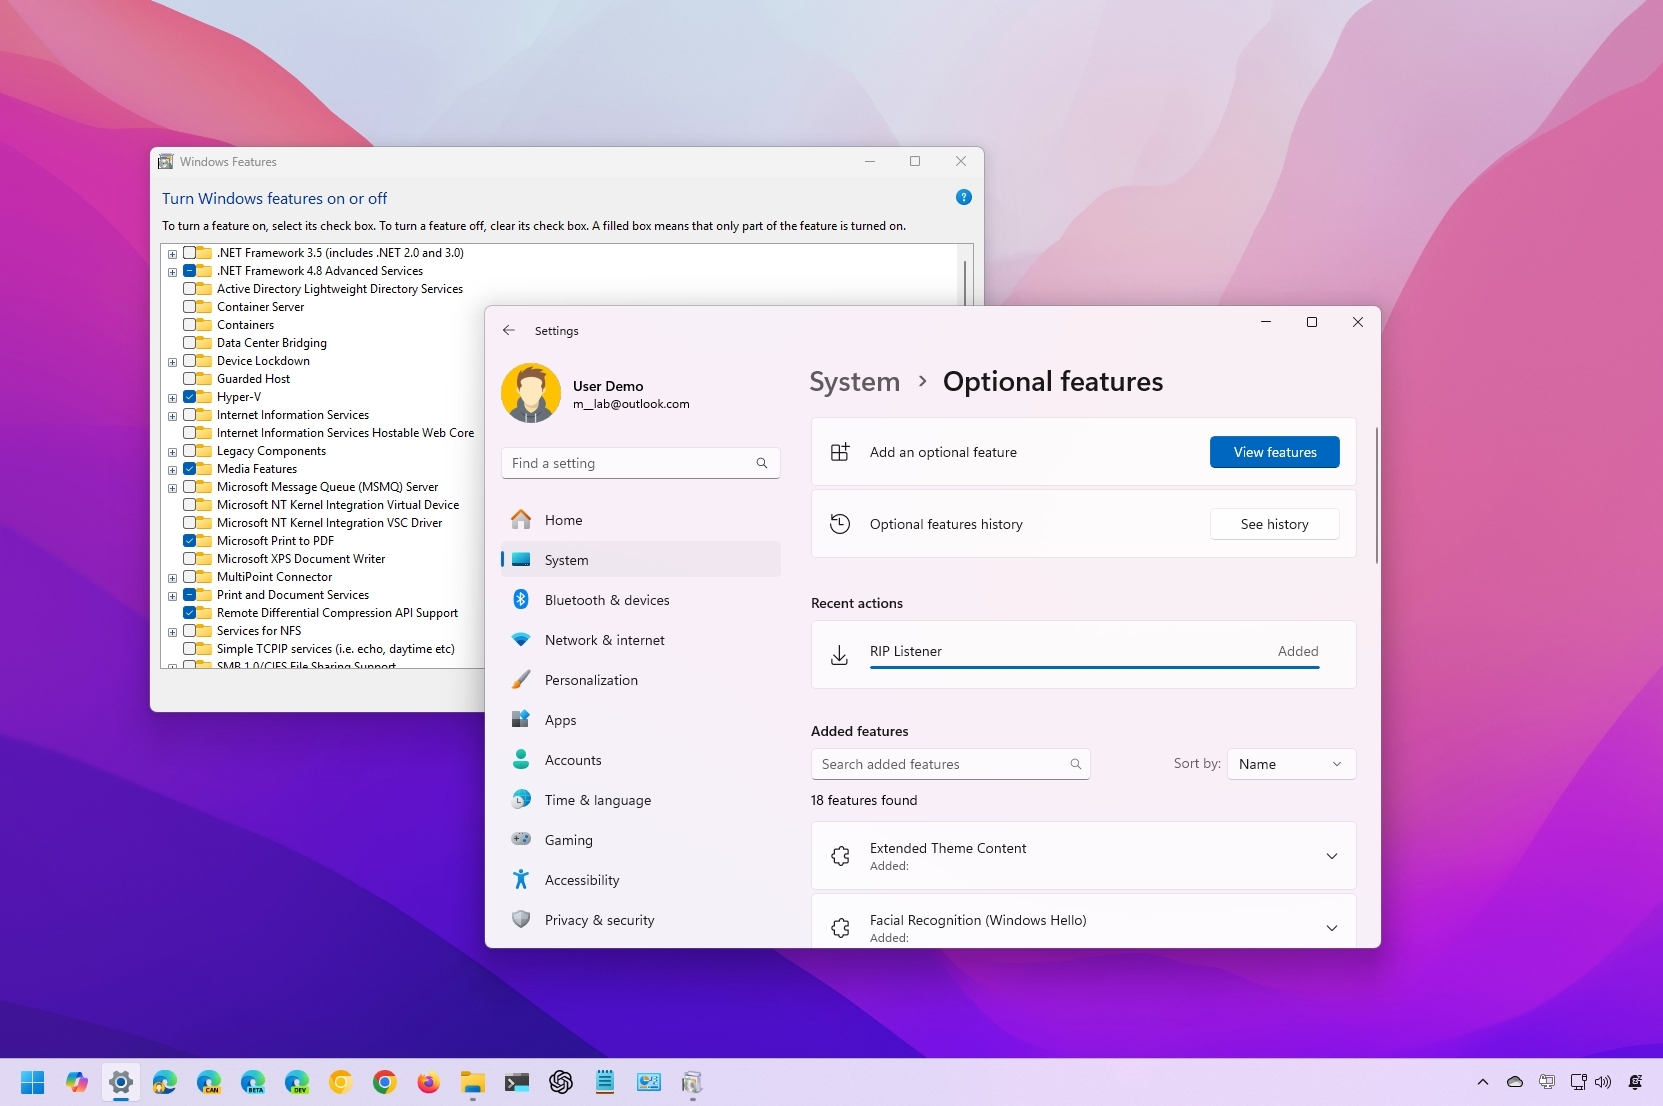
On Windows 11, you can add or remove many "optional features" to extend your computer's functionality. For example, you can configure features such as the Windows Subsystem for Linux, Windows Sandbox, Hyper-V, Windows Hello Face, Windows Developer Mode, Print Management, and more.
Some of these features can be enabled directly from the "Windows Features" page since the components are available on every installation, and others can only be downloaded through the Settings app because they are not part of the default setup.
Also, many of these features are advanced and won't apply to most users. Turning them on can potentially make the system vulnerable or cause performance issues if not configured correctly. However, in the right situation, they can make Windows 11 even more capable.
In this how-to guide, I'll teach you how to add and remove optional features on your computer.
Recent updates
These instructions has been updated to ensure accuracy and reflect changes to the process in the operating system.
How to manage optional features from Settings
On Windows 11, the Settings app lets you install additional features to extend the system's functionality. Since the components are not stored in the default installation, you will need an internet connection to download them.
Add optional features
To download and install optional features through the Settings app, use these steps:
- Open Settings.
- Click on System.
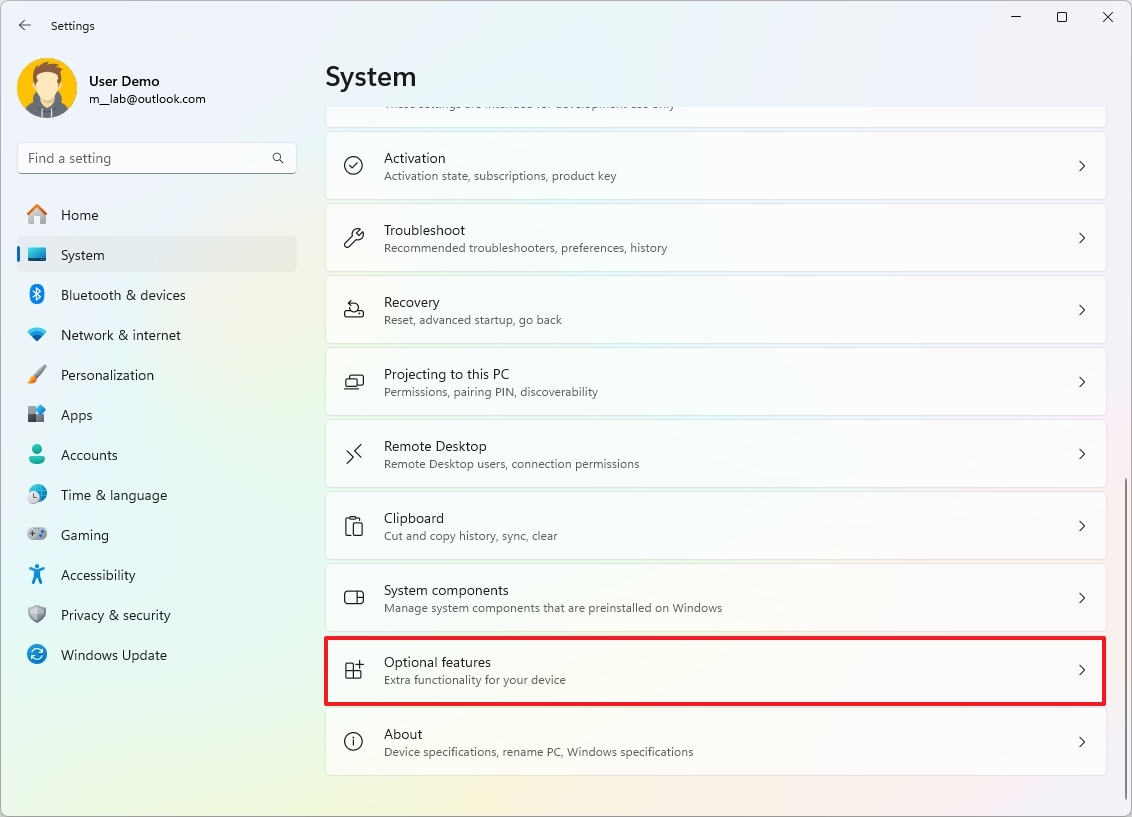
- Click the Optional features page on the right side.
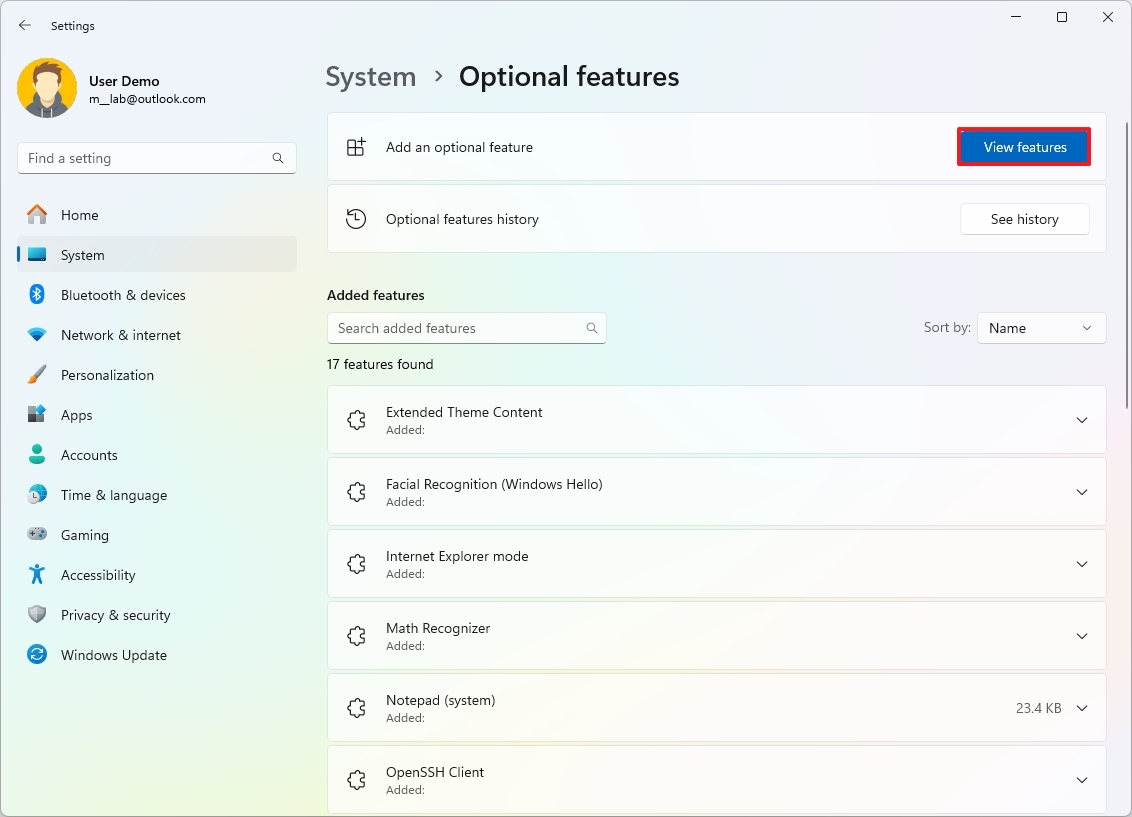
- Click the View features button for the "Add an optional feature" setting.
- Select the feature to install on Windows 11.
- Quick tip: Click the down arrow to view more details about a feature. You can select multiple features at once.
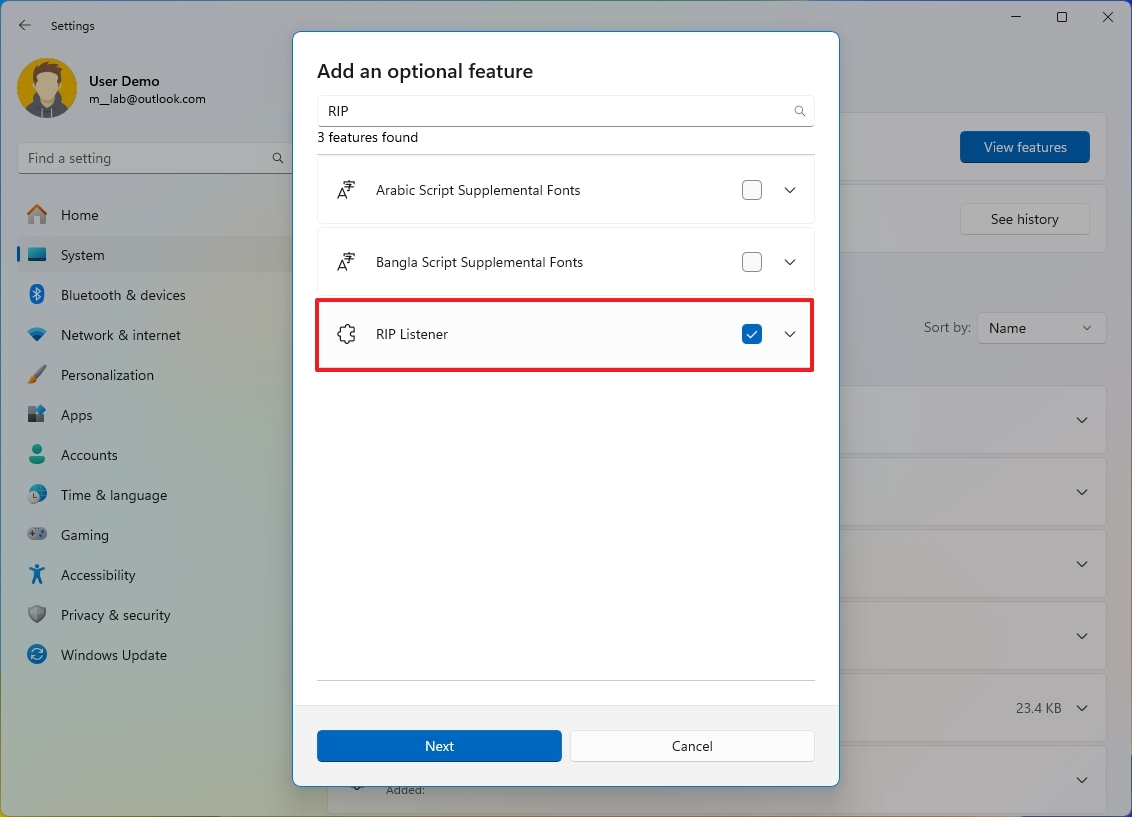
- Click the Next button.
- Click the Add button.
Once you complete the steps, the feature will install without restarting the computer (in most cases).
Get the Windows Central Newsletter
All the latest news, reviews, and guides for Windows and Xbox diehards.
Remove optional features
To remove features from the "Optional features" settings, use these steps:
- Open Settings.
- Click on Settings.
- Click the Optional features page on the right side.

- Select the feature to remove and click the Remove button under the "Installed features" section.
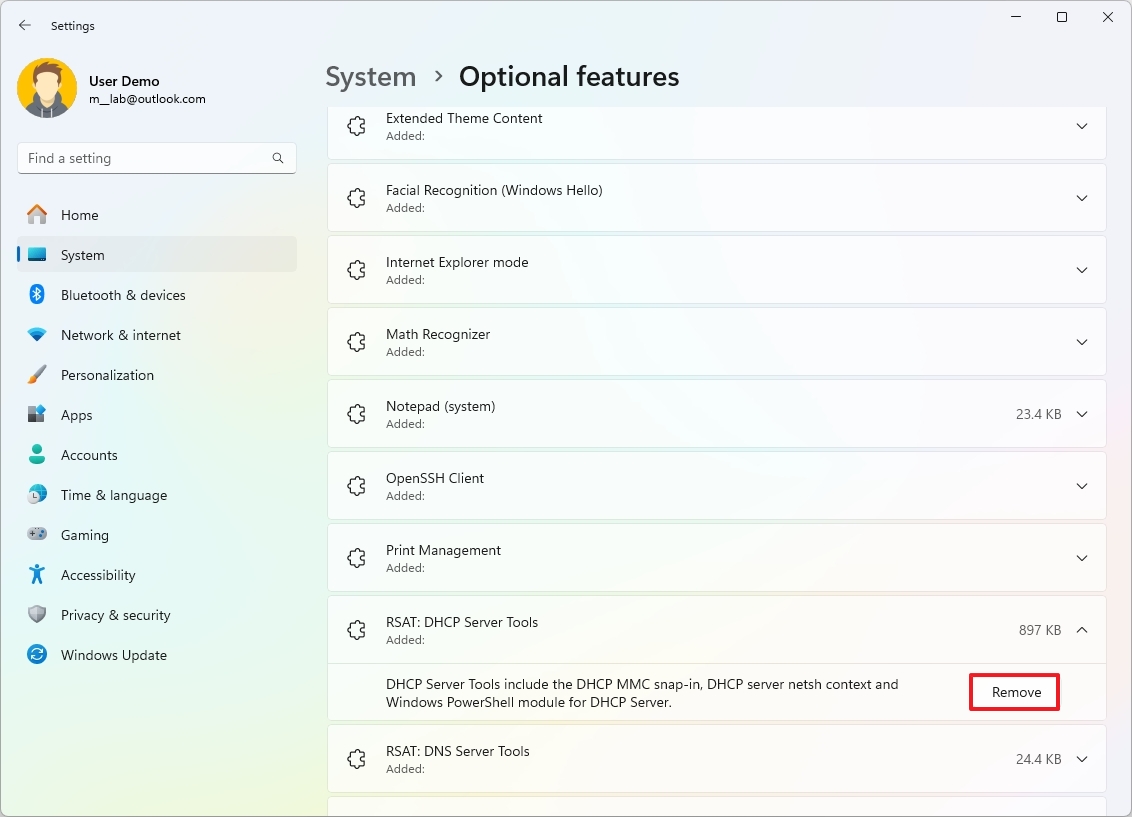
After you complete the steps, the feature will be removed from the installation.
How to manage optional features from Control Panel
The features available through the "Windows features" interface can also help extend the functionality of Windows 11. However, since these components are included in every setup, you don't need an internet connection to enable them.
Add optional features
To turn on Windows features, use these steps:
- Open Settings.
- Click on System.
- Click the Optional features page on the right side.

- Click the "More Windows features" setting under the "Related settings" section.
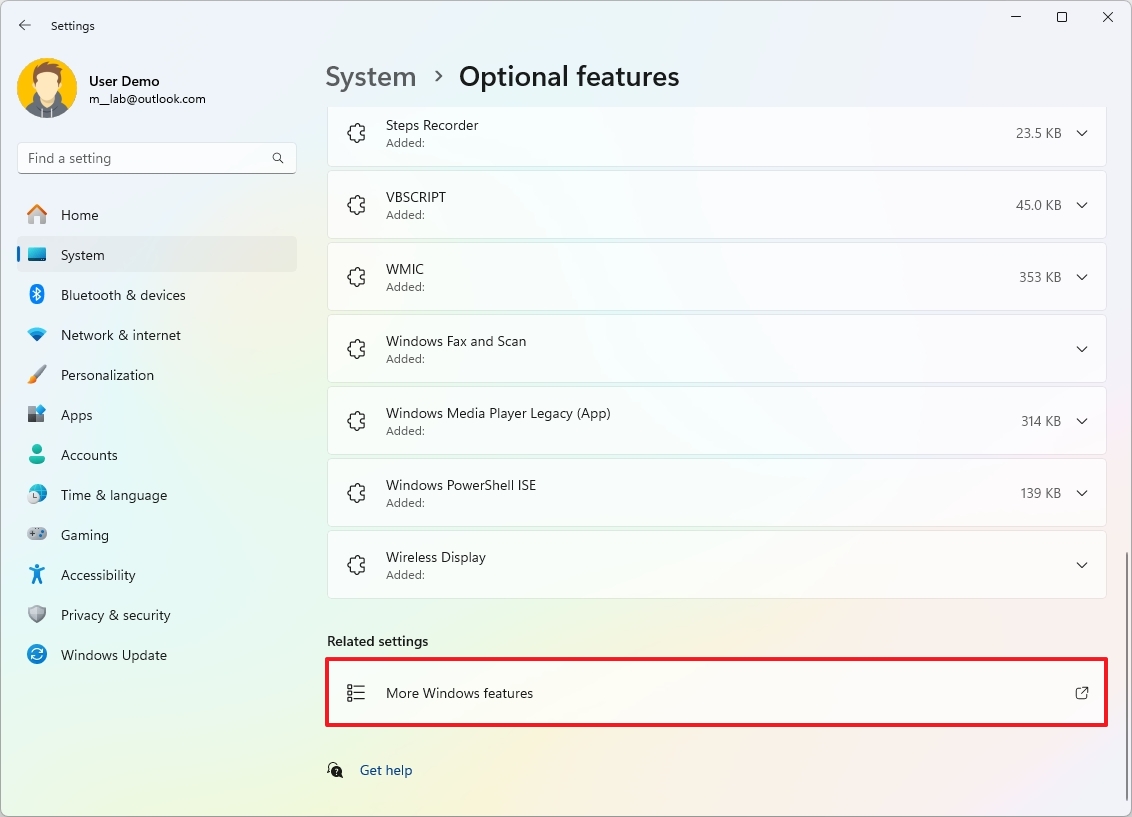
- Check the Windows 11 feature to install.
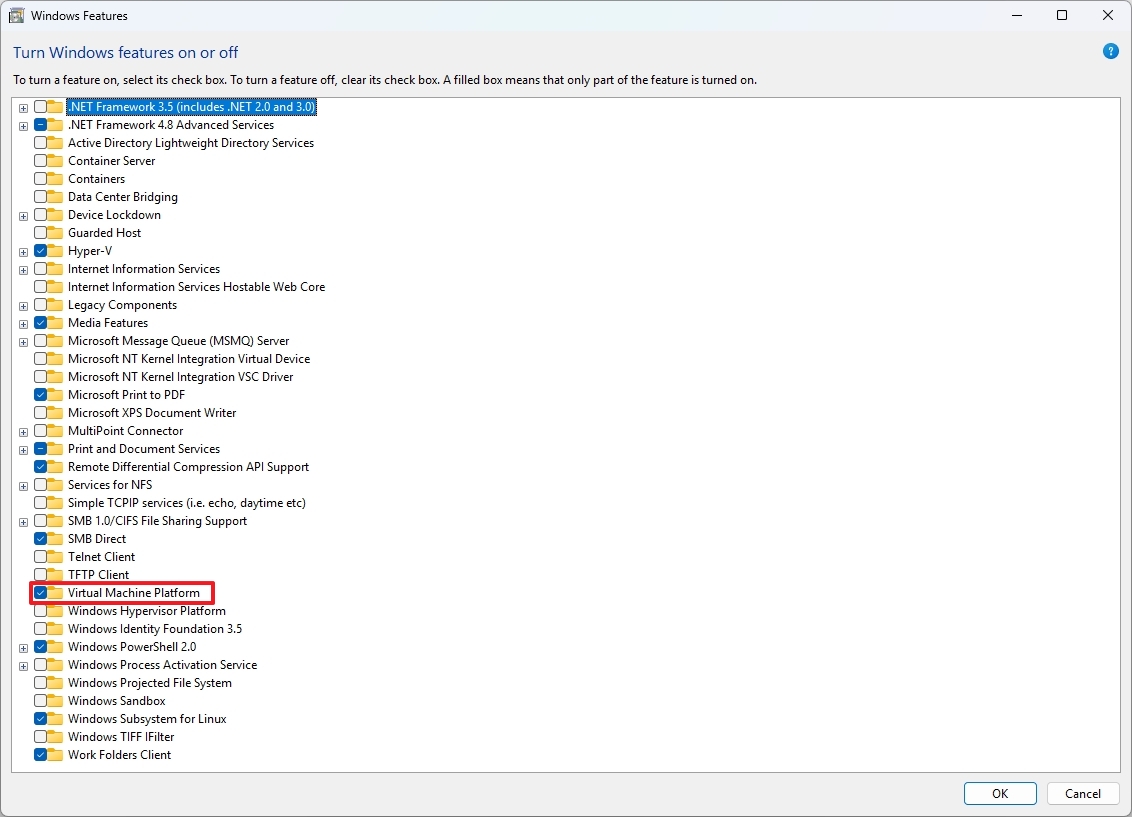
- Click the OK button.
- Click the Restart button.
Once you complete the steps, the computer will restart to finish applying the feature.
Depending on your edition, you can add a number of optional features to Windows 11. The Pro edition has more advanced components than the Home edition.
Here are the Windows features you can turn on or off on Windows 11 Pro:
- .NET Framework 3.5 (includes .NET 2.0 and 3.0): Runs app built using Microsoft .NET software framework version 3.5 or older. You can safely enable this older support, but it'll usually enable it on demand when needed.
- .NET Framework 4.8 Advanced Services: Required for apps built with version 4.8 of the framework.
- Active Directory Lightweight Directory Services: Adds Lightweight Directory Access Protocol (LDAP) support for directory-enabled apps. This is an alternative to Windows Active Directory. Typically, you'll have to turn on this feature in specific corporate network scenarios.
- Containers: Provides services and tools to create and manage Windows Server Containers and Hyper-V containers.
- Data Center Bridging: This is an IEEE standard that enables converged fabrics in a data center, where network, storage, clustering, and traffic management share the same Ethernet network infrastructure. Data center bridging is only useful in corporate networks.
- Device Lockdown: Adds services and tools for a more controlled experience, such as when setting up a kiosk or temporary workstation.
- Guarded Host: Creates an environment to provide stronger protection for virtual machines to prevent tampering and theft by malicious individuals and malware.
- Hyper-V: Virtualization component to create and manage virtual machines on Windows 11.
- Internet Information Services: It's known as "IIS," and it's a service that allows the setting up of an FTP server or a server to host websites with management services.
- Internet Information Services Hostable Web Core: Creates an environment to host apps on the web.
- Legacy Components: Adds support for old components, including DirectPlay, a feature formerly part of DirectX.
- Media Features: Allows you to add or remove the classic Windows Media Player app. This option is also part of the "Optional features" settings page.
- Microsoft Defender Application Guard: Creates an isolated virtualized environment to test apps and browse untrusted sites to prevent old and newly emerging attacks on the physical machine.
- Microsoft Message Queue (MSMO) Server: Enables apps to run correctly on unreliable networks by queuing messages instead of sending them as they're generated.
- Microsoft Print to PDF: Allows printing to a PDF file instead of a physical printer.
- Microsoft XPS Document Writer: This is an old Microsoft feature that is similar to PDF. You can still print documents to XPS, but PDF is a format that's more widely supported.
- MultiPoint Connector: Allows you to monitor and manage a computer using MultiPoint Manager and MultiPoint Manager Dashboard applications.
- Print and Document Services: Adds printing services to Windows 11, including scan, fax, and network printing.
- Remote Differential Compression API Support: Provides synchronization algorithm that intelligently compares two files that are about to be synchronized and only updates the differences between them. Only specific apps can use this feature.
- Services for NFS: Provides file access using the Network File System (NFS) protocol. For example, when you need access files on Network Attached Storage (NAS).
- Simple TCPIP Services (i.e., echo, daytime, etc.): Adds support for additional TCP/IP protocol services, including "Echo," "Character Generator (CHARGEN)," "Daytime," "Discard," and "Quote of the Day (QUOTE)."
- SMB 1.0/CIFS File Sharing Support: Adds support to configure file and printer sharing for previous versions of Windows, including Windows XP and Windows Server 2003 R2.
- SMB Direct: Allows the use of network adapters with Remote Direct Memory Access (RDMA) capability to improve file-sharing support using SMB 3.x.
- Telnet Client: Enables command-line utility to connect to other devices, such as routers and switches, running a Telnet server. This network protocol isn't secure, and you shouldn't use it outside of your network.
- TFTP Client: Enables command-line utility to upload and download files using Trivial File Transfer Protocol. This protocol isn't secure, and you shouldn't use it unless required.
- Virtual Machine Platform: Add platform support for virtual machines, and you can leverage this feature to create MSIX app packages for App-V or MSI. You must enable this option to set up the Windows Subsystem for Linux 2 (WSL2).
- Windows Hypervisor Platform: Enables the virtualization components to run the Microsoft Hyper-V hypervisor.
- Windows Identity Foundation 3.5: This may be needed for apps created with older .NET technologies.
- Windows PowerShell 2.0: Enables or disables PowerShell scripting command-line application on Windows 11.
- Windows Process Activation Service: Installs services that may be required when using IIS web services.
- Windows Projected File System: Also known as (ProjFS), this feature allows an app (provider) to present hierarchical data from a backing data store into the file system, making it seem like files are in the file system.
- Windows Sandbox: Creates a lightweight virtual machine to test applications and navigate untrusted web pages in an isolated environment. When you close the sandbox, everything will be deleted. The next time you open the app, a new sandboxed instance will be created.
- Windows Subsystem for Linux: Installs the platform to install and run Linux distros alongside Windows 11.
- Windows TIFF iFilter: Allows the system to index and search Tagged Image File Format (TIFF) using optical character recognition (OCR), but it typically uses more system resources than traditional file indexing and searching.
- Work Folders Client: Allows file synchronization with network file servers.
Other features like RIP Listener, RAS Connection Manager Administration Kit (CMAK), and Simple Network Management Protocol (SNMP) are now part of optional features through the Settings app.
Remove optional features
To turn off Windows features, use these steps:
- Open Settings.
- Click on System.
- Click the Optional features page on the right side.

- Click the More Windows features setting under the "Related settings" section.

- Clear the Windows 11 feature to install.
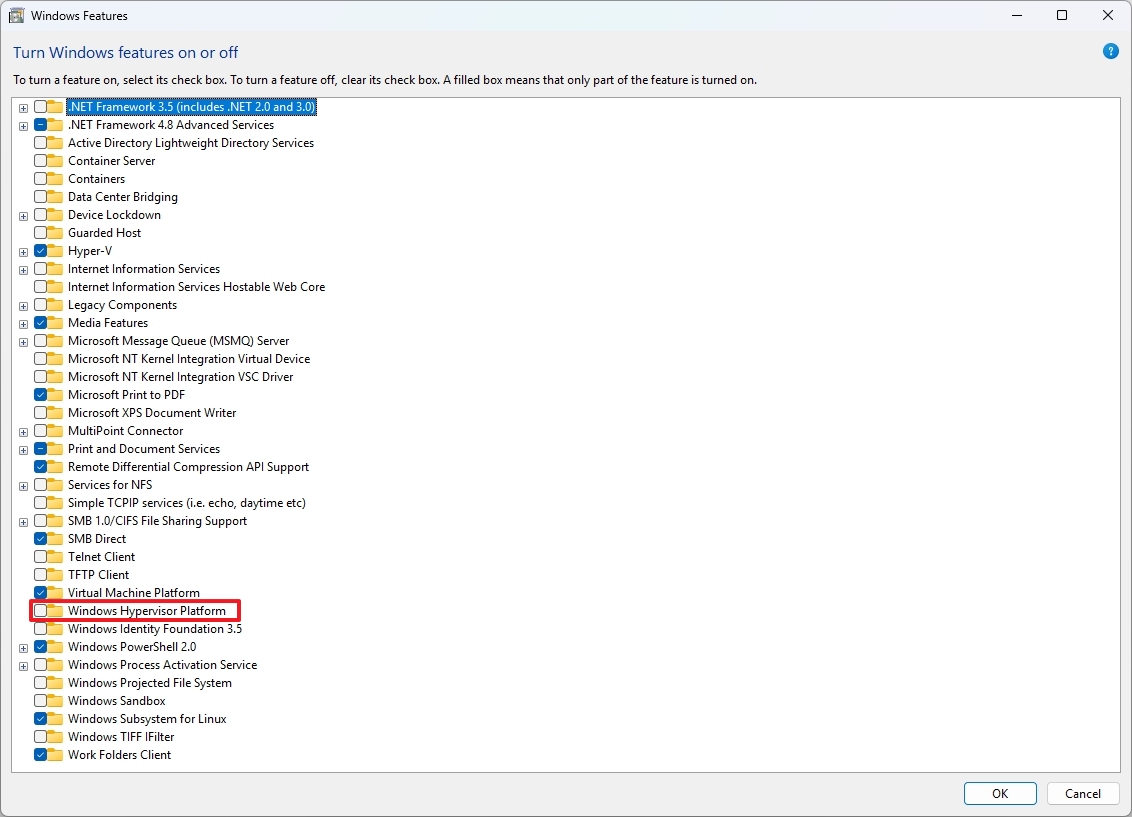
- Click the OK button.
- Click the Restart button.
After you complete the steps, the feature will no longer be available on Windows 11.
More resources
For more in-depth insights, troubleshooting tips, and the latest updates on Windows 11 and 10, be sure to explore these resources:
Mauro Huculak has been a Windows How-To Expert contributor for WindowsCentral.com for nearly a decade and has over 15 years of experience writing comprehensive guides. He also has an IT background and has achieved different professional certifications from Microsoft, Cisco, VMware, and CompTIA. He has been recognized as a Microsoft MVP for many years.

