How to check CPU temperatures on Windows 11: Fast and free methods
Checking CPU temps and keeping processors cool.
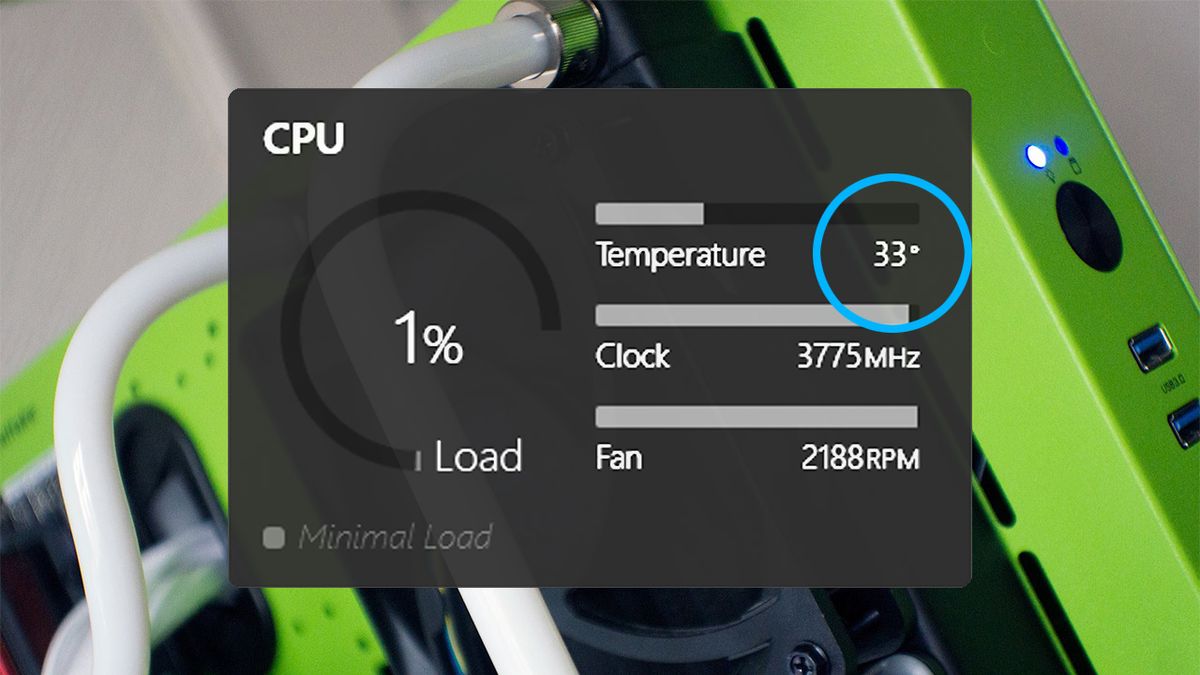
Whether building a customized desktop PC or using a ready-made laptop, checking the CPU temperature is one of the best ways to check for issues that might cause slowdowns on Windows 11. Various CPU cooling and ventilation issues can throttle performance to prevent overheating, but you might not know it's happening unless you dig into the details.
Unfortunately, despite its importance, CPU temperature readings are not readily available when using default tools in Windows. Checking your graphics card temperature on Windows 11 is more straightforward, but processors aren't so lucky. There are several methods for checking your temps, and I'll explain each in order of simplicity (and they're all totally free.)
Check CPU temp with HWMonitor
✅ Great for: Any desktop or laptop with a functional CPU temperature node.
❌ Not so great for: Devices with admin-restricted software installations.
Probably the most common method used by custom desktop PC builders, downloading a lightweight and free app to check your CPU temperatures is also the most straightforward route. I regularly recommend the free HWMonitor app from CPUID to anyone who wants to diagnose high temperatures quickly.
It offers more than a simple CPU readout and might look intimidating when opened for the first time. Not to worry, I'll explain precisely what to look for. First, let's get HWMonitor downloaded and install it.
- Navigate to the HWMonitor page of CPUID's official website.
- Click 'Setup • English' underneath the 'Versions' submenu.
- Click 'Download now!' on the following page.
- Open your downloads folder and run the 'hwmonitor_x.xx.exe' installer.
- Install HWMonitor and decide if you want a desktop shortcut.
- Run HWMonitor and expand its window to a comfortable size.
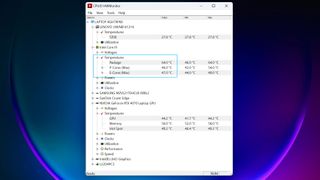
You'll be presented with a list of every component HWMonitor can detect, alongside a temperature readout from the internal nodes. Look for your processor by identifying its icon (a miniature CPU with golden pins) and the matching model/brand name. In my example, the Intel Core i9 submenu has a 'Temperatures' subsection, showing the current value with minimum and maximum readings detected since the app opened.
Other temperature readings, including some from the motherboard and graphics card, can help you diagnose potential CPU-specific overheating issues. If your components are within a similar range for their Celsius readouts, you likely have a general venting problem. However, if only your CPU is reading a high temperature, your culprit is probably a faulty CPU cooler or damaged thermal paste. Anything below 85°C is generally acceptable under stress, depending on your system.
Check CPU temp with companion apps
✅ Great for: Custom-made or pre-built gaming desktops and laptops.
❌ Not so great for: OEM business-grade laptops.
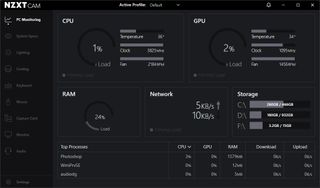
Another method that leans towards desktop PCs for its usefulness, but does have some carry-over into gaming laptops is taking advantage of companion apps from various component manufacturers.
Get the Windows Central Newsletter
All the latest news, reviews, and guides for Windows and Xbox diehards.
For example, ASUS ROG devices usually have Armoury Crate pre-installed, its first-party software suite designed to tweak performance with the side effect of showing live temperature readings.
Many companion apps are cross-compatible with other branded hardware, so you don't necessarily have to pair them perfectly. It's perfectly fine to install NZXT CAM and use it to check temperatures, even if you don't use its parts. I use an NZXT-branded PC case and the CAM software to control my RGB fans, tying their colors to the CPU/GPU temps (green is good, red is too hot.)
Branded companion apps
- ASUS: ROG Armoury Crate
- Cooler Master: MasterPlus+
- Corsair: iCUE
- MSI: Afterburner
- NZXT: CAM
Each branded companion app has its own documentation, so the steps for accessing CPU temperatures differ. However, the purpose is generally the same; despite some variants like MSI Afterburner having a GPU focus, it still offers CPU temps. Naturally, this isn't particularly well-suited to business-focused laptops from Dell and HP. However, the software should still work perfectly fine if you don't mind installing free software designed for gamers.
Check CPU temp in your BIOS
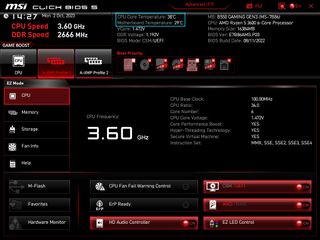
✅ Great for: Desktop computers with gaming-centric motherboards.
❌ Not so great for: Laptops and office-centric desktop PCs.
Every computer has a motherboard, connecting each component and allowing your CPU to communicate with everything needed for Windows 11 to boot. If you're using a gaming PC, whether homemade or pre-built, you can likely see your CPU temperature (and often a secondary motherboard node reading) within the BIOS before Windows starts.
Since your BIOS handles firmware, it's operating behind everything else. Checking temperatures here is the perfect way to tell if Windows 11 is causing unusually high readings or if the problem runs deeper. Most BIOS screens look similar, differing in visual luxuries depending on the brand and motherboard category, but all can be accessed in mostly the same way.
How to access your BIOS
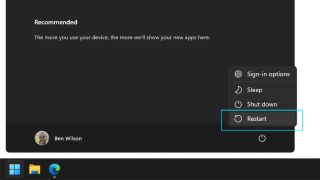
- Open the Start menu and left-click the Power icon.
- Hold down Left Shift on your keyboard and click Restart.
- Continue to hold Left Shift while your computer reboots.
There are multiple methods to enter UEFI BIOS on devices running Windows 11. Typically, pressing a particular Function (F1 - F12) 'ESC' or 'Delete' key will trigger the BIOS if you press it before Windows boots. Still, it's not uncommon to miss this short window due to slow-acting monitors failing to display the correct key in time. Stick to the above method and hold the Left Shift key as your computer restarts, and you're presented with the following choices.


- Click the Troubleshoot option.
- On the following screen, click Advanced options.
- On the Advanced options screen, click UEFI Firmware Settings.
- Click Restart for the last time.
Your device will reboot, but you don't have to hold the Left Shift key this time (or any other key, for that matter.) Once you're in the BIOS menu, your CPU temperature (sometimes listed with different names like CPU core) might be immediately visible on the homepage. Otherwise, you'll need to search for it.
If you can't see any temperatures, navigate the available menus with the arrow keys on your keyboard and enter the submenus with the return key (unless specified otherwise.) Search for tools with names like 'hardware monitor' or 'status' to find a Celsius readout of your processor, often alongside a motherboard temperature (or system temperature.)
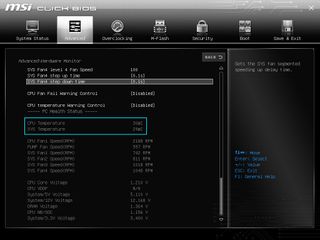
If your BIOS shows a separate motherboard temperature reading from your CPU, this is another way to tell if something is wrong with your cooling solution. When both readings are a close match, or at least within a few degrees of each other, this usually means the temperature inside your PC case or laptop chassis is consistent. However, high CPU and low motherboard/system temperatures generally point towards CPU cooler issues.
Check your thermal paste and that you didn't accidentally leave a 'remove me' sticker on the cooling plate of a desktop CPU cooler (don't be embarrassed; it happens to the best of us.)
More resources
For more helpful articles, coverage, and answers to common questions about Windows 10 and Windows 11, visit the following resources:

Ben is a Senior Editor at Windows Central, covering everything related to technology hardware and software. He regularly goes hands-on with the latest Windows laptops, components inside custom gaming desktops, and any accessory compatible with PC and Xbox. His lifelong obsession with dismantling gadgets to see how they work led him to pursue a career in tech-centric journalism after a decade of experience in electronics retail and tech support.