Warhammer 40,000: Space Marine 2 — List of all enemies and bosses so far
Familiarize yourself with the list of enemies and bosses you'll face in Warhammer 40,000: Space Marine 2.
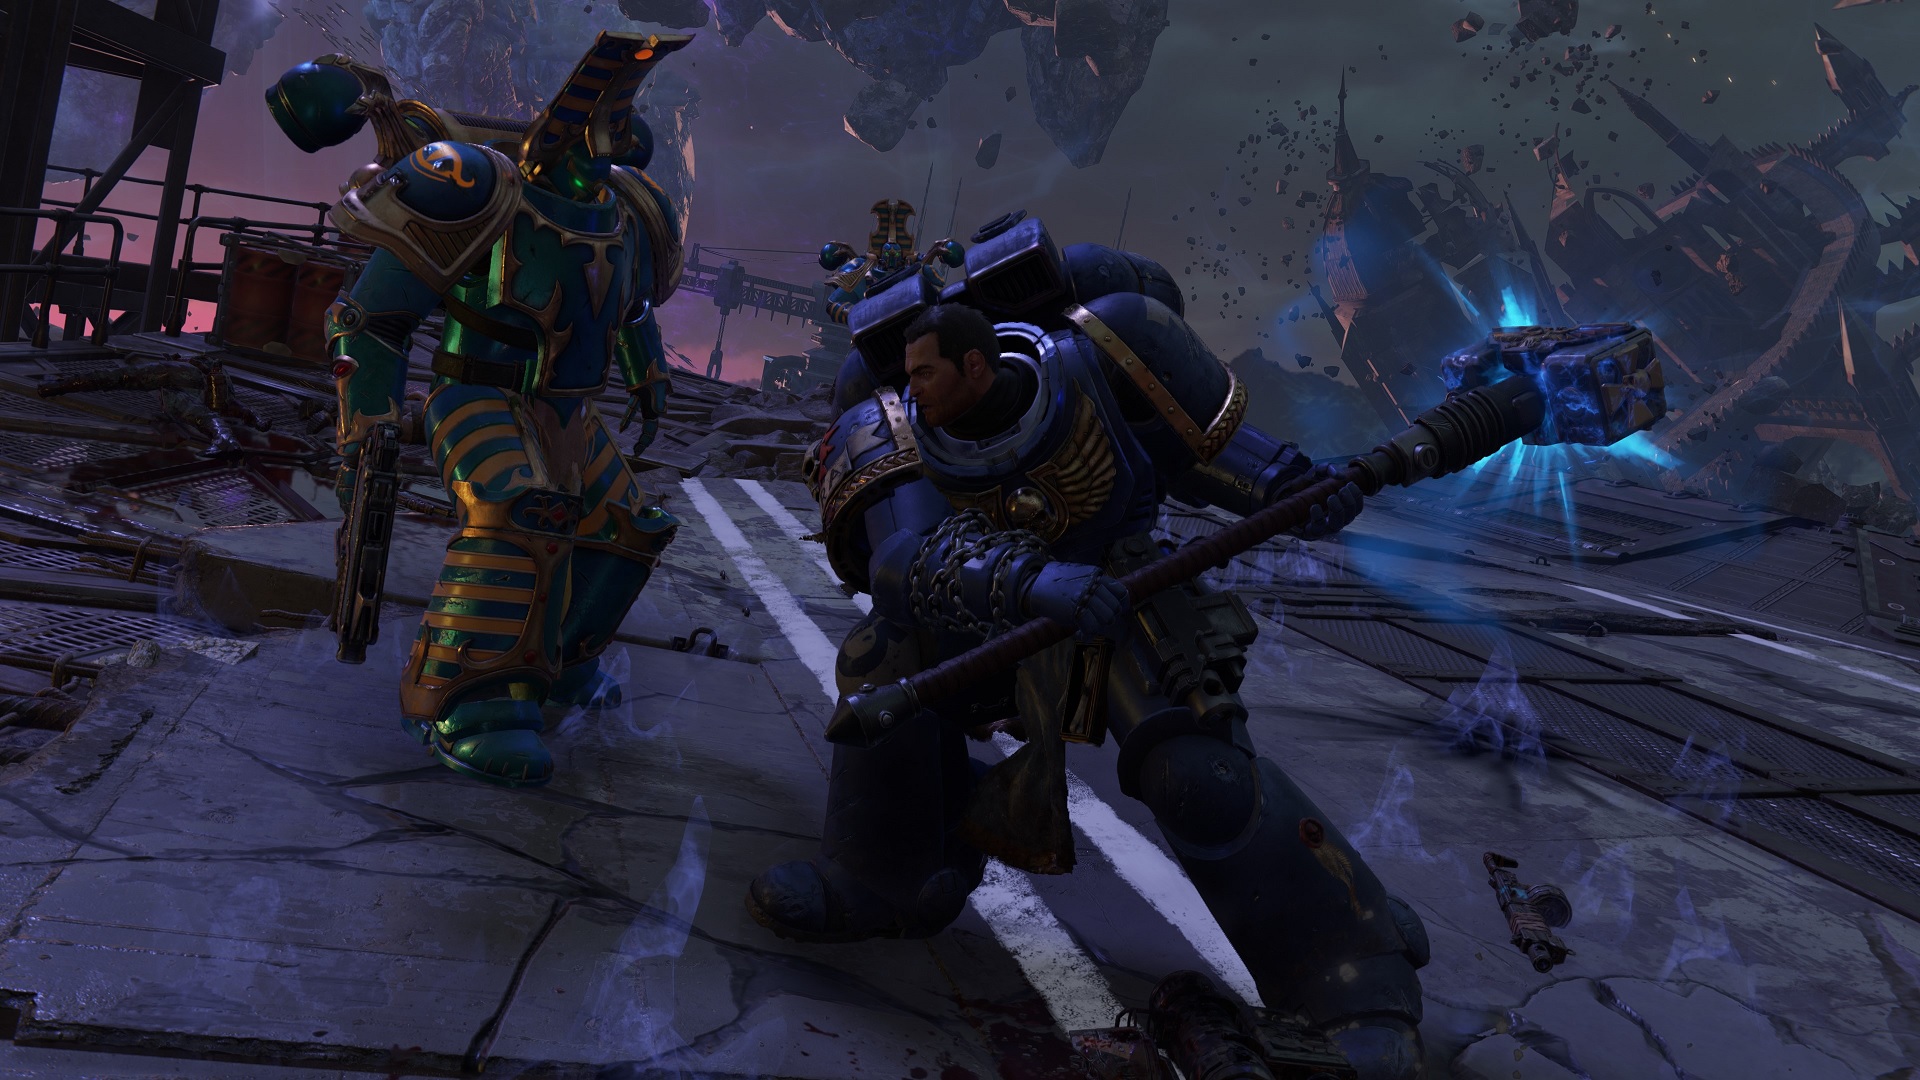
To destroy your foe, you need to know your foe.
Warhammer 40,000: Space Marine 2 is here, bringing players a blockbuster campaign and co-op focused Operations mode, both of which contain innumerable hordes of alien beasts and Chaos-aligned warriors. In order to ensure that players can take on their opponents, I've put together a list of every enemy you can expect to face at some point in the game.
This should really go without saying, but you can expect major spoilers ahead if you haven't played through the campaign and all six of the Operations missions that are available at launch.
Warhammer 40,000: Space Marine 2
13 years later, Titus is back in action. This space marine has crossed the Rubicon Primaris, and he's ready to stop the forces of Chaos and the all-consuming Tyranids from overrunning more Imperial strongholds. I've enjoyed my time with the game, so get ready to jump in.
Buy from: Amazon | Best Buy | GreenManGaming (Steam)
Warhammer 40,000: Space Marine 2 list of Tyranids
The dynamic nature of the Tyranids makes them one of the most unpredictable opponents in the Warhammer 40,000 universe. This massive swarm is driven by a Hive Mind to consume, consume, and consume everything it can, adapting and growing new creatures or altering strategies in response to defeat. The Tyranids from Warhammer 40,000: Space Marine 2 hail from Hive Fleet Leviathan, the largest and most dangerous fleet yet.
Hormagaunt
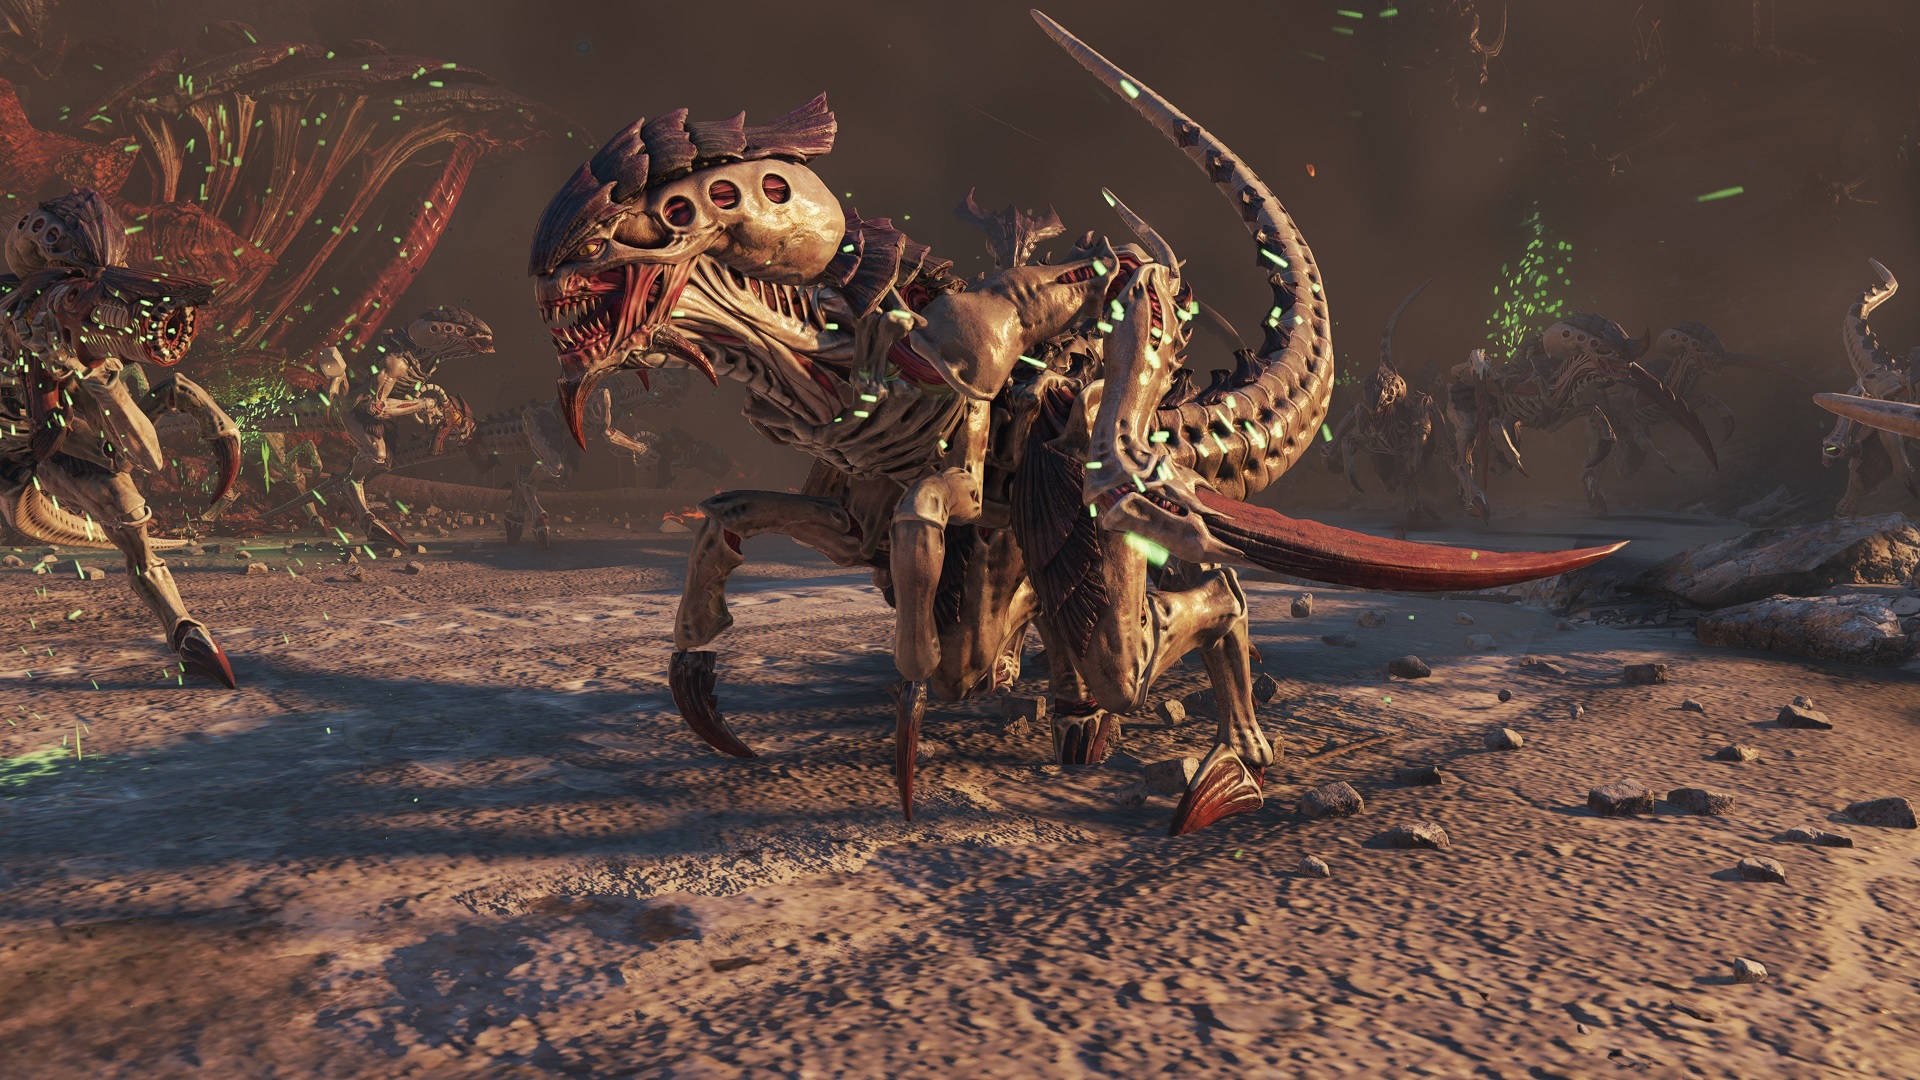
The most basic and the most numerous of your Tyranid opponents is the Hormagaunt. These creatures make up the bulk of the swarm, crawling and leaping dozens at a time, piling up near cliffs to reach you. They're fairly weak and easily killed, but their sheer numbers can be a problem if you don't plan appropriately, or you get surrounded. The best way to deal with them is often to kill any larger Tyranids near them, as the neural backlash will instantly kill a chunk of the Hormagaunts.
Termagant
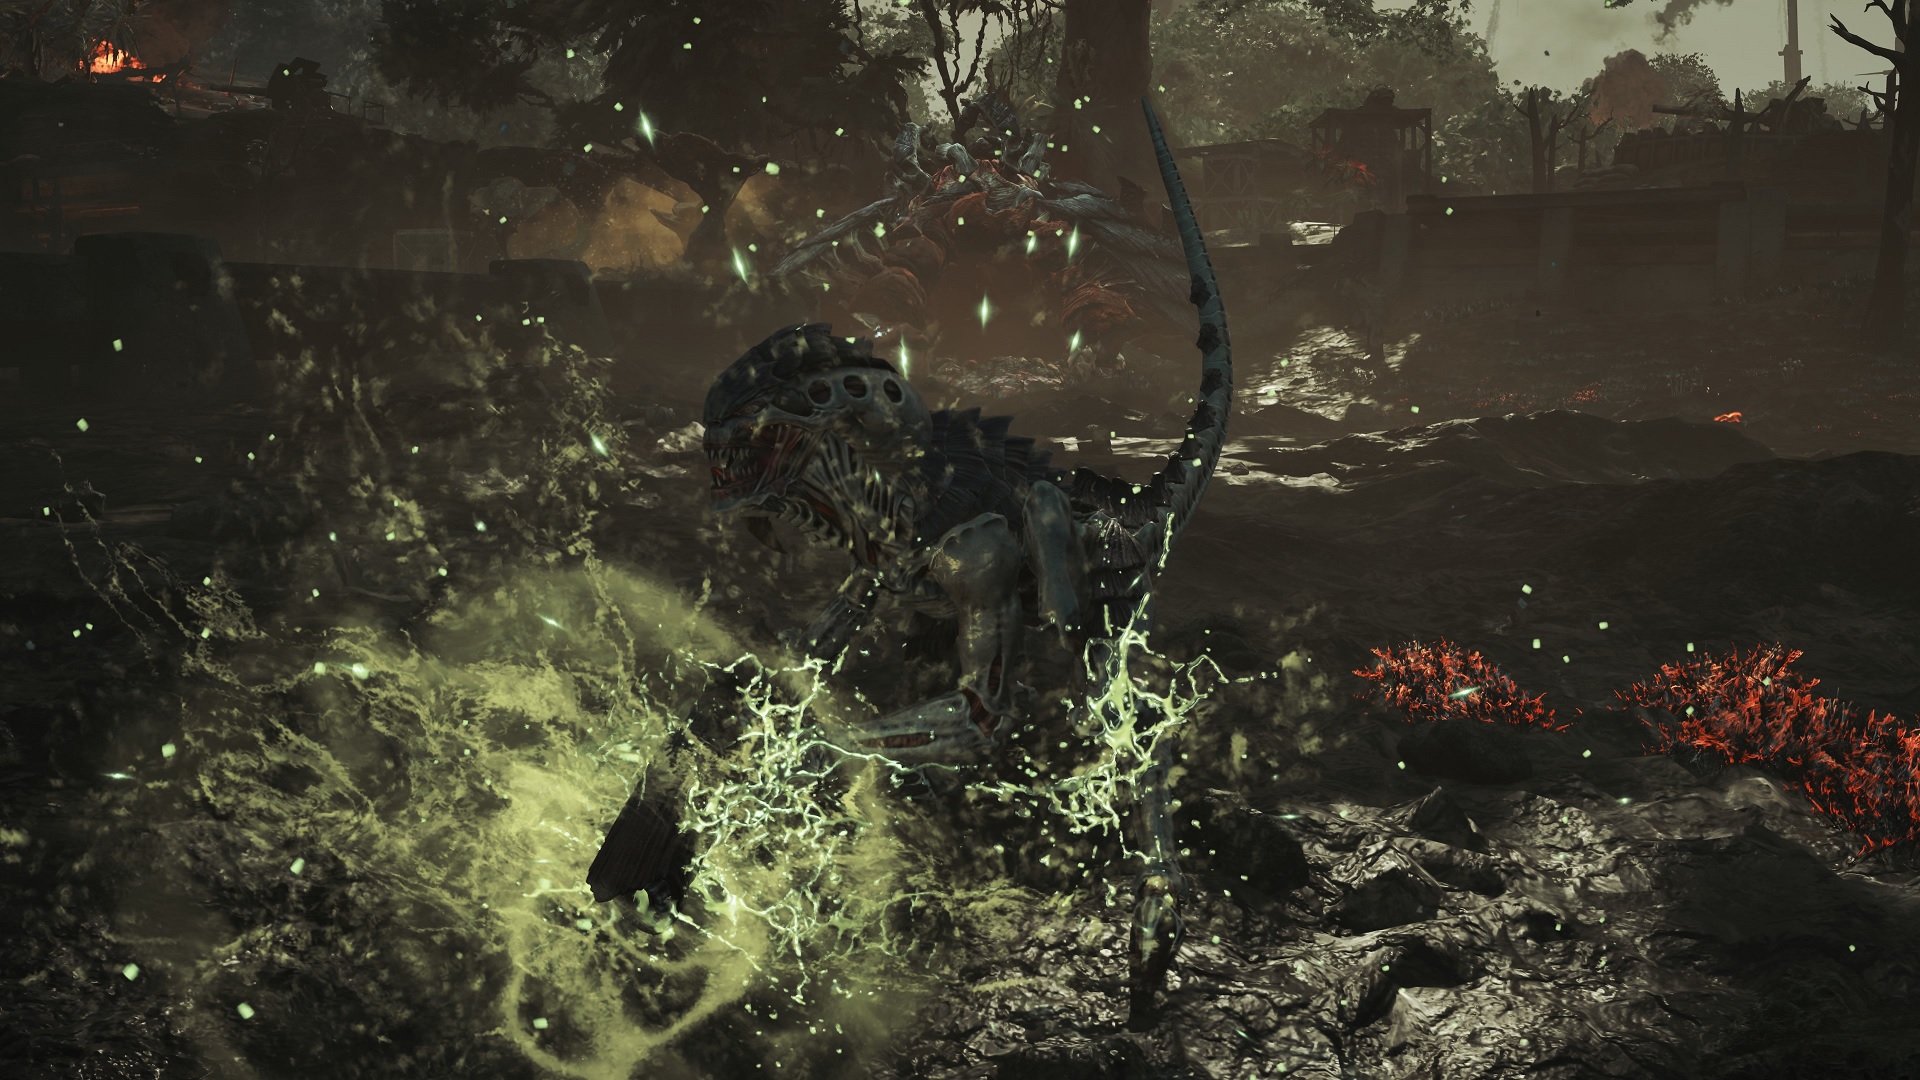
Another common sight in combat, Termagants are ranged foes, pelting you with damage from afar. They're slightly tougher than Hormagaunts, but are still easily disposed of with most weaponry. If you kill a larger Tyranid near them, they won't die instantly, but they will be stunned by the feedback, giving you a break from the ranged bombardment and allowing you to close the distance for some executions.
Warrior
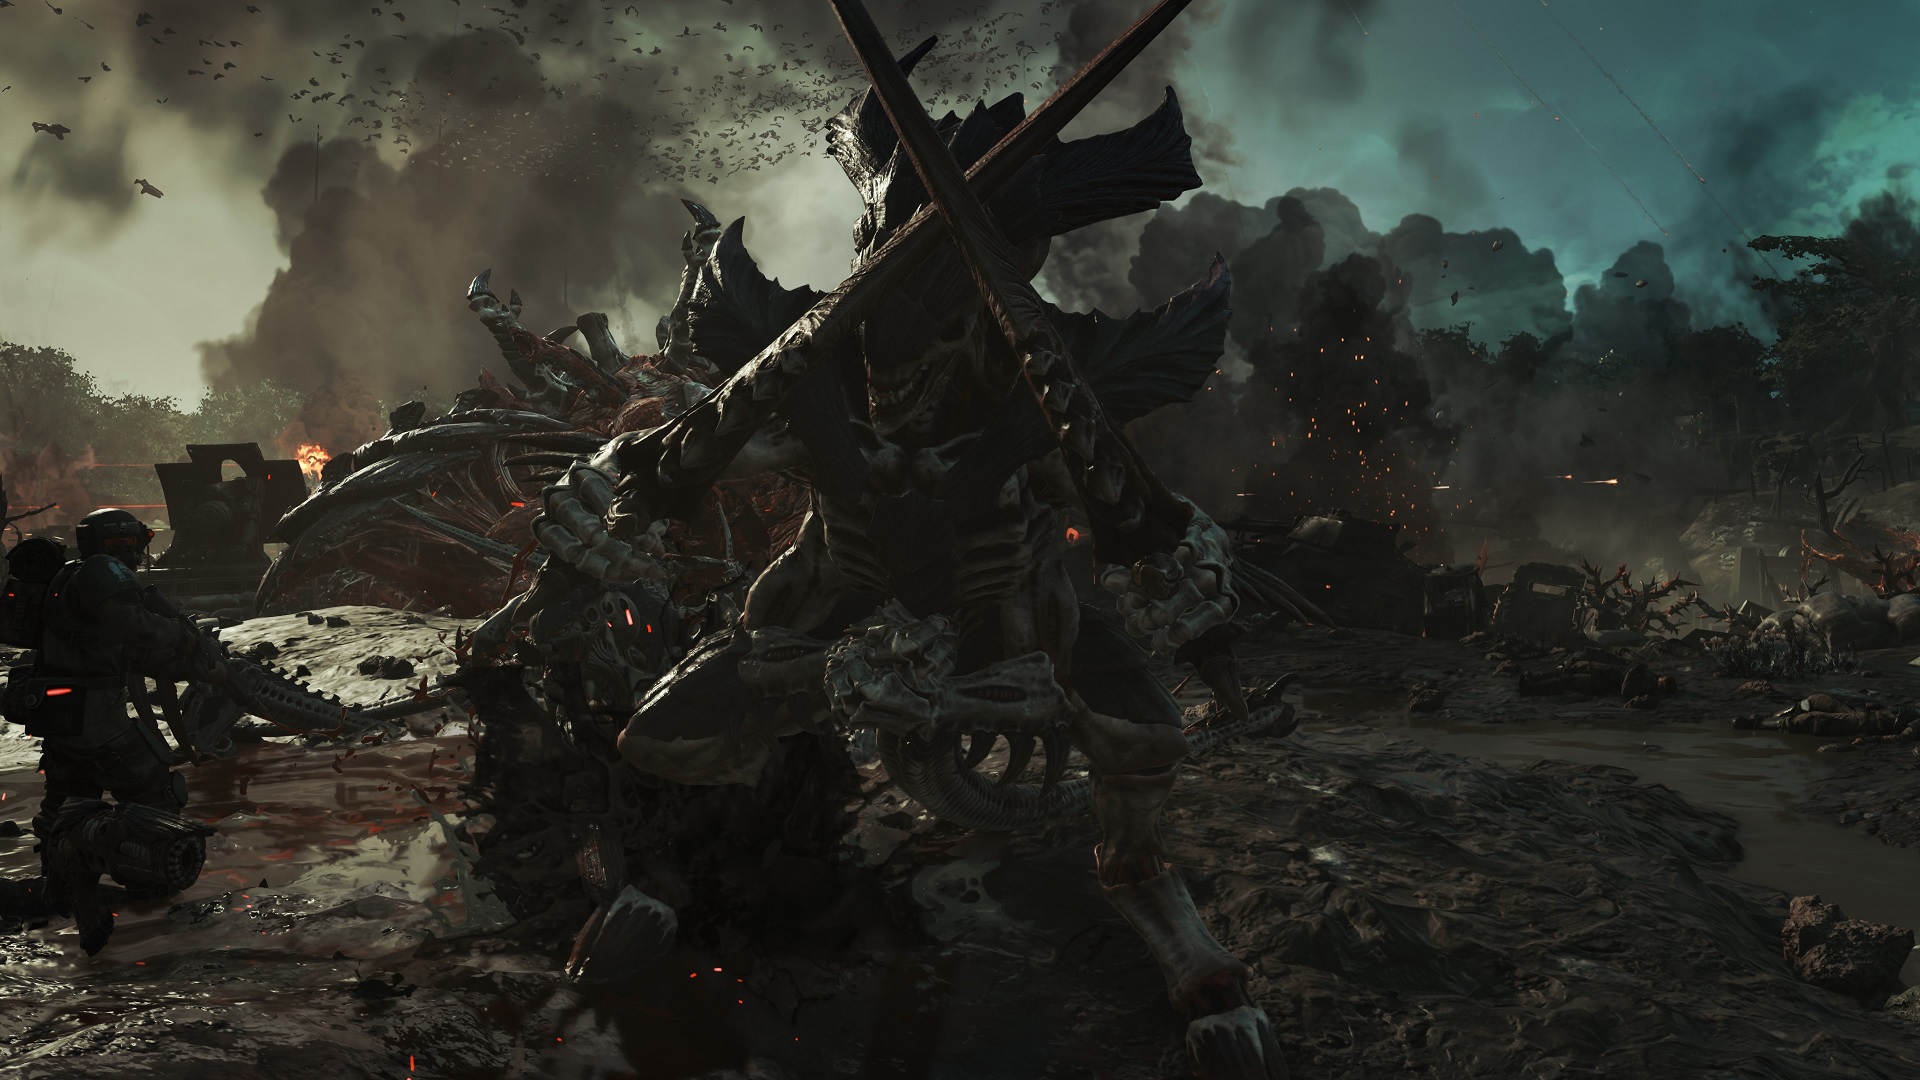
A dangerous opponent at first, Tyranid Warriors help direct Hormagaunts and Termagants while focusing in on you to land devastating attacks. The most common variants wield bone blades, but you'll also encounter Warriors wielding whips and ranged weapons. Repeated headshots from powerful ranged weapons can dispose of them, but softening them up with a grenade before following through with an execution is also reliable. They'll often use their blades to block your shots, but their melee combos can be parried and exploited.
Get the Windows Central Newsletter
All the latest news, reviews, and guides for Windows and Xbox diehards.
Spore Mine
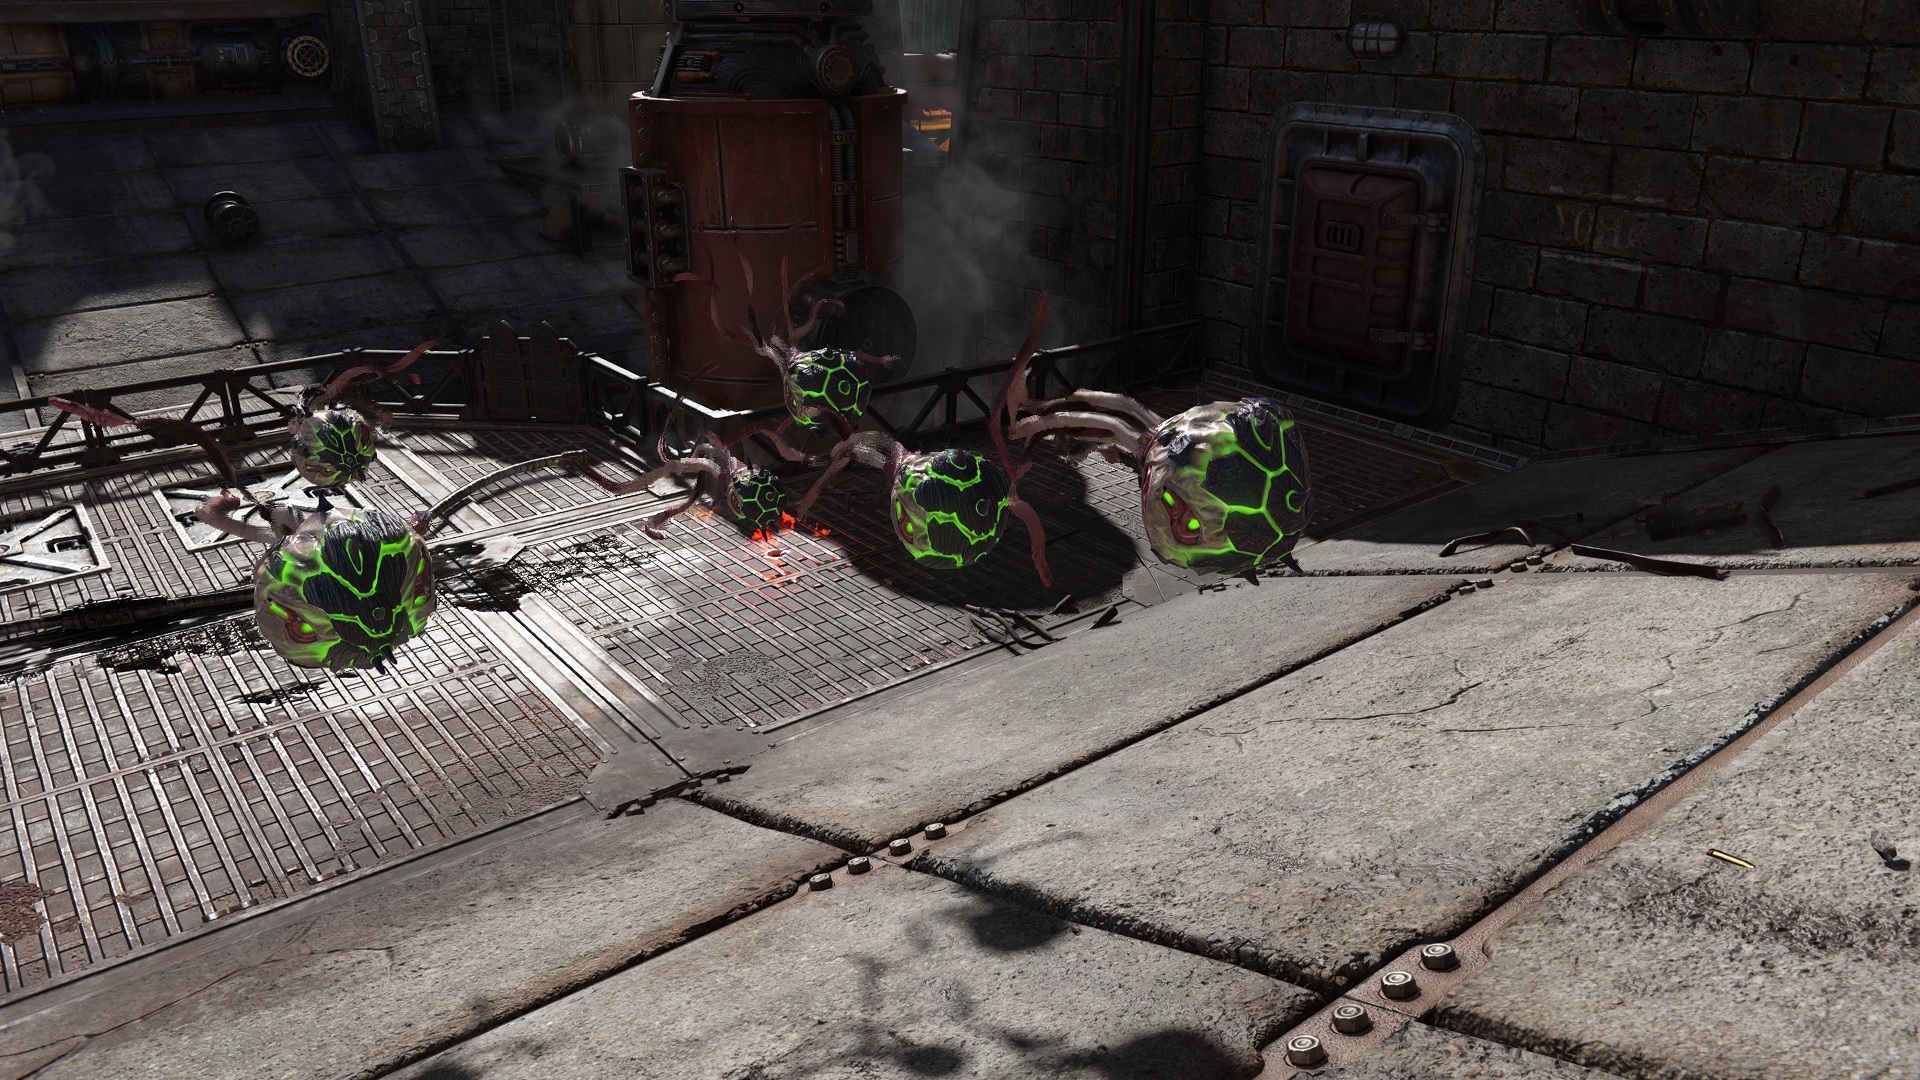
Spore Mines tend to float in large groups, waiting to dive bomb you. If they connect, they'll deal massive damage. Fortunately, they can easily be shot from a distance, but don't use your heavy weapons. Instead, just use your sidearm.
Gargoyles
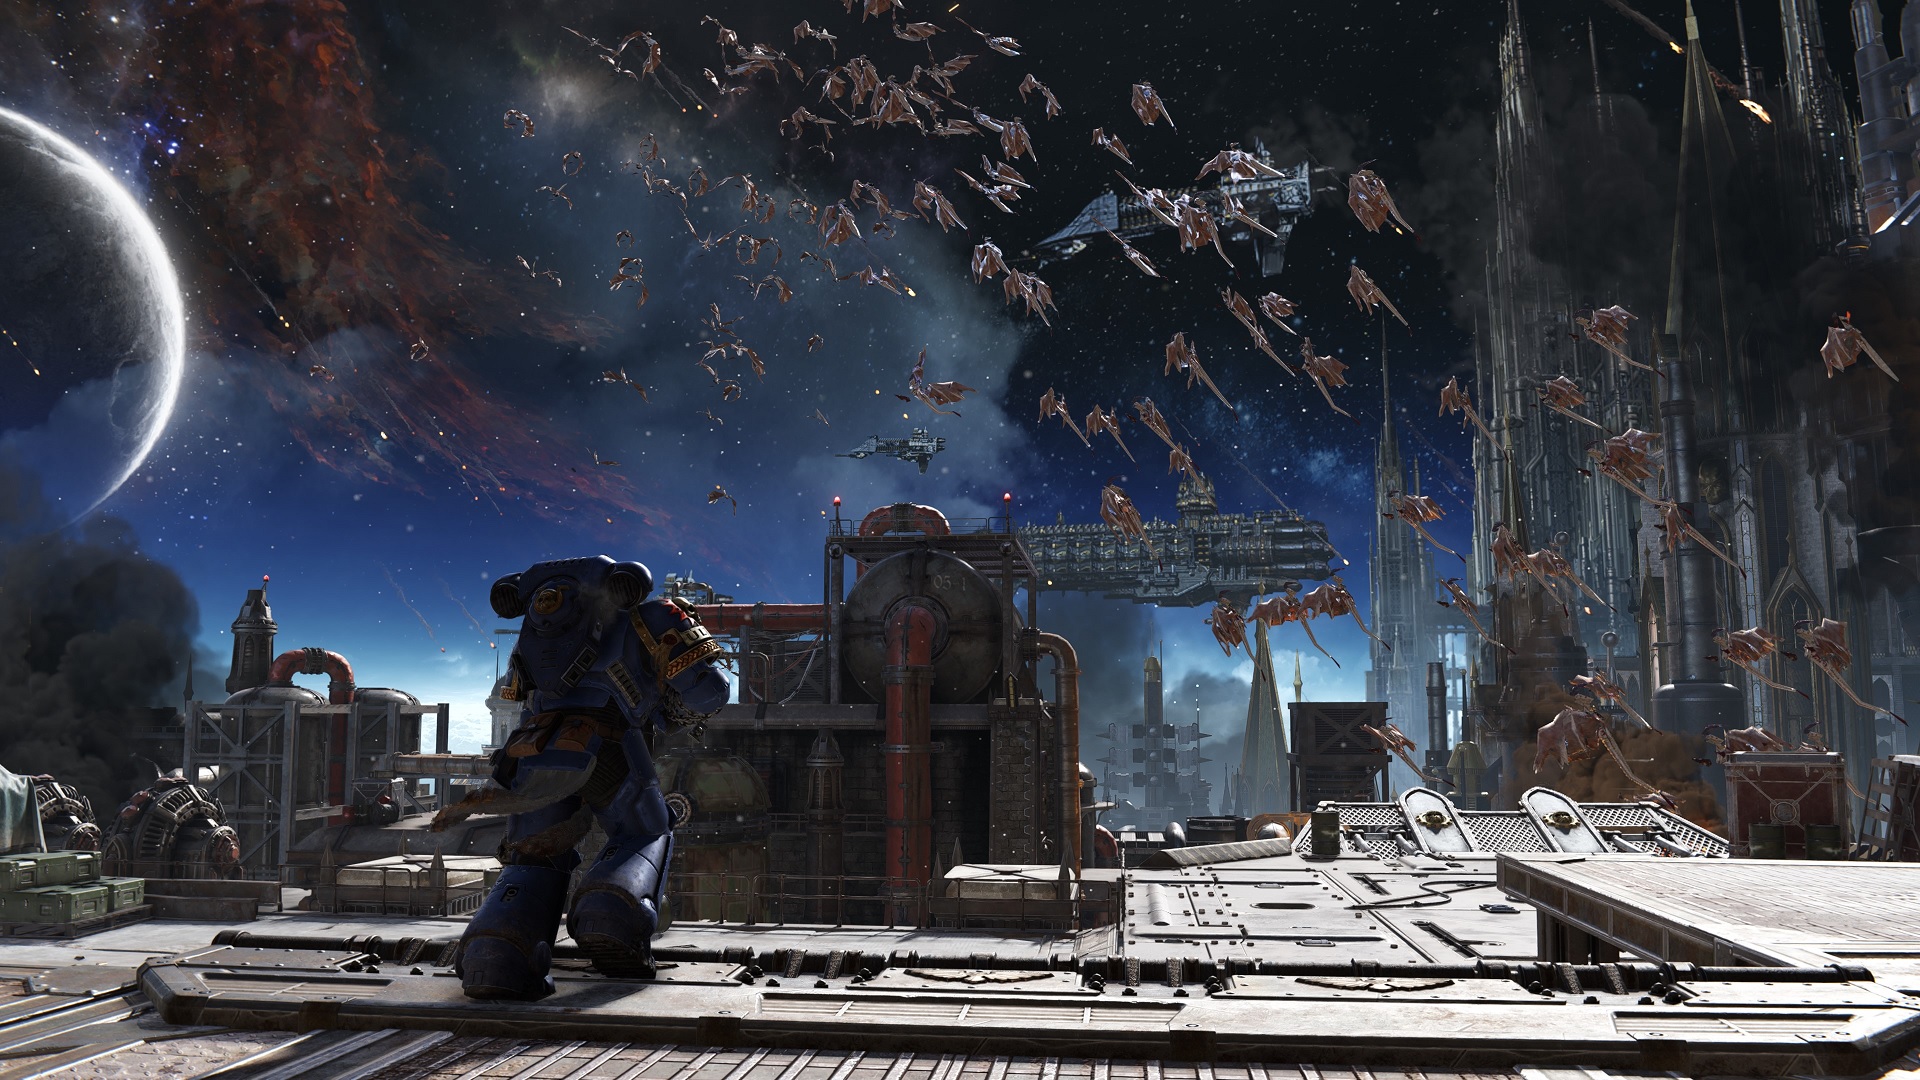
While Gargoyles are seen frequently across the skyboxes of Warhammer 40,000: Space Marine 2, you'll only directly fight them a handful of times. Gargoyles will try to chew through something you need to defend, like chains or transmitters. Use a fast-firing ranged weapon like an Auto Bolt Rifle to quickly dispose of them.
Lictor
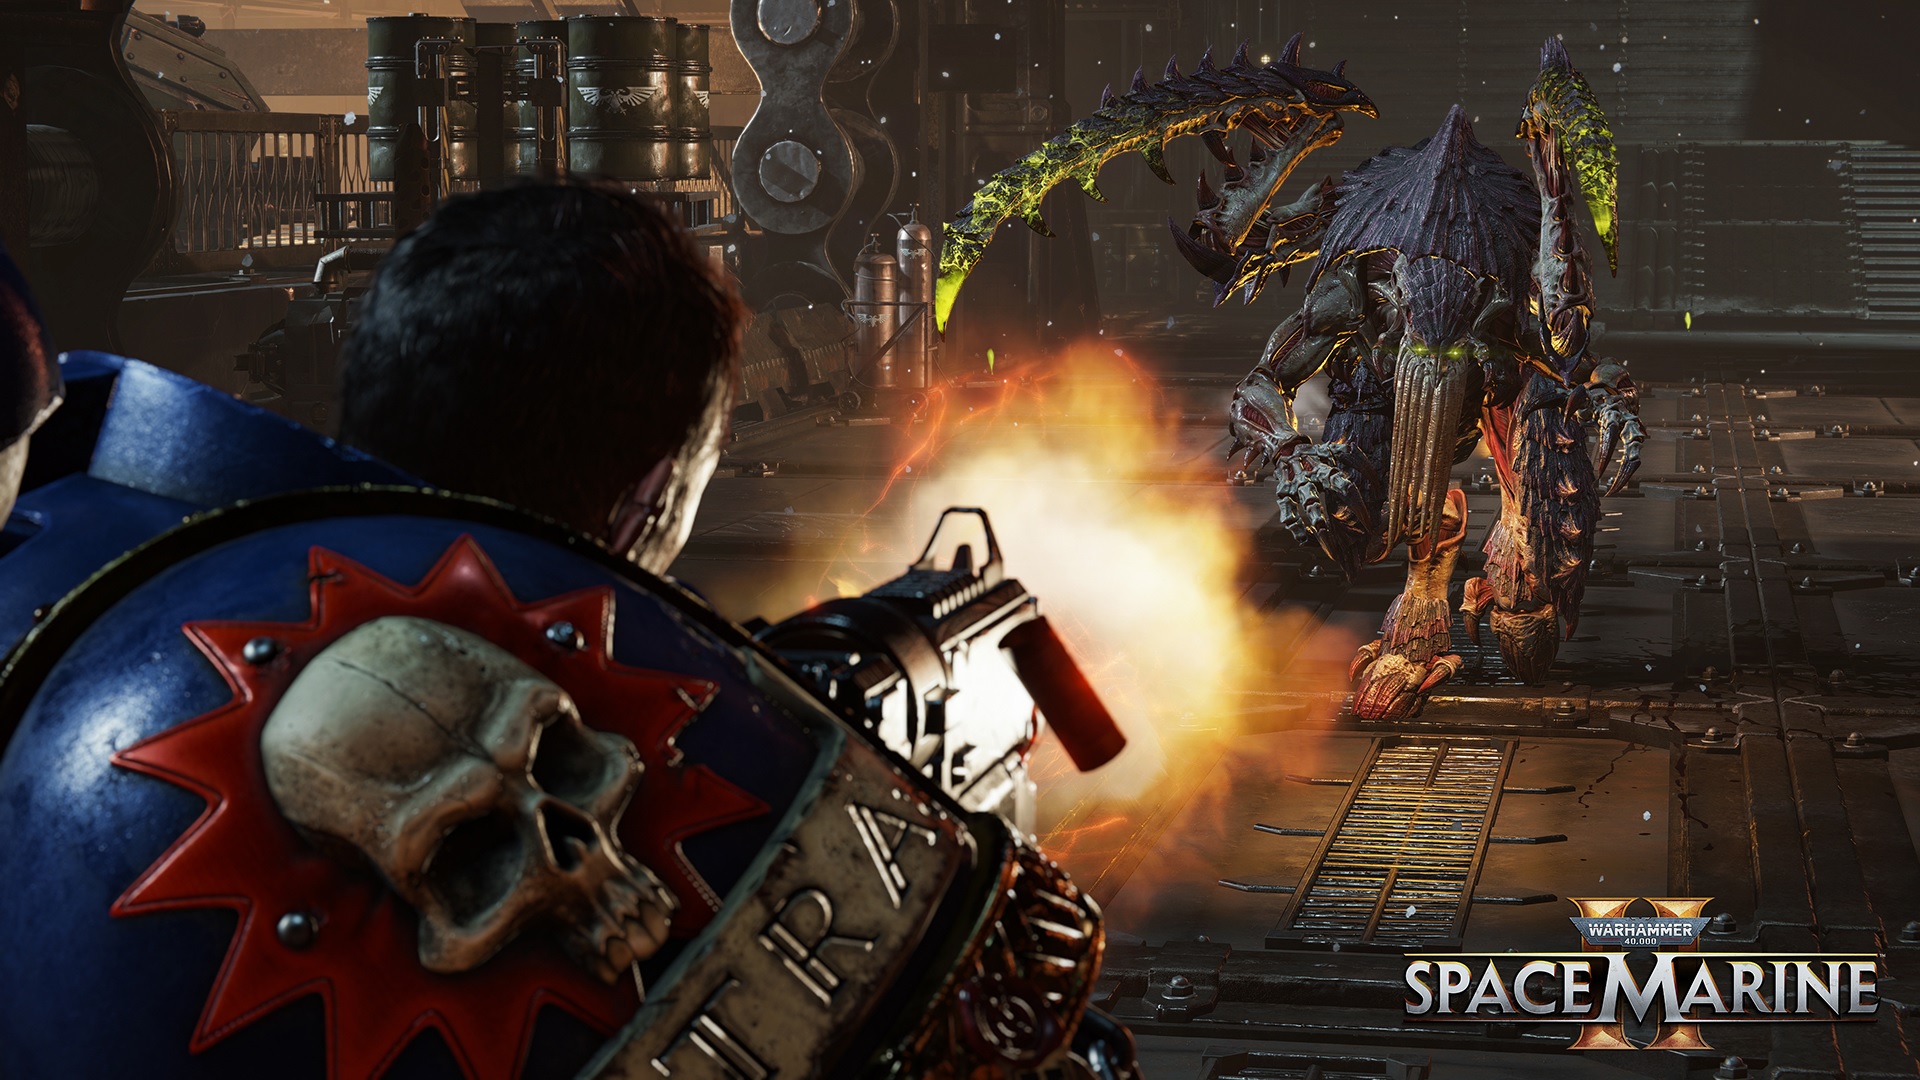
Lictors are lone predators, striking from a distance by leaping and slashing before cloaking and turning nearly invisible. You're not likely to encounter more than one Lictor at a time, but that one Lictor can be a huge challenge to handle. If you have the Auspex ability, it can easily reveal the creature's location while invisible. Otherwise, stay on your guard and get ready to parry.
Ravener
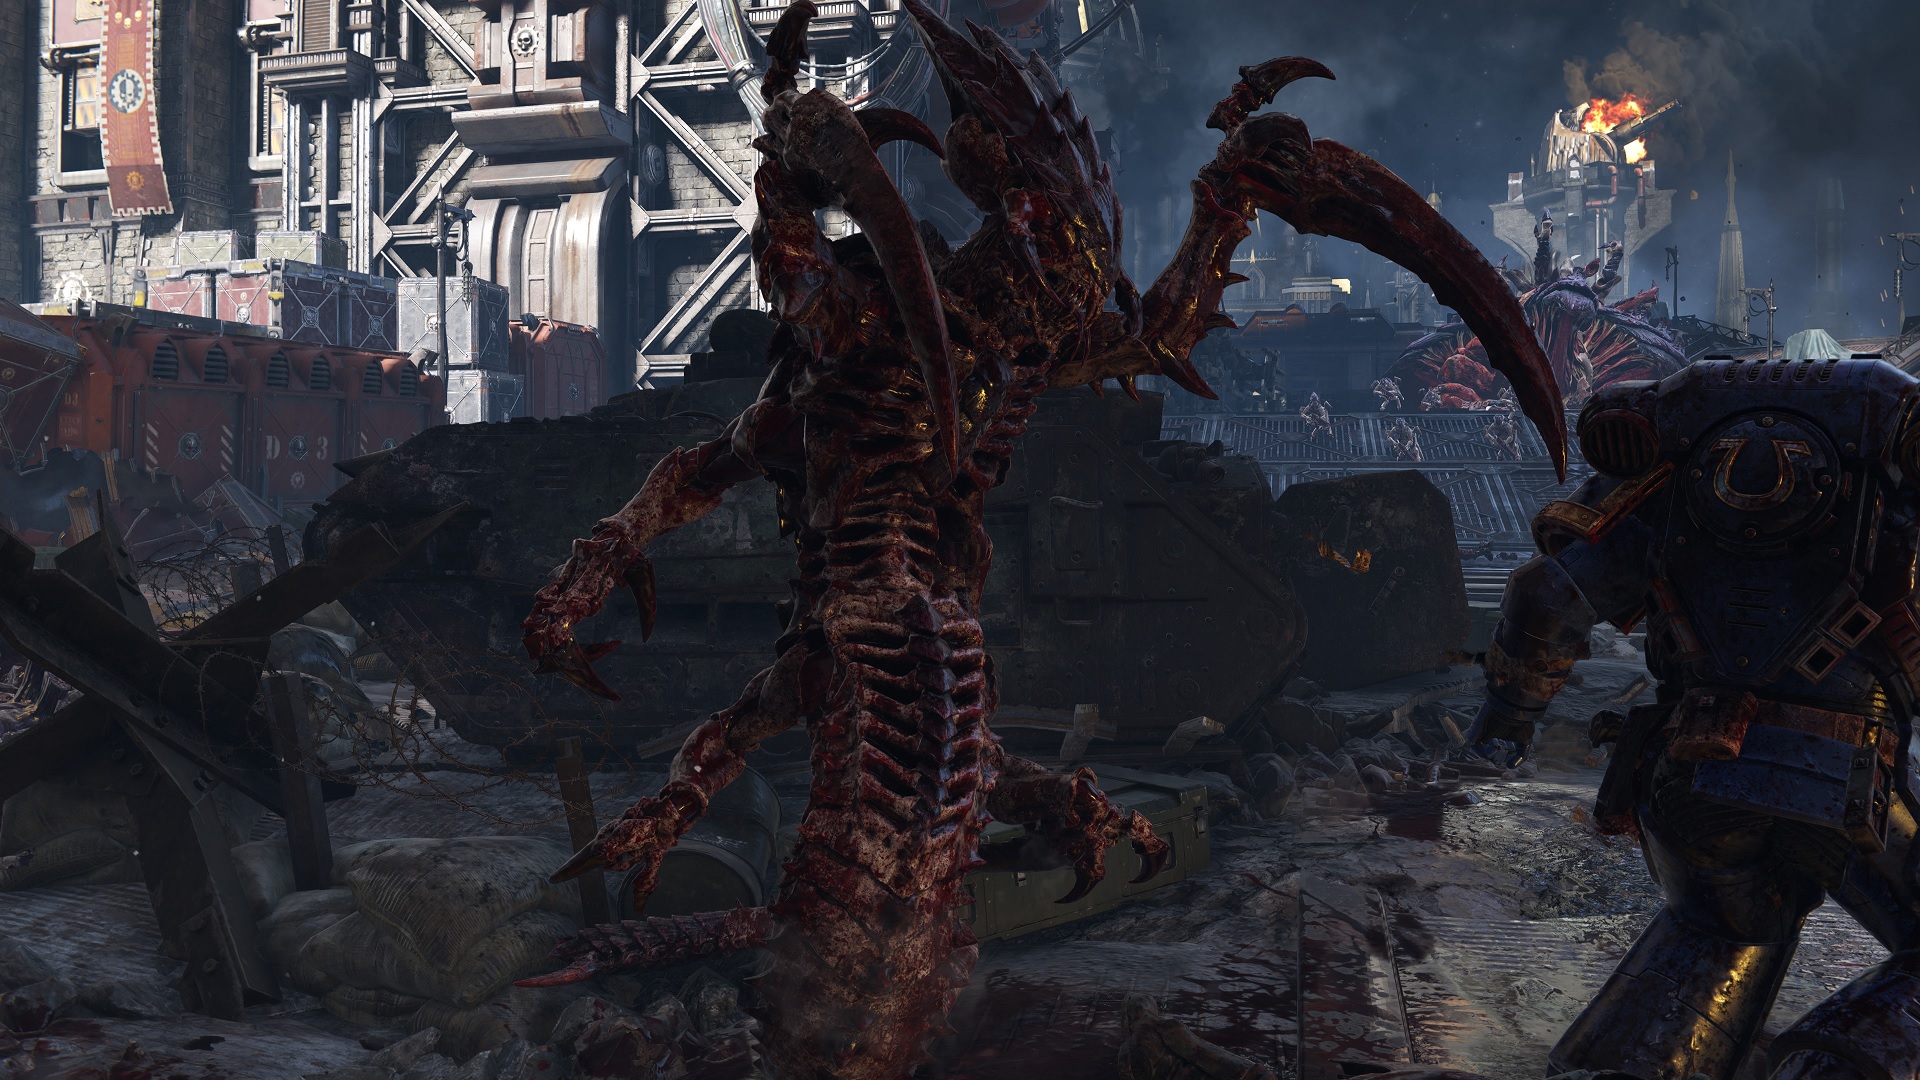
The Ravener resembles a Tyranid Warrior with a snake tail, so it'll come as no surprise that the creature can coil around you and hold you in place, necessitating quick parries in order to survive. While its melee attacks are dangerous, the true threat of the Ravener is in its ability to tunnel around the battlefield, appearing and disappearing with ease. Krak grenades are a serious boon in dealing with these creatures.
Zoanthrope
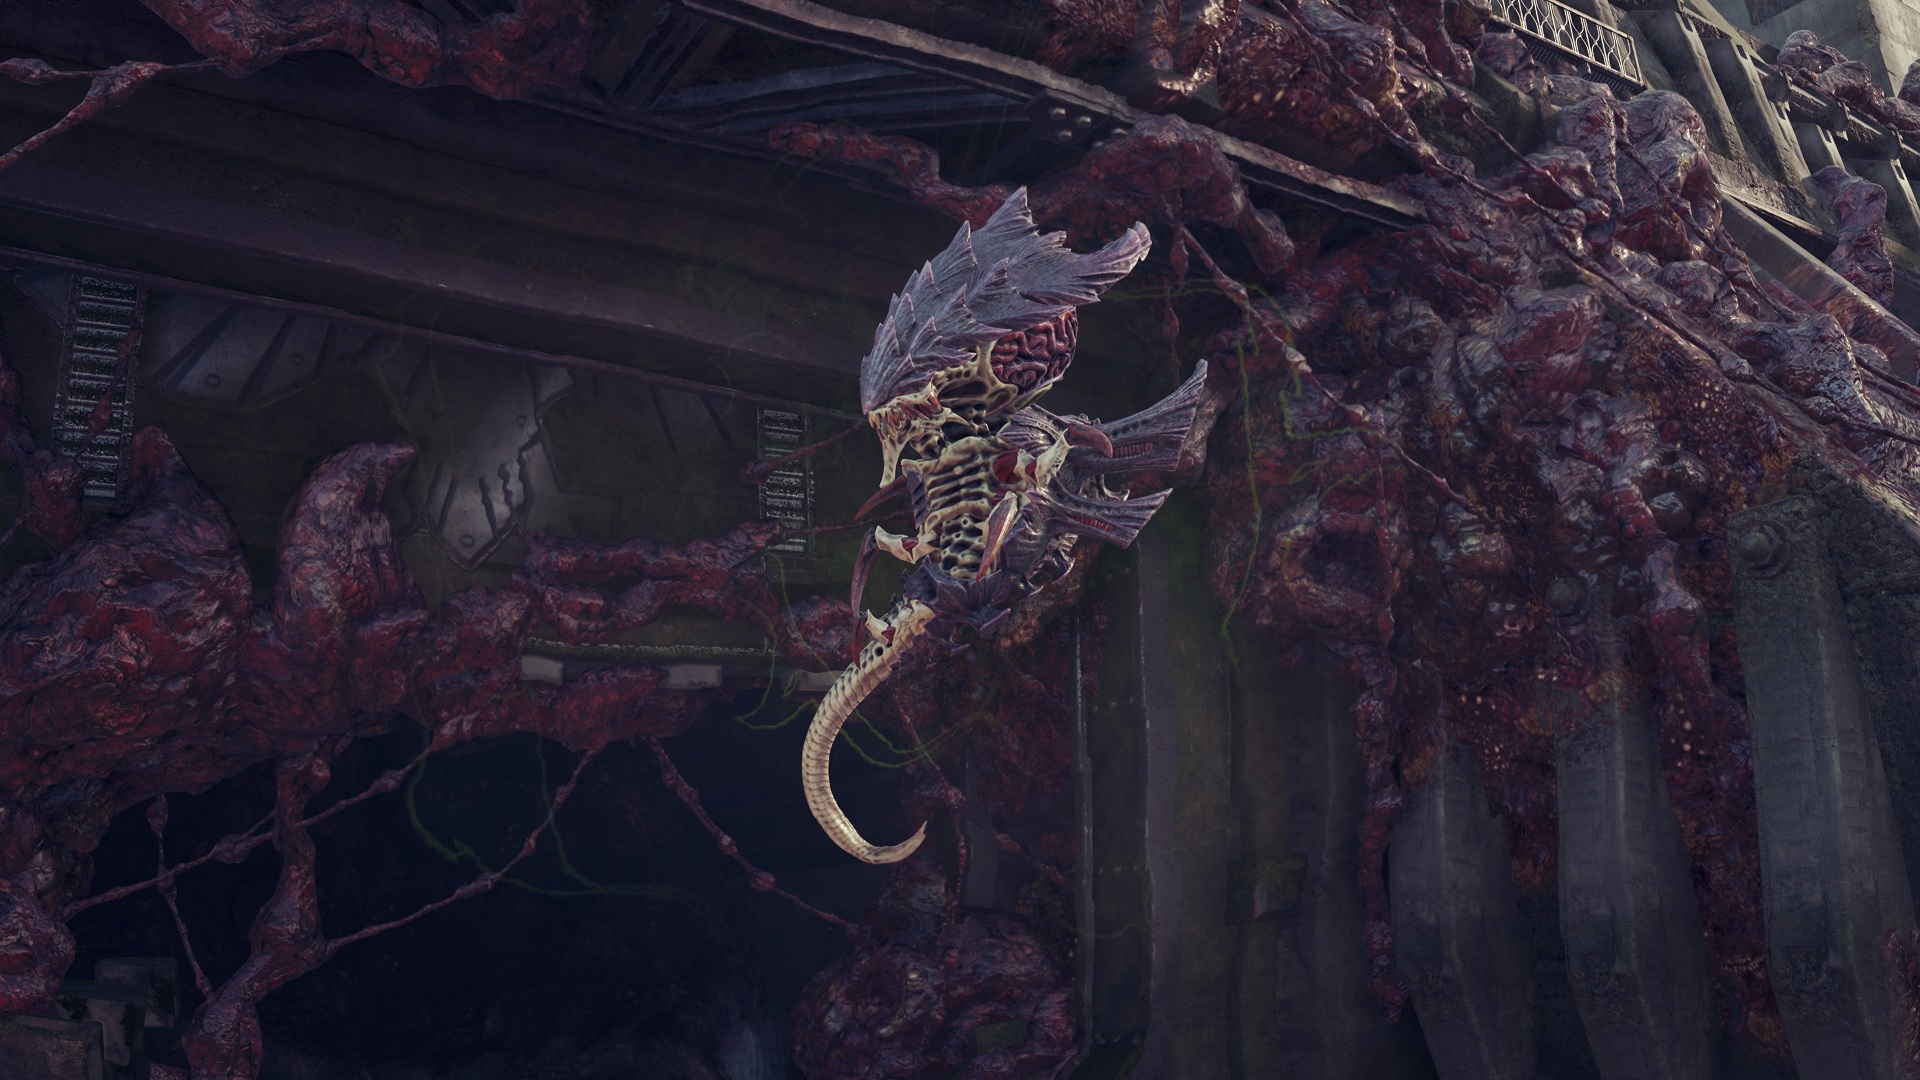
Zoanthropes are floating Tyranids that resemble a giant mouth and a tail. Usually seen high above Hormagaunts, Zoanthropes boost the capabilities of weaker Tyranids below them, so it's best to kill them quickly. Krak grenades and sustained Bolter fire are your best options, but beware the damaging psychic energy the creatures will hurl in your direction. They will often be encountered in pairs, so you'll need to swap targets as they try to shield each other.
Neurothrope
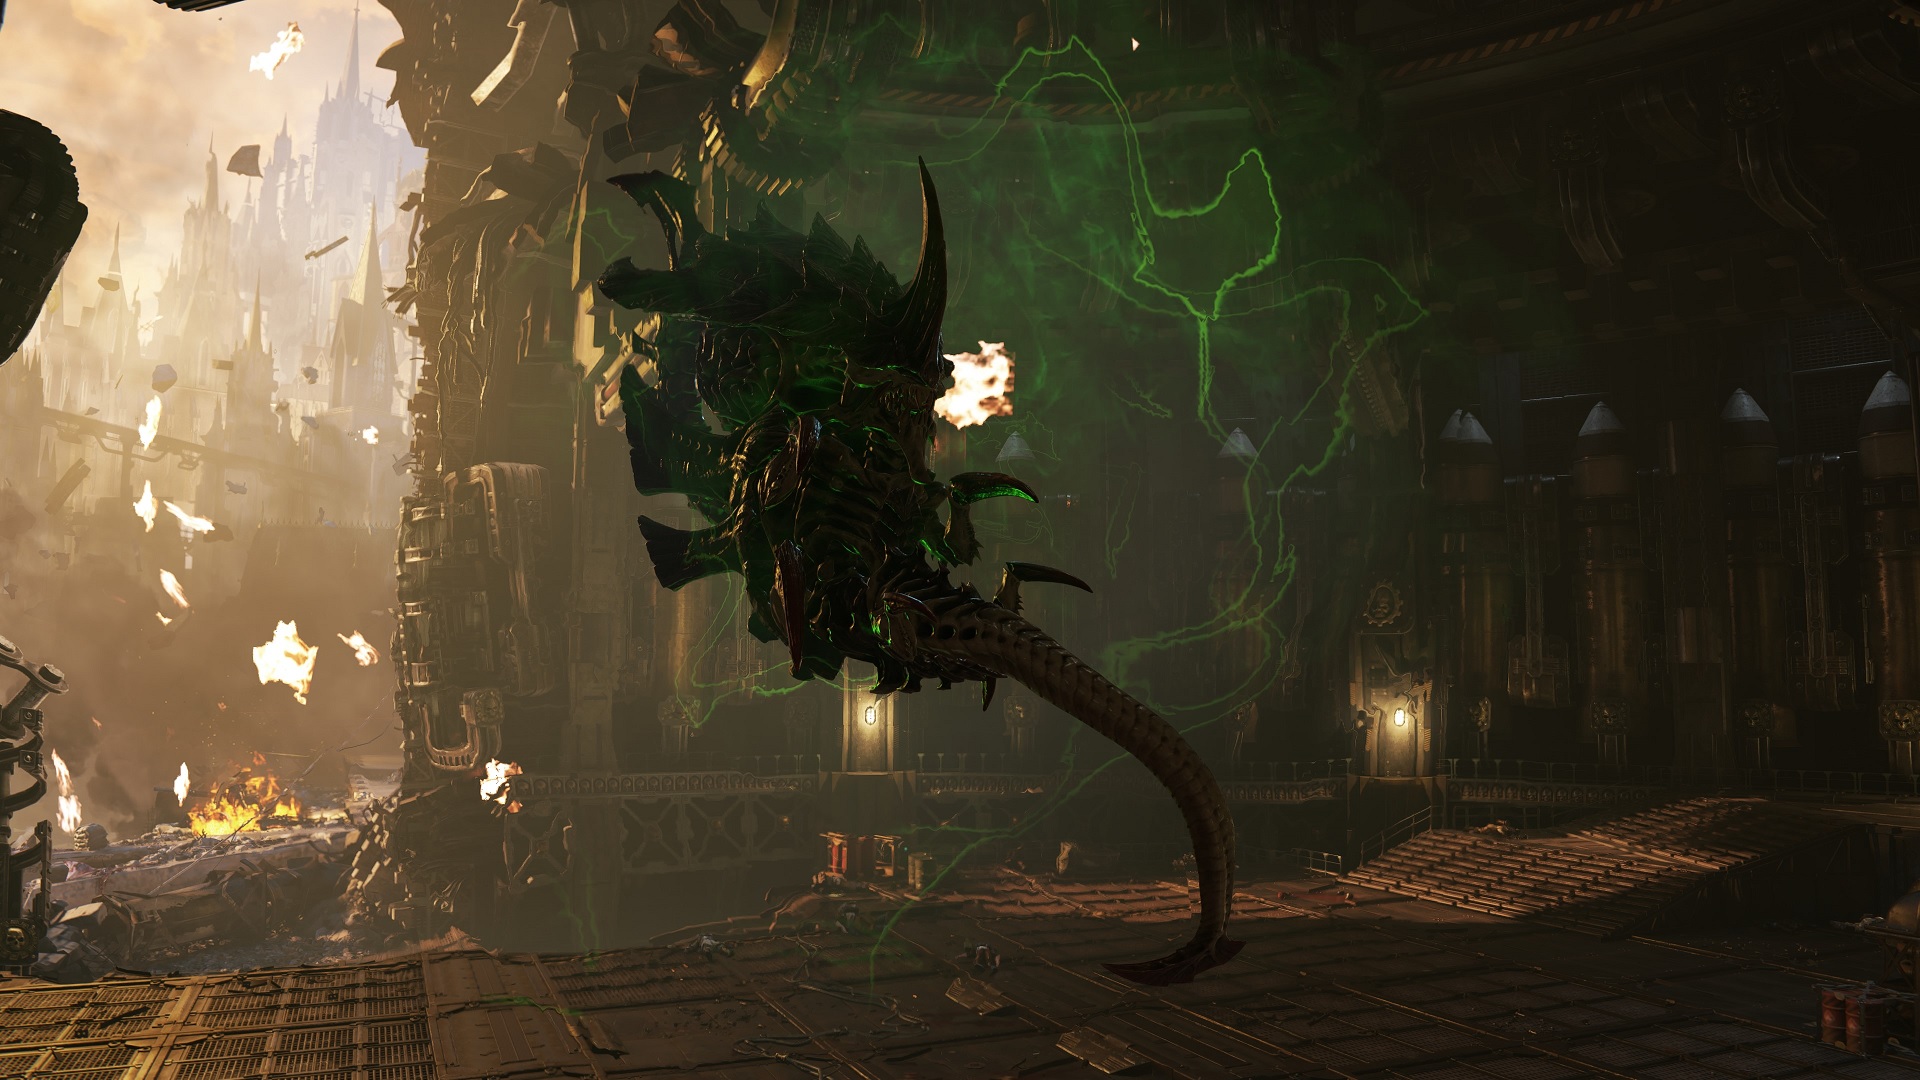
The Neurothrope is a more evolved, improved version of the Zoanthropes. Larger and more dangerous, the Neurothrope is a boss battle, making it mercifully rarer than its weaker cousins. Watch out for the green glow of energy that it uses to scour the battlefield.
Carnifex
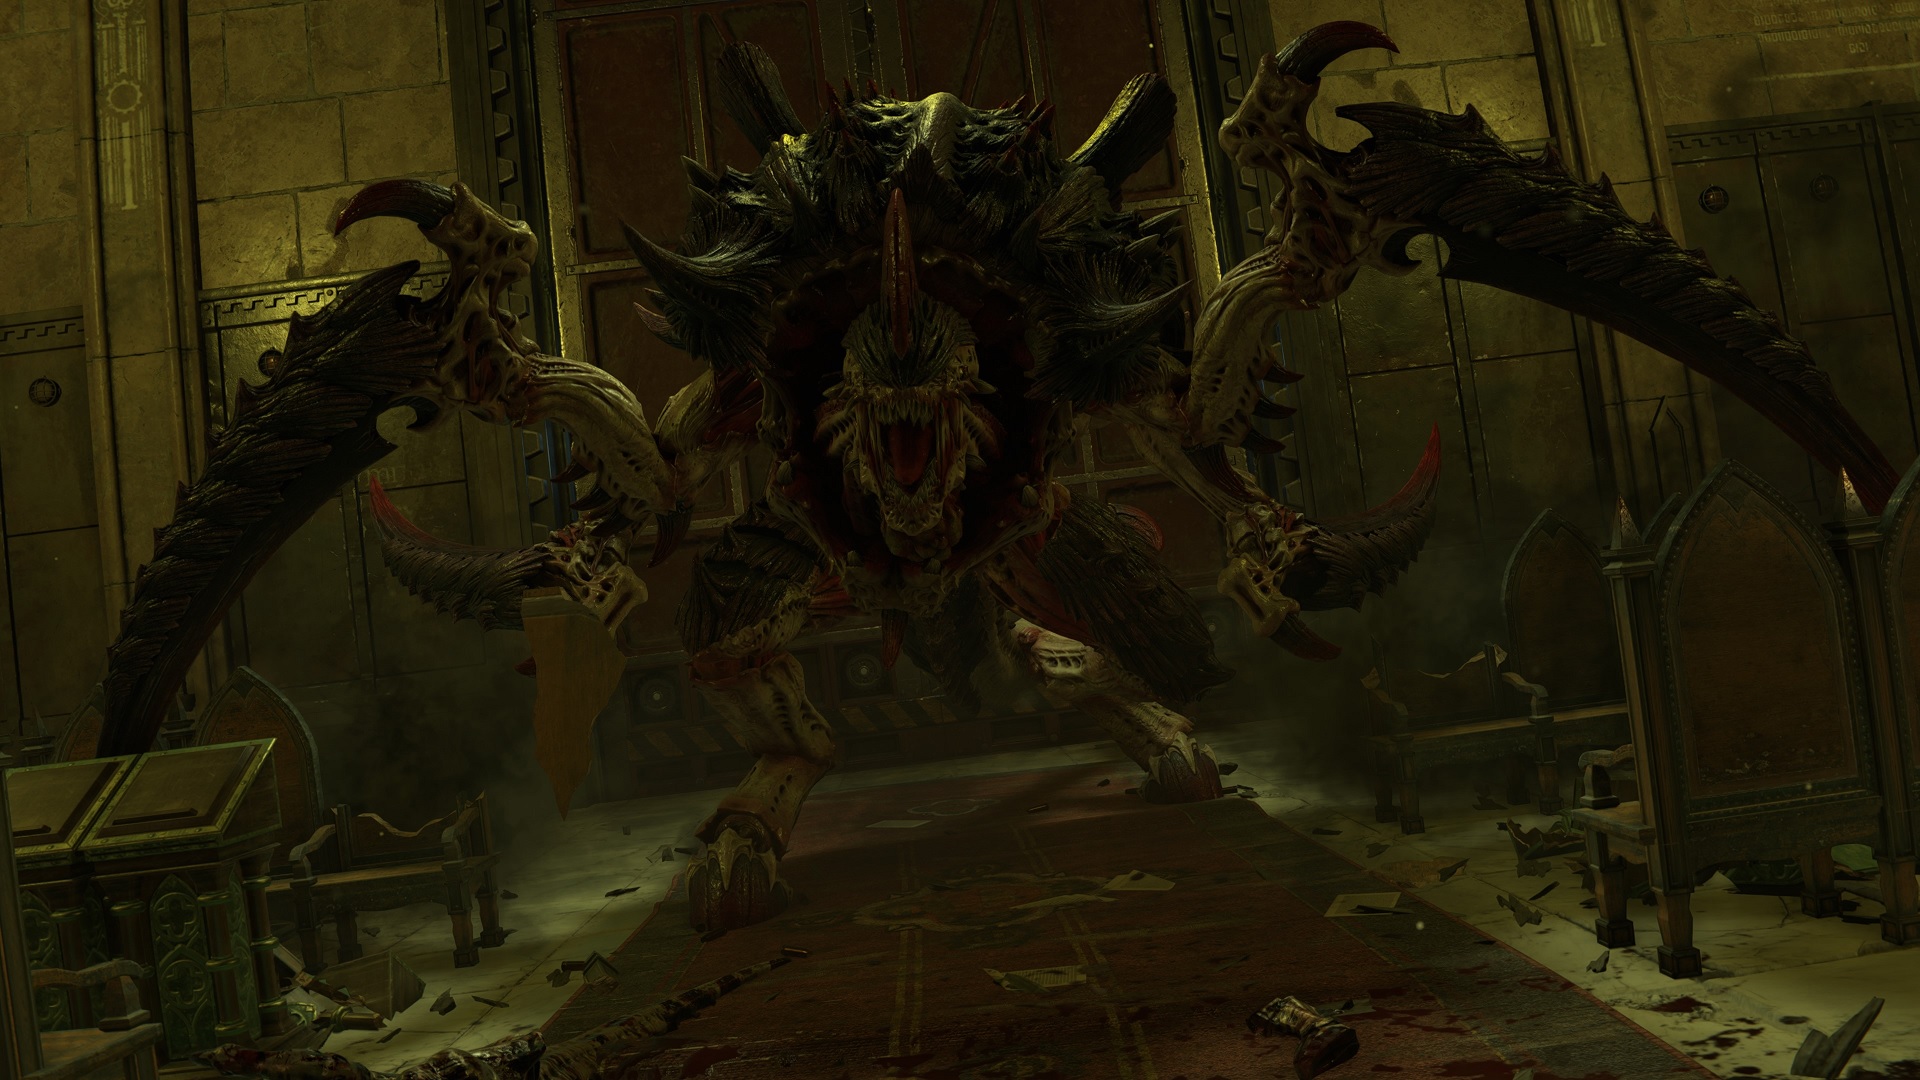
The Carnifex is mercifully a rare sight, as these creatures are among the most dangerous enemies you'll face in the entire game. With short-range organic weapons and huge rending claws, a Carnifex can easily take down a Space Marine squad if you're not being careful. Unload every bit of firepower you have, staying light on your feet to dodge and reposition.
Hive Tyrant
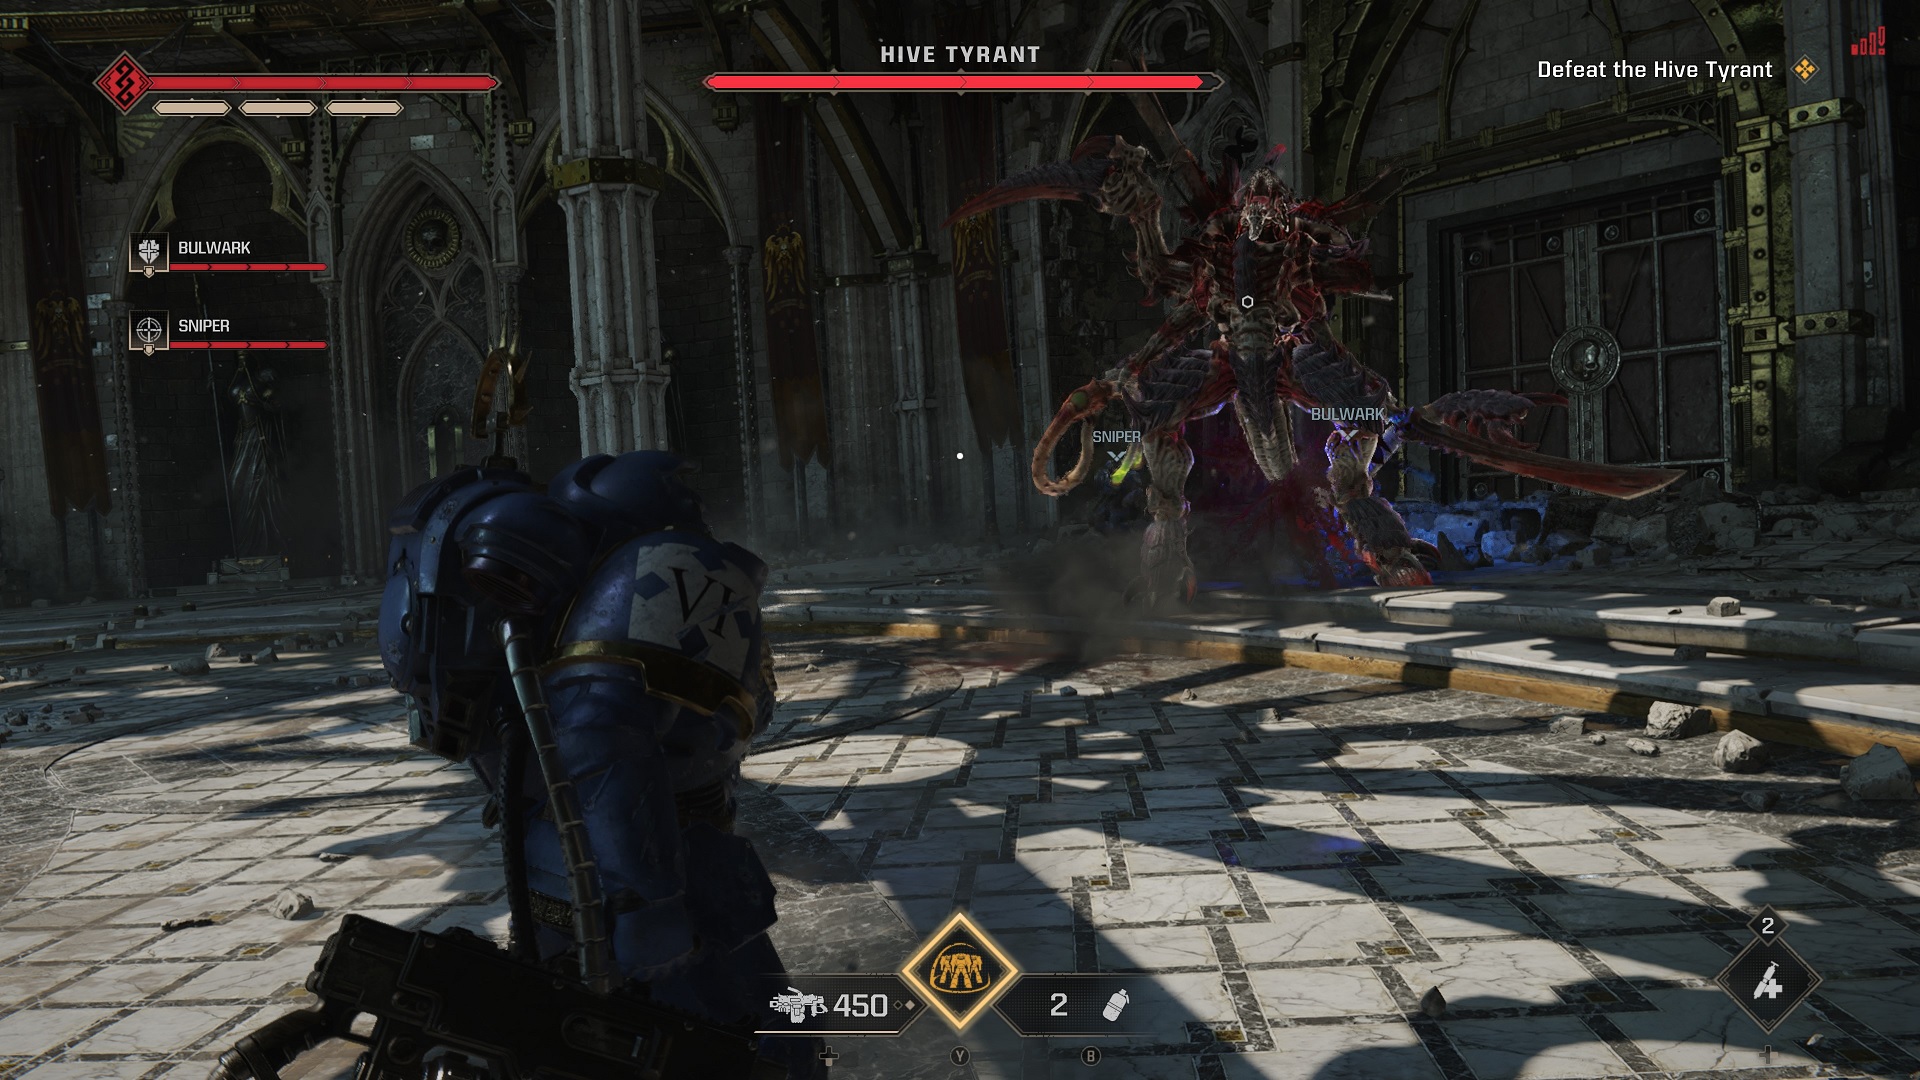
The Hive Tyrant is a massive focal point for the Hive Mind, coordinating an entire planetary assault as the swarm seeks more delicious biomass. As such a key element of each swarm invasion, the Hive Tyrant is extraordinarily dangerous, towering over Space Marine and delivering deadly attacks with its weapons. You'll have to engage the creature in a protracted boss battle after it's been injured in order to deal the Tyranids a decisive blow. Stay on your feet and just keep hammering it with headshots.
Hierophant Bio-Titan
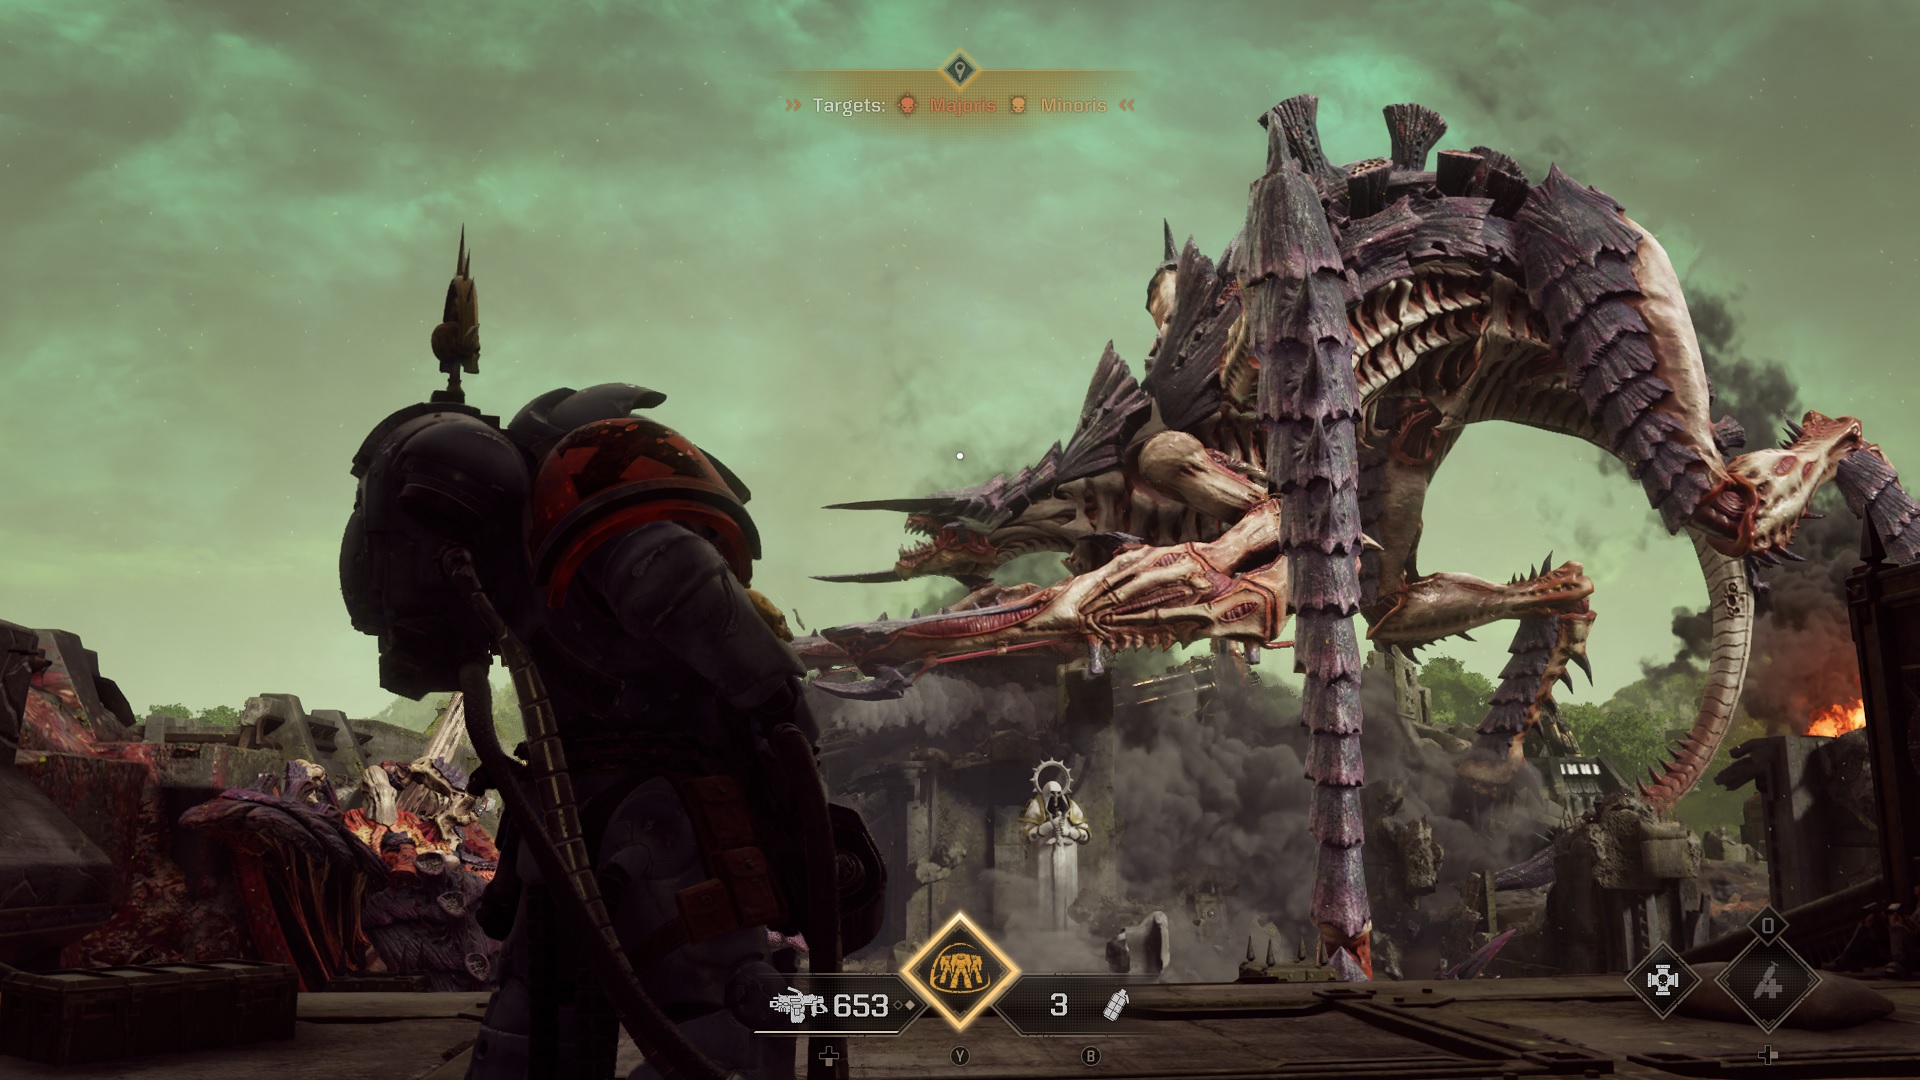
The first boss fight added to the game post-launch, the Hierophant Bio-Titan is the biggest Tyranid yet. Towering far above the swarm and the forces of the Imperium, the Bio-Titan cannot really be fought conventionally. Instead, players need to sync defensive Lascannons to their sidearm aiming in order to deal it tremendous damage and slow down the Tyranid consumption of Kadaku.
Warhammer 40,000: Space Marine 2 list of Chaos Forces
Naturally, Chaos rears its head in Warhammer 40,000: Space Marine 2, giving Titus and the Ultramarines a twisted reflection to face off against alongside the biological horrors of the Tyranids. The Chaos forces in this game hail from the Thousand Sons Traitor Legion.
Cultist
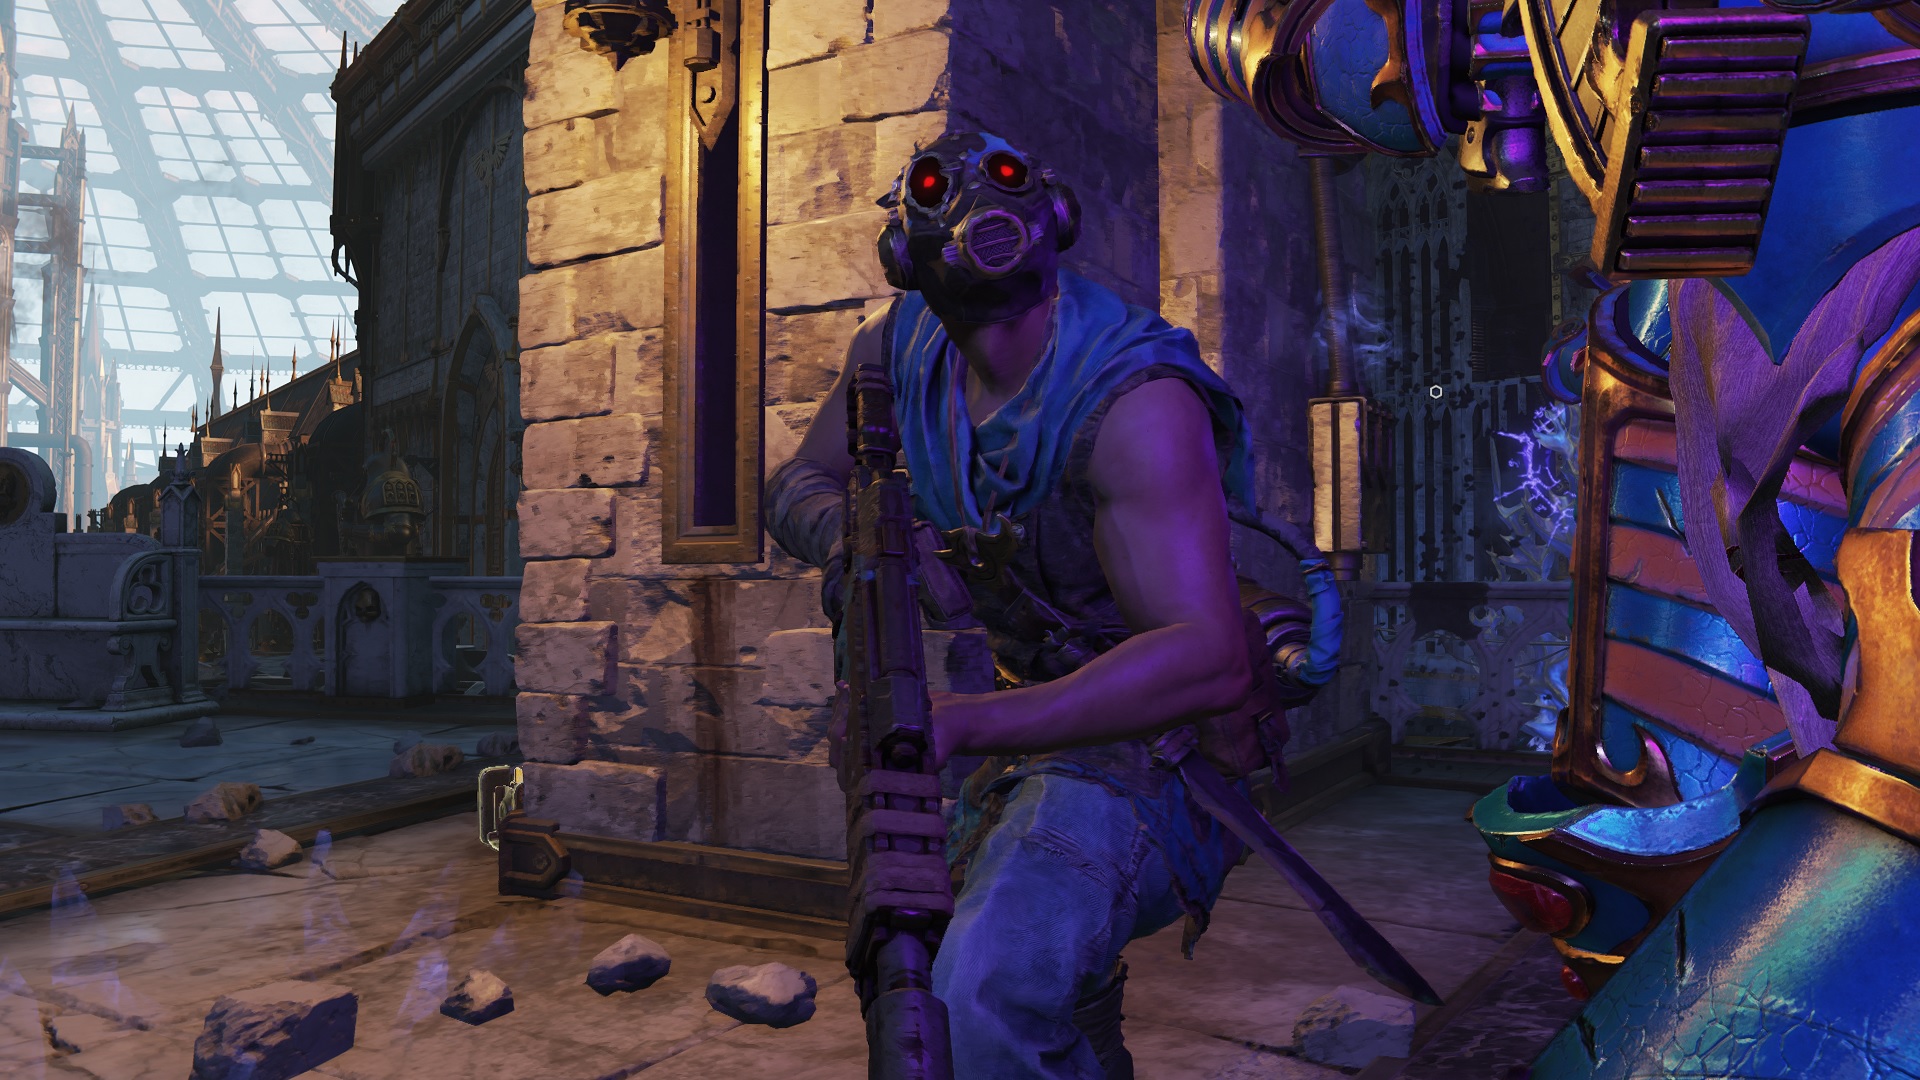
Cultists are the most basic of your foes, simple humans who follow the lure of Tzeentch. Without any augmentations or mutations, they are extremely weak, peppering you with ranged fire from a distance that isn't very damaging. Unless in large groups, don't even both wasting your Bolters on them; simply run through the Cultists you see to turn them into red mist.
Tzaangor
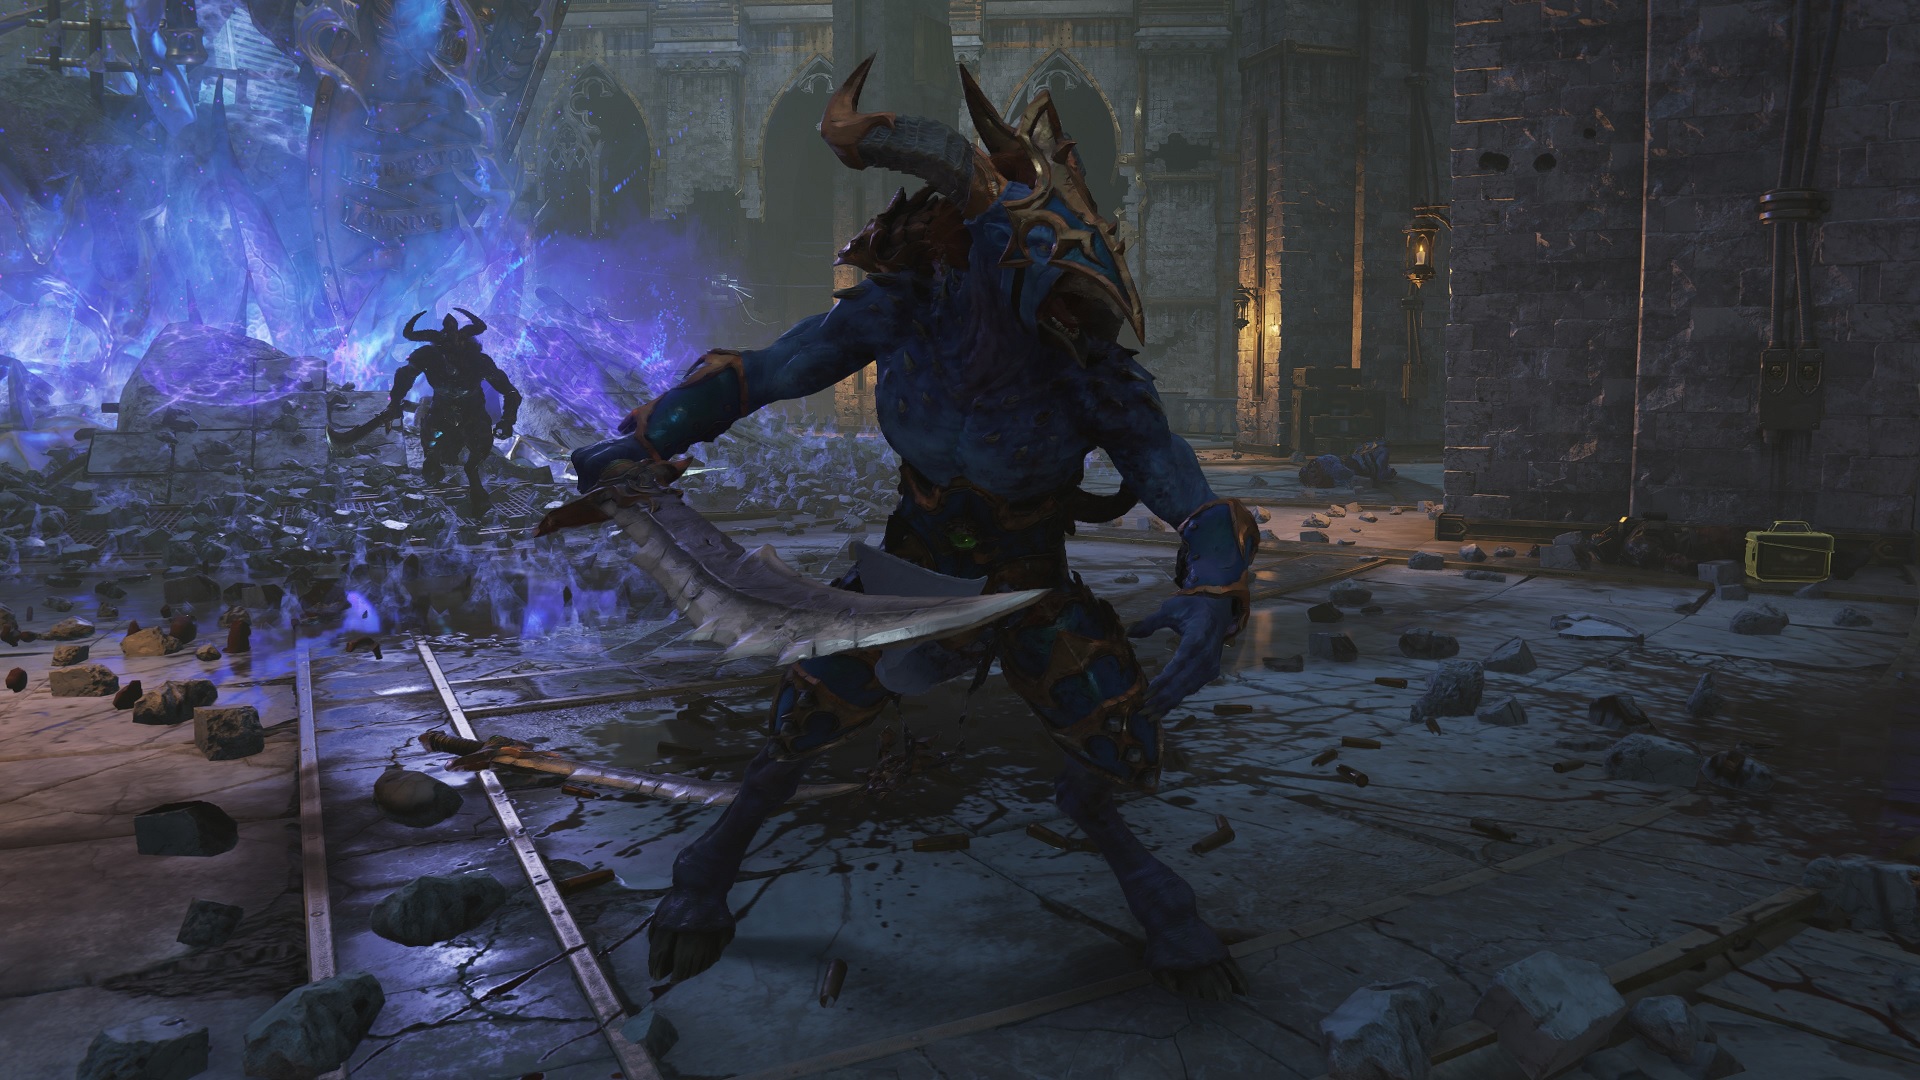
Tzaangors are mutants, Abhumans, that serve Tzeentch and his sorcerers. This service grants them enhanced strength, warping their bodies to reflect the avian Daemons that follow the Changer of Ways. Wielding curved blades and shields, they pose a threat in large groups, but are still easily managed through grenades and Plasma Incinerators.
Tzaangor Enlightened
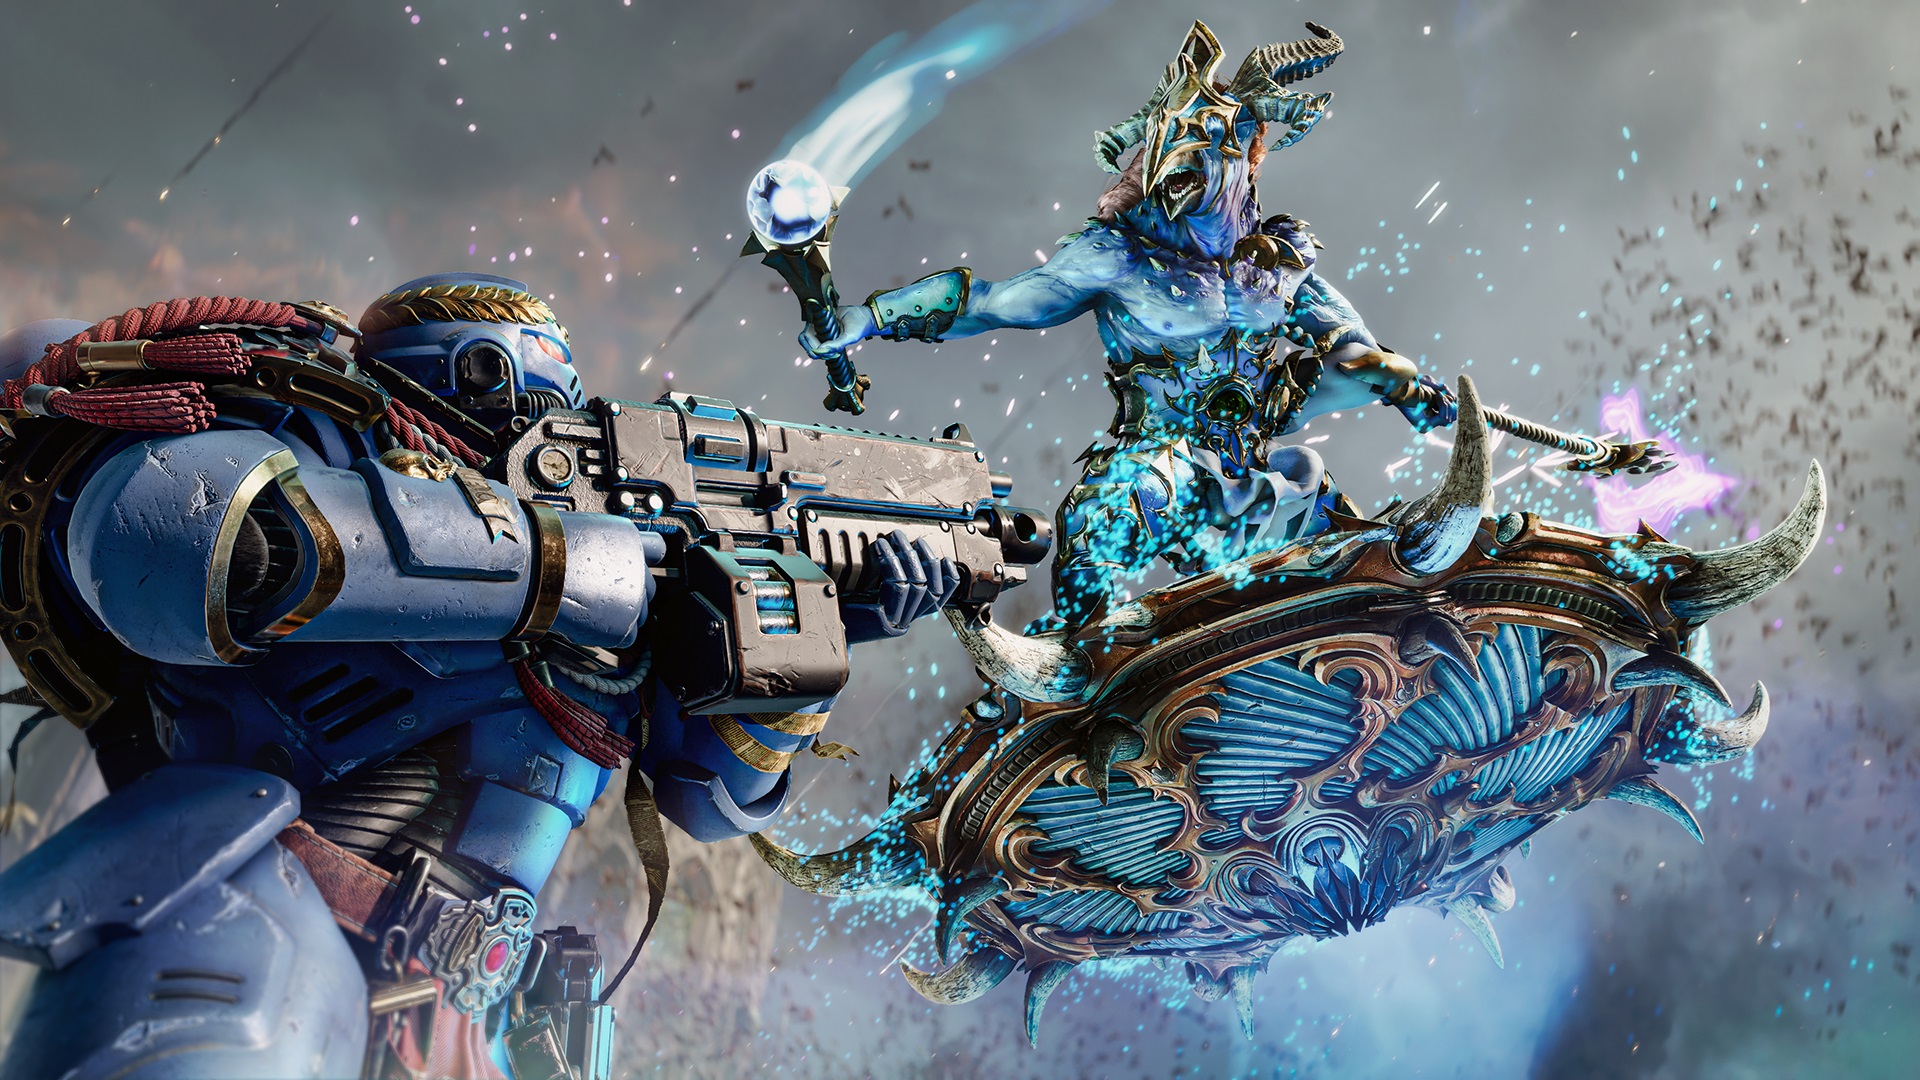
The second enemy added to the game post-launch, the Tzaangor Enlightened is more dangerous than its swarming brethren, capable of hovering around the battlefield to more quickly deal damage. They can be encountered randomly in any Operations where the forces of Chaos are present.
Rubric Marine
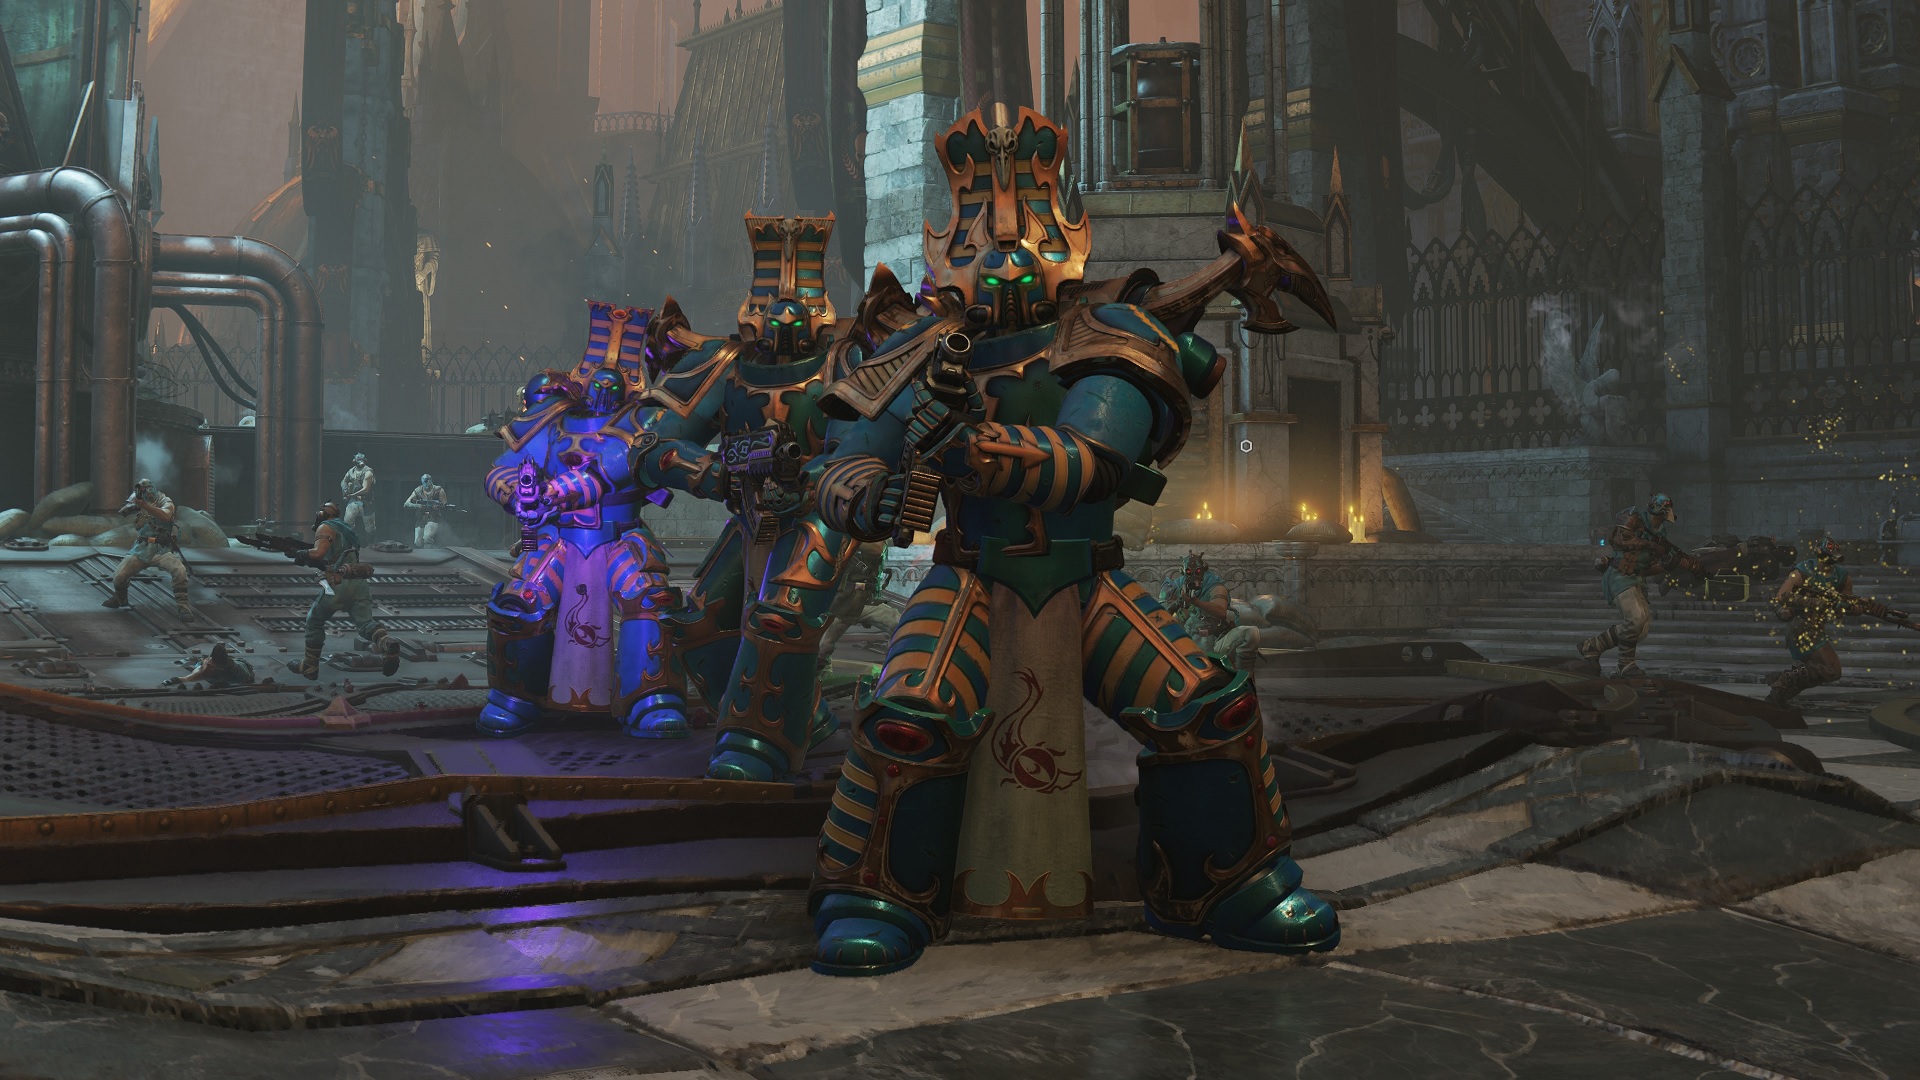
The vast majority of the Thousand Sons have turned to dust, forever resistant to change at the cost of simply being nothing. These nearly-empty shells still take orders from the sorcerers above them, unleashing concentrated firepower on their targets. Rubric Marines are best dealt with through repeated headshots, while heavy weapons like the Las Fusil and Plasma Incinerator can quickly burn through the enemy's armor.
Scarab Occult Terminator
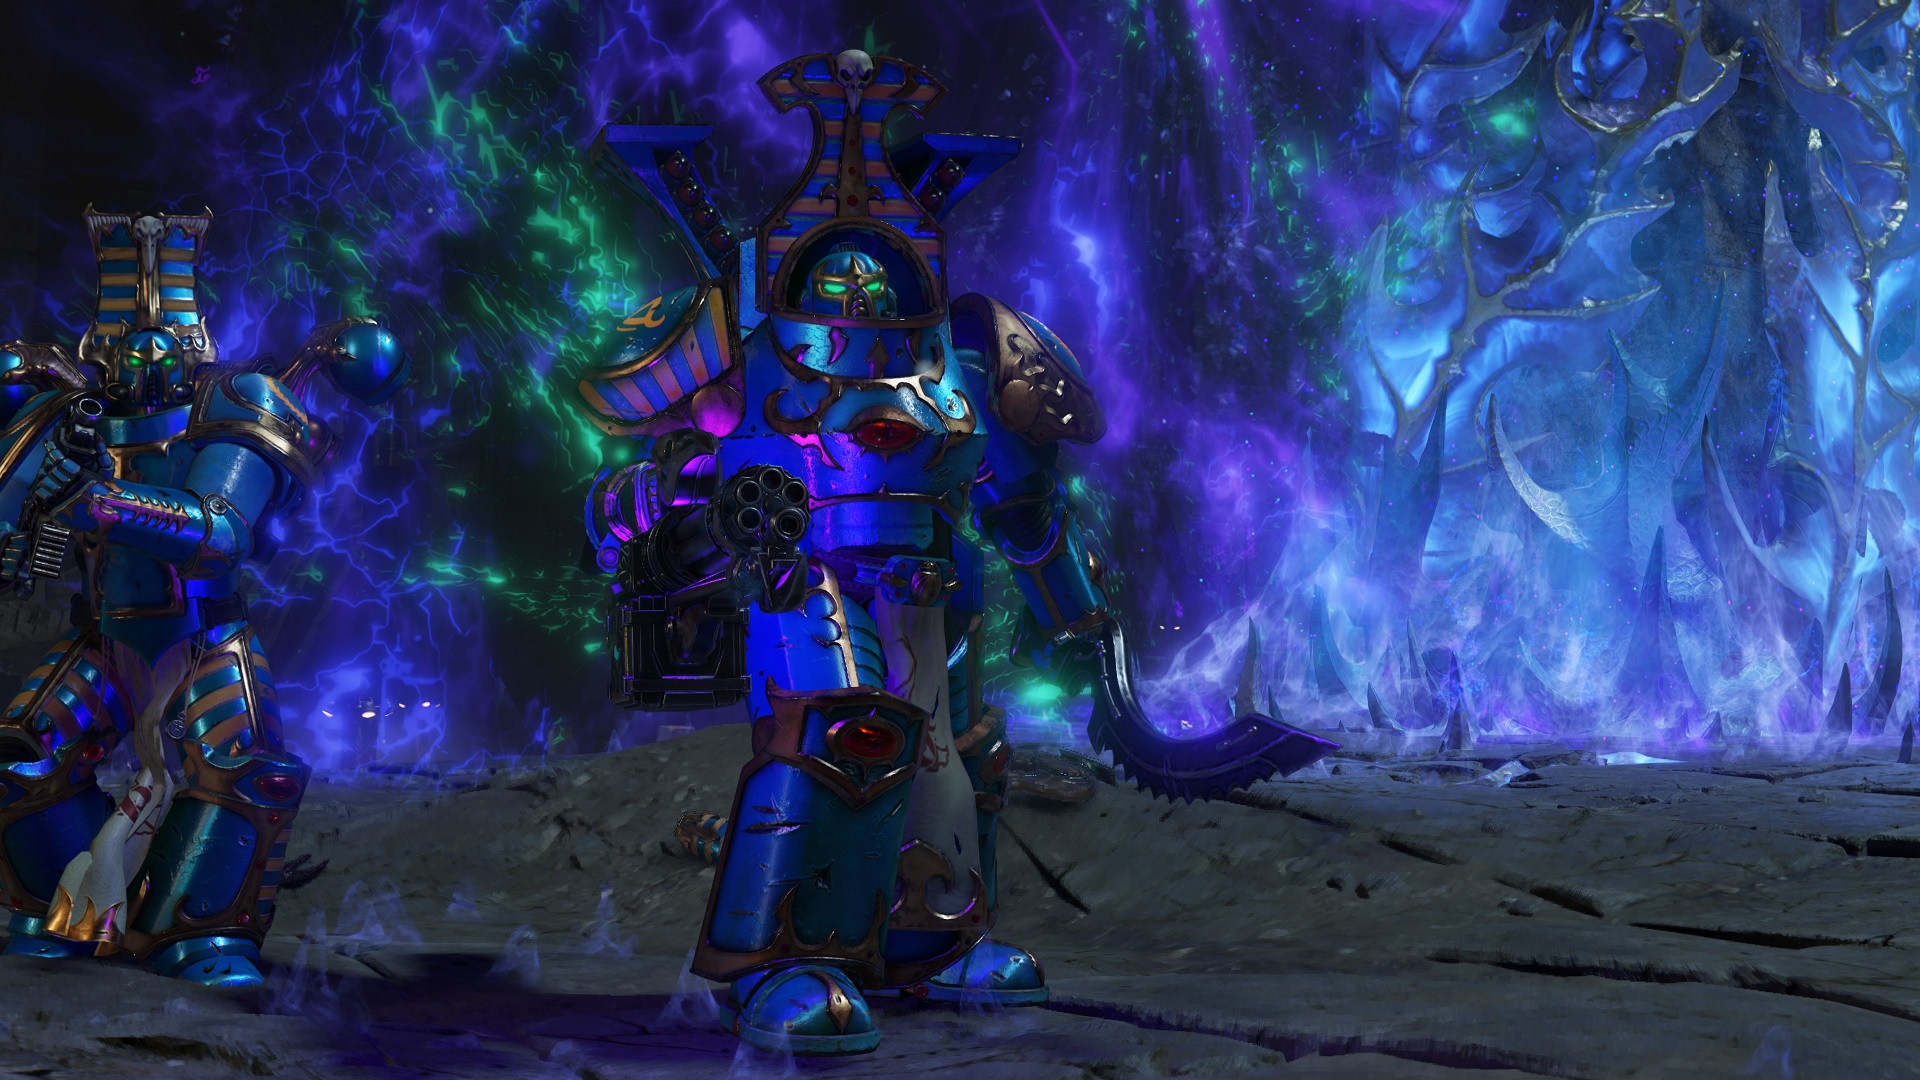
The Thousand Sons count Terminators in their ranks, and while these corrupted Space Marines have turned to dust over the years, they can still fight with overwhelming power. Heavy cannons will quickly shred you, while their blade combos are some of the most dangerous melee attacks you can take in-game. Bring out your heaviest weapons to punch through their armor and execute them as quickly as possible.
Thousand Sons Sorcerer
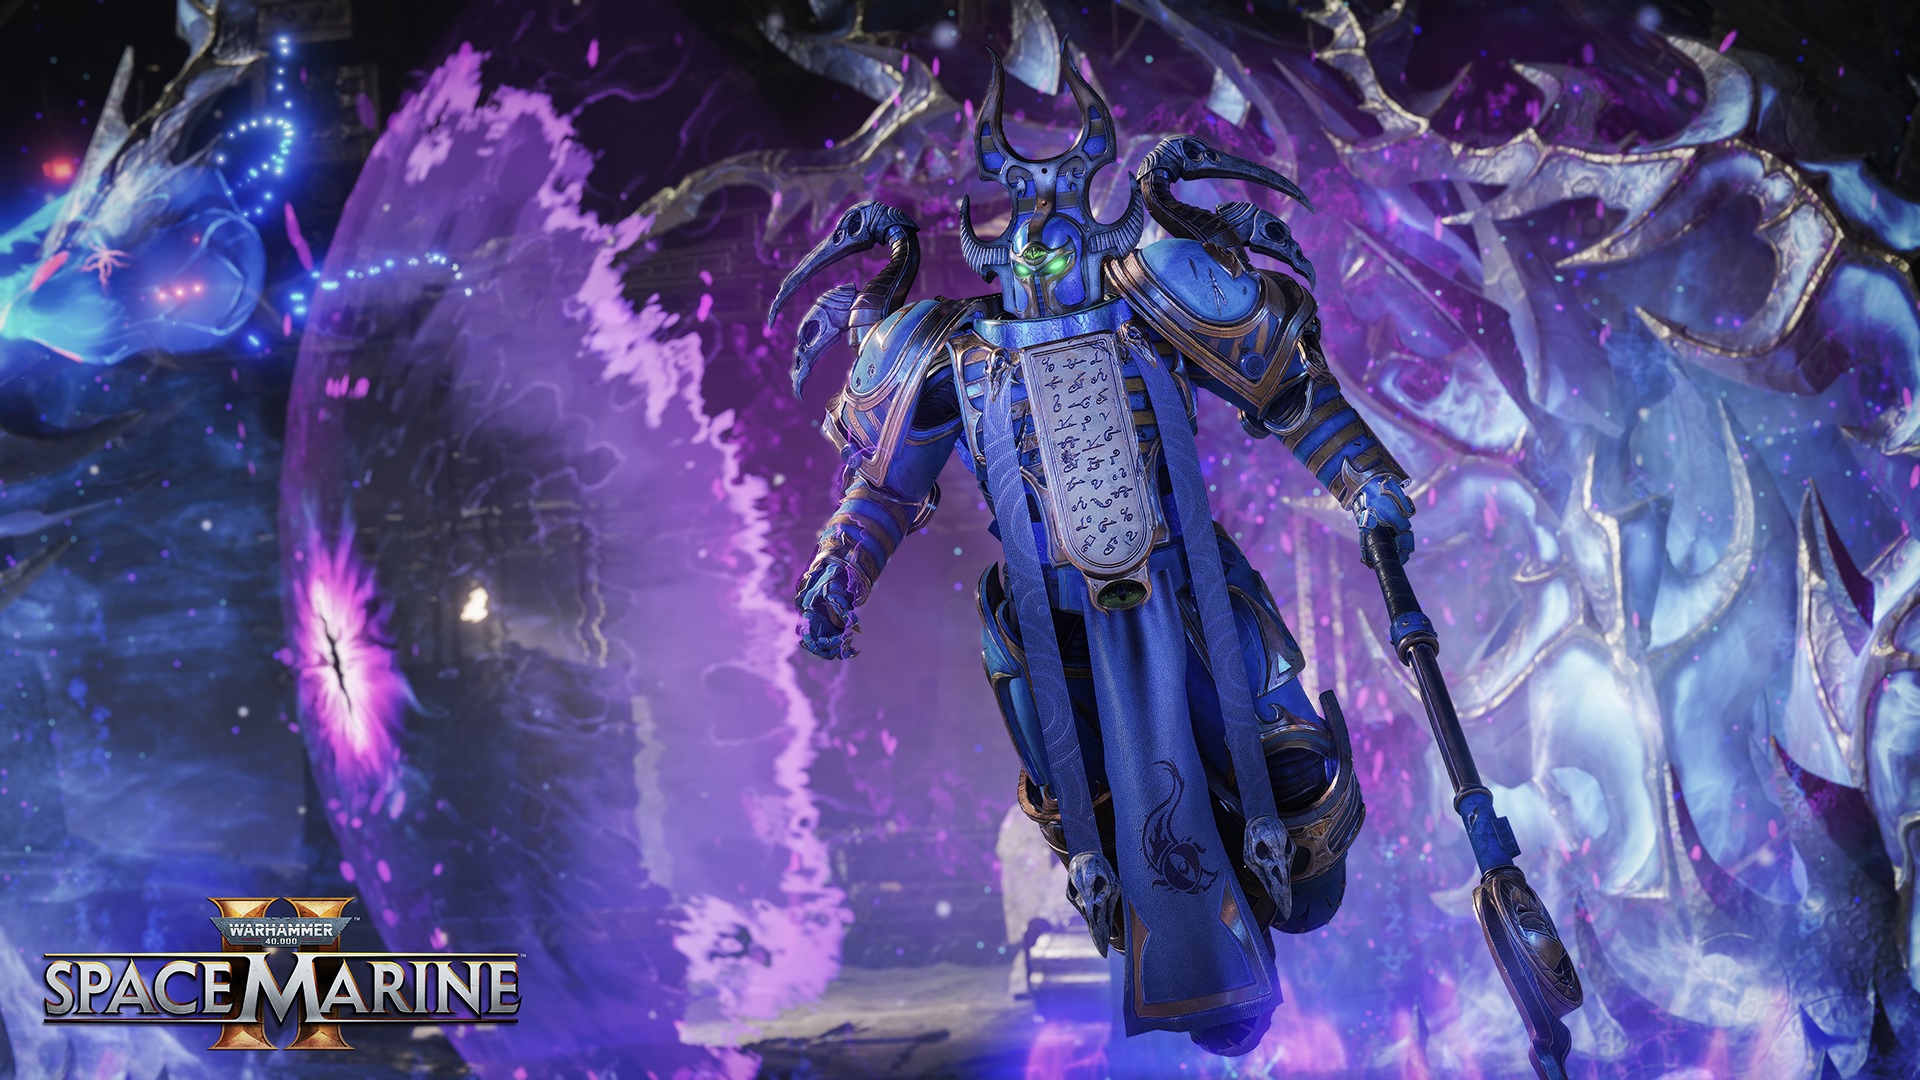
The backbone of the Thousand Sons, the Lesser Sorcerers still retain their physical bodies, though the influence of Chaos means some change is inevitable. Levitating above the battlefield, sorcerers prefer to launch ghostly flames from a distance, raining fire while reviving fallen Rubric Marines. The latter ability means they should be a priority target whenever spotted, but you'll have to time your shots carefully, as sorcerers use warp shields to absorb damage from different directions and respond with huge attacks.
Helbrute
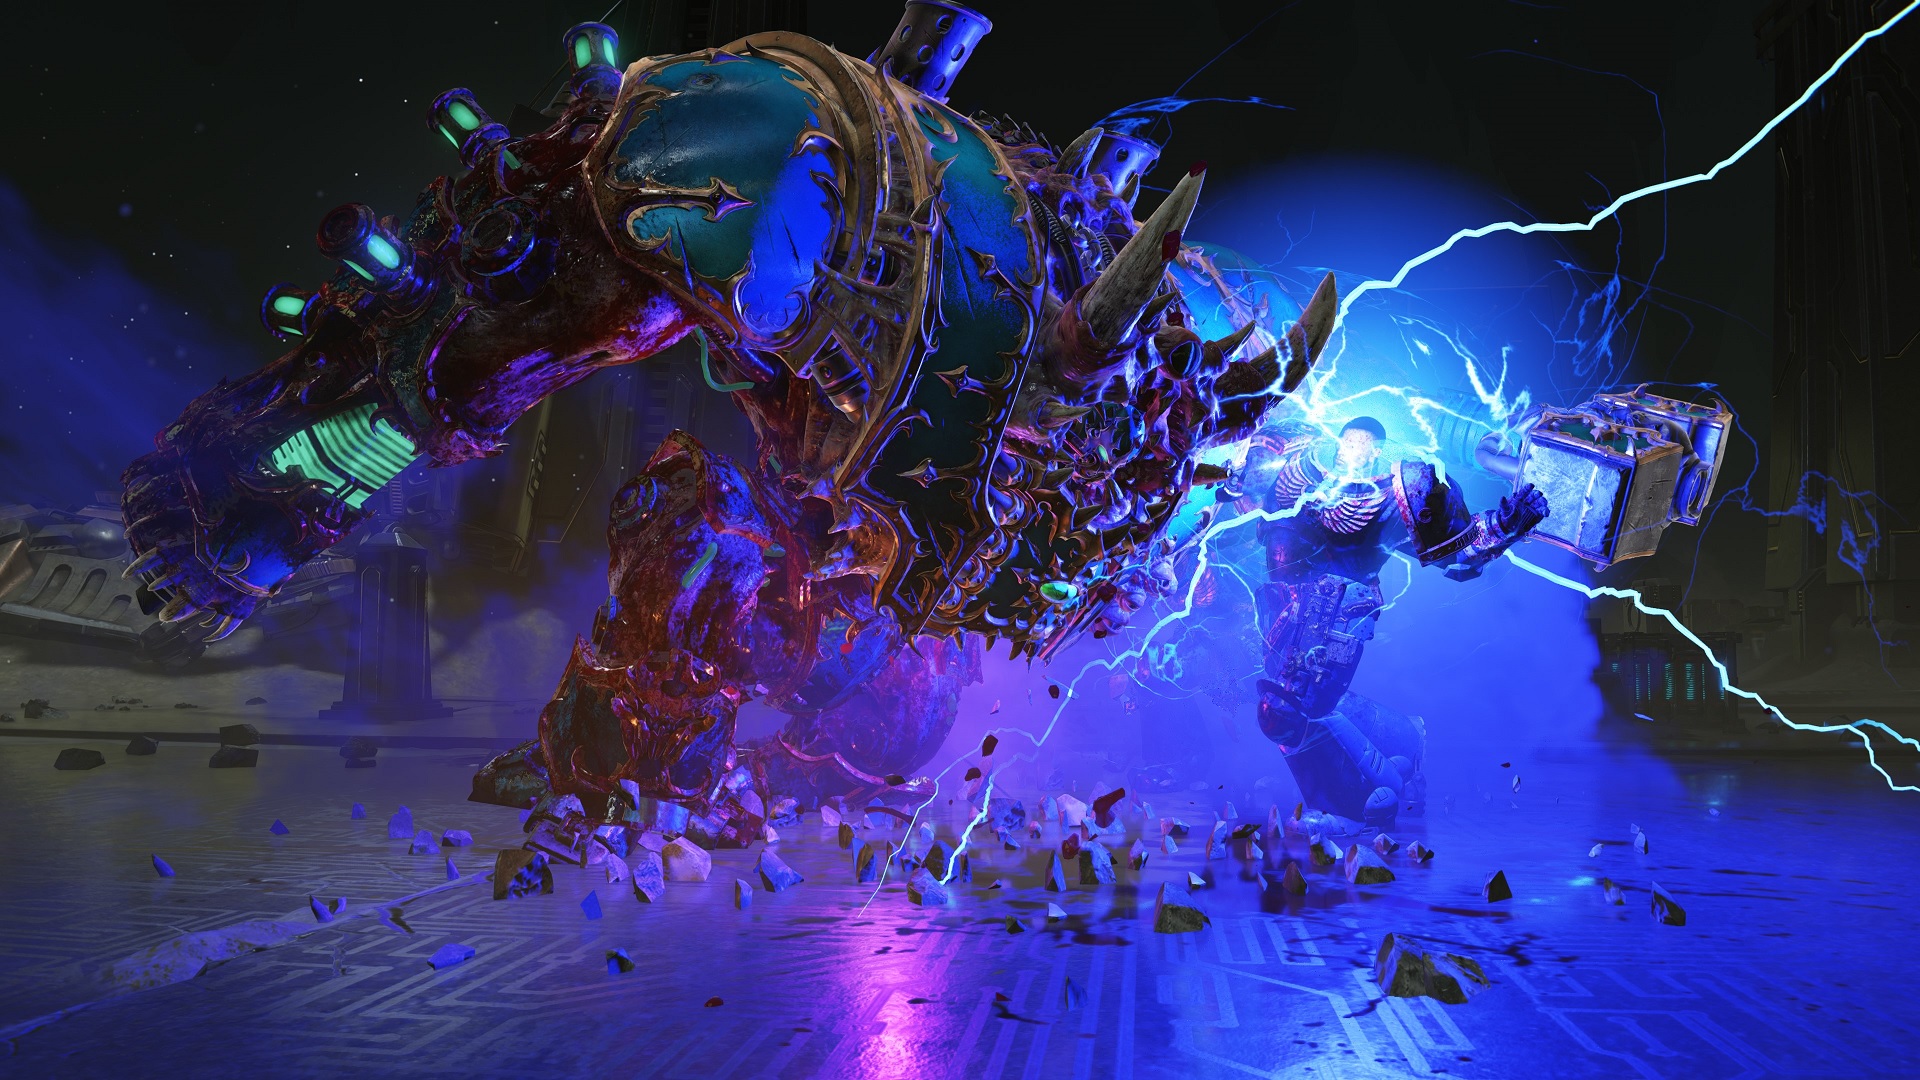
These tortured, twisted Dreadnoughts are powered by a Chaos Space Marine that has gone insane, fueling the mechanical monster with rage. Helbrutes of the Thousand Sons are equipped with Plasma weapons and a massive hammer, meaning they're dangerous up close and at range. If you can dodge their hammer attacks, coordinated melee strikes to their legs and chest will be a good bet for weakening them and bringing them down.
Heldrake
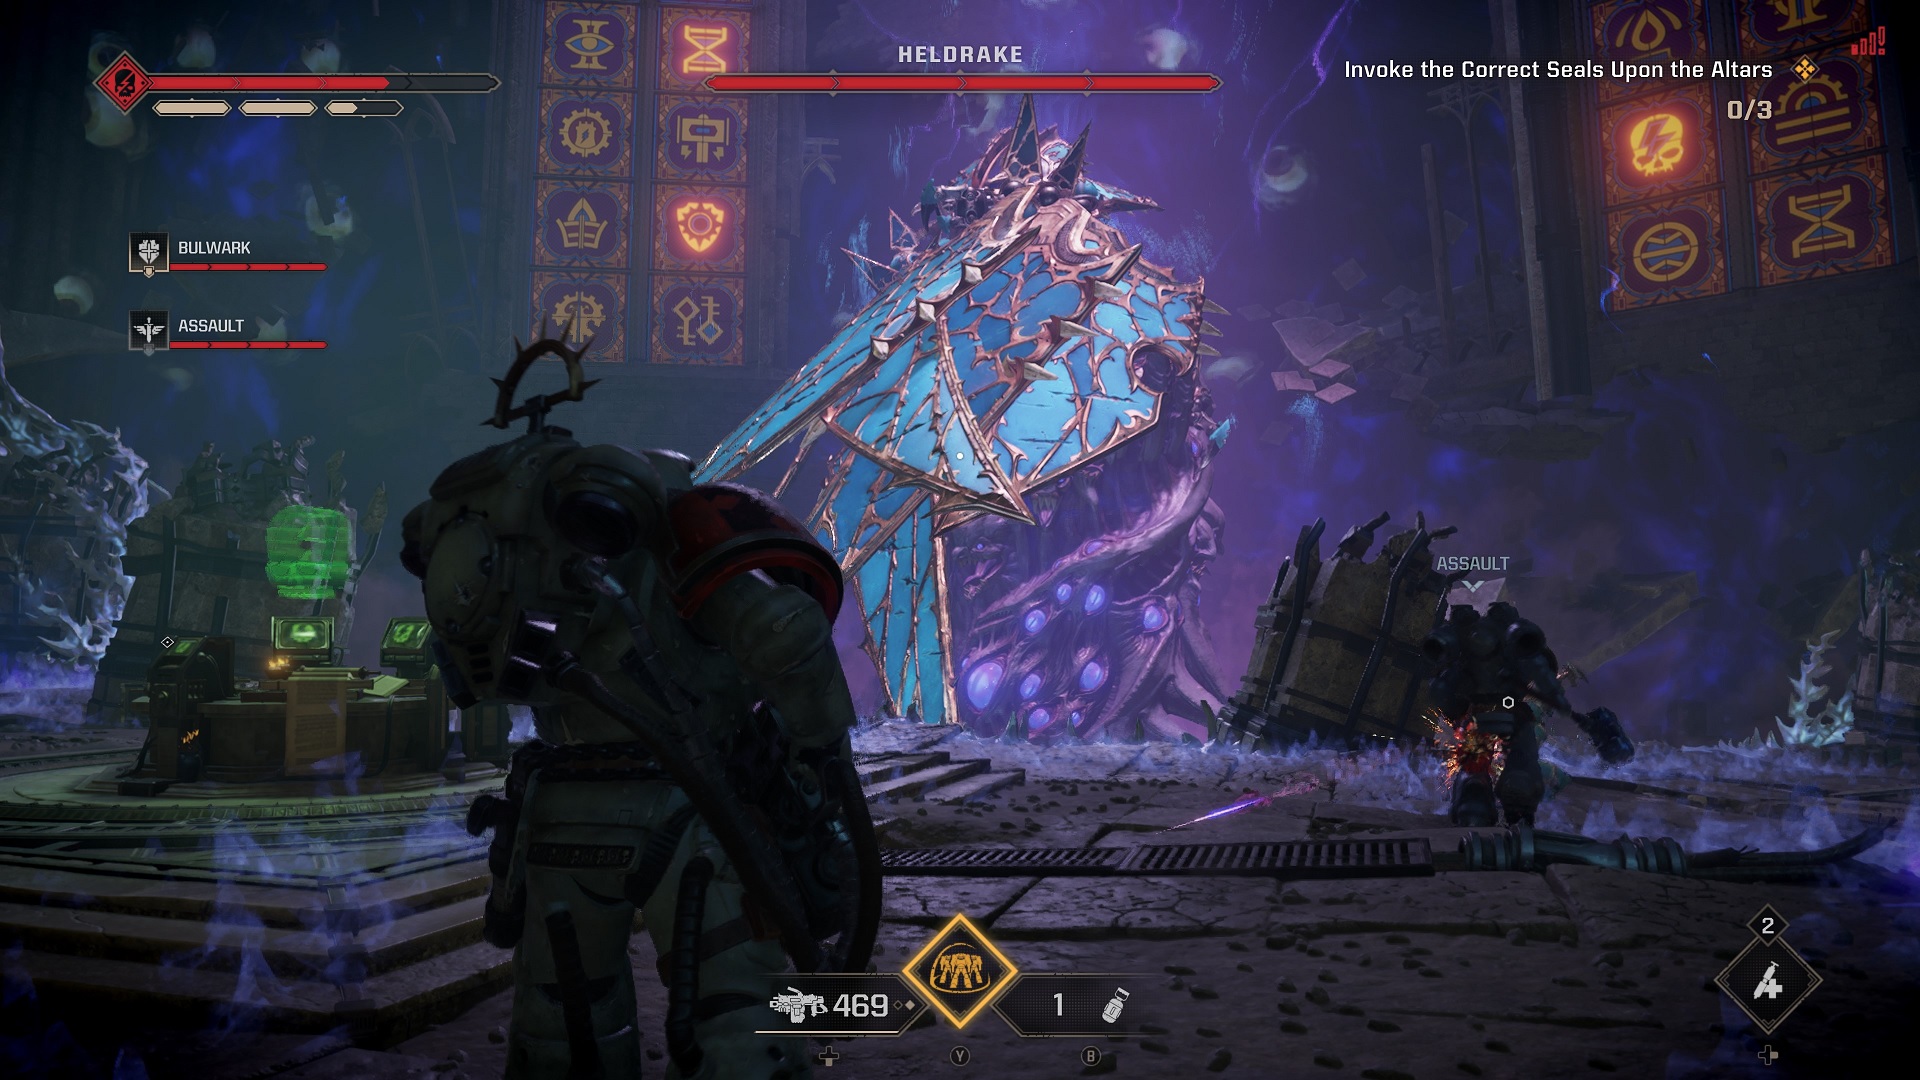
Heldrakes are the near-pinnacle of Daemonic smithing, as each one is a Daemon trapped in a mechanical engine. With multiple wings and a powerful Autocannon, Heldrakes are a fierce foe, and taking them down is something of a puzzle as you have to bring down the dark shield protecting the beast. When vulnerable, target their heads with your Bolters.
Imurah
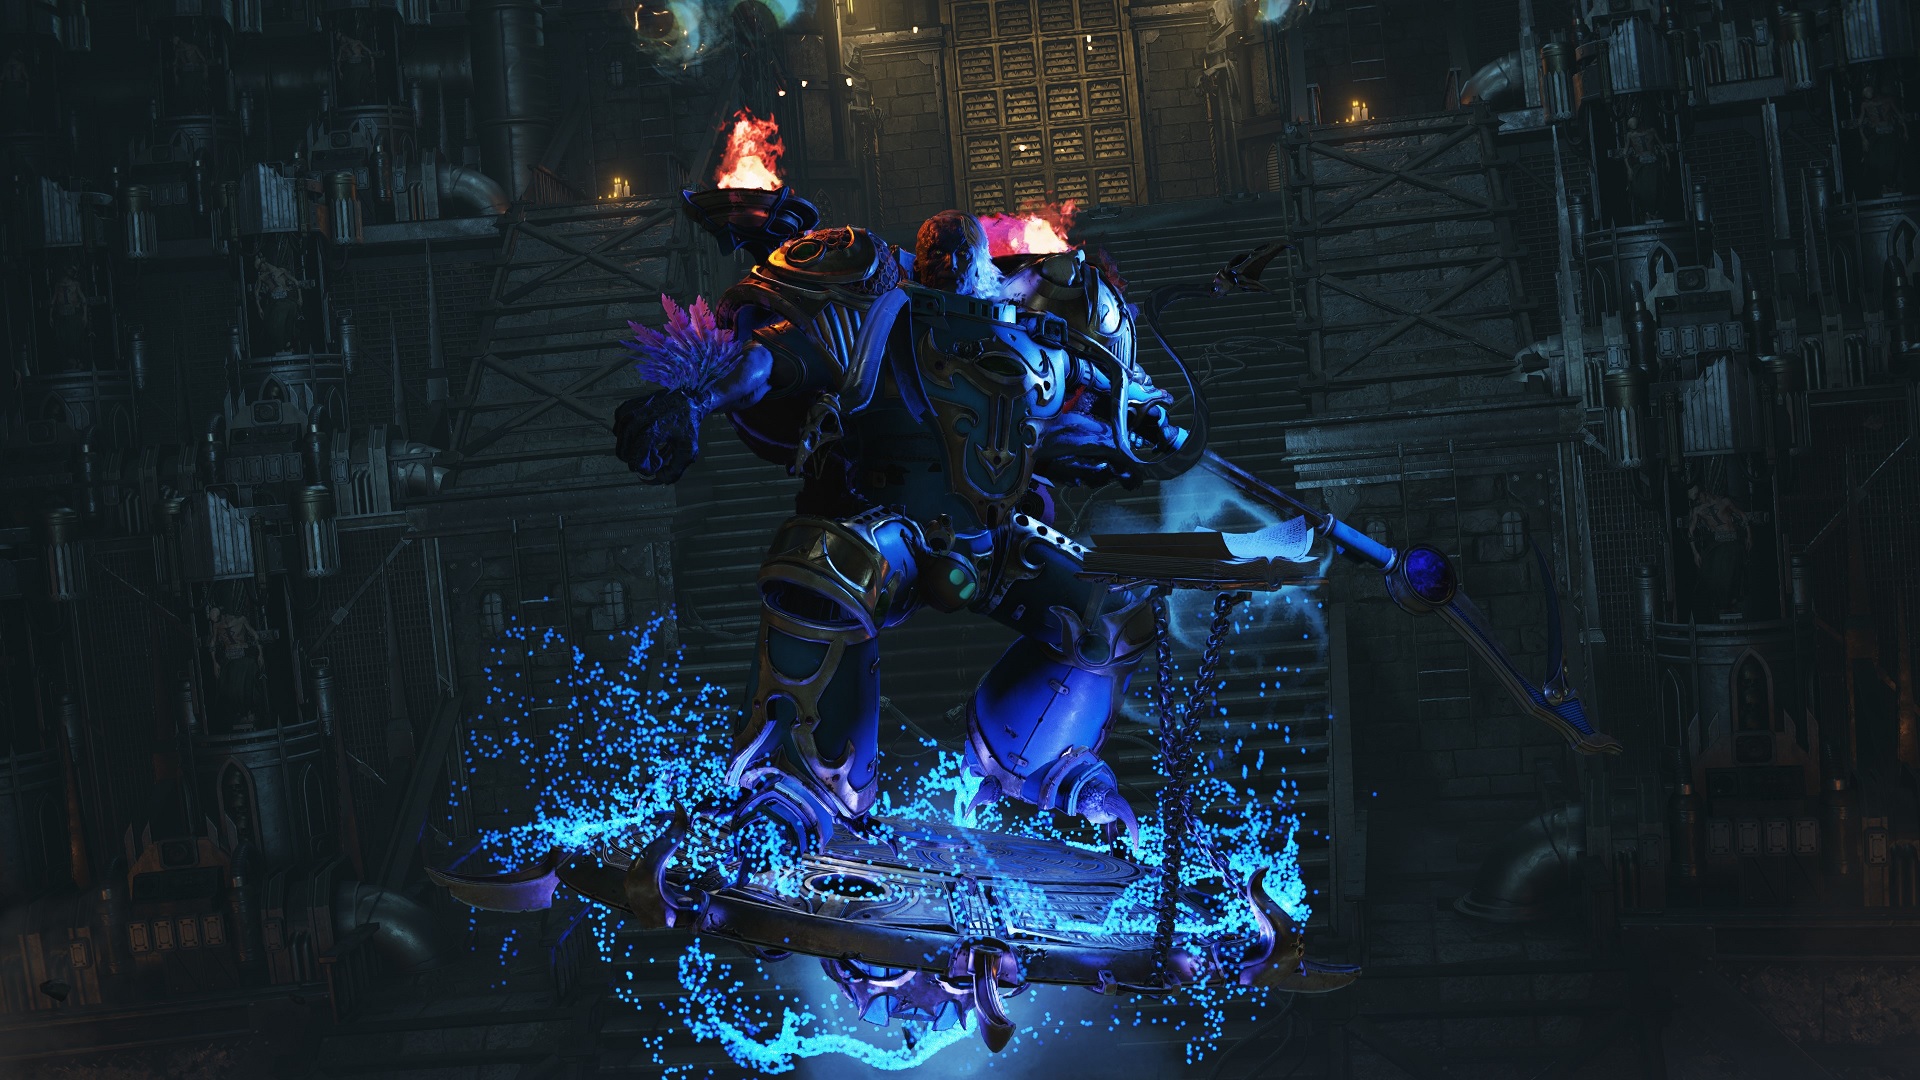
The evil architect of the Thousand Sons' incursion in Warhammer 40,000: Space Marine 2, Imurah is fought multiple times. As a skilled sorcerer, everything said about his lesser brethren applies here, but you'll need to be quick to parry his staff strikes in order to deal him damage. Imurah will also call to a Lord of Change for backup, using the Greater Daemon to bombard the battlefield with Warp energies.
Teeming hordes that grow stronger over time
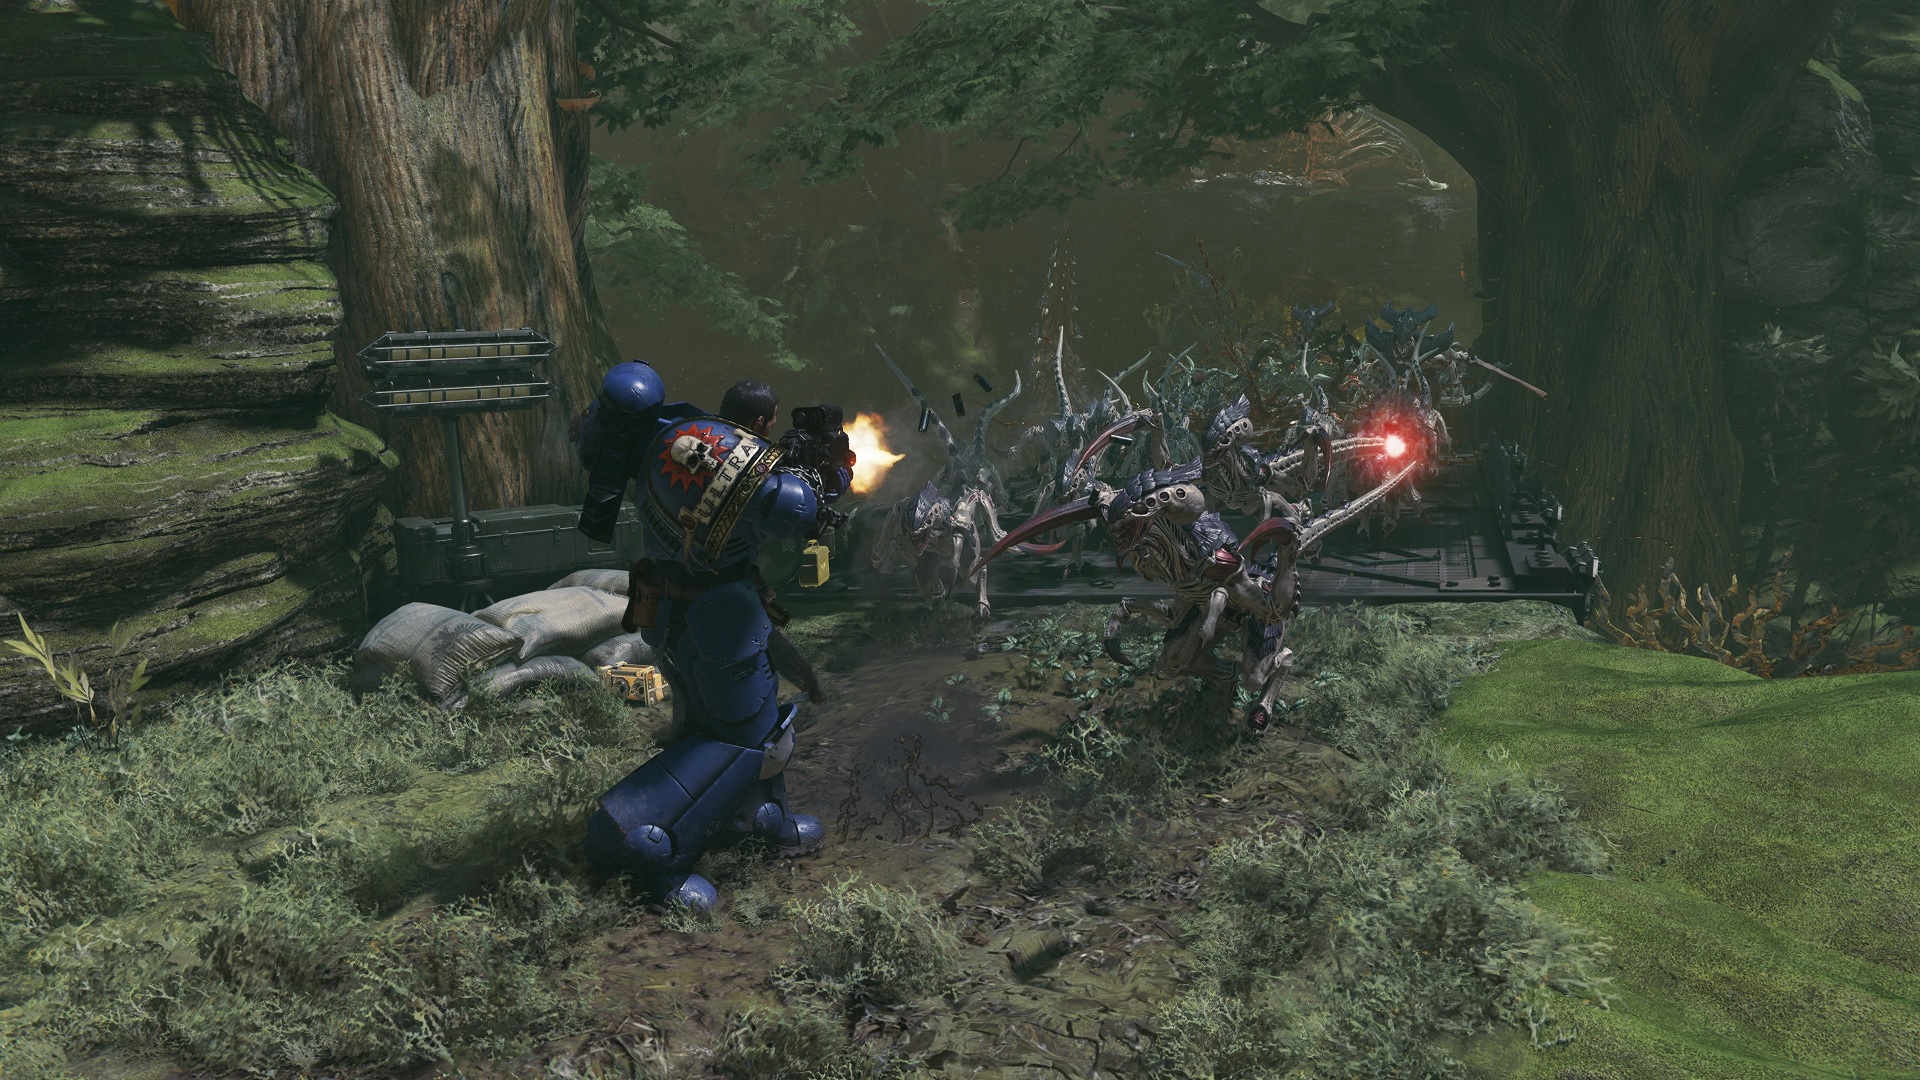
Even once you've completed the campaign and accompanying Operations, your service is not complete. Warhammer 40,000: Space Marine 2 has a huge roadmap extending into 2025, with new Operations missions being added. These additions also include entirely-new enemies, so you can expect this list to grow in the future.
If you haven't jumped in yet, there's no time like the present. This game is being widely praised for its combat and co-op mechanics, so grab a friend and jump aboard the Battle Barge!
In my review of Warhammer 40,000: Space Marine 2, I wrote that "Under Saber Interactive and Focus Entertainment's guidance, Titus and the Ultramarines are back in action with a gore-drenched experience that looks great, sounds great, and just feels fun practically every step of the way. The story isn't anything revolutionary, but it serves its purpose of delivering the 40K experience in an adrenaline-fueled romp."
Warhammer 40,000: Space Marine 2 is available now across Xbox Series X|S, Windows PC, and PlayStation 5.

Samuel Tolbert is a freelance writer covering gaming news, previews, reviews, interviews and different aspects of the gaming industry, specifically focusing on Xbox and PC gaming on Windows Central. You can find him on Twitter @SamuelTolbert.
