 Windows Central Insider


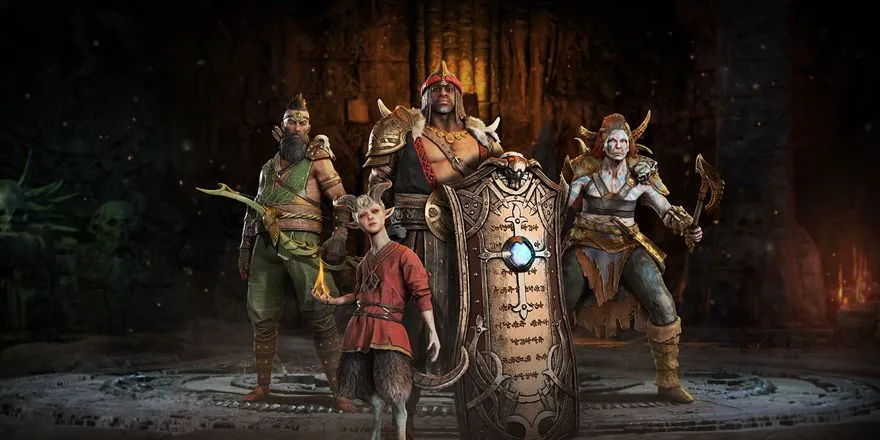
The Diablo 4: Vessel of Hatred expansion adds a new mechanic to the game, Mercenaries. These are NPCs that accompany you in combat throughout Sanctuary and each have their own particular set of skills.
The Diablo 4 Mercenaries differ from previous games iterations of this mechanic, as you can actually have two of them equipped at once. A primary Mercenary to aid directly and a secondary to act as a Reinforcement. Additionally you can build Rapport with your Mercenaries and trade with them.
Here's everything you need to know about these new characters in Diablo 4 and how you unlock each.
How do I unlock Mercenaries in Diablo 4?

Unlocking Mercenaries is an unmissable campaign quest you will be directed to while playing through the Vessel of Hatred expansion. This quest is called 'A Magpie in Flight' and can be found in Gea Kul.
You'll find the first Mercenary, Raheir is standing next to the Blacksmith. Talk to Raheir to start the quest. Following this through will unlock Raheir as a Mercenary and the Mercenary hideout 'The Den'.
The Den


The Mercenary Den is the secret gathering place for the Mercenaries of the Pale Hand. This Den is a hideout for the player to pick up quests to unlock all of the available mercenaries, hire and dismiss them, trade, and also have access to standard town features like the Blacksmith, Occultist and such.
Raheir will be unlocked as part of the story, and you can now click on him to hire as your Mercenary or as a Reinforcement (which I will explain later).

You will notice that Raheir will now also act as a Blacksmith whenever you return to the Den. Additionally, you can now pick up the three other story quests to unlock Subo, Varyana and Aldkin. These are indicated as Purple priority quests in this area.

What is the difference between Mercenary and Reinforcements?
As a solo player, you can hire one Mercenary to follow you into battle at all times, and a Mercenary to act as a Reinforcement. Reinforcements Mercenaries only appear following an action you choose, and you also choose the skill they use.
Your Mercenary will disappear when you join other players, but your Reinforcement will still be activated. So a party of four players can each have a Reinforcement Mercenary to help in critical situations.
Each Mercenary, Perks and Skills
Each Mercenary has its own Skill tree for which you can take two paths. At the top of each skill tree, each Mercenary has a Perk which applied before you choose your skill path. The skills for each unlock as you build Rapport with your Mercenaries. The chosen tree determines their Weapon and Basic Attack. You can equip up to four skills: one active Mercenary Core skill paired with a Core Passive, and one Mercenary Iconic skill paired with an Iconic Passive.
Raheir The Shield Bearer


Raheir has an AoE Barrier ability that reduces incoming damage for himself and nearby players, while boosting Armor and defensive buffs through Resiliency. He is an ideal choice for players with more aggressive builds who need extra survivability.
Raheirs perk: Valiance - When you are damaged for at least 15% of your current Life at once, Raheir comes to your aid to negate the damage, Knock Down Close enemies for 1.5 seconds, and grant you Unstoppable for 0.5 seconds.
Raheir's two skill trees are the Shield Charge skill, and Ground Slam.
| Shield Charge Skill Tree | Effect | Ground Slam skill tree | Effect |
|---|---|---|---|
| Core Skill: Sheild Charge | Raheir rushes forward aggressively, dealing 110% Physical damage and Taunting nearby enemies for 4 seconds. Raheir bashes enemies with a tower shield, dealing 80% Physical damage and Fortifying you for 5% of your Maximum Life. | Core Skill: Ground Slam | Raheir brutalizes the ground, dealing 160% Physical damage and Slowing enemies by 30% for 6 seconds. Targets in the center of the slam are Slowed by 60% instead. Raheir swings a round shield at enemies, dealing 85% Physical damage. Every 3 swings, Raheir Heals you for 2% of your Maximum Life. |
| Choose one of the following 2 Core passives | Row 1 - Cell 1 | Choose one of the following 2 Core passives | Row 1 - Cell 3 |
| Raheir's Guard | Raheir grants you 15%[+] Armor. | Raheir's Aegis | Raheir grants you 15% Resistance to All Elements. |
| Vanguard | Raheir Slows surrounding enemies by 40%. | Drawfire | When you use a Healing Potion, Raheir Taunts enemies around him for 4 seconds. Can only occur once every 20 seconds. |
| Choose one of the two following Iconic Skills, with one Iconic Passive | Row 4 - Cell 1 | Choose one of the two following Iconic Skills, with one Iconic Passive | Row 4 - Cell 3 |
| Iconic Skill: Provoke | Raheir Taunts enemies around you for 5 seconds. You gain 5% Damage Reduction for each target, up to 20%. | Iconic Skill: Bastion | Raheir takes a protective position for 5 seconds, redirecting 90% of the damage that would be dealt to surrounding allies to himself for 5 seconds. |
| Iconic Passive: Mocking Lure | You deal 10%[x] increased damage to enemies Taunted by Raheir. | Iconic Passive: Inspiration | Enemies affected by Raheir's Ground Slam take 10%[x] increased damage. Allies affected by Raheir's Bastion deal 25%[x] increased damage. |
| Iconic Passive: Iron Wolf's Ward | When Raheir's Valiance is triggered, he Knocks Back Close enemies and Taunts Distant enemies for 4 seconds. Raheir's Valiance Cooldown is reduced by 25%. | Iconic Passive: Iron Wolf's Virtue | When Raheir's Valiance is triggered, he Heals you for 25% of your Maximum Life. Raheir's Valiance Cooldown is reduced by 25%. |
| Iconic Skill: Crater | Raheir strikes the ground 3 times, each burst dealing 30% Physical damage and Pulling In enemies. The final burst additionally deals 40 Physical damage and Stuns enemies for 2 seconds. | Iconic Skill: Shield Throw | Raheir throws his shield, dealing 225% Physical damage and Taunting enemies for 3 seconds. The shield bounces up to 3 times and cannot bounce to the same target twice. |
| Iconic Passive: Iron Wolf's Call | When Raheir's Valiance is triggered, your next 2 Core Skills within 10 seconds deal 25%[x] increased damage and cost no Resource. Raheir's Valiance Cooldown is reduced by 25%. | Iconic Passive: Iron Wolf's Arrival | When Raheir's Valiance is triggered, he also casts Ground Slam and Shield Throw. Raheir's Valiance's Cooldown is reduced by 25%. |
| Iconic Passive: Sundering Shield | Raheir's final Crater burst inflicts Vulnerable on enemies for 4 seconds. | Iconic Passive: Consecrated Shield | Raheir's Shield Throw Consecrates enemies for 6 seconds. Directly damaging a Consecrated enemy Heals you for 6% of your Maximum Life, once per target. |
| Row 11 - Cell 0 | Row 11 - Cell 1 | Row 11 - Cell 2 | Row 11 - Cell 3 |
Subo The Bounty Hunter


Subo is a ranged bounty hunter who offers AoE support from a distance, and will mark targets that provide buffs when killed. Subo's playstyle is expected to sit between the support roles of Varyana and Aldkin, making him compatible with most builds.
Subo's perk: Seeker - Subo will call out an enemy target and mark them for 10 seconds. Killing this enemy before the mark expires grants 33.0% of your maximum resource and reduces the next mark's cooldown by 10 seconds.
Passive: Subo reveals nearby enemies, traps and materials.
| Wire Trap Skill Tree | Effect | Molotov skill tree | Effect |
|---|---|---|---|
| Core Skill: Wire Trap | Subo places a concussive trap that arms after 0.8 seconds. When an enemy moves within range, it explodes for 80% Physical damage and Stuns enemies for 2 seconds. Subo fires a toughened arrow at an enemy, dealing 80% Physical damage with a 30% chance to Stun for 1.0 second. | Core Skill: Molotov | Subo tosses an incendiary at an enemy, dealing 10% Physical damage and Stunning them for 1.0 second before exploding into flames. For the next 5 seconds, enemies within the area repeatedly take 36% Burning damage over 3 seconds. Subo launches 5 bolts at an enemy, each dealing 30% Physical damage. The final bolt explodes, Slowing enemies by 50% for 2 seconds. |
| Choose one of the following 2 Core passives | Row 1 - Cell 1 | Choose one of the following 2 Core passives | Row 1 - Cell 3 |
| Piercing Arrows | Subo's Heavy Shot now pierces through enemies. | Scorched Earth | Subo's initial Molotov explosions cause enemies to take 30%[x] increased Damage Over Time from you for 3 seconds. |
| Ready at Hand | Damaging an Elite grants you 20%[+] Movement Speed for 2 seconds if Subo is around you. | Share a Drink | When one of Subo's Molotovs explodes, it has a 50% chance to drop a Healing Potion for you. |
| Choose one of the two following Iconic Skills, with one Iconic Passive | Row 4 - Cell 1 | Choose one of the two following Iconic Skills, with one Iconic Passive | Row 4 - Cell 3 |
| Iconic Skill: Cover Fire | Subo charges a countless volley of arrows, then unleashes it over your position for 140% Physical damage that Slows enemies by 50% for 4 seconds. | Iconic Skill: Snipe | Subo charges a massive piercing bolt, then unleashes it forwards for 300% Physical damage that Knocks Back enemies. |
| Iconic Passive: Pin Cushion | Subo's Cover Fire also Immobilizes enemies for 2 seconds. | Iconic Passive: Incendiary Bolt | If Subo's Snipe hits the target he originally aimed at, a Molotov explodes on them. |
| Iconic Passive: Opening Fire | You deal 25%[x] increased Critical Strike Damage to enemies Slowed by Subo's Cover Fire. | Iconic Passive: Ambusher | You gain 20%[x] Lucky Hit Chance against enemies damaged by Subo's Salvo within the last 3 seconds. |
| Iconic Skill: Trip Mines | Subo scatters 3 explosive traps that each arm after 1.0 second. When an enemy moves within range of one, it explodes for 300% Physical damage and Knocks Down enemies for 1.5 seconds. | Iconic Skill: Explosive Charge | Subo fires 4 Explosive Charges that stick to enemies. Each explodes after 6.5 seconds, dealing 60% Physical damage. Explosive Charges detonate early if their target dies or takes Overpower damage. |
| Iconic Passive: Loaded Munitions | Subo's Wire Traps and Trip Mines inflict Vulnerable on enemies for 5 seconds. | Iconic Passive: Thrillseeker | Your active Cooldowns are reduced by 0.5 seconds when an Explosive Charge explodes. Explosive Charges now detonate after only 3 seconds. |
| Iconic Passive: Mastermind | Subo's Wire Trap and Trip Mines gain 60% Size. You and Subo gain 15%[+] Crowd Control Duration. | Iconic Passive: Bargaining Chips | Targets stuck with Explosive Charges take 2%[x] increased Overpower Damage per Explosive Charge stuck. Each Explosive Charge can be detonated by an additional 2 4Overpower;Overpowers before expiring. |
| Row 11 - Cell 0 | Row 11 - Cell 1 | Row 11 - Cell 2 | Row 11 - Cell 3 |
Varyana The Berserker Crone


Varyana specializes in close-range combat and using a grip ability to pull enemies in closer. She uses a killstreak mechanic that increases in strength as she kills more enemies. Varyana is a well rounded choice for most playstyles, but particularly suits melee DPS builds.
Varyana's perk: Massacre - You and Varyana stack Massacre together on kills. Each stack grants you both 1%[+] Movement Speed, up to 100%[+]. Massacre resets after 7 seconds of not killing an enemy.
| Cleave Skill Tree | Effect | Shockwave skill tree | Effect |
|---|---|---|---|
| Core Skill: Cleave | Varyana swings two axes in an arc in front of her, dealing 60% Physical damage and 400% Bleeding damage over 4 seconds. Varyana slashes enemies with dual axes, dealing 58% Physical damage. She has a 45% chance to also deal 400% Bleeding damage over 3 seconds. | Core Skill: Shockwave | Varyana slams the ground for a brutal shockwave in front of her, dealing 80% Physical damage and Knocking Down enemies for 1.5 seconds. Varyana batters enemies with a mace, dealing 80% Physical damage with 0%[+] increased Critical Strike Chance. |
| Choose one of the following 2 Core passives | Row 1 - Cell 1 | Choose one of the following 2 Core passives | Row 1 - Cell 3 |
| Hysteria | You gain 1.5%[+] Attack Speed for 5 seconds whenever Varyana damages an enemy, up to 12.0%[+]. | Crushing Force | When Varyana deals damage to an enemy, she has a 30% chance to Knock them Down for 1.5 seconds. |
| Recklessness | Varyana's Cleave inflicts Vulnerable on enemies for 3 seconds. | Reprisal | If you become Crowd Controlled, Varyana leaps towards the enemy that inflicted it, dealing 128% Physical damage and Knocking Down surrounding enemies for 2.28 seconds on impact. This can only occur once every 12 seconds. |
| Choose one of the two following Iconic Skills, with one Iconic Passive | Row 4 - Cell 1 | Choose one of the two following Iconic Skills, with one Iconic Passive | Row 4 - Cell 3 |
| Iconic Skill: Bloodthirst | Varyana enters Bloodthirst, gaining 30%[+] Attack Speed, 200%[+] Movement Speed, and Unstoppable for 7 seconds. Varyana's Bloodthirst grants 10%[+] Attack Speed to you for the same duration. | Iconic Skill: Earth Breaker | Varyana crushes the ground with her mace, leaving a tremor that deals 180% Physical damage over 3 seconds and Knocks enemies Down repeatedly. |
| Iconic Passive: Intimidated | While Varyana has Bloodthirst, enemies around her deal 10% reduced damage. | Iconic Passive: Rampage | You deal 15%[x] increased damage to enemies afflicted by any of Varyana's Crowd Control effects. |
| Iconic Passive: Bloodlust | Varyana's Bloodthirst further increases your Attack Speed by 15%[+]. | Iconic Passive: Dismembering | Enemies damaged by Varyana's Earth Breaker are left exposed, causing your next hit against them within 3 seconds to be a guaranteed Overpower. This may only occur on the same target once every 5 seconds. |
| Iconic Skill: Whirlwind | Varyana spins violently in a line, repeatedly dealing 65% Physical damage and 30% Bleeding damage over 5 seconds. | Iconic Skill: Ancient Harpoons | Varyana launches three harpoons ahead of her, piercing enemies for 140% Physical damage. She then rips them back, Pulling In and Stunning enemies for 2 seconds. |
| Iconic Passive: No Escape | Varyana's Whirlwind Pulls In enemies every 1.5 seconds and gains 60% Size. | Iconic Passive: Annihilator | Varyana's Ancient Harpoons additionally Slow enemies by 40% for 3 seconds. During this time, you gain 30%[x] Lucky Hit Chance against those targets. |
| Iconic Passive: Taste of Flesh | When you or Varyana deal direct damage to an enemy inflicted with any of her Bleeding effects, you Heal for 1% of your Maximum Life (0). | Iconic Passive: Iron Grip | Varyana's Ancient Harpoons travel 33% farther and reduce enemies' Impairment Resistance by 50% for 5 seconds. |
| Row 11 - Cell 0 | Row 11 - Cell 1 | Row 11 - Cell 2 | Row 11 - Cell 3 |
Aldkin The Forsaken Child


Aldkin is a Mercenary that casts Shadow or Fire damage depending on which skill tree you choose, he'll shapeshift between human and demon.
Aldkin's perk: Blasphemous Fate - Aldkin occasionally loses control of his curse, transforming into a ferocious demon for 22 seconds. This grants Aldkin powerful new abilities, but the unleashed evil curses you for its duration.
Curse of Darkness: You and nearby enemies become Vulnerable.
Curse of Flames: Your direct damage Burns enemies for 30% damage over 3 seconds, but you lose 10% of your Maximum Resource per second.
Aldkin's curse and demon form are determined by his Mercenary Core Skill.
| Haunt (Shadow) Skill Tree | Effect | Surge (Fire) skill tree | Effect |
|---|---|---|---|
| Core Skill: Haunt | Aldkin emits 3 ghostly souls at enemies, each Haunting their victims and dealing 90% Shadow damage over 10 seconds. If a target dies while being Haunted, its soul jumps to another target. Aldkin shoots a burst of dark bolts at an enemy, dealing 30% Shadow damage. | Core Skill: Flame Surge | Aldkin channels a cone of flame for 4 seconds, repeatedly dealing 80% Fire damage. Aldkin hurls a flaming bolt at an enemy, dealing 40% Fire damage and 55% Burning damage over 4 seconds. |
| Choose one of the following 2 Core passives | Row 1 - Cell 1 | Choose one of the following 2 Core passives | Row 1 - Cell 3 |
| Terrify | Hits of Aldkin's Haunt have a 30% chance to inflict Vulnerable on enemies for 4 seconds. | Covered in Ash | Hits of Aldkin's Flame Surge Slow enemies by 20% and deal an additional 60% Burning damage over 3 seconds. |
| Exhaustion | Aldkin's Shadow damage has a 5% chance to Daze enemies for 2 seconds. | Raging Violence | Allies gain 10%[+] Critical Strike Chance against enemies affected by Flame Surge. |
| Choose one of the two following Iconic Skills, with one Iconic Passive | Row 4 - Cell 1 | Choose one of the two following Iconic Skills, with one Iconic Passive | Row 4 - Cell 3 |
| Iconic Skill: Field of Languish | Aldkin desiccates an area for 6 seconds, Slowing enemies within by 40% and reducing their damage dealt by 20%. | Iconic Skill: Storm of Fire | Aldkin rains a Fire Storm down from the sky that deals 300% Fire damage on impact and remains on the ground for 10 seconds. Every second, the Fire Storm Burns enemies within for 55% damage over 2.5 seconds. Enemies hit by Fire Storm's impact or aftershocks have a 30% chance to be Stunned for 1.0 second. |
| Iconic Passive: Paranoia | Lucky Hit: Attacks against Languishing enemies have up to a 20% chance to Daze them for 1.0 second. | Iconic Passive: Eradication | Enemies killed within Aldkin's Fire Storm explode for 120% Fire damage. |
| Iconic Passive: Condemned | You instantly kill Languishing enemies with less than 40% Life. Does not work on Elites. | Iconic Passive: Ember's Gift | You restore 33% of your Primary Resource per second while inside Aldkin's Fire Storm. |
| Iconic Skill: Chain of Souls | Aldkin chains up to 10 enemies to himself, Tethering to them and dealing 84% Shadow damage over 2.5 seconds. When the chains expire, they deal 35% Shadow damage and Stun their victims for 2.5 seconds. | Iconic Skill: Wave of Flame | Aldkin conjures a mass of flames forward, repeatedly dealing 300% Fire damage, Knocking Back enemies, and destroying small missiles. |
| Iconic Passive: Amplified Suffering | Damaging a Soul Chained enemy detonates the chain early, dealing 50% Shadow damage around them. | Iconic Passive: Burning Chaos | Aldkin's Wave of Flame Cooldown resets when you cast an Ultimate Skill. |
| Iconic Passive: Shared Pain | Aldkin's Chain of Souls Cooldown is reduced by 1.5 seconds when a chained target dies. | Iconic Passive: Raging Havoc | Enemies damaged by Aldkin's Wave of Flame take 15%[x] increased Damage Over Time for 4 seconds. |
What is the difference between a Mercenary and a Reinforcement?

You can choose a Mercenary to Hire, and a Mercenary as a Reinforcement. The latter will be the only option available in multiplayer.
Reinforcements come to your aid at key moments in combat, you select the skill you want and the Opportunity that triggers it.
Opportunities arise from various situations, such as the player using a specific skill or becoming Crowd Controlled. This adds another layer of depth to playstyle customization, enabling players to prioritize different abilities or gear choices depending on their Primary and Secondary Mercenaries.
Mercenary Rapport System

Building Rapport with your Mercenary will also unlock rewards similar to the Reputation UI you will be familiar with from the Season reputation quests. The more you use your Mercenary, the more Rapport you will build and you will gain access to more rewards. Reinforcements earn Rapport at a 50% rate.
Pale Marks and Bartering

You'll also earn a new currency using your Mercenaries, called 'Pale Marks.' You can then use these at a merchant called Faiyra within the hideout to trade. Faiyra will be unlocked as you progress your Mercenary story quests.
Unlock Bartering Upgrades by gaining Rapport with your Mercenaries. You can reroll the store once per day for free, and further rerolls will require Pale Marks.
This guide is a work in progress that will be amended with suggestions for optimal Mercenary builds as we play more of the Vessel of Hatred expansion and Season 6 content.

If you don't care about cosmetics, grab the cheapest edition for all the new content and you'll still get a new Snow Leopard pet.
Deluxe Edition | was $59.99 now $53.29
Ultimate Edition | was $89.99 now $79.09")

