Four things you might have forgotten to do after installing Windows 10

Windows 10 is out the door, and millions of users have already upgraded to the latest version. In part is because the new operating system packs a lot of new features, such as a more useful Start menu that combines part of the Start screen in Widows 8.x and functionality found in Windows 7. The Action Center, which is the new centralized location to review system and apps notifications. There is also the new Settings app that slowly begins to replace the Control Panel; Cortana arrives on the desktop with Windows 10 as well, and many new features.
However, it's also helping to the fast adoption that Microsoft is making the operating system a free upgrade for computers running a genuine copy of Windows 8.1 and Windows 7 Service Pack 1.
Today, in this new Window 10 help guide, we're going to go through a few things you might have forgotten to do after installing the operating system. These tips are also useful information for those who are planning to upgrade to Windows 10 in the near future – perhaps when Windows 10 Threshold 2 releases, as the operating system will be even more stable.
1. How to rename your Windows 10 PC
Since the beginning, users had the ability to name their computers anything they want, and it has been relatively an easy task to do for some people. Most of the time, users will simply choose a name during the installation process, but if you're performing a clean install of Windows 10, you'll notice that you won't be prompted to choose a computer name.
For some reason to speed up the installation process, Windows 10 will randomly name your computer on your behalf, instead of letting you pick a custom one.
In previous versions of Windows, you needed to go to System Properties in Control Panel to rename your computer, and while it's still true in Windows 10, for regular users this can be considered an advanced task to perform.
However, the new operating system also includes the Settings app. This is the centralized location that hosts many of the Windows 10 configuration options, (eventually, it will host all the Control Panel options, but it will take time until that happens). It makes a lot easier to configure many aspects of the operating system, including renaming your PC.
Get the Windows Central Newsletter
All the latest news, reviews, and guides for Windows and Xbox diehards.
If you like to know or change your computer name in Windows 10, do the following:
1- Open the Settings app by clicking the Start button and clicking Settings, or use the Windows + I keyboard shortcut that will get right into the app.
2- Go to System and navigate to the About page.
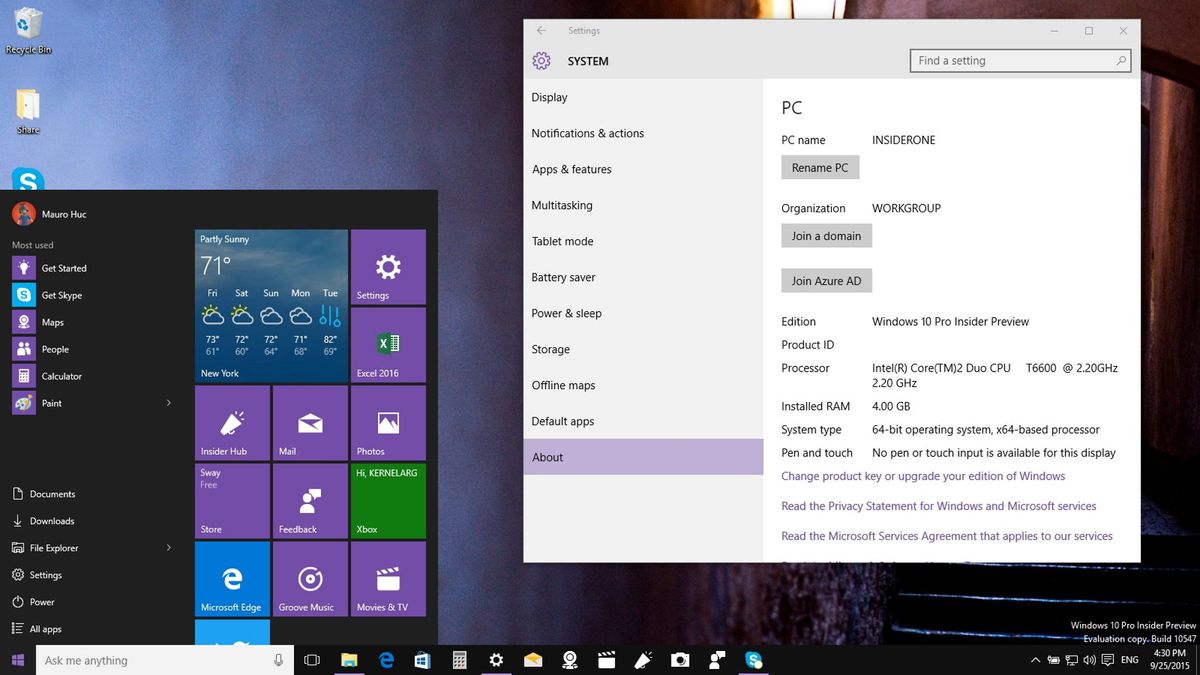
3- On the About section, like in System info, you'll find your computer name, operating system edition and architecture, processor, installed memory, and more useful information about your system.
In this section, you're also going to find the button to change the name of your computer. Simply click Rename PC and enter the new name in the dialog box. You can choose anything you want, but you want to avoid using unsupported characters, such as < > ; : " * + = \ | ? ,.

As you can see in the screenshot, the length of the name doesn't seem short, but in practice, you don't want to go with a name longer than 15 characters (letters and numbers). You don't want to use spaces either. If you need to separate the name, a hyphen will be a better option.
4- After you enter your desired name, click Next, and then you'll need to restart your computer for the setting to take effect.

Note: If you have upgraded your PC to Windows 10, and it carried over your previous PC name, at least now you know how to change it.
2. How to change Date & time
Another setting the setup process doesn't let you configure is your time zone, and you probably have been using Windows 10 with the wrong time or zone.
To change the time zone and correct the time in Windows 10, do the following:
1- Open the Settings app by clicking the Start button and clicking Settings, or use the Windows + I keyboard shortcut that will get right into the app.
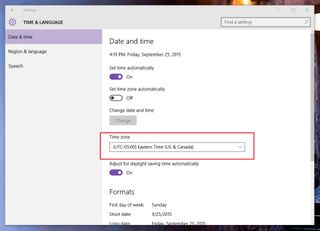
2- Go to Time & language and navigate to the Date & time page.
3- Under Time zone, choose your current time zone and that's it.

3. How to setup File History on Windows 10
In the same way Microsoft included a tool to backup files on Windows 8, Windows 10 also bundles the File History feature.
For those unfamiliar, File History is a tool in Windows that allows users to keep the all their files backed up on an external drive in case you need to restore one or all your files due to damage, accidental deletion, etc.
Compared to the previous version, setting up File History is much easier in Windows 10 than in previous versions.
To configure a file backup using File History, do the following:
1- Connect an external USB hard drive to your computer that know you won't be disconnecting very so often. Also make sure to the external drive has enough space, and space to the backup to grow over time.
2- Open the Settings app by clicking the Start button and clicking Settings, or use the Windows + I keyboard shortcut that will get right into the app.
3- Go to Update & security and navigate to Backup.
4- Click on Add a drive and from the list select the USB drive you connected.

5- Click More options. Here you can configure many options, such as how often to make a backup and how many versions of the of the backup to keep. Also, you can control which folder locations to include or exclude from the backup, and you have the option to stop using the drive for backups.

If you ever need to restore a file, simply use the Restore files from a current backup link from More options or right-click a file or folder, click Properties, and navigate to Previous Versions to recover the file or folder.
4. How to reclaim space after the upgrade
If you have performed an upgrade of Windows 10, to protect your previous installation and allow you to roll back, the setup saves a copy of your old installation. And this could take a lot of valuable space in your system, especially if you have a device with limited storage.
As such, if you're not planning to revert to the previous version and the upgrade went through successfully. You can easily get a lot of gigabytes back doing the following:
1- Go to This PC, right-click the Windows drive (C:), click Properties, and then click Disk Cleanup.
2- Then click the Clean up system files.
3- Make sure to select "Previous Windows Installation(s)" and click OK to delete files.

Now you might have free up between 10 to 15GB, which you can use for more important files.
Wrapping up
While the setup process of Windows 10 is pretty straightforward, there are still a few things you need to configure manually. However, with today's reminder your system should be a little more complete and safer from data lost.
If you have other suggestions, don't forget to share them with everyone in the comments below.
Mauro Huculak has been a Windows How-To Expert contributor for WindowsCentral.com for nearly a decade and has over 15 years of experience writing comprehensive guides. He also has an IT background and has achieved different professional certifications from Microsoft, Cisco, VMware, and CompTIA. He has been recognized as a Microsoft MVP for many years.
