5 Settings tips to make your Windows 10 experience more enjoyable
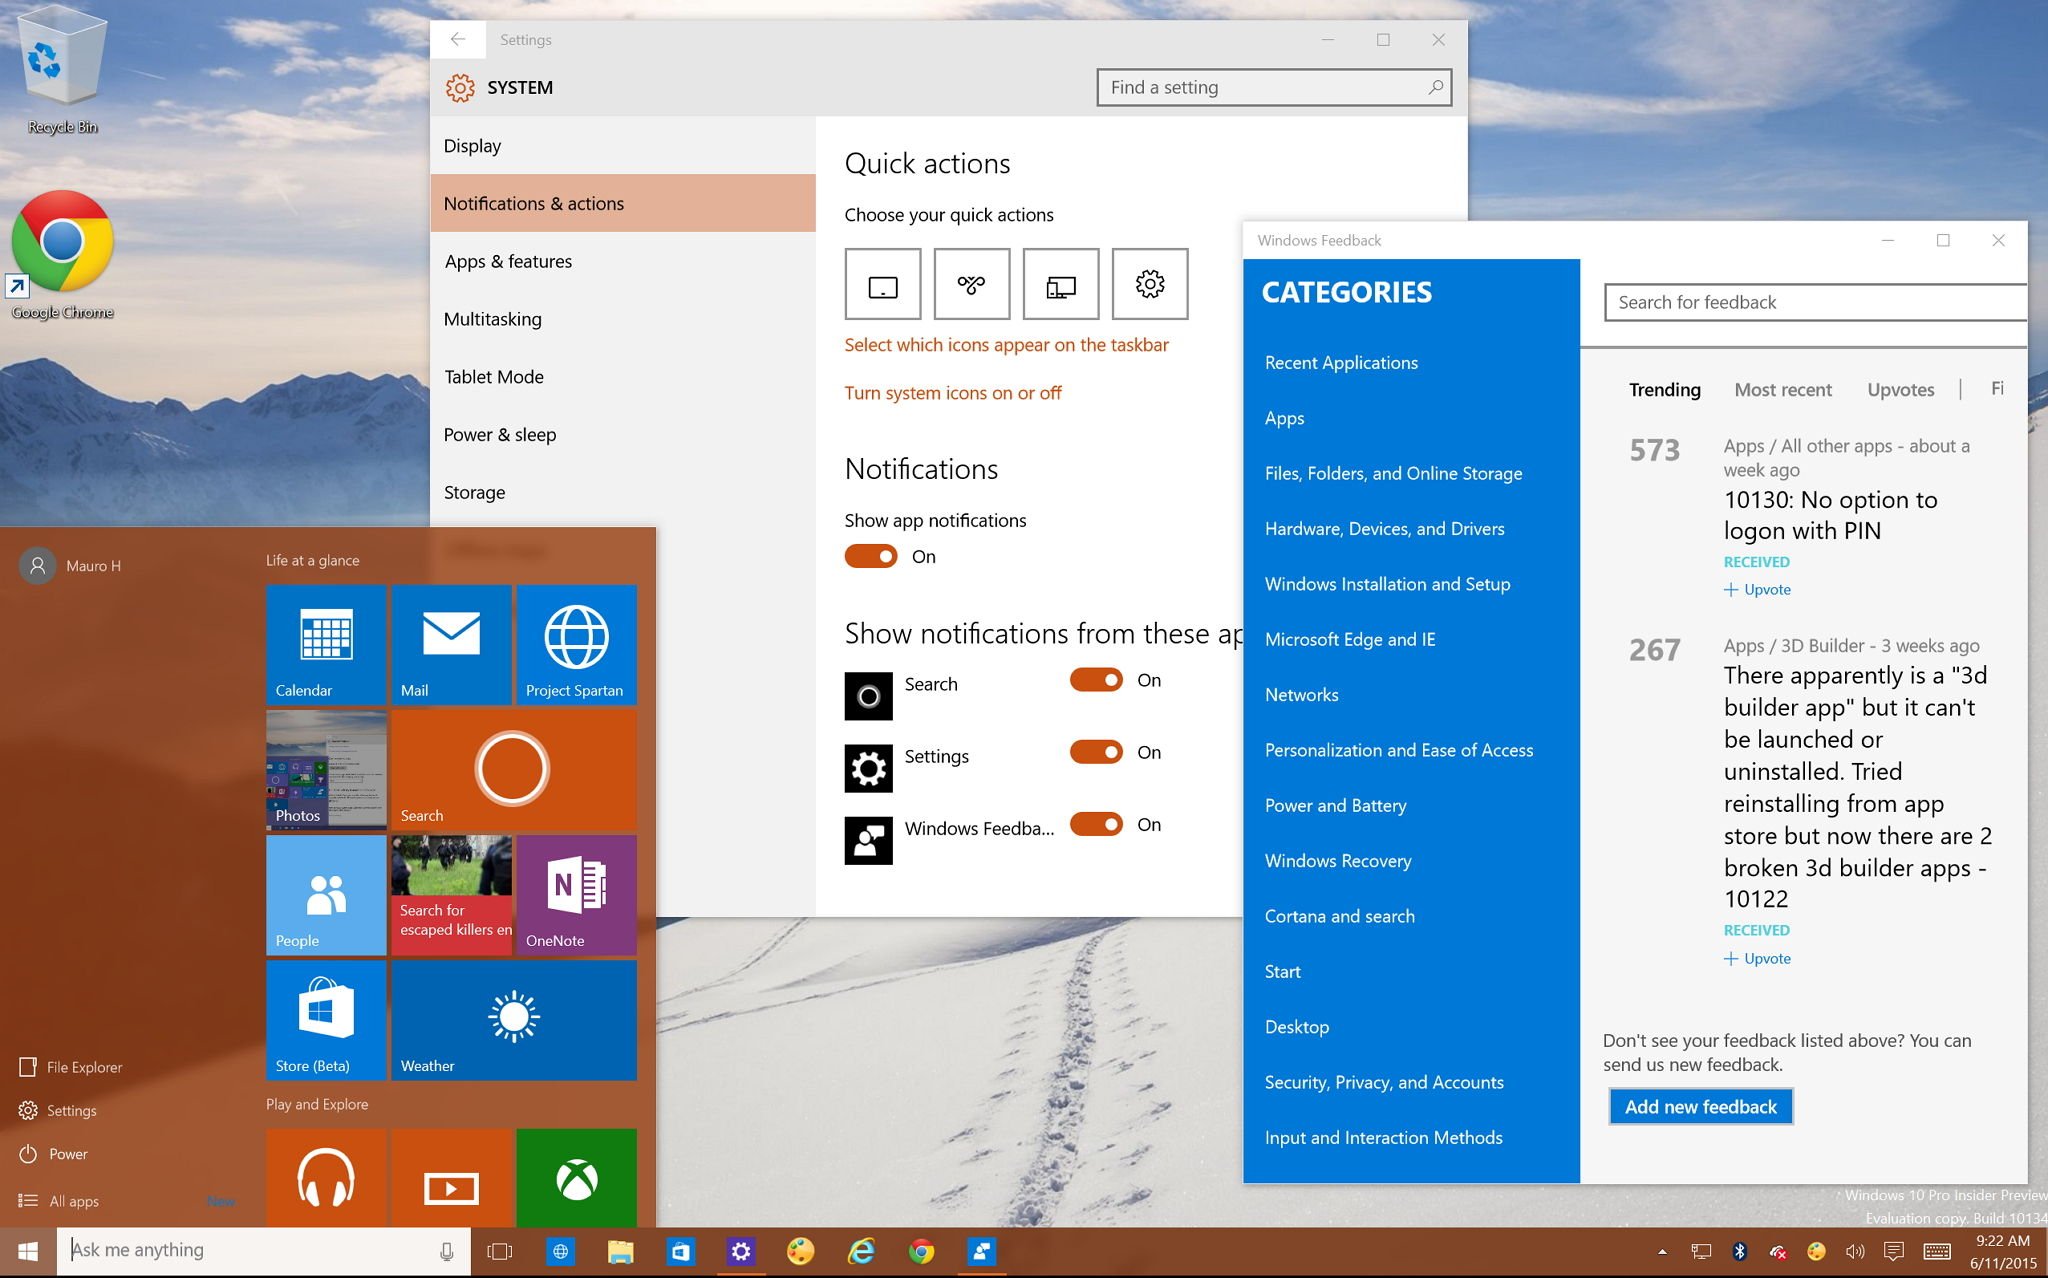
In Windows 10, Microsoft is changing a lot of things. While the focus on this new release is to bring some of the operating system familiarity back to users, the company is also adding new features that will work across different devices. One of these new features is the new Settings app.
The Settings app is the new one-stop-shop to change pretty much all your PC settings, and unlike the Control Panel, the same app will work on PCs, tablets, and phones. Eventually, we also know that Microsoft will be replacing the good old Control Panel in favor of "Settings".
In Windows 8.x, Microsoft introduced the "PC settings", but it doesn't compare with the new Settings app. This new app brings a complete place to customize settings and it's something more like the Control Panel.
While there are many new options you can customize in Settings, today I want focus on five settings you can customize in Windows 10. These include how to control notifications banners and system tray icons, save energy and manually prioritize system resources, and to bring a little more customization to the Start menu.
Control feedback notifications
Feedback is one of the main pieces of information Microsoft is using to build Windows 10. Since the first public preview of the operating system, the software maker has included the "Windows Feedback" app for this purpose. But to get users to engage with Windows 10 and submit their reactions, the company has configured the operating system to show frequently pop-up banners notifications asking users to share their experience after a particular task.
During the development process, it's recommended that users send feedback to Microsoft as much as possible to get a great version of Windows 10. However, constant reminders to submit feedback can be a little bit annoying. Thankfully, the company added an option to control the frequency in which users get prompted for their feedback.
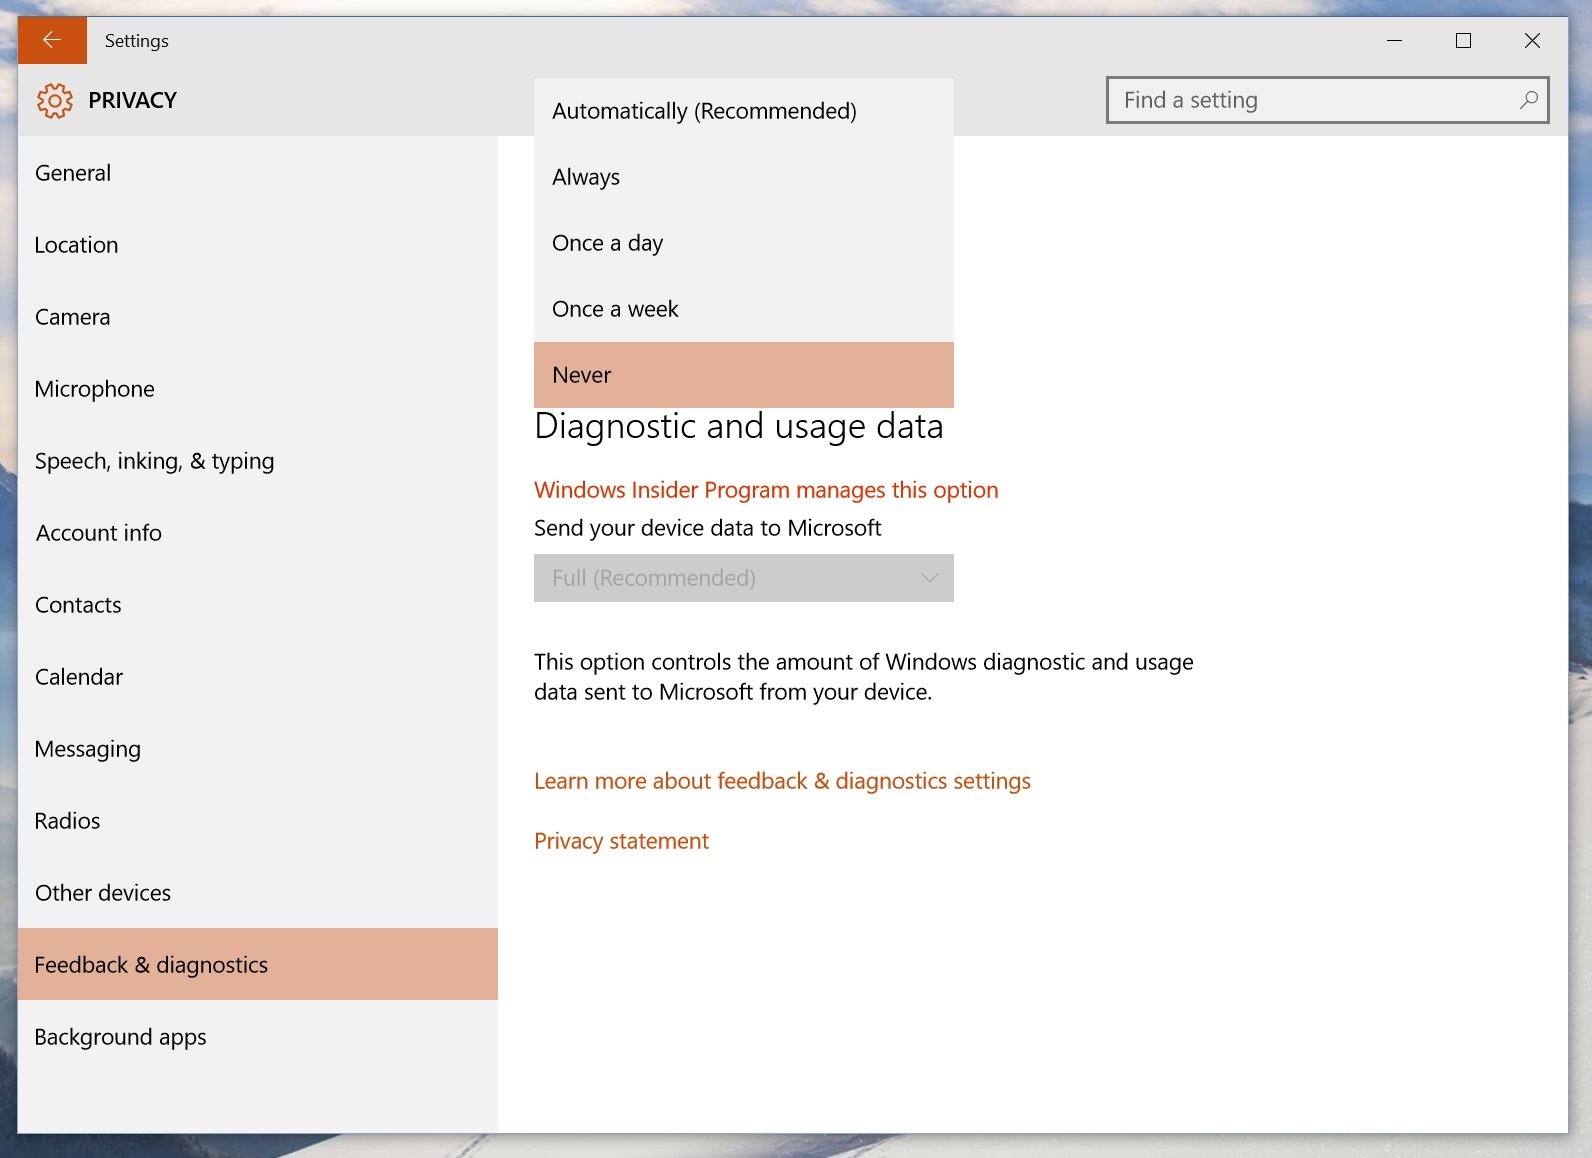
To change this behavior, open the Settings app > Privacy > Feedback (note that "Feedback" has been renamed to "Feedback & diagnostics" starting on Windows 10 build 10134). Then, under Feedback frequency, you can change the frequency to "Automatically, Always, Once a day, Once a week, or Never". Select your preference and now you'll be able to enjoy Windows 10 with less annoying notifications.
Get the Windows Central Newsletter
All the latest news, reviews, and guides for Windows and Xbox diehards.
Also, you can on the System Settings, under Notifications & actions, users can also control notifications for the Windows Feedback app. Users can turn on or off, or click the Advanced link to choose to show only notifications or also show notification banners.
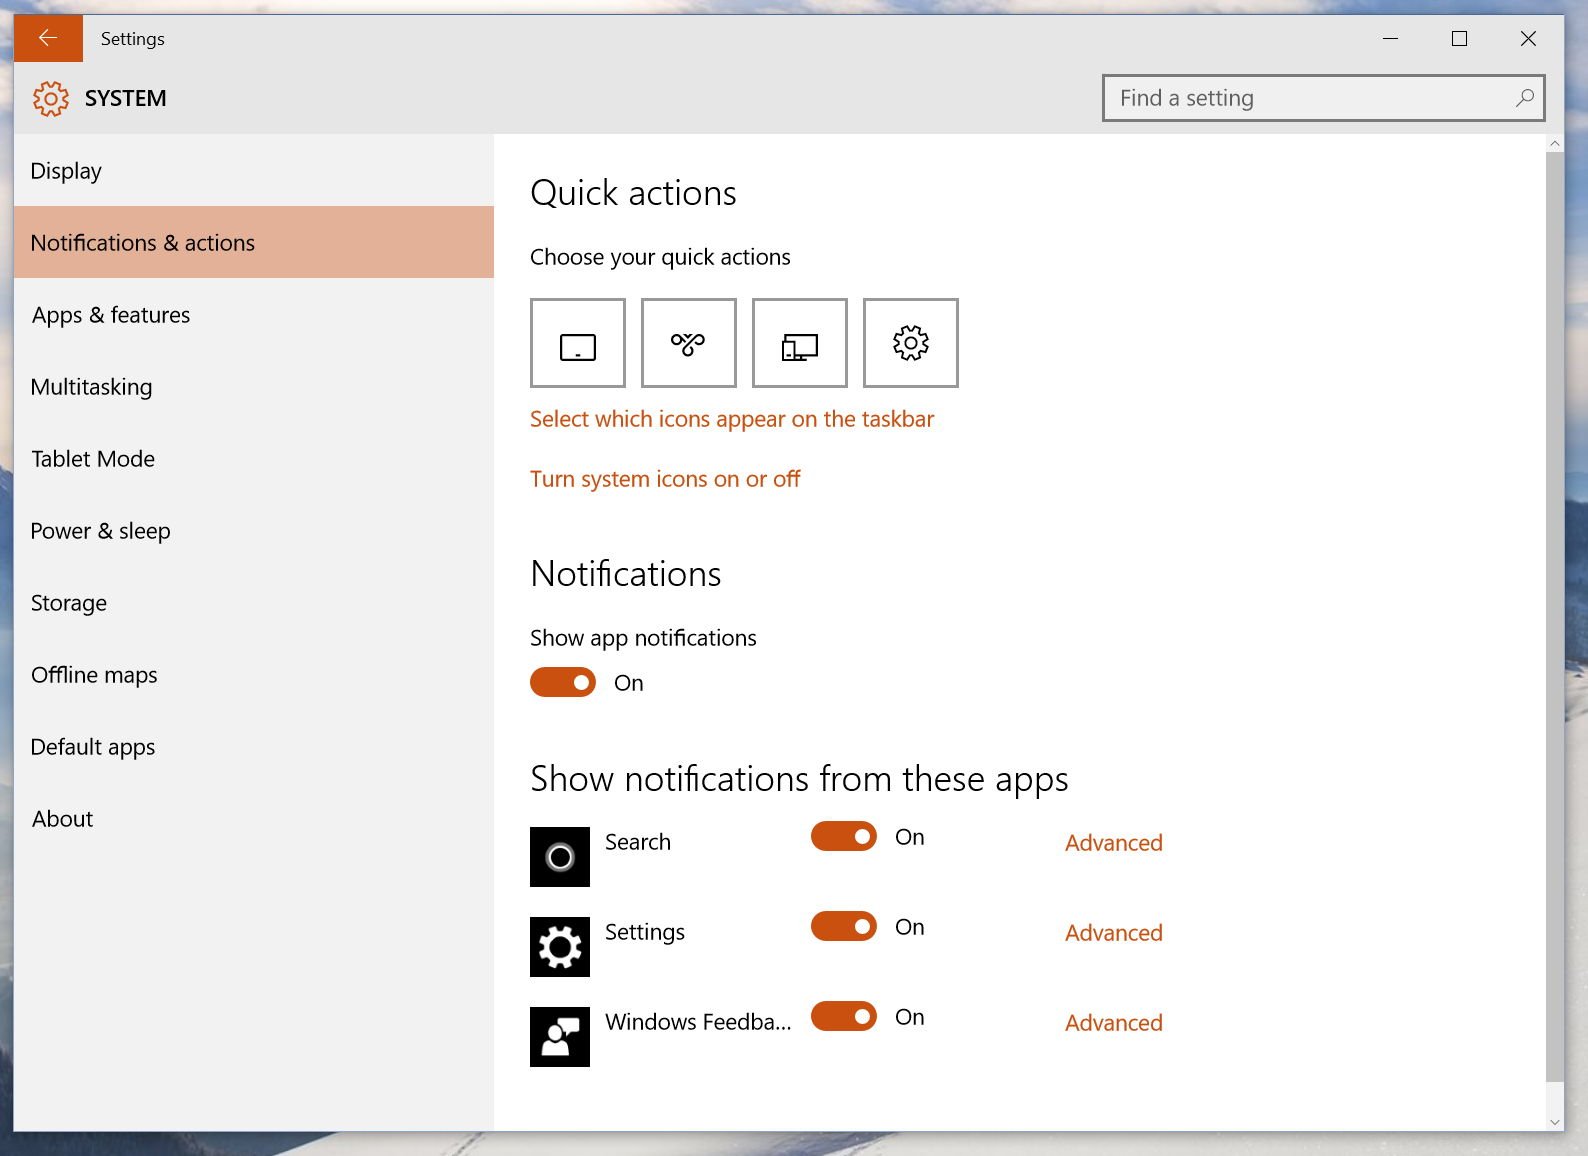
If you don't want to see any notifications, you can simply slide the pill switch to the Off position in "Notifications" (refer to the previous image).
Remove system icons from the system tray
Another change coming to Windows 10 is the location from where users can enable or disable system tray items. In previous versions of Windows, users needed to go to "Notifications Area Icons > System Icons" to choose which items, such as Clock, Volume, Network, Power, Action Center, and more. Users can simply go to the Settings app, and navigate to System > Notifications & actions, and under Turn system icons on or off, you can easily decide which items should appear in the system tray for less clutter taskbar.
Remove program icons from the system tray
In the same way, users can control which program icons can appear in the bottom-right corner of the screen. In Windows 10, Microsoft is also relocating the setting to select which icons from apps will appear on the taskbar to the Notifications & actions area. Simply, click the Select which icons appear on the taskbar, and you'll see a listing with all the apps and services you can turn on and off, make your choice and you're good to go.
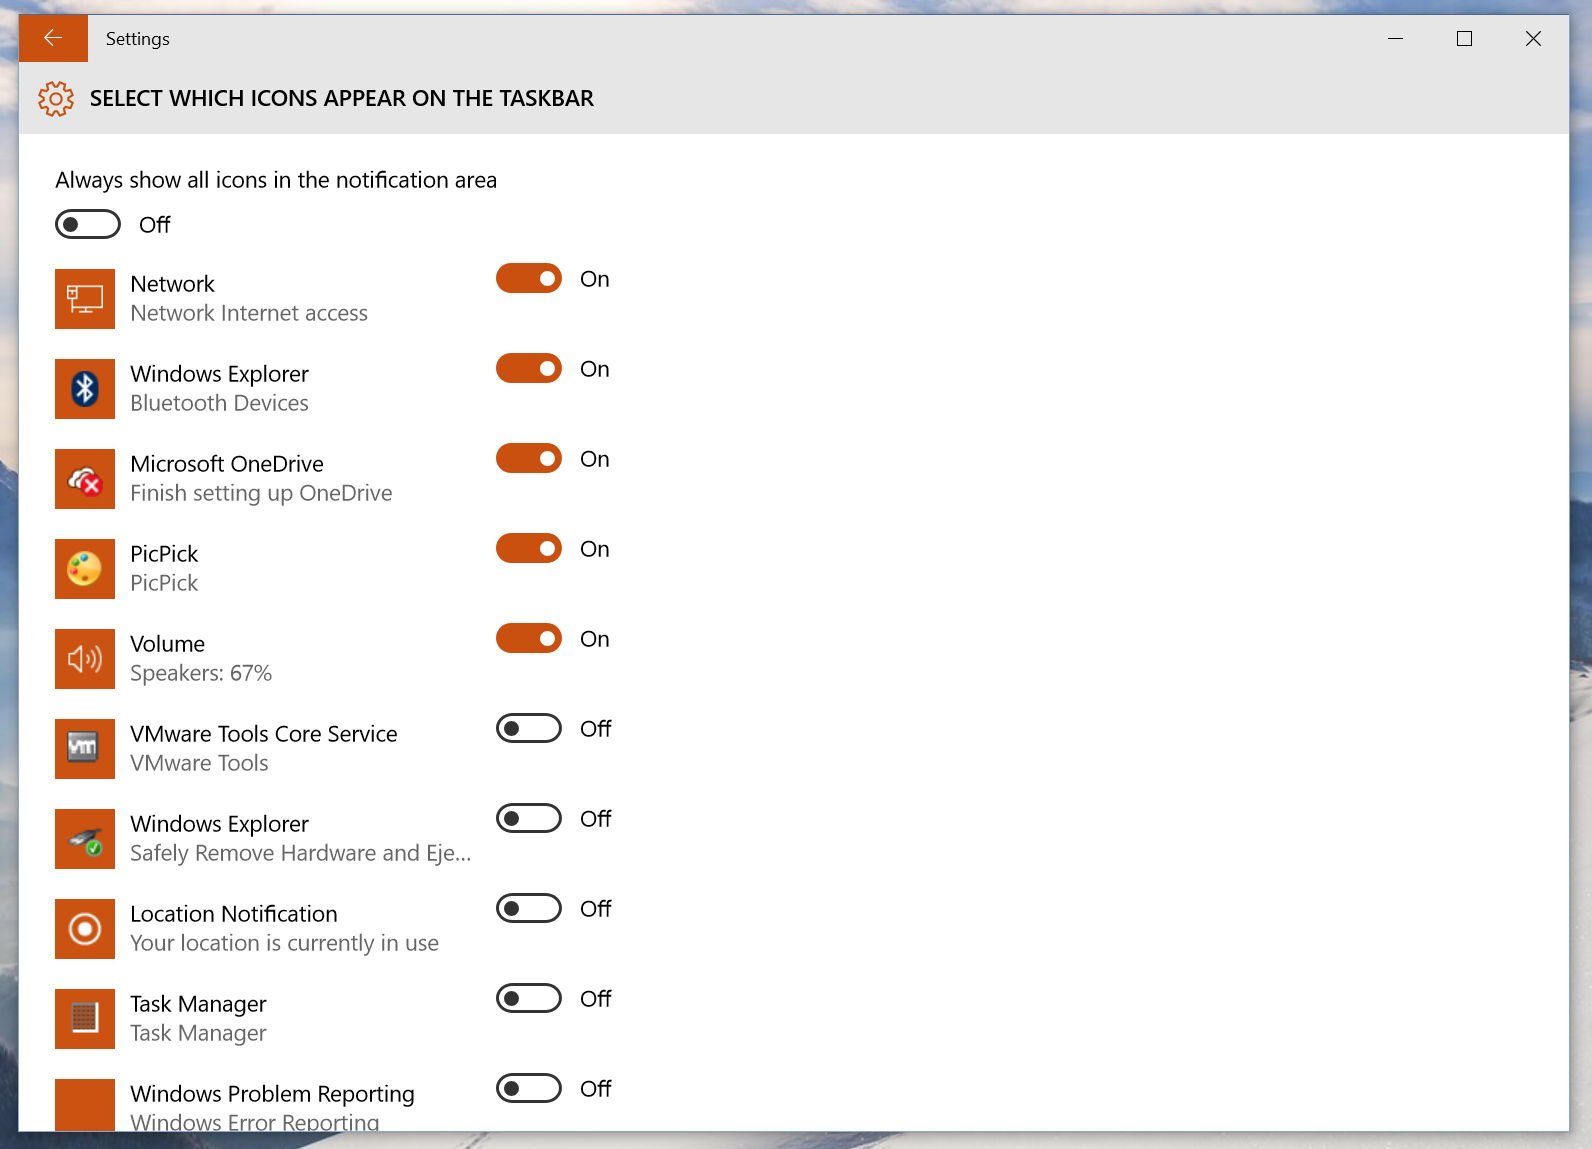
Here is a screenshot of a clean system tray:
Control which apps run the background
In Windows 10 build 10134, Microsoft is adding a new feature in the Privacy settings to give users more control over which apps can run in the background.
A similar feature was included in Windows 8.x, but after allowing a Windows app to run in the background, it was very confusing to disable the functionality. This involved going into each app, opening its settings, and changing the Lock screen option to stop the app from running the background.
In the new operating system, the settings now appear unified in a single place. To change this behavior, simply go to the Settings app, navigate to Privacy > Background apps. Then under "Let apps run in the background", you will see a list of Windows apps currently installed on your system. You can then slide the pill switch on or off to restrict apps from receiving info, send notifications, and stay up-to-date, even if you're not using them.
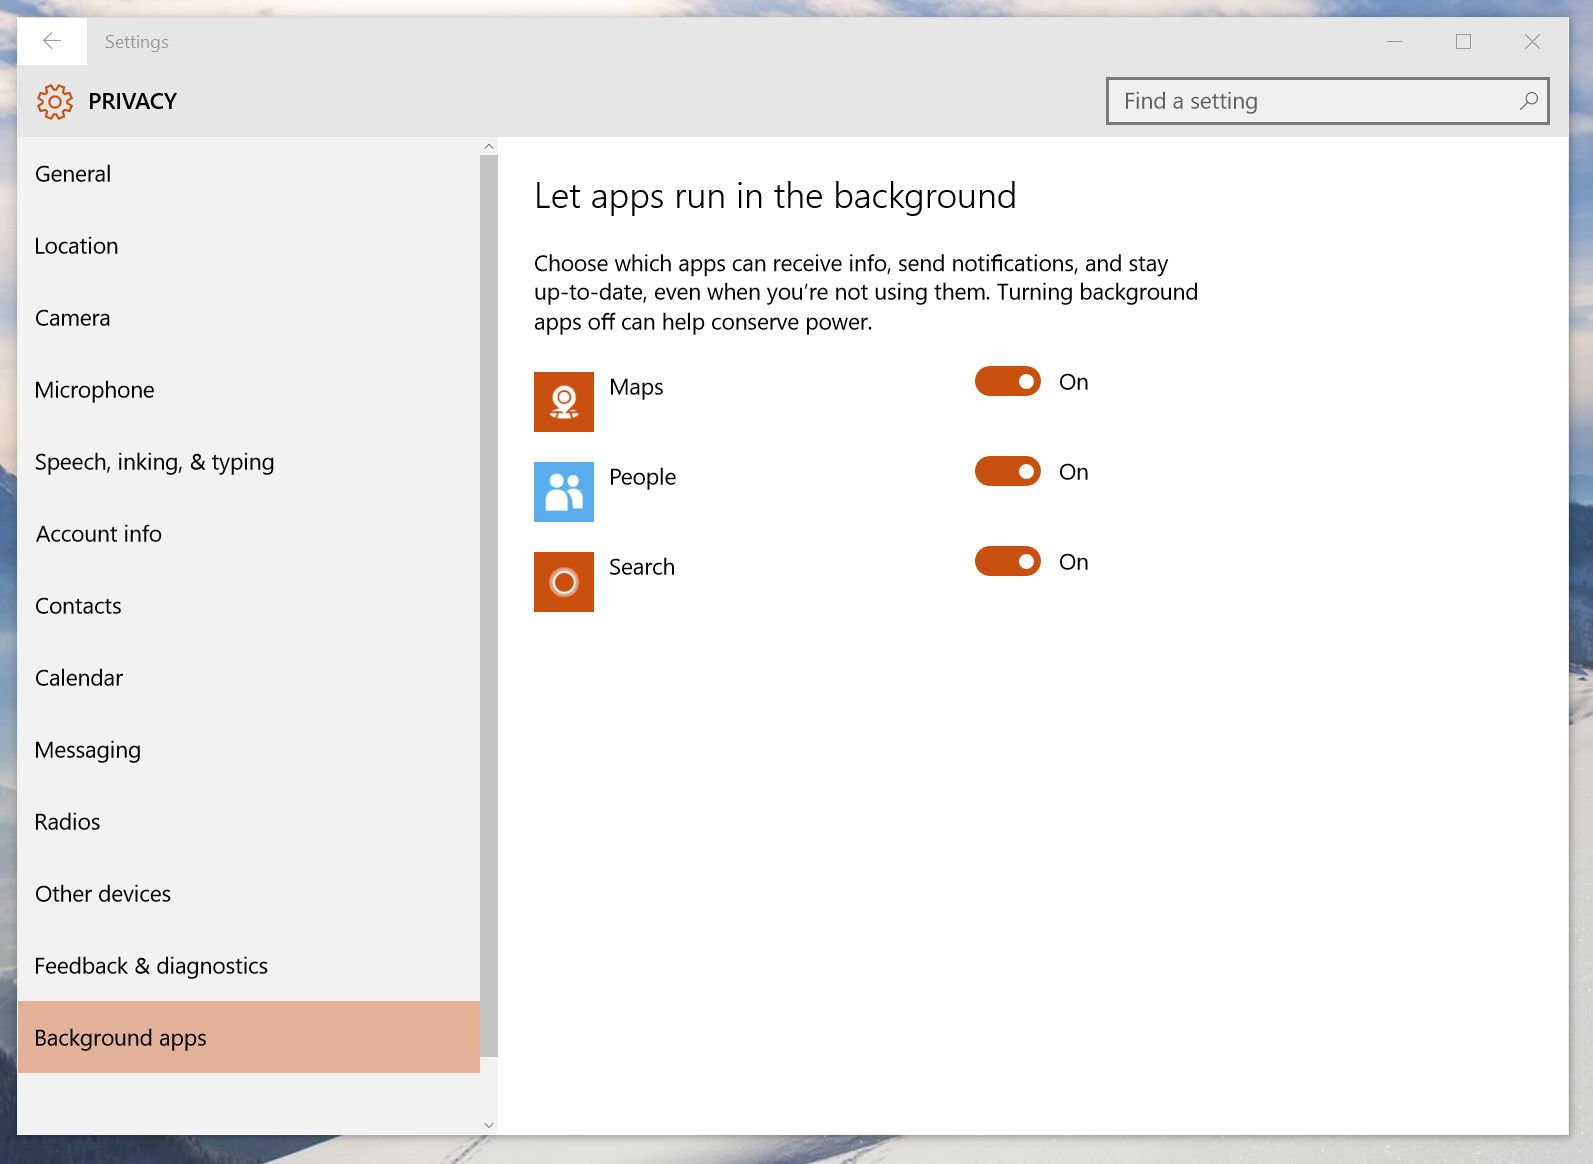
It's worth pointing out that that turning off background apps can also help save battery on mobile devices. However, I think it would be nice if this feature also offered a setting so that background apps can automatically turn off when the Windows 10 device isn't charging.
Remove frequently used apps from the Start menu
Microsoft is also bringing back the Start menu in Windows 10, which is a mix of the Start menu in Windows 7 and the Start screen from Windows 8.1. In the left pane, the part of the menu that looks like Windows 7 has three listings: "Most used", "Recently added", and a list of places such as File Explorer, Settings, and others.
Because you have a listing of the most used apps, it doesn't necessary mean that you like to see listed all the apps Windows 10 thinks you'll keep on using. It can even be the case where you don't want to see even a list of the most used apps in the Start menu at all. For these cases, Microsoft is making it easier for users to manually items from the listing or to disable the entire list.
Furthermore, users will also notice the "Recently added" list that notifies users of newly installed apps. Again the software maker also is including an option for the user to disable this type of notification from the Start menu.
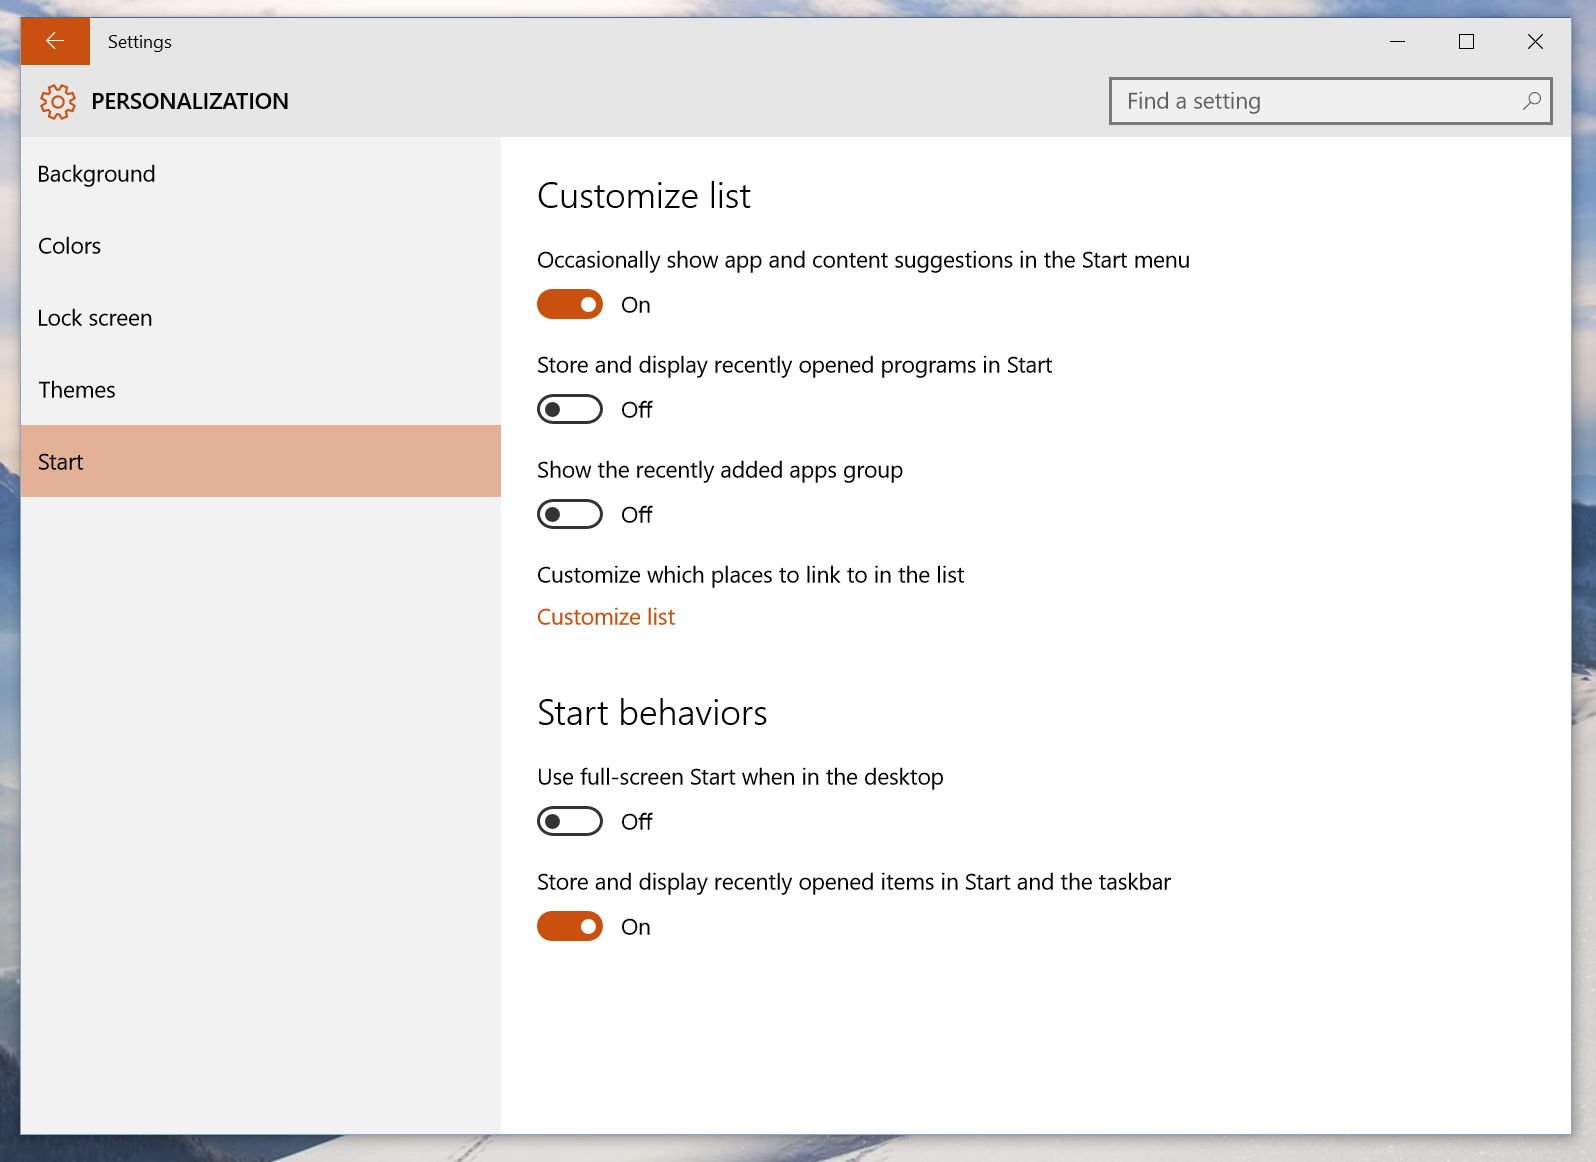
To change these two behaviors, launch the Settings app and navigate to Personalization > Start, and from the "Customize list" slide the pill switch to the Off position for the "Store and display recently opened programs in Start" and "Show the recently added apps group".
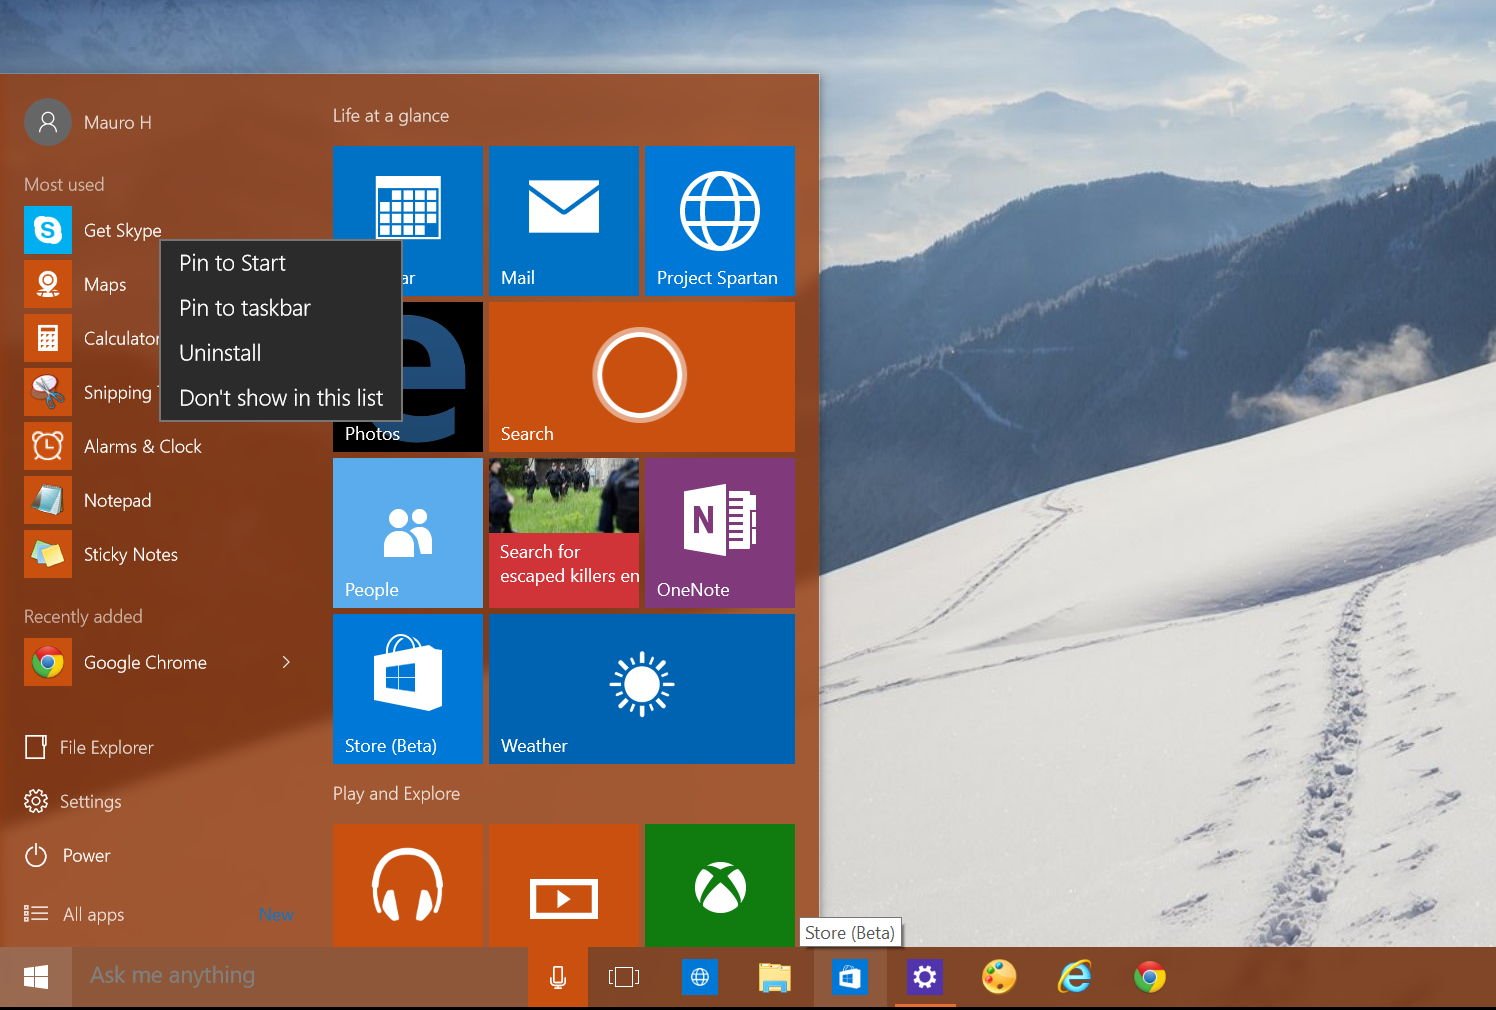
If you like the listing of the "Most used" apps, but there is that one single app, you don't want to see here is how to fix that. Simply open the Start menu, right-click the app, and from the context menu click "Don't show in this list". Then the slot will be filled with the next app in line as the most used.
And there you have it, five useful tips you can use in Settings to get less distracted using Windows 10!
If you haven't seen all the new features coming to Windows 10, don't forget to check out our Windows 10 section with all the latest information, news, and videos.
Do you like how the Settings app is shaping up? Don't forget to let us know what you think in the comments below.
Mauro Huculak has been a Windows How-To Expert contributor for WindowsCentral.com for nearly a decade and has over 15 years of experience writing comprehensive guides. He also has an IT background and has achieved different professional certifications from Microsoft, Cisco, VMware, and CompTIA. He has been recognized as a Microsoft MVP for many years.

