How to remove Quick access from File Explorer in Windows 10
In Windows 10, Microsoft is adding a number of changes to File Explorer. Besides the new icons, a few new user interface tweaks, and listing new drives outside of "This PC", the company is replacing the "Favorites listing" in favor of the new "Quick access".
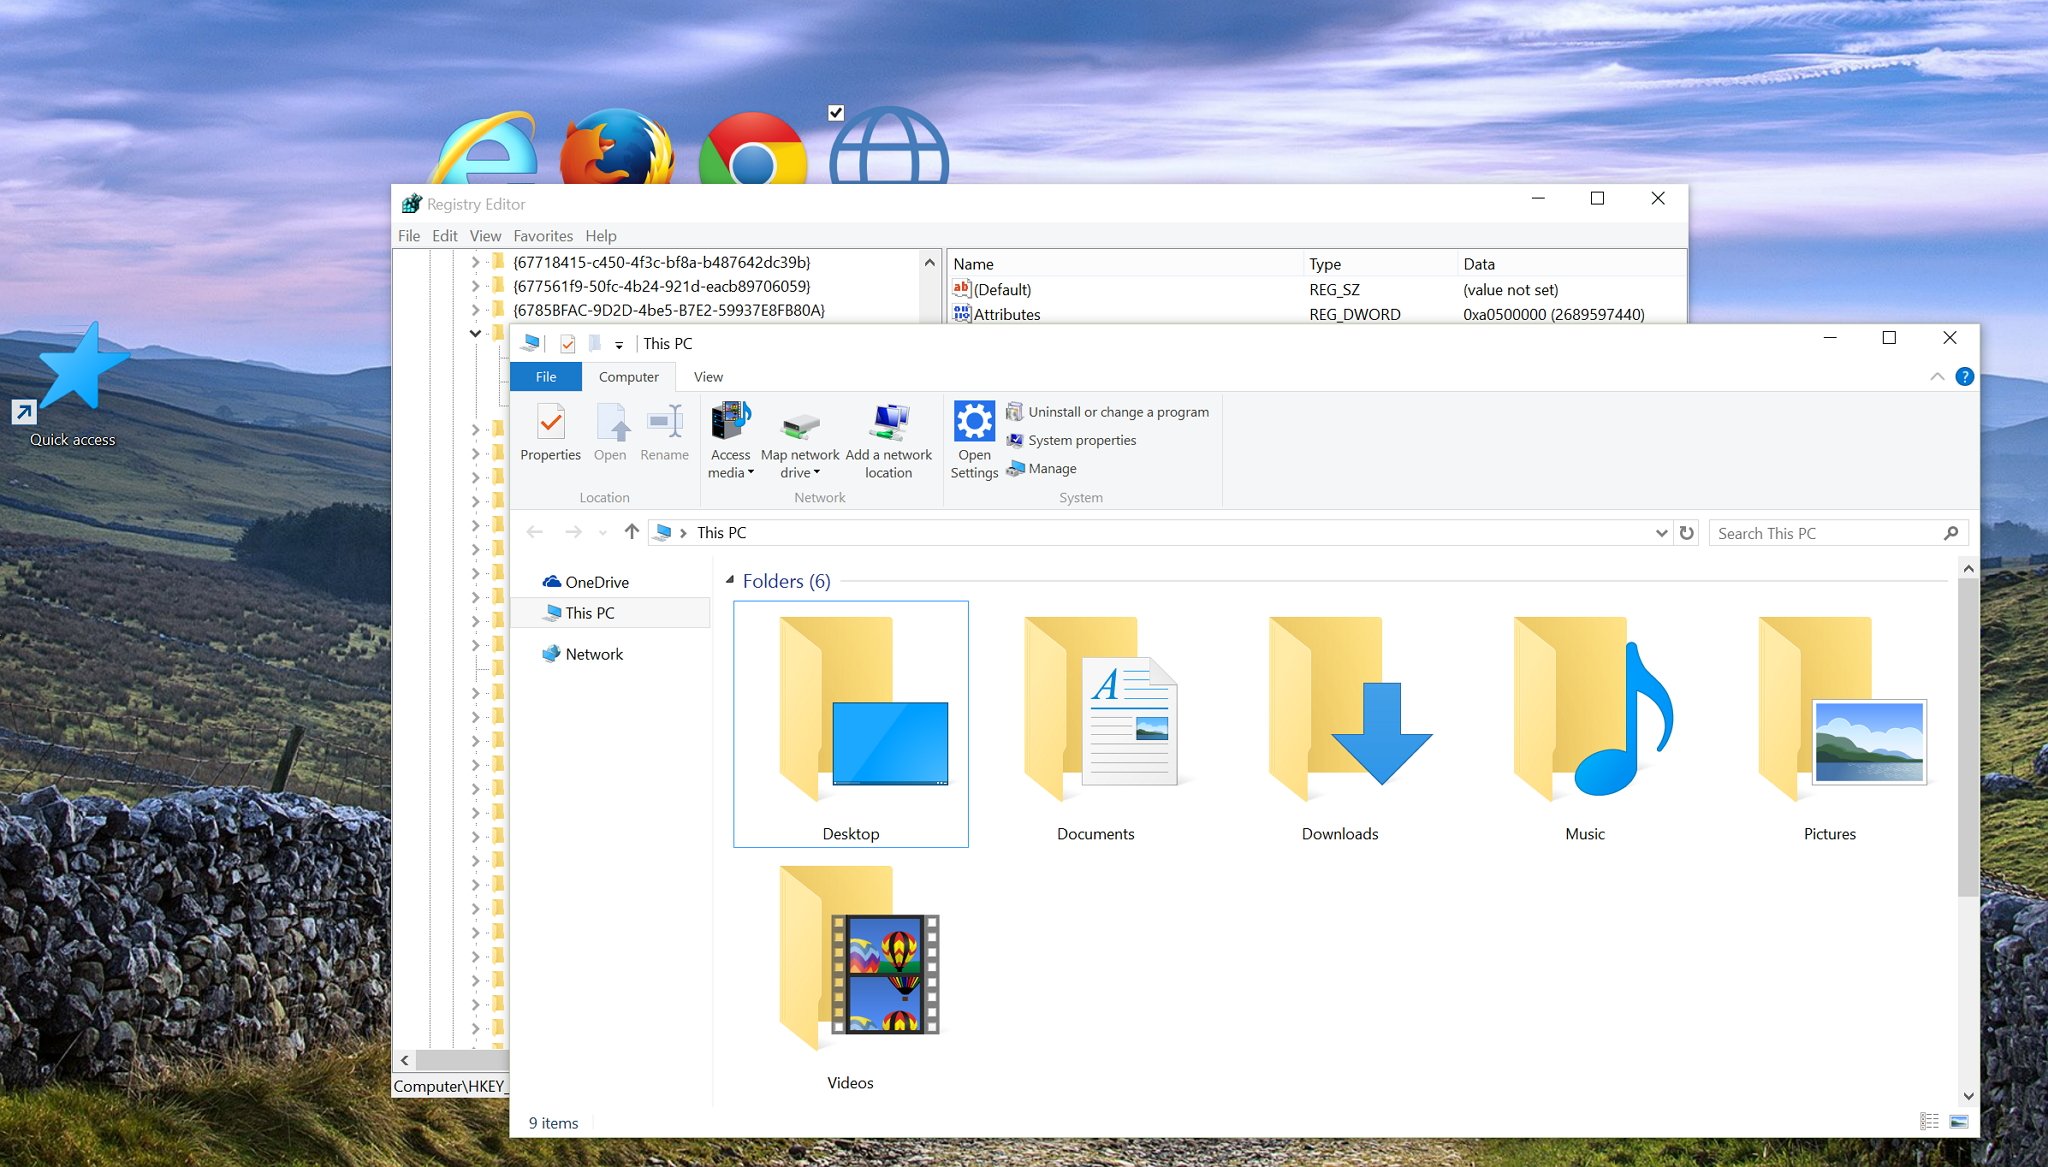
Quick access is the new default location when opening File Explorer and it helps users by listing links of the most frequently accessed files and folders. This content is grouped by "Frequent folders" and "Recent files", and by default, settings can display up to ten folders and twenty files.
Although quick access is a good little feature in Windows 10, it may not be for everyone, so in this new how-to guide, we will go through the steps to remove it from the navigation pane in File Explorer.
Step 1
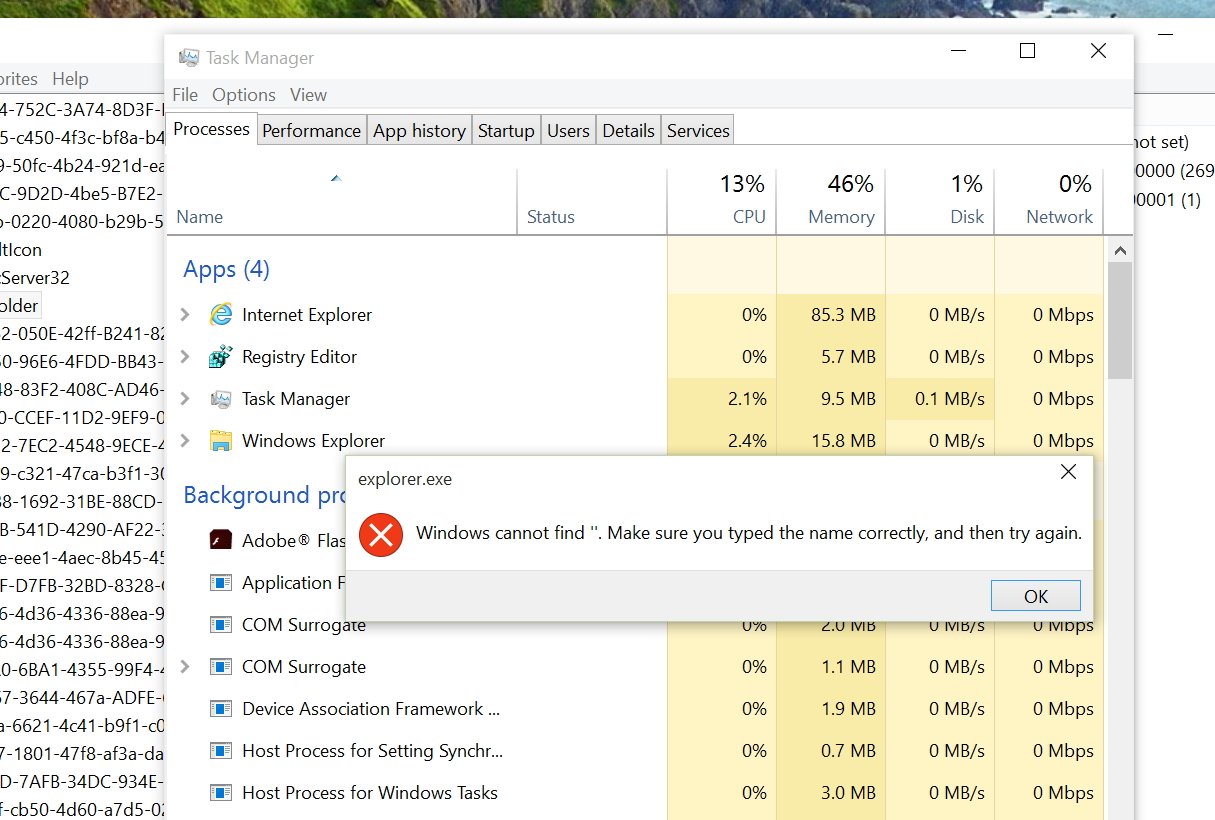
Warning! Before removing quick access, make sure to set File Explorer to access "This PC" by default. If you don't do this, after changing the settings you'll get an error like in the image below.
To do this, open File Explorer, navigate to View, click Options to access "Folder Options", and on the "General" tab, change Open File Explorer to "This PC".
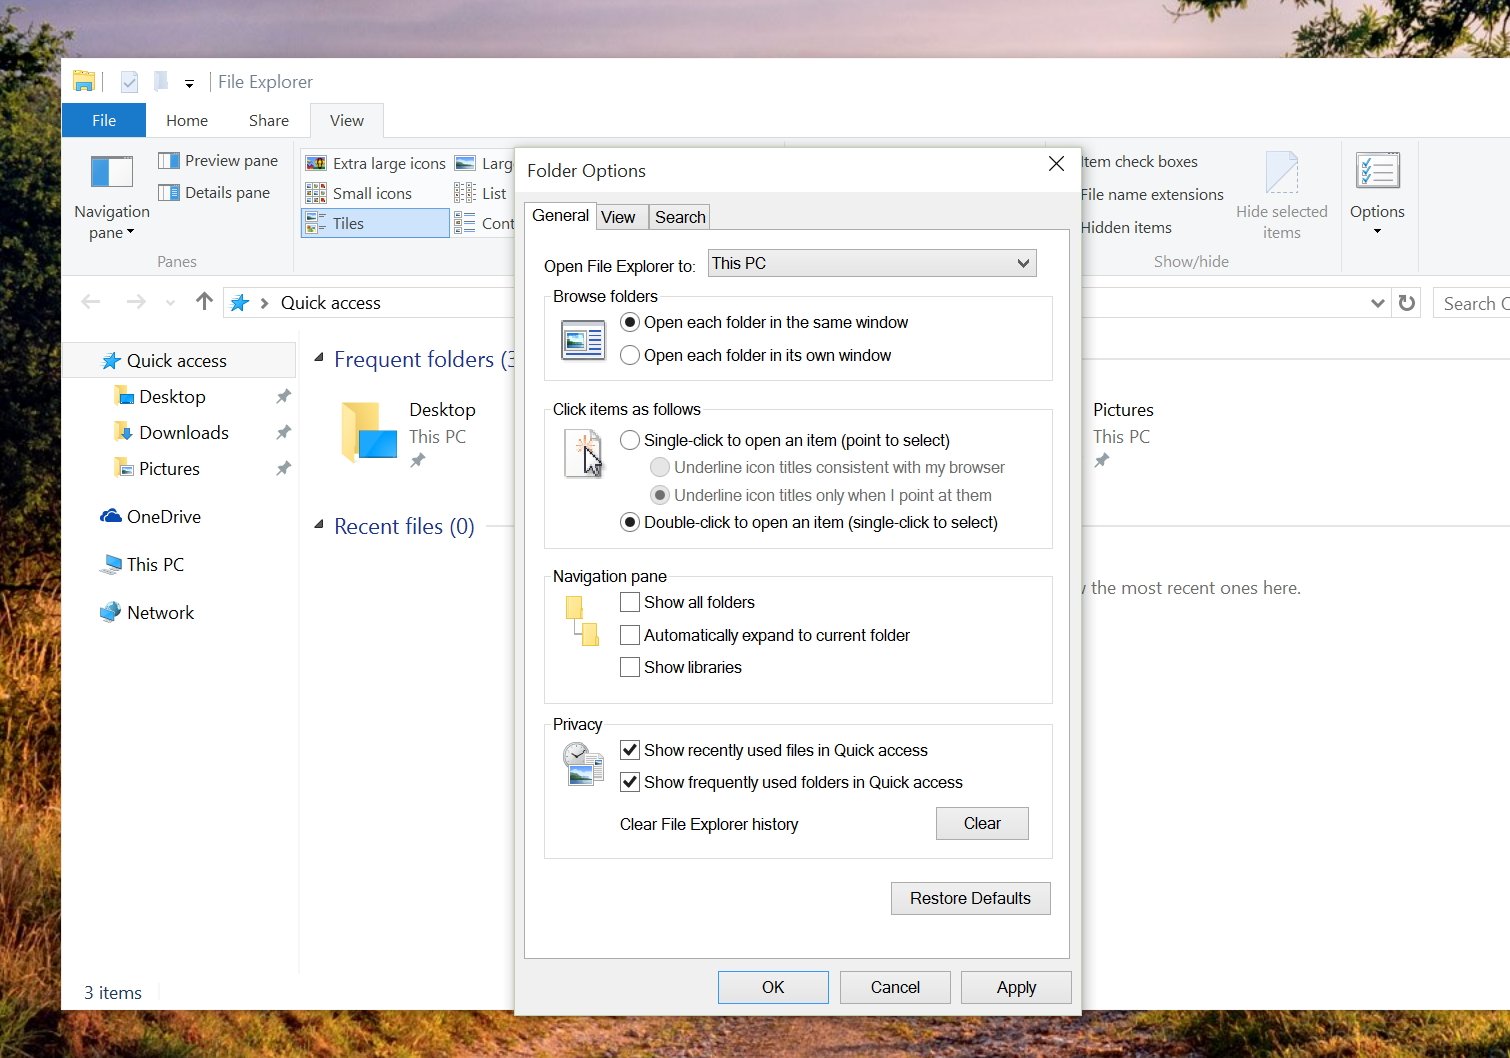
Keep in mind that removing quick access doesn't clear the File Explorer history, as such this is a good time to disable Show recently used files in Quick access and Show frequently used folders in Quick access, and click the Clear button to erase the File Explorer history.
Then click Apply and OK.
Step 2
In this step we will give the local administrator accounts full control over ShellFolder, which will allow us to modify the registry keys located in this particular shell folder.
All the latest news, reviews, and guides for Windows and Xbox diehards.
- Open the Windows Registry as an administrator by launching the Run command using the Windows + R keyboard shortcut, typing "regedit", and hitting Enter.
- Navigate to the following registry path: HKEY_CLASSES_ROOT\CLSID{679f85cb-0220-4080-b29b-5540cc05aab6}
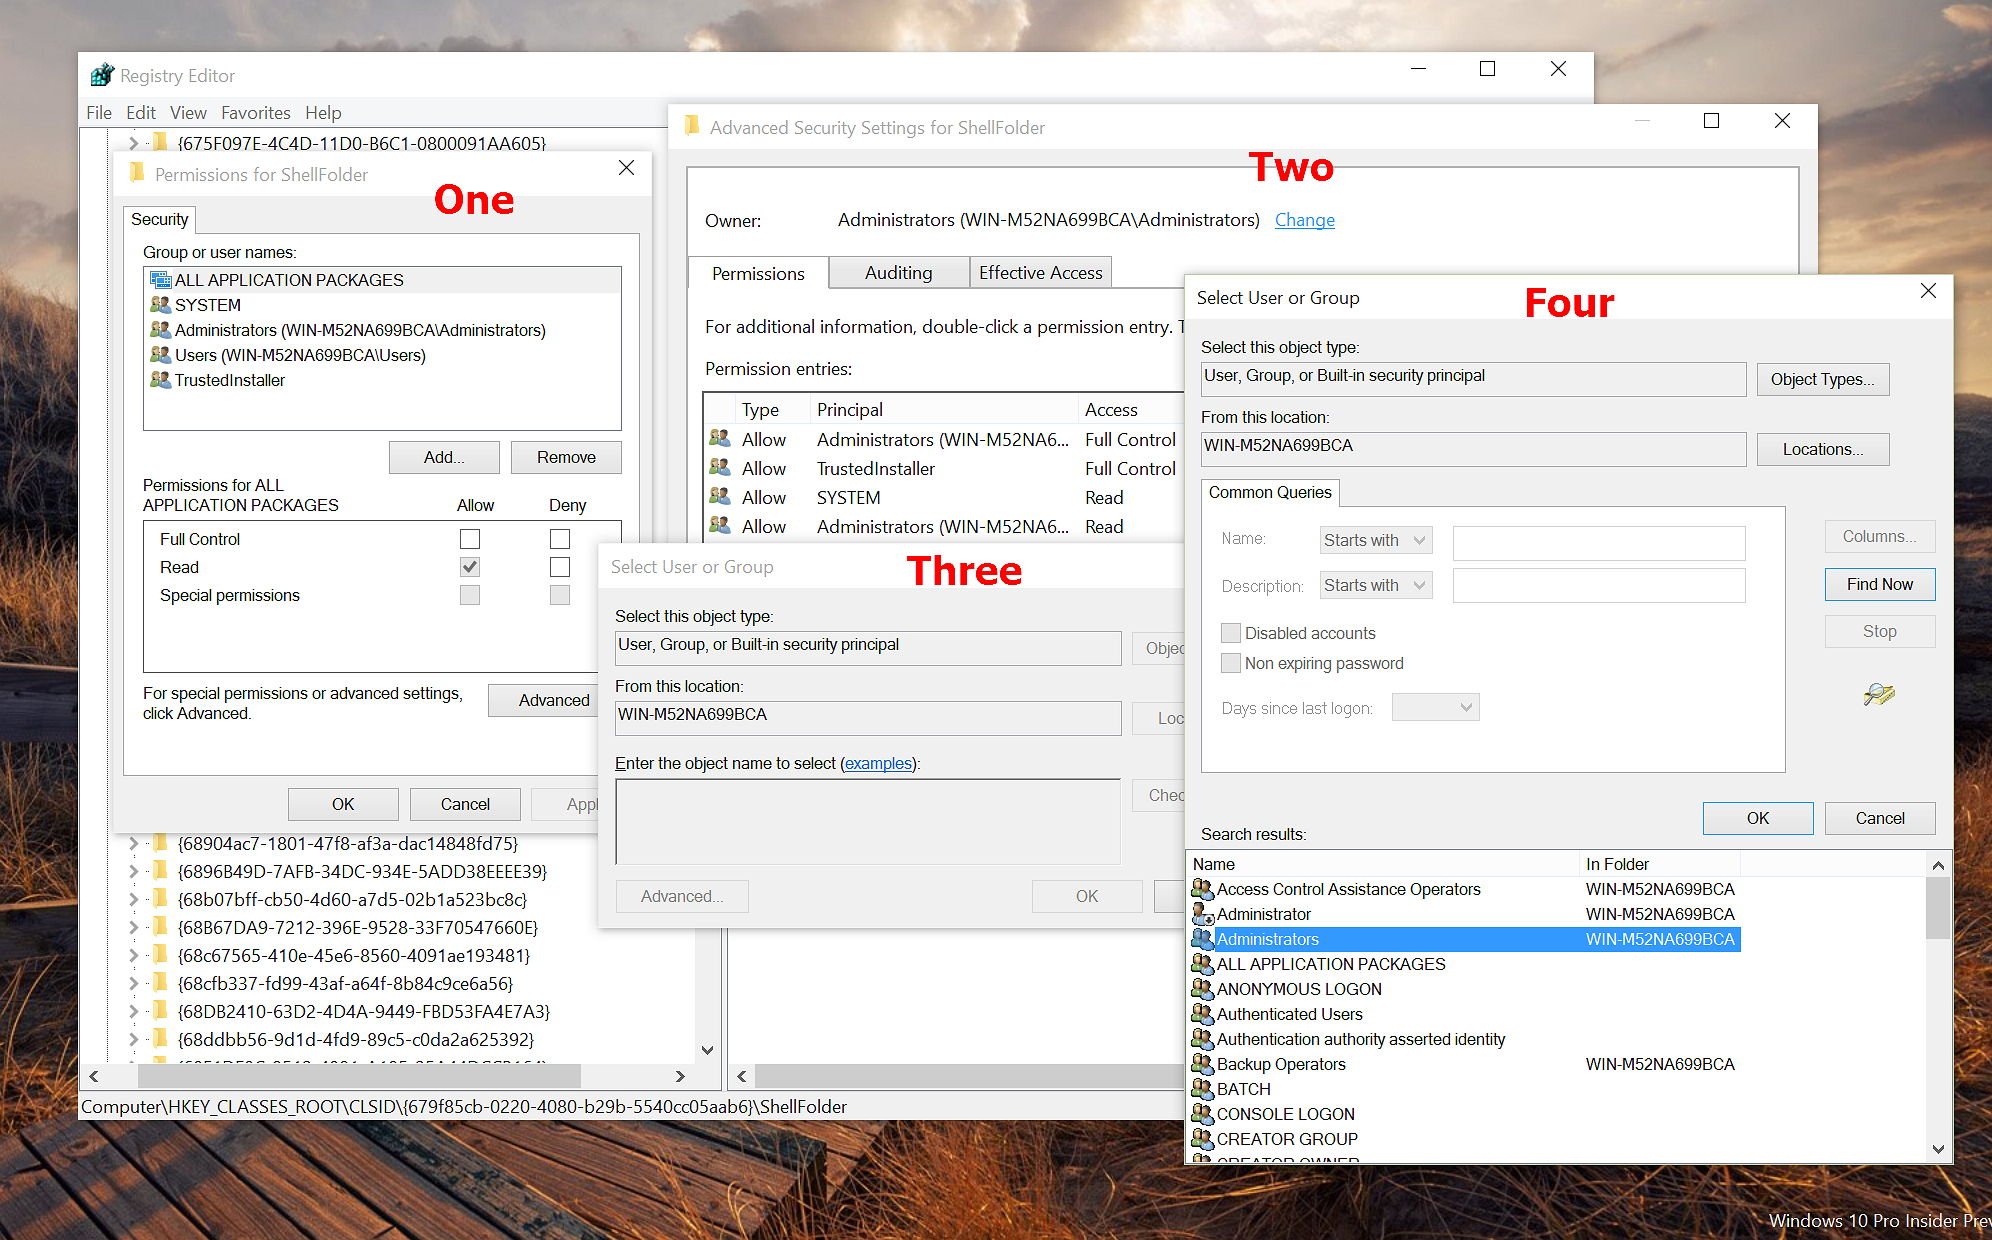
- Now you need to change the permissions of ShellFolder, right-click ShellFolder, select Permissions, then click the Advanced button.
- At the top of Advanced Security Settings for ShellFolder, change the ownership of the folder to "Administrators". To do this, click Change, click Advanced, click the Find Now button, and from "search results" select "Administrators", then click OK, OK again, then Apply, hit OK, and hit OK one last time to close the ShellFolder Permissions box.
Step 3
With step 2 completed, we can now change the settings to remove quick access from File Explorer.
Inside "ShellFolder", double-click Attributes, and change data value from a0100000 to a0600000, and click OK.
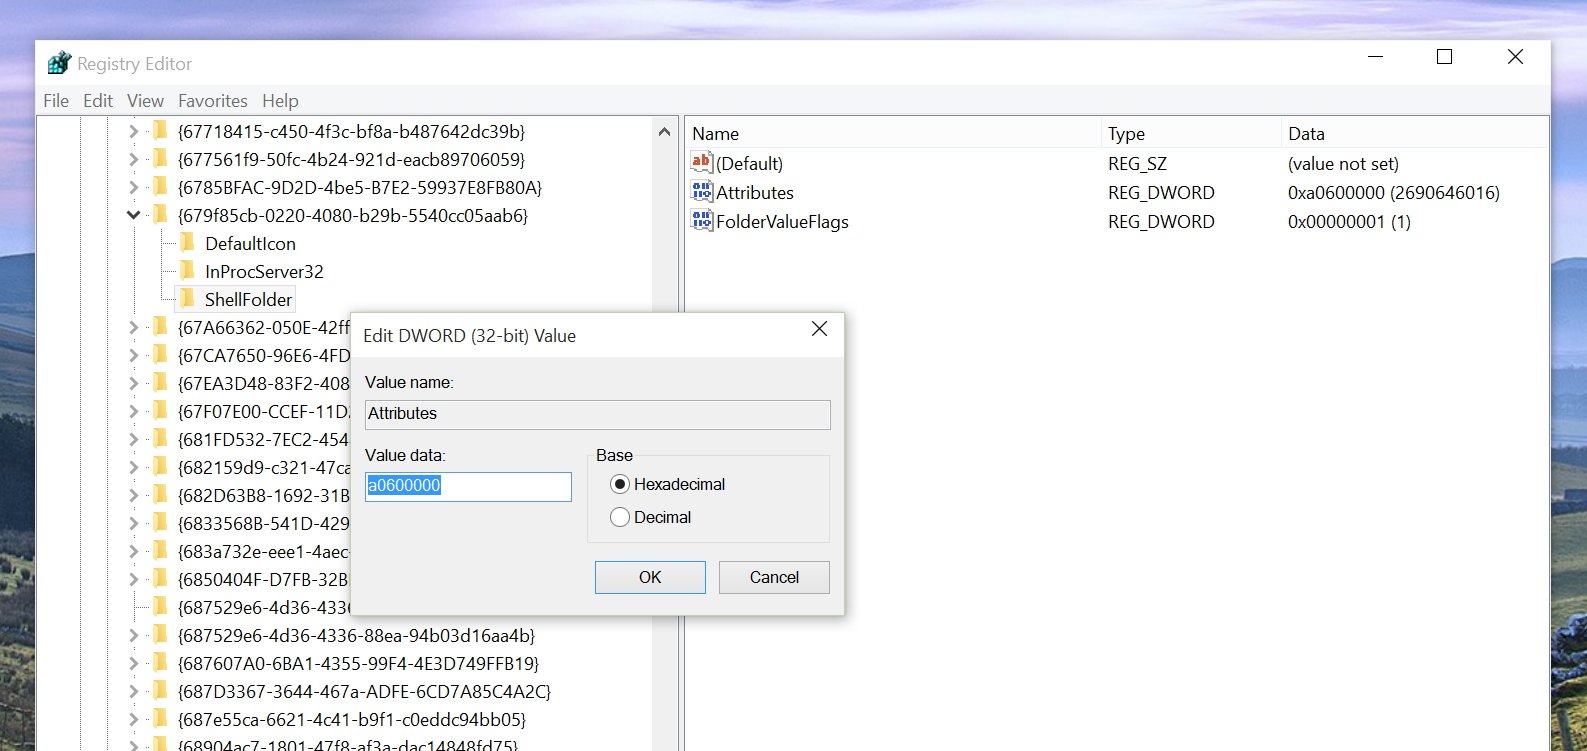
Warning! Making changes to the Windows Registry can cause errors and other serious problems. Make sure to make a full backup of your PC before proceeding.
Step 4
You can now either restart Windows 10 or open the Task Manager, find and select Windows Explorer, and click Restart from bottom-right corner.
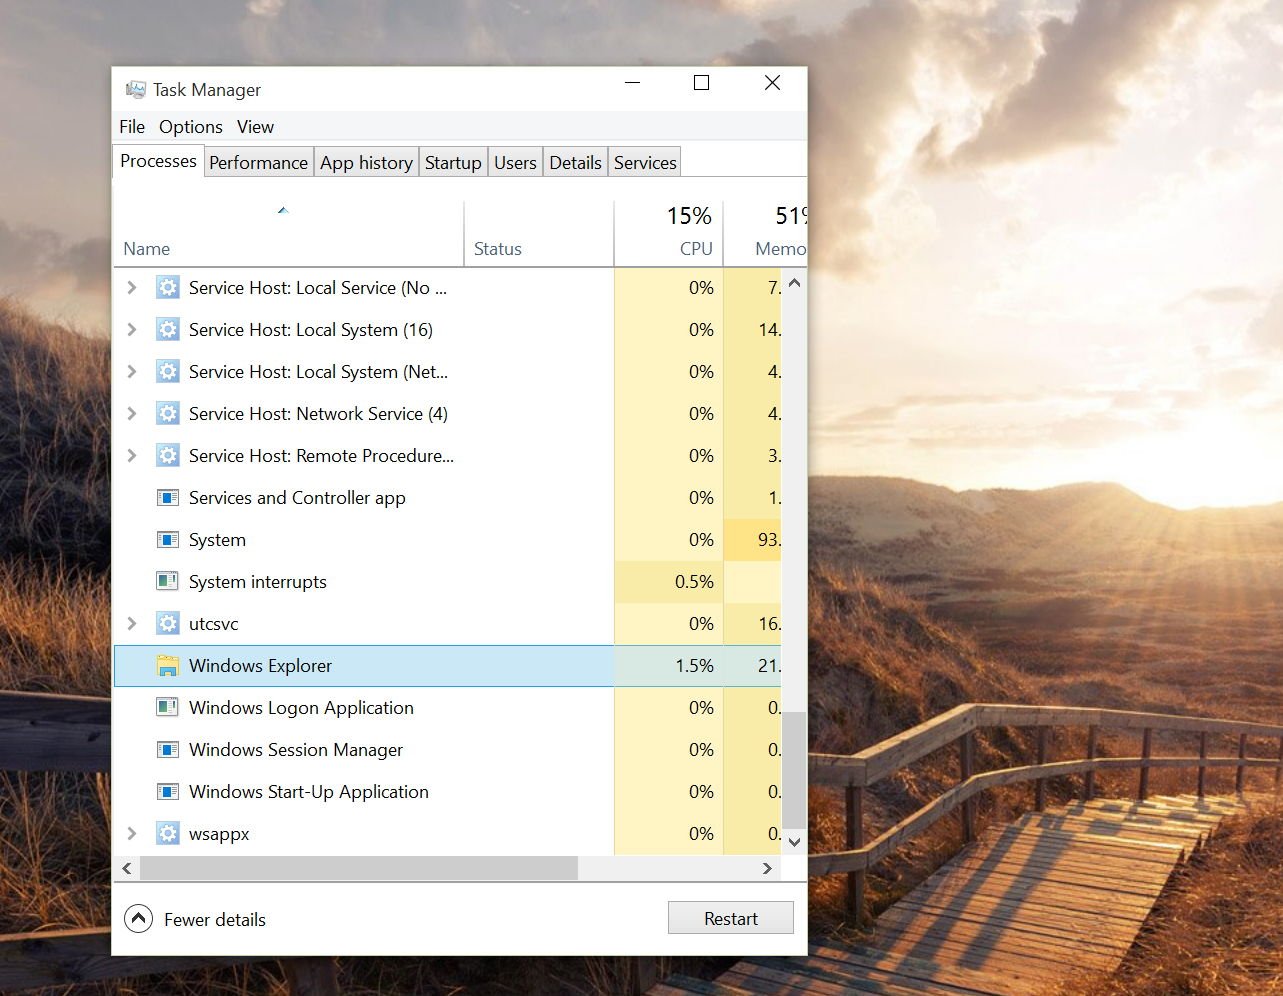
Now try to open the File Explorer and if everything worked as planned, you shouldn't see quick access on the navigation pane anymore.
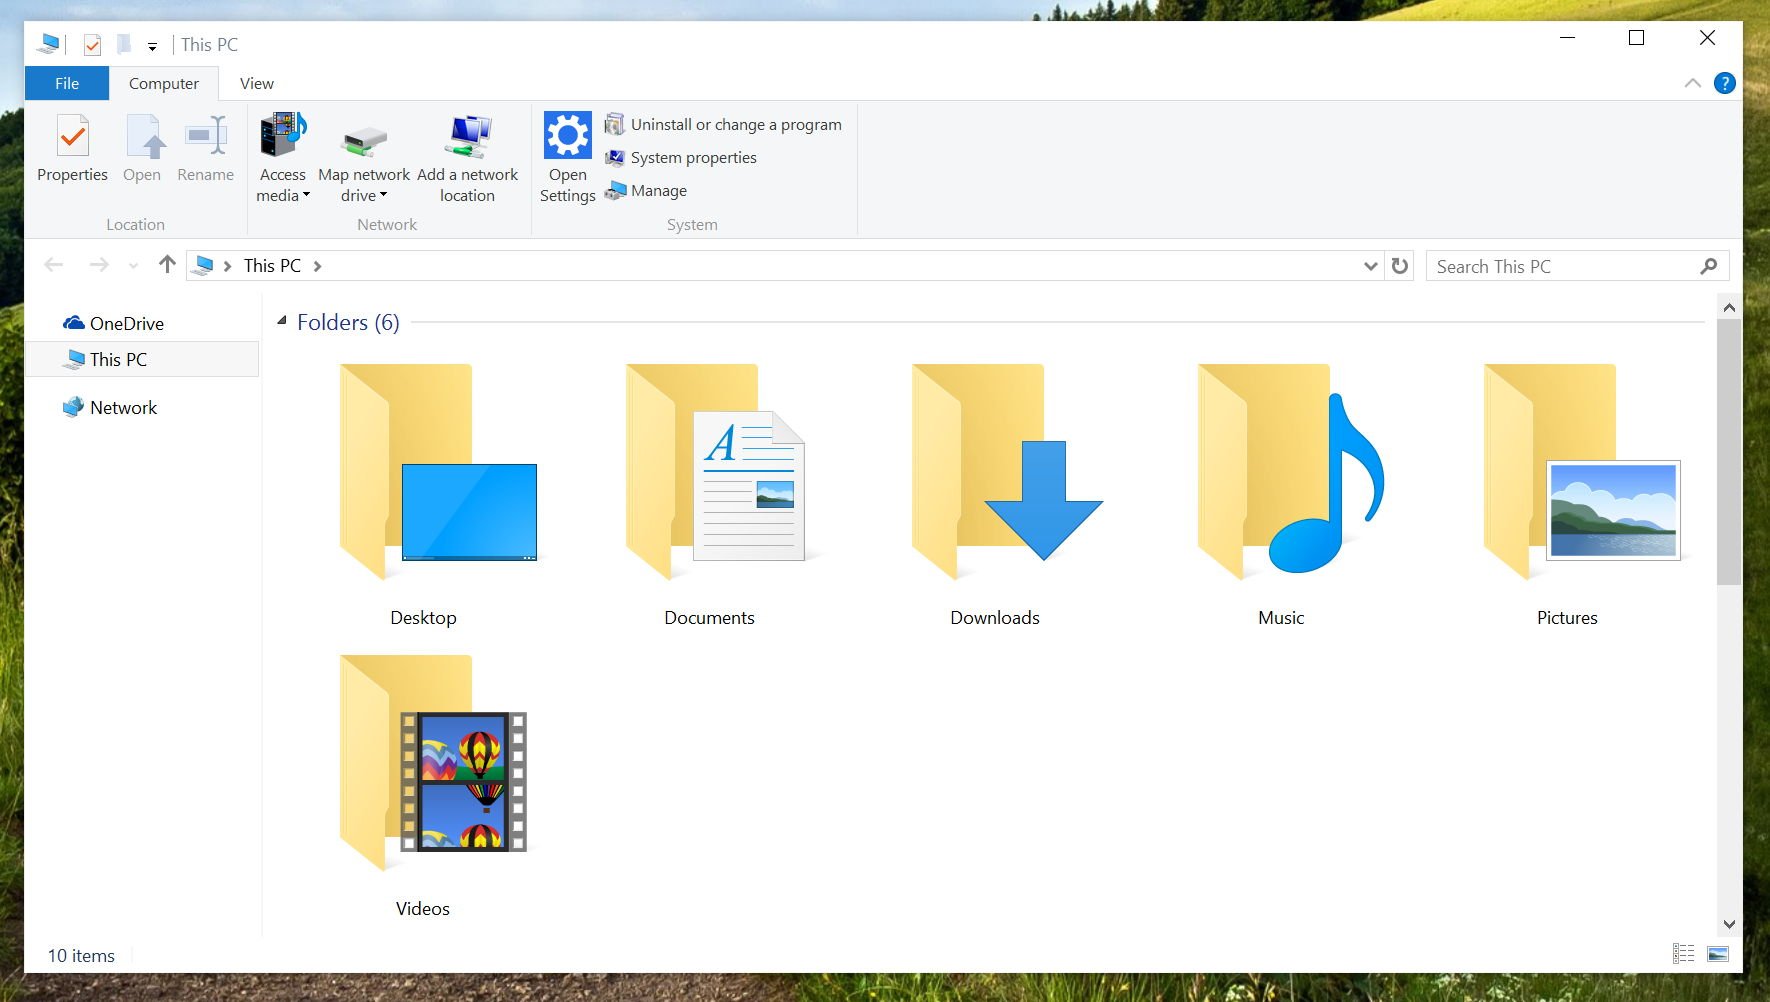
If you want to see quick access again, simply follow step 3 again and change the data on Attributes from a0600000 to a0100000, and click OK.
Do you like the new Quick access feature in Windows 10? Leave your option in the comments below.

Mauro Huculak has been a Windows How-To Expert contributor for WindowsCentral.com for nearly a decade and has over 22 years of combined experience in IT and technical writing. He holds various professional certifications from Microsoft, Cisco, VMware, and CompTIA and has been recognized as a Microsoft MVP for many years.
