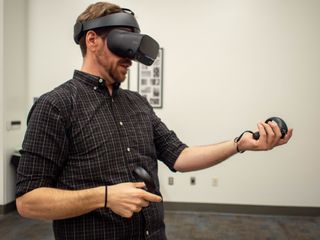
The Oculus Rift S is still in its infancy, and like any new device, it has a few kinks that need to be worked out. One issue that seems to be occurring for more than a few people is Touch tracking loss, which results in motion controllers that can be rotated in place but can't be moved around with the usual six degrees of freedom (6DoF). While there isn't yet a definitive answer as to what is causing this problem, there are some potential fixes you can try out.
Products used in this guide
- Latest Rift HMD: Oculus Rift S ($399 at Amazon)
- Powered USB-A 3.0 hub: AmazonBasics four-port hub ($18 at Amazon)
How to fix Oculus Rift S Touch tracking issues
Touch tracking issues on the Oculus Rift S seem to be tied in with the new Passthrough+ system not working properly. Many users who find their Touch controllers stuck in place also see nothing but static when they should be seeing the real world around them through the headset's cameras. There's not yet a definitive answer from Oculus as to what is causing this problem, so if you're experiencing the issue, your best bet is to tackle these potential fixes one at a time.
If none of these potential fixes works long-term, you can always open an Oculus Support ticket and receive official help.
- Restart the Oculus Runtime Service
- Reseat the Rift S cable
- Swap PC USB-A ports
- Disable USB power saving
- Enroll in the Oculus Public Test Channel
- Repair the Oculus software
- Try using a powered USB hub
Restart the Oculus Runtime Service
If your controllers do bug out and you can no longer do anything but rotate them in place — your Passthrough+ system is also nothing but static at this point — you can restart the Oculus Runtime Service to get them working again. This does close the entire Oculus platform, so any VR apps you have running will also close.
- Right-click the Start button.
- Click Search. You can also click the Search field directly if it's visible in your taskbar.
- Type services and hit Enter on your keyboard.
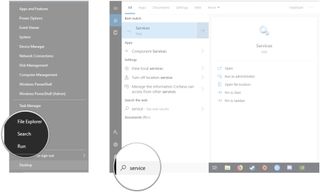
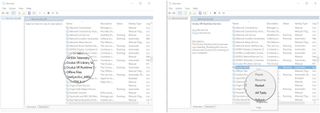
- Right-click Oculus Runtime Service.
- Click Restart. It will likely take a moment to finish.
Reseat the Rift S cable
Touch tracking issues are tied into the sensors on your head-mounted display (HMD), which communicate with your PC via USB. If the cable running to your headset isn't securely fastened, you will likely experience some issues. Here's how to reseat the tether.
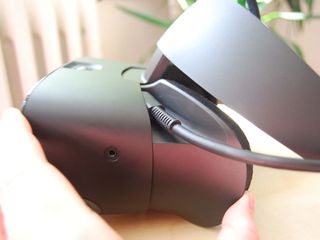
- Pull out the face gasket around the left lens carefully. This includes the rubber portion as well as the foam. Do not just pull on the foam, as it will likely rip.
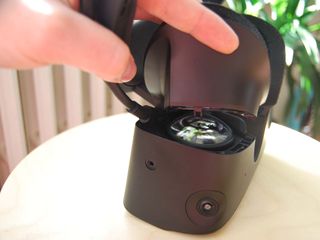
- Remove the cable from the Rift S. Now is a good time to check for any dust or damage.
- Reseat the cable in the Rift S, ensuring it has a tight fit.
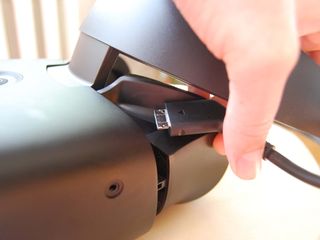
- Replace the face gasket around the left lens by lining up the teeth and applying pressure.
Swap PC USB-A ports
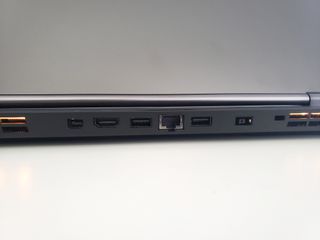
Touch tracking is tied in with with USB bandwidth available from your PC, so swapping USB-A ports might do the trick.
- Unplug the Rift S DisplayPort connector from the PC.
- Unplug USB-A, wait a few seconds.
- Plug USB-A back into a different port.
- Wait for the headset lights to come on, then plug in the DisplayPort connector again.
Some Rift S users have eliminated Touch tracking issues by reaching the USB-A connector all the way to the front ports on their PC case, so be sure to test out each one to see if there's an improvement.
Get the Windows Central Newsletter
All the latest news, reviews, and guides for Windows and Xbox diehards.
Disable USB power saving
USB ports not receiving the right amount of power or no power at all might be at the root of this problem. If you suspect Windows 10 is cutting the power to the USB-A port hooked up to your Rift S, you can disable power saving options with these steps.
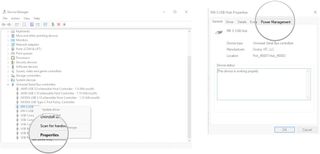
- Right-click the Start button.
- Click Device Manager.
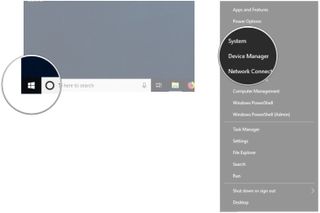
- Click Universal Serial Bus controllers.
- Right-click Rift S USB Hub.

- Click Properties.
- Click Power Management.
- Click Allow this computer to turn off this device to save power so that the checkmark disappears.
- Click OK.
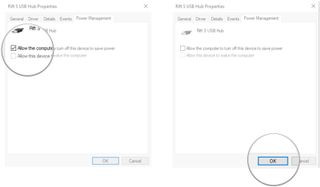
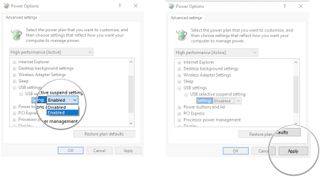
Repeat steps 4–8 for all "Rift S USB Hub" entries. You can now disable USB selective suspend with these steps.
- Right-click the Start button.
- Click Search. You can also click the Search field directly if it is visible in your taskbar.
- Type Power Plan and hit Enter on your keyboard.
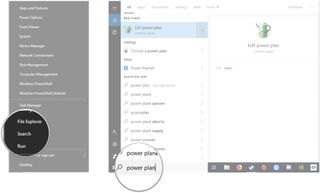
- Click Change advanced power settings.
- Click USB settings.

- Click USB selective suspend settings.
- Click Enabled.
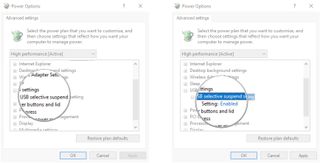
- Click Disabled.
- Click Apply.
Enroll in the Oculus Public Test Channel
Oculus pushes software updates first through its Public Test Channel (PTS), so enrolling and receiving the latest update may help alleviate the issue. Here's how to enroll.
- Launch the Oculus app from your Start menu, desktop, or taskbar.
- Click Settings.

- Click Beta.
- Click the slider next to Public Test Channel so that it turns blue. This enables use of beta software.

Repair the Oculus software
Some Rift S users have reported more reliable Touch tracking after repairing Oculus software. Disconnect your Rift S from your PC and follow these steps.
- Visit the Oculus Setup webpage.
- Click Download Software.
- Click Save File.

- Launch Oculus Setup from wherever it was saved.
- Click Repair.
- Click Repair.

The tool will run through the repair process. Your VR experiences should remain in your library following the process. If you still have the Oculus installation tool from the original installation, you can simply re-launch it without downloading again from the Oculus website.
Try using a powered USB hub
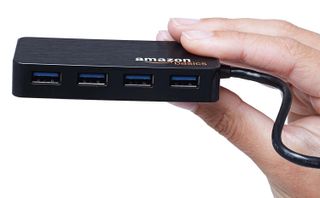
In the days of the original Rift CV1 with its external sensors that each required a USB-A port, some people turned to an AC-powered USB hub for extra connectivity.
Now, with the Rift S, some users have reported fixing their Touch tracking issues by adding a powered hub to their PC. It's not guaranteed to be a one-stop fix and you may still see problems creep up, but it might be worth it if you've exhausted other troubleshooting methods.
AmazonBasics makes an $18 four-port powered hub that works with the Rift CV1, making it a prime candidate for use with your Rift S. If it doesn't fix the issue and you don't need the extra ports for other scenarios, you can always return it.
Our top equipment picks
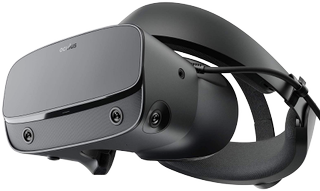
The Rift S is the latest PC-powered VR headset from Oculus. It has ditched external sensors for five built-in sensors known as Oculus Insight, and it has a new design with built-in audio. There are still some kinks to work out, but the VR experience on offer is well worth the effort.
PC-powered VR
The next evolution of the Rift brings improved lenses, a display with a higher pixel count than the original, and a redesigned head strap and tracking system, but you're still tethered to a PC.
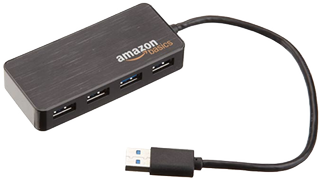
If you've exhausted other potential fixes, a powered USB-A hub might be the key. This option from AmazonBasics works with the Rift CV1, so it's a prime candidate for use with your Rift S.
Four powered USB-A 3.0 ports
It's affordable, it's well-rated, and it might do the trick when it comes to USB power problems and your Rift S. Even if it doesn't fix the main problem, you'll have an extra four USB-A ports for your PC.
Additional Equipment
If you're looking for some Oculus Rift S accessories to take VR to the next level, we've rounded up a bunch of the best out there, from extension cables to stands to hygiene solutions. Here are some of our favorites.
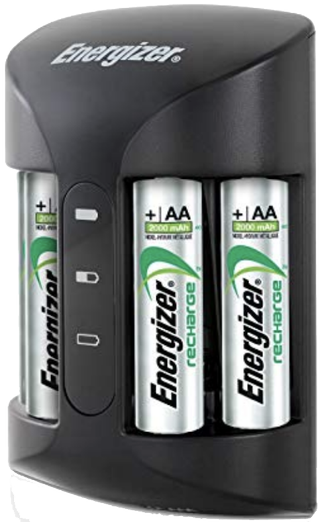
Energizer rechargeable batteries ($14 at Amazon)
The Touch controllers included with the Rift S each require a AA battery to operate and, speaking from experience, you're going to want to invest early in some rechargeable batteries to save money in the long run. This pack includes a wall charger that can handle four AAs at once, so you shouldn't have any downtime while waiting for a charge.
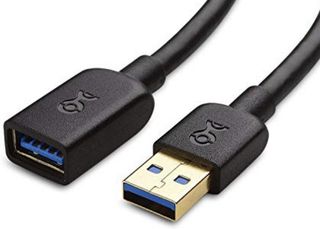
Cable Matters 6-foot USB-A cable ($7 at Amazon)
If you're extending the DisplayPort cable on your Rift S head-mounted display, you'll no doubt also want to extend the USB cable to match. This option from Cable Matters should have no issues working with the Rift S, and it's long enough to fit most setups.
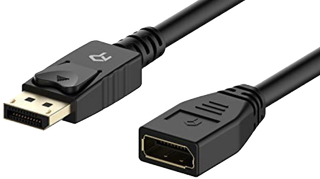
Rankie six-foot DP cable ($9 at Amazon)
The Rift S has made the switch over to DisplayPort 1.2 for a video connection, so you'll need an extension cable to match. This one from Rankie has been seen working with the Rift S, and it's the same length as our recommended USB-A extension so that there's no extra slack lying around.
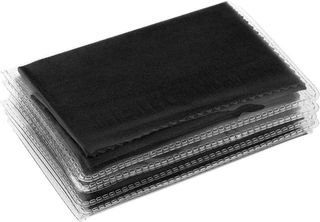
SecurOMax microfiber cloths ($6 at Amazon)
There's nothing worse than foggy or dirty Rift S lenses. They obstruct your ability to focus on the action in the headset properly, and frankly, they're just gross. These cloths from SecurOMax won't scratch your headset's lenses and you'll be glad you have them on hand after a couple of sessions.

Cale Hunt brings to Windows Central more than eight years of experience writing about laptops, PCs, accessories, games, and beyond.
